April 23, 2024

Lemon Basil Cookies

Lemon Basil Cookies

If your FaceBook newsfeed or email are anything like mine, you’ve got dozens of recipes to view every day.  From pages you ‘liked’ to friends sharing recipes, I’m bombarded with recipes for tasty treats all day long!  However, I saw this recipe for Lemon Basil Cookies on the Elana’s Pantry website, and I said to myself – that’s the one I’m going to make today!

I still have lots of basil growing in my flower bed, so that was handy to come by.  Almond flour is easy to find at the store now, and you can also make your own if you choose.  These cookies are herbal and fresh tasting, with a nice balance of flavors.  In fact, I tasted a bit of salt in mine from the salted butter I used, which offset the sweetness.  You may choose to add another tablespoon of honey, because these cookies are not overly sweet.  Try them and see – perfectly balanced, deliciously different!

Lemon Basil Cookies  (Recipe from Elana’s Pantry)

Ingredients:

  • 2 cups blanched almond flour
  • 1/4 teaspoon salt
  • 1/4 teaspoon baking soda
  • 1/4 cup coconut butter (I used regular butter and they came out great!)
  • 1/4 cup honey
  • 1 tablespoon chopped fresh basil
  • 1 teaspoon lemon zest

Directions:

  1. Preheat oven to 350*F.
  2. In the bowl of a food processor, blend together the almond flour, salt, and baking soda.
  3. Add the butter, honey, basil and lemon zest.  Blend again until a ball of dough forms.
  4. Line baking sheets with parchment paper, or use a Silpat mat.  Scoop a teaspoon full of dough and drop it on the parchment paper.  These cookies spread, so give them some room!
  5. Cook for about 8 minutes.  Remove from the oven and let cool on the cookie sheets for an hour.
  6. Store in a sealed container.  This made about 18 cookies for me.
Explore, experiment, enjoy! — Dana

To view even more of Dana’s unique recipe, you can visit her at Frugal Girlmet

Strawberry Shortcake (Gluten-Free)

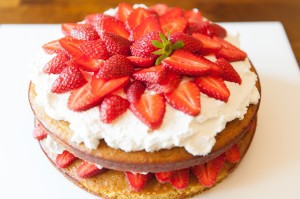
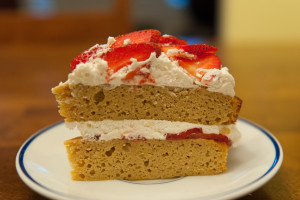
Strawberry-Shortcake-Whole-300x199This is a recipe I shared here on GCH 2 years ago.  I love it and plan on making it soon.  Spring can’t come soon enough for me, and I look forward to farmer’s markets brimming with fresh berries!  If you can’t wait either, read on for my Gluten-Free Strawberry Shortcake!

Strawberry-Shortcake-Cut


Strawberry Shortcake (Gluten-Free)

Ingredients:

  • 12 eggs
  • 1/2 cup coconut oil (or butter), softened
  • 1/2 cup coconut milk (or regular milk)
  • 1/4 cup honey (or more, if you like)
  • 2 teaspoons vanilla extract
  • 1 teaspoon grated orange zest
  • 2 tablespoon orange juice
  • 1 cup coconut flour
  • 1 teaspoon baking powder
  • 1 teaspoon salt
  • 1 cup strawberries, sliced thin
  • 1 pint heavy whipping cream
  • 1 teaspoon vanilla extract
  • optional – 1 or 2 teaspoons sugar (I didn’t use them, since my berries were really sweet. If your strawberries aren’t as sweet as you’d like, add the sugar to the whipping cream)

Directions:

  1. Preheat the oven to 350*F. Grease two 8-inch round cake pans, and then cut a circle of parchment paper for the bottom of each pan, and grease that too. (You can do this without parchment paper, but you will need to be really liberal with the coconut oil / butter / cooking spray on the bottom of the pan. The cake stuck the first time I made it, so the next time I used parchment paper, and it was perfect!)
  2. In a very large bowl, using a stand mixer or a hand mixer, beat the eggs until frothy. Beat in the softened coconut oil and milk, blending well. Mix in the honey, vanilla, orange zest and orange juice. Beat until foamy again.
  3. In a small bowl, stir together the coconut flour, baking powder and salt. Then, a little at a time, blend the flour mixture into the egg mixture. Mix well, making sure there are no lumps.
    Divide the batter between the two prepared pans and bake for 35-40 minutes. When a toothpick comes out dry, remove from the oven and cool for ten minutes. Remove from pans, and finish cooling on a rack.
  4. While the cake is cooling, place the beaters of your hand mixer and a metal mixing bowl in the freezer for half an hour. Slice the strawberries and put back in the fridge until ready to use.
    When the beaters and bowl are very cold, beat the whipping cream with the vanilla (and optional sugar) until stiff peaks form. To decorate: spread a very thin layer of whipped cream on the top of one cake. Make concentric circles of strawberry slices (use half the strawberries, saving the other half for the top), then cover with a thick layer of whipped cream. Place the other cake on top of this, cover with the rest of the whipped cream and the rest of the strawberries. Refrigerate until ready to serve.

This is not a very sweet cake, since it relies on the berries for sweetness. If your berries are not sweet enough for your taste, you can add more honey to the cake, and the optional sugar to the whipped cream.

Explore, experiment, enjoy! — Dana


To view even more of Dana’s unique recipes, you can visit her at Frugal Girlmet!

GF Brownies

GF Brownies

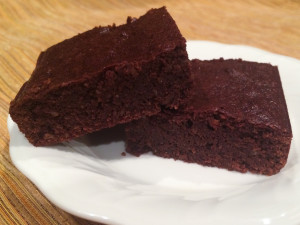
Guilt-free?  Gluten-free?  Girl friends?  Yes, all the above!  As usual, I have taken a recipe, tweaked some things here and there for my family, and made a treat that’s gluten-free, nearly guilt-free, and sure to please all your girl friends!  Here are my GF Brownies!

The three ingredients you’ll need to shop for are coconut flour, almond flour, and coconut oil.  You know what?  You can even trade in the coconut oil, if it’s not your thing, for half a stick of butter.  Now just pick up some coconut and almond flours, use what you need, and store them indefinitely in the freezer.  Frugal!

These are fudgy but not pasty.  There’s a difference!  They’re chewy but they don’t become glue in your mouth.  Super easy.  Let’s go!

GF Brownies

Ingredients:

  • 1 cup dark chocolate chips – the higher the cacao percent, the better!  (These were 64%)
  • 1/4 cup coconut oil (or use butter)
  • 1/2 teaspoon cinnamon
  • 1/2 teaspoon vanilla extract
  • 1/2 teaspoon salt
  • 4 eggs
  • 1/2 cup maple syrup (or you could use brown sugar)
  • 1/2 cup almond flour
  • 2 tablespoons coconut flour
  • butter or coconut oil to grease the pan

Directions:

  1. Preheat the oven to 350*F.  Grease an 8×8 square pan.
  2. In a large pot, melt the chocolate chips and coconut oil together over medium-low heat, stirring constantly.  When the mixture is smooth, remove from heat.  Whisk in the cinnamon, vanilla, and salt.
  3. In a smaller bowl, beat the four eggs together.  Slowly whisk them into the chocolate mixture (make sure it’s cool enough so you don’t make scrambled eggs!)  Whisk in the maple syrup.
  4. A little at a time, whisk in the almond and coconut flours.  Whisk thoroughly, so you don’t have lumps.
  5. Pour the batter into the greased pan.  Bake at 350*F for 25-30 minutes.  Remove from the oven and cool for about an hour.  Slice into 16 squares (2×2 each).  Hide the pan from your kids!

Explore, experiment, enjoy! — Dana


To view even more of Dana’s unique recipe, you can visit her at Frugal Girlmet!

Thumbprint Cookies

It is the season for cookie baskets and cookie exchanges. How many dozen cookies have you made already? How about you, Coleen…(you ask?) Ummmm, zero….well, ‘til these! (I know, I know…better get on it!) Yup, part of my plan for this week. Here’s what I am hoping to accomplish.   I would LOVE to hear what varieties you are making for your loved ones this year!!!

2014-12-14 19.53.53

Mexican Wedding Cookies (Snowballs)
Gingerbread Hearts
Pignoli Cookies (here’s my recipe)
Chocolate Chip Oatmeal
Italian Almond Cookies (Robert’s constant request-here’s my recipe)
Spritz (my all-time, hands-down, yes, please! favorite)

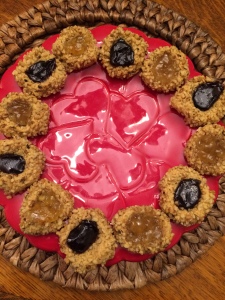
But these are where I started. I just love thumbprint cookies! Most of you know that I bake/cook gluten-free. These also are paleo, dairy-free, and refined sugar-free. (Hope that is helpful to a few of you!) And all of that helps to keep these within my healthy but oh-so-yummy POV!  Enjoy!

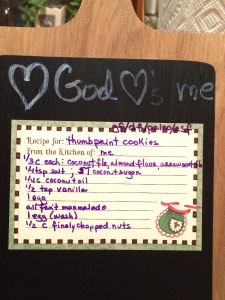
Thumbprint Cookies

ingredients:2014-12-14 21.36.14
1/3 cup arrowroot flour
1/3 cup almond flour
1/3 cup coconut flour, sifted
1/4 teaspoon sea salt
5 tablespoons coconut sugar**
1 tablespoon water
1/4 cup coconut oil, melted
1/2 teaspoon vanilla extract
1 egg, room temperature
all-fruit marmalade or jam (I used ginger/orange and raspberry)
1 egg white beaten with 1 tablespoon water, for egg wash
1/2 cup finely chopped nuts (I used walnuts)

directions:

  • preheat oven to 350
  • line baking sheet with parchment paper
  • in a large bowl, whisk together dry ingredients (first 5)
  • in mixer bowl, combine the wet ingredients (next 4) for 1 minute
  • add the dry ingredients to the wet ingredients and combine with mixer
  • take tablespoon-sized balls of dough and quickly roll into a ball
  • dip into egg wash and then run through chopped nuts
  • place on lined baking sheet about 1″ apart
  • make an good-sized indentation with your thumb (or a wooden spoon handle)—but don’t poke through the bottom
  • fill the indentation with about 1/2 teaspoon marmalade/jam
  • bake for approximately 15 minutes ‘til just lightly browned; remove from oven
  • carefully transfer to a cooling rack
    makes 15 to 20 cookies

** NOTE: these are on the not-so-very-sweet side…you may want to add additional sugar!

 ♥  ♥  ♥  ♥  ♥

God loves you!  ♥  (Don’t ever forget that!)

♥  coleen

Tahini Pancakes

Tahini Pancakes resize

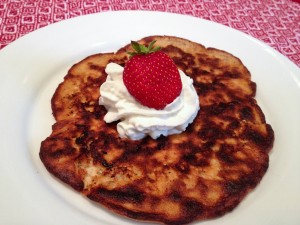
Oh, pancakes!   We all love them.  But sometimes you just don’t want to make them, even when the kids are whining for them.  They take time to mix up (unless you’re using a pre-made mix like Bisquick…in which case, check out that long list of chemicals and preservatives!), and they’re pretty high in carbs.  Ready for a game changer?  Try these Tahini Pancakes!

This recipe is just three ingredients long.  WHAT?!?!  All you need is a very ripe banana, an egg, and a tablespoon of tahini.  You could use another kind of nut butter, but we use tahini to avoid allergies in my house.  Tahini is an amazing thing.  I keep a can of it in my fridge at all times, because it is crucial to homemade hummus, baba ghanoush, and this kale salad.  It’s just sesame seed butter, but it’s lovely.  These pancakes have no gluten and no nuts, plus they’re high in protein.  Win! Win!

Dress these up however you like.  Add in chocolate chips, coconut flakes, or raisins.  They don’t rise like regular pancakes, but they’re certainly more substantial than a crepe.  Try them for breakfast tomorrow and you—and your pancake-loving kids—will thank me!

Tahini Pancakes

(makes two six-inch pancakes.  Go ahead and double or triple the recipe if you like.)

Ingredients:

  • 1 large egg
  • 1 overripe banana
  • 1 heaping tablespoon tahini
  • coconut oil or butter for the pan

Directions:

  1. Heat a small skillet over medium heat.  Add a teaspoon or so of coconut oil or butter.  Make sure the pan is really well lubricated.  These pancakes can fall apart if they stick.
  2. In a bowl, beat the egg.  Mix in the banana and mash and mix well.  Beat in the tahini.
  3. Pour half the pancake batter into the frying pan and reduce the heat to medium low.  Let cook for a few minutes until, like a normal pancake, it gets dry with burst air bubbles on top.  Very carefully, flip the pancake over and turn the heat all the way to low, or even turn it off.  Let cook a minute or two, then slide off the pan and onto a plate.  Smother with whipped cream and berries, or maple syrup, sliced bananas and walnuts.

Explore, experiment, enjoy! — Dana


To view even more of Dana’s unique recipe, you can visit her at Frugal Girlmet!

Cranberry Orange Scones (Gluten-Free)

Cranberry Orange Scones resize

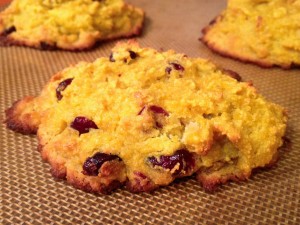
If you have kids, you probably know what summer break is like:  trying to keep them busy and entertained without letting their brains turn to mush!  One of my favorite ways to do that is baking together.    I have my older girl (first grader now!) read the recipe out loud, and both girls love to stir and mix and pour ingredients.  Today’s group baking exercise?  Cranberry Orange Scones!

These are gluten-free, made with coconut flour.  If you’ve never tried it, I can’t recommend it highly enough.  For six big scones, you only need half a cup of coconut flour!  I like making treats for the girls that are single serving – that way there’s no arguing over whether the slice of bread is big enough, or having to share the last one.  These came together in a snap.  The original recipe (found on the Elana’s Pantry website) directs you to mix all the ingredients in a food processor, and I’m sure that would have made the recipe go even faster!  But because my girls wanted to help, we mixed them by hand – dry ingredients in a large bowl, wet ingredients in a smaller bowl, and then mixed wet into dry.

Try these little heaven-scented beauties today!

Cranberry Orange Scones (Gluten-Free)     makes six large scones

Ingredients:

  • 1/2 cup coconut flour
  • 1/4 teaspoon salt
  • 1/4 teaspoon baking soda
  • 1/4 cup coconut oil or softened butter
  • 1/4 cup honey
  • 4 eggs
  • 1/2 cup dried sweetened cranberries
  • zest of one orange, plus the juice of half the orange

Directions:

  1. In a large bowl, blend together the flour, salt, and baking soda.
  2. In another bowl, beat together the coconut oil or butter, honey, and eggs.
  3. Mix the egg mixture into the flour mixture.  Stir in the cranberries, orange zest, and orange juice.
  4. On a Silpat mat or parchment paper, make six mounds of dough.
  5. Bake for about 15 minutes at 350*F.

Explore, experiment, enjoy! — Dana


To view even more of Dana’s unique recipe, you can visit her at Frugal Girlmet!

Crustless Kale Quiche

Crustless Kale Quiche Resize

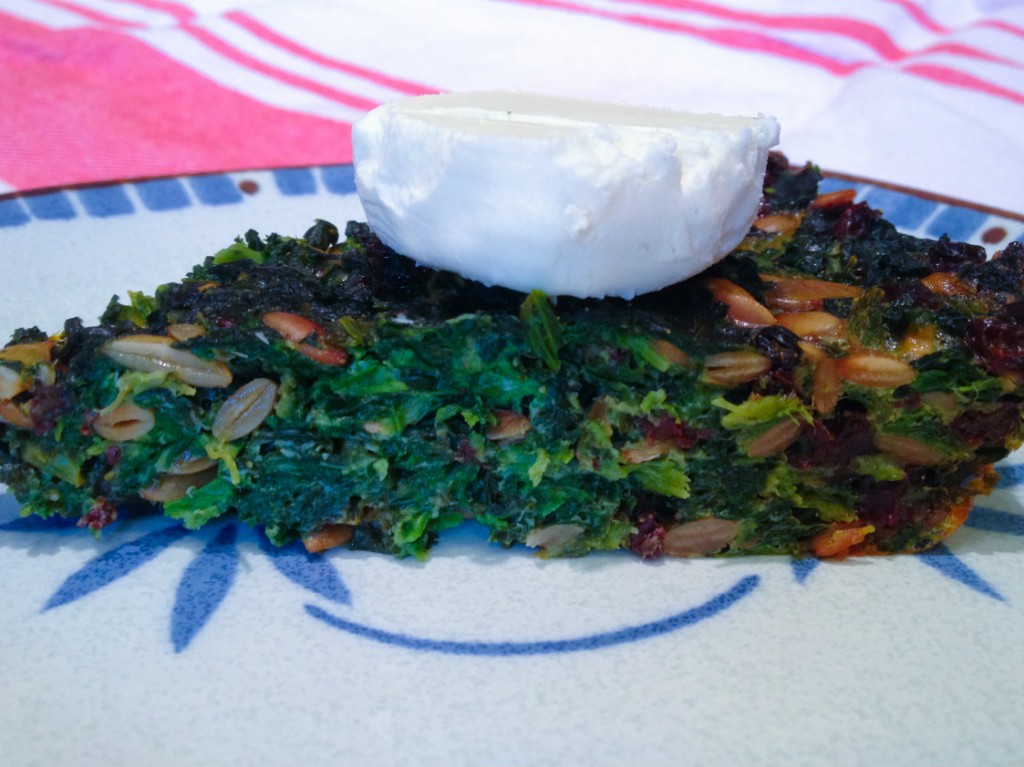
Talk about a tongue twister!  It’s worth the effort to say, and the little bit to make, because this Crustless Kale Quiche hits the spot.

I’ve only made this once … and I’ve already eaten almost half of it.  The kale adds a little bitterness and chew to what would otherwise be a run-of-the-mill spinach pie.  Nutmeg, currants, and pepitas add an almost sweet, Middle Eastern flavor profile.  The three eggs are just enough to combine the ingredients without becoming heavy or custardy like a regular spinach quiche.  Don’t get me wrong – a traditional spinach and swiss cheese quiche is wonderful, but this one is lighter, with an unexpected combination of flavors that will have you craving it again.

I ate this hot, and I ate it cold, cut right out of the fridge.  I ate this with a big slab of goat cheese on top and I ate it plain.  I’m going to eat more of it with dinner tonight and see if I can’t discover some new way to enjoy it.  If you want your greens, with a little extra zing, try this instead of a salad tonight!

Crustless Kale Quiche

Ingredients:

  • 1 pound bag of frozen chopped spinach
  • 1 large bunch of kale
  • 3/4 cup pepitas (or try pine nuts or sunflower seeds)
  • 1 tablespoon coconut oil (or butter) plus more for greasing the pie plate
  • 1 teaspoon chopped garlic (about 2 cloves)
  • 1/2 cup currants or raisins (next time I’m trying golden raisins!)
  • 1/8 teaspoon ground nutmeg
  • 1/2 teaspoon salt
  • 3 eggs
  • Goat cheese, to serve, if desired

Directions:

  1. Wash the kale and remove from the stem, tearing it into smaller-than-bite-sized pieces.  Saute on medium heat in a large pot with a lid.  Don’t add any extra water or oil – just the damp kale by itself.  Stir occasionally until it gets soft, about 15 minutes.  When it appears soft and has reduced in volume, pour in the bag of frozen spinach.  Stir to combine and replace the lid.  Cook on medium-low for another five minutes until the spinach is thawed.  Remove from the heat and let cool.
  2. Preheat the oven to 350*F.  While the spinach and kale are cooling, heat the coconut oil over medium and add the pepitas.  Stir frequently for 5 minutes, then add the garlic and currants.  Stir for another 3 minutes.
  3. Squeeze out as much water from the kale mixture as possible, then dump it into a large bowl.  Pour over the pepita mixture and combine.  Add nutmeg and salt.
  4. Beat 3 eggs well and mix into kale mixture.  Grease a pie plate, then fill with the kale mixture.  Smooth it down so you have a flat top.  Bake for 35 minutes or until not wet in the middle.  Serve warm or cold, with goat cheese or without.

Explore, experiment, enjoy! — Dana


To view even more of Dana’s unique recipe, you can visit her at Frugal Girlmet!

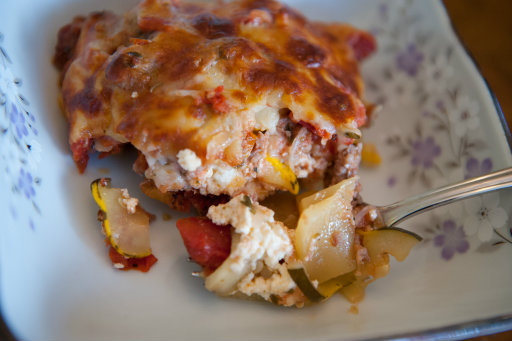
Zucchini Lasagna

Zucchini Lasagna Resize


This recipe came about, as many do, in my house:  I start with an ingredient and brainstorm what in the world I’m going to do with it.  I had a bag of summer squash from the farmer’s market – it was so inexpensive, I couldn’t pass it up.  But aside from making zucchini bread, I couldn’t think of how to use it.  That was when I stumbled upon a recipe for Homemade Ricotta, and it came to me:  Zucchini Lasagna!

The zucchini stands in for traditional noodles in this recipe, so if you are following a low-carb diet, or if you are avoiding gluten, you’re in luck!  If you are making ricotta, drain and squeeze it to keep any extra liquid out of the casserole.  Nobody likes a soggy lasagna!  Feel free to saute and add other veggies or herbs to the lasagna, too – baby spinach, bell peppers, black olives, or fresh basil would all be lovely!

This is a small casserole, so we ate it with a big salad for dinner.  You can easily double or quadruple this recipe to serve more people.  Hope you like it!

Zucchini Lasagna

Ingredients:

  • 1 or 2 zucchinis or other summer squash, about 3/4 pound
  • cooking spray
  • 1/2 pound sausage
  • 1/2 small onion
  • 1 clove garlic
  • 1 can diced tomatoes, drained (I used fire-roasted canned tomatoes)
  • 1/2 teaspoon Italian herbs, or oregano
  • salt and pepper
  • 1 cup Homemade Ricotta, or store-bought
  • 1 cup shredded mozzarella cheese

Directions:

  1. Preheat oven to 400*F.  Line a baking sheet with aluminum foil and spray lightly with cooking spray.  Chop the zucchini into thin coins – about 1/8″-thick.  Lay out on the baking sheet and bake for about 8 minutes.  They don’t need to be cooked through at all – you just want to dry them out a little bit.  Remember, no one likes a soggy lasagna!
  2. While the zucchini is drying out, dice the onion, and mince the clove of garlic.  In a large pan, brown the sausage with the onion and garlic.  Drain any fat that accumulates.  Add in the drained tomatoes, oregano, and salt and pepper, and heat through.
  3. In a casserole dish, spray a little cooking spray so nothing sticks.  Layer half the zucchini slices to cover the bottom of the casserole dish.  Spread half the ricotta over the zucchini, then spread half the sausage mixture over the ricotta.  Repeat with the rest of the zucchini, then ricotta, then sausage.  Cover with the shredded mozzarella.
  4. Cover with a lid or aluminum foil, and bake for 20 minutes.  Remove lid and bake for another ten minutes, until the cheese is golden and melty.

Explore, experiment, enjoy! — Dana


To view even more of Dana’s unique recipe, you can visit her at Frugal Girlmet!

Blueberry Frozen Dessert

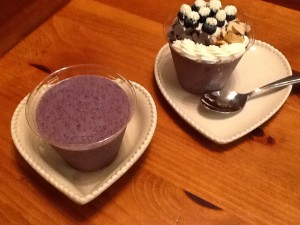
Here on our At Home with GCH blog, Mondays are always focused on healthy but oh-so-yummy! recipes.  We continue our series of summer recipes featuring in-season ingredients.  Our featured ingredient this week is blueberries!  Check out just some of the healthy benefits of this tiny but powerful fruit!  Today’s recipe is for a blueberry frozen dessert—not quite ice cream but it fits perfectly into our ‘healthy but oh-so-yummy’ category!

2013-07-18 22.09.43

Here in the NorthEast, we are in the midst of berry season.  Blueberries are so plentiful that I have six four pints sitting in my refrigerator.  A few weeks ago, we had a recipe for Blueberry Almond Muffins.  But we are also in the midst of a heatwave; so I went looking for a recipe for a frozen treat to make for Robert.  Oh, I found m-a-n-y recipes for blueberry ice cream, sorbet, sherbert, and frozen smoothies…and they all looked so good!  However, I really wanted to keep it light, simple, and healthy but oh-so-yummy!  Over on Amy Green’s website, simplysugarandglutenfree, I found a quite easy recipe that I have tweaked just a bit.  Enjoy!

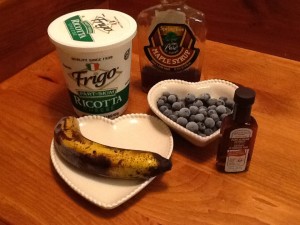
Ingredients:2013-07-18 21.01.21

1/2 very ripe banana, cut into 1/2″ slices and frozen
1/2 cup blueberries, frozen
1/2 cup ricotta
1 teaspoon maple syrup, or to taste
1/2 teaspoon almond extract

Toppings:
1 tablespoon sliced almonds
1-2 dollops whipped cream
Additional blueberries

Directions:

  • First things first: if you haven’t already…place the cut-up banana and blueberries in the freezer for a couple of hours.
  • Put the frozen fruit into the small bowl of a food processor or blender. Process just until it’s in small chunks.
  • Add the ricotta and flavorings; process until smooth, stopping to scrape down sides as necessary.
  • Put your “ice cream” in a bowl and top with chopped nuts, whipped cream, and additional (non-frozen) blueberries.  Best if eaten immediately as a ‘soft-serve’ type dessert!

Substitutions:
For the blueberries – almost any flavorful summer fruit (I am going to try peaches tonight!)
For the ricotta – cottage cheese
For the maple syrup – agave nectar or honey
For the almonds – any of your favorite nuts

♥  ♥  ♥  ♥  ♥

God loves you!    (Don’t ever forget that!)

♥  coleen

_________________________________

If you would like to send a personal message to Coleen concerning this blog post, you may email her at: Coleen@girlfriendscoffeehour.com

Blueberry Almond Muffins (Gluten Free)

Here on our At Home with GCH blog, Monday’s are always focused on healthy but oh-so-yummy! recipes.  As promised, for the next few weeks I am sharing some gluten free treats that you can bring to your bbq’s, picnics, hoedowns, and block parties.  Perhaps your family loves to hike or go backpacking—this recipe is perfect for you!  

2013-06-25 16.18.01

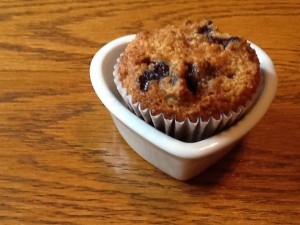
Today’s recipe is for gluten free Blueberry Almond Muffins.  These are full of protein, contain no refined sugars, and have no added fat (except the 1 tablespoon used for the topping).   Also, a nice substitution for the blueberries would be raspberries…don’t forget to see the tip about freezing them!

Blueberry Almond Muffins

makes 10 muffins

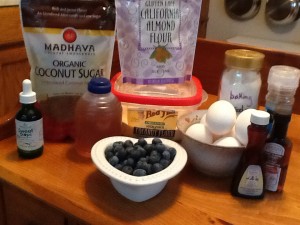
Ingredients2013-06-25 15.23.16
• 2 cups almond flour
• 1/2 cup coconut flour
• 1/2 teaspoon sea salt
• 1/2 teaspoon baking soda
• 6 eggs
• 1/2 cup honey, agave nectar or maple syrup
• 12 drops liquid vanilla stevia (or additional sweetener of your choice)
• 1 teaspoon vanilla extract
• 1 teaspoon almond extract
• 1 cup blueberries, frozen*

Topping Ingredients
• 1 tablespoon butter, softened
• 1 tablespoon coconut sugar

Directions

  1. Put blueberries into freezer
  2. Preheat oven to 350. Put liners into muffin tin
  3. In a large mixing bowl, whisk together almond flour, coconut flour, salt and baking powder
  4. In a separate bowl, whisk eggs; then add honey, stevia, and extracts
  5. Stir liquid ingredients into dry ingredients and blend thoroughly
  6. Gently fold in frozen blueberries*
  7. Spoon batter into lined muffin cups
  8. Lightly pat tops down into rounded heaps; use a pastry brush to dab with butter and sprinkle with coconut sugar
  9. Bake for 22-25 minutes; the tops should be springy yet firm when they are done
  10. Remove from muffin tin immediately and let cool on a rack
  11. Keep in the refrigerator, or place into freezer storage bags or a container

* The purpose of freezing (or using pre-frozen) blueberries is that this batter is very thick; if you used non-frozen berries, they would smoosh. 🙂

♥  ♥  ♥  ♥  ♥

God loves you!  ♥  (Don’t ever forget that!)

♥  coleen

_________________________________

If you would like to send a personal message to Coleen concerning this blog post, you may email her at: Coleen@girlfriendscoffeehour.com