April 20, 2024

Summer Thai Steak Salad

Thai Salad

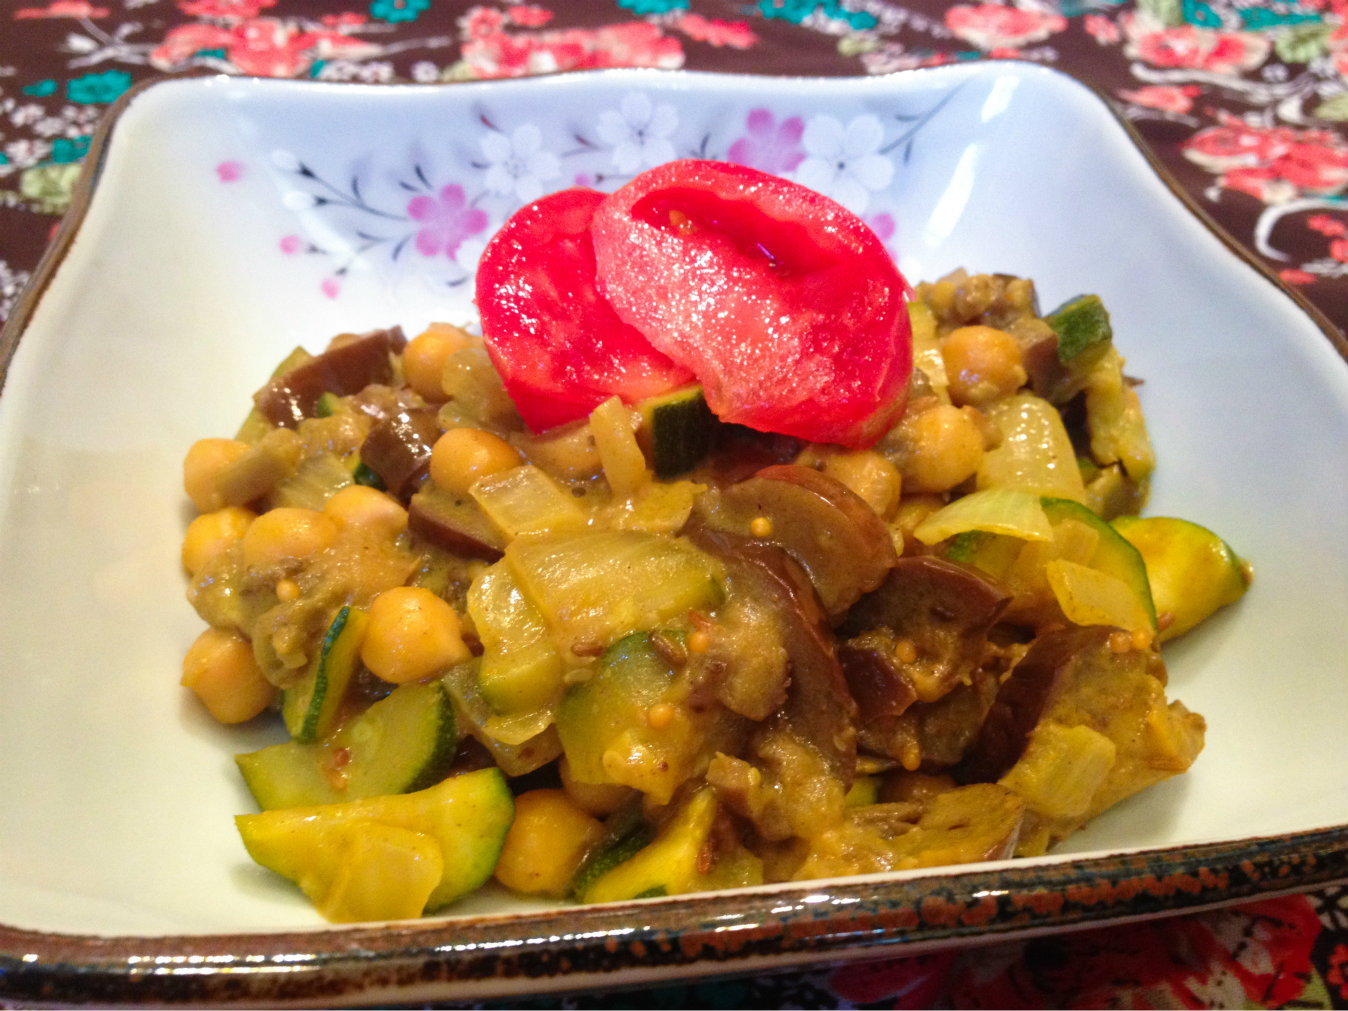
There were lots of adjectives to sift through in trying to create a name for this recipe!  ‘Salad’ had to be in there, of course…and ‘Thai,’ too, because of the peanut dressing.  But feel free to use chicken instead of steak, and you can switch out the veggies used to suit your tastes.  This Summer Thai Steak Salad is really flexible!  Ready?  Let’s go!

Summer Thai Steak Salad

(recipe makes two salads)

Ingredients:

  • 1 heaping tablespoon peanut butter
  • 1 tablespoon rice vinegar (or use a little less apple cider vinegar)
  • 1 teaspoon sugar, honey, or maple syrup
  • 1/2 teaspoon soy sauce
  • 2 tablespoons sesame oil (use grapeseed or olive oil, if you have to)
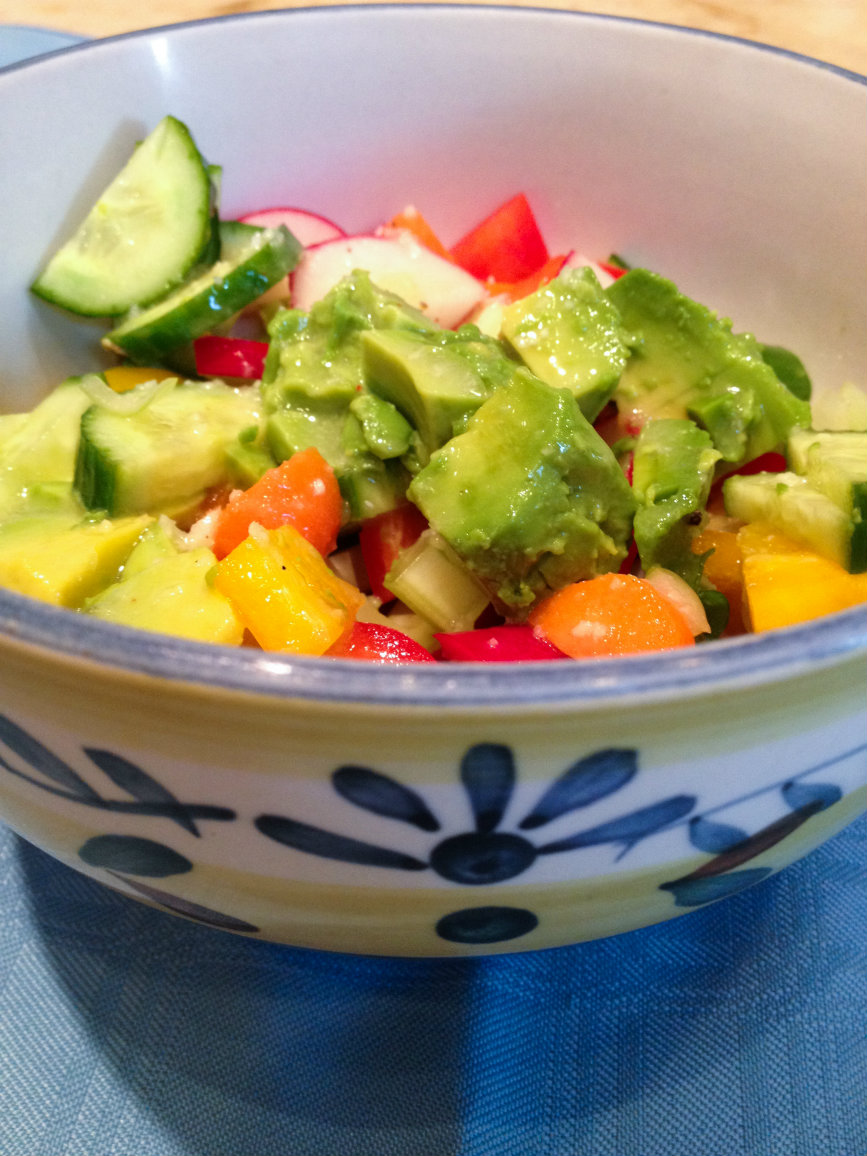
  • a few handfuls of salad greens
  • 1/2 pound cooked steak or chicken, diced
  • 1 large or 2 small bell peppers, thinly sliced
  • 1/4 sweet or red onion, thinly sliced
  • 1 cucumber, peeled and sliced into half-moons
  • 1/2 cup cooked corn kernels
  • other options:  tomatoes, avocado, basil, cilantro, carrots

Directions:

  1. In a food processor, blend together the peanut butter, vinegar, sugar, soy sauce, and sesame oil.  Taste for seasoning – add more sugar, or more vinegar, or whatever you want.  You can even give it a hit of Sriracha if you like!  Set aside.
  2. Wash greens and divide between two really big salad bowls.  Top with diced steak and thinly sliced veggies.
  3. Toss with lots of peanut dressing.
  4. Do a little happy dance in your chair!

Explore, experiment, enjoy! — Dana


To view even more of Dana’s unique recipe, you can visit her at Frugal Girlmet

Napa Cabbage with Peas and Prosciutto

Napa Cabbage with Peas and Prosciutto

Punxatawney Phil, that old son-of-a-gun, just declared there would be six more weeks of winter.  Growing up in Southern California, it didn’t mean much to me—maybe a day or two of drizzle, or a heavier jacket if the temperature dipped into the fifties at night.  Now that we’re in Texas, winter is FOR REAL!  There are no good farmer’s markets, no fresh produce for cheap.  So when it’s the dreary days of February and you can’t plant your garden yet, it’s time to make the most of what you have.  This recipe for Napa Cabbage with Peas and Prosciutto can’t bring spring, but it can warm up your belly!

I had half of a head of cabbage left after making a batch of Stuffed Cabbage Soup and needed a recipe for it.  If you haven’t searched through Epicurious.com, please do.  I used the search function to find recipes for Napa cabbage, stumbled onto this one, and tried it.  Fantastic!  I followed the instructions, except I replaced prosciutto with bacon.  Warm, smoky, sweet, and salty.  Try it tonight!

Napa Cabbage with Peas and Prosciutto (recipe courtesy Epicurious)

Ingredients:

  • 2 tablespoons olive oil
  • 1 cup frozen peas, thawed
  • 1 small napa cabbage, trimmed and sliced crosswise
  • 1 ounce prosciutto, chopped (I substituted 3 slices of bacon, minced, cooked, and drained)
  • 1 teaspoon freshly grated lemon zest
  • 1/2 teaspoon fresh lemon juice (or more, to taste)
  • 2 tablespoons freshly grated Parmesan cheese

Directions:

  1. In a large heavy skillet, heat oil over moderate heat until hot but not smoking. Add peas, cabbage, prosciutto, and zest and cook, stirring, 4 to 5 minutes, or until cabbage is wilted and tender.
  2. Remove skillet from heat and stir in lemon juice, Parmesan, and salt and pepper to taste.


Explore, experiment, enjoy! — Dana


To view even more of Dana’s unique recipe, you can visit her at Frugal Girlmet!

Spinach Salad with Sundried Tomato Vinaigrette

Spinach Salad with Sun-dried Tomato Vinaigrette

This recipe, Spinach Salad with Sundried Tomato Vinaigrette, came from one of those happy accidents we all sometimes have.  Serendipity!  (Does anyone remember those books?) I was in the middle of  making a Caesar salad for dinner one night, and realized I was out of both eggs and anchovy paste!  I had half of a vinaigrette made, so I looked in the refrigerator for something to make it pop, worthy of a dinner salad.  There—far, far back on the shelf—was a nearly empty jar of sun-dried tomatoes.  Hmmm….

I put the ingredients for the dressing I’d already mixed in my food processor and emptied the jar of sun-dried tomatoes right in on top. I had about 2 tablespoons of sun-dried tomatoes and almost a quarter cup of sun-dried tomato-flavored oil. Whiz, whiz!!  And taste – amazing!  Tart and tangy but it needed something a little creamy and fatty to offset it.  Aha!  Avocado and goat cheese!  Now, if you don’t have fresh herbs, just use small pinches of dried…or skip it, no biggie.  Dinner is done!  Et tu Caesar?  Who needs ya?!

Spinach Salad With Sun-dried Tomato Vinaigrette

Ingredients:

  • 1/2 teaspoon Dijon mustard
  • 1 clove garlic
  • 1 tablespoon fresh basil leaves (I use the flowers from my plants, too)
  • 1/2 teaspoon fresh oregano
  • 1/2 teaspoon fresh thyme
  • 1 tablespoon rice wine vinegar
  • splash of balsamic vinegar
  • salt and pepper
  • 2 tablespoons sun-dried tomatoes packed in oil, plus as much of the oil as you can get out of the jar
  • olive oil
  • 1 bag of baby spinach leaves (wash again, no matter what the bag says!)
  • 1/2 red bell pepper, sliced
  • 1 avocado, sliced
  • 2 ounces soft goat cheese, crumbled
  • cherry tomatoes, sliced in half

Directions:

  1. In your food processor, buzz together the mustard, garlic, herbs, and vinegars to combine.  Make sure the garlic and herbs are well broken down.
  2. Add the sun-dried tomatoes along with as much oil as you can get out of the jar; and salt and pepper.  Combine again.  Check the consistency and add olive oil if you’d like to thin out the dressing.
  3. Assemble the salad – a big bed of spinach, with bell pepper, sliced avocado, goat cheese, and cherry tomatoes on top.  Apply dressing liberally!

To make it a meal, you can add black olives and leftover cooked chicken (come to think of it, grilled shrimp might be good on this too!)  Serve with crusty bread and a white or rosé wine.

Explore, experiment, enjoy! — Dana


To view even more of Dana’s unique recipe, you can visit her at Frugal Girlmet!

Summer Vegetable Curry

Summer Vegetable Curry resize

If you think about it, there is a lot of overlap between summer produce here in the United States, and what shows up on Indian food menus.  That’s because what grows where it’s hot there is also what grows in the summer here.  Lots of Indian dishes feature zucchini (also called courgettes), onions, eggplants, and tomatoes – all things coming into season now!  Why not try this Summer Vegetable Curry?

You really can’t mess this up or go wrong.  Don’t like garbanzo beans?  Use another bean, or switch them out for green peas or bite-sized green beans.  Like it spicy?  Add some chopped jalapeños or another chili of your choice.  Use whatever curry powder you have.  Out of coconut milk?  Use water or broth instead.  I didn’t have any cilantro, or I would have chopped up a few tablespoons to stir in right before serving.  See?  There is no wrong way.

For a vegetarian meal, double the amount of beans and serve over basmati rice.  Paleo?  Skip the beans altogether and serve this curry as a side dish to your favorite protein.  Ready?  Let’s go!

Summer Vegetable Curry

Ingredients:

  • 1 large onion
  • 2 tablespoons ghee, butter, or oil
  • 1 tablespoon mustard seeds
  • 1 tablespoon cumin seeds
  • 1 tablespoon curry powder (or more, to taste)
  • 1/2  can coconut milk
  • 2 skinny eggplants
  • 3 zucchinis
  • 1 can garbanzo beans or 1 cup of rehydrated and cooked dried garbanzos
  • cilantro, raw tomato, and rice (optional)  for serving

Directions:

  1. In a very large pot, heat the ghee or butter.  Chop the onion and add to the pot, along with the mustard and cumin seeds.  Fry on medium heat for about 5 minutes, until the onion becomes translucent.  Then add the curry powder and coconut milk and reduce heat.
  2. Cut the eggplants and zucchinis into thin half-moons.  Add to the pot, stir to mix, and cover.  Cook over low heat for about 25 minutes until the vegetables are soft, stirring occasionally to ensure nothing sticks to the bottom of the pot.
  3. Taste for seasoning – add salt or more curry powder if you like.  Stir in the garbanzos and heat through.
  4. Serve with chopped tomato and minced cilantro.  Serve over rice if you like.

This is definitely one of those recipes that is even better the next day, and it’s easy to reheat.  Have some for dinner tonight and save some for lunch tomorrow!

Explore, experiment, enjoy! — Dana


To view even more of Dana’s unique recipes, you can visit her at Frugal Girlmet!

Crunchy Chopped Salad


Crunchy Chopped Salad resize

I think this was originally a recipe from a South Beach Diet cookbook.  But I started making it so long ago, and have added and deleted ingredients over the years…so that I am not sure it’s the same one in the book.  That’s okay – it’s not about exact ingredients.  You can add or subtract as you like.  It’s about CRUNCH!  And that’s what you get in this Crunchy Chopped Salad!

I know that chips aren’t great for me.  I usually don’t crave them, and I make sure I don’t keep them in the house (because as a stay-at-home mom, you DO eat whatever is in the pantry!)  But sometimes you just get that urge for something kind of salty and crunchy.  I make this salad instead.  Is it the same?  Of course not!  (Otherwise I’d call it Doritos Salad!)  But this satisfying, fun-to-eat dish  scratches that itch for me, and maybe it will for you too.

If you need a break from lettuce, try this.  If you have lots of singleton vegetables in your crisper drawer, try this.  If you want something fresh and different for your next cookout, try this!

Crunchy Chopped Salad

(Serves four as a side dish)

Ingredients:

  • 6 baby carrots
  • 1 bunch radishes, trimmed
  • 3 stalks celery, trimmed
  • 2 Persian cucumbers, or one large cucumber
  • 1/2 red bell pepper
  • 1/2 yellow bell pepper
  • 2 green onions
  • 2 cloves garlic
  • juice of 1 lemon or lime
  • 2 or 3 drops of honey
  • salt and pepper
  • 1/4 to 1/3 cup olive oil
  • 2 avocados

Directions:

  1. Wash and trim all your veggies.  Cut them all into medium-small pieces.  This is up to you, but for example, I cut the peppers into 1/2″ square pieces.  The radishes, cucumbers, carrots, and celery all get sliced vertically, then cut into 1/4″ slices.  If you dice everything too small, you won’t get the crunchiness.  If you cut everything too large, you’ll only get one or two veggies on your spoon at a time.  Experiment and see what size you like best.  If you are using a large cucumber, you may want to peel off the waxy skin and scoop out the seeds.  I like Persians because they are thin-skinned and have very little squishy gel around the seeds.  Pile all your chopped veggies into a big bowl and toss.  Beautiful, right?
  2. In a little food processor, blend up your garlic, lemon juice, honey, salt and pepper, and 1/4 cup olive oil.  Taste and dilute with more oil if you like.
  3. To serve, dish the salad into a bowl and drizzle liberally with dressing.  For each serving, dice half of an avocado and place it on top (otherwise it gets smushed.)  Eat this salad with a big soup spoon so you get a little of each vegetable in every bite!

If you have leftovers, you can mix in a can of tuna the next day.  It’s wonderful!


Explore, experiment, enjoy! — Dana


To view even more of Dana’s unique recipe, you can visit her at Frugal Girlmet!

Grilled Caesar Salad


Grilled Caesar Salad resize

Before we go any further:  Yes, you grill the lettuce.  Say what?!  I first encountered this recipe at an Italian restaurant in our neighborhood a few years back.  It was a revelation—you can grill lettuce! And  instead of making it nasty and squishy, just a tiny bit of char adds so much flavor and texture as to change the whole dish!  Then I saw the idea again in a magazine last week and, that was it, I had to try it at home.  (Okay – I made my husband do the actual grilling.  But I supervised, I promise!)

The dressing comes together in a snap in the food processor (or you can do it old-school in a wooden salad bowl with a fork, but I find it is hard on my forearms!)  The only ingredient you may not have is anchovy paste.  It’s pretty cheap and lasts forever in your fridge, and it adds that “umami” flavor you can’t get anywhere else.  It’s also great in spaghetti sauce, if you’re worried you won’t make a lot of Caesar salad.  This dressing also calls for a raw egg yolk.  I would highly recommend buying the highest quality eggs you can find – check your local farmer’s market – or at least getting organic, free-range, or both.  (If you are immunosuppressed you could substitute a spoonful of store-bought mayonnaise, but it’s just not the same.)  Also, you’ll notice there are no croutons on my plate.  We almost never eat bread, but if croutons are your thing, go ahead and pile them on!

This salad was a side dish to a dinner of grilled steaks and grilled veggies.  Feel free to chop up some grilled chicken and make it a whole meal!  For a side dish, plan on one half of a head of lettuce per person.  If you are making it the main dish, serve a whole head of lettuce per person.  Curious?  Let’s go!

Grilled Caesar Salad

Ingredients:

  • 2 cloves garlic, peeled
  • 1 teaspoon Dijon mustard
  • 1/2 teaspoon Worcestershire sauce
  • 1 egg yolk
  • 1 teaspoon anchovy paste
  • juice of one lemon
  • 1/4 – 1/3 cup olive oil
  • 1 head romaine lettuce
  • croutons and grated parmesan cheese to serve

Directions:

  1. Prepare the dressing:  In a food processor, blend together the garlic, mustard, Worcestershire sauce, egg yolk, anchovy paste,  and lemon juice.  Blend in 1/4 cup of oil.  Taste to see if you like the consistency.  If you want it more diluted, add more oil.  Refrigerate until ready to serve.
  2. Prepare the lettuce:  Slice it vertically down through the core.  You have two long halves now.  Wipe with a dry paper towel.  The lettuce needs to be completely dry or else it will stick and wilt.  No washing it, no oiling it!  Place the lettuce on the grill, cut side down, for 2 minutes without moving it.  With tongs, take it off the grill and lay it grilled-side up on a plate.  Don’t cover it or it will get soggy.  Drizzle with dressing, and add croutons or grated cheese to serve.  Eat it now!

Explore, experiment, enjoy! — Dana


To view even more of Dana’s unique recipes, you can visit her at Frugal Girlmet!

Dijon Dill Green Beans

Dijon Dill Green Beans resize

If I remember correctly, this is a recipe from the South Beach Diet book.   In any case, regardless of origin, these Dijon Dill Green Beans are delicious and healthy…and sure to please!

The Dijon dill dressing is very light and won’t hide the sweetness of the green beans.  I’ve used both dried dill and fresh, and they both taste great, so don’t fret or make a trip to the store if you only have dried.  Low-carb, low-cal, and tasty for sure, this veggie side will taste great with whatever main dish you’re making tonight!

Dijon Dill Green Beans

Ingredients:

  • 1 pound green beans, fresh or frozen
  • 2 tablespoons butter
  • 1 tablespoon Dijon mustard
  • 2 tablespoons chopped fresh dill (or one scant teaspoon dried dill)
  • salt and pepper to taste
  • squeeze of lemon, optional

Directions:

  1. Prepare the green beans:  (If using fresh, take off the ends and cut into 2-inch lengths.)  Steam or microwave the beans until they are still a little firm.
  2. While the beans are cooking, heat a large pan over medium and add the butter and dill.  Stir to keep the dill from burning and cook for a few minutes until the butter is bubbly and starting to brown.  Add the Dijon mustard and salt and pepper.
  3. Drain away any excess water from the beans, then add to the dill mixture.  Stir to coat the beans, then serve hot with a squeeze of lemon or another pinch of salt.

Leftovers?  I ate mine cold, with a can of tuna mixed in and (surprise!) a little more lemon juice squeezed over the top.  Yum!

Explore, experiment, enjoy! — Dana


To view even more of Dana’s unique recipe, you can visit her at Frugal Girlmet!


Roasted Vegetables with Buttermilk Herb Sauce

Roasted Vegetables with Buttermilk Herb Sauce Resize

Did you have a fun and festive St. Patrick’s Day?  We didn’t do too much to celebrate.  (I have a little Irish in me, but no freckles!)   I did make a cabbage dish on Monday, leaving me with half a head of green cabbage.  I love roasting wedges of cabbage, but I wanted something a little more assertive, so I decided to make an herb dressing for them.  Add in some other roasted veggies, and I came up with this recipe for Roasted Vegetables with Buttermilk Herb Sauce.

Buttermilk is not something I grew up with, so I can’t really say much about it.  It does have a pleasantly sour taste that adds complexity to baked goods (think pancakes) and sauces.   If you add a lot of dill and pepper to this recipe, you’d have something very close to ranch dressing, but without all the chemicals and preservatives in bottled or packaged varieties.  I used parsley because that’s what I had but I’d like to try it next time with a big handful of tarragon.  If you grow your own herbs, this is the perfect canvas for trying new flavor combinations!

I served the sauce over roasted cabbage wedges and roasted golden beets.  Here is a list of other vegetables I think this would taste good on:  carrots, leeks, green beans, baked potatoes, and Brussels sprouts with bacon.  I served this with balsamic-glazed salmon last night, and you know what?  The sauce went great on the fish too!  I had a little sauce left over, so this morning I used it to make chicken salad for my husband’s lunch.  Find your own way with this delightfully green and springy sauce—start here!

Roasted Vegetables with Buttermilk Herb Sauce

Ingredients:

  • 4 beets
  • olive oil
  • 1/2 head green cabbage
  • 1/2 cup buttermilk
  • 3 tablespoons plain yogurt
  • 4 green onions
  • handful of fresh herbs:  use parsley, tarragon, dill, or a combination of these
  • 1 clove garlic or 1/2 teaspoon garlic powder
  • salt and pepper to taste
  • squeeze of lemon if desired (I used a big squeeze – okay, two big squeezes!)

Directions:

  1. Preheat oven to 400*F.  Prepare the beets for roasting:  Wash them and remove any greens from the top.  In a large rectangle of aluminum foil, place the beets, root tip facing up, in the middle.  Drizzle with a little olive oil, maybe a tablespoon total.  Wrap up the beets in the foil and place in a pie plate or Pyrex bowl.  Bake for one hour or until they give when you push on them.  Set aside to cool.
  2. While the beets are baking, prepare the cabbage: Cut out the core of the cabbage, then cut the cabbage into 4 wedges.  Place them on a foil-lined baking sheet and drizzle each wedge with about 1/2 teaspoon of olive oil.  After the beets have been in the oven for half an hour or so, add the cabbage.  Bake for about 15 minutes, then flip them over and bake again for about ten minutes.  (The time will vary depending on your oven, your cabbage, et cetera.  You want the cabbage to get golden and a little crispy at the edges, but not too dark!)
  3. While the vegetables are cooking, combine buttermilk, yogurt, green onions, herbs, and garlic in a food processor.  Taste it…need more garlic?  Go ahead!  Add salt and pepper and a squeeze of lemon if you like and blend again.  Taste to make sure it’s yummy, and then put in the fridge until ready to serve.
  4. Skin the beets:  once they are cool enough to handle simply slip the skins off with your fingers.  If you are using red beets, you may want to wear gloves, since they will turn your fingers pink!
  5. On each plate, lay down a wedge of cabbage and a beet cut into quarters.  Serve the hot veggies with the cold buttermilk herb sauce.

Explore, experiment, enjoy! — Dana


To view even more of Dana’s unique recipe, you can visit her at Frugal Girlmet!

Brussels Sprouts and Kale Salad

Kale and Brussels Sprouts Salad Resize

Now you ladies know I love a good salad.  I will eat a salad for breakfast – in fact, I’m finishing this big bowl of Brussels Sprouts and Kale Salad right now, with my morning coffee!  Raw Brussels sprouts—for breakfast?!  Yes indeed!

I found this recipe on the Bon Appetit website, which I tweaked to my liking.  The best thing about this salad, aside from the fact that it tastes good, is that it is so hearty.  I made it last night, had some for dinner, and it’s still good this morning!  But because it’s so sturdy, you’ll want to keep the nuts, fruit, and cheese separate until you’re ready to eat it.  You can sub any dried fruit you like for the cranberries:  cherries, blueberries, golden raisins, and diced dried apricot would be delicious too.  And if you don’t have toasted almonds, substitute pecans, walnuts, or hazelnuts.  Check it out, and report back with your chosen combination of flavors!

Brussels Sprouts and Kale Salad

Ingredients:

  • 1 bunch Tuscan kale (also called dinosaur or lacinato kale)
  • 1/2 pound large Brussels sprouts
  • 1 shallot (or 1/4 red onion)
  • juice of one large lemon
  • 1/3 cup olive oil
  • 1/2 teaspoon honey
  • to serve:  almonds, dried cranberries, and Parmesan cheese
  • salt and pepper

Directions:

  1. Prepare kale:  Strip the leaf off the thick stem, then soak the leaves in cold water to remove any dirt.
  2. While the kale is soaking, prepare the Brussels sprouts:  cut off the stem end and any brown or wilted leaves.  Slice in half lengthwise, and lay down flat on the cut side.  Thinly slice each sprout half to create shreds.  Place shredded sprouts in a very large bowl.
  3. Dry the kale.  Grab a handful and sort of wad it up, then run your knife through the kale to shred it.  Add to the sprouts in the  bowl.
  4. In a small food processor, blend together the shallot, lemon juice, olive oil, and honey.
  5. Pour over the kale and mix with your hands.  I mean get in there!  Massage the dressing into the kale, squeezing it to soften everything up and get the dressing into all the sprouts and kale.
  6. To serve:  Dish salad into a bowl.  Take a handful of almonds and crush with a knife or in a mortar and pestle – just crack them lightly, you don’t need to pulverize them.  Add the cracked nuts and cranberries to the salad, then shred some Parmesan to go on top.  I shaved the block of Parmesan with my vegetable peeler, but you don’t have to do that if you don’t want.  Season with salt and pepper and serve.

Explore, experiment, enjoy! — Dana


To view even more of Dana’s unique recipe, you can visit her at Frugal Girlmet!

Crustless Kale Quiche

Crustless Kale Quiche Resize

Talk about a tongue twister!  It’s worth the effort to say, and the little bit to make, because this Crustless Kale Quiche hits the spot.

I’ve only made this once … and I’ve already eaten almost half of it.  The kale adds a little bitterness and chew to what would otherwise be a run-of-the-mill spinach pie.  Nutmeg, currants, and pepitas add an almost sweet, Middle Eastern flavor profile.  The three eggs are just enough to combine the ingredients without becoming heavy or custardy like a regular spinach quiche.  Don’t get me wrong – a traditional spinach and swiss cheese quiche is wonderful, but this one is lighter, with an unexpected combination of flavors that will have you craving it again.

I ate this hot, and I ate it cold, cut right out of the fridge.  I ate this with a big slab of goat cheese on top and I ate it plain.  I’m going to eat more of it with dinner tonight and see if I can’t discover some new way to enjoy it.  If you want your greens, with a little extra zing, try this instead of a salad tonight!

Crustless Kale Quiche

Ingredients:

  • 1 pound bag of frozen chopped spinach
  • 1 large bunch of kale
  • 3/4 cup pepitas (or try pine nuts or sunflower seeds)
  • 1 tablespoon coconut oil (or butter) plus more for greasing the pie plate
  • 1 teaspoon chopped garlic (about 2 cloves)
  • 1/2 cup currants or raisins (next time I’m trying golden raisins!)
  • 1/8 teaspoon ground nutmeg
  • 1/2 teaspoon salt
  • 3 eggs
  • Goat cheese, to serve, if desired

Directions:

  1. Wash the kale and remove from the stem, tearing it into smaller-than-bite-sized pieces.  Saute on medium heat in a large pot with a lid.  Don’t add any extra water or oil – just the damp kale by itself.  Stir occasionally until it gets soft, about 15 minutes.  When it appears soft and has reduced in volume, pour in the bag of frozen spinach.  Stir to combine and replace the lid.  Cook on medium-low for another five minutes until the spinach is thawed.  Remove from the heat and let cool.
  2. Preheat the oven to 350*F.  While the spinach and kale are cooling, heat the coconut oil over medium and add the pepitas.  Stir frequently for 5 minutes, then add the garlic and currants.  Stir for another 3 minutes.
  3. Squeeze out as much water from the kale mixture as possible, then dump it into a large bowl.  Pour over the pepita mixture and combine.  Add nutmeg and salt.
  4. Beat 3 eggs well and mix into kale mixture.  Grease a pie plate, then fill with the kale mixture.  Smooth it down so you have a flat top.  Bake for 35 minutes or until not wet in the middle.  Serve warm or cold, with goat cheese or without.

Explore, experiment, enjoy! — Dana


To view even more of Dana’s unique recipe, you can visit her at Frugal Girlmet!