April 26, 2024

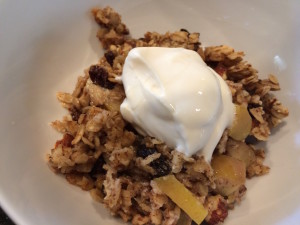
Apple Spice Baked Oatmeal

Baked Oatmeal Dish

Happy New Year, everyone!  For me, the new year is a time to reflect on change, on growth, and on being grateful for all that you have.  If you haven’t heard, we are coming to the end of Girlfriends Coffee Hour.  I hope that in the years we’ve been sharing recipes here at At Home With GCH, you’ve seen something you might want to try; that you’ve experimented a bit in your kitchen and gone outside your comfort zone; and that you thought about cooking as a way to serve God by using the time and talents He gave you.  I have certainly enjoyed challenging myself to come up with new recipes each week to introduce to you, and getting to chat a bit with some of you in the comments section.  Even though GCH is ending, my cooking (and blogging) will continue, and I hope you will find me on Facebook to chat about food and share recipes with me!

For my last entry here on At Home With GCH, I present to you:  Apple Spice Baked Oatmeal!  As usual, I read over several recipes, made a few changes, and came up with something to call my own.  This was easy to make, and serves 6-8 for a hearty breakfast.  You can also make it the night before and reheat portions in the microwave.  This is a great way to start your day (or your year).  Bon apetit, my friends, and God Bless!

Apple Spice Baked Oatmeal

Ingredients:

  • coconut oil or butter for greasing your baking dish
  • 2 apples, chopped (no need to peel)
  • 2 cups rolled oats
  • 1/2 cup brown sugar
  • 1 cup nuts, divided – Try walnuts or pecans.  I used whole almonds and let the kids crush them with my meat mallet!
  • 1/2 cup raisins
  • 1/2 teaspoon salt
  • 1 teaspoon baking powder
  • 1/2 teaspoon ground nutmeg
  • 1 1/2 teaspoons ground cinnamon
  • 2 eggs
  • 2 cups milk
  • 1 teaspoon vanilla extract
  • 1/2 stick butter, melted
  • vanilla yogurt, to serve

Directions:

  1. Preheat oven to 325*F.  Grease your baking dish – mine was an oval dish, but you can use a deep 8″ or 9″ Pyrex.
  2. Spread the chopped apples in the bottom of your dish.
  3. Mix together the oats, sugar, 1/2 cup nuts, raisins, salt, baking powder, nutmeg, and cinnamon in a small bowl.
  4. In a large bowl, beat the eggs with the milk and vanilla.  Stir in the oat mixture, then stir in the melted butter.
  5. Pour the oat mixture over the apples and sprinkle with the remaining 1/2 cup of nuts.   Bake for about 45 minutes.  You want the oatmeal to be set and the top a bit golden and crusty.  Serve warm, with a big spoonful of vanilla yogurt on top.

Explore, experiment, enjoy! — Dana


To view even more of Dana’s unique recipe, you can visit her at Frugal Girlmet!
Sausage Mushroom Frittata

Sausage Mushroom Frittata

When I was a kid, my Mom made two quiches as part of her dinner menu rotation:  a spinach quiche, and a sausage mushroom version.  I loved them both.  And I was going to make one for this week’s Girlfriends’ Coffee Hour blog post and then I realized:  I don’t need a crust!  I can turn my Mom’s quiche recipe into this Sausage Mushroom Frittata, which is just as tasty, saves calories when you don’t include a crust, and cooks up quicker to boot!

You can use any kind of cheese you like.  I think my Mom used Swiss, but my girls don’t like it, so I used Monterey Jack.  You can also mix some cheese into the egg mixture for a richer taste, but I wanted mine to be a lower-calorie meal.  I used bulk breakfast sausage (the kind you get in a tube, by the bacon), but you can use any kind of sausage.  Serve a slice of this frittata hot, with maybe a side salad and a piece of nice bread.  You can also have this for breakfast, of course, with some fruit or toast.  Get crazy – get cooking!

Sausage Mushroom Frittata

Ingredients:

  • 8 ounces bulk sausage
  • 8 ounces button or cremini mushrooms, sliced
  • 6 eggs
  • 1/3 cup whole milk (or use half and half for a richer taste)
  • salt and pepper
  • 2 or more slices of Swiss or Jack Cheese

Directions:

  1. In an oven-proof skillet, cook the sausage, crumbling it with your spoon as it cooks.  After 3 minutes, add the mushrooms.  Season them with a little salt – this helps draw the water out of the mushrooms.  Cover and simmer on medium for five minutes.
  2. Lift the lid and let all the water in the pan cook off.  If the pan looks dry, you can add a tiny bit of olive oil or butter and mix that in.  If it looks like the sausage left enough fat to lubricate the pan, go to Step 3.
  3. In a large bowl, whisk the eggs with the milk.  Season with salt and pepper.
  4. Turn on the broiler in your oven.
  5. Pour the eggs over the sausage mixture and stir a few times.  When the edges look set, put the cheese on top of the eggs and place the pan in the oven.   Make sure it’s not too close to the broiler!
  6. Broil for about 3-5 minutes.  Keep an eye on this!  Take it out when things look golden and bubbly.  Slice and serve hot!

Explore, experiment, enjoy! — Dana


To view even more of Dana’s unique recipe, you can visit her at Frugal Girlmet

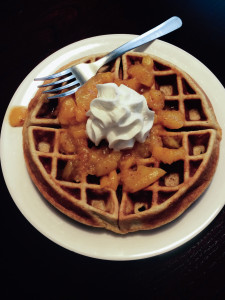
Peach Pie Waffles

Peach Pie Waffles

The kids were clamoring for waffles.  They usually like berries and maple syrup, but I had a better idea:  Peach Pie Waffles!  They ate these things up like they were going out of style!

The waffle recipe is straight from Martha Stewart.  She is my go-to resource when I’m checking out a basic recipe.  No waffle iron?  Make pancakes with the batter instead!  These are quick to put together and the leftover waffles (if you have any – it made four waffles for me) freeze and reheat very well.  If you have any leftover peaches, mix them into plain or vanilla yogurt for breakfast.  Ready?  It’s easy as pie!

Peach Pie Waffles

(makes 4 waffles)

Ingredients:

  • 1 large can of sliced or halved peaches, lightly drained
  • 1/2 teaspoon cinnamon
  • 1/4 teaspoon grated nutmeg
  • 1 cup flour (I used whole wheat – you can use regular, too)
  • 2 tablespoons sugar
  • 1 teaspoon baking powder
  • 1/4 teaspoon salt
  • 2 eggs
  • 1 cup milk
  • 4 tablespoons butter, melted
  • whipped cream to serve

Directions:

  1. In a medium non-stick pan (or use a regular pan and add a tablespoon of butter!) pour in the can of peaches.  Add the cinnamon and nutmeg.  Let simmer while you make the waffles.  Mash them with a potato masher if you like, or with the back of a fork.  Keep an eye on them to make sure nothing burns.
  2. In a large bowl, mix together the flour, sugar, baking powder, and salt.  In a smaller bowl, beat the eggs and stir in the milk.  Whisk the egg mixture into the dry mix.  Stir in the melted butter.
  3. Make the waffles according to your waffle maker’s instructions.  Mine called for half a cup of batter for each waffle, and this recipe made four waffles.  If you’re making pancakes, you’ll get … I’m not sure.  Maybe 8?  Anyway, cook them how you normally do, then set aside and plate up.
  4. To serve:  top each waffle with a ladle of hot peaches and a good shot of whipped cream.

Explore, experiment, enjoy! — Dana


To view even more of Dana’s unique recipe, you can visit her at Frugal Girlmet


Protein Banana Bread Breakfast Bars

Protein Banana Bread Breakfast Bars

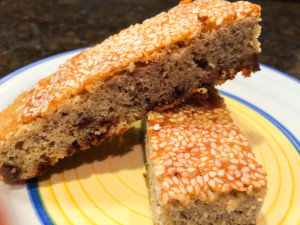
I found this recipe on a website called PaleOMG.  I love their photos on Instagram, and they have great ideas for healthy snacks and things to give your kids.  I changed the recipe a bit, just subbing a few things here and there, and now I present to you:  Protein Banana Bread Breakfast Bars!

That’s a mouthful.  These PBBBBs are just like banana bread, but not cloyingly sweet.  They are made with almond flour and whey protein powder, so you’re getting a good dose of protein in your sweet treat.  These were easy and delicious!  I’m storing mine in the fridge, and hope there is enough left for me to enjoy one with my morning coffee tomorrow!

Protein Banana Bread Breakfast Bars

Ingredients:

  • 2 bananas, mashed
  • 1/4 cup melted coconut oil
  • 1/4 cup maple syrup
  • 1 teaspoon vanilla extract
  • 1 egg, beaten
  • 2/3 cup almond flour
  • 1/3 cup whey protein (vanilla, but I used cinnamon!)
  • 1/4 cup tapioca or arrowroot flour
  • 1/2 teaspoon baking soda
  • 1/4 teaspoon salt
  • 1/3 cup cacao nibs (I used mini chocolate chips)
  • 1/4 cup sliced almonds (I used sesame seeds)

Directions:

  1. Preheat oven to 350*F.  Grease an 8×8 square pan.
  2. Mix all the ingredients together, except for chocolate chips and almonds.  Then fold in cacao nibs or chocolate chips.  Pour into the prepared pan, and cover the top with the almonds or sesame seeds.
  3. Bake for 20-25 minutes until the middle is set.  Cool for 10 minutes before cutting.
  4. I cut mine into 1″x4″ bars, so I had 16 servings.  Store in the fridge, covered.


Explore, experiment, enjoy! — Dana


To view even more of Dana’s unique recipes, you can visit her at Frugal Girlmet!

Tahini Pancakes

Tahini Pancakes resize

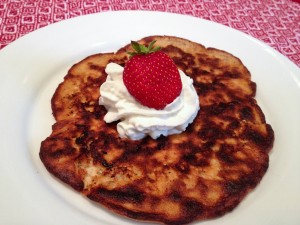
Oh, pancakes!   We all love them.  But sometimes you just don’t want to make them, even when the kids are whining for them.  They take time to mix up (unless you’re using a pre-made mix like Bisquick…in which case, check out that long list of chemicals and preservatives!), and they’re pretty high in carbs.  Ready for a game changer?  Try these Tahini Pancakes!

This recipe is just three ingredients long.  WHAT?!?!  All you need is a very ripe banana, an egg, and a tablespoon of tahini.  You could use another kind of nut butter, but we use tahini to avoid allergies in my house.  Tahini is an amazing thing.  I keep a can of it in my fridge at all times, because it is crucial to homemade hummus, baba ghanoush, and this kale salad.  It’s just sesame seed butter, but it’s lovely.  These pancakes have no gluten and no nuts, plus they’re high in protein.  Win! Win!

Dress these up however you like.  Add in chocolate chips, coconut flakes, or raisins.  They don’t rise like regular pancakes, but they’re certainly more substantial than a crepe.  Try them for breakfast tomorrow and you—and your pancake-loving kids—will thank me!

Tahini Pancakes

(makes two six-inch pancakes.  Go ahead and double or triple the recipe if you like.)

Ingredients:

  • 1 large egg
  • 1 overripe banana
  • 1 heaping tablespoon tahini
  • coconut oil or butter for the pan

Directions:

  1. Heat a small skillet over medium heat.  Add a teaspoon or so of coconut oil or butter.  Make sure the pan is really well lubricated.  These pancakes can fall apart if they stick.
  2. In a bowl, beat the egg.  Mix in the banana and mash and mix well.  Beat in the tahini.
  3. Pour half the pancake batter into the frying pan and reduce the heat to medium low.  Let cook for a few minutes until, like a normal pancake, it gets dry with burst air bubbles on top.  Very carefully, flip the pancake over and turn the heat all the way to low, or even turn it off.  Let cook a minute or two, then slide off the pan and onto a plate.  Smother with whipped cream and berries, or maple syrup, sliced bananas and walnuts.

Explore, experiment, enjoy! — Dana


To view even more of Dana’s unique recipe, you can visit her at Frugal Girlmet!

Homemade Coconut Milk and Coconut Chia Pudding

Coconut Milk Jar
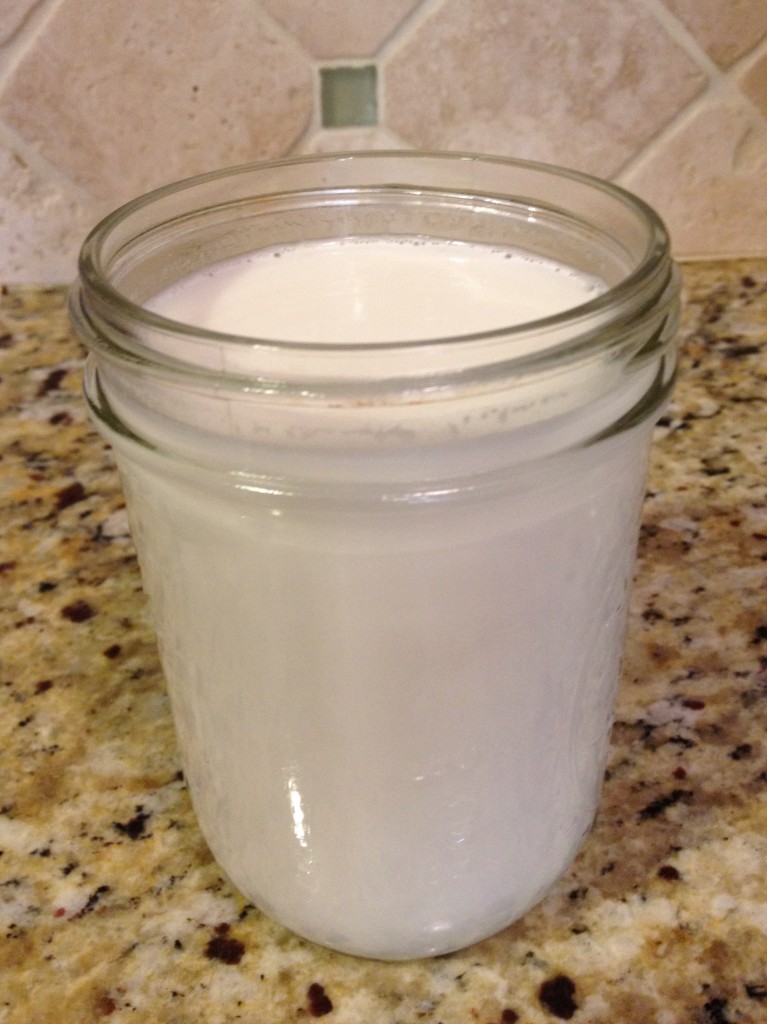
I think I speak for everyone who blogs for At Home with GCH when I say that we are not afraid of a little hard work.  Some things are worth the extra time, effort, or energy.  From Christi’s homemade laundry detergent, to Coleen’s gluten-free goodies, we all have tricks to share so you can give your family the safest, freshest, and healthiest choices possible.  I’d like to toss my hat into the ring and offer a recipe for Homemade Coconut Milk!

Coconut milk is a key ingredient in many Indian, Thai, and other Southeast Asian recipes.  It’s also a great staple to have on hand if you are lactose intolerant, or if you are allergic to soy or almond milk.  And while you can find it in a can in many supermarkets, it is quite easy to make at home!  All you need is dried or desiccated coconut flakes, a blender, a colander, and cheesecloth.  Now, this is not the coconut you make into a pie – that stuff is full of sugar and preservatives!  Make sure it is unsweetened, dried coconut.  You can use fresh coconut too, if you can find one. (I can get them at my local Thai market, but you may not have one of those nearby.)  The coconut milk is good for about a week in your refrigerator.  I keep mine in a Ball jar with a lid, but I can’t make it last more than 3 days – it’s that delicious!

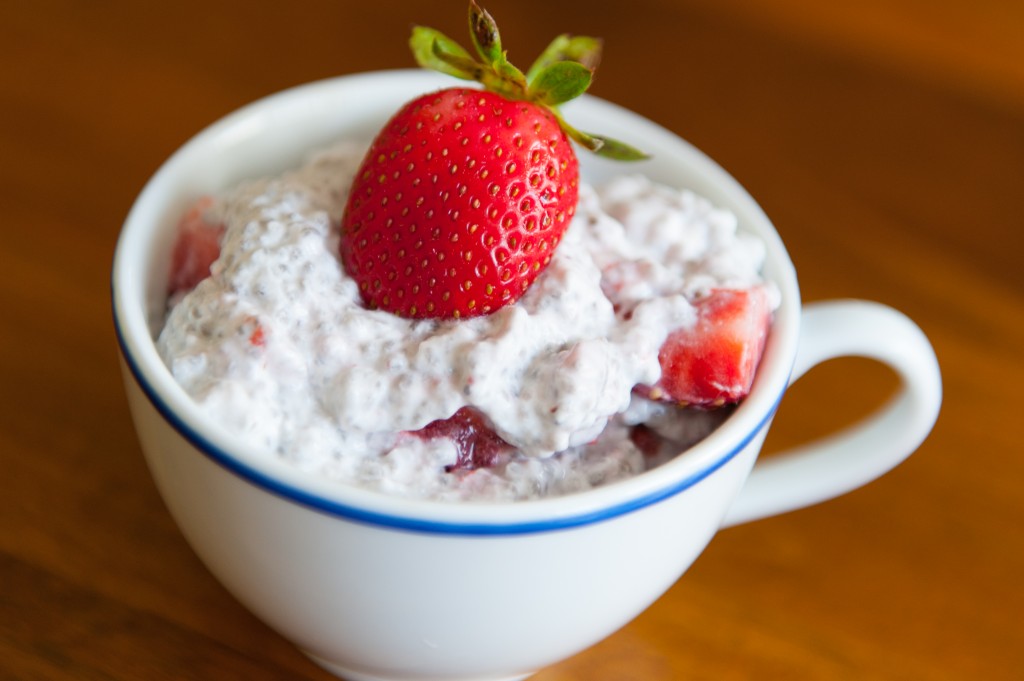
What you do with it is up to you.  Pour it over your cereal (or Christi’s Granola), use it in coffee in place of creamer, or make this delicious Coconut Chia Pudding.  Chia seeds can be found online at Amazon, at nearly all health food stores or Whole Foods, and at Trader Joe’s.   Chia seeds are teeny, tiny, little health bombs!  Full of Omega-3 fatty acids, protein, and other necessary things, chia seeds can add crunch to homemade crackers, or top sweet potatoes and salads.  Even better, when mixed with liquid, they create a gel, and make a delicious “pudding” that feels decadent, but is actually quite healthy.  Think tapioca or rice pudding, without all the diet-busting starch!

Coconut Chia Pudding


Next week I’ll have more recipes that use coconut milk, but for now, here are the basics.  Check it out!

Homemade Coconut Milk

Ingredients:

  • 1 cup shredded, dried coconut
  • 1 1/2 cups boiling water

Directions:

  1. Boil water.  (I know, but it has to be said.)  In the pitcher of a blender or a large food processor (I use a food processor and it works fine), pour in one cup of coconut flakes.  Measure out 1 1/2 cups of boiling water and pour over the coconut.  Let sit for about 20 minutes.  Then blend for 2 or 3 minutes if you have a really strong blender, or about 4 minutes in a food processor.  You want to see a foamy slurry.
  2. Line a sieve or colander with a large piece of cheesecloth, folded over on itself.  Place the colander over a large bowl.  Pour the coconut mixture into the cheesecloth and squeeze, squeeze, SQUEEZE!!!  Pour the coconut milk into a jar with a lid and keep refrigerated.
  3. Don’t throw away the coconut pulp!  This can be mixed into smoothies, or spread out on a baking sheet lined with parchment paper and baked at 200*F for about 1 to 2 hours.  When it is completely dry, grind again in the food processor … and you just made coconut flour!  And now for the other recipe…

Coconut Chia Pudding

Ingredients:

  • 1 cup coconut milk
  • 1/4 cup chia seeds
  • 1/2 teaspoon honey (optional, depending on how ripe and sweet your fruit is)
  • 1 cup chopped fruit – I like strawberries, blueberries, or peaches, but find what you like best

Directions:

  1. In a Tupperware container with a lid, pour in one cup of coconut milk and 1/4 cup chia seeds.  Put the lid on and shake to combine.  Put in the refrigerator.  Shake again in one hour.  
  2. The chia pudding should be ready in about 3 hours.  When ready, it should be very thick, like tapioca pudding.  To serve, divide chia pudding between two bowls, drizzle with a tiny bit of honey if desired, and stir in the chopped fruit.  This makes a great dessert, or a nice, light breakfast.


Explore, experiment, enjoy! — Dana


To view even more of Dana’s unique recipe, you can visit her at Frugal Girlmet!
 

At Home with GCH: Two Breakfasts for Health

Kale Sweet Potato Eggs

My Mom always said, “Breakfast is the most important meal of the day.”  Yours too?  It’s actually true!  Breakfast is the meal we should pay the most attention to, because it has the most dramatic affect on our bodies.  You haven’t eaten in ten or twelve hours, and your body is in need of fuel and nutrition!  Are you going to give it a danish and a mocha?  No!  That’s the worst breakfast you can have!  You’ll have an insulin spike, a sugar crash, and a deficit of the things your body wants: protein, a little fat, and slow-release carbs.  The best breakfast?  Eggs and vegetables.

Please check out  Coleen’s recipe for a delicious frittata, or consider these two ideas:  Spinach Scramble, and, Kale and Sweet Potato Hash with Eggs.  A frittata can be made for dinner, with the leftovers reheated for breakfast; both the Spinach Scramble and Kale and Sweet Potato Hash can be made ahead of time, and reheated with eggs added at the end.  All of these breakfast ideas are great ways to start your day, with a big dose of protein, a little healthy fat (which helps your body absorb Vitamins A, D, E, and K) and slow-release carbohydrates to keep your energy levels stable.  Plus, if you make them the night before, you won’t have to think so hard in the morning.  And that’s a good thing!


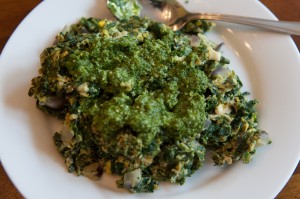
Spinach Scramble with Pesto

Spinach Scramble

Ingredients (per person / per serving):

  • 1/4 red or white onion, minced
  • 1 tablespoon butter
  • 4 oz. frozen chopped spinach (from a one pound bag – just estimate a quarter of the bag)
  • salt and pepper
  • 2 eggs
  • optional:  1 ounce cheese (I like feta or goat cheese), 1 tablespoon pesto, or 1/2 an avocado

Directions:

  1. In a non-stick pan, add the minced onion and butter.  Over medium heat. stir and cook for 2 or 3 minutes until the onion turns translucent.  Add the frozen spinach, stir to combine, and cover with a lid.  Cook for 3 minutes.  Remove lid, stir again, and season with salt and pepper.
  2. In a small bowl, beat the two eggs, then add to the pan.  If you are using cheese, add it now.  Turn down the heat to medium-low and stir to scramble.  Cook for two or three minutes until done.  Serve with pesto or half an avocado, sliced, if you like.  Serve with sliced fruit.

To make ahead:  Mince the whole onion, cook like in Step 1 with 2 tablespoons butter.  Add the whole bag of spinach, cover, and cook until done, about 4 or 5 minutes, stirring to break up any frozen clumps.  Hey, you just made four servings!  Put three-quarters of the pan away in the fridge, and eat one-quarter of the pan with the ingredients in Step 2.  Every day, scoop out a serving of spinach and onions, microwave for one minute until hot, then add to the pan and continue to Step 2.

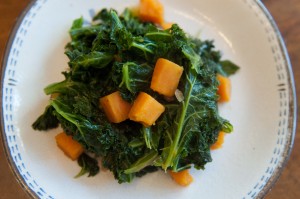
Kale Sweet Potato Hash


Kale and Sweet Potato Hash with Eggs

Ingredients:

  • 2 sweet potatoes, peeled and chopped into 1/2-inch cubes
  • 1/2 red onion, minced fine
  • 2 tablespoons butter or coconut oil
  • 2 bunches kale, washed, ribs discarded, and torn into small pieces
  • 1/2 teaspoon ground cumin
  • 1/4 teaspoon smoked paprika
  • salt and pepper
  • 2 eggs

Directions:

  1. In a large pan with a lid, cook the sweet potatoes and onion in the butter or coconut oil over medium heat.  After 5 minutes, add a few teaspoons of water and cover with the lid.  Stir every few minutes to make sure nothing sticks, adding more water if necessary.  (I’ve found sometimes I only need to add water once, and sometimes I need to add it again.  Not sure why, maybe some sweet potatoes are drier than others?)  
  2. When you can break up a sweet potato chunk with a rubber spatula or wooden spoon, add the kale and spices.  If your kale is still wet from washing, carry on; if not, add another tablespoon of water.  Cover and cook for 3 minutes, then stir.  Continue to cook until the kale is tender, about 5 more minutes.
  3. You just made 5 servings!  From here, you can serve this as a side dish, or use it as a bed for fried eggs.  To eat for breakfast, reheat about one cup of kale and sweet potatoes on a plate in the microwave, and serve with two eggs, sunny-side up.  Break open the eggs so the yolk coats everything and dig in!


Explore, experiment, enjoy! — Dana


To view even more of Dana’s unique recipes, you can visit her at Frugal Girlmet!
GCH: What’s on Your Plate? – Crockpot Apple Oatmeal

photo 3

I love this recipe!  You can throw all the ingredients in the crock pot before you go to bed and when you wake up in the morning, breakfast is ready!  I made this Christmas Eve night and we woke up to a wonderful smelling house and had a delicious breakfast ready to go!  Because who wants to cook on Christmas morning?  This would also be perfect for Sunday mornings when you don’t want to cook before church.

What you need:

Two sliced apples (I used Golden Delicious)

2/3 cup brown sugar

1 tsp cinnamon

pinch of salt

2 tbsp butter

2 cups oatmeal

4 cups water

crockpot

Directions:

Throw the sliced apples, the brown sugar, cinnamon, salt, and butter in the bottom of the crockpot.  Then pour in the oatmeal and then the water on top.  DO NOT STIR.  Cook overnight 8-9 hours on low.  Makes about 4 servings.  Depending on your tastes, you may need to add more sugar or butter to your individual serving 🙂

That’s it!  Easy peasy… and delicious!

God is great, God is good… let us thank Him for our food!

<3 Shauna

PS – you can also find Shauna on her personal blog at www.workhomeplay.net.

GCH:What’s on Your Plate? – Gluten-free Muffins

This will be Renee’s last post for GCH.  She has been offered a job by her local newspaper.  We would like to thank her for the awesome posts she has submitted, and pray that God will bless her new job!  Thanks much Renee!


Gluten-free Muffins

by Renee Porter Sullivan, CHt

Ingredients

1 Very Ripe Banana (approx. 1/2-3/4 cup)

4 Whole Pastured Eggs (Or extra Omega-3)

1/3 to 1/2 Cup Filtered Water (adjust for consistency)

1 Organic Apple (finely chopped) or 2 Organic Carrots (Grated) or approx. 3/4 cup pumpkin or winter  squash (grated)

2 1/4 cups Almond Meal (Trader Joe’s)1/4 Cup Dried Raisins or Dried Cranberries depending on the combination you choose (optional)

1-2 Tbsp. Coconut Flour (adjust as needed)

1/2 tsp. Baking Soda

2-3 tsp. Cinnamon

1/4 tsp. Ground Nutmeg (optional)

1/4 tsp. Ground Cloves (optional)

1/4 Cup Coconut Oil (melted)

Please feel free to be creative with your spices and the combination of fruit/vegetables  and dried fruit you choose.  The recipe is basic and open to experimentation.  Use whatever is in season and fresh.  The Almond Meal is high in fat and coconut flour is very dry, so adjust the quantities according to the desired texture you want.  More Almond flower will give more moisture, more coconut will balance with a dryer texture.  Altitude will change your ratios as well.

Directions

  1. Preheat Oven to 350 degrees
  2. Mash the banana in a large mixing bowl with a fork
  3. Add the eggs, water and apples or other fruit/vegetables to the banana.  Melt the coconut oil and add here. Mix well.  Add dried fruit at the end.
  4. Mix dry ingredients in another bowl. Almond flour, coconut flour, baking soda, and spices.  Blend well.
  5. Combine the wet ingredients with the dry and mix until all is well incorporated.  Don’t over do it.
  6. Grease muffin tins with coconut oil.  I don’t recommend using papers unless you need to.  Silicone muffin molds are excellent for this as well.  No extra grease is needed in that  case.
  7. Fill each muffin cup about 3/4 full.  These muffins don’t rise much. You may choose to fill them more after you make these once depending on your results.  I fill mine almost full.
  8. Bake for 18-22 minutes.  Do the toothpick test to see if they are done.  Don’t over-bake.  They will burn due to the high fat content of the almond flour.
  9. These are great hot out of the oven.

These muffins are really easy and a great thing to teach the kids.  They can make these themselves and serve to Mom for breakfast in bed!  There are no power tools needed and only a few ingredients.  Just making them with an apple and nothing else will give great results, no need to get too complex.  An apple and cinnamon alone will be enough.


If you are looking for a great way to fellowship with other Christian women, check into our upcoming online Bible studies!  For more information, click HERE.  If you have any questions, please send us an email at: Christi@girlfriendscoffeehour.com.