April 19, 2024

Banana Cake with Coconut Frosting

IMG_3485

We were having friends over for dinner a few weeks back, and I’d just gotten back from the store when I realized I hadn’t planned anything for dessert.  Oh no!  I did have some bananas, and I figured I had enough staples on hand to whip up a banana cake.  I lucked out and found this delicious recipe on Epicurious.com:  Banana Cake with Coconut Frosting!

This is extremely simple and it came out perfectly.  The only kind of weird thing in the recipe is the cream of coconut.  It’s not coconut milk, and it’s not coconut cream, and in fact it’s more like a syrup for making pina coladas than anything else.  I bought some earlier in the year, because I was going to make coconut-flavored yogurt for my girl.  (It’s delicious, but it does have a lot of added sugar – not exactly healthy, but okay for a splurge.)  If you don’t have it or don’t want to use it, substitute whole coconut milk or coconut cream.  Or leave it out and double the sweetened shredded coconut.  In any case, this came together quickly but was fancy enough for company.  Can’t beat that combination!

Banana Cake with Coconut Frosting

Ingredients:

For cake

  • 1 stick (1/2 cup) unsalted butter, softened, plus additional for greasing pan
  • 1 1/2 cups all-purpose flour plus additional for dusting pan
  • 1 1/2 teaspoons baking powder
  • 1/2 teaspoon baking soda
  • 1/2 teaspoon salt
  • 3/4 cup packed light brown sugar
  • 1 large egg
  • 3/4 cup well-mashed very ripe bananas
  • 1/4 cup sour cream
  • 1/2 teaspoon vanilla

For coconut frosting

  • 3 ounces cream cheese, softened
  • 3 tablespoons unsalted butter, softened
  • 1/3 cup confectioners sugar
  • 3 tablespoons well-stirred canned cream of coconut such as Coco López (not coconut milk)
  • 1 teaspoon dark rum (optional)
  • 1/3 cup sweetened flaked coconut

Directions:

  1. Put oven rack in middle position and preheat oven to 350°F.  Lightly butter and flour a 9-inch round cake pan, knocking out excess flour.
  2. Whisk together flour (1+1/2 cups), baking powder, baking soda, and salt in a small bowl.
  3. Beat together butter (1 stick) and brown sugar in a large bowl with an electric mixer at high speed until pale and fluffy. Beat in egg until combined, then add bananas, sour cream, and vanilla and beat until combined well. Reduce speed to low and add flour mixture, mixing until just incorporated.
  4. Spread batter in cake pan and bake until pale golden and a wooden pick or skewer inserted in center comes out clean, 20 to 25 minutes.  Cool in pan on a rack 10 minutes. Run a thin knife around edge of pan, then invert rack over cake and invert cake onto rack to cool completely.
  5. Make frosting while cake cools:
    Beat together cream cheese and butter in a bowl using cleaned beaters at medium speed until smooth. Reduce speed to low, then add confectioners sugar, cream of coconut, and rum (if using) and mix until combined. Increase speed to high and beat until light and fluffy, about 2 minutes.  Frost top of cooled cake and sprinkle with coconut.


Explore, experiment, enjoy! — Dana


To view even more of Dana’s unique recipe, you can visit her at Frugal Girlmet!
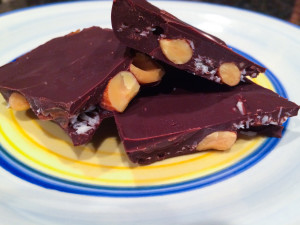
Almond Joy Chocolate Bark

Almond Joy Chocolate Bark

What’s Valentine’s Day without some chocolate?  This is pretty healthy stuff though, so as long as you don’t eat the whole batch in one sitting, you can have a treat and not be naughty.  Almond Joy Chocolate Bark is the way to go!

I love dark chocolate and I use the darkest I can find in the grocery store.  Here I used a bag (11.5 oz) of 63% cacao Guittard chocolate chips, but feel free to use whatever dark chocolate you like.  I also used roasted, salted almonds because that little bit of salt really offsets the sweet and makes the flavors pop.  If you want a sweeter bark, you can use “Angel Flake” coconut that has sugar added.  I used unsweetened coconut flakes and it’s quite yummy!  I also used 2 tablespoons of coconut oil.  I like that it makes the chocolate a little smoother, and I think it tastes great too.  You can leave it out if you don’t have it.

Give some to your sweeties, treat your friends at work, or just nibble on this chocolate bark and enjoy some quiet time.  Happy Valentines Day!

Almond Joy Chocolate Bark

Ingredients:

  • 1 bag of semi-sweet chocolate chips (use the darkest chocolate you can find, with the highest percent of cacao)
  • 2 tablespoons coconut oil
  • 1 cup whole, roasted, salted almonds
  • 1/3 cup shredded, unsweetened coconut

Directions:

  1. In an oven-safe bowl, microwave the chocolate and coconut oil together for 30 seconds.  Stir very well with a rubber spatula, then microwave again.  Keep doing this until your chocolate and coconut oil are smooth and blended.  Mine took 3 blasts of 30 seconds each.
  2. Line an 8×8 baking pan with plastic wrap.  Pour in 1/3 of the melted chocolate and spread over the bottom of the pan.
  3. Spread the almonds over the chocolate layer and sprinkle with coconut.
  4. Pour the rest of the chocolate over the almonds and coconut and lightly spread to cover.  Put in the freezer for about 2 hours until solid.  Cut or break into 2″ pieces.

Explore, experiment, enjoy! — Dana


To view even more of Dana’s unique recipe, you can visit her at Frugal Girlmet!
Pumpkin Chia Pudding

Pumpkin Chia Pudding resize

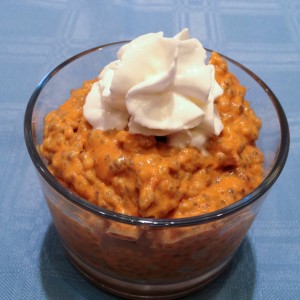
It seems like when we turn the calendar page to October, we all mysteriously start craving PUMPKIN!   I am not immune.   However, I didn’t want to make a big sugar bomb, so I searched around for something to satisfy the pumpkin craving and not spike my insulin.  Bingo:  Pumpkin Chia Pudding!

If you’ve never made chia pudding, now’s your chance.  I love it – the texture is a crazy blend of creamy and crunchy—like tapioca with attitude!  I make it with coconut milk, but you can try another nut milk or soy milk if that’s your thing.  This was ready to eat in an hour, and tastes just like pumpkin pie.  What more can you ask for?!

Pumpkin Chia Pudding

Ingredients:

  • 1 can full-fat coconut milk (about 2 cups)
  • 1/2 can pumpkin puree (about 1 cup, or use one cup of roasted and mashed pumpkin)
  • 1/2 teaspoon pumpkin pie spice (or combine cinnamon, nutmeg, allspice and cloves)
  • 1/2 teaspoon vanilla extract
  • 2 tablespoons honey or maple syrup
  • 1/4 cup chia seeds

Directions:

  1. In a blender or food processor, blend the coconut milk, pumpkin puree, pumpkin pie spice, vanilla, and honey together.
  2. Pour into a Tupperware container with a tight-fitting lid, or a very large jar with a lid.  Add the chia seeds and Shake!  Shake!  Shake!
  3. Refrigerate.  After another hour, shake again!  If it’s cold, go ahead and eat it!  Garnish with a little whipped cream if you like.

Explore, experiment, enjoy! — Dana


To view even more of Dana’s unique recipe, you can visit her at Frugal Girlmet!
Mondo Coconut Shrimp

Mondo Coconut Shrimp Resize

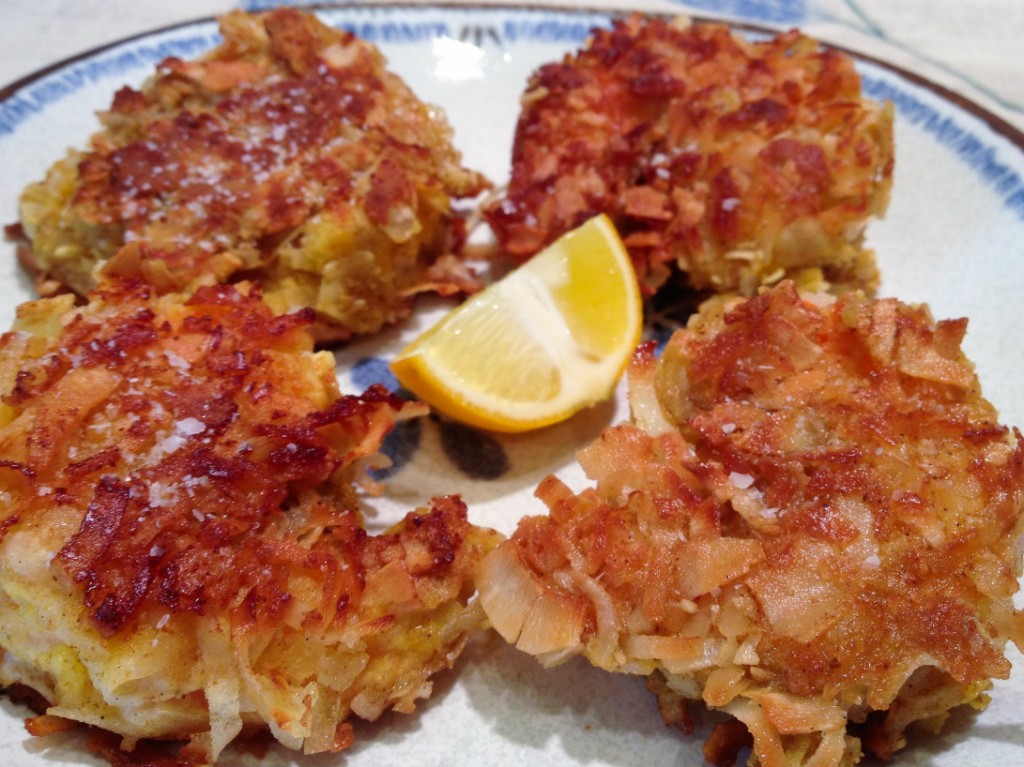
Yes, MONDO!  With four, count ’em, FOUR different coconut products, you too can make your favorite appetizer from that restaurant you go to with your girlfriends!  Mondo Coconut Shrimp are really quite easy to make, and, a fun and tasty appetizer for a party.

You’ll want to use BIG shrimp for this recipe—the larger the better.  I found  some 13-15 count shrimp on sale, and they worked really well.  If you are using smaller shrimp, decrease your cooking time so you don’t make these guys all tough and rubbery.  I coated these in both sweetened AND unsweetened coconut.  Feel free to use one or the other if you don’t have both.  I was going to make this recipe just with the unsweetened kind, but I found a cup of sweetened coconut in my freezer and decided to use it up – and I’m glad I did!

To be  honest, these are fantastic with just some salt sprinkled on top when they come off the stove.  I took a photo of them with a lemon slice, and found out they didn’t even need that to be delicious!  So make these for friends, or as part of a funky dinner, and go MONDO!

MONDO Coconut Shrimp

Ingredients:

  • 1 pound large shrimp, shelled and deveined
  • 3 eggs
  • 1 cup coconut flour
  • 1 cup sweetened shredded coconut
  • 1 cup unsweetened shredded coconut
  • 1 teaspoon curry powder
  • coconut oil, for frying
  • salt for serving

Directions:

  1. Set up a breading station.  In the first bowl, beat the 3 eggs with a tablespoon of water.  In the second bowl, pour in the coconut flour.  In the third bowl, mix together the two coconut shreds and the curry powder.
  2. Start breading:  Dip a shrimp into the egg, then the coconut flour, then back into the egg, and then the coconut shreds.  Place on a plate while you complete the breading.
  3. In a large non-stick frying pan, heat one heaping teaspoon of coconut oil over medium heat.  When  hot, carefully add the breaded shrimp.  You’ll probably have to do this in at least two batches.  Let them cook for about six minutes, then flip and cook again for another five minutes.  Watch your heat here – you want it medium to medium-low, so that the shrimp cooks evenly and the breading doesn’t burn before the shrimp are done.
  4. Remove cooked shrimp to a plate and immediately sprinkle with kosher or sea salt.  Add another teaspoon of coconut oil  to the pan, if necessary, and cook the next batch.  Serve hot!

I texted my husband a photo of the shrimp and he said, “Oooh, looks yummy!” so I saved him some.  Unfortunately, they aren’t as nice the second time around.  They still taste great, but you can’t get them crispy on the outside a second time.  That means Carpe Diem – Gather ye rosebuds while ye may – and eat your shrimp while they’re hot.

Explore, experiment, enjoy! — Dana


To view even more of Dana’s unique recipe, you can visit her at Frugal Girlmet!
Tropical Granita

Tropical Granita

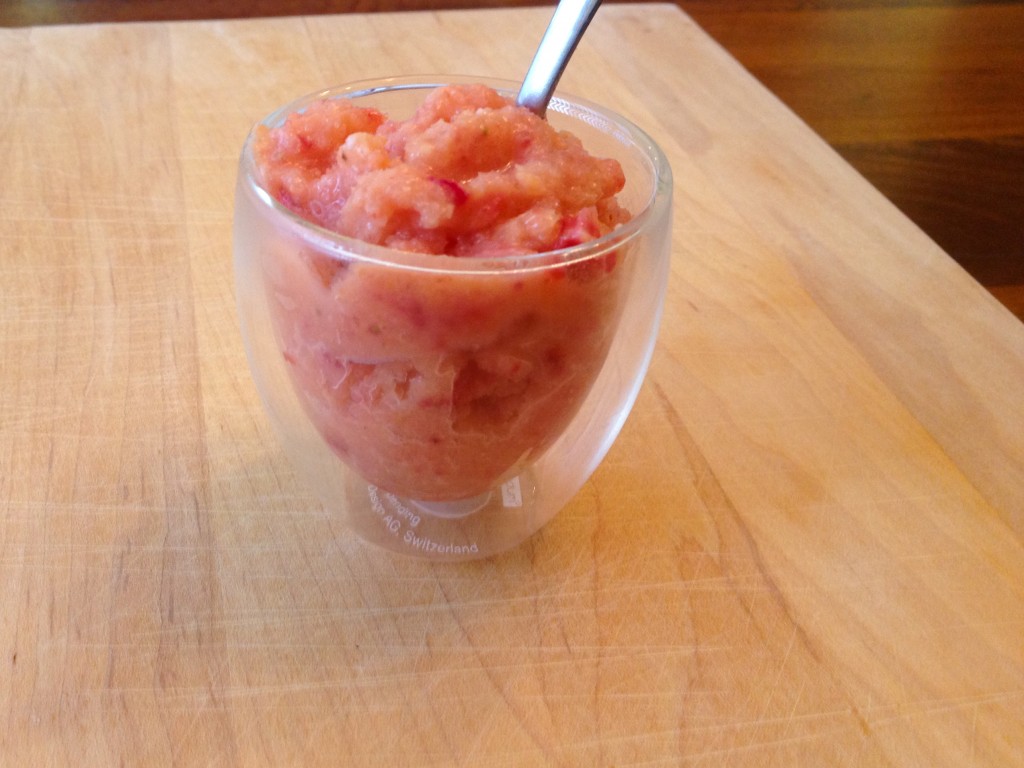
In my last post on the joys of Homemade Coconut Milk, we’ll look at the most traditional use of coconut:  Dessert!  Coconut milk can be used in savory or sweet dishes, but I think most people like to find coconut mingling with chocolate or fruit.  Here’s a recipe that will satisfy your sweet tooth in a healthy way – Tropical Granita!

For some reason, my girls won’t try new fruits readily, but if I put them in a smoothie or in this granita, they love it!  A granita, if you don’t know, is like a cross between a sorbet and shaved ice.  It’s icy, flaky, and refreshing!  You can use any fresh, juicy fruit you want here – mangoes, peaches, any berries – but be sure you add at least one banana.  The bananas create a thicker texture and enough sweetness that you don’t need to add any sugar!  You could use frozen fruit too – pineapple and raspberries would be lovely!  I used nectarines, bananas, and strawberries.

As with all homemade recipes, there are pros and cons.  The pro, of course, is there are no sweeteners, preservatives, artificial color, etc.  The con is that since there are no stabilizers and gums, this granita is a little more difficult to scoop than commercial ice cream.  I take it out of the freezer about half an hour before we eat it, so it can soften up a little.  It’s a great motivator – I tell my daughter I’m taking dessert out of the freezer, so if she wants to eat some, she better start eating that broccoli on her plate!

Tropical Sorbet

Ingredients:

  • 1 cup dessicated coconut and 1 1/2 cups water (or one can coconut milk)
  • 3 nectarines or peaches
  • 1 ripe banana
  • 1 cup strawberries
  • optional toppings:  whipped cream, shredded coconut, strawberry jam

Directions:

  1. In a blender, blend the coconut and water.  Strain through a colander and cheese cloth.  Return coconut milk to the blender.  (If using canned coconut milk, just pour it in the blender!)
  2. Boil a pot of water.  Score an X on the bottom of each peach or nectarine.  Drop each nectarine into the water and let it boil for 30 seconds.  Remove the nectarines to an ice bath.  When cool, peel off the skin.  Cut the flesh from the pits and add to the blender.
  3. Add the banana to the blender and blend for 30 seconds.  Remove stems from strawberries and cut in half.  Add to blender and pulse a few times – I like to see chunks of berries!
  4. Pour into a large, shallow container and cover with plastic wrap.  Freeze until firm, at least 6 hours.  To serve, let thaw for about half an hour, and then scrape up with a spoon or fork.  Mound in a dish and serve with whipped cream, more diced berries or coconut flakes, or a dollop of strawberry jam!

These make great popsicles too!

Explore, experiment, enjoy! — Dana


To view even more of Dana’s unique recipe, you can visit her at Frugal Girlmet!
Homemade Coconut Flour, and Homemade Cheezits


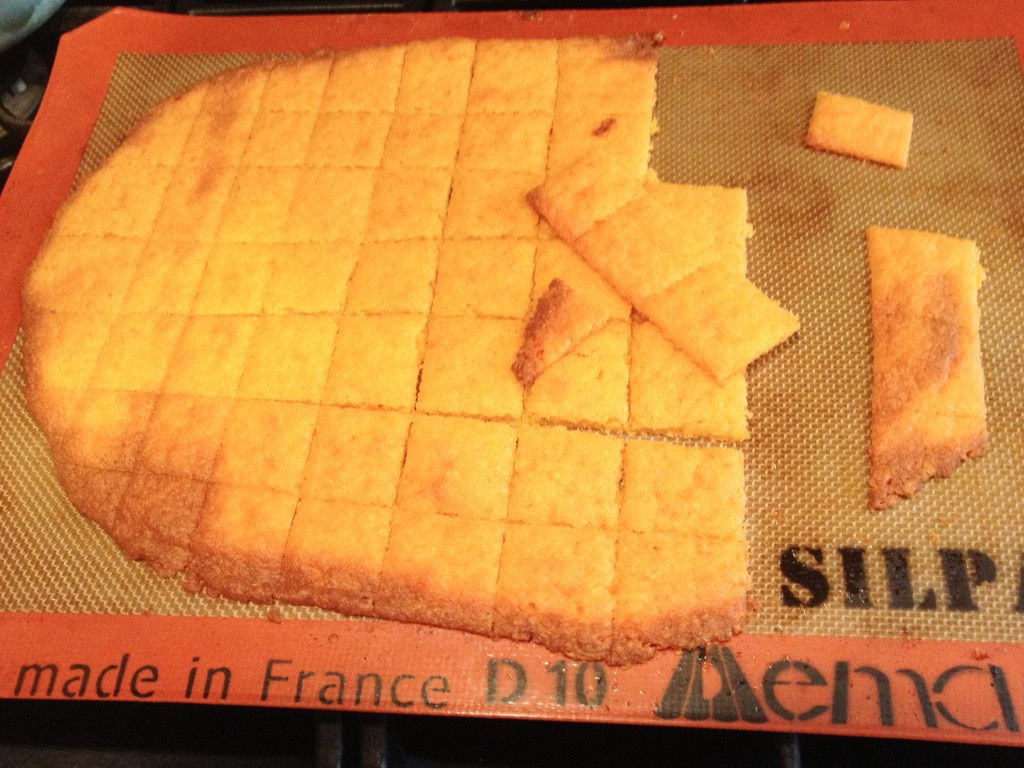
Homemade Cheezits


So, you fell in love with coconut milk too, right?  It’s your end-all, be-all, new favorite thing? That’s okay if it’s not.  But if you have made it, or plan to, you will be left with a cheesecloth-wrapped ball of pulp.  Now, someone who didn’t know better might just chuck that in the trash.  But not us!  We are going to use the pulp to make Homemade Coconut Flour and, with that flour, we’re going to make Homemade Cheezits!

First, the tools you will need:  You’ll need a baking sheet, parchment paper, and a food processor or blender.  If you have a Silpat silicone baking liner, now is the time to use it.  And you’re in luck:  the ingredients are already in your house, right now!  Once you make (or purchase) coconut flour, you can whip these crackers up in minutes.  The good news is that they have no preservatives, artificial colors or flavors, or any unpronounceable chemicals – hooray!  They come out of the oven the perfect blend of crispy and  chewy, ready for snacking.  The bad news is, because they lack any of that lab-created stuff, they don’t stay crispy.  But that is easily remedied by a quick pass through a toaster oven.  Just a few minutes is enough to make these crackers crunchy again.

Ready to make some homemade, preservative-free snacks your family will love?  Let’s go!

Homemade Coconut Flour

Ingredients:

  • Pulp from 2 batches of coconut milk

Directions:

  1. Preheat oven to 250 F.  Cover a large baking sheet with parchment paper or a Silpat mat.  Spread out the coconut pulp, breaking up any lumps.  Toast the pulp until completely dry and powdery.  You really need to make sure all the moisture is removed.  This can take anywhere from one to two hours.  Stir occasionally to make sure the lumps are broken up and there are no hot-spots, and don’t let it burn!
  2. When the pulp is very dry, let it cool in the oven for another hour or so.  Transfer to a blender or food processor and blend for 5 minutes.  Depending on how powerful your blender is, you can get it pretty fine.  My food processor did a decent job, but the flour was not silky fine in texture.  That’s okay!  Get it as powdery in texture as your tools allow.


Homemade Coconut Flour


Homemade Cheezits

Ingredients:

  • 1/2 cup coconut flour
  • 1 egg
  • 2 tablespoons butter, softened
  • pinch salt
  • 1 1/2 cups shredded cheese (I used cheddar)

Directions:

  1. Preheat the oven to 400F.  In a food processor, blend all the ingredients together.  You will end up with a moist ball of dough.
  2. Line a baking sheet with parchment paper or Silpat liner.  Plop the ball of dough down on the liner, and cover with a piece of parchment paper.  Roll out the dough very thinly, to about 1/8″ thickness.  Try to make it even thickness all the way across – you can see my edges were a little thinner, and they got crispier than in the middle.  That’s fine, but you don’t want a huge variation in thickness.  Remove top sheet of parchment paper and bake for 8-10 minutes until starting to color.
  3. Remove from oven and score with a sharp knife.  You don’t need to go all the way through, because you don’t want to cut your liner or parchment paper.  Bake again for another 8-10 minutes until golden brown and starting to get crispy at the edges.
  4. When it’s cool enough to touch, cut all the way through the crackers, or just use your hands to break them at the perforations.  When cool, store crackers in sealed container.  To crisp, put them on a baking sheet in the toaster oven or regular oven for five minutes.

I think next time I make these, I’ll add a little paprika or garlic powder.  New flavor combinations are exciting!  My girls helped me make these, so here is a photo of them enjoying their handiwork:


B+L Homemade Cheezits


Explore, experiment, enjoy! — Dana


To view even more of Dana’s unique recipes, you can visit her at Frugal Girlmet!

Thai Coconut Chicken Soup (Tom Kha Gai)

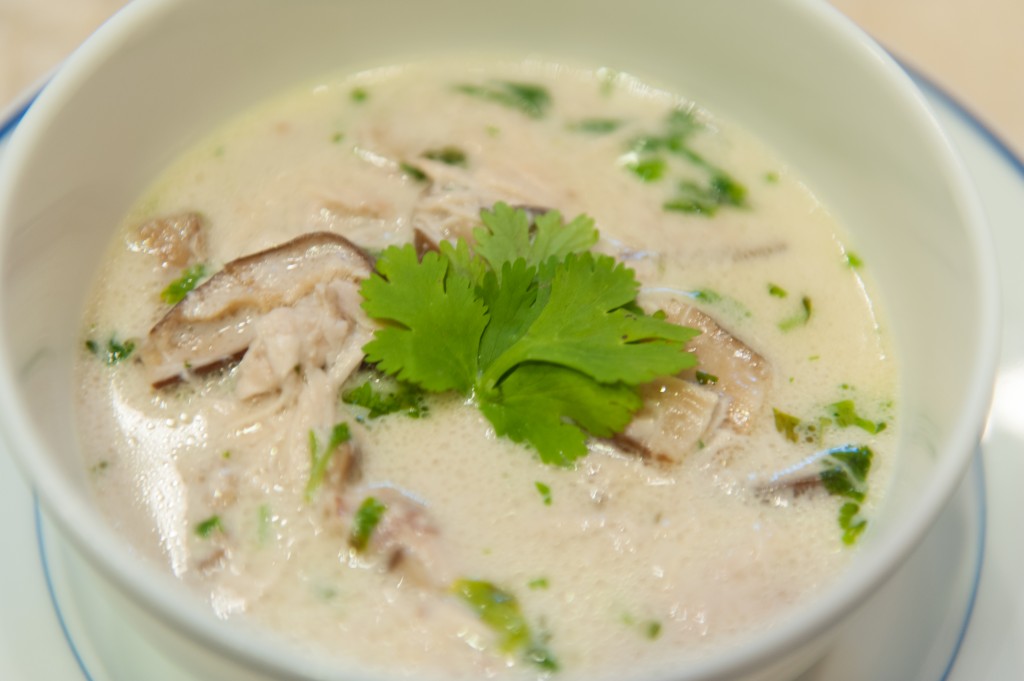
Thai Coconut Chicken Soup

I am convinced that every culture, every civilization, has a chicken soup recipe.  Nothing else satisfies or feels so much like a hug to the tummy like a big bowl of chicken soup made by someone you love.  If you are like me and are a frugal girl, you buy a whole chicken at least once a week.  I remove the breasts and legs and cook them one night, then cook the carcass for broth and about two cups of shredded chicken left on the body.  If you have a chicken body and the desire to try something new, read on – here comes Thai Coconut Chicken Soup, also known as Tom Kha Gai!

Now that you know how to make coconut milk from scratch, you’ll need about 2 cups of homemade coconut milk, or you can use one can of packaged coconut milk.  There are a few other unusual ingredients for this recipe:  ginger, cilantro, and fish sauce.  Ginger really isn’t that out of the ordinary, and goes great in smoothies and peach dishes; but if you aren’t going to use it soon, you can peel whatever is left and freeze it to use later.  Cilantro shows up in many different cuisines, so if you don’t want to waste half a bunch of cilantro, you have many options (like Mexican or Indian food), or try this  and  this.  Fish sauce is a savory liquid distillation of anchovy, sugar and salt.  If you can’t find it, you can still make the soup, but fish sauce is the secret ingredient that really brings everything together.  It keeps in the fridge forever, and is a great flavor booster for clam chowder or a substitute for anchovy paste (think Caesar salad.)  The only other ingredients you need are a chicken, some limes, and mushrooms.  Thai restaurants use straw mushrooms, and you can find them in a can, but I used dried shiitake mushrooms here, and they’re delicious.  You could also use cremini mushrooms.

Try this with Jasmine rice and a green salad for a light but satisfying dinner!

Thai Coconut Chicken Soup (Tom Kha Gai)

Ingredients:

  • 1 chicken body, breasts and legs removed (or use two cooked chicken breasts, diced, plus 3 cups of chicken broth)
  • 1 large piece of ginger, 2 or 3 inches long, peeled and bashed with the handle of your knife
  • 1 can coconut milk, or about 2 cups homemade coconut milk
  • 1 ounce dried mushrooms, broken into little pieces, or 8 ounces fresh mushrooms, chopped
  • 1/2 bunch fresh cilantro, chopped
  • 1/2 teaspoon or so fish sauce (to taste – if you don’t have fish sauce, use salt)
  • 2 limes, juiced

Directions:

  1. In a large pot, cook the chicken carcass with 4 cups of water and the peeled, bashed ginger, until the chicken is cooked through. Remove chicken to a large bowl; shred meat from bones and set aside. Strain the broth into another bowl, discarding ginger. Wash the pot and return to stove. Over medium low, add the dried mushrooms to the chicken broth and cook ten minutes. (If using fresh mushrooms, add them in Step 2.)
  2. Add back the chicken to the broth, and pour in coconut milk (and fresh mushrooms, if using).  Cook until simmering.  Add chopped cilantro, fish sauce, and lime juice, and stir to combine.  Taste for seasoning – may need more salt, or you may like more lime (you can add the zest of the lime too, if you want a stronger citrus flavor.)  Serve hot with more chopped cilantro.  You can also stir in a little hot sauce or chili flakes if you like!

Explore, experiment, enjoy! — Dana


To view even more of Dana’s unique recipe, you can visit her at Frugal Girlmet!
Homemade Coconut Milk and Coconut Chia Pudding

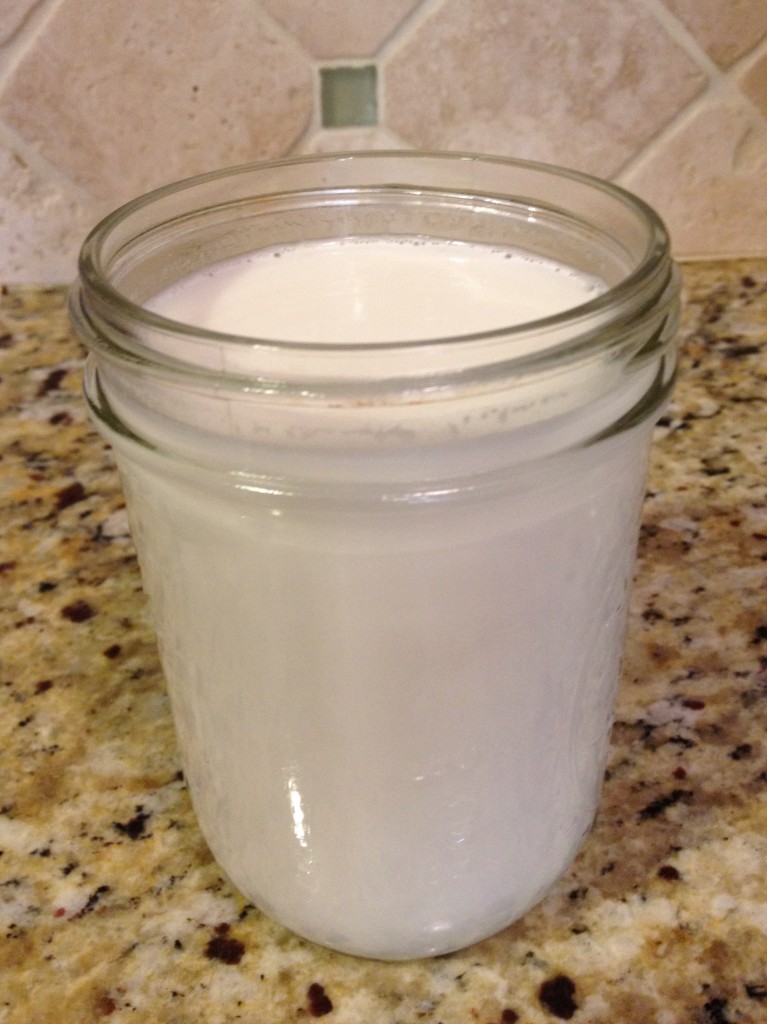
Coconut Milk Jar
I think I speak for everyone who blogs for At Home with GCH when I say that we are not afraid of a little hard work.  Some things are worth the extra time, effort, or energy.  From Christi’s homemade laundry detergent, to Coleen’s gluten-free goodies, we all have tricks to share so you can give your family the safest, freshest, and healthiest choices possible.  I’d like to toss my hat into the ring and offer a recipe for Homemade Coconut Milk!

Coconut milk is a key ingredient in many Indian, Thai, and other Southeast Asian recipes.  It’s also a great staple to have on hand if you are lactose intolerant, or if you are allergic to soy or almond milk.  And while you can find it in a can in many supermarkets, it is quite easy to make at home!  All you need is dried or desiccated coconut flakes, a blender, a colander, and cheesecloth.  Now, this is not the coconut you make into a pie – that stuff is full of sugar and preservatives!  Make sure it is unsweetened, dried coconut.  You can use fresh coconut too, if you can find one. (I can get them at my local Thai market, but you may not have one of those nearby.)  The coconut milk is good for about a week in your refrigerator.  I keep mine in a Ball jar with a lid, but I can’t make it last more than 3 days – it’s that delicious!

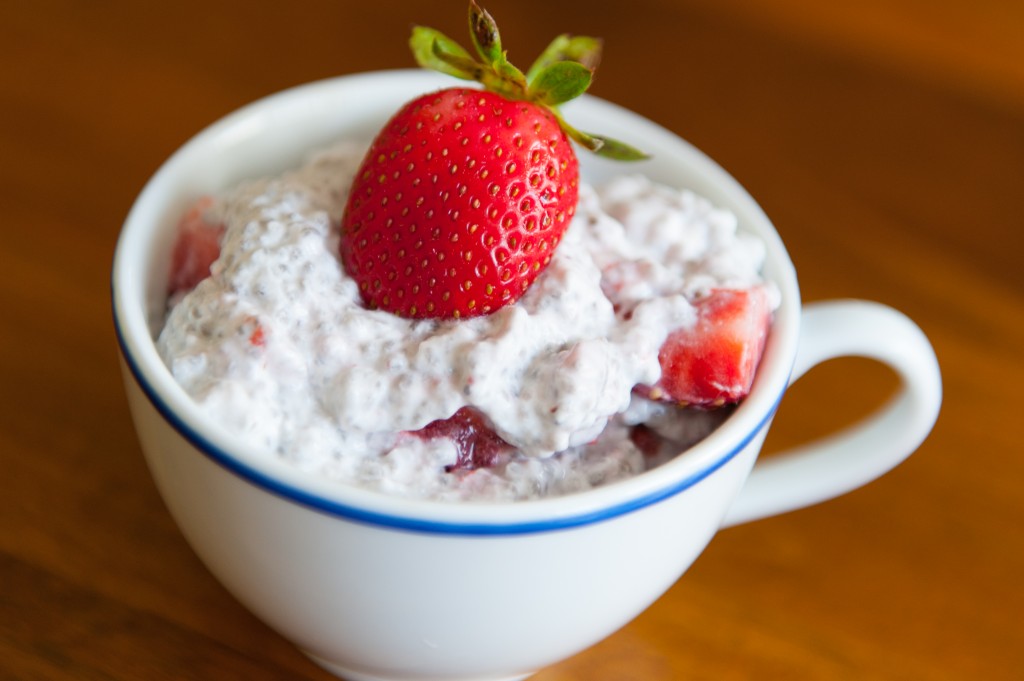
What you do with it is up to you.  Pour it over your cereal (or Christi’s Granola), use it in coffee in place of creamer, or make this delicious Coconut Chia Pudding.  Chia seeds can be found online at Amazon, at nearly all health food stores or Whole Foods, and at Trader Joe’s.   Chia seeds are teeny, tiny, little health bombs!  Full of Omega-3 fatty acids, protein, and other necessary things, chia seeds can add crunch to homemade crackers, or top sweet potatoes and salads.  Even better, when mixed with liquid, they create a gel, and make a delicious “pudding” that feels decadent, but is actually quite healthy.  Think tapioca or rice pudding, without all the diet-busting starch!

Coconut Chia Pudding


Next week I’ll have more recipes that use coconut milk, but for now, here are the basics.  Check it out!

Homemade Coconut Milk

Ingredients:

  • 1 cup shredded, dried coconut
  • 1 1/2 cups boiling water

Directions:

  1. Boil water.  (I know, but it has to be said.)  In the pitcher of a blender or a large food processor (I use a food processor and it works fine), pour in one cup of coconut flakes.  Measure out 1 1/2 cups of boiling water and pour over the coconut.  Let sit for about 20 minutes.  Then blend for 2 or 3 minutes if you have a really strong blender, or about 4 minutes in a food processor.  You want to see a foamy slurry.
  2. Line a sieve or colander with a large piece of cheesecloth, folded over on itself.  Place the colander over a large bowl.  Pour the coconut mixture into the cheesecloth and squeeze, squeeze, SQUEEZE!!!  Pour the coconut milk into a jar with a lid and keep refrigerated.
  3. Don’t throw away the coconut pulp!  This can be mixed into smoothies, or spread out on a baking sheet lined with parchment paper and baked at 200*F for about 1 to 2 hours.  When it is completely dry, grind again in the food processor … and you just made coconut flour!  And now for the other recipe…

Coconut Chia Pudding

Ingredients:

  • 1 cup coconut milk
  • 1/4 cup chia seeds
  • 1/2 teaspoon honey (optional, depending on how ripe and sweet your fruit is)
  • 1 cup chopped fruit – I like strawberries, blueberries, or peaches, but find what you like best

Directions:

  1. In a Tupperware container with a lid, pour in one cup of coconut milk and 1/4 cup chia seeds.  Put the lid on and shake to combine.  Put in the refrigerator.  Shake again in one hour.  
  2. The chia pudding should be ready in about 3 hours.  When ready, it should be very thick, like tapioca pudding.  To serve, divide chia pudding between two bowls, drizzle with a tiny bit of honey if desired, and stir in the chopped fruit.  This makes a great dessert, or a nice, light breakfast.


Explore, experiment, enjoy! — Dana


To view even more of Dana’s unique recipe, you can visit her at Frugal Girlmet!