April 23, 2024

Chocolate Zucchini Muffins

choc zucchini muffins

Happy Fall, everyone!  Time to harvest – clean out your garden, gather all your herbs, and start prepping for the cold.  If you have any zucchini left on your vines, pick them and make this!  Ready?  Go!

Chocolate Zucchini Muffins

Ingredients:

  • 1/3 cup unsweetened cocoa powder
  • 2 cups flour (I used half regular flour, half whole wheat)
  • 1 teaspoon baking powder
  • 1 teaspoon baking soda
  • 1/2 teaspoon salt
  • 1/2 teaspoon cinnamon
  • 1 teaspoon vanilla
  • 1 stick butter, melted 
  • 2 eggs
  • 1 ripe banana
  • 1/2 cup brown sugar
  • 2 zucchini, grated
  • 1/2 bag chocolate chips (about 6 oz. or 2/3 cup)
Directions:
  1. Preheat oven to 350F.  Grease muffin tin or use paper liners.  (I just use Pam.)
  2. In a bowl, combine first six ingredients (all the dry ones).  
  3. In a larger bowl, whisk vanilla and melted butter into eggs, then mash the banana and add that to the mixture.  Whisk in sugar and stir in grated zucchini.  Stir in the chocolate chips.
  4. A little at a time, stir the dry ingredients into the wet.  Pour into muffin tin and bake for 20-25 minutes.  
This recipe made 18 muffins for me.  We ate a bunch and froze the rest.  To thaw, microwave for 30 seconds, but be careful, the chocolate chips get all hot and melty again!
Explore, experiment, enjoy! — Dana

To view even more of Dana’s unique recipe, you can visit her at Frugal Girlmet

Easy Chicken Mole

Easy Chicken Mole

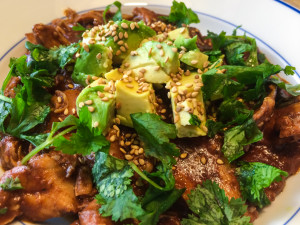
The first time I had mole (say moe-lay) it was at a small but very well-regarded Mexican restaurant in Los Angeles, La Loteria.  I had heard of mole poblano before and decided to take a chance.  Que rico!  What a glorious taste!  It was rich, a tiny bit spicy, a little bitter, and a little fruity.  It was really a savory fiesta in my mouth.  However, when I went home with the intent to find out more about this magical dish and how to make it, all the recipes I saw were 40 ingredients long and took days to make.  No me gusta – I just didn’t have time to mess with that.  So after some more research, I came up with this recipe – my Easy Chicken Mole!

The two ingredients that most moles share to give them such depth of flavor are dried chiles and chocolate.  Really!  Buy the darkest chocolate you can find.  You can use baker’s unsweetened chocolate, but that will make it bitter, and you’ll probably want to bring it back around with some added honey or brown sugar.  I used bittersweet chocolate, 63% cacao.  I think it worked well, and next time I might even add a little more.

As far as the chiles go, it gets a little confusing.  Oftentimes a chile will have one name when it’s fresh and a different name when it’s dried (I guess kind of like grapes vs. raisins.)  To be honest, I think I bought ancho chiles, but I’m not sure – there were two kinds and neither were labeled!  You want chiles that are a very dark reddish-brown—like the color of dried blood—and about fist-sized.  I used two but I may use three or even four next time.  I removed the seeds, and that’s where the heat resides, so you only get the smoky, fruity flavor of the chiles and not the spiciness.

Try this recipe.  If you’ve never had mole, this is a great place to start.  If you are a mole aficionado, go ahead and tweak my recipe to get the taste you like.  Either way, I bet you’ll say, Que sabor!  (Or if you don’t habla espanol, ‘So tasty!’)

Easy Chicken Mole

Ingredients:

  • 2-4 dried chiles (use ancho, pasilla, or guajillo)
  • 2 onions, chopped
  • 4 tablespoons butter
  • 4 cloves garlic, minced
  • 1/4 cup sesame seeds (or use pepitas, peanuts, or almond butter)
  • 1/4 cup dark chocolate chips
  • 1/4 cup raisins
  • 1/2 teaspoon ground cinnamon
  • 1/2 teaspoon salt
  • 1/2 teaspoon dried oregano
  • 2 cups chicken stock
  • 1/2 cup brewed coffee
  • 2 slices bread
  • 2 pounds boneless, skinless chicken thighs (or use breasts, up to you!)
  • diced avocado, cilantro, sesame seeds to serve
  • rice or tortillas to serve, optional

Directions:

  1. Put the dried chiles in a bowl and cover with boiling water.  Put a plate over the bowl and let the chiles soak for about 15 minutes.  When they have softened, remove the stem and seeds and roughly chop.  Discard the stem, keep some seeds if you want some heat.
  2. While the chiles are soaking, cook the onion in the butter in a very large pot or Dutch oven.  Stir to make sure they don’t burn.
  3. Add the chopped chiles, minced garlic, and sesame seeds.  Stir and cook for 3 minutes.
  4. Add the chocolate, raisins, cinnamon, salt, and oregano.  Stir to combine and cook for another 2 minutes.
  5. Add the chicken stock and coffee.  Crumble in the bread.  Cover the pot with a lid and simmer for 10 minutes.
  6. CAREFULLY transfer sauce to a blender and blend until pretty smooth.  You could use an immersion blender, too.
  7. Return the sauce to the pot and add the chicken thighs.  Tuck them into the sauce and stir.  Make sure the chicken is covered in sauce, then cover with the lid.  Let simmer for about 25 minutes.
  8. The chicken is done when you can shred it with forks.  To serve, ladle the chicken and lots of mole into a bowl.  Garnish with lots of avocado, cilantro and sesame seeds.  You can also eat this in tortillas – just serve with less sauce if you are making tacos.  You can also serve it over rice to soak up the sauce.

Explore, experiment, enjoy! — Dana


To view even more of Dana’s unique recipes, you can visit her at Frugal Girlmet!

Almond Joy Chocolate Bark

Almond Joy Chocolate Bark

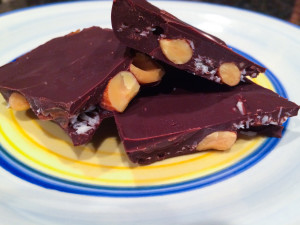
What’s Valentine’s Day without some chocolate?  This is pretty healthy stuff though, so as long as you don’t eat the whole batch in one sitting, you can have a treat and not be naughty.  Almond Joy Chocolate Bark is the way to go!

I love dark chocolate and I use the darkest I can find in the grocery store.  Here I used a bag (11.5 oz) of 63% cacao Guittard chocolate chips, but feel free to use whatever dark chocolate you like.  I also used roasted, salted almonds because that little bit of salt really offsets the sweet and makes the flavors pop.  If you want a sweeter bark, you can use “Angel Flake” coconut that has sugar added.  I used unsweetened coconut flakes and it’s quite yummy!  I also used 2 tablespoons of coconut oil.  I like that it makes the chocolate a little smoother, and I think it tastes great too.  You can leave it out if you don’t have it.

Give some to your sweeties, treat your friends at work, or just nibble on this chocolate bark and enjoy some quiet time.  Happy Valentines Day!

Almond Joy Chocolate Bark

Ingredients:

  • 1 bag of semi-sweet chocolate chips (use the darkest chocolate you can find, with the highest percent of cacao)
  • 2 tablespoons coconut oil
  • 1 cup whole, roasted, salted almonds
  • 1/3 cup shredded, unsweetened coconut

Directions:

  1. In an oven-safe bowl, microwave the chocolate and coconut oil together for 30 seconds.  Stir very well with a rubber spatula, then microwave again.  Keep doing this until your chocolate and coconut oil are smooth and blended.  Mine took 3 blasts of 30 seconds each.
  2. Line an 8×8 baking pan with plastic wrap.  Pour in 1/3 of the melted chocolate and spread over the bottom of the pan.
  3. Spread the almonds over the chocolate layer and sprinkle with coconut.
  4. Pour the rest of the chocolate over the almonds and coconut and lightly spread to cover.  Put in the freezer for about 2 hours until solid.  Cut or break into 2″ pieces.

Explore, experiment, enjoy! — Dana


To view even more of Dana’s unique recipe, you can visit her at Frugal Girlmet!

Chocolate-Covered Strawberries

Chocolate-Covered Strawberries Resize

Nothing says Valentine’s Day like Chocolate-Covered Strawberries!  Surprise your sweetie – or sweeties, because my kids went cuckoo for these!  If you can get your hands on some nice strawberries (and I know it’s still very much winter in some places, but go with me on this), you can make these for dessert and watch their eyes light up!

My trick here is to use a teaspoon of coconut oil in the chocolate.  It keeps the chocolate from becoming brittle and adds the lightest hint of tropical flavor.  Instead of shattering when you bite into it, this chocolate holds tight to the strawberry so you can eat every last bite.  No worries if you don’t have coconut oil.  You can go without and just use the chocolate, but you will definitely want to make sure your berries are blemish-free and thoroughly dried.

Ready to make your loved ones’ hearts go pitter-pat?  Bring out these healthy and gorgeous treats tonight!

Chocolate-Covered Strawberries

Ingredients:

  • 18 strawberries
  • 1 cup semisweet chocolate chips
  • 1 teaspoon coconut oil

Directions:

  1. Wash the strawberries and dry very carefully.  Pull up the stem leaves so they point up; otherwise you’ll get them covered in chocolate!  Make sure you don’t have any open, weepy spots on the berries, or the chocolate won’t stick.
  2. In a small but deep bowl, microwave the chocolate chips and coconut oil for 30 seconds at a time, and stir after each 30 seconds.  It took three 30-second bursts to get everything melted and smooth.
  3. Line a baking sheet or tray with parchment paper.  Holding onto the stem of the berry, dip in chocolate and place on the parchment paper.  When all berries are dipped, place the tray in the fridge (or freezer if you are short on time!)  Serve cold.

I had a little leftover chocolate in my bowl.  I dipped cashews and banana pieces in there to get every last drop.  My 2 year-old’s chocolate mustache was a sight to behold!

Explore, experiment, enjoy! — Dana


To view even more of Dana’s unique recipe, you can visit her at Frugal Girlmet!


Monkey Bites (Banana Chocolate Chip Cookies)


monkey bite cookies

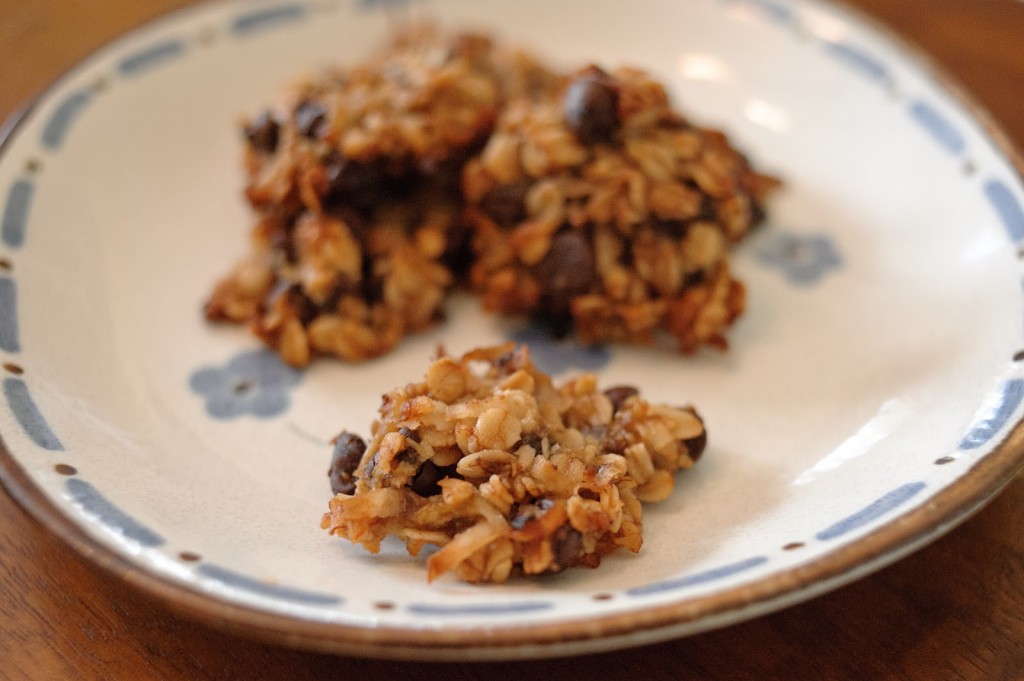
Christmas cookies are a tradition at my house – and yours too, I’m sure.  My Dad lives for Tollhouse chocolate chip cookies.  My favorites are peanut butter, with or without jam thumbprints and crushed walnuts.  When I worked outside the home, I made dozens of cookies each year for Christmas, sharing them with co-workers and other friends and family.  Now that I am home with my girls, I have to be much more careful – I can’t have all those cookies around, since I don’t have anywhere reliable to offload them, and I DON’T want to eat them all myself!  So I am committed to striking a balance between festivity and nutrition.  Enter:  Monkey Bites!

These cookies have all the flavor (and more!) of your typical chocolate chip cookie, but instead of being filled with flour and sugar, you get bananas and oats.  These are soft cookies, and I keep them in the fridge when I’m done.  But the best part of Monkey Bites is that they use three of these:

overripe banana

So if you are looking for a healthier chocolate chip cookie (or you have a few squishy bananas to contend with), try these Monkey Bites.  And feel free to customize:  butterscotch or peanut butter chips would be delicious, or add dried cranberries or cherries to pair nicely with the chocolate chips.  The sky is the limit!

Monkey Bites

Ingredients:

  • 3 overripe bananas
  • 2 cups oats
  • 3 tablespoons coconut oil or butter
  • 1 teaspoon vanilla extract
  • 1/2 teaspoon cinnamon
  • 3/4 cup (or about half a bag) of chocolate chips
  • 1/2 cup shredded unsweetened coconut

Directions:

  1. Preheat oven to 375*F.  Lightly grease a cookie sheet or use a Silpat liner.
  2. In a large bowl, mash bananas with a fork.  Stir in the rest of the ingredients, mixing well.
  3. Using a spoon and fork, scoop up a largish tablespoon of cookie dough and place on baking sheet.  You’re going to have to mold it into shape, because these don’t spread.  Mine are about 2″ in diameter and about 1/4″ high.  Try to make them a uniform size so they bake evenly.
  4. Bake for 15-20 minutes.  You want them to be firm, and the chocolate chips should be starting to melt.  These are soft cookies but you don’t want them squishy.  Let cool on baking sheet for 10 minutes, then store covered in the fridge.  You can put them in a toaster oven to warm them and crisp them up a little.

Explore, experiment, enjoy! — Dana


To view even more of Dana’s unique recipe, you can visit her at Frugal Girlmet!

Mocha Brownie Torte

mocha brownie torte
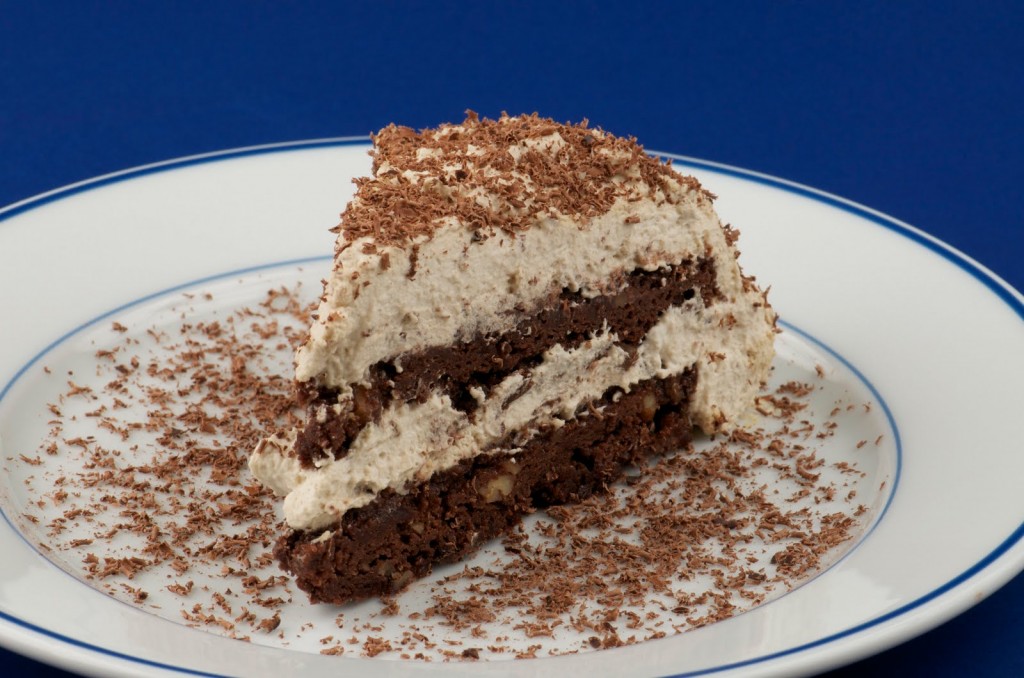
I remember the first time I had something other than pumpkin pie for dessert at Thanksgiving, and it BLEW MY MIND.  We spent the holiday with another family when I was 12, and for dessert they had pumpkin pie and a chocolate silk pie.  It was inconceivable to me that there could even be anything else for dessert besides the standard pumpkin pie, yet here was chocolate! It was a game-changer for me.  So while I always look forward to pumpkin pie, I like to make a second dessert too.  Believe it or not, there might be someone at your table who doesn’t adore pumpkin pie.  For a change of pace, and for those non-pumpkin people, may I suggest Mocha Brownie Torte?
You can, of course, omit the nuts if you have an allergic family member, but I really recommend you leave them in – the walnuts add crunch amidst the dense and chewy brownie. And the frosting? Heck, I’d happily mix up a batch right now to eat with a spoon. I dare say I like the frosting more than ice cream. Yes, it’s that good!  To simplify your Thanksgiving day, bake the cakes the night before, cool on racks, and wrap in plastic wrap overnight.  The morning of Thanksgiving, frost the cake and let it chill in the fridge while you make the rest of your dinner.
Mocha Brownie Torte
(recipe is courtesy of my Mom’s battered and splattered 1970’s Betty Crocker Cookbook)
Ingredients:
  • 1 package (15 oz.) fudge brownie mix
  • 1/4 cup water
  • 2 eggs
  • 1/2 cup chopped walnuts (pecans would be nice too)
  • 1 1/2 cups chilled whipping cream
  • 1/3 cup packed brown sugar
  • 1 tablespoon powdered instant coffee or espresso
  • Shaved chocolate for garnish
Directions:
1.) Preheat oven to 350 F. Mix brownie mix, water and eggs. Stir in the nuts. Grease and flour (2) 8-inch cake pans. Divide the brownie mix evenly in the pans.
2.) Bake for 20 minutes. Remove from the oven and let cool in the pans for 5 minutes. Remove the cakes from the pans and let them cool completely on a baking rack.
3.) Chill a big metal bowl and your beaters in the freezer for a while. Pour the whipping cream into the cold bowl and beat with an electric mixer for 2 minutes. Gradually add the brown sugar and powdered coffee. Continue beating until stiff peaks form.
4.) Put one cake down on a serving tray, flattest side down. Top with one cup of the whipped cream frosting. Put the other cake on top of the frosting, so the flattest side is up, and use the rest of the frosting to cover the top and sides of the torte. Grate or shave some dark chocolate over the torte and chill for at least an hour before serving.

Explore, experiment, enjoy! — Dana


To view even more of Dana’s unique recipe, you can visit her at Frugal Girlmet!