November 15, 2024

Korean-Style Tuna Salad

Korean Tuna Salad resize

Now that school is starting up again, it’s time for some lunchbox ideas.  One of my favorites as a kid was tuna salad.  Growing up, I had it only two ways:  with mayonnaise, and the way my Mom made it, which was with mayo and chopped celery.  It wasn’t until I was in high school that I had tuna salad made with mayo and pickle relish.  (Thanks, Mrs. Carson!)  It’s really easy to believe that a food will only taste good if prepared in the way you’re familiar with.  I mean, even 15 years ago, I would have been hard-pressed to believe that I would like tuna salad made without mayonnaise.  But old dogs can learn new tricks, so here I present to you:  Korean-Style Tuna Salad!

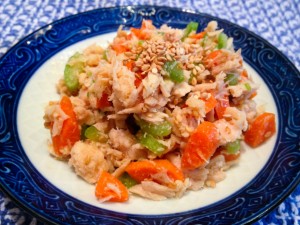
My husband asked me to make this for him several years ago, because this is the way he grew up eating canned tuna.  Believe it or not, Koreans do enjoy tuna salad, and even make a dish called Tuna Kimbap with it – tuna salad rolled up in rice and seaweed (kind of a Korean sushi roll.)  In this Korean-style dish, the mayonnaise is gone, replaced by savory sesame oil.  The celery is joined by minced carrot and green onion, and the whole dish is seasoned with a little vinegar and a healthy shake of sesame seeds.  It’s a whole new take on tuna!

Try this wrapped in lettuce or served on crackers for lunch.  Ready to break out of your comfort food comfort zone?  Let’s go!

Korean-Style Tuna Salad

Ingredients:

  • 2 cans tuna, drained
  • 2 green onions
  • 1 large carrot
  • 2 celery stalks
  • 2 tablespoons sesame oil (or more, to taste)
  • 1 teaspoon rice vinegar (or use lemon juice)
  • 2 tablespoons sesame seeds
  • 1/2 teaspoon salt

Directions:

  1. In a mixing bowl, add the tuna.
  2. Finely mince the green onion, carrot, and celery.  Add to the tuna.
  3. Pour in the sesame oil and rice vinegar.  Toss to combine.
  4. In a small bowl, combine the sesame seeds and salt. Crush them together with the back of a spoon until most of the seeds are crushed.  (You can also do this quickly in a mortar and pestle, if you have one.)  Pour the sesame seed salt mixture over the tuna and mix well.  Taste – now you can add more sesame oil, vinegar, or salt.  Refrigerate until ready to serve.

Explore, experiment, enjoy! — Dana


To view even more of Dana’s unique recipe, you can visit her at Frugal Girlmet!
 

Fruity Energy Bars

Fruity Energy Bars resize

I’ve got a lot of hoops to jump through when it comes to making snacks for my girls.  I try to eat Paleo myself, and while I do serve my girls grains and legumes, I am always searching for recipes that rely on Paleo ingredients first.  Next, my older daughter is allergic to peanuts and tree nuts.  That eliminates a giant swath of choices in the Paleo category, which excludes grains in favor of nuts.  So for baking, that leaves me either coconut products (which we love and use often), or seeds, like pepitas or sunflower seeds.  I found a recipe that sounded good, reconfigured it for our needs, and now I proudly present:  Fruity Energy Bars!

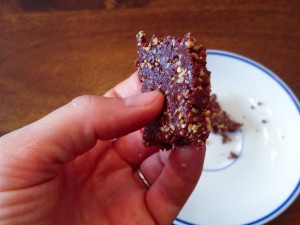
In the grocery store, you’ll find half an aisle dedicated to energy and granola bars.  I love them and I love that, for the most part, they’re healthy and nutritious.  They are, however, kind of pricy – sometimes two or three dollars a bar!  And it seems like the ones with the fewer ingredients are even more expensive!  (I’m looking at you, Larabar!)  Now, these Fruity Energy Bars couldn’t be quicker – just three minutes in the food processor, and about half an hour to chill and firm up.  I think you could easily exchange the dried cranberries for another dried fruit – apples, apricots, raisins, prunes, or cherries would all work.  If you want to use nuts instead of sunflower seeds, try almonds or walnuts.  They do warm up very quickly and get soft, so keep them in the fridge until ready to eat.  Ready?  Get energized!

Fruity Energy Bars

Ingredients:

  • 1 cup pitted dates
  • 1 cup dried cranberries
  • 1 cup sunflower seeds (I used roasted and salted)
  • 1/4 cup unsweetened flaked coconut
  • 1/4 cup chocolate chips

Directions:

  1. Pour all the ingredients into the bowl of  your food processor.  Pulse to blend, then mix for about 3 minutes.  You can blend it all the way together and it will form a ball, but I took mine out before that so I could still have a little texture to the bars – kind of like the consistency of sticky sand.
  2. Line an 8×8 pan with plastic wrap, or grease with a little coconut oil.  Press the mixture into the pan and press down with the back of a big spoon.  Refrigerate for at least half an hour.  Cut into 1″x4″ bars.  Get energized and go be productive!

Explore, experiment, enjoy! — Dana

—————————————————————————————————
To view even more of Dana’s unique recipes, you can visit her at Frugal Girlmet!

Homemade Strawberry Ice Cream (No Ice Cream Machine Needed!)

rsz_homemade_strawberry_ice_cream

A few months ago, my daughter made vanilla ice cream in her kindergarten class.  She raved about how fun it was to make it, and how the finished product was delicious.  Well, I took her story with a grain of salt (unintentional pun!) because 6 year-olds aren’t really known for their discriminating pallets.  But I researched online, found a recipe, and decided to give it a whirl.  And you know what?  If anything, she undersold it!  This stuff is fantastic!  Here’s my recipe for Homemade Strawberry Ice Cream.

We don’t have an ice cream machine.  It sounds like kind of a waste of space, because it’s not something I’d use too often.  The only equipment this recipe needs is two Ziploc bags!  The technique is easy and is perfect for kids to make.  All the recipes online were the same, so I used one (of several) you can find with a Google search.  But what’s even better than vanilla ice cream?  Strawberry ice cream!  Instead of just sprinkling chopped fruit on top, I made a strawberry puree that, when mixed into the vanilla ice cream, makes a strawberry ice cream as good (or better!) than anything you can get at the grocery store.  Also, the serving size is just right.  It’s big enough that you can satisfy two kids with this recipe, and get a taste or two for yourself.  But it’s small enough that you won’t beat yourself up if you eat the whole thing yourself!

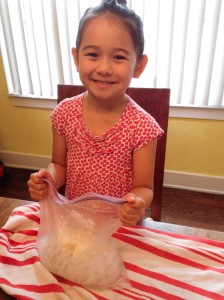
Becky puts in some sweat equity

Becky puts in some sweat equity

Homemade Strawberry Ice Cream (No Ice Cream Machine Needed!)

Ingredients:

For the Strawberry Puree:

  • 1 pint strawberries
  • 1 tablespoon honey
  • 1/4 cup water

For the Ice Cream:

  • 1 cup half-and-half (or use 1/2 cup whipping cream and 1/2 cup whole milk)
  • 2 tablespoons sugar
  • 1/2 teaspoon vanilla
  • 1/2 cup rock salt or kosher salt (whatever you can find that has big grains of salt, the bigger the better)
  • ice
  • sandwich-sized Ziploc bag
  • gallon-sized Ziploc bag

Directions:

  1. First make the strawberry puree:  Wash, hull, and quarter the strawberries.  Over medium-low heat, mix together the strawberries, honey, and water.  Mash with a wooden spoon or potato masher, but leave some chunks.  Cook on low for about 20 minutes until reduced and thickened a little.  Don’t let it burn!  Take off the heat.  (You can do this the day before, if you want.  Just pop it in the fridge when you’re done letting it cool.)
  2. For the ice cream:  In a bowl, stir together the half-and-half, sugar, and vanilla.  Pour the mixture into the small Ziploc bag and make double sure it’s sealed well.
  3. Fill the large Ziploc bag halfway with ice and the salt.  Add the small bag to the ice, then cover with a little more ice.
  4. Shake!
  5. Shake!
  6. Shake!  (My bag got really cold, really fast, so I had to wrap it in a towel so it didn’t hurt my hands.)  Shake for about ten minutes.  You can squeeze the ice cream bag and tell when it’s frozen.
  7. Serve the vanilla ice cream with the strawberry puree.  Voila!
Sweet success!

Sweet success!


Explore, experiment, enjoy! — Dana


To view even more of Dana’s unique recipe, you can visit her at Frugal Girlmet!
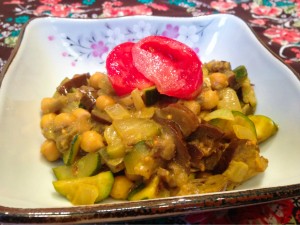
Summer Vegetable Curry

Summer Vegetable Curry resize

If you think about it, there is a lot of overlap between summer produce here in the United States, and what shows up on Indian food menus.  That’s because what grows where it’s hot there is also what grows in the summer here.  Lots of Indian dishes feature zucchini (also called courgettes), onions, eggplants, and tomatoes – all things coming into season now!  Why not try this Summer Vegetable Curry?

You really can’t mess this up or go wrong.  Don’t like garbanzo beans?  Use another bean, or switch them out for green peas or bite-sized green beans.  Like it spicy?  Add some chopped jalapeños or another chili of your choice.  Use whatever curry powder you have.  Out of coconut milk?  Use water or broth instead.  I didn’t have any cilantro, or I would have chopped up a few tablespoons to stir in right before serving.  See?  There is no wrong way.

For a vegetarian meal, double the amount of beans and serve over basmati rice.  Paleo?  Skip the beans altogether and serve this curry as a side dish to your favorite protein.  Ready?  Let’s go!

Summer Vegetable Curry

Ingredients:

  • 1 large onion
  • 2 tablespoons ghee, butter, or oil
  • 1 tablespoon mustard seeds
  • 1 tablespoon cumin seeds
  • 1 tablespoon curry powder (or more, to taste)
  • 1/2  can coconut milk
  • 2 skinny eggplants
  • 3 zucchinis
  • 1 can garbanzo beans or 1 cup of rehydrated and cooked dried garbanzos
  • cilantro, raw tomato, and rice (optional)  for serving

Directions:

  1. In a very large pot, heat the ghee or butter.  Chop the onion and add to the pot, along with the mustard and cumin seeds.  Fry on medium heat for about 5 minutes, until the onion becomes translucent.  Then add the curry powder and coconut milk and reduce heat.
  2. Cut the eggplants and zucchinis into thin half-moons.  Add to the pot, stir to mix, and cover.  Cook over low heat for about 25 minutes until the vegetables are soft, stirring occasionally to ensure nothing sticks to the bottom of the pot.
  3. Taste for seasoning – add salt or more curry powder if you like.  Stir in the garbanzos and heat through.
  4. Serve with chopped tomato and minced cilantro.  Serve over rice if you like.

This is definitely one of those recipes that is even better the next day, and it’s easy to reheat.  Have some for dinner tonight and save some for lunch tomorrow!

Explore, experiment, enjoy! — Dana


To view even more of Dana’s unique recipes, you can visit her at Frugal Girlmet!

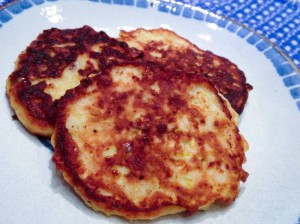
Bacon Corn Fritters

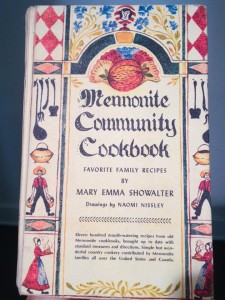
Last week at the grocery store, my older girl informed me that she had never had corn on the cob.  What kind of monster am I to deprive her of that experience? We bought corn and she liked it.  Then more corn came in my CSA box, and I was stumped: what else can I do with it? I like this recipe but I wanted to try something new. So I flipped open this old dear:

danamennoniteckbk

And I stumbled upon this recipe for corn fritters. Yum! But since I can’t leave well enough alone, I added bacon and summer squash to mine. My new recipe: Bacon Corn Fritters!

These mix up quickly and fry quickly too. My girls ate these like pancakes with a little maple syrup. I ate mine with a dollop of plain yogurt (or you can use sour cream) and some shredded cheddar cheese. Fantastic! I bet these would be great with some cheese and lots of fresh sliced tomatoes. Sound interesting? Let’s go!

Bacon Corn Fritters

danabaconcornfritters

· 3-5 slices of bacon, diced
· 3 ears fresh corn
· 2 zucchini
· 2 eggs
· ¼ cup flour
· ½ teaspoon salt
· 1/8 teaspoon pepper
· 1 teaspoon baking powder
· 2 tablespoons plain yogurt (or use sour cream, or whole milk)

Directions:
1. In a large pan, fry the bacon. When crispy, remove to a paper towel-lined plate. Leave the bacon grease in the pan!
2. Using a box grater, grate the corn from the cob into a bowl. Grate the zucchini too.
3. Beat the eggs, and then add to the corn and zucchini. Stir in the flour, baking powder, salt, pepper, and yogurt.
4. Heat the pan again. Drop the corn batter by large spoonsful into the hot bacon fat. Flip and brown again.

Explore, experiment, enjoy! — Dana


To view even more of Dana’s unique recipes, you can visit her at Frugal Girlmet!

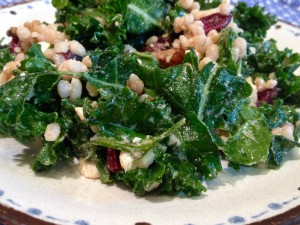
Kale and Barley Salad

Kale and Barley Salad resize

My husband and I eat mostly Paleo.  That means we avoid grains.  But occasionally, I do eat whole grains like barley, wheat berries, or quinoa.  I like their hearty texture and nutty flavor.  They go especially well with greens, as in this Kale and Barley Salad.

You pretty much cover all the bases with this one:  leafy green kale, salty feta, tart dried cranberries (or cherries, or raisins), rich walnuts, and a dressing with a balance of sweet and savory to tie it all together.  You can make this hours ahead of time – even in the morning – and the kale will still have a sturdy texture.  I even eat the leftovers the next day and the kale is chewy and wonderful.  Can’t say that about a lettuce salad!

Try this with pearl barley, wheat berries, or quinoa.  Let me know what you think!

Kale and Barley Salad

Ingredients:

  • 1/3 cup pearl barley
  • 1 large bunch of kale
  • 1 heaping tablespoon tahini
  • 1 teaspoon lemon juice or apple cider vinegar
  • 1/2 teaspoon honey
  • 1/4 teaspoon soy sauce
  • 1/4 cup olive oil or sesame oil
  • 1/3 cup dried cranberries
  • 2 ounces crumbled feta cheese
  • 1/2 cup walnuts

Directions:

  1. Boil one cup of salted water.  When the water boils, add barley and reduce heat to a simmer.  Cook until done and the water has evaporated, about 20 minutes.  (Depending on the grain you’re using and other factors, these directions may vary.  Use your best judgment.)
  2. While the barley is cooking, prepare the kale:  Tear bite-sized pieces off the tough ribs and wash thoroughly.  Spin dry and place in a very large bowl.
  3. Make the dressing:  In a bowl, combine tahini, vinegar, honey, and soy sauce.  Mix in oil.  Pour it over the kale and mix it in with your hand.  Really!  Get in there and massage and squeeze the kale, to make the dressing stick and soften up the tough leaves.
  4. Add the barley, cranberries, feta, and walnuts.  Toss again and refrigerate until ready to serve.

Explore, experiment, enjoy! — Dana


To view even more of Dana’s unique recipes, you can visit her at Frugal Girlmet!

Tahini Pancakes

Tahini Pancakes resize

Oh, pancakes!   We all love them.  But sometimes you just don’t want to make them, even when the kids are whining for them.  They take time to mix up (unless you’re using a pre-made mix like Bisquick…in which case, check out that long list of chemicals and preservatives!), and they’re pretty high in carbs.  Ready for a game changer?  Try these Tahini Pancakes!

This recipe is just three ingredients long.  WHAT?!?!  All you need is a very ripe banana, an egg, and a tablespoon of tahini.  You could use another kind of nut butter, but we use tahini to avoid allergies in my house.  Tahini is an amazing thing.  I keep a can of it in my fridge at all times, because it is crucial to homemade hummus, baba ghanoush, and this kale salad.  It’s just sesame seed butter, but it’s lovely.  These pancakes have no gluten and no nuts, plus they’re high in protein.  Win! Win!

Dress these up however you like.  Add in chocolate chips, coconut flakes, or raisins.  They don’t rise like regular pancakes, but they’re certainly more substantial than a crepe.  Try them for breakfast tomorrow and you—and your pancake-loving kids—will thank me!

Tahini Pancakes

(makes two six-inch pancakes.  Go ahead and double or triple the recipe if you like.)

Ingredients:

  • 1 large egg
  • 1 overripe banana
  • 1 heaping tablespoon tahini
  • coconut oil or butter for the pan

Directions:

  1. Heat a small skillet over medium heat.  Add a teaspoon or so of coconut oil or butter.  Make sure the pan is really well lubricated.  These pancakes can fall apart if they stick.
  2. In a bowl, beat the egg.  Mix in the banana and mash and mix well.  Beat in the tahini.
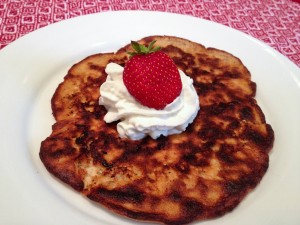
  3. Pour half the pancake batter into the frying pan and reduce the heat to medium low.  Let cook for a few minutes until, like a normal pancake, it gets dry with burst air bubbles on top.  Very carefully, flip the pancake over and turn the heat all the way to low, or even turn it off.  Let cook a minute or two, then slide off the pan and onto a plate.  Smother with whipped cream and berries, or maple syrup, sliced bananas and walnuts.

Explore, experiment, enjoy! — Dana


To view even more of Dana’s unique recipe, you can visit her at Frugal Girlmet!

Baked Beans

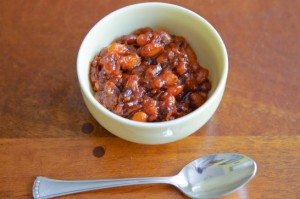
Baked Beans resize Happy Independence Day!  I’m hoping you are able to celebrate with family and friends today.  What’s on the menu? One of my guilty food pleasures is a right-off-the-grill hot dog.  I know, not the most gourmet of foods, or the healthiest, but everything in moderation, right? And what goes better with hot dogs than baked beans?  Now you could just open a can of baked beans and plop them in a saucepan, but where’s the fun in that? Make your own!

Once I decided to do just that, I found my Mom’s recipe for baked beans.  That poor note card has seen better days, but its hard-used appearance proves what a popular recipe it is.
Baked Beans Recipe Card Mom resize
 
I didn’t have any canned white beans in the pantry, but I did have a one-pound bag of dried white beans. They take more preparation than canned beans (obviously – canned beans come out ready for use) but are worth the effort.  First, dried beans are cheaper than their canned cousins, because once you soak and rehydrate them, they double in weight. (Put another way, when you buy canned beans, you are paying for water.)  Second, you are avoiding any salt, preservatives, or chemicals in the canned beans, not to mention the chance of BPA in the can itself.
 
Anyway, I soaked the beans the night before, but they double in size, so I only used half. (You could freeze the rehydrated beans in a Ziploc bag and thaw them when you have another recipe for them.)  I used my Mom’s recipe as a jumping off point, and they were just as delicious as hers were.  I realized they don’t need to bake in the oven and are great on the stovetop—that way you won’t have to heat up your kitchen on a hot summer day to make them.  These are easy, cheap to make, and will impress everyone who has them.  Hearty, smoky, and fantastic, these put those  gloopy canned baked beans to shame!

Baked Beans

Ingredients:
  • 1/2 pound dried white beans, soaked overnight in 6 cups water (or use 2 cans of white beans, reserving some of the canning liquid)
  • 5 slices bacon, diced 
  • 1 onion, diced
  • 3/4 cup ketchup
  • 1 tablespoon mustard
  • 1/4 cup BBQ sauce (optional, but I like the smokiness – you could also try a few dashes of liquid smoke)
  • 1/4 cup molasses
  • 1/4 cup dark brown sugar
Directions:
  1. If you are using canned beans, skip to Step 2.  If you are using dried beans: Drain the water from the beans you soaked overnight. Put the beans in a pot, cover with about 4 cups of water and a lid, and cook over medium heat for about 2 hours. You don’t want to cook off all the water, so check in on them every once in a while. When they’re done, save about a cup of the cooking water to use in the baked beans, in case you like them a little “saucier” than I do.  
  2. In a Dutch oven or very heavy-bottomed pot, fry the bacon. When it’s about halfway to crunchy, add the onion. When the bacon looks done, add the beans. Turn the heat down to low and stir everything together for a few minutes.
  3. Add the rest of the ingredients and stir to combine. Give it a taste and see if you need to adjust the seasonings. It likely won’t need salt, but you may like some pepper.
  4. Cover and cook on low heat for half an hour. Check the consistency – if it’s too thick, add some of the bean cooking water; too thin, take the lid off and let simmer.  Serve hot.
Explore, experiment, enjoy! — Dana


To view even more of Dana’s unique recipe, you can visit her at Frugal Girlmet!
Popsicles!

apple popsicle

I guess this is less of a recipe, and more of an exhortation:  You should be making your own popsicles this summer!  My mom made these Popsicles for us when we were kids, and now my girls are helping me make them, and loving the results.

The most basic thing you can do is just freeze apple juice.  That’s it!  My girls like pieces of fruit in their popsicles, too.  The first run was halved cherries frozen in the apple juice, and the next batch was chopped strawberries.  You can do just about anything:  concord grape juice, lemonade, pureed watermelon!  Nearly any fruit you like can be added in—just make sure you chop it into small bits, and kind of stir it around with the juice to make sure you don’t have a just a big clump of fruit in the middle.

What’s even better than popsicles?  Jell-o Pudding Pops!  These are just like the ones I’d eat as a kid, when they still sold them in stores (remember this commercial?)  They’re easy and so good.

My popsicle set is this one:

zoku mini pops


I like the small size for my little girls.  You can also use it to make cake pops, but I haven’t done that (yet?).  Check online or in housewares stores to find the popsicle molds best for your family.  Let’s get freezing!

Apple Strawberry Popsicles

Makes 9 mini popsicles

Ingredients:

  • 1/2 cup minced fresh strawberries
  • 1 cup apple juice

Directions:

  1. Make sure popsicle mold is clean!  Chop strawberries and put a teaspoon of fruit in each mold.  Fill the mold to the line with apple juice and stir to distribute fruit.  Insert sticks into popsicles.
  2. Freeze for 6 hours.  Pop out of the molds and watch your kids’ faces light up!


Jell-O Pudding Pops

Ingredients:

  • 1 small package Instant Jell-O Pudding (go for the chocolate!)
  • 2 cups milk

Directions:

  1. Quickly whisk together pudding mix and milk.  Spoon into molds and insert sticks.
  2. Freeze.  Eat.  Watch reruns of The Cosby Show!


Explore, experiment, enjoy!
 — Dana


To view even more of Dana’s unique recipe, you can visit her at Frugal Girlmet!

Cranberry Orange Scones (Gluten-Free)

Cranberry Orange Scones resize

If you have kids, you probably know what summer break is like:  trying to keep them busy and entertained without letting their brains turn to mush!  One of my favorite ways to do that is baking together.    I have my older girl (first grader now!) read the recipe out loud, and both girls love to stir and mix and pour ingredients.  Today’s group baking exercise?  Cranberry Orange Scones!

These are gluten-free, made with coconut flour.  If you’ve never tried it, I can’t recommend it highly enough.  For six big scones, you only need half a cup of coconut flour!  I like making treats for the girls that are single serving – that way there’s no arguing over whether the slice of bread is big enough, or having to share the last one.  These came together in a snap.  The original recipe (found on the Elana’s Pantry website) directs you to mix all the ingredients in a food processor, and I’m sure that would have made the recipe go even faster!  But because my girls wanted to help, we mixed them by hand – dry ingredients in a large bowl, wet ingredients in a smaller bowl, and then mixed wet into dry.

Try these little heaven-scented beauties today!

Cranberry Orange Scones (Gluten-Free)     makes six large scones

Ingredients:

  • 1/2 cup coconut flour
  • 1/4 teaspoon salt
  • 1/4 teaspoon baking soda
  • 1/4 cup coconut oil or softened butter
  • 1/4 cup honey
  • 4 eggs
  • 1/2 cup dried sweetened cranberries
  • zest of one orange, plus the juice of half the orange

Directions:

  1. In a large bowl, blend together the flour, salt, and baking soda.
  2. In another bowl, beat together the coconut oil or butter, honey, and eggs.
  3. Mix the egg mixture into the flour mixture.  Stir in the cranberries, orange zest, and orange juice.
  4. On a Silpat mat or parchment paper, make six mounds of dough.
  5. Bake for about 15 minutes at 350*F.

Explore, experiment, enjoy! — Dana


To view even more of Dana’s unique recipe, you can visit her at Frugal Girlmet!