November 25, 2024

Lunch for One: Baked Potato with Broccoli and Cheese

Broccoli Cheese Potato

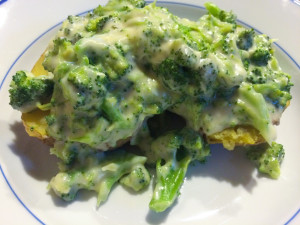
There are many reasons you’d want to have a stash of “table for one” recipes:  You could be a stay-at-home mom (or work-from-home mom, like me) and you don’t want hot dogs or buttered noodles or whatever it is your toddler will deign to consume this week; it could be you live alone and don’t need to make a recipe that serves 6; or it could be a case where the other people around you want something else, and you need a dish you can whip up quickly just for you.   Whatever the case, this Baked Potato with Broccoli and Cheese feeds one person perfectly!

I cooked both the potato and the broccoli in the microwave.  You could use leftover baked potatoes; you could also use frozen broccoli instead of fresh.  The important thing is the cheese sauce!  No Velveeta here – just regular ingredients you have around your house come together in 4 minutes for a creamy, healthy sauce.  I had a little Boursin cheese leftover – about an ounce – or you could use goat cheese or even cream cheese if you don’t have Boursin.  If you have none of those and are just using grated cheese, add about a quarter cup more cheese, plus a hefty shake of garlic salt or garlic powder.

Lunch for One:  Baked Potato with Broccoli and Cheese

Ingredients:

  • 1 potato (any kind – I like Yukon Gold)
  • 1 small head of broccoli (or use about 8 ounces frozen broccoli)
  • 2 tablespoon butter
  • 1 tablespoon flour
  • 1/2 cup milk
  • 1/2 cup shredded cheese
  • 1 ounce Boursin or goat cheese (or use cream cheese, plus garlic powder, salt and pepper)

Directions:

  1. Chop the broccoli into smallish pieces, and microwave until steamed.  Not too crisp, but definitely not mushy.  Set aside.
  2. Microwave the potato.  I poked holes in the potato with a fork, wrapped it in a wet dishcloth, and microwaved until soft and pliable.  Set aside.
  3. In a pan, melt the butter and add the flour over medium-low heat.  Stir together (this is a roux) for about 2 minutes.
  4. Add the milk and stir until it blends into the sauce and starts to thicken.  Add the cheeses (and spices if using) and stir until hot and melted.
  5. Stir the broccoli into the cheese sauce.  Split the potato in half and smother with broccoli and cheese.

Explore, experiment, enjoy! — Dana


To view even more of Dana’s unique recipe, you can visit her at Frugal Girlmet!
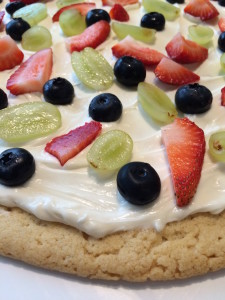
Fruit Pizza

Fruit Pizza Close

My daughter turned four last week, and we had her friends over for an old-school birthday party:  pizza, some play time, and cake.  Except…instead of cake…I presented her with another pizza:  this Fruit Pizza!  All the kids thought it was hilarious – and then the glorious silence of small children who are too busy eating to talk!

This is incredibly easy.  Just make sure you give yourself enough time for the cookie to cool before you frost it.  You can use homemade sugar cookie dough, but a log of store-bought cookie dough saves time and is just as good.  Decorate with any fruits you like – the more colorful the better! – but if you think you might have a lot of leftovers, save really delicate or juicy fruits – like kiwi, mandarin oranges, or bananas – until you are ready to eat it.

Fruit Pizza

Ingredients:

  • 1 tube of refrigerated sugar cookie dough
  • 6 ounces softened cream cheese
  • 1/2 cup powdered sugar
  • 1/2 teaspoon vanilla extract
  • 2 – 4 tablespoons milk (optional, to thin out the frosting)
  • squeeze of lemon (optional, but I like a more balanced frosting)
  • 2 cups sliced fruit of your choice – berries, halved grapes, sliced kiwi, mandarin oranges, whatever you like – the more colorful, the better!

Directions:

  1. Preheat oven to 350*F.  Cover your largest baking sheet (or a pizza stone!) with parchment paper.  Spread out the cookie dough into a big circle.  (I put a plastic baggie over my hand because the dough was sticking and it worked well.)  Flatten to about 1/4″ thick.  Bake until lightly golden – it took about 22 minutes for me.  Keep in mind – the dough will spread a lot!  If you don’t have a very large baking sheet, you may want to make your pizza oval-shaped, just so it doesn’t climb up the sides of your baking sheet when it spreads.  Remove from the oven and set aside to cool.
  2. In a large mixing bowl, beat together the softened cream cheese,  vanilla extract, and powdered sugar.  If you would like a smoother frosting, add a tablespoon of milk at a time, until you reach your desired texture.  Also you can add a squeeze of lemon (it balances out the sweetness.)
  3. When the cookie crust is cool, cover with the frosting, but leave a border around the edges (so you can see the pizza “crust”).  Decorate with sliced fruit and serve.  Keep refrigerated.

Explore, experiment, enjoy! — Dana


To view even more of Dana’s unique recipe, you can visit her at Frugal Girlmet!
School Birthday Muffins

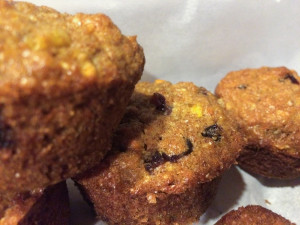
School Birthday Muffins

It’s nice to be able to make a healthy snack for your family.  It’s also nice to have a recipe in your arsenal that makes a LOT of healthy snacks!  This recipe for School Birthday Muffins fits that bill!

This is a recipe my daughter’s preschool gave me in case I wanted to bring a treat for her birthday.  No nuts, so we can include kids with nut allergies, and pretty healthy to boot.  The recipe specifies “6 cups of chopped fruit,” so that leaves it open to a lot of variations.  You can easily use six cups of mashed banana, if you want to make it easy on yourself!  Also try canned pumpkin, or a combination of berries and bananas.

Next time one of your little ones has a birthday, maybe bring these to share with her class.  Your child’s teacher will thank you!

School Birthday Muffins (adapted from the Moosewood Cookbook)
(makes 3 dozen)

Ingredients:

Wet

  • 2 sticks butter, or soy margarine, or vegan butter, room temperature
  • 2 1/4 cups brown sugar
  • 4 eggs
  • 2 cups milk, or soy milk
  • 1 1/2 teaspoons vanilla extract
  • 6 cups chopped fruit – I used 3 apples and 1 cup of baby carrots, chopped in the food processor, along with 2 cups of Craisins

Dry

  • 6 cups whole wheat flour
  • 3 teaspoons baking powder
  • 1 1/2 teaspoons baking soda
  • 1 1/2 teaspoons salt
  • 1 1/2 teaspoons ground cinnamon (or pumpkin pie spice)

Directions:

  1. Preheat the oven to 350*F.  Grease muffin tin or use paper liners.
  2. In a mixing bowl, cream together the butter and sugar until smooth.  Beat in the eggs; then the milk and vanilla.  With a rubber spatula, fold in the fruit.
  3. In a separate large bowl, mix the dry ingredients together.  Stir in the wet ingredients until just mixed.  Fill each muffin cup about 3/4 full of batter.
  4. Bake for about 32 minutes, or until puffy and golden.  Remove muffins from tin and cool on a baking rack.  Store in a sealed container.

Explore, experiment, enjoy! — Dana


To view even more of Dana’s unique recipe, you can visit her at Frugal Girlmet!
Banana Cake with Coconut Frosting

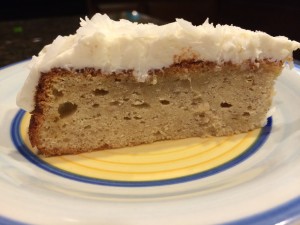
IMG_3485

We were having friends over for dinner a few weeks back, and I’d just gotten back from the store when I realized I hadn’t planned anything for dessert.  Oh no!  I did have some bananas, and I figured I had enough staples on hand to whip up a banana cake.  I lucked out and found this delicious recipe on Epicurious.com:  Banana Cake with Coconut Frosting!

This is extremely simple and it came out perfectly.  The only kind of weird thing in the recipe is the cream of coconut.  It’s not coconut milk, and it’s not coconut cream, and in fact it’s more like a syrup for making pina coladas than anything else.  I bought some earlier in the year, because I was going to make coconut-flavored yogurt for my girl.  (It’s delicious, but it does have a lot of added sugar – not exactly healthy, but okay for a splurge.)  If you don’t have it or don’t want to use it, substitute whole coconut milk or coconut cream.  Or leave it out and double the sweetened shredded coconut.  In any case, this came together quickly but was fancy enough for company.  Can’t beat that combination!

Banana Cake with Coconut Frosting

Ingredients:

For cake

  • 1 stick (1/2 cup) unsalted butter, softened, plus additional for greasing pan
  • 1 1/2 cups all-purpose flour plus additional for dusting pan
  • 1 1/2 teaspoons baking powder
  • 1/2 teaspoon baking soda
  • 1/2 teaspoon salt
  • 3/4 cup packed light brown sugar
  • 1 large egg
  • 3/4 cup well-mashed very ripe bananas
  • 1/4 cup sour cream
  • 1/2 teaspoon vanilla

For coconut frosting

  • 3 ounces cream cheese, softened
  • 3 tablespoons unsalted butter, softened
  • 1/3 cup confectioners sugar
  • 3 tablespoons well-stirred canned cream of coconut such as Coco López (not coconut milk)
  • 1 teaspoon dark rum (optional)
  • 1/3 cup sweetened flaked coconut

Directions:

  1. Put oven rack in middle position and preheat oven to 350°F.  Lightly butter and flour a 9-inch round cake pan, knocking out excess flour.
  2. Whisk together flour (1+1/2 cups), baking powder, baking soda, and salt in a small bowl.
  3. Beat together butter (1 stick) and brown sugar in a large bowl with an electric mixer at high speed until pale and fluffy. Beat in egg until combined, then add bananas, sour cream, and vanilla and beat until combined well. Reduce speed to low and add flour mixture, mixing until just incorporated.
  4. Spread batter in cake pan and bake until pale golden and a wooden pick or skewer inserted in center comes out clean, 20 to 25 minutes.  Cool in pan on a rack 10 minutes. Run a thin knife around edge of pan, then invert rack over cake and invert cake onto rack to cool completely.
  5. Make frosting while cake cools:
    Beat together cream cheese and butter in a bowl using cleaned beaters at medium speed until smooth. Reduce speed to low, then add confectioners sugar, cream of coconut, and rum (if using) and mix until combined. Increase speed to high and beat until light and fluffy, about 2 minutes.  Frost top of cooled cake and sprinkle with coconut.


Explore, experiment, enjoy! — Dana


To view even more of Dana’s unique recipe, you can visit her at Frugal Girlmet!
Oven-Roasted Pork Chops with Lemon-Caper Sauce

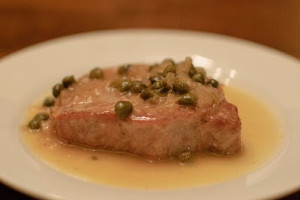
Pork Chop with Capers

Where others have a sweet tooth, I have a sour tooth. I’ve been known to use only vinegar, and skip the oil, when dressing my salad. I eat cornichons like other people eat bon-bons. So when I saw this recipe for Oven-Roasted Pork Chops with Lemon-Caper Sauce, I knew I was going to like it.

Using a recipe from my Complete America’s Test Kitchen TV Show Cookbook (which I highly recommend!), I made a few changes to work with what I had.  If you don’t have a shallot, feel free to use a red onion – just mince as finely as possible.  These pork chops are easy, quick, and nearly fool-proof.  They were tart and tangy (but not pucker…so if you are not a sour-lover like me, you won’t be put off.)
Oven-Roasted Pork Chops with Lemon-Caper Sauce

Ingredients:

  • 4 pork chops, about 1 1/2 inches thick, trimmed of excess fat
  • 2 tablespoons oil or bacon fat for cooking
  • 1 medium shallot, minced
  • 1 cup chicken broth
  • 1/4 cup lemon juice (about 2 lemons)
  • 2 tablespoons capers, drained
  • 3 tablespoons butter

Directions:

  1. Preheat oven to 450*F. Heat the oil in a large skillet over high heat, and brown the pork chops on one side, for about 2 minutes. Flip and brown the other side, another 2 minutes.
  2. Transfer the chops to a foil-lined baking sheet or large, wide baking dish (so they aren’t crowded or touching each other.) Roast in the oven until the internal temperature reaches 140*F on a thermometer, about 15 minutes, turning them over halfway through cooking time.  Remove from the oven, place on a platter, and cover with aluminum foil.  Let the chops rest for about 5 minutes, and check to make sure the internal temperature has reached 150*F.
  3. While the chops are in the oven, add the shallot to the skillet you cooked the pork chops in, and cook over medium heat until softened, about 30 seconds (about 2 minutes if you are using a red onion.)
  4. Increase the heat and add the broth, stirring to scrape up any bits stuck to the pan.  Add the lemon juice and the capers and cook until the sauce reduces to about 1/3 cup, about 4 minutes.
  5. Off the heat, whisk the butter into the sauce, and pour over the pork chops.

Explore, experiment, enjoy! — Dana


To view even more of Dana’s unique recipe, you can visit her at Frugal Girlmet!
Egg and Olive Salad

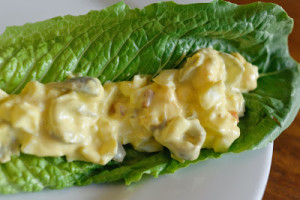
Egg Olive Salad Leaf

This was my favorite lunch when I was a kid: an Egg and Olive Salad sandwich on wheat bread, maybe with a leaf or two of lettuce, and some fruit. If your fridge looks like mine, you still have a few hardboiled pink and purple eggs in there from Easter!  What better way to use them up with this unusual spin on plain old egg salad!

This recipe is pretty bare bones, and that’s how I like it. Like any other salad, people like to add different things; please feel free to doctor this as you see fit. If you are watching your carbs or are cutting out refined and processed foods, skip the bread and serve on lettuce leaves – either in little bundles in butter lettuce leaves, or down the middle of a romaine leaf.

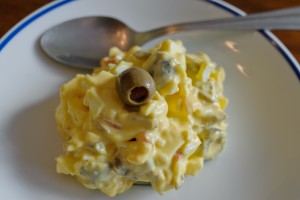
Egg Olive Salad Plate

Egg and Olive Salad

Ingredients:

  • 4 hard-boiled eggs
  • 1/4 cup green olives (preferably with pimentos)
  • 2 tablespoons mayonnaise
  • 1 teaspoon yellow mustard
  • salt and pepper (optional)

Directions:

  1. In a mixing bowl, use two knives to roughly chop the eggs. Don’t mash it, but don’t leave the chunks of egg too big. Mix in the mayo and mustard. Check for consistency – you may want a little more mayo, it’s up to you.
  2. Chop the olives and mix into the egg salad. Taste – you’ll probably want to add some pepper, but it might already be salty enough from the olives. Serve on bread or lettuce leaves.

Explore, experiment, enjoy! — Dana


To view even more of Dana’s unique recipes, you can visit her at Frugal Girlmet!
Protein Banana Bread Breakfast Bars

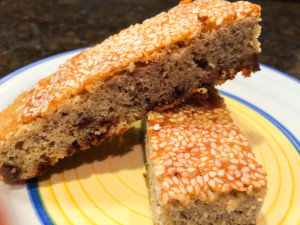
Protein Banana Bread Breakfast Bars

I found this recipe on a website called PaleOMG.  I love their photos on Instagram, and they have great ideas for healthy snacks and things to give your kids.  I changed the recipe a bit, just subbing a few things here and there, and now I present to you:  Protein Banana Bread Breakfast Bars!

That’s a mouthful.  These PBBBBs are just like banana bread, but not cloyingly sweet.  They are made with almond flour and whey protein powder, so you’re getting a good dose of protein in your sweet treat.  These were easy and delicious!  I’m storing mine in the fridge, and hope there is enough left for me to enjoy one with my morning coffee tomorrow!

Protein Banana Bread Breakfast Bars

Ingredients:

  • 2 bananas, mashed
  • 1/4 cup melted coconut oil
  • 1/4 cup maple syrup
  • 1 teaspoon vanilla extract
  • 1 egg, beaten
  • 2/3 cup almond flour
  • 1/3 cup whey protein (vanilla, but I used cinnamon!)
  • 1/4 cup tapioca or arrowroot flour
  • 1/2 teaspoon baking soda
  • 1/4 teaspoon salt
  • 1/3 cup cacao nibs (I used mini chocolate chips)
  • 1/4 cup sliced almonds (I used sesame seeds)

Directions:

  1. Preheat oven to 350*F.  Grease an 8×8 square pan.
  2. Mix all the ingredients together, except for chocolate chips and almonds.  Then fold in cacao nibs or chocolate chips.  Pour into the prepared pan, and cover the top with the almonds or sesame seeds.
  3. Bake for 20-25 minutes until the middle is set.  Cool for 10 minutes before cutting.
  4. I cut mine into 1″x4″ bars, so I had 16 servings.  Store in the fridge, covered.


Explore, experiment, enjoy! — Dana


To view even more of Dana’s unique recipes, you can visit her at Frugal Girlmet!
Bacon B.O.M.B. Jam

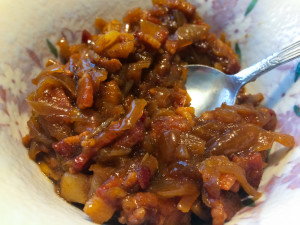
Bacon BOMB Jam

You read that correctly:  B.O.M.B.  This stuff will blow you away!  Bacon Onion Maple Bourbon Jam is an out of this world condiment you will want to smear on everything!

This is easy and amazing.  I ate some of this bacon jam on my baked salmon.  Next I’m going to try it on a cracker, maybe with a little goat cheese, or as part of an olive and cheese tray.  And I may just go off the rails and slather it on bread with cheddar and sliced apple and make the best grilled cheese sandwich I’ve ever had!  This recipe yields a cup and a half of jam.  Let’s see how long it lasts!

Bacon B.O.M.B. Jam

Ingredients

  • 3/4 pound bacon (I used 7 slices), diced
  • 2 large onions (try sweet onions, if you have them), sliced
  • 1/4 cup maple syrup
  • 1 tablespoon bourbon
  • 1/4 cup coffee (or use water if you like)

Directions:

  1. In a heavy pot with a lid, cook the bacon over medium heat.  You want all the fat to render, but you don’t want the bacon to get really crisp.  Remove the bacon from the pan, and pour out all but one tablespoon of bacon fat.  (I keep mine in a jar in the refrigerator, and use it to pan fry.)
  2. Add the sliced onions to the bacon fat in the pan.  Cover and cook on medium low for 15 minutes.  Stir, making sure nothing is burning, and cook another 10 minutes.
  3. Add the bacon, maple syrup, bourbon, and coffee; stir, making sure to scrape the bottom of the pan (use a wooden spoon).  Cover with the lid, cook another 10 minutes.
  4. Remove the lid and cook uncovered for 15 minutes.  I sort of mashed the jam with my wooden spoon to get a smoother consistency.  You can do that or you can leave it chunky.  You could even put it in a food processor and pulse a few times to get it even smoother.  Taste it and see how you like it.
  5. Refrigerate the leftovers and eat within a week.

Explore, experiment, enjoy! — Dana


To view even more of Dana’s unique recipes, you can visit her at Frugal Girlmet!
Chimichuri Sauce

Chimichuri Sauce

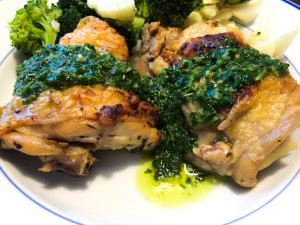
Here’s the thing:  You probably cook for your family a lot.  Or maybe you’re cooking a chicken breast for one.  Doesn’t matter.  What matters is:  Sometimes, you overcook the meat.  I know, it happens to the best of us.  (Okay, especially me, since I have a fear of giving my kids undercooked meat that gives them food poisoning.)  So what do you do?  Trash the whole thing?  NO WAY.  I’m frugal.  I scrape the black off toast.  So when you get dry chicken – or fish or beef or pork or even tofu – you sauce that thing.  Enter Chimichuri Sauce.

It sounds spicy, right?  It’s not.  It’s a milder, slimmer cousin to pesto.  Aside from being healthy for you (olive oil, parsley, garlic, and vinegar are all great for your health) – this sauce is mild enough to dress up any protein, and macho enough to save the day.

This photo is of my Chimichuri Sauce over chicken thighs.  (Yes, I cook A LOT of chicken thighs.)  Try it on beef (like the Argentinians do), chicken breasts, or the salmon filet I may or may not have just overcooked in the oven for dinner …

Chimichuri Sauce

Ingredients:

  • 1 cup parsley
  • 4 cloves garlic
  • 1/3 cup olive oil
  • salt and pepper
  • 1/2 teaspoon dried Italian herbs (or just dried oregano)
  • 3 tablespoons vinegar (or use lemon juice in a pinch)
  • optional:  hot sauce, diced jalapeño, or chile powder, to taste

Directions:

  1. In a food processor or blender, combine all ingredients.  That’s it!  Serve cold or at room temperature over protein of your choice.

Explore, experiment, enjoy! — Dana


To view even more of Dana’s unique recipes, you can visit her at Frugal Girlmet!
Strawberry Shortcake (Gluten-Free)

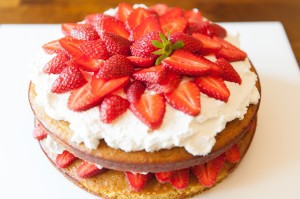
Strawberry-Shortcake-Whole-300x199This is a recipe I shared here on GCH 2 years ago.  I love it and plan on making it soon.  Spring can’t come soon enough for me, and I look forward to farmer’s markets brimming with fresh berries!  If you can’t wait either, read on for my Gluten-Free Strawberry Shortcake!

Strawberry-Shortcake-Cut


Strawberry Shortcake (Gluten-Free)

Ingredients:

  • 12 eggs
  • 1/2 cup coconut oil (or butter), softened
  • 1/2 cup coconut milk (or regular milk)
  • 1/4 cup honey (or more, if you like)
  • 2 teaspoons vanilla extract
  • 1 teaspoon grated orange zest
  • 2 tablespoon orange juice
  • 1 cup coconut flour
  • 1 teaspoon baking powder
  • 1 teaspoon salt
  • 1 cup strawberries, sliced thin
  • 1 pint heavy whipping cream
  • 1 teaspoon vanilla extract
  • optional – 1 or 2 teaspoons sugar (I didn’t use them, since my berries were really sweet. If your strawberries aren’t as sweet as you’d like, add the sugar to the whipping cream)

Directions:

  1. Preheat the oven to 350*F. Grease two 8-inch round cake pans, and then cut a circle of parchment paper for the bottom of each pan, and grease that too. (You can do this without parchment paper, but you will need to be really liberal with the coconut oil / butter / cooking spray on the bottom of the pan. The cake stuck the first time I made it, so the next time I used parchment paper, and it was perfect!)
  2. In a very large bowl, using a stand mixer or a hand mixer, beat the eggs until frothy. Beat in the softened coconut oil and milk, blending well. Mix in the honey, vanilla, orange zest and orange juice. Beat until foamy again.
  3. In a small bowl, stir together the coconut flour, baking powder and salt. Then, a little at a time, blend the flour mixture into the egg mixture. Mix well, making sure there are no lumps.
    Divide the batter between the two prepared pans and bake for 35-40 minutes. When a toothpick comes out dry, remove from the oven and cool for ten minutes. Remove from pans, and finish cooling on a rack.
  4. While the cake is cooling, place the beaters of your hand mixer and a metal mixing bowl in the freezer for half an hour. Slice the strawberries and put back in the fridge until ready to use.
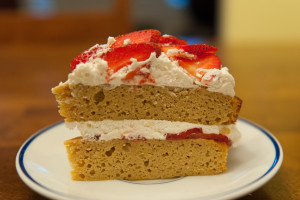
    When the beaters and bowl are very cold, beat the whipping cream with the vanilla (and optional sugar) until stiff peaks form. To decorate: spread a very thin layer of whipped cream on the top of one cake. Make concentric circles of strawberry slices (use half the strawberries, saving the other half for the top), then cover with a thick layer of whipped cream. Place the other cake on top of this, cover with the rest of the whipped cream and the rest of the strawberries. Refrigerate until ready to serve.

This is not a very sweet cake, since it relies on the berries for sweetness. If your berries are not sweet enough for your taste, you can add more honey to the cake, and the optional sugar to the whipped cream.

Explore, experiment, enjoy! — Dana


To view even more of Dana’s unique recipes, you can visit her at Frugal Girlmet!