January 22, 2025

Lemon Basil Cookies

Lemon Basil Cookies

If your FaceBook newsfeed or email are anything like mine, you’ve got dozens of recipes to view every day.  From pages you ‘liked’ to friends sharing recipes, I’m bombarded with recipes for tasty treats all day long!  However, I saw this recipe for Lemon Basil Cookies on the Elana’s Pantry website, and I said to myself – that’s the one I’m going to make today!

I still have lots of basil growing in my flower bed, so that was handy to come by.  Almond flour is easy to find at the store now, and you can also make your own if you choose.  These cookies are herbal and fresh tasting, with a nice balance of flavors.  In fact, I tasted a bit of salt in mine from the salted butter I used, which offset the sweetness.  You may choose to add another tablespoon of honey, because these cookies are not overly sweet.  Try them and see – perfectly balanced, deliciously different!

Lemon Basil Cookies  (Recipe from Elana’s Pantry)

Ingredients:

  • 2 cups blanched almond flour
  • 1/4 teaspoon salt
  • 1/4 teaspoon baking soda
  • 1/4 cup coconut butter (I used regular butter and they came out great!)
  • 1/4 cup honey
  • 1 tablespoon chopped fresh basil
  • 1 teaspoon lemon zest

Directions:

  1. Preheat oven to 350*F.
  2. In the bowl of a food processor, blend together the almond flour, salt, and baking soda.
  3. Add the butter, honey, basil and lemon zest.  Blend again until a ball of dough forms.
  4. Line baking sheets with parchment paper, or use a Silpat mat.  Scoop a teaspoon full of dough and drop it on the parchment paper.  These cookies spread, so give them some room!
  5. Cook for about 8 minutes.  Remove from the oven and let cool on the cookie sheets for an hour.
  6. Store in a sealed container.  This made about 18 cookies for me.
Explore, experiment, enjoy! — Dana

To view even more of Dana’s unique recipe, you can visit her at Frugal Girlmet

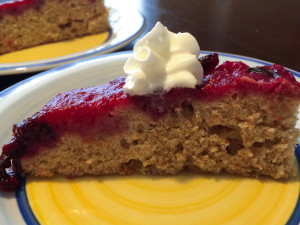
Plum and Basil Upside-Down Cake

Plum Basil Upside Down Cake

I  hadn’t really planned on baking a cake today.  But every Friday, I need to have a post up for you fine ladies, and sometimes…{sigh}.  The kids are acting crazy, work is busy, the husband has to work late—you know how it is.  So, you make all the family favorites for dinner because it’s easy and you don’t have to think about it.

This week, however, I was really stumped.  I looked in my fridge:  I had a LOT of plums to deal with that were edging toward soft.  I also have a basil plant in my front yard that I’m in love with!   I am plucking off leaves daily and trying to find new uses for it.  Well, I did a Google search for “plums and basil”…and guess what came up?  This Plum and Basil Upside-Down Cake!

It was easy to make and, while not instantaneous to whip up, I could still do it in steps—in between washing dishes, or folding some laundry.   You don’t need the basil in this recipe, but it adds a lovely complexity to the flavor and elevates it from being just another sweet cake.  If you don’t have plums, use nectarines or peaches – both taste great with basil.

Plum and Basil Upside-Down Cake

(click here for the original recipe)

Ingredients:

  • 1/4 cup plus 2 teaspoons butter, divided use
  • 1 pound large plums – any kind, or peaches or nectarines – pitted and quartered (about 6 plums)
  • 1 1/4 cups sugar, divided use
  • 1/2 cup packed fresh basil leaves, roughly chopped
  • 1 1/2 cups whole wheat flour (or use regular flour)
  • 1 1/2 teaspoons baking powder
  • 1/4 teaspoon salt
  • 2 eggs
  • 3/4 cup buttermilk (I used plain yogurt instead)

Directions:

  1. Melt 2 teaspoons butter in a large nonstick skillet over medium heat. Add plums, and cook for 3 minutes.  Add 1/2 cup sugar, basil, and a pinch of salt.  Cook for 10 minutes or until plums are tender, stirring frequently.  Remove plums from pan using a slotted spoon.  Bring cooking liquid to a boil.  Cook 5 minutes or until liquid is very thick, like jam.  Strain liquid through a sieve to remove basil.
  2. While the liquid reduces, arrange plums in the bottom of a 9-inch cake pan (I used square, but the author recommends round) coated with cooking spray.  Pour the liquid over the plums.  Let cool.  (I actually reserved about 3 tablespoons of the liquid for another use – read on!)
  3. Preheat oven to 350F*.  In a medium bowl, whisk together the flour, baking powder, and salt.  In a separate bowl, beat the remaining 1/4 cup butter and remaining 3/4 cup sugar with an electric mixer until fluffy.  Add one egg at a time, beating well. Add flour and buttermilk (or yogurt) alternately to sugar blend, beginning and ending with flour.  Pour batter over plums, spreading evenly.
  4. Bake for about 50 minutes, or until a wooden toothpick comes out clean.  Let cool for 10 minutes.  Run a knife around the edge of the cake.  Invert onto a plate.  Cool and serve plain, or with whipped cream, or even vanilla ice cream!

I saved a bit of the plum syrup.  My husband got a promotion today (Praise the Lord!), and I’m going to surprise him with a glass of sparkling wine with a teaspoon of the plum syrup stirred in for a champagne cocktail!  If you don’t like champagne, I bet this plum syrup would be delicious stirred into sparkling water or iced tea too.

Explore, experiment, enjoy! — Dana


To view even more of Dana’s unique recipe, you can visit her at Frugal Girlmet
Peach Pie Waffles

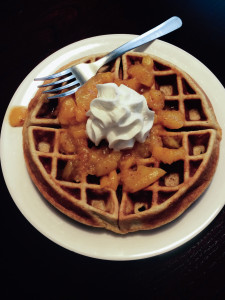
Peach Pie Waffles

The kids were clamoring for waffles.  They usually like berries and maple syrup, but I had a better idea:  Peach Pie Waffles!  They ate these things up like they were going out of style!

The waffle recipe is straight from Martha Stewart.  She is my go-to resource when I’m checking out a basic recipe.  No waffle iron?  Make pancakes with the batter instead!  These are quick to put together and the leftover waffles (if you have any – it made four waffles for me) freeze and reheat very well.  If you have any leftover peaches, mix them into plain or vanilla yogurt for breakfast.  Ready?  It’s easy as pie!

Peach Pie Waffles

(makes 4 waffles)

Ingredients:

  • 1 large can of sliced or halved peaches, lightly drained
  • 1/2 teaspoon cinnamon
  • 1/4 teaspoon grated nutmeg
  • 1 cup flour (I used whole wheat – you can use regular, too)
  • 2 tablespoons sugar
  • 1 teaspoon baking powder
  • 1/4 teaspoon salt
  • 2 eggs
  • 1 cup milk
  • 4 tablespoons butter, melted
  • whipped cream to serve

Directions:

  1. In a medium non-stick pan (or use a regular pan and add a tablespoon of butter!) pour in the can of peaches.  Add the cinnamon and nutmeg.  Let simmer while you make the waffles.  Mash them with a potato masher if you like, or with the back of a fork.  Keep an eye on them to make sure nothing burns.
  2. In a large bowl, mix together the flour, sugar, baking powder, and salt.  In a smaller bowl, beat the eggs and stir in the milk.  Whisk the egg mixture into the dry mix.  Stir in the melted butter.
  3. Make the waffles according to your waffle maker’s instructions.  Mine called for half a cup of batter for each waffle, and this recipe made four waffles.  If you’re making pancakes, you’ll get … I’m not sure.  Maybe 8?  Anyway, cook them how you normally do, then set aside and plate up.
  4. To serve:  top each waffle with a ladle of hot peaches and a good shot of whipped cream.

Explore, experiment, enjoy! — Dana


To view even more of Dana’s unique recipe, you can visit her at Frugal Girlmet
 

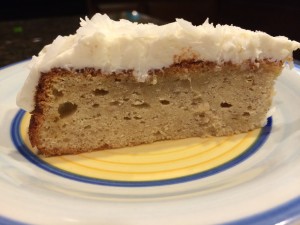
Banana Cake with Coconut Frosting

IMG_3485

We were having friends over for dinner a few weeks back, and I’d just gotten back from the store when I realized I hadn’t planned anything for dessert.  Oh no!  I did have some bananas, and I figured I had enough staples on hand to whip up a banana cake.  I lucked out and found this delicious recipe on Epicurious.com:  Banana Cake with Coconut Frosting!

This is extremely simple and it came out perfectly.  The only kind of weird thing in the recipe is the cream of coconut.  It’s not coconut milk, and it’s not coconut cream, and in fact it’s more like a syrup for making pina coladas than anything else.  I bought some earlier in the year, because I was going to make coconut-flavored yogurt for my girl.  (It’s delicious, but it does have a lot of added sugar – not exactly healthy, but okay for a splurge.)  If you don’t have it or don’t want to use it, substitute whole coconut milk or coconut cream.  Or leave it out and double the sweetened shredded coconut.  In any case, this came together quickly but was fancy enough for company.  Can’t beat that combination!

Banana Cake with Coconut Frosting

Ingredients:

For cake

  • 1 stick (1/2 cup) unsalted butter, softened, plus additional for greasing pan
  • 1 1/2 cups all-purpose flour plus additional for dusting pan
  • 1 1/2 teaspoons baking powder
  • 1/2 teaspoon baking soda
  • 1/2 teaspoon salt
  • 3/4 cup packed light brown sugar
  • 1 large egg
  • 3/4 cup well-mashed very ripe bananas
  • 1/4 cup sour cream
  • 1/2 teaspoon vanilla

For coconut frosting

  • 3 ounces cream cheese, softened
  • 3 tablespoons unsalted butter, softened
  • 1/3 cup confectioners sugar
  • 3 tablespoons well-stirred canned cream of coconut such as Coco López (not coconut milk)
  • 1 teaspoon dark rum (optional)
  • 1/3 cup sweetened flaked coconut

Directions:

  1. Put oven rack in middle position and preheat oven to 350°F.  Lightly butter and flour a 9-inch round cake pan, knocking out excess flour.
  2. Whisk together flour (1+1/2 cups), baking powder, baking soda, and salt in a small bowl.
  3. Beat together butter (1 stick) and brown sugar in a large bowl with an electric mixer at high speed until pale and fluffy. Beat in egg until combined, then add bananas, sour cream, and vanilla and beat until combined well. Reduce speed to low and add flour mixture, mixing until just incorporated.
  4. Spread batter in cake pan and bake until pale golden and a wooden pick or skewer inserted in center comes out clean, 20 to 25 minutes.  Cool in pan on a rack 10 minutes. Run a thin knife around edge of pan, then invert rack over cake and invert cake onto rack to cool completely.
  5. Make frosting while cake cools:
    Beat together cream cheese and butter in a bowl using cleaned beaters at medium speed until smooth. Reduce speed to low, then add confectioners sugar, cream of coconut, and rum (if using) and mix until combined. Increase speed to high and beat until light and fluffy, about 2 minutes.  Frost top of cooled cake and sprinkle with coconut.


Explore, experiment, enjoy! — Dana


To view even more of Dana’s unique recipe, you can visit her at Frugal Girlmet!

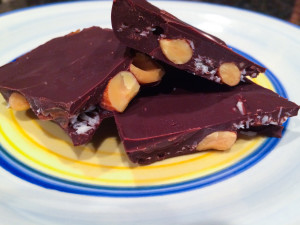
Almond Joy Chocolate Bark

Almond Joy Chocolate Bark

What’s Valentine’s Day without some chocolate?  This is pretty healthy stuff though, so as long as you don’t eat the whole batch in one sitting, you can have a treat and not be naughty.  Almond Joy Chocolate Bark is the way to go!

I love dark chocolate and I use the darkest I can find in the grocery store.  Here I used a bag (11.5 oz) of 63% cacao Guittard chocolate chips, but feel free to use whatever dark chocolate you like.  I also used roasted, salted almonds because that little bit of salt really offsets the sweet and makes the flavors pop.  If you want a sweeter bark, you can use “Angel Flake” coconut that has sugar added.  I used unsweetened coconut flakes and it’s quite yummy!  I also used 2 tablespoons of coconut oil.  I like that it makes the chocolate a little smoother, and I think it tastes great too.  You can leave it out if you don’t have it.

Give some to your sweeties, treat your friends at work, or just nibble on this chocolate bark and enjoy some quiet time.  Happy Valentines Day!

Almond Joy Chocolate Bark

Ingredients:

  • 1 bag of semi-sweet chocolate chips (use the darkest chocolate you can find, with the highest percent of cacao)
  • 2 tablespoons coconut oil
  • 1 cup whole, roasted, salted almonds
  • 1/3 cup shredded, unsweetened coconut

Directions:

  1. In an oven-safe bowl, microwave the chocolate and coconut oil together for 30 seconds.  Stir very well with a rubber spatula, then microwave again.  Keep doing this until your chocolate and coconut oil are smooth and blended.  Mine took 3 blasts of 30 seconds each.
  2. Line an 8×8 baking pan with plastic wrap.  Pour in 1/3 of the melted chocolate and spread over the bottom of the pan.
  3. Spread the almonds over the chocolate layer and sprinkle with coconut.
  4. Pour the rest of the chocolate over the almonds and coconut and lightly spread to cover.  Put in the freezer for about 2 hours until solid.  Cut or break into 2″ pieces.

Explore, experiment, enjoy! — Dana


To view even more of Dana’s unique recipe, you can visit her at Frugal Girlmet!

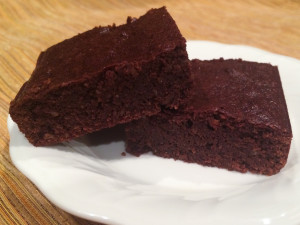
GF Brownies

GF Brownies

Guilt-free?  Gluten-free?  Girl friends?  Yes, all the above!  As usual, I have taken a recipe, tweaked some things here and there for my family, and made a treat that’s gluten-free, nearly guilt-free, and sure to please all your girl friends!  Here are my GF Brownies!

The three ingredients you’ll need to shop for are coconut flour, almond flour, and coconut oil.  You know what?  You can even trade in the coconut oil, if it’s not your thing, for half a stick of butter.  Now just pick up some coconut and almond flours, use what you need, and store them indefinitely in the freezer.  Frugal!

These are fudgy but not pasty.  There’s a difference!  They’re chewy but they don’t become glue in your mouth.  Super easy.  Let’s go!

GF Brownies

Ingredients:

  • 1 cup dark chocolate chips – the higher the cacao percent, the better!  (These were 64%)
  • 1/4 cup coconut oil (or use butter)
  • 1/2 teaspoon cinnamon
  • 1/2 teaspoon vanilla extract
  • 1/2 teaspoon salt
  • 4 eggs
  • 1/2 cup maple syrup (or you could use brown sugar)
  • 1/2 cup almond flour
  • 2 tablespoons coconut flour
  • butter or coconut oil to grease the pan

Directions:

  1. Preheat the oven to 350*F.  Grease an 8×8 square pan.
  2. In a large pot, melt the chocolate chips and coconut oil together over medium-low heat, stirring constantly.  When the mixture is smooth, remove from heat.  Whisk in the cinnamon, vanilla, and salt.
  3. In a smaller bowl, beat the four eggs together.  Slowly whisk them into the chocolate mixture (make sure it’s cool enough so you don’t make scrambled eggs!)  Whisk in the maple syrup.
  4. A little at a time, whisk in the almond and coconut flours.  Whisk thoroughly, so you don’t have lumps.
  5. Pour the batter into the greased pan.  Bake at 350*F for 25-30 minutes.  Remove from the oven and cool for about an hour.  Slice into 16 squares (2×2 each).  Hide the pan from your kids!

Explore, experiment, enjoy! — Dana


To view even more of Dana’s unique recipe, you can visit her at Frugal Girlmet!

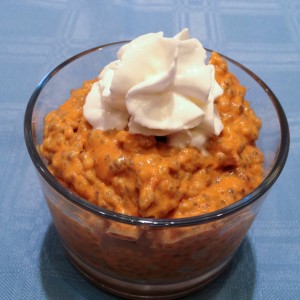
Pumpkin Chia Pudding

Pumpkin Chia Pudding resize

It seems like when we turn the calendar page to October, we all mysteriously start craving PUMPKIN!   I am not immune.   However, I didn’t want to make a big sugar bomb, so I searched around for something to satisfy the pumpkin craving and not spike my insulin.  Bingo:  Pumpkin Chia Pudding!

If you’ve never made chia pudding, now’s your chance.  I love it – the texture is a crazy blend of creamy and crunchy—like tapioca with attitude!  I make it with coconut milk, but you can try another nut milk or soy milk if that’s your thing.  This was ready to eat in an hour, and tastes just like pumpkin pie.  What more can you ask for?!

Pumpkin Chia Pudding

Ingredients:

  • 1 can full-fat coconut milk (about 2 cups)
  • 1/2 can pumpkin puree (about 1 cup, or use one cup of roasted and mashed pumpkin)
  • 1/2 teaspoon pumpkin pie spice (or combine cinnamon, nutmeg, allspice and cloves)
  • 1/2 teaspoon vanilla extract
  • 2 tablespoons honey or maple syrup
  • 1/4 cup chia seeds

Directions:

  1. In a blender or food processor, blend the coconut milk, pumpkin puree, pumpkin pie spice, vanilla, and honey together.
  2. Pour into a Tupperware container with a tight-fitting lid, or a very large jar with a lid.  Add the chia seeds and Shake!  Shake!  Shake!
  3. Refrigerate.  After another hour, shake again!  If it’s cold, go ahead and eat it!  Garnish with a little whipped cream if you like.

Explore, experiment, enjoy! — Dana


To view even more of Dana’s unique recipe, you can visit her at Frugal Girlmet!

Cheesecake Baked Apples

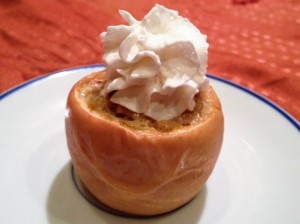
Cheesecake Baked Apples resize

I love baked apples.  They’re tender yet sturdy, and you can fill them with lovely loads of raisins, spices and nuts.  Since my girl is allergic to nuts, I needed to find something different.  Ta-da!  Cheesecake Baked Apples!

I used Gala apples, and I would suggest you use either Galas or Fujis.  You can top these with whatever you like – nuts, crumbled cookies, or even ice cream!  We kept it simple and added some whipped cream.

You know a dessert is a winner when it suddenly grows quiet in the dining room.  My girls were so serious eating these healthy treats they stopped their near-constant girl chatter.  Try these easy baked apples today!

Cheesecake Baked Apples

Ingredients:

  • 6 apples (use Gala or Fuji)
  • 8 ounces cream cheese, softened
  • 1/4 cup sugar
  • 1 teaspoon vanilla
  • 1 egg
  • 1 teaspoon cinnamon (I added a little ground nutmeg, too)

Directions:

  1. Slice off the top of the apples.  With a knife, cut out the core and scoop out the apple flesh. You want to leave at least 1/4 inch of apple “wall.”   Make sure you don’t cut through the bottom!
  2. In a bowl, blend together the cream cheese, sugar, vanilla, egg, and cinnamon.  If you like, you can add a little bit of the scooped-out apple flesh; just chop it up and stir it in.  Fill the apples about 3/4 full.
  3. Bake for about 20 minutes in a 350*F oven.  Remove and chill in the refrigerator until ready to serve.

Explore, experiment, enjoy! — Dana


To view even more of Dana’s unique recipe, you can visit her at Frugal Girlmet!

Homemade Strawberry Ice Cream (No Ice Cream Machine Needed!)

rsz_homemade_strawberry_ice_cream

A few months ago, my daughter made vanilla ice cream in her kindergarten class.  She raved about how fun it was to make it, and how the finished product was delicious.  Well, I took her story with a grain of salt (unintentional pun!) because 6 year-olds aren’t really known for their discriminating pallets.  But I researched online, found a recipe, and decided to give it a whirl.  And you know what?  If anything, she undersold it!  This stuff is fantastic!  Here’s my recipe for Homemade Strawberry Ice Cream.

We don’t have an ice cream machine.  It sounds like kind of a waste of space, because it’s not something I’d use too often.  The only equipment this recipe needs is two Ziploc bags!  The technique is easy and is perfect for kids to make.  All the recipes online were the same, so I used one (of several) you can find with a Google search.  But what’s even better than vanilla ice cream?  Strawberry ice cream!  Instead of just sprinkling chopped fruit on top, I made a strawberry puree that, when mixed into the vanilla ice cream, makes a strawberry ice cream as good (or better!) than anything you can get at the grocery store.  Also, the serving size is just right.  It’s big enough that you can satisfy two kids with this recipe, and get a taste or two for yourself.  But it’s small enough that you won’t beat yourself up if you eat the whole thing yourself!

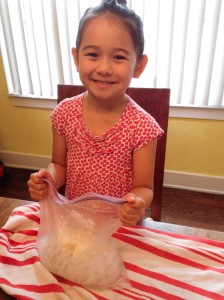
Becky puts in some sweat equity

Becky puts in some sweat equity

Homemade Strawberry Ice Cream (No Ice Cream Machine Needed!)

Ingredients:

For the Strawberry Puree:

  • 1 pint strawberries
  • 1 tablespoon honey
  • 1/4 cup water

For the Ice Cream:

  • 1 cup half-and-half (or use 1/2 cup whipping cream and 1/2 cup whole milk)
  • 2 tablespoons sugar
  • 1/2 teaspoon vanilla
  • 1/2 cup rock salt or kosher salt (whatever you can find that has big grains of salt, the bigger the better)
  • ice
  • sandwich-sized Ziploc bag
  • gallon-sized Ziploc bag

Directions:

  1. First make the strawberry puree:  Wash, hull, and quarter the strawberries.  Over medium-low heat, mix together the strawberries, honey, and water.  Mash with a wooden spoon or potato masher, but leave some chunks.  Cook on low for about 20 minutes until reduced and thickened a little.  Don’t let it burn!  Take off the heat.  (You can do this the day before, if you want.  Just pop it in the fridge when you’re done letting it cool.)
  2. For the ice cream:  In a bowl, stir together the half-and-half, sugar, and vanilla.  Pour the mixture into the small Ziploc bag and make double sure it’s sealed well.
  3. Fill the large Ziploc bag halfway with ice and the salt.  Add the small bag to the ice, then cover with a little more ice.
  4. Shake!
  5. Shake!
  6. Shake!  (My bag got really cold, really fast, so I had to wrap it in a towel so it didn’t hurt my hands.)  Shake for about ten minutes.  You can squeeze the ice cream bag and tell when it’s frozen.
  7. Serve the vanilla ice cream with the strawberry puree.  Voila!
Sweet success!

Sweet success!


Explore, experiment, enjoy! — Dana


To view even more of Dana’s unique recipe, you can visit her at Frugal Girlmet!

Strawberry Overload Cake

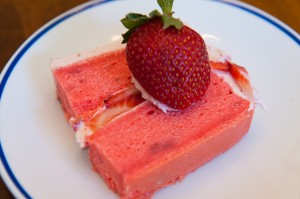
Strawberry Overload Cake sliceDespite my tomboy nature, both my daughters are girly-girls.  Princesses, fairies, dress-up, and everything pink rules their world.  This year we ended up celebrating my three year-old’s birthday on Mother’s Day, so I had a lot going on and didn’t want to spend too much time planning and decorating an elaborate cake.  Instead, I found a recipe online for a strawberry cake, created a strawberry frosting for it, and filled it with even more fresh strawberries.  The result is Strawberry Overload Cake!

The strawberry flavor comes from three sources:  fresh berries, frozen berries, and strawberry Jell-O.  Be sure to keep the cake in the fridge until time to serve.  The original recipe called for two 9-inch round cake pans, but I used a rectangular 9×13 pan and cut that in half to make two layers.  Your girly-girl will delight in the layers of pink in this sweet treat!

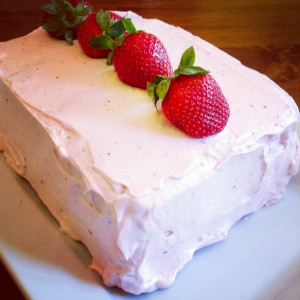
Strawberry Overload Cake resize

Strawberry Overload Cake

Ingredients:

  • 1 1/2 cups sugar
  • 1 three-ounce package of strawberry Jell-O
  • 1 cup butter, softened
  • 4 eggs, room temperature
  • 2 3/4 cups sifted cake flour
  • 2 1/2 teaspoons baking powder
  • 1 cup whole milk
  • 1 teaspoon vanilla
  • 1/2 cup pureed frozen strawberries

Directions:

  1. Preheat the oven to 350*F.  Grease and flour your pans (two 9-inch round, or one 9×13 rectangular.)
  2. Cream together the sugar, Jell-O and butter.  Blend in the eggs, one at a time.
  3. In a small bowl, mix together the flour and baking powder.
  4. Add the flour mixture and milk to the butter mixture, alternating flour and milk, and blend well.  Mix in the pureed strawberries.
  5. Pour batter into pans and bake.  Check the cakes at 25 minutes.  I took mine out at about 35 minutes, because I was using a bigger pan.  Do a toothpick test to make sure the cake is not wet inside.
  6. Cool for ten minutes in the pan, then turn out on a rack to continue cooling.

For the frosting and filling:

Strawberry Frosting

Ingredients:

  • 1 8-ounce package of cream cheese, room temperature
  • 1 stick butter, room temperature
  • 1 cup frozen strawberries
  • juice of 1 lemon
  • 1/2 cup powdered sugar
  • 1 cup whipped cream (or try Cool Whip)
  • 1 cup fresh strawberries for layering

Directions:

  1. In a pot with a lid, simmer the frozen strawberries and break them up with a wooden spoon, smashing them.  When they are all cooked and smashed, add the cream cheese, butter, and lemon juice and beat with a hand mixer.
  2. Add in the powdered sugar, beating well.  Beat in the whipped cream.  Taste.  It should be sweet tart – the cake is very sweet, so I wanted the icing to be a little different.  You can add a squeeze more lemon if you like, or  take it the other direction and add more sugar if you like.  It’s pretty flexible and you can change it to suit your taste.

To assemble:

  1. Cut the large cake in half, width-wise, so you have two 9×6 rectangles (or just put one of the round cakes on a plate.)  On a large serving platter, place the cake on the bottom, and frost the top of it with about half a cup of the frosting.  Slice the fresh strawberries and layer them over the frosting.  Carefully add another layer of frosting on top of the fresh berries.  Then place the next layer on top and frost the whole thing, top and sides.  Garnish with more fresh strawberries.
  2. This cake is kind of dense and rich, so small pieces are a good thing.


Explore, experiment, enjoy! — Dana


To view even more of Dana’s unique recipe, you can visit her at Frugal Girlmet!