November 16, 2024

Homemade Coconut Flour, and Homemade Cheezits


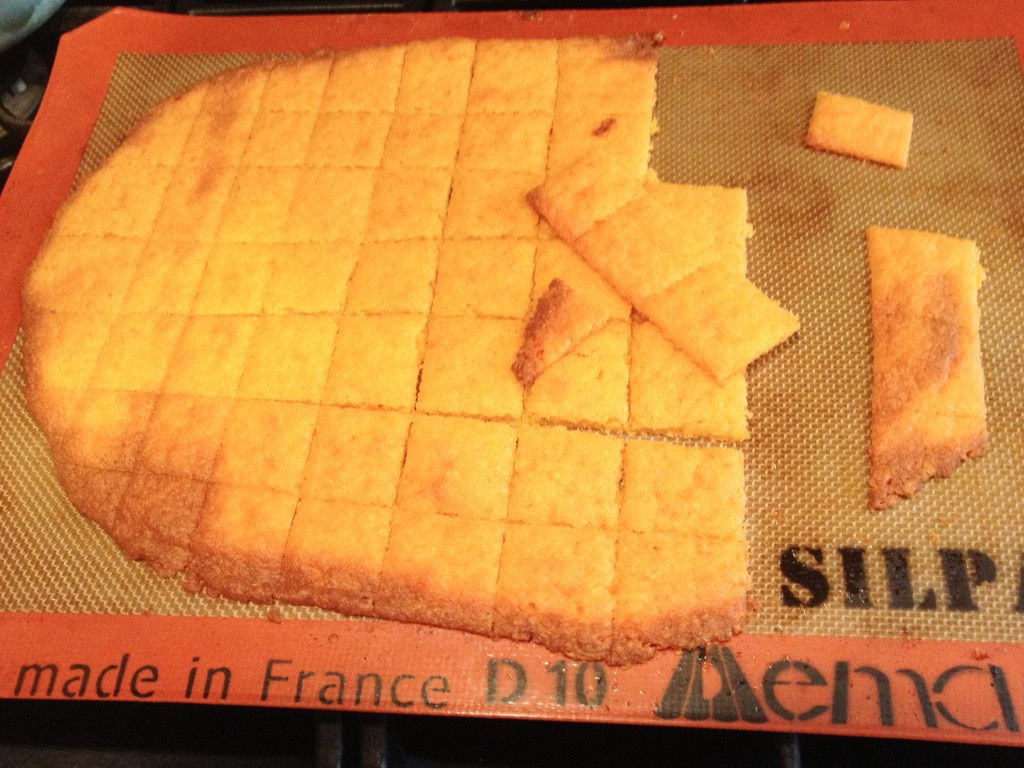
Homemade Cheezits


So, you fell in love with coconut milk too, right?  It’s your end-all, be-all, new favorite thing? That’s okay if it’s not.  But if you have made it, or plan to, you will be left with a cheesecloth-wrapped ball of pulp.  Now, someone who didn’t know better might just chuck that in the trash.  But not us!  We are going to use the pulp to make Homemade Coconut Flour and, with that flour, we’re going to make Homemade Cheezits!

First, the tools you will need:  You’ll need a baking sheet, parchment paper, and a food processor or blender.  If you have a Silpat silicone baking liner, now is the time to use it.  And you’re in luck:  the ingredients are already in your house, right now!  Once you make (or purchase) coconut flour, you can whip these crackers up in minutes.  The good news is that they have no preservatives, artificial colors or flavors, or any unpronounceable chemicals – hooray!  They come out of the oven the perfect blend of crispy and  chewy, ready for snacking.  The bad news is, because they lack any of that lab-created stuff, they don’t stay crispy.  But that is easily remedied by a quick pass through a toaster oven.  Just a few minutes is enough to make these crackers crunchy again.

Ready to make some homemade, preservative-free snacks your family will love?  Let’s go!

Homemade Coconut Flour

Ingredients:

  • Pulp from 2 batches of coconut milk

Directions:

  1. Preheat oven to 250 F.  Cover a large baking sheet with parchment paper or a Silpat mat.  Spread out the coconut pulp, breaking up any lumps.  Toast the pulp until completely dry and powdery.  You really need to make sure all the moisture is removed.  This can take anywhere from one to two hours.  Stir occasionally to make sure the lumps are broken up and there are no hot-spots, and don’t let it burn!
  2. When the pulp is very dry, let it cool in the oven for another hour or so.  Transfer to a blender or food processor and blend for 5 minutes.  Depending on how powerful your blender is, you can get it pretty fine.  My food processor did a decent job, but the flour was not silky fine in texture.  That’s okay!  Get it as powdery in texture as your tools allow.


Homemade Coconut Flour


Homemade Cheezits

Ingredients:

  • 1/2 cup coconut flour
  • 1 egg
  • 2 tablespoons butter, softened
  • pinch salt
  • 1 1/2 cups shredded cheese (I used cheddar)

Directions:

  1. Preheat the oven to 400F.  In a food processor, blend all the ingredients together.  You will end up with a moist ball of dough.
  2. Line a baking sheet with parchment paper or Silpat liner.  Plop the ball of dough down on the liner, and cover with a piece of parchment paper.  Roll out the dough very thinly, to about 1/8″ thickness.  Try to make it even thickness all the way across – you can see my edges were a little thinner, and they got crispier than in the middle.  That’s fine, but you don’t want a huge variation in thickness.  Remove top sheet of parchment paper and bake for 8-10 minutes until starting to color.
  3. Remove from oven and score with a sharp knife.  You don’t need to go all the way through, because you don’t want to cut your liner or parchment paper.  Bake again for another 8-10 minutes until golden brown and starting to get crispy at the edges.
  4. When it’s cool enough to touch, cut all the way through the crackers, or just use your hands to break them at the perforations.  When cool, store crackers in sealed container.  To crisp, put them on a baking sheet in the toaster oven or regular oven for five minutes.

I think next time I make these, I’ll add a little paprika or garlic powder.  New flavor combinations are exciting!  My girls helped me make these, so here is a photo of them enjoying their handiwork:


B+L Homemade Cheezits


Explore, experiment, enjoy! — Dana


To view even more of Dana’s unique recipes, you can visit her at Frugal Girlmet!
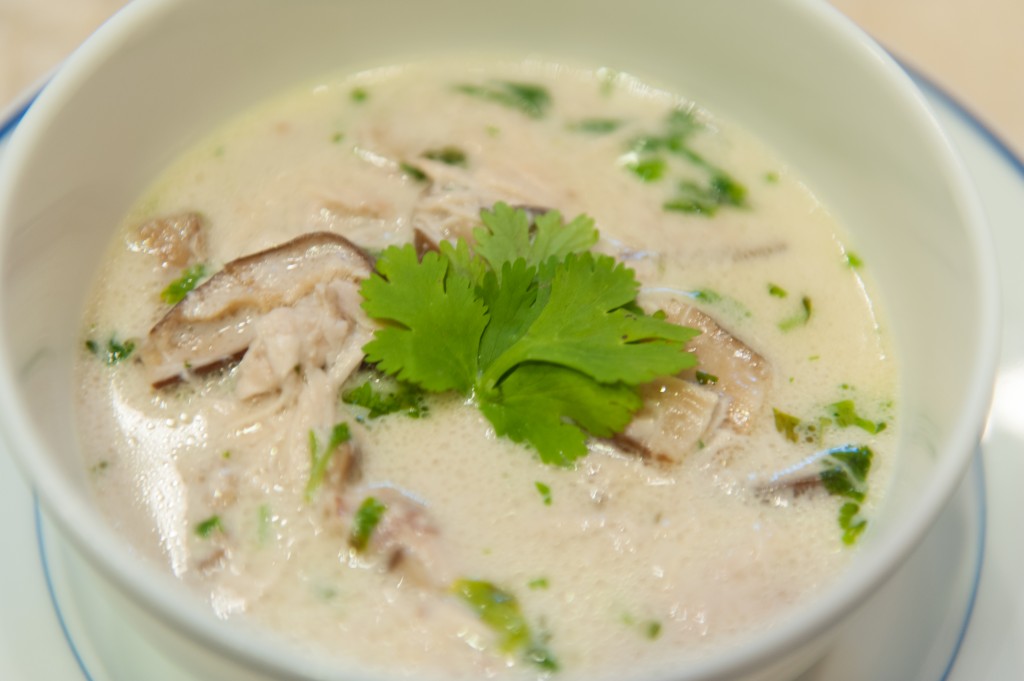
Thai Coconut Chicken Soup (Tom Kha Gai)

Thai Coconut Chicken Soup

I am convinced that every culture, every civilization, has a chicken soup recipe.  Nothing else satisfies or feels so much like a hug to the tummy like a big bowl of chicken soup made by someone you love.  If you are like me and are a frugal girl, you buy a whole chicken at least once a week.  I remove the breasts and legs and cook them one night, then cook the carcass for broth and about two cups of shredded chicken left on the body.  If you have a chicken body and the desire to try something new, read on – here comes Thai Coconut Chicken Soup, also known as Tom Kha Gai!

Now that you know how to make coconut milk from scratch, you’ll need about 2 cups of homemade coconut milk, or you can use one can of packaged coconut milk.  There are a few other unusual ingredients for this recipe:  ginger, cilantro, and fish sauce.  Ginger really isn’t that out of the ordinary, and goes great in smoothies and peach dishes; but if you aren’t going to use it soon, you can peel whatever is left and freeze it to use later.  Cilantro shows up in many different cuisines, so if you don’t want to waste half a bunch of cilantro, you have many options (like Mexican or Indian food), or try this  and  this.  Fish sauce is a savory liquid distillation of anchovy, sugar and salt.  If you can’t find it, you can still make the soup, but fish sauce is the secret ingredient that really brings everything together.  It keeps in the fridge forever, and is a great flavor booster for clam chowder or a substitute for anchovy paste (think Caesar salad.)  The only other ingredients you need are a chicken, some limes, and mushrooms.  Thai restaurants use straw mushrooms, and you can find them in a can, but I used dried shiitake mushrooms here, and they’re delicious.  You could also use cremini mushrooms.

Try this with Jasmine rice and a green salad for a light but satisfying dinner!

Thai Coconut Chicken Soup (Tom Kha Gai)

Ingredients:

  • 1 chicken body, breasts and legs removed (or use two cooked chicken breasts, diced, plus 3 cups of chicken broth)
  • 1 large piece of ginger, 2 or 3 inches long, peeled and bashed with the handle of your knife
  • 1 can coconut milk, or about 2 cups homemade coconut milk
  • 1 ounce dried mushrooms, broken into little pieces, or 8 ounces fresh mushrooms, chopped
  • 1/2 bunch fresh cilantro, chopped
  • 1/2 teaspoon or so fish sauce (to taste – if you don’t have fish sauce, use salt)
  • 2 limes, juiced

Directions:

  1. In a large pot, cook the chicken carcass with 4 cups of water and the peeled, bashed ginger, until the chicken is cooked through. Remove chicken to a large bowl; shred meat from bones and set aside. Strain the broth into another bowl, discarding ginger. Wash the pot and return to stove. Over medium low, add the dried mushrooms to the chicken broth and cook ten minutes. (If using fresh mushrooms, add them in Step 2.)
  2. Add back the chicken to the broth, and pour in coconut milk (and fresh mushrooms, if using).  Cook until simmering.  Add chopped cilantro, fish sauce, and lime juice, and stir to combine.  Taste for seasoning – may need more salt, or you may like more lime (you can add the zest of the lime too, if you want a stronger citrus flavor.)  Serve hot with more chopped cilantro.  You can also stir in a little hot sauce or chili flakes if you like!

Explore, experiment, enjoy! — Dana


To view even more of Dana’s unique recipe, you can visit her at Frugal Girlmet!

Homemade Coconut Milk and Coconut Chia Pudding

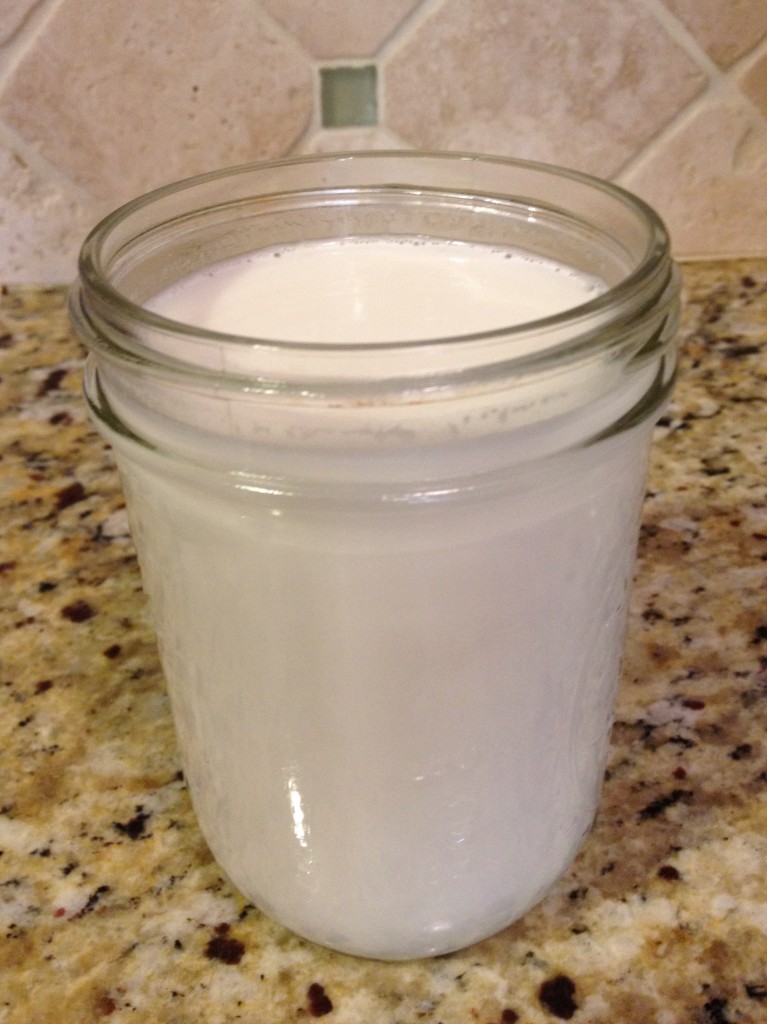
Coconut Milk Jar
I think I speak for everyone who blogs for At Home with GCH when I say that we are not afraid of a little hard work.  Some things are worth the extra time, effort, or energy.  From Christi’s homemade laundry detergent, to Coleen’s gluten-free goodies, we all have tricks to share so you can give your family the safest, freshest, and healthiest choices possible.  I’d like to toss my hat into the ring and offer a recipe for Homemade Coconut Milk!

Coconut milk is a key ingredient in many Indian, Thai, and other Southeast Asian recipes.  It’s also a great staple to have on hand if you are lactose intolerant, or if you are allergic to soy or almond milk.  And while you can find it in a can in many supermarkets, it is quite easy to make at home!  All you need is dried or desiccated coconut flakes, a blender, a colander, and cheesecloth.  Now, this is not the coconut you make into a pie – that stuff is full of sugar and preservatives!  Make sure it is unsweetened, dried coconut.  You can use fresh coconut too, if you can find one. (I can get them at my local Thai market, but you may not have one of those nearby.)  The coconut milk is good for about a week in your refrigerator.  I keep mine in a Ball jar with a lid, but I can’t make it last more than 3 days – it’s that delicious!

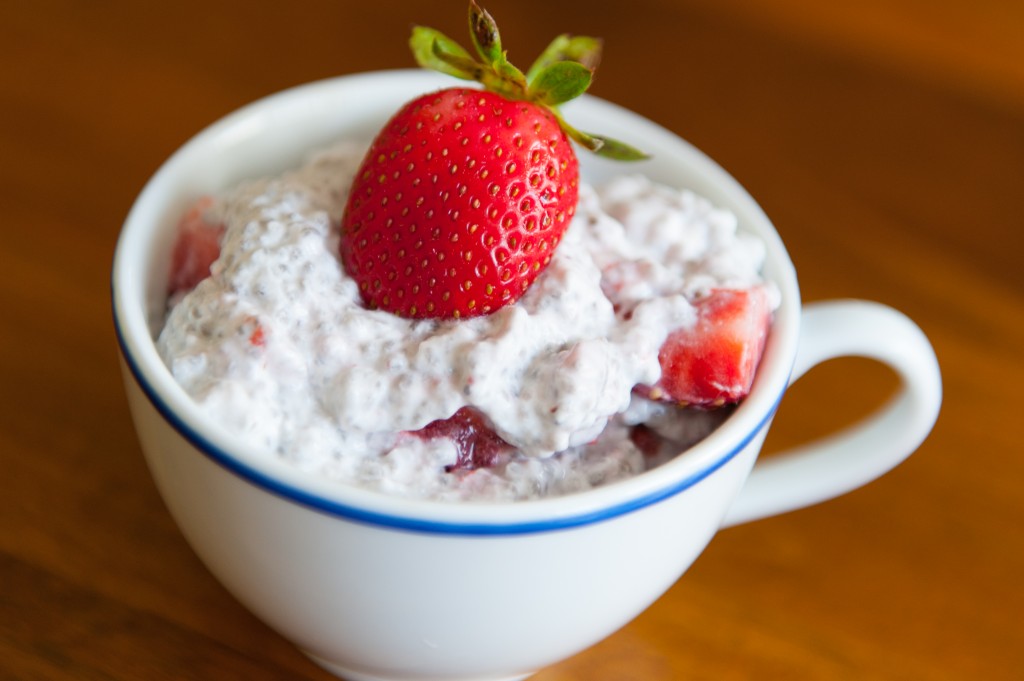
What you do with it is up to you.  Pour it over your cereal (or Christi’s Granola), use it in coffee in place of creamer, or make this delicious Coconut Chia Pudding.  Chia seeds can be found online at Amazon, at nearly all health food stores or Whole Foods, and at Trader Joe’s.   Chia seeds are teeny, tiny, little health bombs!  Full of Omega-3 fatty acids, protein, and other necessary things, chia seeds can add crunch to homemade crackers, or top sweet potatoes and salads.  Even better, when mixed with liquid, they create a gel, and make a delicious “pudding” that feels decadent, but is actually quite healthy.  Think tapioca or rice pudding, without all the diet-busting starch!

Coconut Chia Pudding


Next week I’ll have more recipes that use coconut milk, but for now, here are the basics.  Check it out!

Homemade Coconut Milk

Ingredients:

  • 1 cup shredded, dried coconut
  • 1 1/2 cups boiling water

Directions:

  1. Boil water.  (I know, but it has to be said.)  In the pitcher of a blender or a large food processor (I use a food processor and it works fine), pour in one cup of coconut flakes.  Measure out 1 1/2 cups of boiling water and pour over the coconut.  Let sit for about 20 minutes.  Then blend for 2 or 3 minutes if you have a really strong blender, or about 4 minutes in a food processor.  You want to see a foamy slurry.
  2. Line a sieve or colander with a large piece of cheesecloth, folded over on itself.  Place the colander over a large bowl.  Pour the coconut mixture into the cheesecloth and squeeze, squeeze, SQUEEZE!!!  Pour the coconut milk into a jar with a lid and keep refrigerated.
  3. Don’t throw away the coconut pulp!  This can be mixed into smoothies, or spread out on a baking sheet lined with parchment paper and baked at 200*F for about 1 to 2 hours.  When it is completely dry, grind again in the food processor … and you just made coconut flour!  And now for the other recipe…

Coconut Chia Pudding

Ingredients:

  • 1 cup coconut milk
  • 1/4 cup chia seeds
  • 1/2 teaspoon honey (optional, depending on how ripe and sweet your fruit is)
  • 1 cup chopped fruit – I like strawberries, blueberries, or peaches, but find what you like best

Directions:

  1. In a Tupperware container with a lid, pour in one cup of coconut milk and 1/4 cup chia seeds.  Put the lid on and shake to combine.  Put in the refrigerator.  Shake again in one hour.  
  2. The chia pudding should be ready in about 3 hours.  When ready, it should be very thick, like tapioca pudding.  To serve, divide chia pudding between two bowls, drizzle with a tiny bit of honey if desired, and stir in the chopped fruit.  This makes a great dessert, or a nice, light breakfast.


Explore, experiment, enjoy! — Dana


To view even more of Dana’s unique recipe, you can visit her at Frugal Girlmet!


Curried Potato Salad

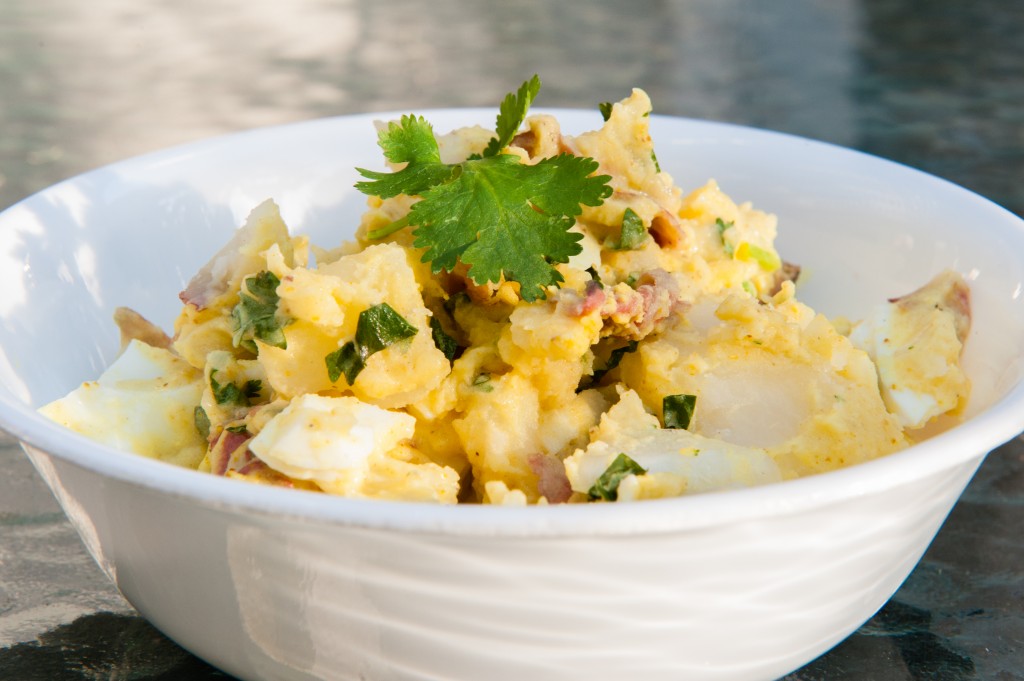
Curried Potato Salad

No matter what you think of Martha Stewart, you can’t argue that she doesn’t know what she’s doing in the kitchen.  Sometimes when I’m looking around for inspiration and new recipes, I come across something that I might be on the fence about.  Maybe it sounds unusual, or I don’t know if I can make it right, or sometimes the measurements or directions don’t seem correct.  But when you make a Martha Stewart recipe, you know you’re going to end up with something pretty good.  And that’s what you get with this recipe for Curried Potato Salad!

My husband bought me the Martha Stewart Living cookbook 12 years ago, and we’ve certainly gotten our money’s worth out of it.  This was one of the first recipes we made and it has become a family favorite – my Dad, in particular, requests it.  Every ingredient is easy to find in the grocery store, although you may have to look a little harder for cilantro and curry powder, depending on where you live.  Trust me (and Martha) – this recipe is a keeper!

Curried Potato Salad

(Recipe courtesy of Martha Stewart Living)

Ingredients:

  • 3 pounds baby white potatoes, scrubbed (I’ve used red potatoes, too – just make sure they are small, and all the same size)
  • 1 tablespoon plus 1 teaspoon salt
  • 2 tablespoons white wine vinegar (I’ve used red wine vinegar too – it’s fine)
  • 5 large eggs
  • 1/2 cup plus 2 tablespoons homemade mayonnaise, or from a jar
  • 3 tablespoons curry powder
  • 1 medium onion, very thinly sliced
  • 1/4 cup fresh cilantro, finely chopped

Directions:

  1. Place potatoes in a large pot with enough water to cover by several inches.  Bring to a boil over high heat, add 1 tablespoon salt, and reduce to a gentle boil.  Cook until potatoes are tender when pierced with a knife, 15 to 20 minutes.  Drain into a colander. Using gloves or paper towels to protect  your hands, cut potatoes into wedges while still hot.  Drizzle with vinegar, and set aside to cool.
  2. Place eggs in a small pan with enough water to cover by 1 inch, and place over medium-high heat.  When water comes to a boil, turn off heat, cover, and let stand for 13 minutes. Drain, and place in a bowl with cold water to cover. When cold, peel hard-boiled eggs, and cut into quarters lengthwise.
  3. Place mayonnaise, curry powder, and remaining teaspoon of salt in a large bowl; whisk to combine.  Add potatoes to mayonnaise mixture.  Add eggs, onion, and cilantro.  Stir to combine.  Chill until ready to serve.

Explore, experiment, enjoy! — Dana


To view even more of Dana’s unique recipe, you can visit her at Frugal Girlmet!

Roasted Broccoli and Chicken with Raisin Sauce

Roasted Broccoli and Chicken with Raisin Sauce

Wait, wait, where are you going?  This isn’t a joke!  Raisin sauce!  It’s real, and it’s delicious!

Let me back up a bit.  We love roasted broccoli at our house.  We eat it two, sometimes three times a week.  And while I enjoy it, I really do, there came a day (last week) when I wanted to add a little something new to our dinner repetoire.  Google is my friend, and I quickly came across several different recipes for Broccoli with Raisin Sauce.  Well, if so many other people thought it good enough to make, photograph, and write about, it must be worth a try.

And it was an unmitigated success!  This simple sauce has it all – sweet and spicy, with a little bite from the vinegar.  I served this with roasted chicken thighs, and the raisin sauce was amazing with those too!  For an easy dinner, roast the broccoli on one sheet pan, chicken thighs on another, and make the sauce when they’re done.  Be bold, try something new, and surprise yourself with a funky, fun new recipe!

Roasted Broccoli and Chicken with Raisin Sauce

Ingredients:

  • 3 large bunches of broccoli, chopped into florets
  • 1 to 1 1/2 pounds boneless, skinless chicken thighs
  • salt and pepper
  • 9 tablespoons olive oil, divided
  • 1/2 cup raisins (I used golden raisins, but use what you like)
  • 2 tablespoons sherry or red wine vinegar
  • 1/2 teaspoon ground cumin

Directions:

  1. Preheat oven to 400*F.  Line two cookie sheet pans with aluminum foil.  On one pan, lay out the chicken thighs, making sure there is room between them; don’t crowd.  Drizzle with 3 tablespoons of olive oil, and sprinkle with salt and pepper (and a little garlic powder is nice too).  Place in the oven on the top rack.
  2. On the second sheet pan, spread out the broccoli florets and drizzle with 3 tablespoons of oil.  Sprinkle with salt and place in the oven on the bottom rack.
  3. While the chicken and broccoli cook, make the raisin sauce:  combine remaining 3 tablespoons of oil, raisins, vinegar, and cumin in a blender or food processor.  Blend until relatively smooth – until the raisins are broken down and saucy.
  4. The chicken is done when a thermometer reads 160*F, and the broccoli is done when it’s getting some crispy brown spots.  Serve both with the raisin sauce!

Explore, experiment, enjoy! — Dana


To view even more of Dana’s unique recipe, you can visit her at Frugal Girlmet!


Asian Pasta Salad

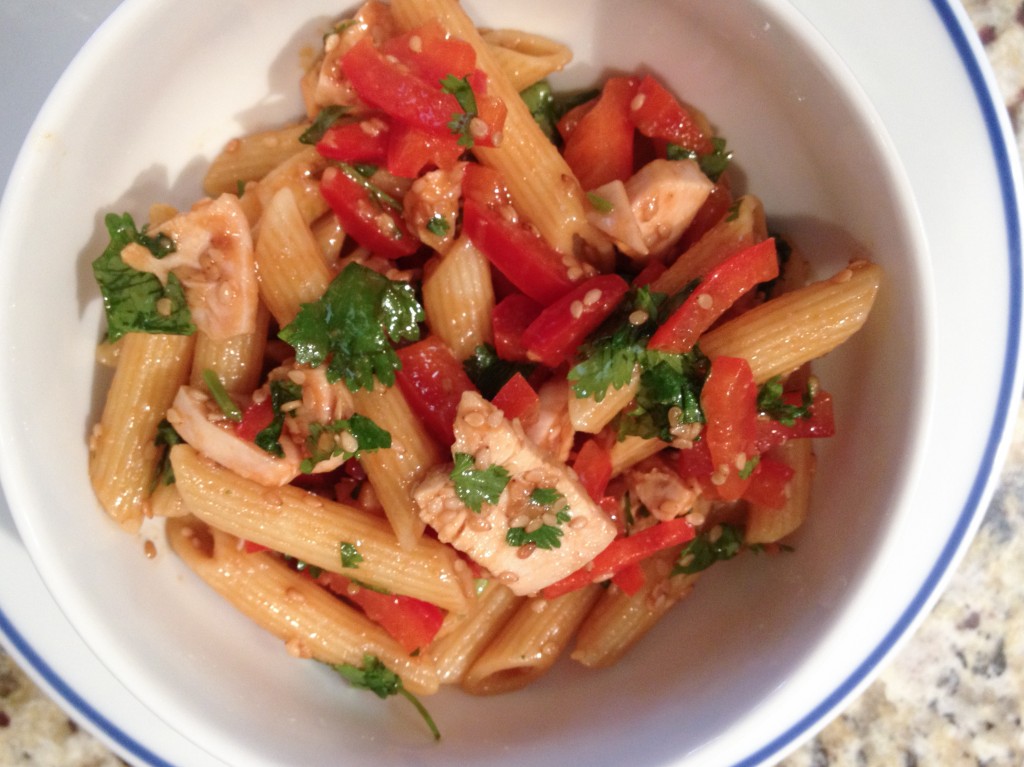
Asian Pasta Salad

This is a recipe my sister used to make 20 years ago.  I think it came from a cookbook she had, which has since been lost in the shuffle of life.  I replicated as closely as I could when I had to bring a dish for a potluck at my daughter’s school.  This Asian Pasta Salad is great alternative to macaroni salad, especially in the summer, since there’s no mayonnaise to worry about.

Use any small pasta shape you like.  I usually like to use bow-ties, but I was out of them for this go around.  To save time, you can cook the chicken the night before you plan to eat this.  I think next time I make this, I will add pea pods and diced green onion.   Those weren’t in the original recipe, but I bet they’d add some sweet, crunchy interest!

Hoisin sauce is widely available, and if your grocery store has an Asian section, I’m sure you can find it – look for a little jar, next to the soy sauce.  You could substitute a jar of Plum Sauce if you can’t find Hoisin.  Hoisin sauce is great for any kind of stir fry you make at home, so I doubt it will go to waste.  The dressing for the Asian Pasta Salad is also tasty on a more traditional “Chinese chicken salad” with shredded cabbage, diced chicken, green onions, slivered almonds, and mandarin orange segments.

Asian Pasta Salad

Ingredients:

  • 4 tablespoons Hoisin sauce
  • 1 tablespoon rice vinegar
  • 3 tablespoons sesame oil
  • 1 pound box of dried pasta, small shape preferred (macaroni, mini-shells, or bow-ties work well)
  • 2 chicken breasts, cooked, cooled, and chopped
  • 2 bell peppers (try to get at least one red bell pepper), cut into very thin slices
  • 1/2 bunch fresh cilantro, chopped
  • salt and pepper
  • 2 tablespoons sesame seeds

Directions:

  1. Boil the pasta, following the directions on the box.   Don’t overcook!
  2. While the pasta is cooking, in a small container with a lid, shake together the Hoisin, vinegar, and oil.  When the pasta is done, drain and pour into a very large bowl.  Pour the dressing over the pasta and toss well.
  3. Add the chicken, peppers, and cilantro to the bowl and toss to combine.  Taste for seasoning, as you will probably need salt, and may prefer a little pepper.  Sprinkle with sesame seeds and toss again.  Chill for at least an hour, or until ready to serve.


Explore, experiment, enjoy! — Dana


To view even more of Dana’s unique recipes, you can visit her at Frugal Girlmet!


Sweet Potato Pizzas

Sweet Potato Pizza

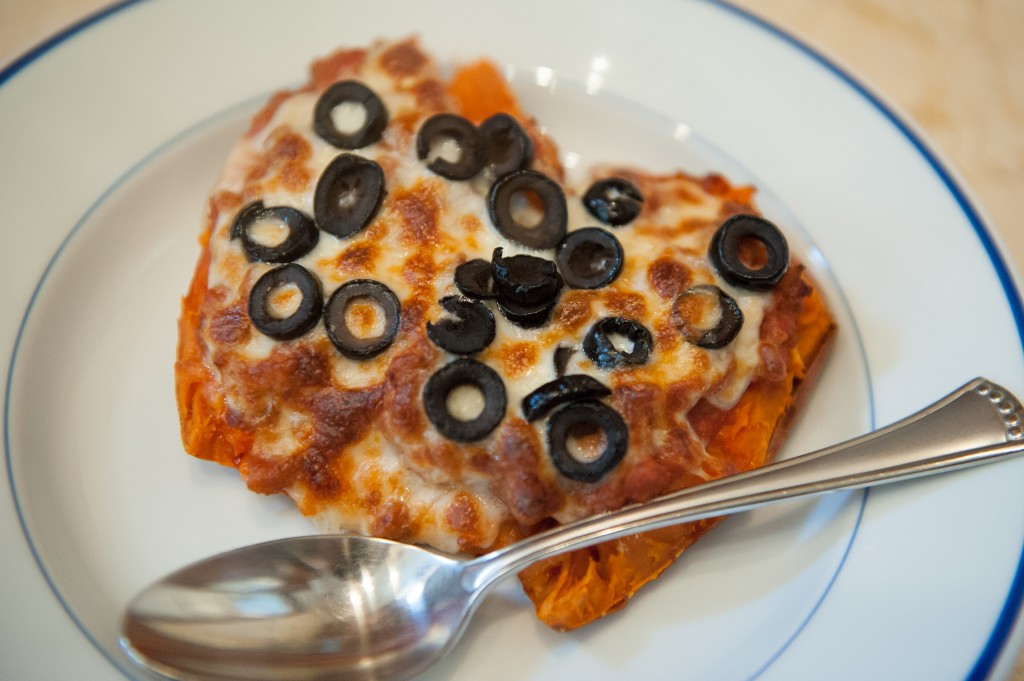
My husband is a big inspiration to me.  He made a resolve to take his fitness seriously, and keeps me on the right track when I am tempted to go off the rails.  As I was searching online for dinner inspiration, he looked over my shoulder and said, “OOH, I want THAT!”  It sounded weird and unappetizing to me, but I humored him and made it anyway.  What was it?  Sweet Potato Pizzas!

And boy am I glad I listened to him!  Whether you are craving pizza or just want a healthy, fun side dish, this is the way to go!  For the sweet potatoes, choose medium-sized ones that are not too skinny.  They should be about the size of your hand.  I recommend using Italian sausage, because the fennel seed adds a fantastic contrast to the sweet potato.  Use any toppings you like – kids love pepperoni!  In the summer, I microwave the sweet potatoes and then finish them in the toaster oven, but you can do the whole thing in your regular oven if you like.

We eat these as a side dish, with a salad and baked chicken breasts.  Take a chance, like I did, and try this tonight!

Sweet Potato Pizzas

(Makes 2 servings)

Ingredients:

  • 2 medium — large sweet potatoes
  • 1 cup tomato sauce, canned or homemade
  • 1/2 pound ground Italian sausage
  • 1 cup shredded mozzarella cheese
  • 1 small can sliced black olives

Directions:

  1. Wash the sweet potatoes.  Scrape off any eyes or weirdness on the outside, then poke several times with a fork.  Wrap in a slightly damp dish towel and microwave until done.  (My microwave takes about 6 – 10 minutes depending on the size of the potatoes.  You’ll know they’re done when you can squeeze them and they yield to your hand – kind of squishy inside.)  Remove from the microwave, unwrap and let cool a bit.
  2. While the sweet potatoes are cooking, crumble the sausage into a frying pan.  Cook until no longer pink.  Drain away any grease, then add the tomato sauce.  Heat over low heat until the sauce is hot.
  3. Slice the sweet potatoes in half lengthwise.  Place them on a foil-lined baking sheet, and mash up the insides.  (I kind of cut-and-fluff them.)  Spoon half the sausage-sauce mixture over each potato.  Cover with shredded mozzarella, then sprinkle with black olives.  Bake or broil until the cheese melts.  Serve hot!

Explore, experiment, enjoy! — Dana


To view even more of Dana’s unique recipes, you can visit her at Frugal Girlmet!

Chicken Satay with Spicy Peanut Sauce


Chicken Satay

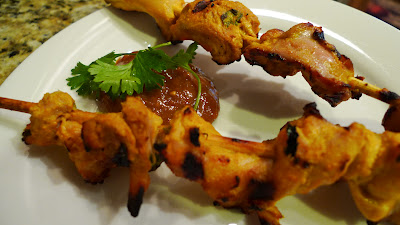
Finally, summer is here!  That means lots of grilling at our house.  One of my favorite things to grill are skewers.  You can get so creative with what you thread on those sticks!  Veggie kabobs are a must, with juicy mushrooms, sweet-and-spicy onions, and bell peppers.  Keep the skewers close at hand for this easy recipe:  Chicken Satay with Spicy Peanut Sauce!

I use boneless, skinless chicken thighs here, although you could use skinless breasts instead. Everything else should be easy to procure.  These are best when they’ve had a chance to marinate for at least 2 hours, but don’t let the chicken marinate more than eight hours, or the chicken will start to break down.

If you have any leftover skewers, these mildly spiced chicken bites make a fantastic salad!  Just chop them up and toss with salad greens, lots of cucumber, and red or yellow bell pepper.  Make the peanut sauce into a salad dressing by buzzing in a blender with a little water or more oil. Delightful!

Chicken Satay with Spicy Peanut Sauce

Ingredients:

Chicken Satay:

  • 1 pound boneless, skinless chicken thighs
  • 1 cup plain yogurt
  • 1 teaspoon curry powder
  • 1 teaspoon fresh grated ginger (use powdered if you can’t find fresh)
  • 2 cloves garlic, minced
  • 2 tablespoon minced fresh cilantro
  • juice from 1/2 lemon or lime
  • wooden skewers, soaked in water for 30 minutes, or use metal skewers

Peanut Sauce:

  • 1/2 cup chunky peanut butter
  • 1/2 teaspoon soy sauce
  • 1 clove garlic
  • 3 tablespoon brown sugar
  • 1/2 teaspoon minced ginger
  • 1/2 teaspoon Sriracha or hot sauce of your choice
  • juice from 1/2 lemon or lime
  • 1 teaspoon coconut oil or olive oil
  • optional:  a few dashes of nam pla (Thai fish sauce)

Directions:

  1. Slice the chicken thighs into 1″-wide strips
  2. Mix together the rest of the chicken satay ingredients and stir in the chicken.  Cover and refrigerate for two hours (or longer, up to 8 hours).
  3. While the chicken is marinating, make the Spicy Peanut Sauce.  Place all the ingredients in a blender or food processor and blend until smooth.  Refrigerate until ready to serve.
  4. When the grill is hot, thread the marinated chicken onto the skewers.  Grill for 5-8 minutes per side.  Serve with Spicy Peanut Sauce and more chopped cilantro.


Explore, experiment, enjoy! — Dana


To view even more of Dana’s unique recipe, you can visit her at Frugal Girlmet!

Bacon and Peach Salad


Bacon Peach Salad

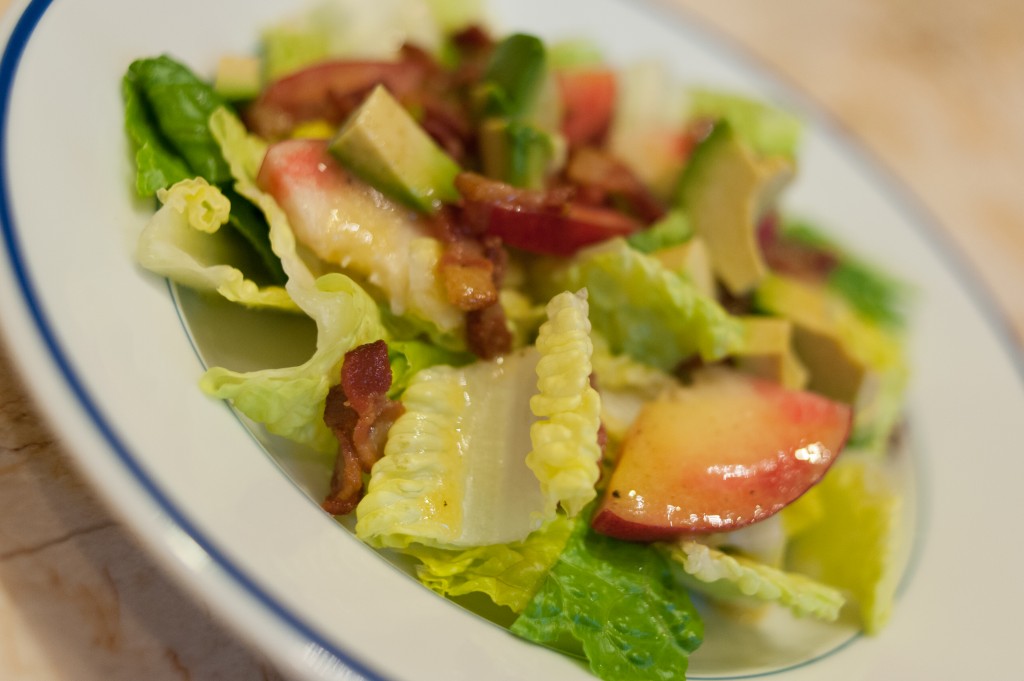
When it’s hot, I crave a nice cool salad.  This Bacon and Peach Salad would be great, with some sweet and spicy barbecued chicken, perfect for your Memorial Day BBQ!  My husband brought home some ripe avocados and sweet little peaches from the farmer’s market this past weekend.  If you can’t find peaches yet, give it a few weeks – this salad is worth the wait!

For the dressing, you can use any mild vinaigrette you have in the fridge, or use my recipe below.  I used romaine lettuce, but I bet spinach, or even arugula, would be tasty too.  This salad is based on an Emeril Lagasse recipe, and he adds feta.  I didn’t have any, but next time I make it, I’ll sprinkle on a little feta or crumbled goat cheese.  And this dish was so delicious, there WILL be a next time!

Bacon and Peach Salad

Makes four small starter salads or two larger side dish salads

Ingredients:

  • 4-5 slices bacon
  • 2 tablespoons rice vinegar
  • 1/2 teaspoon honey
  • 1/2 teaspoon Dijon mustard
  • salt and pepper
  • 1/8 teaspoon garlic powder
  • 3 tablespoons olive oil
  • 2 heads romaine lettuce, torn into pieces
  • 1 ripe peach, diced
  • 1 ripe avocado, diced
  • 1 tablespoon crumbled feta for each plate

Directions:

  1. Dice the bacon and cook until crispy.  Drain on paper towels and set aside.
  2. While the bacon is cooking, add the vinegar, honey, mustard, salt and pepper, garlic powder, and olive oil in a small container with a lid, and shake vigorously to combine.
  3. To serve, divide the lettuce among the plates and top with bacon, peach, and avocado.  Drizzle with the dressing and sprinkle with feta.

Explore, experiment, enjoy! — Dana


To view even more of Dana’s unique recipes, you can visit her at Frugal Girlmet!
Balsamic Roasted Chicken by Dana Kim

Balsamic Roasted Chicken


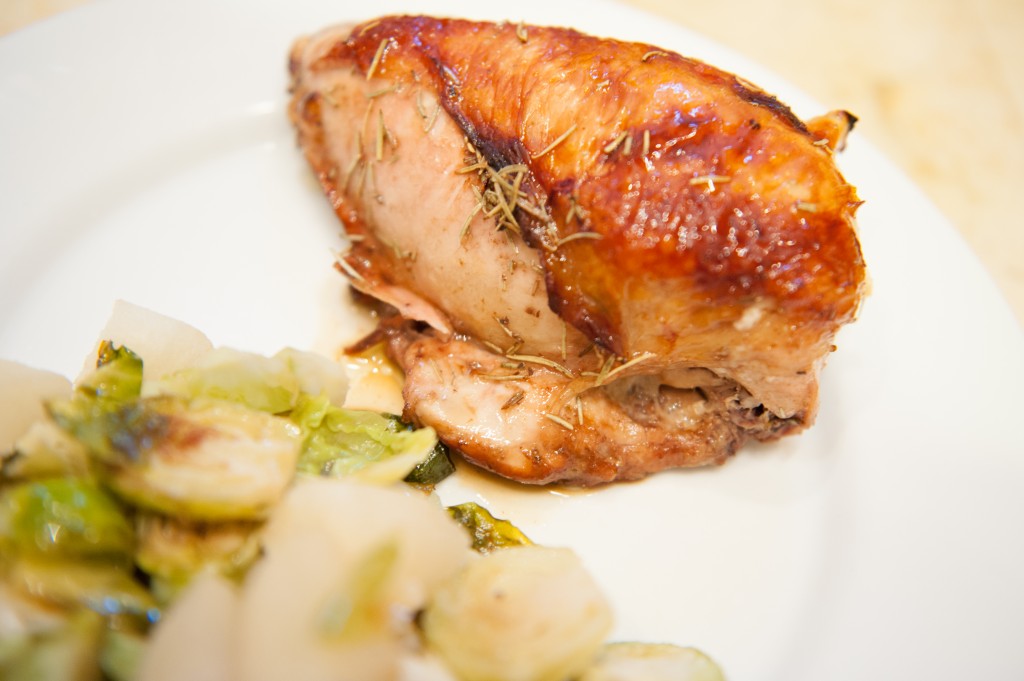
I had a hard time figuring out what to call this recipe.  In my head, I call it “Quarter Cup Chicken,” and you’ll see why when you look at the ingredients; but that wasn’t very descriptive.  This is one of those everyday, basic dishes that you end up falling in love with for its simplicity and ease of preparation.

I didn’t have any on hand this time around, but I like to add in quartered onions and baby potatoes, cut in half.  The onions get soft and smooth, the potatoes get a little roasted crust, and they both play nicely with the chicken.  Feel free to make this recipe with all drumsticks, or all breasts—whatever you like best.  Just make sure you use bone-in, skin-on chicken.  Also, dried rosemary works fine…but fresh rosemary really makes this dish sing!

Balsamic Roasted Chicken

Ingredients:

  • 1/4 cup soy sauce
  • 1/4 cup balsamic vinegar
  • 1/4 cup honey
  • 1/4 cup olive oil
  • 1 tablespoon chopped rosemary needles
  • 1 chicken, cut into pieces (or any combination of bone-in, skin-on chicken pieces)

Directions:

  1. In a large Ziploc bag, add the soy sauce, vinegar, honey, oil, and rosemary.  Squish around to combine, then add the chicken pieces.  Squish around some more, making sure all the chicken pieces are coated in the marinade.  Refrigerate for 1 – 8 hours.  (You could do this in the morning and cook it at night, but I wouldn’t let it marinate overnight, or the chicken might break down too much.)
  2. Preheat oven to 400*F.  In a large Dutch oven or roasting pan, empty the bag – get all the marinade in there too!  You can add quartered red or white onions, halved baby potatoes, 2-inch chunks of regular potato, or even large chunks of sweet potato.  Toss to coat everything.  Bake for 45 minutes, or until internal temperature of chicken reaches 170*F.

That’s it!  I served this with roasted Brussels Sprouts and Korean Pear.

Explore, experiment, enjoy! — Dana


To view even more of Dana’s unique recipes, you can visit her at Frugal Girlmet!