December 27, 2024

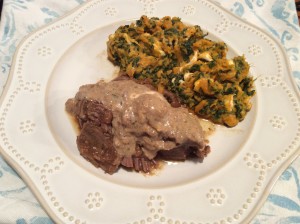
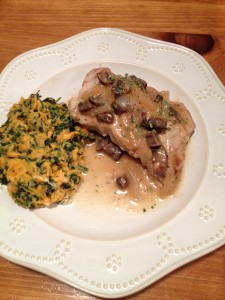
PorkChops with Mushroom-Tarragon Sauce

Recently we were on vacation in Florida and spent a few days with my sister and brother-in-law.  We had been having meals out for a week or so…and I was really missing a home-cooked meal.  They graciously prepared supper our first night visiting them…and it was my brother-in-law’s version of this dish.  Simply delicious!  (Thank you, Tony and Brenda!)

A few days after we returned home to New York, I thought about this dish.  It is simple and quick (aren’t some of your best meals just like that?).  But full of flavor from the caramelized onions and mushrooms, the abudance of garlic, and the subtle flavor that herbs—in this case, tarragon—add.   The prep and cooking time amount to just about 30 minutes or so. This fits well into our healthy but oh-so-yummy POV since the pork chops are low in fat and protein-rich.  The entire dish  includes just a small amount of olive oil…and just a little bit of carbs.  You can make this your own by increasing the quantity of mushrooms or perhaps using a variety of mushrooms!  This goes along well with quite a variety of side dishes.  We enjoyed it with our family served with black rice and broccoli; I prepared it at home with one of our current favorites, this Sweet Potato-Spinach Mash.  Enjoy!

Mushroom-Tarragon Pork Chops

2015-04-24 19.52.33

ingredients:
4 boneless pork chops (5 or 6 ounces each)
1+ teaspoon lemon-pepper blend, freshly ground
2 teaspoons olive oil, divided
3/4 pound Baby Bella mushrooms, cleaned and sliced
1 medium sweet onion, halved and sliced into half-moons
2 tablespoons minced garlic (I use jarred)
1/2 cup white wine (or chicken broth)
2 tablespoons brown rice (or all-purpose) flour
1 cup reduced-sodium chicken broth
1 teaspoon dried tarragon or 2 teaspoons minced fresh tarragon

directions:

  • coat both sides of pork chops with lemon-pepper blend
  • in a large skillet over medium-high heat, warm 1 teaspoon olive oil, and then add pork chops
  • quickly brown (about 2 minutes each side), and then remove, cover and keep warm
  • in the same pan, saute mushrooms and onion in additional teaspoon of oil ’til lightly caramelized
  • lower heat and add garlic; stirring constantly, cook for 1 minute longer
  • stir in wine; raise heat to medium and bring to a boil; cook ‘til all liquids are almost evaporated
  • lower heat again and sprinkle the flour over the onion-mushroom mixture; stir well and cook on low heat for 2-3 minutes to reduce the flour-y taste
  • stir the broth into the onion-mushroom mixture ‘til smooth
    bring to a boil; cook and stir continually for about 2 minutes ‘til thickened and a gravy has formed. (if necessary, add additional broth ‘til the gravy reaches the consistency you prefer.)
  • return the pork chops to pan along with the tarragon; cover and cook on low heat (just barely simmering) for 6-8 minutes or ‘til a thermometer reads 145
  • turn off heat and allow to sit for 5 minutes or so ‘til plating

♥  ♥  ♥  ♥ 

God loves you!    (Don’t ever forget that!)

♥  coleen

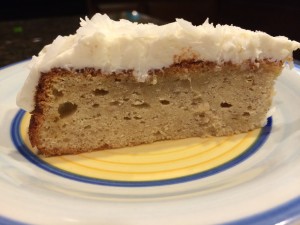
Banana Cake with Coconut Frosting

IMG_3485

We were having friends over for dinner a few weeks back, and I’d just gotten back from the store when I realized I hadn’t planned anything for dessert.  Oh no!  I did have some bananas, and I figured I had enough staples on hand to whip up a banana cake.  I lucked out and found this delicious recipe on Epicurious.com:  Banana Cake with Coconut Frosting!

This is extremely simple and it came out perfectly.  The only kind of weird thing in the recipe is the cream of coconut.  It’s not coconut milk, and it’s not coconut cream, and in fact it’s more like a syrup for making pina coladas than anything else.  I bought some earlier in the year, because I was going to make coconut-flavored yogurt for my girl.  (It’s delicious, but it does have a lot of added sugar – not exactly healthy, but okay for a splurge.)  If you don’t have it or don’t want to use it, substitute whole coconut milk or coconut cream.  Or leave it out and double the sweetened shredded coconut.  In any case, this came together quickly but was fancy enough for company.  Can’t beat that combination!

Banana Cake with Coconut Frosting

Ingredients:

For cake

  • 1 stick (1/2 cup) unsalted butter, softened, plus additional for greasing pan
  • 1 1/2 cups all-purpose flour plus additional for dusting pan
  • 1 1/2 teaspoons baking powder
  • 1/2 teaspoon baking soda
  • 1/2 teaspoon salt
  • 3/4 cup packed light brown sugar
  • 1 large egg
  • 3/4 cup well-mashed very ripe bananas
  • 1/4 cup sour cream
  • 1/2 teaspoon vanilla

For coconut frosting

  • 3 ounces cream cheese, softened
  • 3 tablespoons unsalted butter, softened
  • 1/3 cup confectioners sugar
  • 3 tablespoons well-stirred canned cream of coconut such as Coco López (not coconut milk)
  • 1 teaspoon dark rum (optional)
  • 1/3 cup sweetened flaked coconut

Directions:

  1. Put oven rack in middle position and preheat oven to 350°F.  Lightly butter and flour a 9-inch round cake pan, knocking out excess flour.
  2. Whisk together flour (1+1/2 cups), baking powder, baking soda, and salt in a small bowl.
  3. Beat together butter (1 stick) and brown sugar in a large bowl with an electric mixer at high speed until pale and fluffy. Beat in egg until combined, then add bananas, sour cream, and vanilla and beat until combined well. Reduce speed to low and add flour mixture, mixing until just incorporated.
  4. Spread batter in cake pan and bake until pale golden and a wooden pick or skewer inserted in center comes out clean, 20 to 25 minutes.  Cool in pan on a rack 10 minutes. Run a thin knife around edge of pan, then invert rack over cake and invert cake onto rack to cool completely.
  5. Make frosting while cake cools:
    Beat together cream cheese and butter in a bowl using cleaned beaters at medium speed until smooth. Reduce speed to low, then add confectioners sugar, cream of coconut, and rum (if using) and mix until combined. Increase speed to high and beat until light and fluffy, about 2 minutes.  Frost top of cooled cake and sprinkle with coconut.


Explore, experiment, enjoy! — Dana


To view even more of Dana’s unique recipe, you can visit her at Frugal Girlmet!

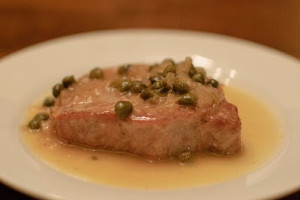
Oven-Roasted Pork Chops with Lemon-Caper Sauce

Pork Chop with Capers

Where others have a sweet tooth, I have a sour tooth. I’ve been known to use only vinegar, and skip the oil, when dressing my salad. I eat cornichons like other people eat bon-bons. So when I saw this recipe for Oven-Roasted Pork Chops with Lemon-Caper Sauce, I knew I was going to like it.

Using a recipe from my Complete America’s Test Kitchen TV Show Cookbook (which I highly recommend!), I made a few changes to work with what I had.  If you don’t have a shallot, feel free to use a red onion – just mince as finely as possible.  These pork chops are easy, quick, and nearly fool-proof.  They were tart and tangy (but not pucker…so if you are not a sour-lover like me, you won’t be put off.)
Oven-Roasted Pork Chops with Lemon-Caper Sauce

Ingredients:

  • 4 pork chops, about 1 1/2 inches thick, trimmed of excess fat
  • 2 tablespoons oil or bacon fat for cooking
  • 1 medium shallot, minced
  • 1 cup chicken broth
  • 1/4 cup lemon juice (about 2 lemons)
  • 2 tablespoons capers, drained
  • 3 tablespoons butter

Directions:

  1. Preheat oven to 450*F. Heat the oil in a large skillet over high heat, and brown the pork chops on one side, for about 2 minutes. Flip and brown the other side, another 2 minutes.
  2. Transfer the chops to a foil-lined baking sheet or large, wide baking dish (so they aren’t crowded or touching each other.) Roast in the oven until the internal temperature reaches 140*F on a thermometer, about 15 minutes, turning them over halfway through cooking time.  Remove from the oven, place on a platter, and cover with aluminum foil.  Let the chops rest for about 5 minutes, and check to make sure the internal temperature has reached 150*F.
  3. While the chops are in the oven, add the shallot to the skillet you cooked the pork chops in, and cook over medium heat until softened, about 30 seconds (about 2 minutes if you are using a red onion.)
  4. Increase the heat and add the broth, stirring to scrape up any bits stuck to the pan.  Add the lemon juice and the capers and cook until the sauce reduces to about 1/3 cup, about 4 minutes.
  5. Off the heat, whisk the butter into the sauce, and pour over the pork chops.

Explore, experiment, enjoy! — Dana


To view even more of Dana’s unique recipe, you can visit her at Frugal Girlmet!

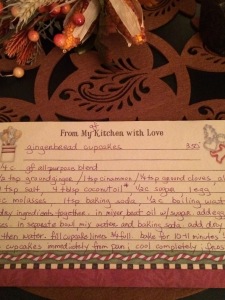
Gingerbread Cupcakes

Many of you have gone on Spring Break or are anticipating taking a vacation this summer. It is a time to refresh spirit, soul, and body. Over the next couple of weeks, our faithful bloggers will be taking a ‘spring break’ from writing so that they can come back to us refreshed and freshly anointed.
However, Girlfriends’ Coffee Hour website won’t ‘go black’! We will be revisiting some of our favorite blogs and daily devotions which have blessed us in the past. We pray that each of you, our faithful friends and readers, will continue to start your day meditating on the devotionals and songblogs, and be encouraged and blessed.

Let’s give each of our bloggers a big round of applause, a hug,
and the rest they so deserve. God bless you, ladies!

2014-11-30 20.38.40

For our family’s Thanksgiving Feast (as the grandchildren call it!), we always divvy up all of the different dishes that make up our spread.  This year I was happy to prepare a side dish (Quinoa Veggie Salad w/ Orange Vinaigrette), the beverages (one <adult> choice of which was Apple Cider Sangria), and a dessert…these spicy-sweet Gingerbread Mini-Cupcakes. Oh, they were so darling! And just the perfect mouthful (and I mean FULL).  <Of course you certainly could make these in a standard cupcake size, too!>

2014-11-27 13.11.15

For those of you who are just beginning to follow the path of gluten-free baking, try this recipe.  When I first made these cupcakes, I used a ‘gf all-purpose flour blend.’ You can pick up a box in the gluten-free section of almost any grocery store. However, if you have a pantry filled with jars of different gluten-free flours, I used 1/2 cup brown rice flour, 1/4 cup tapioca flour, 1/4 cup potato starch, 1/4 cup hazelnut flour).  Note that these cupcakes are dairy-free if you prepare them with coconut oil…and of course no whipped cream!

This is a quick recipe to pull together…and only takes 10-12 minutes to bake. We enjoyed ours with Spiced Whipped Cream (see the recipe from last week’s blogpost here).  But they would be equally yummy with a cream cheese frosting or a simple buttercream frosting, too.  Enjoy!

2014-11-29 22.51.34

Mini Gingerbread Cupcakes

ingredients:
1+1/4 cup gluten-free all purpose flour blend **
1+1/2 teaspoon ground ginger
1 teaspoon cinnamon
1/4 teaspoon ground cloves
1/2 teaspoon ground allspice
1/4 teaspoon salt
4T butter, room temperature (I used coconut oil)
1/2 cup brown sugar
1/2 cup molasses
1 egg, room temperature
1 teaspoon baking soda
1/2 cup boiling water

directions:

  • set out the butter (or coconut oil) and egg to come to room temperature
  • fill muffin/cupcake tins with liners (mini = 30; regular = 12)
  • preheat oven to 350
  • mix flour(s) and spices together in a small bowl
  • with mixer, cream together butter (or coconut oil) and sugar
  • add egg, then molasses; beating ‘til nice and creamy
  • microwave the water in a measuring cup ‘til boiling; remove and <carefully> stir in the baking soda; set aside
  • add the dry ingredients to the mixer bowl, and blend for about 1 minute ‘til it all comes together
  • continue to blend while pouring in the water; beat for an additional minute or so (batter will seem thin but it very quickly thickens up)
  • fill lined cupcake tins about 3/4 full with batter
  • bake minis for 10-12 minutes (regular for 20 minutes), or ‘til firm to the touch and slightly browned
  • take pan from oven and immediately remove cupcakes to a cooling rack
  • once completely cool, frost as desired

 ♥   ♥   ♥   ♥   ♥

God loves you!  ♥  (Don’t ever forget that!)

♥  coleen
CrockPot Apricot Lamb Roast

Oh!  If only there were a way to share with you the aroma that filled the house when this was cooking away in the CrockPot…delectable! (But there is not…so…if you want to smell it you will just have to put this together yourself!)  My husband loves lamb! It is a bit of an indulgence, but he deserves it!  So we enjoyed this for our Easter Sunday dinner.  This was super-easy, too!  I served it with this Sweet Potato – Spinach Mash.  This meal fit well into our healthy but oh-so-yummy POV also. Full of protein, low-carb…and delish!  Lamb is ‘in-season’ now so you shouldn’t find it difficult to purchase either in your grocery store or at the butcher shop. Enjoy!

CrockPot Apricot-Honey Lamb Roast

2015-04-06 20.16.16

ingredients:
3-4# boneless lamb roast
1 lemon, zested and juiced
2 tablespoons spicy mustard
2 tablespoons honey
2 tablespoons chopped garlic
1 teaspoon dried crushed rosemary
1 teaspoon dried thyme
1 teaspoon freshly ground pepper
1/2 cup (or more) dried apricots
1 medium sweet onion, cut into thin wedges
1/2 cup pitted green olives
2-4 teaspoons cornstarch (or your favorite gravy thickener)
1/2 – 1 cup sour cream or plain Greek yogurt (optional)

directions:

  • use a small CrockPot (I used my 2-quart insert); turn it on and put the lid on to begin warming it up
  • add the onions, olives, and apricots to the bottom of the insert
  • in a small bowl, combine mustard, honey, garlic, the spices, lemon zest, and lemon juice; stir with a spoon to form a paste
  • rub this on all sides of the lamb roast; place into the CrockPot liner on top of the fruit and veggies
  • cover and cook on low for 8 hours (you can check it with a meat thermometer, if you’d like, but I usually cook ‘til it’s very tender and falling apart)
  • remove the meat; slice, and keep warm
  • skim off (and discard) as much fat as you can (just use a small ladle)
  • using an immersion blender right in the CrockPot liner, puree the fruit and veggies into a smooth sauce
  • optional – you can add a bit of cornstarch slurry to thicken as you puree, or a bit of sour cream

NOTE: the juices can be served as a simple au jus spooned over the meat, or you could even make a quick gravy!

♥   ♥   ♥   ♥   ♥

God loves you!  ♥  (Don’t ever forget that!)

♥  coleen
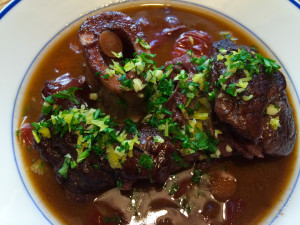
Braised Beef Shanks with Gremolata


Braised Beef Shanks with Gremolata


…otherwise known as “Osso Buco”.   I didn’t use veal, so I’m calling it something else.  When you’re the boss in the kitchen, you can do that!  These Braised Beef Shanks with Gremolata would be perfect for Easter or any other lazy Sunday afternoon.  Make them now, before spring heats up and you don’t want to have your oven on for three hours!

Yes, I said three hours, but the prep is pretty easy.  Then you just pop this dish in the oven letting the low and slow cooking turn something pretty plain into magic!  Look for thick cross-sections of shank (the leg) with a large bone in the middle, or ask your butcher.  The meat will fall off the bone, the marrow will soften and become delicious, and you top it off with a bright and flavorful gremolata.  Serve with roasted potatoes and vegetables and eat like a king!

Braised Beef Shanks with Gremolata

Ingredients:

  • 4 pounds of cross-cut beef shanks (or ask for ‘osso buco’ cut)
  • 1/4 cup flour, seasoned with 1 teaspoon salt and 1/2 teaspoon pepper
  • 2 tablespoons olive oil
  • 2 tablespoons butter
  • 1 large onion, diced
  • 3 carrots, diced
  • 1 stick celery, diced
  • 1/2 teaspoon celery salt (or plain salt)
  • 1 can of tomatoes (I used fresh tomatoes – just dice them, about one cup)
  • 2 cups red wine
  • 2 cups water
  • 1 lemon, zested (or peeled, and mince the peel)
  • 1 large clove garlic, minced
  • 1 small handful parsley, minced

Directions:

  1.  Preheat oven to 300*F.  Place the seasoned flour in a wide bowl or pie plate, and dredge all the shank pieces.  In a very large pot, heat the oil and butter together, and brown the meat.
  2. When browned, remove the meat to a plate, and add the diced onions, carrots, celery, and celery salt to the pan.  Sauté for about five minutes, or until starting to soften.  Add the tomatoes, wine, and water, then  simmer for five minutes.
  3. Add the meat back to the pan, and make sure it is submerged in the vegetable and wine mixture.  Cover with a lid and bake for 2.5 – 3 hours, or until done and very tender.
  4. Remove the meat from the pot and return the pot to the stovetop.  Stir the juices and vegetables over medium heat and let it reduce while you make the gremolata.
  5. To make the gremolata:  mix together the lemon zest, minced garlic, and minced parsley.  Stir to combine.
  6. To serve:  Spoon some veggies and juice into your bowl.  Place a shank on top, and garnish with a spoonful of gremolata.

Explore, experiment, enjoy! — Dana


To view even more of Dana’s unique recipes, you can visit her at Frugal Girlmet!


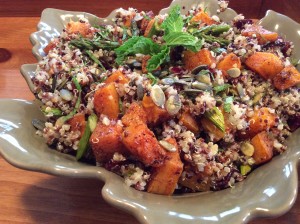
Quinoa-Veggie Salad with Citrus Honey Vinaigrette

This simple salad is so refreshing!  The first time I made it, I made just enough for supper.  THAT was a mistake!  Hubby loved it…so i included it in our menu plan for the next week.  This time, I made a double batch (quantities below).  This salad stays very well kept in the ‘fridge for up to a week (my experience).  The vinaigrette is tart and sweet at the same time making this refreshing.

This salad is a great basic and can easily be adapted to your loved ones’ tastes.  Here are a few additional serving suggestions:
– add another orange, segmented and chopped, is delicious in here
– this is even better (as seen in the picture) with some roasted asparagus or steamed green beans tossed in
– you can use agave instead of the honey to make a vegan salad
– try a different nut or seed (pine nuts, slivered almonds, etc.)

I think this is a good one to keep in the rotation all year long!  Equally enjoyable wintertime  alongside a piece of salmon as it would be on your picnic buffet during the summertime!  Enjoy!

Quinoa Salad with Citrus-Honey Vinaigrette

2014-11-27 14.19.10

ingredients:
salad
1 butternut squash, peeled, seeded, and cut up into 1″ cubes
olive (or coconut) oil
salt and freshly ground black pepper, for seasoning squash
2 cups multi-color quinoa
1 teaspoon olive or coconut oil
4 cups water
pinch of salt
1 cup dried cranberries
1 cup pepitas (pumpkin seeds)

vinaigrette
2 large oranges (zest 1 first; and then juice both of them)
1/4 cup olive oil
1 tablespoon honey
Salt and freshly ground black pepper, to taste

directions:

  • preheat oven to 400
  • line a baking sheet with parchment paper
  • place butternut squash cubes and oil in a large bowl; season well with salt, pepper and pour onto the lined baking sheet
  • roast the squash for 20 minutes, turning once, ‘til tender and slightly caramelized
  • while the butternut is roasting, cook the quinoa: in a medium saucepan, heat 1 teaspoon of oil and then stir in the quinoa, making sure to coat all the grains w/the oil.  then add the water and salt; stir well and bring to a boil over medium heat. cover pan, turn heat to low and simmer for about 15 minutes or so ‘til all the water is absorbed. remove from heat and fluff with a fork. let quinoa cool to room temperature (I spread it out on a baking sheet)
  • and this is a good time to get the vinaigrette together… in a small bowl, whisk together the orange juice, zest, olive oil, and honey (I used an immersion blender) ‘til emulsified.  season well with salt and pepper, to taste
  • when the squash is done, let that cool for a few minutes, too. then combine quinoa, butternut, dried cranberries, and pepitas in a large serving bowl
  • drizzle the vinaigrette over quinoa salad. toss until ingredients are well dressed.  taste again for additional seasoning


   ♥      ♥      ♥      ♥      ♥ 

God loves you!   ♥  (Don’t ever forget that!)

♥  coleen
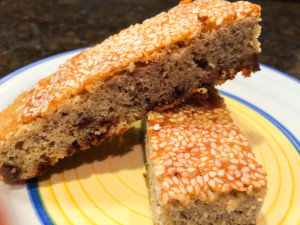
Protein Banana Bread Breakfast Bars

Protein Banana Bread Breakfast Bars

I found this recipe on a website called PaleOMG.  I love their photos on Instagram, and they have great ideas for healthy snacks and things to give your kids.  I changed the recipe a bit, just subbing a few things here and there, and now I present to you:  Protein Banana Bread Breakfast Bars!

That’s a mouthful.  These PBBBBs are just like banana bread, but not cloyingly sweet.  They are made with almond flour and whey protein powder, so you’re getting a good dose of protein in your sweet treat.  These were easy and delicious!  I’m storing mine in the fridge, and hope there is enough left for me to enjoy one with my morning coffee tomorrow!

Protein Banana Bread Breakfast Bars

Ingredients:

  • 2 bananas, mashed
  • 1/4 cup melted coconut oil
  • 1/4 cup maple syrup
  • 1 teaspoon vanilla extract
  • 1 egg, beaten
  • 2/3 cup almond flour
  • 1/3 cup whey protein (vanilla, but I used cinnamon!)
  • 1/4 cup tapioca or arrowroot flour
  • 1/2 teaspoon baking soda
  • 1/4 teaspoon salt
  • 1/3 cup cacao nibs (I used mini chocolate chips)
  • 1/4 cup sliced almonds (I used sesame seeds)

Directions:

  1. Preheat oven to 350*F.  Grease an 8×8 square pan.
  2. Mix all the ingredients together, except for chocolate chips and almonds.  Then fold in cacao nibs or chocolate chips.  Pour into the prepared pan, and cover the top with the almonds or sesame seeds.
  3. Bake for 20-25 minutes until the middle is set.  Cool for 10 minutes before cutting.
  4. I cut mine into 1″x4″ bars, so I had 16 servings.  Store in the fridge, covered.


Explore, experiment, enjoy! — Dana


To view even more of Dana’s unique recipes, you can visit her at Frugal Girlmet!

Homemade Chicken Meatballs

Y’know those fully-cooked ground chicken sausages and meatballs that you can find in almost every grocery store?  There are any number of brands that now make them…plus they come in quite a variety of flavor variations.  You can find breakfast sausages, dinner sausages, mini-sausages, and meatballs.  I have been a big fan of these for quite some time now.  Of course, there is ‘variety’ in quality amongst the different brands, too. You probably wouldn’t have to search too hard to find organic chicken sausages and meatballs.  All very helpful towards a healthy eating lifestyle! And they are so handy for those nights when your meal plan falls apart (or you forgot to take something out of the freezer)! These even defrost right in their package in a bowl of cold water for 10-15 minutes!

But recently I had the crazy thought, ‘Why can’t I do that? I should be able to make my own, right?’ And then I found it that wasn’t really so crazy!  Easy to find the ingredients…easy to throw together…easy to prepare…easy to cook!  And here’s the best part—making them from scratch in your own kitchen, the variety’s are almost endless.  But I started fairly simple…check out the recipe!  The variety I made this time lent itself well to serving with some Tzatziki (zah-d/zee-kee) Sauce (Greek yogurt cucumber sauce) alongside some spaghetti squash and steamed broccoli…yum!  I would love to hear about your version, if you decide to make them.  Enjoy!

Homemade Chicken Meatballs—Greek Style

2015-03-11 20.11.51

ingredients:
meatballs:
2 (10 ounce) boxes frozen chopped spinach
1 tablespoon +/- olive oil
1 small onion, finely chopped
2 heaping tablespoons chopped garlic
1 egg, lightly beaten
(2) 4 ounce pkg. crumbled feta cheese (set aside 2 ounces or so)
2# ground chicken (or ½ chicken, ½ turkey)
2 tablespoons lemon-pepper blend
1/4 cup almond flour

tzatziki sauce:
1+1/2 cups Greek-style plain yogurt
1/2-1 teaspoon garlic, finely minced
1/3 seedless cucumber, peeled and chopped small
3 tablespoons fresh dill (or 2 teaspoons dried)
1/2 lemon, juiced
sea salt, freshly ground pepper (to taste)

directions:

  • mix up the tzatziki sauce and refrigerate ’til ready to serve
  • preheat oven to 400; line a baking sheet w/parchment paper
  • cook frozen spinach (stovetop or microwave) just ‘til heated through; drain excess liquid, dump out onto a clean dishtowel and squeeze dry; set aside
  • preheat the oven to 400 degrees F
  • in a large bowl combine onion and garlic; add egg
  • add the spinach, pulling it apart to separate it
  • add feta, chicken, and seasoning to the bowl
  • dust the almond flour over top
  • start combining and add a 1 tablespoon of extra-virgin olive oil
  • lightly mix everything ‘til well-combined
  • using a 1+1/2″ cookie scoop, or something similar, form 36-40 meatballs; they do not have to be perfectly round…I left mine fairly rustic
  • place the meatballs on the lined baking sheet and bake for 10 minutes and then turn them over
  • cook for additional 8-10 minutes (depending on the size of them) ‘til they are beginning to brown
  • I used my instant-read meat thermometer (165 degrees for poultry); you can also test them by poking one and making sure the juices run clear
  • serve with tzatziki sauce and a sprinkle of the leftover feta cheese

I know I often mention that I use ‘lemon-pepper seasoning’ in the place of salt&pepper.  Here is a link to what I use.

  ♥       ♥       ♥       ♥       ♥

God loves you!  ♥  (Don’t ever forget that!)

♥  coleen
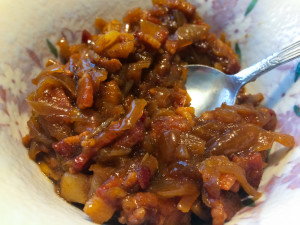
Bacon B.O.M.B. Jam

Bacon BOMB Jam

You read that correctly:  B.O.M.B.  This stuff will blow you away!  Bacon Onion Maple Bourbon Jam is an out of this world condiment you will want to smear on everything!

This is easy and amazing.  I ate some of this bacon jam on my baked salmon.  Next I’m going to try it on a cracker, maybe with a little goat cheese, or as part of an olive and cheese tray.  And I may just go off the rails and slather it on bread with cheddar and sliced apple and make the best grilled cheese sandwich I’ve ever had!  This recipe yields a cup and a half of jam.  Let’s see how long it lasts!

Bacon B.O.M.B. Jam

Ingredients

  • 3/4 pound bacon (I used 7 slices), diced
  • 2 large onions (try sweet onions, if you have them), sliced
  • 1/4 cup maple syrup
  • 1 tablespoon bourbon
  • 1/4 cup coffee (or use water if you like)

Directions:

  1. In a heavy pot with a lid, cook the bacon over medium heat.  You want all the fat to render, but you don’t want the bacon to get really crisp.  Remove the bacon from the pan, and pour out all but one tablespoon of bacon fat.  (I keep mine in a jar in the refrigerator, and use it to pan fry.)
  2. Add the sliced onions to the bacon fat in the pan.  Cover and cook on medium low for 15 minutes.  Stir, making sure nothing is burning, and cook another 10 minutes.
  3. Add the bacon, maple syrup, bourbon, and coffee; stir, making sure to scrape the bottom of the pan (use a wooden spoon).  Cover with the lid, cook another 10 minutes.
  4. Remove the lid and cook uncovered for 15 minutes.  I sort of mashed the jam with my wooden spoon to get a smoother consistency.  You can do that or you can leave it chunky.  You could even put it in a food processor and pulse a few times to get it even smoother.  Taste it and see how you like it.
  5. Refrigerate the leftovers and eat within a week.

Explore, experiment, enjoy! — Dana


To view even more of Dana’s unique recipes, you can visit her at Frugal Girlmet!