April 23, 2024

Gingerbread Cupcakes

2014-11-30 20.38.40

For our family’s Thanksgiving Feast (as the grandchildren call it!), we always divvy up of the different dishes that make up our spread.  This year, Robert and I are hosting the Feast at our home, so mine is the turkey to prepare (I always use Alton Brown’s Brined Turkey recipe), along with gluten-free gravy and the stuffing (see my recipe I shared here a couple of weeks ago).   My daughter, Kassia and her mother-in-law Mary Ann are divvy-ing up the sides and salads!  And we each are making a dessert…these spicy-sweet Gingerbread Mini-Cupcakes are my contribution.  Oh, they are so darling!  And just the perfect mouthful (and I mean FULL).  <Of course you certainly could make these in a standard cupcake size, too!>

For those of you who are just beginning to follow the path of gluten-free baking, try this recipe.  When I first made these cupcakes, I used a ‘gf all-purpose flour blend.’ You can pick up a box in the gluten-free section of almost any grocery store. However, if you have a pantry filled with jars of different gluten-free flours, I used ** 1/2 cup brown rice flour, 1/4 cup tapioca flour, 1/4 cup potato starch, 1/4 cup hazelnut flour).  Note that these cupcakes are dairy-free if you prepare them with coconut oil…and of course no whipped cream!

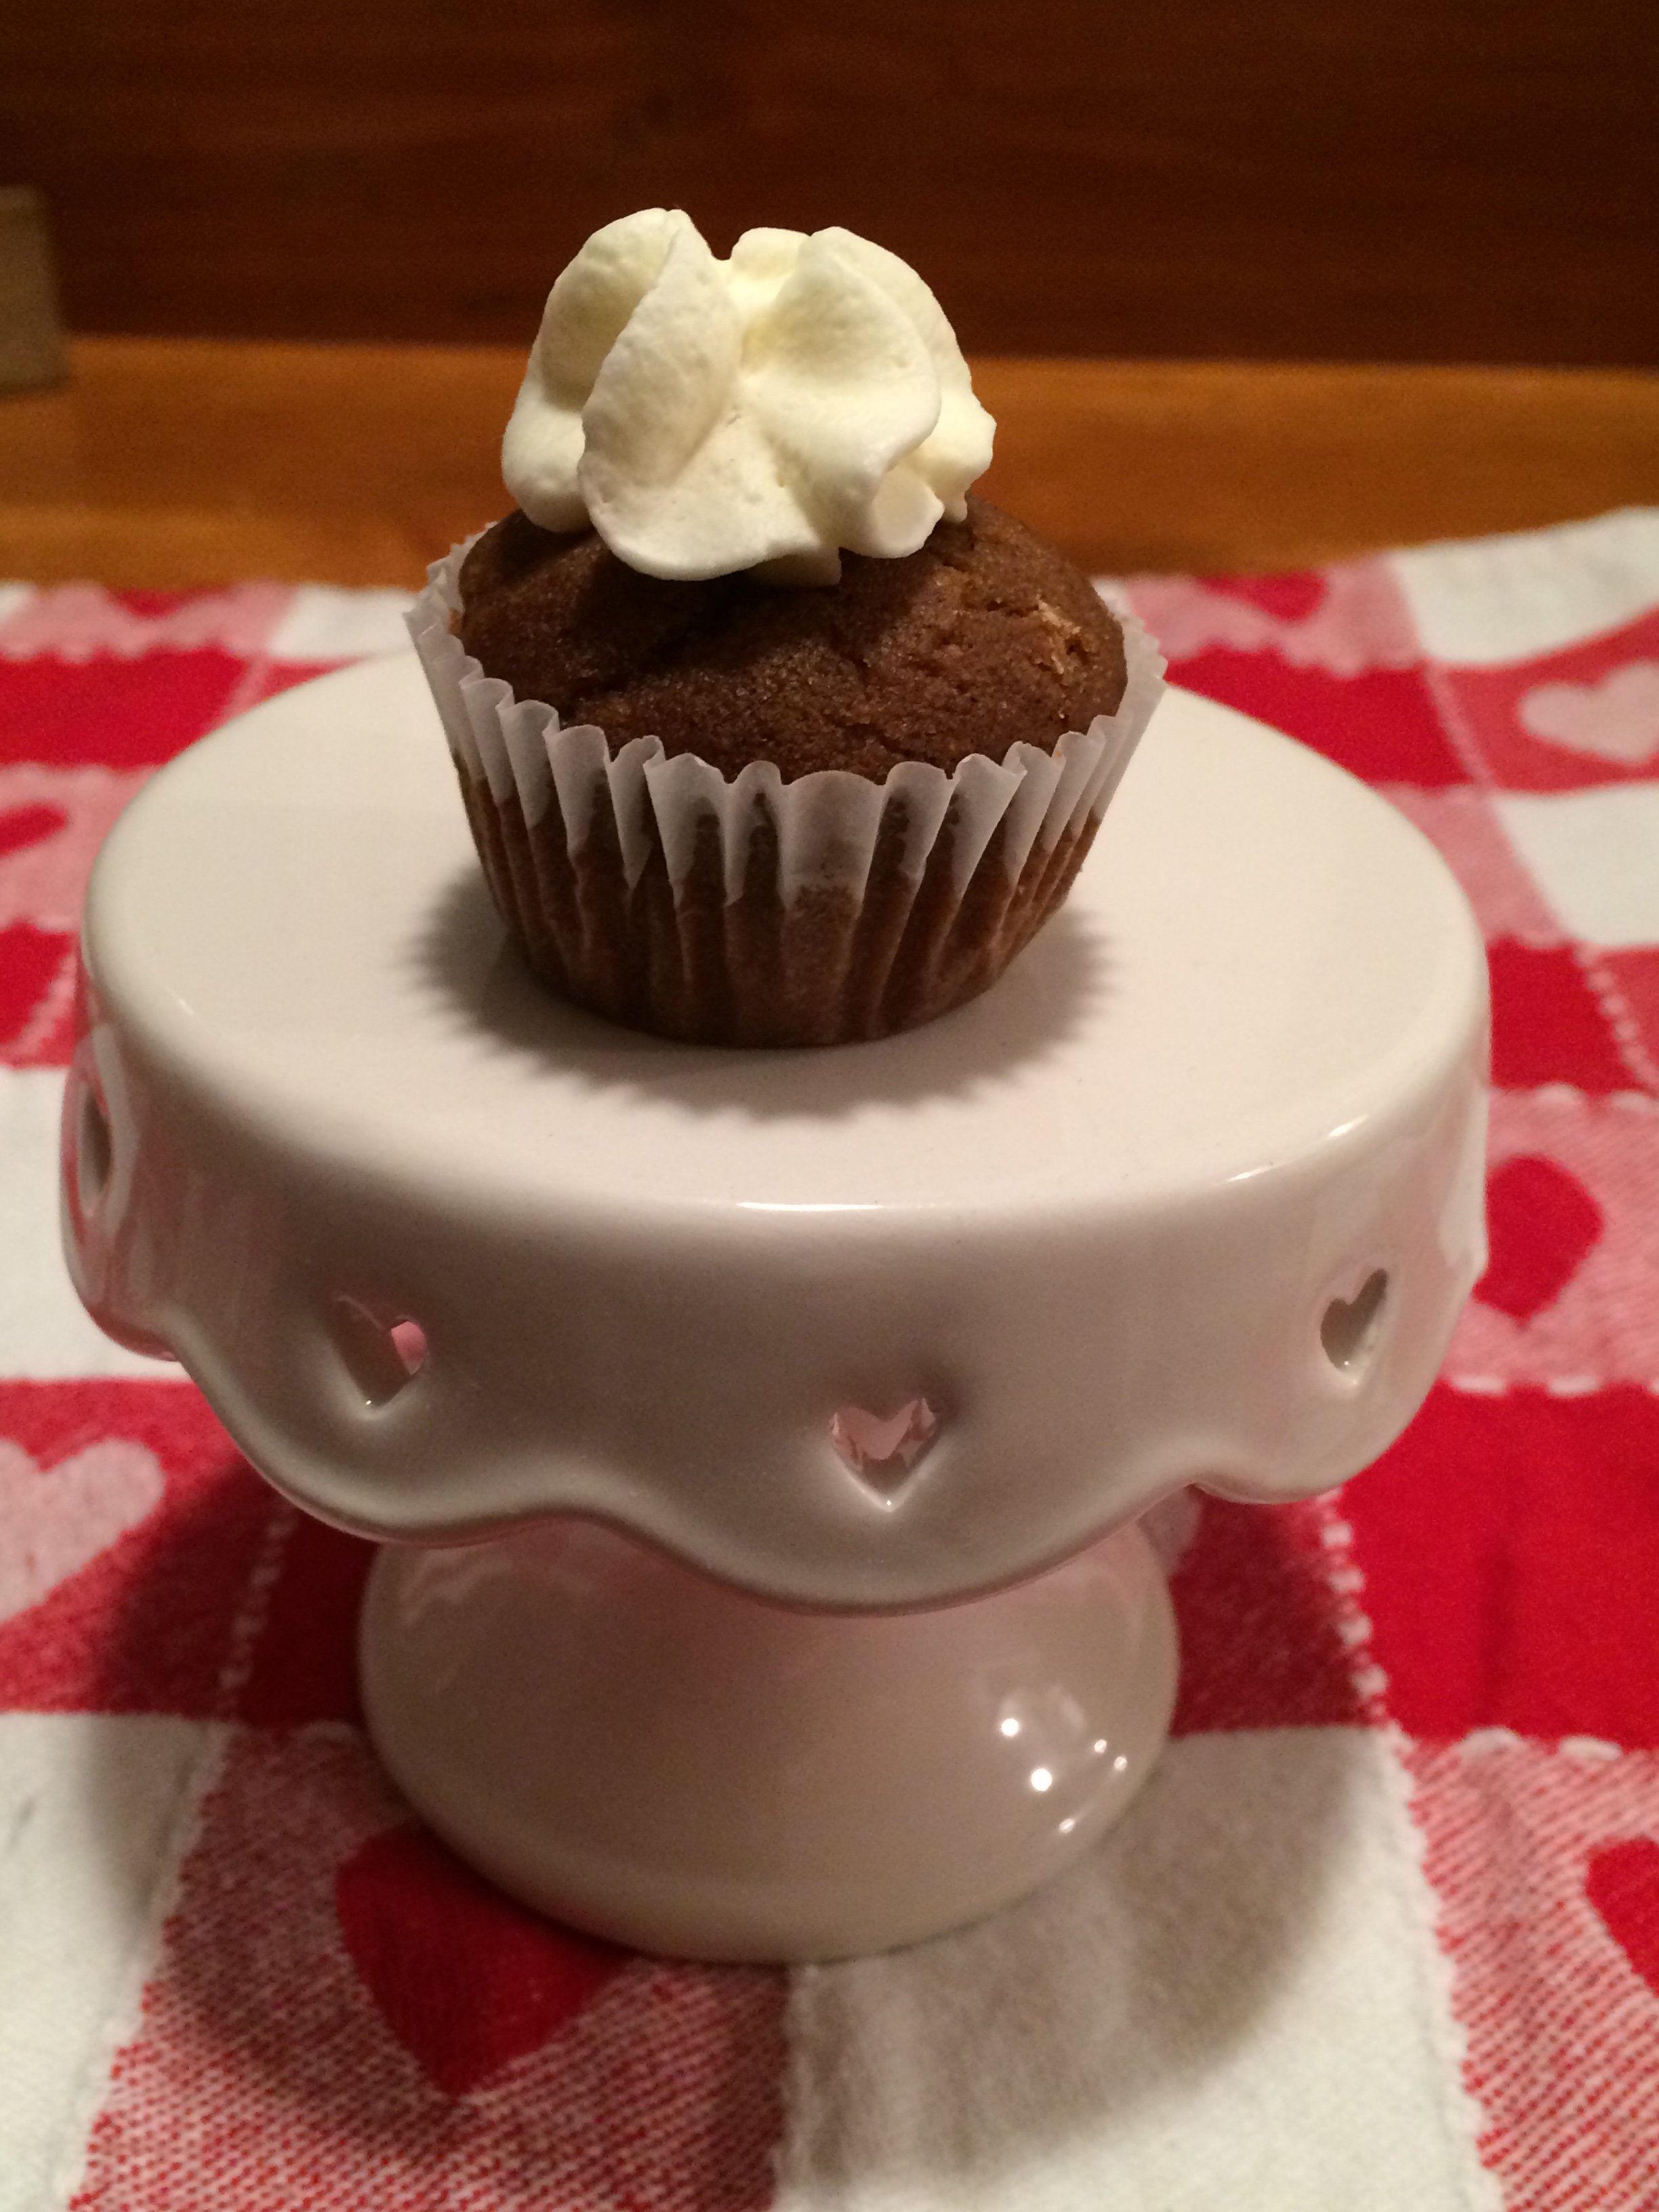
This is a quick recipe to pull together…and the mini-cupcakes only take 10-12 minutes to bake.  We will have ours with Spiced Whipped Cream (see the recipe  here).  But they are equally yummy with a cream cheese frosting or a simple buttercream frosting, too.  Enjoy!

2014-11-29 22.51.34

Mini Gingerbread Cupcakes

ingredients:
1+1/4 cup gluten-free all purpose flour blend **(see above)
1+1/2 teaspoon ground ginger
1 teaspoon cinnamon
1/4 teaspoon ground cloves
1/2 teaspoon ground allspice
1/4 teaspoon salt
4 tablespoons butter, room temperature (I used coconut oil)
1/2 cup brown sugar
1/2 cup molasses
1 egg, room temperature
1 teaspoon baking soda
1/2 cup boiling water

directions:

  • set out the butter (or coconut oil) and egg to come to room temperature
  • fill muffin/cupcake tins with liners (mini = 30; regular = 12)
  • preheat oven to 350
  • mix flour(s) and spices together in a small bowl
  • with mixer, cream together butter (or coconut oil) and sugar
  • add egg, then molasses; beating ‘til nice and creamy
  • microwave the water in a measuring cup ‘til boiling; remove and <carefully> stir in the baking soda; set aside to cool slightly
  • add the dry ingredients to the mixer bowl, and blend for about 1 minute ‘til it all comes together
  • continue to blend while pouring in the water; beat for an additional minute or so (batter will seem thin but it very quickly thickens up)
  • fill lined cupcake tins about 3/4 full with batter
  • bake minis for 10-12 minutes (regular-sized for 20 minutes), or ‘til firm to the touch and slightly browned
  • take pan from oven and immediately remove cupcakes to a cooling rack
  • once completely cool, frost as desired

 ♥   ♥   ♥   ♥   ♥

God loves you!  ♥  (Don’t ever forget that!)

♥  coleen

Gingerbread Cupcakes

Many of you have gone on Spring Break or are anticipating taking a vacation this summer. It is a time to refresh spirit, soul, and body. Over the next couple of weeks, our faithful bloggers will be taking a ‘spring break’ from writing so that they can come back to us refreshed and freshly anointed.
However, Girlfriends’ Coffee Hour website won’t ‘go black’! We will be revisiting some of our favorite blogs and daily devotions which have blessed us in the past. We pray that each of you, our faithful friends and readers, will continue to start your day meditating on the devotionals and songblogs, and be encouraged and blessed.

Let’s give each of our bloggers a big round of applause, a hug,
and the rest they so deserve. God bless you, ladies!

2014-11-30 20.38.40

For our family’s Thanksgiving Feast (as the grandchildren call it!), we always divvy up all of the different dishes that make up our spread.  This year I was happy to prepare a side dish (Quinoa Veggie Salad w/ Orange Vinaigrette), the beverages (one <adult> choice of which was Apple Cider Sangria), and a dessert…these spicy-sweet Gingerbread Mini-Cupcakes. Oh, they were so darling! And just the perfect mouthful (and I mean FULL).  <Of course you certainly could make these in a standard cupcake size, too!>

2014-11-27 13.11.15

For those of you who are just beginning to follow the path of gluten-free baking, try this recipe.  When I first made these cupcakes, I used a ‘gf all-purpose flour blend.’ You can pick up a box in the gluten-free section of almost any grocery store. However, if you have a pantry filled with jars of different gluten-free flours, I used 1/2 cup brown rice flour, 1/4 cup tapioca flour, 1/4 cup potato starch, 1/4 cup hazelnut flour).  Note that these cupcakes are dairy-free if you prepare them with coconut oil…and of course no whipped cream!

This is a quick recipe to pull together…and only takes 10-12 minutes to bake. We enjoyed ours with Spiced Whipped Cream (see the recipe from last week’s blogpost here).  But they would be equally yummy with a cream cheese frosting or a simple buttercream frosting, too.  Enjoy!

2014-11-29 22.51.34

Mini Gingerbread Cupcakes

ingredients:
1+1/4 cup gluten-free all purpose flour blend **
1+1/2 teaspoon ground ginger
1 teaspoon cinnamon
1/4 teaspoon ground cloves
1/2 teaspoon ground allspice
1/4 teaspoon salt
4T butter, room temperature (I used coconut oil)
1/2 cup brown sugar
1/2 cup molasses
1 egg, room temperature
1 teaspoon baking soda
1/2 cup boiling water

directions:

  • set out the butter (or coconut oil) and egg to come to room temperature
  • fill muffin/cupcake tins with liners (mini = 30; regular = 12)
  • preheat oven to 350
  • mix flour(s) and spices together in a small bowl
  • with mixer, cream together butter (or coconut oil) and sugar
  • add egg, then molasses; beating ‘til nice and creamy
  • microwave the water in a measuring cup ‘til boiling; remove and <carefully> stir in the baking soda; set aside
  • add the dry ingredients to the mixer bowl, and blend for about 1 minute ‘til it all comes together
  • continue to blend while pouring in the water; beat for an additional minute or so (batter will seem thin but it very quickly thickens up)
  • fill lined cupcake tins about 3/4 full with batter
  • bake minis for 10-12 minutes (regular for 20 minutes), or ‘til firm to the touch and slightly browned
  • take pan from oven and immediately remove cupcakes to a cooling rack
  • once completely cool, frost as desired

 ♥   ♥   ♥   ♥   ♥

God loves you!  ♥  (Don’t ever forget that!)

♥  coleen

Mini Gingerbread Cupcakes

2014-11-30 20.38.40

For our family’s Thanksgiving Feast (as the grandchildren call it!), we always divvy up all of the different dishes that make up our spread.  This year I was happy to prepare a side dish (Quinoa Veggie Salad w/ Orange Vinaigrette), the beverages (one <adult> choice of which was Apple Cider Sangria), and a dessert…these spicy-sweet Gingerbread Mini-Cupcakes. Oh, they were so darling! And just the perfect mouthful (and I mean FULL).  <Of course you certainly could make these in a standard cupcake size, too!>

2014-11-27 13.11.15

For those of you who are just beginning to follow the path of gluten-free baking, try this recipe.  When I first made these cupcakes, I used a ‘gf all-purpose flour blend.’ You can pick up a box in the gluten-free section of almost any grocery store. However, if you have a pantry filled with jars of different gluten-free flours, I used 1/2 cup brown rice flour, 1/4 cup tapioca flour, 1/4 cup potato starch, 1/4 cup hazelnut flour).  Note that these are dairy-free if you prepare them with coconut oil…and of course no whipped cream!

This is a quick recipe to pull together…and only takes 10-12 minutes to bake. We enjoyed ours with Spiced Whipped Cream (see the recipe from last week’s blogpost here).  But they would be equally yummy with a cream cheese frosting or a simple buttercream frosting, too.  Enjoy!

2014-11-29 22.51.34

Mini Gingerbread Cupcakes

ingredients:
1+1/4 cup gluten-free all purpose flour blend **
1+1/2 teaspoon ground ginger
1 teaspoon cinnamon
1/4 teaspoon ground cloves
1/2 teaspoon ground allspice
1/4 teaspoon salt
4T butter, room temperature (I used coconut oil)
1/2 cup brown sugar
1/2 cup molasses
1 egg, room temperature
1 teaspoon baking soda
1/2 cup boiling water

directions:

  • set out the butter (or coconut oil) and egg to come to room temperature
  • fill muffin/cupcake tins with liners (mini = 30; regular = 12)
  • preheat oven to 350
  • mix flour(s) and spices together in a small bowl
  • with mixer, cream together butter (or coconut oil) and sugar
  • add egg, then molasses; beating ‘til nice and creamy
  • microwave the water in a measuring cup ‘til boiling; remove and <carefully> stir in the baking soda; set aside
  • add the dry ingredients to the mixer bowl, and blend for about 1 minute ‘til it all comes together
  • continue to blend while pouring in the water; beat for an additional minute or so (batter will seem thin but it very quickly thickens up)
  • fill lined cupcake tins about 3/4 full with batter
  • bake minis for 10-12 minutes (regular for 20 minutes), or ‘til firm to the touch and slightly browned
  • take pan from oven and immediately remove cupcakes to a cooling rack
  • once completely cool, frost as desired

 ♥   ♥   ♥   ♥   ♥

God loves you!  ♥  (Don’t ever forget that!)

♥  coleen

GCH: What’s on Your Plate? – Norwegian Fattigman “Poor Man’s Cookie”

fattigman

A few weeks ago, I posted a delicious recipe for Scandinavian Spritz and talked about the “syv slag kaker til Jul,” the seven cookies of Christmas. (You can click HERE to go to that post.) I am back this week with a second, and my favorite, Norwegian Christmas cookie… fattigman!

Fattigman is an ages-old Norwegian cookie that translates to “Poor Man,” and was named so either because purchasing all of these ingredients would’ve cost someone in the old country quite a bit of money, leaving them “poor,” or because sugar was so expensive in Norway that even a poor man (or woman) could afford to make these, since there isn’t much sugar used in these cookies. I’ll let you decide which version of the story you like better, but I grew up hearing the first version, and I’m sticking to it 😉

The recipe(s) for fattigman was brought to America by Norwegian immigrants in the 1800’s… my family included. Christmas just isn’t Christmas without these on the table, and they quickly disappear once put out! They’re traditionally rolled out, then cut using a fattigman roller. My grandmother, however, rolled them out and cut them in triangles, so that’s how we’ve always made them… no special cutter required! I hope you enjoy them as much as we do!

Ingredients:

  • 3 eggs, beaten
  • 4 T. heavy whipping cream
  • 3 T. powdered sugar
  • 1/2 tsp. ground cardamom
  • 1 T. brandy (optional)
  • 1/2 tsp. grated lemon rind
  • 1 1/2 – 2 c. flour
  • lard for deep frying

Directions:

  1. Mix all ingredients together, stirring in flour until dough becomes thick enough to knead. Dough will be slightly rubbery.
  2. Chill in the refrigerator for a few hours.
  3. On a floured cutting board, roll out dough (small pieces at a time) to 1/8″ thick.
  4. Cut in triangles.
  5. Fry in lard, which has been heated to approximately 350 degrees (F.) Dough will rise to the top. Turn dough over with tongs and fry to a very light golden brown.
  6. fattigman fryingRemove from lard and place on a cookie sheet covered in paper towels.
  7. Generously sprinkle both sides of cookies with powdered sugar.
  8. Store in airtight container on counter or in pantry.

Notes:

  • This goes much faster with 2 people making the fattigman. One person to roll out and cut cookies, and one person to fry them.
  • The cookies are very fragile (and VERY yummy!)

Praise God! Let’s eat!

Shandy

Be sure to visit Shandy’s personal blog Aprons ‘n Pearls for recipes, crafts, homekeeping tips & more!

GCH:What’s on Your Plate? – Uncle Everett’s Coffee Cake

Note from my Aunt Phyllis:
Everett started making this, several years ago, when our family was small enough that one cake was enough to go around!! Now, he has to make two of them!! Every Christmas Eve, before noon, you can find Everett and I in the kitchen making this recipe.  We have this after Midnight mass, along with Pork Roast sandwiches for the family. Everett wouldn’t think it was Christmas if we didn’t fix a pork roast for breakfast!! That was the tradition in his family and we have continued it into ours.

I asked if my Aunt would mind if I shared her and Uncle Everett’s recipes here on our blog, and she said, “I would be honored!”  So here go…. Uncle Everett’s Coffee Cake!! 🙂  ENJOY!!

Uncle Everett’s Coffee Cake

Ingredients:

For the Dough:
2 pkgs–dry yeast
1/4 cup–warm water
1 cup–scalded milk
1/2 cup–shortening
2 teaspoons–salt
1/4 cup–sugar
2 well beaten–eggs
4 1/2 cups–flour
.
Honey Nut Filling:
1/2 cup honey
1/4 cup sugar
grated rind of 1 orange
1 Tablespoon orange juice
1 teaspoon–cinnamon
1/3 cup chopped raisins
1/3 cup chopped nuts
1 Tablespoon melted oleo
.
Glaze:
1/2 cup honey
1/2 cup sugar
1 Tablespoonmelted oleo
1 Tablespoon grated orange rind
.
Directions:
Dissolve yeast in warm water. Scald milk. Add the shortening, sugar and salt. Stir until the shortening is melted. Add the yeast mixture and the eggs. Beat well. Add flour and knead until smooth.(This is a very soft dough). Place in an oiled bowl and allow to double in bulk. Punch down and let rise for another 10 minutes. (Use a generous amount of flour when you roll this, as it is very sticky).
.
Divide the dough in two parts and roll each, to 1/2 inch thickness. Brush with melted oleo and cover with the Nut Filling. Roll like a jelly roll and slice in 1 inch slices. Arrange, in an oiled tube pan, in layers. Allow to rise until doubled. Bake at 350 degrees for 45–60 minutes. Cool in the pan. Remove and pour the heated glaze over the top and a bit on the sides.
.
Bon Appetit,
Christi


If you are interested in joining an Online Bible Study here at Girlfriends Coffee Hour, click HERE to check out what’s coming up in January of 2013!

GCH: What’s on Your Plate? – Rice Pudding

rice pudding

Rice pudding is one of those comfort foods that my family really enjoys throughout the year, but especially at Christmastime. One Norwegian tradition we keep in our home is to serve rice pudding on Christmas Eve. An almond is hidden in one person’s pudding, and the lucky person who gets it, gets a marzipan pig! (Much like the German tradition of hiding a pickle ornament in the Christmas tree – another tradition of ours!) It’s a fun way to create memories, and we get to enjoy eating this yummy dessert at the same time!

Ingredients:

  • 3 eggs, beaten
  • 2 cups whole milk
  • 1 1/2 cups cooked rice
  • 1/2 cup granulated sugar
  • 1 1/4 tsp. pure vanilla extract
  • 1/2 tsp. salt
  • a mixture of ground cinnamon and sugar
  • Reddi Whip or light cream (optional)

Directions:

  1. Preheat oven to 325 degrees (F.)
  2. Combine eggs, milk, rice, sugar, salt, and vanilla in a bowl and mix well.
  3. Bake in an 11×7 baking dish for 20 minutes.
  4. Remove from oven. Lightly sprinkle with cinnamon sugar. Stir well.
  5. Return to oven and bake for another 25 minutes.
  6. Remove from oven. Put into individual serving dishes. Chill well in the refrigerator.
  7. Before serving, sprinkle the top with cinnamon sugar. You may also top with Reddi Whip or a little bit of light cream.

Wishing you and yours a very Merry Christmas!

Praise God! Let’s eat!
Shandy

Be sure to visit Shandy’s personal blog Aprons ‘n Pearls for crafts, recipes, homekeeping tips & more!

GCH: What’s on Your Plate? – Old-Fashioned Chocolate Fudge

fudge

There is nothing like summer on Mackinac Island. The no cars rule (you get around by bicycle or horse!), the beautiful Victorian homes, the Grand Hotel’s porch, the lilacs, the quaint downtown, and the FUDGE. Ryba’s Fudge Shop has made me a fudge snob. There is nothing in the world like it, and believe me… I’ve tasted a lot of fudge from a lot of places and have tested several recipes, looking for something that comes close, and this recipe comes the closest! Some of my taste testers have even said it’s the best fudge they’ve had. While it’s not Mackinac fudge, I sure enjoy it, and hope you do too!

Ingredients:

  • 4 ounces baker’s unsweetened chocolate
  • 1 1/2 cups whole milk
  • 1/4 tsp salt
  • 3 1/4 Tblsp light corn syrup
  • 4 cups baker’s ultrafine sugar
  • 2 tsp pure vanilla extract
  • 3 1/2 Tblsp salted butter, melted

Directions:

  1. In a medium saucepan, heat the milk and chocolate on low until melted, stirring occasionally.
  2. Add salt, corn sugar, and syrup to the saucepan, and gradually increase heat until boiling while stirring constantly.
  3. Once it reaches a boil, stop stirring, and allow to boil until it reaches 234 degrees F on a digital/candy thermometer.
  4. As soon as it reaches 234 degrees, remove the saucepan from the burner, then add in the vanilla and melted butter. Do not stir.
  5. Allow to cool in the pan to 110-115 degrees.
  6. Butter an 8″ cake pan. Bottom and sides.
  7. When fudge reaches  the correct temperature, stir for 14-18 minutes with a wooden spoon. It will become thick and lose its glossiness.
  8. Pour fudge into cake pan and smooth top.
  9. Allow to cool in the refrigerator. Once fudge is completely cooled, cut into small squares.

Praise God! Let’s eat!
Shandy

Be sure to visit Shandy’s personal blog Aprons ‘n Pearls for crafts, recipes, homekeeping tips & more!


GCH: What’s on Your Plate? – Old-Fashioned Scandinavian Spritz

spritz-GCH

No Christmas in our home is complete without Scandinavian Spritz (Sprits.) I’m of Norwegian and Swedish descent, and grew up in a family that was mighty proud of its heritage. As a child, we always had two kinds of Scandinavian cookies at Christmas time – spritz and fattigman – but I’ve learned a lot in my adult years about a “proper” Norwegian Christmas, and to do it right, the hostess must offer the “syv slag kaker til Jul,” the seven cookies of Christmas. Yes, seven! Fortunately, Norwegian housewives know how to take a few basic ingredients and turn them into something delicious, and spritz are no exception. They’re also one of the easiest to make, and don’t require any special tools (like some of the other Norwegian cookies) other than a cookie press.

Ingredients:

  • 2 sticks salted butter, softened
  • 2/3 c. sugar
  • 3 egg yolks
  • 1 tsp. pure vanilla extract
  • 1 tsp. pure almond extract
  • 2 1/2 c. unbleached flour
  • food coloring

Directions:

  1. Preheat oven to 350 degrees F.
  2. In a mixing bowl, cream softened butter and sugar.
  3. In a separate small bowl, whisk the 3 egg yolks.
  4. Mix the vanilla and almond extracts into the egg yolks.
  5. Add the yolk mixture into the bowl with the butter and sugar, and mix well.
  6. Add flour, one cup at a time, into the mixing bowl. Combine well.
  7. Divide dough into smaller bowls. (I wanted to make three different colors of cookies this time, so I divided the dough equally into three separate bowls.)
  8. Add a few drops of food coloring into each bowl to make colored dough. Mix well.
  9. Using one color at a time, put dough into a cookie press and press cookies onto an ungreased cookie sheet in the shapes of your choice. (*Tip: I have found that a chilled cookie sheet works best, so I stick mine in the freezer for 5 minutes before pressing the cookies.)
  10. When your cookie sheet is full, bake in oven for approx. 8 minutes, until the cookie is just slightly golden. The cookie will be very soft the touch, but will firm up just a bit while cooling.
  11. Remove cookie sheet from oven, and allow cookies to cool for a couple minutes.
  12. Using a spatula, carefully remove cookies and place on a cooling rack.

*I used a little bit of leftover dough to make the candy canes in the picture, just to see if it would work. If you do make a few cutouts with this dough, you will need to be very careful, as it’s a very soft dough. Using the cookie press is much better, and is the traditional way.

spritz2

I’ll be sharing one more of the syv slag kaker til Jul this month, so be sure to check back!

Praise God! Let’s eat!

Shandy

Be sure to visit Shandy’s personal blog Aprons ‘n Pearls for recipes, crafts, homekeeping tips & more!

GCH: What’s on Your Plate? – Orange Salad

orange salad

No family get-together at my mom’s is complete without her orange salad. She’s been making it for years, and it has become one of those dishes we look forward to whenever we’re there for dinner. My daughter literally jumped up and down with excitement when I told her I was making it this week. She savored every single bite, and asked if she could have it for her fruit in her lunch yesterday. I’m not one to pack desserts in her lunch bag, but I thought I’d treat her this once. I hope you enjoy it as much as we do!

os2

Ingredients:

  • 3 oz. pkg. vanilla cook & serve pudding
  • 3 oz. pkg. tapioca cook & serve pudding
  • 3 oz. pkg. orange gelatin
  • 8 oz. tub Cool Whip
  • 15 oz. can mandarin oranges
  • 3 c. hot water
  • This recipe serves about 6 people.

Directions:

  1. Pour 3 cups of hot water into a medium saucepan.
  2. Empty the packages of vanilla and tapioca pudding, and orange gelatin into the saucepan. (Do NOT make according to the package instructions.) Turn the heat to medium-high and heat until boiling, stirring constantly.
  3. Once it starts boiling, continue to stir for about 30 seconds, then remove from heat. (The mixture will thicken as it heats, and will continue to thicken as it cools down.)
  4. Empty the mixture into a glass bowl. Cover and refrigerate overnight, or you can make it first thing in the morning and it will be ready to go by dinner time. My rule of thumb is an 8 hour cooling time.
  5. Once it is completely cooled, fold in the Cool Whip.
  6. Drain the juice/syrup from the mandarin oranges, then fold in the oranges, making sure everything is completely incorporated. os3
  7. Serve cold, and enjoy!

Praise God! Let’s eat!

Shandy

Be sure to visit Shandy’s personal blog Aprons ‘n Pearls for recipes, crafts, homekeeping tips & more!

GCH: What’s on Your Plate? – Strawberry-Rhubarb Dessert

This dessert is one of my most requested recipes of all time! I make it for family gatherings, Bible study groups, and parties, and my friends and family absolutely LOVE it. As a bonus, it’s simple to make, and tastes scrumptious whether it’s just out of the oven, or right out of the fridge two days later. Prepare to be amazed! *Disclaimer: Do not expect leftovers. In fact, you better stock up on plastic containers, because your friends will be wanting to take extra home with them. You’ve been warned.

Notes:

  • This is a sweet dessert. I oftentimes use Splenda in place of sugar, or 1/2 sugar & 1/2 Splenda.
  • The cake mix really makes this dessert extra special. I sometimes use 2 boxes of cake mix instead of one, and push the extra into the fruit. I use 2 – 2 1/4 sticks of butter when I do this.
  • This is great with vanilla ice cream in the summer.
  • I think it tastes best after it’s been left on the counter for one or two hours to cool, but it really is delicious no matter when you eat it!

Praise God! Let’s eat!

Shandy

Be sure to visit Shandy’s personal blog Aprons ‘n Pearls for recipes, crafts, homekeeping tips & more!