April 26, 2024

Protein Powder Cookie Bars

Protein Powder Cookie Bars

Have you ever used protein powder?  My husband loves the stuff, so we always have a few mongo-sized tubs of it in the pantry.  There are  dozens of varieties – whey, casein, hemp, or pea, to name and few – and as many different flavors, though for most recipes, I would suggest you stick with vanilla.  When you need a sweet treat (and come on, we ALL do sometimes) but don’t want to feel overly guilty, whip up a batch of these Protein Powder Cookie Bars.

Sometimes you know you need protein and you just don’t want to fry some eggs or eat that leftover chicken breast.  Protein powder to the rescue!  I’m normally a champion of whole foods, but sometimes there really is better living through chemistry.  This recipe comes together completely in the food processor and takes just a few minutes to make.  Hold out for the bars to firm up in the fridge or freezer, and you have a candy bar that doesn’t break the calorie bank.  This is totally customizable and deserves a go.  Ready?

Protein Powder Cookie Bars

Ingredients:

  • 1 cup roasted, salted almonds (leave skins on for extra fiber)
  • 1/2 cup coconut oil
  • 2 cups oats
  • 1 cup protein powder (vanilla casein or whey both work here)
  • 1/2 cup shredded coconut
  • 1/2 cup mini chocolate chips

Directions:

  1. In the food processor, add the coconut oil to the almonds and make almond butter.  Then add the ingredients, one by one, and mix after each addition.
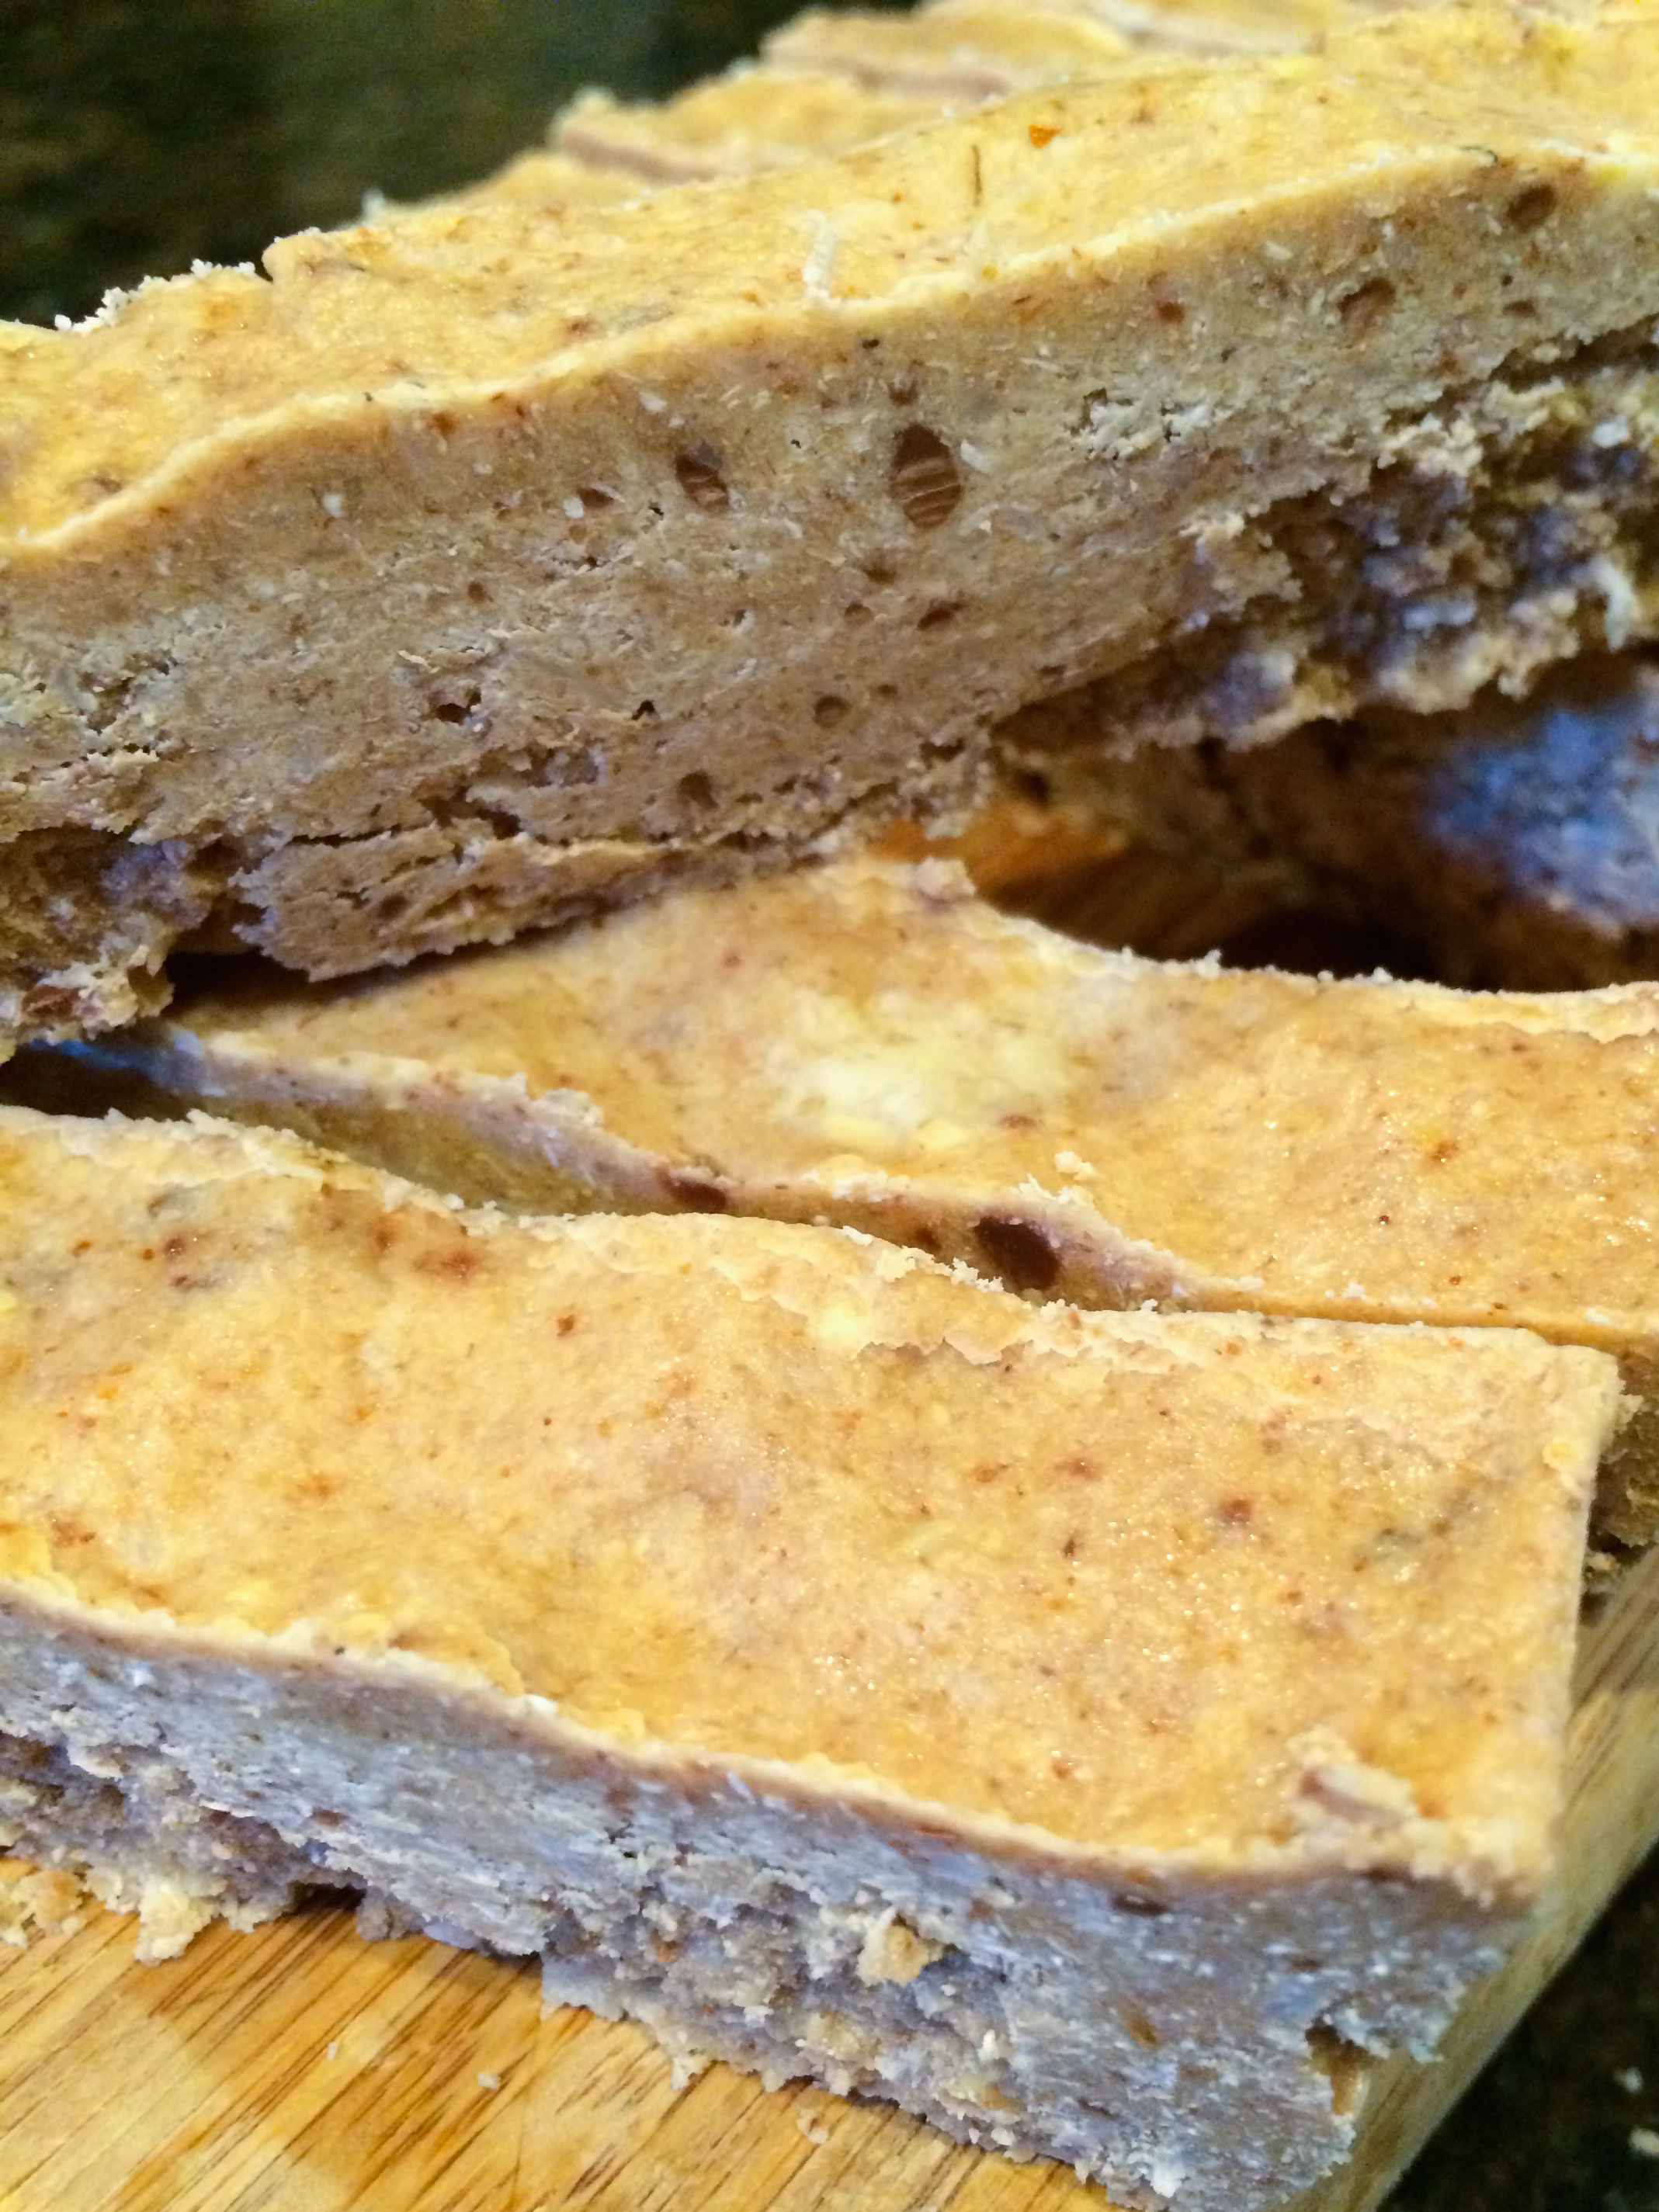
  2. When you have a mixture that feels like heavy, wet sand, pour it out into a metal loaf pan.  Flatten it out with your hands or a spatula and freeze or refrigerate until very firm.  Cut into 4″ x 1″ bars.  (You could go crazy and drizzle these bars with melted chocolate!)  Store in the fridge or freezer until ready to eat.

Explore, experiment, enjoy! — Dana


To view even more of Dana’s unique recipe, you can visit her at Frugal Girlmet!

Pignoli Cookies

One of the ways I like to mix up the variety of baked goodies included on a cookie platter is to include some cookies traditionally made in other countries.  Spritz cookies from the Scandanavian region, and Pfefferneuse from Germany, and French Madelines are among the varieties that we enjoy!  But the following cookies are a must-have!

Pignoli (pronounce it peen-yO-lee) cookies…a traditional Italian cookie. Their name comes from the delicious tiny pine nuts that are the outer layer of these yummy cookies.  Have you ever had one?  They are very decadent  with a softish, creamy almond paste middle and a slightly crunchy exterior surrounded by those delectable pine nuts. And these are very easy to put together. They are a tiny mouthful and so cute with all those toasted pine nuts on the outside. I think that they are a must for our cookie platter!  Be sure to hide a couple away for yourself!  They disappear quickly!

2013-12-18 00.20.30

These little morsels have a pronounced almond flavor that comes from the hit of almond three ways: the almond paste, almond extract, and almond flour. They are gluten free, grain free, dairy free but not sugar free!  You can bake them to be just a little on the softer side, so that just the outsides are crisp and the insides are super soft and moist; or, the way my husband, Robert, likes them—a little crispier and chewier by baking just 2-3 minutes longer.  Just keep an eye on them…the pine nuts can burn…you DEFINITELY do not want that!   Enjoy!

Pignoli Cookies

Ingredients:
1 can almond paste  *** 2013-12-17 22.49.02
1/4 cup granulated sugar
1/8 teaspoon salt
1/2 teaspoon almond extract
1/2 teaspooon vanilla extract
1/2 cup blanched almond flour
1 extra-large egg white, lightly beaten
6 ounces pine nuts
confectioners (powdered) sugar, optional

*** be sure to purchase almond paste not pie filling

Directions:

  • preheat oven to 325
  • line a baking sheet with parchment paper
  • place the nuts onto a dinner plate
  • in a food processor, break up the almond paste into small pieces, and pulse with the sugar, salt, and almond flour
  • once the mixture is finely ground, slowly add the extracts and egg white just ‘til the dough comes together
  • dump the dough onto a piece of waxed paper
  • use a tablespoon measure to figure out the correct amount of dough and then pinch off pieces this size dropping them into the nuts (keeping your fingertips just slightly wet helps so much!)
  • then, working quickly, roll a piece of dough covered with nuts into a small ball and place it on the lined baking sheet
  • form all of the dough into cookies in this manner, placing them 1+1/2 inches apart
  • bake the cookies 20 to 25 minutes
  • remove from oven and allow to cool 5 minutes on pan and then completely cool on a rack
  • optional: dust with confectioners sugar before serving

   ♥  ♥  ♥ 

God loves you!  ♥  (Don’t ever forget that!)

Merry Christmas to you and your loved ones!

♥  coleen

GCH: What’s on Your Plate? – Norwegian Fattigman “Poor Man’s Cookie”

fattigman

A few weeks ago, I posted a delicious recipe for Scandinavian Spritz and talked about the “syv slag kaker til Jul,” the seven cookies of Christmas. (You can click HERE to go to that post.) I am back this week with a second, and my favorite, Norwegian Christmas cookie… fattigman!

Fattigman is an ages-old Norwegian cookie that translates to “Poor Man,” and was named so either because purchasing all of these ingredients would’ve cost someone in the old country quite a bit of money, leaving them “poor,” or because sugar was so expensive in Norway that even a poor man (or woman) could afford to make these, since there isn’t much sugar used in these cookies. I’ll let you decide which version of the story you like better, but I grew up hearing the first version, and I’m sticking to it 😉

The recipe(s) for fattigman was brought to America by Norwegian immigrants in the 1800’s… my family included. Christmas just isn’t Christmas without these on the table, and they quickly disappear once put out! They’re traditionally rolled out, then cut using a fattigman roller. My grandmother, however, rolled them out and cut them in triangles, so that’s how we’ve always made them… no special cutter required! I hope you enjoy them as much as we do!

Ingredients:

  • 3 eggs, beaten
  • 4 T. heavy whipping cream
  • 3 T. powdered sugar
  • 1/2 tsp. ground cardamom
  • 1 T. brandy (optional)
  • 1/2 tsp. grated lemon rind
  • 1 1/2 – 2 c. flour
  • lard for deep frying

Directions:

  1. Mix all ingredients together, stirring in flour until dough becomes thick enough to knead. Dough will be slightly rubbery.
  2. Chill in the refrigerator for a few hours.
  3. On a floured cutting board, roll out dough (small pieces at a time) to 1/8″ thick.
  4. Cut in triangles.
  5. Fry in lard, which has been heated to approximately 350 degrees (F.) Dough will rise to the top. Turn dough over with tongs and fry to a very light golden brown.
  6. fattigman fryingRemove from lard and place on a cookie sheet covered in paper towels.
  7. Generously sprinkle both sides of cookies with powdered sugar.
  8. Store in airtight container on counter or in pantry.

Notes:

  • This goes much faster with 2 people making the fattigman. One person to roll out and cut cookies, and one person to fry them.
  • The cookies are very fragile (and VERY yummy!)

Praise God! Let’s eat!

Shandy

Be sure to visit Shandy’s personal blog Aprons ‘n Pearls for recipes, crafts, homekeeping tips & more!

GCH: What’s on Your Plate? – Old-Fashioned Scandinavian Spritz

spritz-GCH

No Christmas in our home is complete without Scandinavian Spritz (Sprits.) I’m of Norwegian and Swedish descent, and grew up in a family that was mighty proud of its heritage. As a child, we always had two kinds of Scandinavian cookies at Christmas time – spritz and fattigman – but I’ve learned a lot in my adult years about a “proper” Norwegian Christmas, and to do it right, the hostess must offer the “syv slag kaker til Jul,” the seven cookies of Christmas. Yes, seven! Fortunately, Norwegian housewives know how to take a few basic ingredients and turn them into something delicious, and spritz are no exception. They’re also one of the easiest to make, and don’t require any special tools (like some of the other Norwegian cookies) other than a cookie press.

Ingredients:

  • 2 sticks salted butter, softened
  • 2/3 c. sugar
  • 3 egg yolks
  • 1 tsp. pure vanilla extract
  • 1 tsp. pure almond extract
  • 2 1/2 c. unbleached flour
  • food coloring

Directions:

  1. Preheat oven to 350 degrees F.
  2. In a mixing bowl, cream softened butter and sugar.
  3. In a separate small bowl, whisk the 3 egg yolks.
  4. Mix the vanilla and almond extracts into the egg yolks.
  5. Add the yolk mixture into the bowl with the butter and sugar, and mix well.
  6. Add flour, one cup at a time, into the mixing bowl. Combine well.
  7. Divide dough into smaller bowls. (I wanted to make three different colors of cookies this time, so I divided the dough equally into three separate bowls.)
  8. Add a few drops of food coloring into each bowl to make colored dough. Mix well.
  9. Using one color at a time, put dough into a cookie press and press cookies onto an ungreased cookie sheet in the shapes of your choice. (*Tip: I have found that a chilled cookie sheet works best, so I stick mine in the freezer for 5 minutes before pressing the cookies.)
  10. When your cookie sheet is full, bake in oven for approx. 8 minutes, until the cookie is just slightly golden. The cookie will be very soft the touch, but will firm up just a bit while cooling.
  11. Remove cookie sheet from oven, and allow cookies to cool for a couple minutes.
  12. Using a spatula, carefully remove cookies and place on a cooling rack.

*I used a little bit of leftover dough to make the candy canes in the picture, just to see if it would work. If you do make a few cutouts with this dough, you will need to be very careful, as it’s a very soft dough. Using the cookie press is much better, and is the traditional way.

spritz2

I’ll be sharing one more of the syv slag kaker til Jul this month, so be sure to check back!

Praise God! Let’s eat!

Shandy

Be sure to visit Shandy’s personal blog Aprons ‘n Pearls for recipes, crafts, homekeeping tips & more!