November 15, 2024

Irish Soda Bread

Irish Soda Bread resize

For last week’s recipe, I needed a carton of buttermilk.  I still had quite a bit left, and I knew I wanted to use it all up, so I found a few recipes that fit the bill.  None, however, sounded as tasty as this one for Irish Soda Bread!

A “soda bread” is simply a quick bread that uses baking soda and /or baking powder to rise, as opposed to yeast.  That means you don’t need to wait for it to rise, or worry about the yeast being old and feeble (or killing it with water that is too hot … or not hot enough to wake it up … Have I mentioned lately I hate baking with yeast?!?!)  This recipe comes together in a food processor, but if yours isn’t big enough to fit all the ingredients, or you just like using a pastry cutter, you can certainly put some elbow grease into it and do it the old-fashioned way.

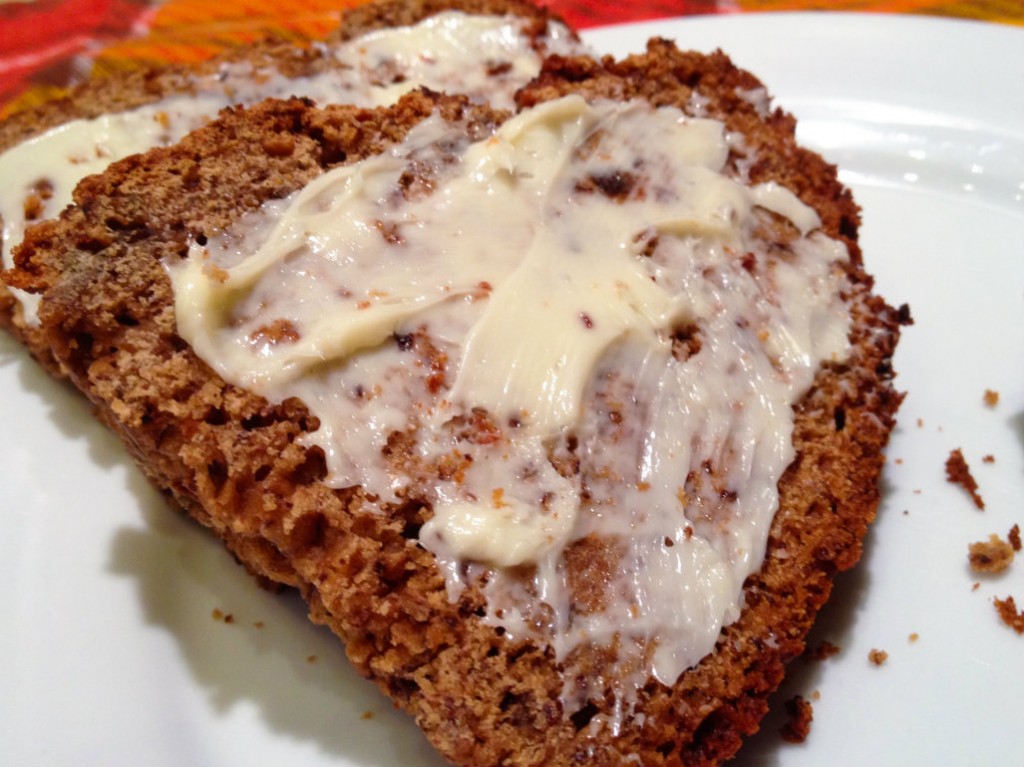
This recipe is based on a Martha Stewart recipe, but I made a few changes.  The biggest change is that, unlike regular soda bread that is kind of bland and dotted with raisins, this one has chopped currants throughout, so it is more of a currant-flavored bread.  Also, the original recipe called for caraway seeds, but I used anise seeds instead.  This bread keeps on the counter, wrapped tightly in plastic wrap and foil, for a few days.  Cut a big slice, cover it with butter, and match it up with your favorite coffee or tea.

Irish Soda Bread

Ingredients:

  • 4 cups flour
  • 1/4 cup sugar
  • 1 teaspoon salt
  • 2 teaspoons baking powder
  • 2 tablespoons anise seed
  • 4 tablespoon cold butter, cubed
  • 1 10-ounce box currants (or use 2 cups of raisins)
  • 1 1/2 cups buttermilk
  • 1 egg
  • 1 teaspoon baking soda
  • 3 tablespoons buttermilk

Directions:

  1. Preheat oven to 350*F.  Butter a large round Pyrex baking dish, all the way to the top.
  2. In the bowl of a large food processor, blend together the flour, sugar, salt, baking powder, and anise seed.  Add the cold butter cubes and pulse to blend.  Add in the currants and blend again.
  3. In a large bowl, beat together the buttermilk, egg, and baking soda.  Add this to the food processor and blend again until thoroughly mixed.  It will be wet and sticky!
  4. Scoop the bread dough into the buttered Pyrex dish and smooth into a mound.  With a brush or the back of a spoon, brush the top with the 3 tablespoons of buttermilk.  Bake for 70-80 minutes, or until a toothpick comes out clean.
Sweet Pea Soup

Sweet Pea Soup resize

I call both of my girls “Sweet Pea.”  My Mom called me “Sweet Pea” too.   So when I was working on a recipe to use up the last of my buttermilk and stumbled on this tempting combination of peas and mint, I couldn’t help but give it a cute name:  Sweet Pea Soup!

Peas and mint are a natural springtime match-up.  This soup comes together in half an hour, and with another half hour to chill,  it will be ready to eat.  I used both frozen peas and pea pods (which are all over my Farmer’s Market, and probably yours, too.)  If you can’t find pea pods, just double the frozen peas and use a full pound.  The recipe calls for you to strain the blended soup, which gives it a more silky, smooth texture.  You can skip this step if you are in a hurry, or if you like a little thicker body to your soup.  Either way I think you’ll love it, and so will all the “Sweet Pea’s” in your life!

Sweet Pea Soup

Ingredients:

  • 1 cup pea pods, any kind
  • 1 onion (sweet Vidalia would be nice, but I just used a regular white onion), chopped
  • 3 tablespoons butter
  • 8 ounces frozen peas
  • 2 cups chicken stock
  • 1 cup buttermilk
  • 1 handful mint leaves (save a few pretty ones for garnish)
  • salt to taste

Directions:

  1. In a large pot, heat the pea pods and onion in the butter.  Cook over medium heat for ten minutes until the onion is getting soft.
  2. Add the frozen peas and chicken stock.  Cook on medium for ten minutes.
  3. Turn off the heat.  Pour in buttermilk and mint.  Blend with an immersion blender, or transfer to a large blender and blend in batches until smooth.  Taste and add salt to your liking.
  4. Strain the soup through a mesh sieve (or not, your choice.)  Cool in the refrigerator for half an hour.  Serve chilled, with additional mint leaves for garnish.

Explore, experiment, enjoy! — Dana


To view even more of Dana’s unique recipe, you can visit her at Frugal Girlmet!

Roasted Vegetables with Buttermilk Herb Sauce

Roasted Vegetables with Buttermilk Herb Sauce Resize

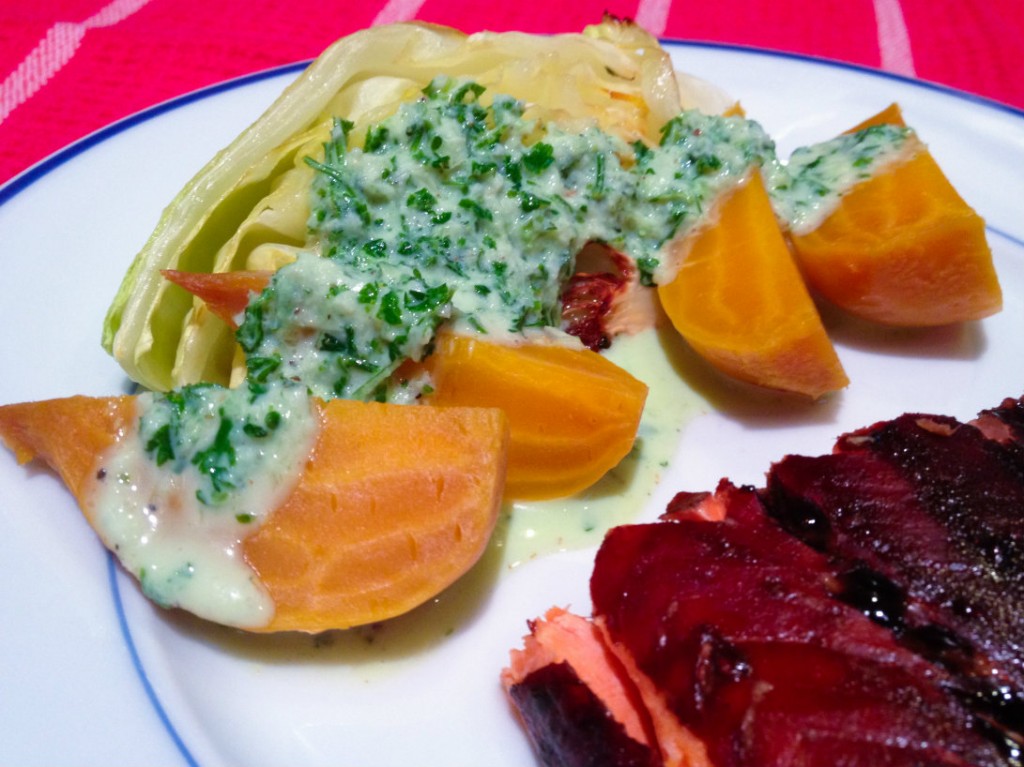
Did you have a fun and festive St. Patrick’s Day?  We didn’t do too much to celebrate.  (I have a little Irish in me, but no freckles!)   I did make a cabbage dish on Monday, leaving me with half a head of green cabbage.  I love roasting wedges of cabbage, but I wanted something a little more assertive, so I decided to make an herb dressing for them.  Add in some other roasted veggies, and I came up with this recipe for Roasted Vegetables with Buttermilk Herb Sauce.

Buttermilk is not something I grew up with, so I can’t really say much about it.  It does have a pleasantly sour taste that adds complexity to baked goods (think pancakes) and sauces.   If you add a lot of dill and pepper to this recipe, you’d have something very close to ranch dressing, but without all the chemicals and preservatives in bottled or packaged varieties.  I used parsley because that’s what I had but I’d like to try it next time with a big handful of tarragon.  If you grow your own herbs, this is the perfect canvas for trying new flavor combinations!

I served the sauce over roasted cabbage wedges and roasted golden beets.  Here is a list of other vegetables I think this would taste good on:  carrots, leeks, green beans, baked potatoes, and Brussels sprouts with bacon.  I served this with balsamic-glazed salmon last night, and you know what?  The sauce went great on the fish too!  I had a little sauce left over, so this morning I used it to make chicken salad for my husband’s lunch.  Find your own way with this delightfully green and springy sauce—start here!

Roasted Vegetables with Buttermilk Herb Sauce

Ingredients:

  • 4 beets
  • olive oil
  • 1/2 head green cabbage
  • 1/2 cup buttermilk
  • 3 tablespoons plain yogurt
  • 4 green onions
  • handful of fresh herbs:  use parsley, tarragon, dill, or a combination of these
  • 1 clove garlic or 1/2 teaspoon garlic powder
  • salt and pepper to taste
  • squeeze of lemon if desired (I used a big squeeze – okay, two big squeezes!)

Directions:

  1. Preheat oven to 400*F.  Prepare the beets for roasting:  Wash them and remove any greens from the top.  In a large rectangle of aluminum foil, place the beets, root tip facing up, in the middle.  Drizzle with a little olive oil, maybe a tablespoon total.  Wrap up the beets in the foil and place in a pie plate or Pyrex bowl.  Bake for one hour or until they give when you push on them.  Set aside to cool.
  2. While the beets are baking, prepare the cabbage: Cut out the core of the cabbage, then cut the cabbage into 4 wedges.  Place them on a foil-lined baking sheet and drizzle each wedge with about 1/2 teaspoon of olive oil.  After the beets have been in the oven for half an hour or so, add the cabbage.  Bake for about 15 minutes, then flip them over and bake again for about ten minutes.  (The time will vary depending on your oven, your cabbage, et cetera.  You want the cabbage to get golden and a little crispy at the edges, but not too dark!)
  3. While the vegetables are cooking, combine buttermilk, yogurt, green onions, herbs, and garlic in a food processor.  Taste it…need more garlic?  Go ahead!  Add salt and pepper and a squeeze of lemon if you like and blend again.  Taste to make sure it’s yummy, and then put in the fridge until ready to serve.
  4. Skin the beets:  once they are cool enough to handle simply slip the skins off with your fingers.  If you are using red beets, you may want to wear gloves, since they will turn your fingers pink!
  5. On each plate, lay down a wedge of cabbage and a beet cut into quarters.  Serve the hot veggies with the cold buttermilk herb sauce.

Explore, experiment, enjoy! — Dana


To view even more of Dana’s unique recipe, you can visit her at Frugal Girlmet!

Italian Tuna Wraps


Italian Tuna Wraps resize

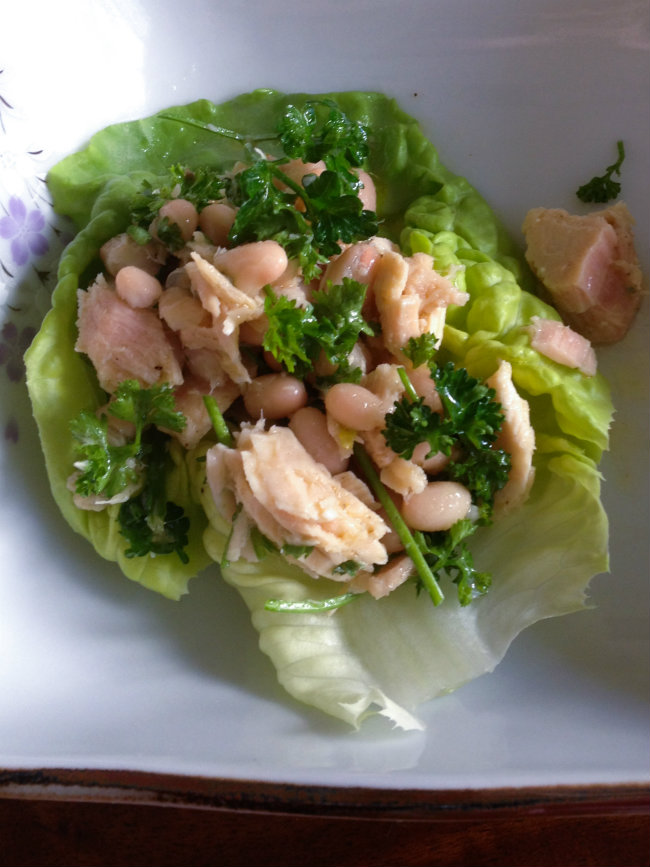
I love it when a plan comes together!  I was hungry at lunchtime yesterday, so I opened my pantry.  I stared at the shelf for a good minute…eyes glazing over.  “There’s got to be something here, some combination of flavors that will fill and delight me” I thought.  And bingo!  Inspiration struck and I made these Italian Tuna Wraps.

Okay, this is pretty much just tuna salad in a lettuce wrap.  But the addition of white beans makes it filling, contributes a creamy texture, and ups the fiber.  A handful of chopped parsley adds freshness.  This recipe serves two for lunch.  Or just do what I did, and put it in the fridge for tomorrow’s lunch.  It will still taste great the next day!

Italian Tuna Wraps

Ingredients:

  • 1 can of tuna
  • 1 can of white beans
  • juice of 2 lemons
  • 1 tablespoon olive oil
  • salt and pepper
  • pinch of garlic powder
  • 1/4 cup roughly chopped parsley
  • Boston lettuce leaves (or other lettuce leaves of choice) for wrapping

Directions:

  1. Drain the can of tuna and put it in a large bowl.  Drain the beans, rinse them in a strainer and then add them to the tuna.
  2. Toss the tuna mixture with the lemon juice and olive oil.  Season with salt, pepper, and garlic powder; toss again.  Add parsley and toss.
  3. To serve, wash and shake dry the lettuce leaves, and place a large spoonful of tuna in the lettuce.  Wrap and eat.  Couldn’t be easier!

Explore, experiment, enjoy! — Dana


To view even more of Dana’s unique recipe, you can visit her at Frugal Girlmet!

Brussels Sprouts and Kale Salad

Kale and Brussels Sprouts Salad Resize

Now you ladies know I love a good salad.  I will eat a salad for breakfast – in fact, I’m finishing this big bowl of Brussels Sprouts and Kale Salad right now, with my morning coffee!  Raw Brussels sprouts—for breakfast?!  Yes indeed!

I found this recipe on the Bon Appetit website, which I tweaked to my liking.  The best thing about this salad, aside from the fact that it tastes good, is that it is so hearty.  I made it last night, had some for dinner, and it’s still good this morning!  But because it’s so sturdy, you’ll want to keep the nuts, fruit, and cheese separate until you’re ready to eat it.  You can sub any dried fruit you like for the cranberries:  cherries, blueberries, golden raisins, and diced dried apricot would be delicious too.  And if you don’t have toasted almonds, substitute pecans, walnuts, or hazelnuts.  Check it out, and report back with your chosen combination of flavors!

Brussels Sprouts and Kale Salad

Ingredients:

  • 1 bunch Tuscan kale (also called dinosaur or lacinato kale)
  • 1/2 pound large Brussels sprouts
  • 1 shallot (or 1/4 red onion)
  • juice of one large lemon
  • 1/3 cup olive oil
  • 1/2 teaspoon honey
  • to serve:  almonds, dried cranberries, and Parmesan cheese
  • salt and pepper

Directions:

  1. Prepare kale:  Strip the leaf off the thick stem, then soak the leaves in cold water to remove any dirt.
  2. While the kale is soaking, prepare the Brussels sprouts:  cut off the stem end and any brown or wilted leaves.  Slice in half lengthwise, and lay down flat on the cut side.  Thinly slice each sprout half to create shreds.  Place shredded sprouts in a very large bowl.
  3. Dry the kale.  Grab a handful and sort of wad it up, then run your knife through the kale to shred it.  Add to the sprouts in the  bowl.
  4. In a small food processor, blend together the shallot, lemon juice, olive oil, and honey.
  5. Pour over the kale and mix with your hands.  I mean get in there!  Massage the dressing into the kale, squeezing it to soften everything up and get the dressing into all the sprouts and kale.
  6. To serve:  Dish salad into a bowl.  Take a handful of almonds and crush with a knife or in a mortar and pestle – just crack them lightly, you don’t need to pulverize them.  Add the cracked nuts and cranberries to the salad, then shred some Parmesan to go on top.  I shaved the block of Parmesan with my vegetable peeler, but you don’t have to do that if you don’t want.  Season with salt and pepper and serve.

Explore, experiment, enjoy! — Dana


To view even more of Dana’s unique recipe, you can visit her at Frugal Girlmet!

Mondo Coconut Shrimp

Mondo Coconut Shrimp Resize

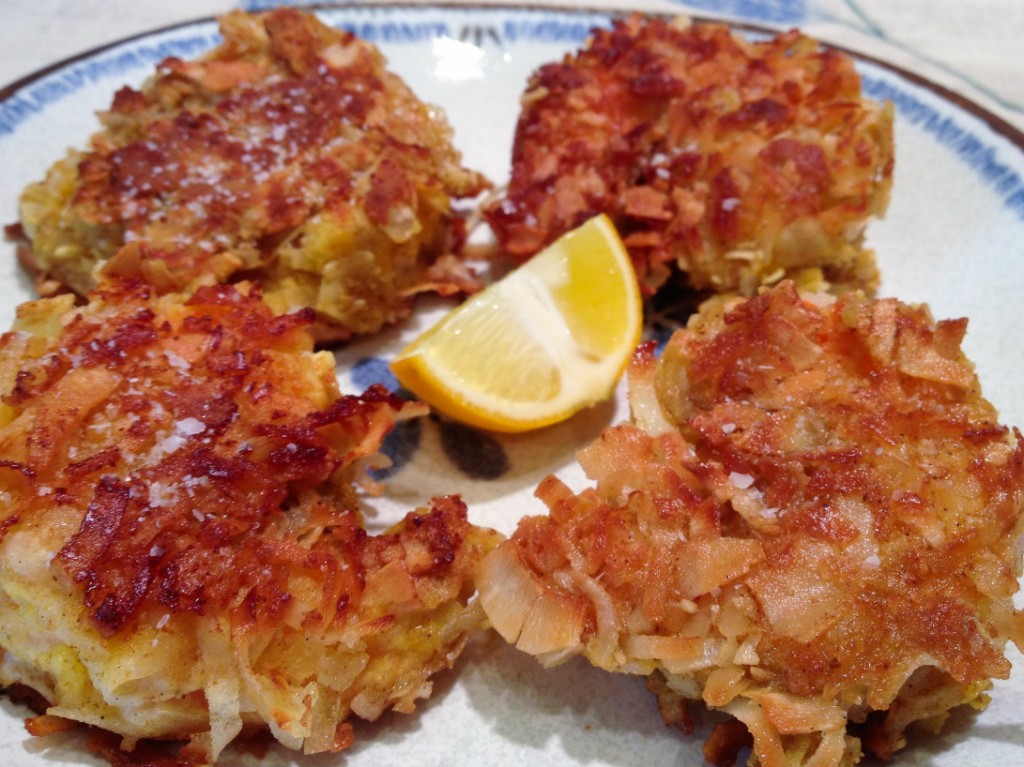
Yes, MONDO!  With four, count ’em, FOUR different coconut products, you too can make your favorite appetizer from that restaurant you go to with your girlfriends!  Mondo Coconut Shrimp are really quite easy to make, and, a fun and tasty appetizer for a party.

You’ll want to use BIG shrimp for this recipe—the larger the better.  I found  some 13-15 count shrimp on sale, and they worked really well.  If you are using smaller shrimp, decrease your cooking time so you don’t make these guys all tough and rubbery.  I coated these in both sweetened AND unsweetened coconut.  Feel free to use one or the other if you don’t have both.  I was going to make this recipe just with the unsweetened kind, but I found a cup of sweetened coconut in my freezer and decided to use it up – and I’m glad I did!

To be  honest, these are fantastic with just some salt sprinkled on top when they come off the stove.  I took a photo of them with a lemon slice, and found out they didn’t even need that to be delicious!  So make these for friends, or as part of a funky dinner, and go MONDO!

MONDO Coconut Shrimp

Ingredients:

  • 1 pound large shrimp, shelled and deveined
  • 3 eggs
  • 1 cup coconut flour
  • 1 cup sweetened shredded coconut
  • 1 cup unsweetened shredded coconut
  • 1 teaspoon curry powder
  • coconut oil, for frying
  • salt for serving

Directions:

  1. Set up a breading station.  In the first bowl, beat the 3 eggs with a tablespoon of water.  In the second bowl, pour in the coconut flour.  In the third bowl, mix together the two coconut shreds and the curry powder.
  2. Start breading:  Dip a shrimp into the egg, then the coconut flour, then back into the egg, and then the coconut shreds.  Place on a plate while you complete the breading.
  3. In a large non-stick frying pan, heat one heaping teaspoon of coconut oil over medium heat.  When  hot, carefully add the breaded shrimp.  You’ll probably have to do this in at least two batches.  Let them cook for about six minutes, then flip and cook again for another five minutes.  Watch your heat here – you want it medium to medium-low, so that the shrimp cooks evenly and the breading doesn’t burn before the shrimp are done.
  4. Remove cooked shrimp to a plate and immediately sprinkle with kosher or sea salt.  Add another teaspoon of coconut oil  to the pan, if necessary, and cook the next batch.  Serve hot!

I texted my husband a photo of the shrimp and he said, “Oooh, looks yummy!” so I saved him some.  Unfortunately, they aren’t as nice the second time around.  They still taste great, but you can’t get them crispy on the outside a second time.  That means Carpe Diem – Gather ye rosebuds while ye may – and eat your shrimp while they’re hot.

Explore, experiment, enjoy! — Dana


To view even more of Dana’s unique recipe, you can visit her at Frugal Girlmet!

Crustless Kale Quiche

Crustless Kale Quiche Resize

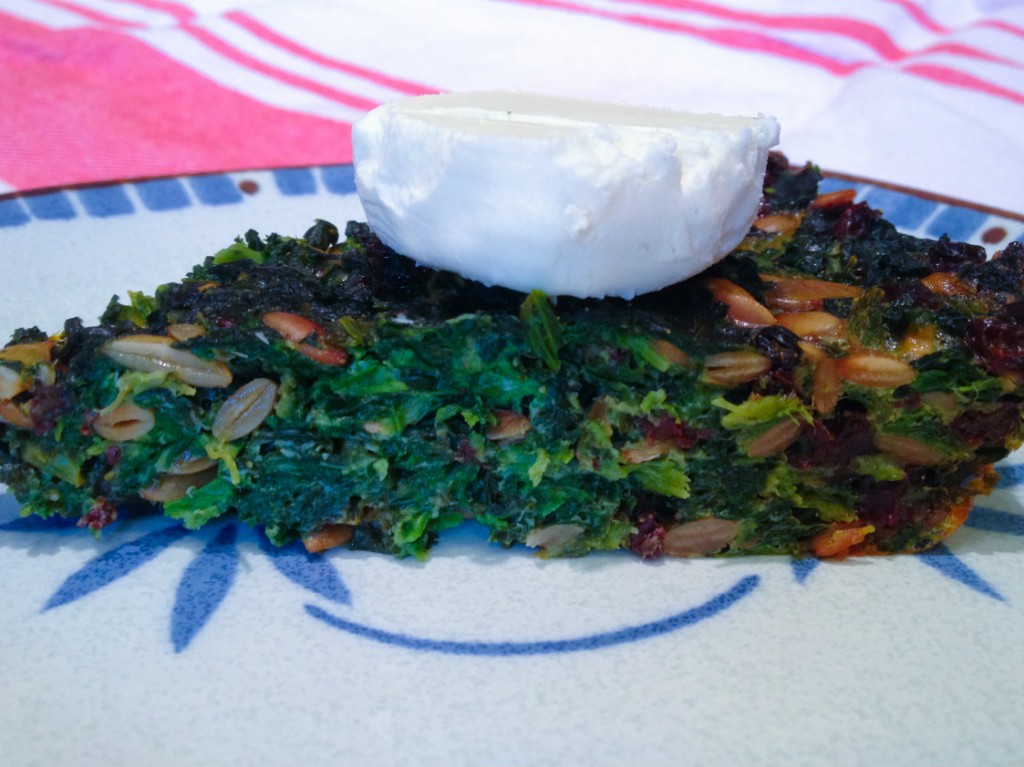
Talk about a tongue twister!  It’s worth the effort to say, and the little bit to make, because this Crustless Kale Quiche hits the spot.

I’ve only made this once … and I’ve already eaten almost half of it.  The kale adds a little bitterness and chew to what would otherwise be a run-of-the-mill spinach pie.  Nutmeg, currants, and pepitas add an almost sweet, Middle Eastern flavor profile.  The three eggs are just enough to combine the ingredients without becoming heavy or custardy like a regular spinach quiche.  Don’t get me wrong – a traditional spinach and swiss cheese quiche is wonderful, but this one is lighter, with an unexpected combination of flavors that will have you craving it again.

I ate this hot, and I ate it cold, cut right out of the fridge.  I ate this with a big slab of goat cheese on top and I ate it plain.  I’m going to eat more of it with dinner tonight and see if I can’t discover some new way to enjoy it.  If you want your greens, with a little extra zing, try this instead of a salad tonight!

Crustless Kale Quiche

Ingredients:

  • 1 pound bag of frozen chopped spinach
  • 1 large bunch of kale
  • 3/4 cup pepitas (or try pine nuts or sunflower seeds)
  • 1 tablespoon coconut oil (or butter) plus more for greasing the pie plate
  • 1 teaspoon chopped garlic (about 2 cloves)
  • 1/2 cup currants or raisins (next time I’m trying golden raisins!)
  • 1/8 teaspoon ground nutmeg
  • 1/2 teaspoon salt
  • 3 eggs
  • Goat cheese, to serve, if desired

Directions:

  1. Wash the kale and remove from the stem, tearing it into smaller-than-bite-sized pieces.  Saute on medium heat in a large pot with a lid.  Don’t add any extra water or oil – just the damp kale by itself.  Stir occasionally until it gets soft, about 15 minutes.  When it appears soft and has reduced in volume, pour in the bag of frozen spinach.  Stir to combine and replace the lid.  Cook on medium-low for another five minutes until the spinach is thawed.  Remove from the heat and let cool.
  2. Preheat the oven to 350*F.  While the spinach and kale are cooling, heat the coconut oil over medium and add the pepitas.  Stir frequently for 5 minutes, then add the garlic and currants.  Stir for another 3 minutes.
  3. Squeeze out as much water from the kale mixture as possible, then dump it into a large bowl.  Pour over the pepita mixture and combine.  Add nutmeg and salt.
  4. Beat 3 eggs well and mix into kale mixture.  Grease a pie plate, then fill with the kale mixture.  Smooth it down so you have a flat top.  Bake for 35 minutes or until not wet in the middle.  Serve warm or cold, with goat cheese or without.

Explore, experiment, enjoy! — Dana


To view even more of Dana’s unique recipe, you can visit her at Frugal Girlmet!

Chocolate-Covered Strawberries

Chocolate-Covered Strawberries Resize

Nothing says Valentine’s Day like Chocolate-Covered Strawberries!  Surprise your sweetie – or sweeties, because my kids went cuckoo for these!  If you can get your hands on some nice strawberries (and I know it’s still very much winter in some places, but go with me on this), you can make these for dessert and watch their eyes light up!

My trick here is to use a teaspoon of coconut oil in the chocolate.  It keeps the chocolate from becoming brittle and adds the lightest hint of tropical flavor.  Instead of shattering when you bite into it, this chocolate holds tight to the strawberry so you can eat every last bite.  No worries if you don’t have coconut oil.  You can go without and just use the chocolate, but you will definitely want to make sure your berries are blemish-free and thoroughly dried.

Ready to make your loved ones’ hearts go pitter-pat?  Bring out these healthy and gorgeous treats tonight!

Chocolate-Covered Strawberries

Ingredients:

  • 18 strawberries
  • 1 cup semisweet chocolate chips
  • 1 teaspoon coconut oil

Directions:

  1. Wash the strawberries and dry very carefully.  Pull up the stem leaves so they point up; otherwise you’ll get them covered in chocolate!  Make sure you don’t have any open, weepy spots on the berries, or the chocolate won’t stick.
  2. In a small but deep bowl, microwave the chocolate chips and coconut oil for 30 seconds at a time, and stir after each 30 seconds.  It took three 30-second bursts to get everything melted and smooth.
  3. Line a baking sheet or tray with parchment paper.  Holding onto the stem of the berry, dip in chocolate and place on the parchment paper.  When all berries are dipped, place the tray in the fridge (or freezer if you are short on time!)  Serve cold.

I had a little leftover chocolate in my bowl.  I dipped cashews and banana pieces in there to get every last drop.  My 2 year-old’s chocolate mustache was a sight to behold!

Explore, experiment, enjoy! — Dana


To view even more of Dana’s unique recipe, you can visit her at Frugal Girlmet!


Double Mushroom Pot Roast (Crock Pot)

Double Mushroom Pot Roast resize

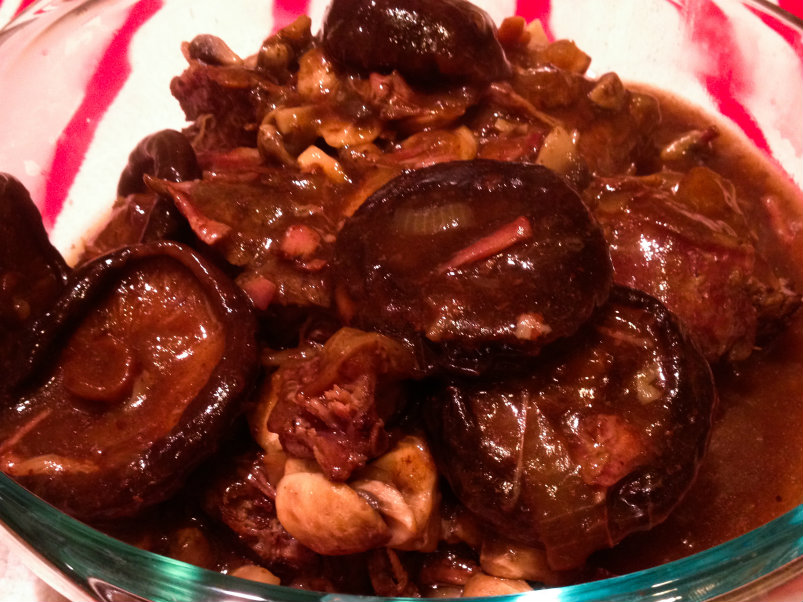
I feel like I should apologize for the photo. It’s very…brown.  There’s really no good way to photograph this recipe.  It’s not glamorous.  But it is the easiest and most delicious thing that has ever come out of my Crock Pot!  I present to you:  Double Mushroom Pot Roast!

The secret ingredient is dried mushrooms.  I use dried shiitake mushrooms, because they’re cheap and plentiful at my Korean market.  You can try this with whatever dried mushrooms you can find.  I use a big handful, about 6 or 7 big mushrooms.  For the second dose of mushrooms, regular button mushrooms or creminis will do the trick.  Use whatever large beef roast you like.  Chuck roast is always a favorite, and for this one, I used something called a “seven bone roast” that was also flavorful.

If you want your house to smell amazing when you walk in the door after work or errands, make this in the morning and revel at how easy and delicious it is that night.

Double Mushroom Pot Roast (Crock Pot)

Ingredients:

  • 1 large beef roast, preferably chuck, about 3 pounds
  • 1 onion, sliced
  • handful of dried mushrooms
  • 8 ounces fresh button or cremini mushrooms, sliced
  • 2 tablespoons cornstarch
  • salt and pepper

Directions:

  1. In a very large Crock Pot, drop in the sliced onions and dried mushrooms.  Set to LOW and the timer for 8-10 hours.
  2. In a large pan, brown the roast on each side.  When browned, place on top of mushrooms and onion, season with salt and pepper, and cover.
  3. After 8 hours, remove the roast from the Crock Pot to a large serving platter or bowl.  In  a large pan, cook the button (or cremini) mushrooms and spoon a bit of the juice from the Crock Pot over them to keep them from sticking.
  4. When the mushrooms are done, pour them over the roast.  In the same pan, pour in the contents of the Crock Pot – the juice, onions and mushrooms.  Cook for 5 minutes on medium to reduce a bit.
  5. Mix the cornstarch with 1/4 cup of water and mix to blend.  Pour this mixture into the pan and stir into the onion mixture.  Stir frequently to prevent the gravy from sticking to the pan.  When thickened, about 5 to 10 minutes, pour over the roast and serve.  Season heavily with salt and pepper.


Explore, experiment, enjoy!
 — Dana


To view even more of Dana’s unique recipe, you can visit her at Frugal Girlmet!


The Wise Man Built His House Upon the Rock

On the Wee Sing Bible Songs CD, this song gets special treatment.  We do movements along with the words – jazz hands down for “the rain came down” and jazz hands up for “the floods came up.”  My girls’ favorite part is one we added on:  a big raspberry after “the house on the sand went SPLAT!”  You gotta be silly sometimes!

The wise man built his house upon the rock, (x3)

And the rains came tumbling down.

The rains came down and the floods came up (x3)

And the house on the rock stood firm.

The foolish man built his house upon the sand (x3)

And the rains came tumbling down

The rains came down and the floods came up (x3)

And the house on the sand went SPLAT!

So build your house on the Lord Jesus Christ (x3)

And the blessings will come down!

The blessings will come down as the prayers go up (x3)

So build your house on Christ!

I was thinking about this song in church this Sunday when our pastor was preaching on Matthew 6.  In verse 18, Jesus  says,

I also say to you that you are Peter, and upon this rock I will build My church; and the gates of Hades will not overpower it.

What an amazing blessing from God—to be proclaimed the rock!  Think “bedrock” or “rock-solid” – these are phrases that announce strength, faithfulness, reliability, and value.  Peter must have been so thrilled and encouraged!

But just five verses later, Peter is called a different kind of rock.  When Jesus explained to his disciples that he was going to be tortured and killed, Peter exclaimed, “No Lord!”  Then Jesus rebuked him, saying, “Get behind me, Satan!  You are a stumbling block to me;  you do not have in mind the concerns of God, but merely human concerns.”  A stumbling block is a hindrance, an obstacle to be avoided, and something that could do real damage if you trip over it.

Of course, we know how the story ends—Peter has some shaky moments, including denying Christ three times, but ultimately his faith in Jesus wins, and God does indeed use Peter as the foundation of the Church.  It is a reminder to me that every day we have to chose what kind of rock we are going to be.  Will we be a bedrock, solid in our faith, and available to be a source of stability and help to our family, friends, and whomever God places in our path that day?  Or will we be a stumbling block, to ourselves and others, hindering God’s plan in our lives?  The only way to make sure we will be the right kind of rock is to check OUR foundation:  the Word of God and faith in Christ.

* ~ * ~ * ~ * ~ *

Please pray this with me:  Lord, make me an instrument of Your peace.  Make me a rock to be built upon in others’ lives—faithful, loyal, and supportive.  Keep me grounded in Your Word and Your will.  Thank you for giving us Jesus, to build our lives on.  We praise You and bless You today!  Amen.