November 24, 2024

At Home with GCH – SoupPalooza Week 5

Here on our At Home with GCH  blog, Monday’s are usually focused on healthy but oh-so-yummy! recipes.  But this week, I get to visit with you on Thursday!  This past Monday, our Christi put forth a challenge that you just might want to take part in…check it out!

Christi’s Pantry/Freezer Challenge

We are continuing to celebrate soup, soup, and soup since this is National Soup Month!  Now this week—since SOME of us are gearing up for Super Bowl Sunday with all of the eating attached to the watching—we are making Cheese & Cider Soup, with a Spicy Popcorn topping as well as a hearty Black Bean and Sausage Soup.  These are my contributions to the “Soup”er  Bowl buffet!

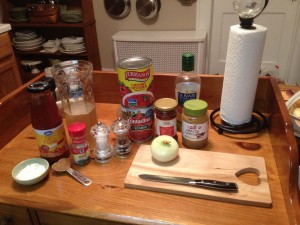
Cheese & Cider Soup w/Spicy Popcorn2013-01-29 21.05.45

2 slices bacon, diced
1 medium onion, small dice
1 large Yukon Gold potato, peeled and cut into ¼-inch dice
1 medium carrot, minced
1 large Granny Smith apple, peeled and diced small
1 heaping teaspoon chopped garlic
2 tablespoons all-purpose flour
1+1/2 cups apple cider
3 cups chicken stock
1 cup filtered water
1 can (12 ounce) evaporated milk
Pinch cayenne pepper (add up to 1/8 teaspoon if you enjoy the heat!)
4 ounces sharp Cheddar cheese, shredded (I also use Gouda)
1 tablespoon minced fresh thyme leaves (if using dried, use 1 tsp)
Kosher salt and freshly ground black pepper, to taste

Fry the bacon in a large stockpot or Dutch oven over medium heat until crisp, 5-10 minutes. With a slotted spoon, transfer the bacon pieces to a paper towel-lined plate to drain, and set aside.

Add the onion to the bacon drippings and cook, stirring occasionally, until softened, about 4 minutes. Add the potato, carrot, apple, and garlic stirring continuously for about 1 minute, or until the garlic is fragrant.

Dust the flour across the vegetables and stir to coat the vegetables; cook for approximately 2 minutes until the mixture JUST begins to brown on the bottom of the pot.

Gradually whisk in the cider, water, and chicken stock; increase the heat to medium-high. Bring to a boil, then immediately reduce the heat to medium-low; simmer uncovered until the vegetables are cooked, approximately 30-40 minutes. Stir occasionally; you will see the liquid begin to thicken slightly.  When the potatoes yield to gentle pressure (done!), whisk in the evaporated milk and bring back to a very gentle simmer. Stir in the cayenne (if using) and the thyme, and then slowly add in the cheese stirring JUST until the cheese melts.  Remove from heat.  Carefully taste for additional seasoning, if necessary.  Ladle into bowls or mugs; serve immediately with Spicy Popcorn on the side.

Spicy Popcorn

In a small bowl, mix:
1/4 teaspoon kosher salt
1/4 teaspoon ground black pepper
1/4 teaspoon garlic powder
1/8-1/4 cup grated parmesan cheese

Simply prepare your popcorn in the manner you prefer (you will need about 2 cups).  As soon as it is done popping, IMMEDIATELY sprinkle 2 cups of popped popcorn with the seasoning mixture.  Stir gently.  Serve alongside your Cheddar & Cider Soup along with the bacon bits you prepared in the beginning.  Enjoy!

 _________________________

OK!  Onto our second soup this week, Black Bean and Sausage Soup.  This has a decidedly Mexican flavor so top it with some chopped avocado and red pepper…or a simple guacamole.

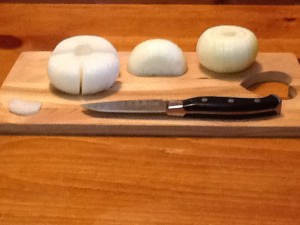
Black Bean and Sausage Soupsoup

1/2# Italian sausage meat, hot or sweet—your choice*
1 small onion
2 heaping tablespoons chopped garlic
1 (14-15 ounce) can diced tomatoes with juice
2 cups broth
2 cups filtered water
3 cans (14-15 ounce) black beans, drained and rinsed with warm water**
2 tbsp sun-dried tomatoes packed in oil, chopped and drained (optional)
1 teaspoon EACH: dried oregano, chili powder, cumin
1 teaspoon chipotle chili powder (optional)
1/8-1/4 teaspoon cayenne (optional)
Kosher salt & freshly ground black pepper
1 small red pepper, seeded and chopped small

Add a small amount of oil to stockpot; heat over medium-high and then saute the sausage meat and onion together for approximately 6-7 minutes.  Stir in chopped garlic and stir continuously for 1 minute.

Then add in tomatoes, broth, TWO (2) cans of the black beans, and all of the seasonings. Bring to a boil, reduce heat to medium-low and simmer, covered, for 30 minutes allowing for flavors to meld.

Remove from heat.  Take approximately 1 cup of the beans and tomatoes out of the soup and add to the reserved can of black beans.  Using a blender or an immersion blender, CAREFULLY puree, making as smooth as possible.  Add back into hot soup and stir well.  Ladle into bowls or mugs.  Serve immediately.

I like to serve this soup with the following toppings, letting everyone make their own choice of how to finish off their mug of soup:

  • chopped avocado
  • chopped red pepper, and/or tomato
  • chopped fresh cilantro
  • sour cream
  • shredded sharp cheddar
  • crushed tortilla chips

*I purchased ground Italian sausage meat OUT of the casings (looks like ground beef and is packaged the same).  However, if you already have sausage links on hand, you could just as easily remove the sausage from the casings and use that.

** reserve 1 can of black beans


God loves you!  ♥ (Don’t ever forget that!)

♥ coleen

_________________________________

If you would like to send a personal message to Coleen concerning this series, you may email her at:  Coleen@girlfriendscoffeehour.com
At Home with GCH – SoupPalooza, Part 4

SoupPalooza Part 4 – Creamy Homemade Tomato Soup

Here on our At Home with GCH  blog, Monday’s are always focused on healthy but oh-so-yummy! recipes.  We are continuing to celebrate soup, soup, and soup since this is National Soup Month!  Each week we will explore soup basics sometimes along with a bonus recipe for you to serve to your loved ones.

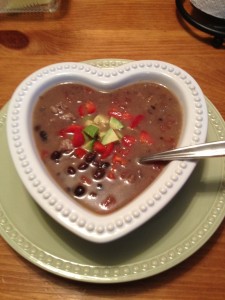
This week we are making Creamy Homemade Tomato Soup with Grilled Cheese Croutons. Such a comfort food and indulgence!  The way we manage to stay within our ‘healthy’ parameters is that this soup contains evaporated milk instead of heavy cream.  Using evaporated milk saves approximately 80 calories AND 12 grams of fat (yes, you read that right!) in each serving.  All the yummy creaminess…and now—since you have kept the soup lower in calories—you can thoroughly indulge in those grilled cheese croutons; oh my!

2013-01-18 22.14.54

Creamy Homemade Tomato Soup

1 Tablespoon butter
1 Tablespoon olive oil
1 onion, chopped small
1 Tablespoon chopped garlic (I use jarred)2013-01-18 21.23.16
1 Tablespoon dried basil
Kosher salt and freshly ground black pepper
2 cups broth
1 cup red wine, or additional cup of broth
1 can crushed tomatoes (28 ounces)
1 can tomato puree (28 ounces)
1 small jar of roasted red peppers, chopped small, optional
1 portion homemade condensed tomato soup (see recipe below)
1 can evaporated milk

In a medium-sized saucepan (4 quarts or so), melt butter and olive oil together over medium heat.  Add chopped onion and saute for 5 minutes until softened and transparent.  Add garlic and basil; cook for 1 minute stirring continuously.  Pour in red wine to deglaze pan; then add broth, all tomato products (also roasted red peppers, if you are using them) and salt & pepper.  Stir really well.  Bring up to a boil then reduce heat to low and simmer for 20-25 minutes. Stir occasionally, making sure to mix up from the bottom.  Carefully taste for seasoning, adding if necessary. Finally, add in evaporated milk and heat through.  Keep warm.

Another aspect of this recipe that fulfills our healthy but oh-so-yummy needs is the homemade condensed soup.  You know… just like in the can BUT no wheat, no additives, no un-pronounceable ingredients, no high fructose corn syrup!  So easy and quick to pull together!

Homemade “Condensed” Tomato Soup

8 ounces tomato puree or sauce
1 Tablespoon brown sugar
1 Tablespoon cornstarch
1/2 teaspoon kosher salt

In a small saucepan over low-medium heat, stir all ingredients together.  Bring just up to a boil, reduce heat to very low and simmer for 2-3 minutes.  Ready to use!

OK!

Now the part that (some of you!) have been waiting for…Grilled Cheese Croutons!  Actually, no recipe 🙂 Prepare your most incredible, delicious, gooey grilled cheese sammies!  You choose the bread (I would suggest cutting off the crusts!)…you choose the cheese!  Make sure that they are really nicely crunchy and toasted! Let them cool for just a minute or two, and cut up into small squares.  Serve alongside the soup…toss them in as you go because you wouldn’t want them to get soggy!  Comfort food that is healthy but oh-so-yummy !

God loves you!  ♥ (Don’t ever forget that!)

♥ coleen

_________________________________________________________________

If you would like to send a personal message to Coleen concerning this series, you may email her at:  Coleen@girlfriendscoffeehour.com
At Home with GCH – SoupPalooza Part 3

SoupPalooza, Part Three

Here on our At Home with GCH  blog, Monday’s are always focused on healthy but oh-so-yummy! recipes.  We are continuing to celebrate soup, soup, and soup since this is National Soup Month!  Each week we will explore soup basics sometimes along with a bonus recipe for you to serve to your loved ones.

Last week I shared that I made a commitment to Mr. Hayden to serve soup at least once each day for the month.  So far…so good!  He’s enjoyed  Homemade Mini-Meatball Soup, White Bean & Kale Soup w/Chicken Sausage, as well as Vegetable Tortellini Soup, and homemade Creamy Tomato Soup.

IMG_1387

This week we are making French Onion Soup accompanied by the traditional baguette with a yummy, cheesy topping.  Whenever I think of this soup, I always remember Julia Child!  Any other Julia fans out there?  For fans, or those who would love to be entertained while learning from the best, I have attached a short video of Julia preparing her version of French Onion Soup.    Bon Appetit!

IMG_1386

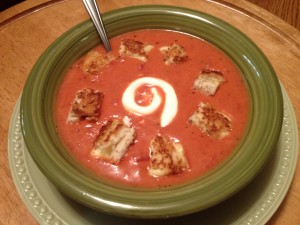
Onto our preparation…  This soup is fairly uncomplicated but it does take some time. One important part of the preparation for this recipe is the manner in which the onions are cut…really.  In this recipe this is the shape onion that works best.  Onions sliced from top to bottom, or “pole to pole” also cook more evenly.  And they have a shape and size that ‘eats well.’  You don’t want long, stringy pieces of onion falling off your spoon!  Try this: Peel the onions and slice off the ends.  Cut the onion in half through the middle (think: along the equator).  Then lay the half of the onion down and make thin (1/4″) cuts from top to bottom.

Ingredients:

1/4 cup (½ stick) unsalted butter
5-6 small to medium-sized onions (approximately 2#), sliced thin **
2 tablespoons chopped garlic
1 tablespoon dried thyme, 1 teaspoon dried crushed rosemary
Kosher salt and freshly ground black pepper
1 cup red wine, or additional cup of broth
3 tablespoons flour
2 quarts broth (beef, chicken, or veggie)
1 loaf French, or Italian, bread
3/4 cup shredded Swiss cheese (traditionally Gruyere is used; pricey!  I use Jarlsberg)
1/4 cup shredded Parmesan cheese

Melt the stick of butter in a large stockpot over medium heat.  Add all the onions, the herbs and a few grinds of salt and pepper.  Stir well making sure to thoroughly coat all of the onions with the butter. Now just allow the onions to cook; occasionally, give a thorough stir up from the bottom of the pan.  After 10 minutes, turn the heat down just a bit.  The onions will need to cook for an additional 20 minutes or so; during the last minute or two, stir in the chopped garlic.  You will see the onions getting very soft and turning a light brown.  This is called caramelization.  Do Not Let Burn…just brown…this is where the majority of all the yummy flavor of the soup will come from.

Add the wine and raise the heat to bring to a quick boil.  Immediately reduce the heat to low and simmer until the wine has evaporated and the onions appear almost dry, about 5 minutes.  Dust the onions with the flour; give them a stir.  Cook for 5 minutes to cook out the raw flour taste. Now slowly add in the broth, and raise the heat to bring the soup back to a simmer; cook for 15 minutes. Season, to taste, with salt and pepper.

When you’re ready to eat, preheat the broiler.  Cut the bread on the diagonal into 1″ slices that will fit into your soup bowl or mug.  Place the bread on a baking sheet in a single layer. Sprinkle the slices with the cheeses (mound it up!) and broil until bubbly and golden brown, 3 or 4 minutes. Watch they don’t burn!  I usually make a few extra for dipping.

Ladle the soup into the bowls and float the bread slice on top.  Voila!  French Onion Soup!

God loves you!  (Don’t ever forget that!)

♥ coleen


For all the Julia Child fans, I give you Julia at her best—she always gives wonderful tips and ideas!  My favorite here is how to get the onion-y smell off your hands!

http://video.pbs.org/video/2261536742/

** Here is a tutorial about all types of onion cuts, if you would like to check it out: HOW TO CUT ONIONS


If you would like to send a personal message to Coleen, in regards to this blog, please email her at: Coleen@girlfriendscoffeehour.com.

GCH: What’s on Your Plate? – SoupPalooza, Part Two

Soup-Palooza, Part Two

  • “Not from a Box, Nor from a Can” Chicken Broth
  • White Bean & Kale Soup with Chicken Sausage

Did you know that January is National Soup Month?  That is good news to one particular individual here in the Hayden household…my husband would eat soup e-v-e-r-y single day!  So this month I have committed to serving soup at one meal per day for the entire month (ummm, yeah…he’s a happy camper!).  And I am taking YOU along for the ride, too!

Here on our GCH:WoYP, where Monday’s are focused on healthy but oh-so-yummy! recipes, we will be promoting soup, soup, and soup for the next four weeks.  Each week we will explore the basics along with a delicious recipe for you to serve to your loved ones.

So, this week we are starting from scratch!  Homemade chicken broth.  Oh, yeah!  Now don’t be afraid, please…this is so simple, I promise!  One way to make this easy to fit into a busy schedule would be to start it as you are making your supper preparations.  Then the broth can simmer away, and you can finalize it after supper.  Just a thought!

This recipe makes a vat…well, not quite a vat…it makes 8+ quarts.  A quart of soup is the size of those aseptically sealed boxes from your grocery store (or approximately 2 cans).  Most soup recipes that feed 4-6 people require two quarts of broth.  Now you can have delicious, nutritious, chemical-free chicken broth handy right in your refrigerator or freezer!  Let’s get started!

“Not From a Can, Nor From a Box” Chicken Broth     

Makes 8+ quarts

1 8-9# ‘oven stuffer’ whole chicken, cut-up (or buy cut-up chicken)*
1 large sweet onion (Vidalia), rough chopped
4-5 stalks of celery WITH the leaves, cut in 3-4″ sized pieces
1/4# carrots (3-4 whole carrots, or ½ bag baby carrots), rough chopped
1 heaping tablespoon minced garlic
2 tablespoons whole peppercorns
1 teaspoon kosher salt

4-5 sprigs each of fresh thyme and dill, optional
9 quarts of water; I use filtered; use whatever you would drink 😉

Use the largest pot you own.**  I use a 12 quart-sized pot. You don’t want to fill your pot up to the top; this needs a little room to move around while it is boiling.

Carefully rinse the cut-up chicken (the better the chicken is rinsed…the less yuck floating around in your broth).  Then place the chicken pieces along with the vegetables, and the seasonings, into the pot and pour water over them all.  Cover pot and heat on high ‘til just coming to a boil; reduce heat and partially cover.  You want the soup to be gently boiling.  You can occasionally skim off the yucky stuff from the top of the broth.  Let everything simmer away for a half hour; remove breastmeat to cool.  Continue cooking an additional 45 minutes to 1 hour.  Remove pot from heat.  Take dark meat sections and add to breastmeat which has cooled.  You can strain your broth, if preferred; it all depends on just how clear you would like the broth to be.  CAREFULLY pour, or ladle, the broth along with the cooked veggies into storage containers, leaving enough room to add the chicken.  Cut up (or shred) the chicken into bite-size pieces; keep every last one of all the little bits!  Add back into the broth.

Let cool ‘til container is no longer HOT to the touch; refrigerate.  When thoroughly cooled, I would suggest discarding the layer of fat that will have solidified on the top of the container. This broth freezes very well.  I usually keep 2 quarts in the refrigerator (use within 1 week or so) and the rest in the freezer.

* Toss the wings in the trash…not even worth cooking.  I cut each of the breastmeat pieces in half; that way they don’t overcook.  You want tender meat in the end (but throw the bones into the pot, too).

**Should you not have a pot this size, or cannot beg or borrow one, just reduce all of the ingredients by half and proceed, ok?  Don’t let that stop you!

****************************************

Now, to actually USE that healthy but oh-so-yummy broth…

White Bean and Kale Soup with Chicken Sausage 

Makes 6 servings

IMG_0138

8 cups (2 quarts) chicken broth, divided
(1) 12 oz pkg italian chicken sausage, sliced diagonally ½” thick
2+ tablespoons olive oil
1 large sweet onion (Vidalia), sliced
1 heaping tablespoon minced garlic
½ cup white wine, or additional broth
2 cans cannellini (white kidney) beans, drained and rinsed
1 can great northern beans, drained and rinsed
1 bunch kale, stems and tough ribs removed, leaves roughly chopped
1 teaspoon kosher salt
1+1/2 teaspoon freshly ground pepper (I used lemon pepper)
½ cup Parmesan cheese, freshly grated if possible
1 lemon

Heat 1 tablespoon of olive oil in a large pot (4 quart) over medium heat. Add sausage slices and cook, stirring occasionally, until sausage is just starting to brown, about 5-6 minutes. Add onion slices and additional olive oil, if necessary.  Cook, stirring often, until onions and sausage are slightly browned, about 10 minutes more.  Reduce heat to low; stir in garlic and cook for 1 more minute.  Remove sausage, onions and garlic; set aside.  Pour wine into pot and scrape up brown bits stuck to the bottom. Let simmer for a minute or two.  Meanwhile, put 3 cups beans and 2 cups broth into a blender and purée ‘til smooth; set aside.  Add all of  the remaining broth to the liquid in pot; increase heat to medium and bring to a boil.  Add kale, reduce heat; cover and gently simmer, stirring a few times until kale is wilted and softened, about 5 minutes. Uncover, add remaining beans, bean puree, sausage and onion mixture; stir well.  Season to taste with salt and pepper.  Simmer gently until hot, about 5 minutes more.  Ladle into soup bowls; sprinkle with Parmesan cheese and a squeeze of lemon juice.

“This soup is delicious, hearty and satisfying while still light and fresh-tasting.  It definitely fits the healthy but oh-so-yummy comfort food category.”  (Comment from the hubby.)  🙂


If you would like to send a personal message to Coleen, in regards to this blog, please email her at: Coleen@girlfriendscoffeehour.com.

GCH: What’s on Your Plate? – SoupPalooza

One of my favorite ways to feed a crowd during the winter months is with a variety of soups. Warming, satisfying, healthy but oh so yummy soups! So, it was easy to figure out what was on the menu when I was planning for my extended family’s Christmas party.  I am blessed to have 7 siblings, almost all with spouses, 16 nieces and nephews (and 8 spouses, too) along with 5 great-nieces and nephews.  Unfortunately, some live quite a distance away—Oklahoma, Minnesota, Florida—and are not always able to join in the family gatherings. So this year we “only” have 26 expected to join us!  Wish I could show you a picture of us enjoying our soup & sandwich buffet!  May God bless you and all your lovies! <3

kayliesoup

This soup is definitely in the ‘comfort food’ category—very creamy and full of flavor, while still healthy but oh-so-yummy!

Potato – Corn Chowder
makes approximately 8 servings

1/4# bacon, cut into 1″ pieces
1 tablespoon olive oil
2 large sweet (vidalia) onions, choppedpotatocornchowder
4 tablespoons (1/2 stick) butter
1/2 cup flour
2 teaspoons kosher salt
1 teaspoon freshly ground black pepper
1 tablespoon dried thyme
12 cups chicken stock
2# peeled Yukon gold potatoes, cut into ½” dice (about 6 cups)
2 bags frozen white & gold corn (cut bags open to defrost)
1 cup half-and-half
1 can evaporated milk
1/2# sharp white cheddar cheese, grated
dried parsley

Cut bacon into 1″ pieces; use scissors to make this quick and easy. In a large stockpot over medium-high heat, cook the bacon and olive oil until the bacon is crisp, about 5 minutes. Remove the bacon with a slotted spoon and drain on paper towels; reserve.
Reduce heat to medium, add onions and butter to the bacon drippings left in the pot, and cook for 10 minutes ‘til the onions are soft and translucent. Sprinkle the flour, salt, pepper, and thyme over the onions; stir in and cook for 3 minutes. Slowly stir in 2 cups of chicken stock, mixing ‘til smooth. Then add the rest of the chicken stock and potatoes. Bring to a boil and simmer uncovered for 15 minutes, or ‘til the potatoes are tender. Add the corn to the soup, and bring back to a simmer. Reduce heat a bit, then add the half-and-half and milk; stir ‘til combined. Do not boil. Sprinkle cheese over soup; stir in. Cook for 5 more minutes over low heat just ‘til the cheese is melted. Season, to taste, with salt and pepper. Ladle into serving bowls or mugs; top with a bit of bacon and a pinch of parsley. <3

*******************************************************************************

Some of you are probably familiar with a variety of soup that comes in a blue can made by a company that begins with a “P.” I just l-o-v-e that soup! But I don’t love all the sodium that is included in canned soup. So, I googled and tried recipes ‘til I found one that fit our healthy but oh so yummy criteria. We thoroughly enjoy this soup…hope you do, too!

Homemade Mini Meatball Soup (aka “Chickarina” soup)chickarina

Soup
2 tablespoons olive oil
2 tablespoons chopped garlic
2 carrots, peeled and chopped
2 ribs celery, chopped
1/2 medium onion, chopped
8 cups chicken broth, divided
2 cups water
2 cups “small” pasta (acini di pepe, ditalini, tubettini or even large coucous)
3 cups cooked chicken, diced
2 tablespoons dried parsley
kosher salt, ground black pepper to taste
1/4 cup grated Parmesan cheese (freshly grated, if possible)

Mini Chicken Meatballs
1/2 cup plain bread crumbs (I used gluten-free)
2 tablespoons dried parsley
2 tablespoons chopped garlic
1 large egg, lightly beaten
3/4 cup finely grated Parmesan cheese
3/4 each teaspoon kosher salt, freshly ground black pepper
1# ground chicken

In a large stockpot, heat olive oil over medium heat. Add onion and cook 5 minutes ‘til softened and translucent. Add the celery pieces and chopped carrots, and cook for 5 more minutes. Then add the chopped garlic and cook for 1 minute, stirring gently. Pour in 5 cups of chicken broth and the water, stirring well. Bring to a boil, reduce heat so that the broth is simmering. Add salt and pepper to taste (carefully!). Cover and let simmer away ‘til the other components are completed.
In a separate smaller pot, heat the remaining 3 cups of chicken broth to boiling; reduce heat to simmer.
Then in a medium bowl, stir together the bread crumbs, chopped garlic, parsley, Parmesan cheese, and salt & pepper; stir in the lightly beaten egg. Add the ground chicken and gently stir with a fork to combine.
Use a teaspoon measure to get an idea of how much mix for each meatball. Take a nice rounded teaspoonful for each meatball. With slightly damp (not wet) hands, roll the chicken pieces into mini meatballs. As you complete each mini meatball, carefully drop into the gently simmering chicken broth in the smaller pot. When you have added the final mini meatball to this pot, remove from heat and let sit for 10 minutes. Then pour into larger stockpot, broth and all, along with the diced chicken pieces.
Cook the pasta of your choice, according to package directions. Drain when done. Add pasta at the bottom of each soup bowl or mug, and then ladle your finished broth and ingredients over. (This is my personal preference…otherwise the pasta just continues to expand.) Sprinkle with a pinch of freshly grated Parmesan cheese…and enjoy!

Here is my biggest soup-making tip: make it ahead! The flavor is ALWAYS enhanced as the ingredients meld together as they rest.

God loves you!  (Don’t ever forget that!)

<3 coleen

GCH: What’s on Your Plate? – Spaghetti Sauce (with a Bonus!)

A very long time ago—when I was a teenager—a gracious, lovely woman taught me how to cook “nuttin’ fancy,” as she put it. Nonnina, my high-school sweetheart’s gramma, took me to her side and instructed me in all things Italian…and not just the food! But food she DID teach me! Mostly we cooked in the basement—her summer kitchen. When I asked her why, when we just had to carry the finished dishes back upstairs, she would tell me “ ‘Cause I’m-a not gonna stink up-a da house!” 😉 We made pasta of all types, cookies, meat dishes, desserts, soups… and spaghetti sauce or, as Nonnina called it, “gravy.” So today, I give you ‘Spaghetti Sauce’ wishing I could throw a kiss to Nonnina for ALL that she schooled me in (and taught me about love)!

2012-12-15 23.12.04

Spaghetti Sauce

Makes 13+ cups

1# ground beef
1# Italian sausage meat
2 tablespoons good olive oil
1 medium-large sweet (Vidalia) onion, chopped small
3 tablespoons minced garlic (jarred)
1 cup good red wine
2 (28-ounce) cans crushed tomatoes with seasonings
1 (28 ounce) can tomato puree
1 (28 ounce) can diced tomatoes, drained
3 (6 ounce) cans tomato paste
1+ cups beef broth
2 tablespoon each dried basil
1 teaspoon each dried thyme, oregano
2 teaspoons kosher salt,  1 teaspoon freshly ground black pepper
2 tablespoons dark brown sugar

In a large saute pan over medium high heat, brown meats together. When cooked, set aside in a large bowl including the juices. Pour the olive oil into a stockpot (6 quart size or so), heat over medium heat, and add the chopped onions. Cook for 5-6 minutes ‘til soft but not browned; add the garlic and cook for 1 more minute. Then pour in the wine and cook ‘til the wine is almost evaporated; 3-4 minutes or so.

At this point, pour in all of tomato products stirring well as you add them. Pour a small amount of the beef broth into the cans and swirl around (Nonnina-style) to get as much tomato product out of the cans as possible, and empty into your stockpot. Also add the cooked meats along with any accumulated juices. Stir in your seasonings; don’t forget the brown sugar! When the sauce starts coming to a boil, cover and reduce heat to low.

All you want the sauce to do is simmer. Cook for 30 minutes or so. It is important every 5-6 minutes to give a thorough, quick stir up from the bottom of the pan. This is a thick sauce and you wouldn’t want to have it stick to the bottom of the pan and burn. (Nonnina ALWAYS insisted that, when you remove the lid to stir, quickly tip it up flat so that the condensation doesn’t drip into the ‘gravy.’ Why? The water will dilute your sauce…and we don’t want that! Just pour it into the sink and quickly replace the lid.)
That’s it! You have now made ‘gravy!’ (And your house must smell fantastic!)

If not serving immediately, let cool a bit and then package for storage. I put approximately 2 cup portions into freezer bags (I use the type that have a wider sealing ‘zipper.’) If you lay them flat in the freezer ‘til completely frozen, they can then be stored anywhere in the freezer taking up little space!


And now for the Bonus!! 🙂

Bonus? What bonus? The bonus, friends, is a lasagna recipe using the Spaghetti Sauce! Putting lasagna together is SIMPLE! Try it; I think your family will be impressed! Gather your ingredients…this goes quickly.

2012-12-15 22.40.44

Lasagna

2 boxes “no-boil” lasagna noodles (you will have some extra)*
16 ounces shredded cheese, such as mozzarella, provolone
2 ounces parmesan (freshly grated is preferred)
4 cups of spaghetti sauce (preferably the ‘gravy’ you just made!)

for the cheesy mixture:2012-12-15 20.38.01
3# ricotta
8 ounces shredded mozzarella
2-4 ounces parmesan
3 eggs, lightly beaten
2 teaspoons dried basil
1 teaspoon kosher salt
1 teaspoon ground black pepper

Preheat oven to 350. Now, combine the cheesy mixture together in a large bowl. Then, using a 9X13 pan, begin assembling your lasagna (see * below):
Pour about 2/3 cup of your spaghetti sauce onto the bottom spreading around. [Tip: I find that a soup ladle is approximately 1/3 cup so I just use that as my ‘measuring tool.’] Lay down 4 no-boil lasagna noodles. Just overlap them slightly to fit.
Top with 1/3 of the cheesy mixture; spread. Add 2 ladles of sauce.
Add 4 more noodles, 1/3 of the cheesy mixture, 1 cup of shredded cheese, 2 ladles of sauce.
Add 4 more noodles, 2 ladles of sauce, the balance of the shredded cheese and the parmesan.

Cover tightly with aluminum foil. Bake for 50-60 minutes, ‘til bubbly. Remove foil and bake another 5 minutes or so. Remove from oven…let sit for 15 minutes before cutting to firm up. As Nonnina would say, “Mangia! Mangia! (Eat! Eat!)” And she would toss a kiss up to God! <3

* I use the Barilla brand. The trick to using these noodles is to make certain that the noodles are covered with sauce and the cheesy mixture! And certainly you can use traditional lasagna noodles that need to be pre-cooked! If you do, just reduce the amount of sauce you place between layers as you build your lasagna dish.

God loves you! and I do, too.
<3 coleen


Interested in joining us for our next Online Bible Studies that start on January 6, 2013?   Click HERE for more details!

GCH:What’s on Your Plate? – Chicken Shepherd’s Pie with Parmesan Cauliflower Topping

Now that title’s a mouthful, hmmm?  Pun FULLY intended!  My husband loves Shepherd’s Pie—and any variation I can come up with!  And so I indulge him! 🙂  This recipe fits into our healthy but oh-so-yummy category in a couple of ways:

  • it is low-carb (with the absence of mashed potato topping)
  • it  is made with natural ingredients that you can pronounce (as the gravy is made from scratch)
  • it is low in fat/high in protein (using boneless chicken breast as the protein)

This recipe could easily be doubled and baked in an 11 x 13 baking dish.

Chicken Shepherd’s Pie with Parmesan-Cauliflower ToppingIMG_1310

Filling Ingredients:

4 tablespoons olive oil, divided
1# boneless chicken breast, pounded evenly, cut into 1″ cubes
1 sweet (vidalia-type) onion, chopped in pieces about 1/2 inch
4 ounces baby bella mushrooms, wiped clean sliced chunky
2 tablespoons chopped garlic in oil (from a jar)
16 ounce package frozen mixed veggies (your choice), set out to defrost

1 tablespoon butter
2 tablespoons flour
1/4 cup white wine (or broth)
1 + 1/4 cups chicken broth

Topping Ingredients:

1 medium-sized head of cauliflower, cored and chopped into small pieces
1/4 cup milk
1/2 cup finely grated parmesan cheese
salt and freshly ground black pepper to taste

1/3 cup shredded cheese (sharp cheddar, smoked gouda) *use a flavorful cheese

Instructions:

Preheat the oven to 375.  Bring a medium-sized pot of salted water to a boil. Chop cauliflower into small pieces and simmer ‘til  soft enough to mash easily (10-12 minutes). Drain cauliflower very well in colander; place back into pot and  use an immersion blender or hand beater to “mash” the cauliflower with the milk and Parmesan. Season very well with salt and pepper to taste.

While the cauliflower cooks, heat 2 tablespoons of olive oil in a large frying pan and saute the cut-up chicken adding the chopped garlic for the last minute (don’t let garlic burn).  Saute ’til just getting brown but don’t overcook.  Remove pan from stove; set aside cooked chicken.  Wipe frying pan with paper towels to remove bits. Then add 2 additional tablespoons olive oil; heat over medium, and saute chopped onions for 3 minutes.  Add chopped mushrooms and saute for 4-5 minutes more to caramelize.  Reduce heat to low; add 1 tablespoon butter, and sprinkle flour over the mushroom-onion mixture, stirring with a whisk.  Cook this mixture for 3 minutes occasionally scraping the pan.  Then gradually whisk in the wine ’til the mixture is smooth.  Gradually whisk in the  broth and your gravy will come together.  Gently simmer for 5 minutes.  Add back the cooked chicken and the defrosted veggies and heat together for 1-2 minutes.

Spread the chicken-vegetable-gravy mixture in the bottom of an 8 cup casserole dish.  Top with the cauliflower, and spread across the pan almost to the edges.  Bake for 20 minutes, and then top with the grated cheese.  Continuing baking another 10 minutes or so ’til bubbly.  If top is not lightly browned, can be carefully placed under broiler for 2-3 minutes.  Enjoy!

God loves you!  and I do too.  <3 Coleen

GCH: What’s on Your Plate? – Butternut Squash Vegetarian Chili

This is one of our all-time-favorites…Roasted Butternut Squash Vegetarian Chili!    It is another ‘healthy…but oh-so-yummy‘ meal!  I cannot tell you how many moving parties we have showed up to with a crockpot of veggie chili.  Spring, summer, fall, winter—this fits the bill.  You can feed quite a crowd with this recipe.  I already have this recipe in the rotation for the week prior to Christmas; maybe that will be the day I wrap presents.

Fill out the menu with a simple tossed salad and cornbread. *Be sure to check back tomorrow for Shauna Jared’s recipe for cornbread…it was passed down to her from her daddy!*

1 medium butternut squash, peeled, seeded, chopped (about 1″x1″)
3-5 tablespoons olive oil, divided as needed
½ teaspoon cinammon and ½ teaspoon nutmeg, freshly grated if possible
½ teaspoon salt, 1 teaspoon ground black pepper

1 tablespoon olive oil, additional as needed
1 large onion, chopped * these veggies should be chopped fairly large, about 1″ x 1″
1 red bell pepper, chopped *
1 yellow bell pepper, chopped *
1 green bell pepper, chopped *
6-8 baby bella mushrooms, chopped *
1 medium zucchini, chopped *

1 (15-ounce) cans black beans
1 (15-ounce) can dark red kidney beans
1 (15-ounce) can cannellini beans
1 bag frozen white&yellow corn
2 garlic cloves, minced
1 tablespoon brown sugar
1+1/2 tablespoons chili powder
1 teaspoon ground cumin
1 teaspoon dried oregano
1/2 teaspoon salt
1/2 teaspoon black pepper

1 (29 ounce) can of crushed tomatoes, undrained
1-2 cups of vegetable broth (start with 1 cup; can always add more)

Directions:
Preheat oven to 400.  Line medium-sized,rimmed baking sheet with foil (for easy clean-up). Mix chopped butternut squash with 1 tablespoon olive oil, cinammon and nutmeg.  Pour onto foil-lined baking sheet.  Bake for 15 minutes.  Remove from oven and set aside.

Turn crockpot on HIGH.  In a large saute pan, lightly brown the veggies (peppers, onion, mushrooms, zucchini), approximately 4 minutes per batch. As the veggies get done, they can be poured into the crockpot.  Don’t overcrowd the saute pan; put only as much as will cover the bottom of the pan.  The veggies can be cooked together in any combination.  Add additional olive oil as needed.

In the meanwhile, open the cans of beans, pour into a colander, rinse with warm water and set aside to drain. Also, the frozen corn can be place in a microwave-safe bowl and warmed for 3-4 minutes.

Once the veggies are sauteed and in the crockpot, stir in the seasonings (garlic through black pepper).  Then add the crushed tomatoes and broth; mixing well. Finally, gently stir in the butternut squash.  Cover crockpot and walk away for 2 hours.  Reduce heat to low and give a good,  quick stir; cook on low for an additional 2-3 hours.

* Note: the veggies for this recipe should be chopped fairly large, about 1″ x 1.”

There are lots of ideas for topping chili (when I asked Robert what his favorite topping was, he said “How many can I have?”)  Usually, I will put out a tray of small bowls filled with a variety of the following.  Let me know if you can think of others!  And because this recipe is made from scratch, has natural ingredients, and little fat , keeping it healthy…but oh-so-yummy the toppings are where you can splurge just a little bit!

  • sour cream
  • shredded cheddar or jack cheese
  • diced jalapenos
  • slices of avocado
  • salsa
  • corn chips
  • chipotle peppers in adobo sauce

God loves you!  and I do, too!

Coleen <3

GCH:What’s on Your Plate? – Roasted Winter Veggies & Broccoli Craisin Salad!

Thanksgiving week!  Oh boy…here we go!  Don’t you just love it?  I do.  My favorite foods on the table are always the side dishes.  So this week I am going to share two recipes.  Maybe one of them might even end up on your table this year!  Both of these recipes also fall into the healthy but oh-so-yummy category, too!

The first recipe is for Roasted Winter Veggies.  I love roasted veggies…the melange of colors, and textures, and flavors; the nicely caramelized bits; the few little pieces that hover just this side of burnt!  Making roasted veggies is a very forgiving recipe, too.  I have the veggies ready to go into the oven the moment the turkey comes out to rest and be carved.* There are a few basic ingredients; but then you can add and subtract to your heart’s content.

Ingredients:

1/3 cup olive oil

1 medium butternut squash, halved, seeded and peeled

1 large Vidalia onion, peeled

3 large Yukon Gold potatoes  (or 4-5 medium red potatoes), peeled

1 bag (12-16 ounces) carrot chips (or baby carrots)

1# brussel sprouts, trim end off and remove outer leaves (if large, cut in half)

1 small head of cauliflower, trimmed and cut into 1+1/2″ florets

12 ounce pkg Baby Bella mushrooms, stemmed and cleaned; cut into appropriate size

3 medium red beets, peeled (rinse your hands after handling the beets..unless you like a pink tint to your nails and fingers!)

1 tablespoon each: sea salt,  freshly ground pepper


Directions: Prep the veggies, washing anything that needs it. Place two really large low-sided roasting pans (sometimes called cookie sheets with sides) into the oven and preheat oven to 425. Cut everything into approximately 1+1/2″ pieces; don’t cut the veggies too small as all they will shrink a bit while roasting. Just try and have everything fairly close to the same size.

Place all the veggies, EXCEPT for the beets, into a really large bowl (or stockpot). Pour most of the oil over the veggies (add the rest if necessary), add salt &pepper, then gently mix together making sure to thoroughly coat each piece of veggie. Pour onto the heated pans. Then place the cut-up beets into the bowl stirring to coat, and add them to the veggies on the roasting pans. It is important that the veggies are not piled up on one another. You do not want them to steam but to roast.  They should be in a single layer. It might be very snug but they will shrink slightly as they roast.

Roast for 30-35 minutes ‘til the most dense veggies are done when poked with a fork.  I like to <attempt> to turn the veggies over after the first 15 minutes; that way more sides of each piece will caramelize; yum.  Be fairly quick during this turning process as you don’t want to leave the oven open very long!  Once you have determined that they are done, remove from oven.  Turn off the oven.   Carefully taste, adding additional salt and pepper (I always add more!) and place into your serving bowl.  <3

A few other things to keep in mind:

If you are preparing this recipe…and there is nothing else in the oven…follow the directions in the recipe.  HOWEVER, if you are making this on Thanksgiving Day: put the pans into the oven for about 10 minutes before you take the turkey out.  Then while the bird is resting, and being carved, and the gravy is being made, the veggies can be roasting. When the turkey is removed, bump the heat up to 425.  Fill the heated pans, and place them back into the oven.  Roast the veggies for approximately 30-35 minute, check that the densest veggies are done and, if so, remove the pans from the oven and turn off the oven.

At this point, if the meal is not ready to be brought to the table, place the veggies into a serving dish, and place back into the oven ‘til you are ready to go. Other veggies to consider: asparagus, broccoli, parsnips, sweet potatoes, fingerlings, fennel. Leftover roasted veggies?  (Hard to believe, but…) Use them as the key ingredients to roasted veggie lasagna, roasted veggie chowder, roasted veggie omelet or frittata, roasted veggie burritos…the list could go on and on.  These are particular dishes I have made.  How kind would you be to yourself but to have one of these chosen as a quick and easy meal to come home to after Christmas shopping-til-you-drop?

*  *  *  *  *  *  *  *  *  *

And here is the recipe for the second side dish: Broccoli-Craisin Salad.  This is a beautiful raw salad, a very healthy but oh-so-yummy addition to the side dish array on your Thanksgiving Day table.  It has a slightly smoky (from the bacon), slightly sweet (from the honey), slightly tart (from the vinegar), very mellow taste.  I have had MANY supposed broccoli haters be prompted to try just one tiny taste…only to find they enjoy it and come back for more!  We enjoy this salad all year long!  Hoping that your family enjoys it, too!

Ingredients:

2 heads broccoli crowns, cut into small florets*

1/2 pkg Craisins (dried cranberries)

6 slices bacon, cooked and crumbled

1/2 red onion, very thinly sliced

1/2 cup mayonnaise

1/2  cup sour cream

1/4 cup honey, warmed

2 tablespoons apple cider vinegar

1 cup sunflower seeds

freshly ground pepper


Directions:

In a small bowl, stir together mayonnaise, sour cream, honey, and vinegar; set aside. In a large bowl, combine first 4 ingredients. Take mayo mixture and pour over broccoli mixture, tossing gently to thoroughly coat. I pour the dressed mixture into a large zip-top bag to go into the fridge.  Every once in a while, give the bag a flip-over and a couple of squeezes to massage the yumminess all around!

Then when your meal is ready to go onto the table, just pour the salad out into a serving bowl.  Easy-peasy!

Should be prepared at least 4 hours beforehand, up to 8 hours or so. Just prior to serving, stir in the sunflower seeds and ground pepper to taste.

* The biggest hint I can offer to you for this salad is to cut the broccoli florets as small as you possibly can.  I consider it a labor of love and, oh, so worth it!  It is MUCH more palatable to have little florets in your mouth as you munch on this salad rather than a large hunk of broccoli!  Trust me!  You can do the chopping ahead of time, even a day or so, and simply store in the fridge. 😉

Honestly, I have been known to sit in front of the television while doing it! <3

Have a wonderful, thanks-filled Thanksgiving Day! May we each always remember how very much we have to be thankful for and give thanks to the One Who so perfectly and abundantly and graciously provides for our every need!

Psalms 30:12

To the end that my tongue and my heart and everything glorious within me may sing praise to You and not be silent. O Lord my God, I will give thanks to You forever. <3

God loves you!  and I do too.

Coleen <3

GCH: What’s on Your Plate? – Loaded Baked Potato Soup

Yum!  Who doesn’t enjoy a baked potato with all the fixin’s?!?  Just picture it!  What is your favorite topping?  I admit it—mine is bacon.  And even choosing just what to put on top…when my husband gets done “loading” his potato, it is a masterpiece (and he enjoys every bite)!

Healthy but oh-so-yummy Loaded Baked Potato Soup

Last winter a friend asked if I would include this soup on the menu for one of our soup nights.  I had never even heard of ‘Baked Potato Soup!’  Well, you can only imagine the variety of recipes to be found out on the internet!  Sadly, most I found were “loaded” with more than just yummy toppings!  They also were loaded with many more calories than I desired to serve to my husband and guests!

And that is how we get here to our healthy but oh so yummy version.  This recipe includes cauliflower.  Using cauliflower as a main ingredient does a number of things in a healthy but yummy way:

– provides our bodies with more veggies

– and for those of you trying to sneak veggies into your family’s repertoire…perfect!

– keeps the carb count down (approximately the same # of carbs in an entire head of cauliflower as in 1 russet potato)

– bulks up the soup so it is thick and creamy without the any of the usual additions

Loaded Baked Potato Soup

(makes approximately 5 cups; 4 servings)

soup:

2 medium-sized russet* potatoes, washed and dried

1 head of cauliflower, cut into florets

1-1/2 cups chicken broth, or vegetable broth

1-1/2 cups 2% milk (warmed)

salt and freshly ground black pepper

toppings:

2 slices bacon, cooked and crumbled (you can use turkey bacon if you wish)

1/2 cup light sour cream

1 cup reduced-fat shredded sharp cheddar cheese

dried parsley

First get your baked potatoes going.  After scrubbing them, pierce potatoes with a fork in 4 or 5 places.  I prepared mine in the microwave oven (on high for 5 minutes; turn over and cook another 3-5 minutes, until tender).  Or, you can bake them at 400° for approximately 1 hour or until tender. Either way, when potatoes are done, cool for 10-15 minutes. Then they can be peeled and chopped.   This recipe is also a great way to use up leftover baked potatoes!

While the potatoes are cooking and cooling, you can prepare the other main ingredients.

Here’s how I cook bacon: I stack the slices and, using kitchen scissors, I cut it into approximately 1-1/2″ to 2″ pieces. I find that the bacon cooks much more quickly and evenly this way. Place the pieces into a COLD small frying pan, heat over medium heat.  Once the bacon starts frying, reduce the heat a bit and cook to the desired degree of doneness, keeping a careful eye so that it does not burn.  I like to cook bacon over a medium low heat so that most of the fat is rendered out.  Using a slotted spoon or spatula, remove the bacon, leaving the drippings, and place onto a couple of paper towels to finish draining.  Set aside for topping the soup.

Now while the bacon is cooking, place the cut-up cauliflower into a medium-sized pot along with the broth.  Bring to a boil, reduce heat, then cover and simmer ‘til tender.  Do not drain.

Once cauliflower is cooked, add warmed milk and the chopped potatoes to the pot, and bring back to a boil. Reduce heat and simmer ‘til thoroughly heated, stirring once or twice; this will take just a couple of minutes.  Remove pot from heat.  Now you are going to puree (smooth out) the soup.  I use an immersion or stick blender** to puree.  Other options would be to use a potato masher, or to puree the soup in your blender.  You must be very careful doing it this way because it is hot! See below for tips (just ‘cause God loves you…we don’t want to see you get hurt!).  I like to leave a few pieces of cauliflower and potato for texture. Once pureed, place pot back on very low heat, add sour cream, half the parsley, and season to taste with salt and pepper. cook on very low ‘til heated to your preference, stirring occasionally.

OK!  Time to “load” your potato soup!  Ladle soup into each bowl. Top each serving with cheese, a sprinkle of the remaining parsley, and crumbled bacon.  Healthy but oh so yummy!

_________________

God loves you!  And I do too!

<3 coleen

Notes and stuff!

*Russet potatoes are the quintessential “baking potato.”  They have a high starch content, and when baked, the insides are light and fluffy.

**Here is a link giving lots of info on immersion blenders, and a good review of a few options <http://www.cooksillustrated.com/equipment/overview.asp?docid=23596>

*** and a link to a quick tutorial on safely pureeing soups in your kitchen blender. Faithful Provisions is a great website for so many things! <http://faithfulprovisions.com/2011/10/26/how-to-puree-soup-in-a-blender/>