January 24, 2025

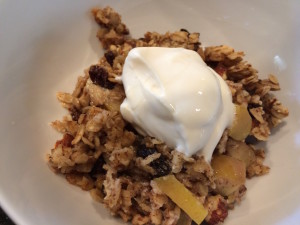
Apple Spice Baked Oatmeal

Baked Oatmeal Dish

Happy New Year, everyone!  For me, the new year is a time to reflect on change, on growth, and on being grateful for all that you have.  If you haven’t heard, we are coming to the end of Girlfriends Coffee Hour.  I hope that in the years we’ve been sharing recipes here at At Home With GCH, you’ve seen something you might want to try; that you’ve experimented a bit in your kitchen and gone outside your comfort zone; and that you thought about cooking as a way to serve God by using the time and talents He gave you.  I have certainly enjoyed challenging myself to come up with new recipes each week to introduce to you, and getting to chat a bit with some of you in the comments section.  Even though GCH is ending, my cooking (and blogging) will continue, and I hope you will find me on Facebook to chat about food and share recipes with me!

For my last entry here on At Home With GCH, I present to you:  Apple Spice Baked Oatmeal!  As usual, I read over several recipes, made a few changes, and came up with something to call my own.  This was easy to make, and serves 6-8 for a hearty breakfast.  You can also make it the night before and reheat portions in the microwave.  This is a great way to start your day (or your year).  Bon apetit, my friends, and God Bless!

Apple Spice Baked Oatmeal

Ingredients:

  • coconut oil or butter for greasing your baking dish
  • 2 apples, chopped (no need to peel)
  • 2 cups rolled oats
  • 1/2 cup brown sugar
  • 1 cup nuts, divided – Try walnuts or pecans.  I used whole almonds and let the kids crush them with my meat mallet!
  • 1/2 cup raisins
  • 1/2 teaspoon salt
  • 1 teaspoon baking powder
  • 1/2 teaspoon ground nutmeg
  • 1 1/2 teaspoons ground cinnamon
  • 2 eggs
  • 2 cups milk
  • 1 teaspoon vanilla extract
  • 1/2 stick butter, melted
  • vanilla yogurt, to serve

Directions:

  1. Preheat oven to 325*F.  Grease your baking dish – mine was an oval dish, but you can use a deep 8″ or 9″ Pyrex.
  2. Spread the chopped apples in the bottom of your dish.
  3. Mix together the oats, sugar, 1/2 cup nuts, raisins, salt, baking powder, nutmeg, and cinnamon in a small bowl.
  4. In a large bowl, beat the eggs with the milk and vanilla.  Stir in the oat mixture, then stir in the melted butter.
  5. Pour the oat mixture over the apples and sprinkle with the remaining 1/2 cup of nuts.   Bake for about 45 minutes.  You want the oatmeal to be set and the top a bit golden and crusty.  Serve warm, with a big spoonful of vanilla yogurt on top.

Explore, experiment, enjoy! — Dana


To view even more of Dana’s unique recipe, you can visit her at Frugal Girlmet!
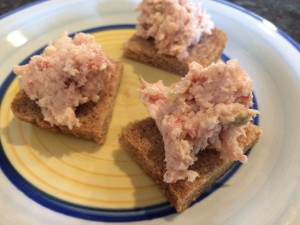
Ham Pate

ham pate

There are some things that you eat as a child that will always be welcome on your plate.  For instance, I love the green bean casserole – you know, that one with cream of mushroom soup and french-fried onions?  I know in my brain that it’s kind of gross, but my tongue, my heart, and my memory all enjoy it so much!  This recipe for Ham Pate is in that category.

When I was a kid, my Dad brought home a canned ham from work every year around Christmas.  I don’t know whether his boss gave it to him or if a client sent it to him – but you know the kind – not the best for eating…packed in a weird jelly…would last in a nuclear bunker for 50 years?  So my Mom, never one to waste food, made this recipe.  She used a hand-cranked meat grinder and mixed up a huge batch of this stuff.  It’s great on crackers, between two slices of bread, or just with a fork.  Low brow?  Yes, but definitely worth a try (especially if you have leftover holiday ham)!

Ham Pate

Ingredients:

  • 1 pound ham
  • 1 8-ounce can water chestnuts, drained
  • 1/4 cup mayonnaise
  • 4 to 6 ounces whipped cream cheese
  • 3 teaspoons prepared horseradish
  • 4 teaspoons sweet pickle relish
  • squeeze of lemon
  • salt and pepper to taste

Directions:

  1. Blend the ham in a food processor until broken down a lot.  Blend in all of the other ingredients.  Taste for seasoning.  You may want to add more pickle relish, if you like it sweeter, or more lemon and salt if you like it more savory.  You can also add plain yogurt if you like it creamier.  Eat it on a fork, spoon it on a cracker, and adjust to suit your tastes.

Explore, experiment, enjoy! — Dana


To view even more of Dana’s unique recipe, you can visit her at Frugal Girlmet!
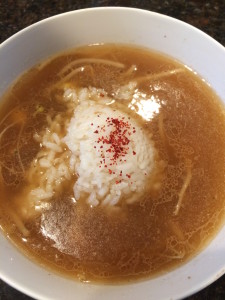
Korean Beansprout Soup (Kong Namul Guk)

kong namul guk

One of the best parts of winter is enjoying all the warming soups, stews, and other comfort foods.  This Korean Beansprout Soup (Kong Namul Guk) is just what the doctor ordered if you’r sick, or just what your tummy ordered if you’re not!

Some recipes call for an anchovy and seaweed broth, but I prefer this soup with a beef broth.  You can either use canned or homemade beef broth, or my favorite – bone broth.  Serve this soup with a scoop of cooked rice for a traditional Korean breakfast, or any time you need to warm up.

Korean Beansprout Soup (Kong Namul Guk)

Ingredients:

  • 1 teaspoon sesame oil
  • 4 ounces beef, sliced fine into small pieces (or you can chop up a leftover hamburger – not traditional, but it’s delicious!)
  • 2 cloves garlic, minced
  • 4 cups beef broth, bone broth, or other broth of your choice
  • 8 ounces beansprouts
  • 1 teaspoon soy sauce
  • cooked rice, green onions, sesame seeds, dried chili pepper flakes to serve

Directions:

  1. In a large pot with a lid, heat the sesame oil and add the meat, stirring to cook through.  (If you are using leftover cooked beef, just sauté quickly.)  Add the minced garlic and stir for a minute or two – don’t let it burn!
  2. Add the broth.  Bring it to a simmer.
  3. Wash and sort through the bean sprouts – get rid of any that are discolored or mushy.   Add to the broth and cook, covered, for about ten minutes.
  4. Add soy sauce and taste for salt.  Serve with rice, green onions, sesame seeds, and chili pepper flakes, if desired.

Explore, experiment, enjoy! — Dana


To view even more of Dana’s unique recipe, you can visit her at Frugal Girlmet!
 

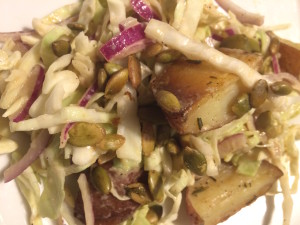
Roasted Potato and Cabbage Salad

potato cabbage salad

I found this delicious recipe here and I’m so glad I did!  This Roasted Potato and Cabbage Salad makes use of winter veggies to create a hearty and healthy side dish.  Next time I make this, I plan to add either raisins or another dried fruit, maybe diced apricots; I think a bit of added sweetness would set off the herbs and cabbage wonderfully.  Eat this with eggs cooked to your liking for a light supper.

Roasted Potato and Cabbage Salad
(recipe courtesy of www.eyecandypopper.com)

Ingredients:

  • 8 small potatoes (use different colors!)
  • 1 sweet potato
  • 1 or two tablespoons of olive oil
  • 1/2 head savoy cabbage, thinly sliced
  • 1 red onion, thinly sliced
  • 2 tablespoons Dijon mustard
  • 1/4 cup apple cider vinegar
  • 2 tablespoons tahini
  • 2 tablespoons honey or maple syrup
  • 1/3 cup olive oil
  • salt and pepper to taste
  • handful of almonds, crushed or chopped coarsely (I used pumpkin seeds)
  • fresh cilantro (optional)

Directions:

  1. Preheat oven to 450*F.  Wash potatoes and sweet potato, slice thickly, and toss with a tablespoon of olive oil.  Line a pan with parchment paper and bake for about 25 minutes.  Take care they don’t burn!
  2. While the potatoes bake, prepare the dressing:  in a resealable container, shake together the mustard, vinegar, tahini, maple syrup, olive oil, and salt and pepper.
  3. Slice the cabbage and onion very thinly.  Put them in a large bowl and toss with the dressing.
  4. When the potatoes are roasted, remove from the oven and let cool 5-10 minutes, then toss into the salad.  Top salad with almonds and cilantro (and next time I’m adding dried fruit here too!)

Explore, experiment, enjoy! — Dana


To view even more of Dana’s unique recipe, you can visit her at Frugal Girlmet!
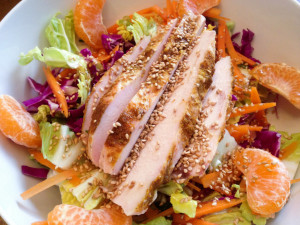
Thankful for Turkey!

Chinese-Chicken-Salad-Resize

Hi Ladies,

I’m sitting here with a belly full of food.  I bet when you read this, you will still have lots of food in your refrigerator from yesterday!  Thanksgiving is such a lovely day to spend with family and friends, eating turkey (and lots of other good foods) and enjoying some time together.  And then comes the day after …

So you don’t want to make a whole new meal, but you probably don’t want to eat exactly the same thing you did on Thanksgiving for three or four or five days afterward as you eat up your leftovers.  I made a list of links to recipes  on our website that you can make with leftover turkey.  I know – that was so thoughtful of me!  ;- }

See if there’s anything you like down here, or share in the comments your family’s leftover turkey preparation of choice.  Happy Thanksgiving!

Thankful for Turkey!

Turkey Veggie Soup

Turkey Fajitas Salad

Tom Kha Gai

Grilled Chicken (Turkey) Supper Salad

Pineapple Chicken (or Turkey) Salad

Curry Chicken (or Turkey) Stew

Chicken (0r Turkey) Enchiladas

Chinese Chicken (or Turkey) Salad

{That should take care of at least a dinner or two, right?}

Explore, experiment, enjoy! — Dana


To view even more of Dana’s unique recipe, you can visit her at Frugal Girlmet!
Sausage & Mushroom Stuffed Shells with Pumpkin Sage Béchamel

sausage pumpkin shells

Whoo, that’s a long title!  And I’ll be honest – this does take a bit of time to prepare.  But if you have an extra hour on a Sunday night and want to make a delicious dinner with generous portions that you can eat the whole week through and not stop loving – try these Sausage and Mushroom Stuffed Shells with Pumpkin Sage Béchamel.

I was going to post my take on this recipe, since I made a few changes for my family, but I didn’t take careful note of my measurements. Food blogger fail!  So I’m just giving you the recipe I found at A Beautiful Bite.  I do want to note that I switched out cottage cheese for ricotta in this recipe, and it worked great.  Just buzz it in the food processor for a few seconds and it’s indistinguishable from the pricier ricotta.  Also, I ran out of sage and I had to garnish with parsley.  In any case, this recipe was a big hit, and it reheats well, so we’ll be seeing this again in our house.

 Sausage and Mushroom Stuffed Shells with Pumpkin Sage Béchamel

(Recipe Courtesy of A Beautiful Bite)

Ingredients:

  • 1 pound pasta shells, cooked al dente
  • 32-ounce ricotta cheese (or use cottage cheese)
  • 2/3 cup Parmesan cheese, grated
  • 1 egg
  • 1 teaspoon salt
  • ground pepper to taste
  • 1 pound Italian sausage (I used sage breakfast sausage)
  • 2 large yellow onion, diced
  • 2 cloves garlic, minced
  • 2 cups fresh mushrooms, sliced
  • 4 fresh sage leaves, thinly sliced
  • 3 tablespoons butter
  • 2 tablespoons flour
  • 3 cups milk
  • 1 cup pumpkin puree
  • 1 cup Greek yogurt
  • 1/2 cup Parmesan cheese, grated
  • 1/3 cup ricotta cheese
  • 6 fresh sage leaves, thinly sliced
  • 1 1/2 teaspoon salt
  • pepper to taste
  • 1/2 cup Parmesan cheese, grated for topping (I skipped this)

Directions:

  1. In a large mixing bowl, combine ricotta cheese, Parmesan, egg, salt and pepper.  Set aside.
  2. Cook shells according to directions on box.  Drain and let cool.
  3. While shells are cooking, brown sausage in a large skillet.  Remove from skillet and place meat on a paper towel to drain.  Reserve 1 tablespoon of the fat to cook the onions in.
  4. Cook onions in fat over medium heat until translucent.  Add garlic and cook for just a minute.  Add mushrooms and sage and cook for another four to five minutes.  Remove from heat and add cooked sausage.   Allow to cool for several minutes.
  5. Stuff shells with ricotta mixture, then top with sausage mixture.  Place shells in a 9×13 baking dish.  Set aside while you prepare béchamel sauce.
  6. In a large heavy pot, melt butter over medium heat.  Add flour and cook, stirring, for several minutes.  Add milk, pumpkin, yogurt, Parmesan, and ricotta.  Cook for a few minutes to thicken.  Add sage, salt and pepper.
  7. Pour béchamel over shells.  Top with extra grated Parmesan.  Bake at 350*F for forty minutes.

Explore, experiment, enjoy! — Dana


To view even more of Dana’s unique recipe, you can visit her at Frugal Girlmet!
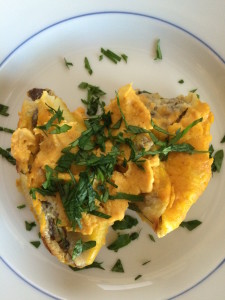
Easy Chicken Mole

Easy Chicken Mole
The first time I had mole (say moe-lay) it was at a small but very well-regarded Mexican restaurant in Los Angeles, La Loteria.  I had heard of mole poblano before and decided to take a chance.  Que rico!  What a glorious taste!  It was rich, a tiny bit spicy, a little bitter, and a little fruity.  It was really a savory fiesta in my mouth.  However, when I went home with the intent to find out more about this magical dish and how to make it, all the recipes I saw were 40 ingredients long and took days to make.  No me gusta – I just didn’t have time to mess with that.  So after some more research, I came up with this recipe – my Easy Chicken Mole!
The two ingredients that most moles share to give them such depth of flavor are dried chiles and chocolate.  Really!  Buy the darkest chocolate you can find.  You can use baker’s unsweetened chocolate, but that will make it bitter, and you’ll probably want to bring it back around with some added honey or brown sugar.  I used bittersweet chocolate, 63% cacao.  I think it worked well, and next time I might even add a little more.
As far as the chiles go, it gets a little confusing.  Oftentimes a chile will have one name when it’s fresh and a different name when it’s dried (I guess kind of like grapes vs. raisins.)  To be honest, I think I bought ancho chiles, but I’m not sure – there were two kinds and neither were labeled!  You want chiles that are a very dark reddish-brown—like the color of dried blood—and about fist-sized.  I used two but I may use three or even four next time.  I removed the seeds, and that’s where the heat resides, so you only get the smoky, fruity flavor of the chiles and not the spiciness.
Try this recipe.  If you’ve never had mole, this is a great place to start.  If you are a mole aficionado, go ahead and tweak my recipe to get the taste you like.  Either way, I bet you’ll say, Que sabor!  (Or if you don’t habla espanol, ‘So tasty!’)
Easy Chicken Mole
Ingredients:
  • 2-4 dried chiles (use ancho, pasilla, or guajillo)
  • 2 onions, chopped
  • 4 tablespoons butter
  • 4 cloves garlic, minced
  • 1/4 cup sesame seeds (or use pepitas, peanuts, or almond butter)
  • 1/4 cup dark chocolate chips
  • 1/4 cup raisins
  • 1/2 teaspoon ground cinnamon
  • 1/2 teaspoon salt
  • 1/2 teaspoon dried oregano
  • 2 cups chicken stock
  • 1/2 cup brewed coffee
  • 2 slices bread
  • 2 pounds boneless, skinless chicken thighs (or use breasts, up to you!)
  • diced avocado, cilantro, sesame seeds to serve
  • rice or tortillas to serve, optional
Directions:
  1. Put the dried chiles in a bowl and cover with boiling water.  Put a plate over the bowl and let the chiles soak for about 15 minutes.  When they have softened, remove the stem and seeds and roughly chop.  Discard the stem, keep some seeds if you want some heat.
  2. While the chiles are soaking, cook the onion in the butter in a very large pot or Dutch oven.  Stir to make sure they don’t burn.
  3. Add the chopped chiles, minced garlic, and sesame seeds.  Stir and cook for 3 minutes.
  4. Add the chocolate, raisins, cinnamon, salt, and oregano.  Stir to combine and cook for another 2 minutes.
  5. Add the chicken stock and coffee.  Crumble in the bread.  Cover the pot with a lid and simmer for 10 minutes.
  6. CAREFULLY transfer sauce to a blender and blend until pretty smooth.  You could use an immersion blender, too.
  7. Return the sauce to the pot and add the chicken.  Tuck them into the sauce and stir.  Make sure the chicken is covered in sauce, then cover the pot with a lid.  Let simmer for about 25 minutes.
  8. The chicken is done when you can shred it with forks.  To serve, ladle the chicken and lots of mole into a bowl.  Garnish with lots of avocado, cilantro and sesame seeds.  You can also eat this in tortillas – just serve with less sauce if you are making tacos.  You can also serve it over rice to soak up the sauce.

Explore, experiment, enjoy! — Dana


To view even more of Dana’s unique recipe, you can visit her at Frugal Girlmet!
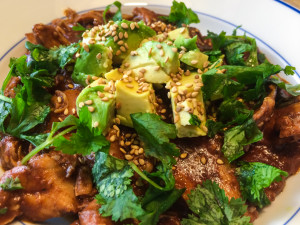
Thai Coconut Chicken Soup (Tom Kha Gai)

Thai Coconut Chicken Soup

I am convinced that every culture, every civilization, has a chicken soup recipe.  Nothing else satisfies, or feels so much like a hug to the tummy, like a big bowl of chicken soup made by someone you love.  If you are like me and are a frugal girl, you buy a whole chicken at least once a week.  I remove the breasts and legs and cook them one night, then cook the carcass for broth and about two cups of shredded chicken left on the body.  If you have a chicken body and the desire to try something new, read on – here comes Thai Coconut Chicken Soup, also known as Tom Kha Gai!

Now that you know how to make coconut milk from scratch, you’ll need about 2 cups of homemade coconut milk, or you can use one can of packaged coconut milk.  There are a few other unusual ingredients for this recipe:  ginger, cilantro, and fish sauce.  Ginger really isn’t that out of the ordinary, and goes great in smoothies and peach dishes; but if you aren’t going to use it soon, you can peel whatever is left and freeze it to use later.  Cilantro shows up in many different cuisines, so if you don’t want to waste half a bunch of cilantro, you have many options (like Mexican or Indian food), or try this  and  this.  Fish sauce is a savory liquid distillation of anchovies, sugar, and salt.  If you can’t find it, you can still make the soup, but fish sauce is the secret ingredient that really brings everything together.  It keeps in the fridge forever, and is a great flavor booster for clam chowder or a substitute for anchovy paste (think Caesar salad.)  The only other ingredients you need are a chicken, some limes, and mushrooms.  Thai restaurants use straw mushrooms (you can find them in a can), but I used dried shiitake mushrooms, and they’re delicious.  You could also use cremini mushrooms.

Try this with Jasmine rice and a green salad for a light but satisfying dinner!

Thai Coconut Chicken Soup (Tom Kha Gai)

Ingredients:

  • 1 chicken body, breasts and legs removed (or use two cooked chicken breasts, diced, plus 3 cups of chicken broth)
  • 1 large piece of ginger, 2 or 3 inches long, peeled and bashed with the handle of your knife
  • 1 can coconut milk, or about 2 cups homemade coconut milk
  • 1 ounce dried mushrooms, broken into little pieces, or 8 ounces fresh mushrooms, chopped
  • 1/2 bunch fresh cilantro, chopped
  • 1/2 teaspoon or so fish sauce (to taste – if you don’t have fish sauce, use salt)
  • 2 limes, juiced

Directions:

  1. In a large pot, cook the chicken carcass with 4 cups of water and the ginger, until the chicken is cooked through. Remove chicken to a large bowl; shred meat from bones and set aside. Strain the broth into another bowl, discarding ginger. Wash the pot and return to stove. Over medium low heat, add the dried mushrooms to the chicken broth and cook ten minutes. (If using fresh mushrooms, add them in Step 2.)
  2. Add back the chicken to the broth, and pour in coconut milk (and fresh mushrooms, if using).  Cook until simmering.  Add chopped cilantro, fish sauce, and lime juice, and stir to combine.  Taste for seasoning – may need more salt, or you may like more lime (you can add the zest of the lime too, if you want a stronger citrus flavor.)  Serve hot with more chopped cilantro.  You can also stir in a little hot sauce or chili flakes if you like!

Explore, experiment, enjoy! — Dana


To view even more of Dana’s unique recipe, you can visit her at Frugal Girlmet!

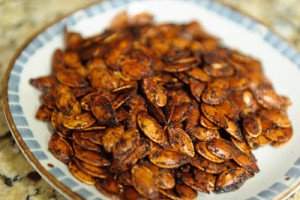
Korean-Spiced Pumpkin Seeds

Korean Spiced Pumpkin Seeds
Happy Halloween, everyone!  While it’s not my favorite holiday, I like watching my kids get into it.  When we drive down the street, my little one likes to shout out the neighborhood decorations:  “Mommy, I just saw a skeleton!!!”  “Oh no,” I cower, “I’m scaaaaared!”  “Don’t worry Mommy, it’s just pretend!”  And they really love seeing jack-o-lanterns.

Thank you, Rose the Jack-o-Lantern, for your tasty guts!

My Mom always toasted the pumpkin seeds for us when we were kids, and I loved them so much!  I found a recipe at My Retro Kitchen, which, I think, is the way my Mom made them.  Unfortunately, I was all out of Worcestershire sauce!  Frugal Girlmet to the rescue – I decided to keep the technique and use a different flavor.  Innovate, experiment – voila!  Korean Spiced Pumpkin Seeds!

These have everything you want in a snack – crunchy, salty, spicy (but not TOO spicy – unless that’s how you roll, in which case, double the dried chili pepper powder!) and just a bit sweet.  These would be a great bar snack (in the name of science, I had to test my hypothesis, and these are fantastic with a cold beer!)

Korean Spiced Pumpkin Seeds

Ingredients:

  • 1 1/2 – 2 cups raw pumpkin seeds, rinsed and patted dry
  • 1 tablespoon sesame oil
  • 1 tablespoon soy sauce
  • 1/2 teaspoon sugar
  • 1/2 teaspoon granulated garlic (not to be confused with garlic salt!)
  • 1/4 teaspoon Korean chili powder (or use Cayenne or sriracha)
Directions:
  1. Preheat oven to 275 degrees.  Line a baking sheet with aluminum foil.
  2. In a large bowl, mix everything but the pumpkin seeds.  Make sure you have no lumps of garlic or sugar.  Stir in the pumpkin seeds, then scrape it all out onto the baking sheet.  Spread the seeds out on the sheet so they can cook evenly.
  3. Cook for one hour, stirring every ten minutes.  They get a little sticky, so use a silicon spatula.  After an hour, remove from the oven and let cool for about an hour.  Don’t worry, they’re not sticky anymore.  Remove to a bowl and get snacking!

Spinach Pakoras with Royal Dip

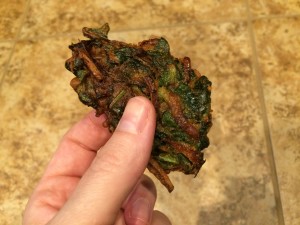
Spinach Pakora

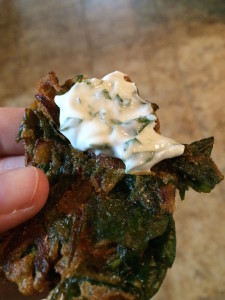
I first had these delicious veggie fritters at a stand at the farmer’s market.  I’d never seen them before, but it was love at first bite!  I swore I’d have to find a way to make them at home – and I did!  Spinach Pakoras with Royal Dip are healthy, tasty, vegetarian and gluten-free too!  These Indian snacks are eaten with a minty yogurt dip and are a popular street food.

The only ingredient that may be a bit tough to find is chickpea flour.  Also called gram flour or besan flour, it’s just dried garbanzo beans ground powder-fine.  I made it at home, and while it took a bit of time because my food processor is wimpy, it worked very well!  If you do grind your own, you will need to sift it through a fine sieve, and return any pebbles to the food processor for a finer grind.  After that, it’s smooth sailing.  If you’re lucky enough to have an Indian grocery store nearby, stop in and buy some chickpea flour – and whatever else catches your eye and tempts your nose!

Spinach Pakora with Royal Dip

Spinach Pakoras with Royal Dip

Ingredients:

  • 1 cup Greek yogurt
  • 1 clove garlic, finely minced
  • 1 tablespoon cilantro, finely minced
  • 1 tablespoon mint, finely minced
  • 1 cup chickpea flour
  • 1 teaspoon curry powder
  • 1/2 teaspoon  ground fennel seeds
  • 2 tablespoons rice flour (or use more chickpea flour, or use regular flour)
  • 2 cups fresh spinach or other hearty greens (mustard, collard, kale), chopped
  • 1/2 onion, cut into very thin strings
  • 1/4 teaspoon salt
  • 1/4 cup water (may use more or less)
  • oil for frying:  grapeseed, coconut, peanut, or vegetable oil

Directions:

  1. Make the Royal Dip:  stir together the yogurt, garlic, cilantro, and mint.  Cover and refrigerate.
  2. Mix together the chickpea flour, curry powder, fennel, and rice flour in a large bowl.
  3. Mix in the spinach and onion. Stir to combine.
  4. Add about 3 tablespoons of water and stir.  Mix it all very well.  You don’t want a thin batter – you just want the flour to be wet and coating the veggies.  Add a bit of water until you make a thick batter.
  5. Heat the oil over a medium burner and drop the pakora batter in by the tablespoonful.  Try to flatten them out a bit so they are pancake-shaped as opposed to spherical.  Cook for about 3 minutes until crispy, then flip and cook the other side.
  6. Remove pakoras to a paper towel-lined plate and sprinkle with a bit of salt.  Serve hot with the Royal Dip.
Explore, experiment, enjoy! — Dana

To view even more of Dana’s unique recipe, you can visit her at Frugal Girlmet