November 15, 2024

Peach Pie Waffles

Peach Pie Waffles

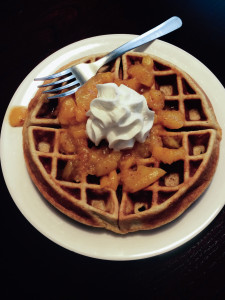
The kids were clamoring for waffles.  They usually like berries and maple syrup, but I had a better idea:  Peach Pie Waffles!  They ate these things up like they were going out of style!

The waffle recipe is straight from Martha Stewart.  She is my go-to resource when I’m checking out a basic recipe.  No waffle iron?  Make pancakes with the batter instead!  These are quick to put together and the leftover waffles (if you have any – it made four waffles for me) freeze and reheat very well.  If you have any leftover peaches, mix them into plain or vanilla yogurt for breakfast.  Ready?  It’s easy as pie!

Peach Pie Waffles

(makes 4 waffles)

Ingredients:

  • 1 large can of sliced or halved peaches, lightly drained
  • 1/2 teaspoon cinnamon
  • 1/4 teaspoon grated nutmeg
  • 1 cup flour (I used whole wheat – you can use regular, too)
  • 2 tablespoons sugar
  • 1 teaspoon baking powder
  • 1/4 teaspoon salt
  • 2 eggs
  • 1 cup milk
  • 4 tablespoons butter, melted
  • whipped cream to serve

Directions:

  1. In a medium non-stick pan (or use a regular pan and add a tablespoon of butter!) pour in the can of peaches.  Add the cinnamon and nutmeg.  Let simmer while you make the waffles.  Mash them with a potato masher if you like, or with the back of a fork.  Keep an eye on them to make sure nothing burns.
  2. In a large bowl, mix together the flour, sugar, baking powder, and salt.  In a smaller bowl, beat the eggs and stir in the milk.  Whisk the egg mixture into the dry mix.  Stir in the melted butter.
  3. Make the waffles according to your waffle maker’s instructions.  Mine called for half a cup of batter for each waffle, and this recipe made four waffles.  If you’re making pancakes, you’ll get … I’m not sure.  Maybe 8?  Anyway, cook them how you normally do, then set aside and plate up.
  4. To serve:  top each waffle with a ladle of hot peaches and a good shot of whipped cream.

Explore, experiment, enjoy! — Dana


To view even more of Dana’s unique recipe, you can visit her at Frugal Girlmet
 

Cauliflower-Cheeseburger Mac ‘n Cheese

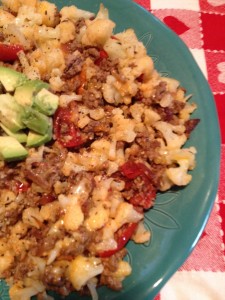
So perhaps you did a double take when you read the title of this recipe in our At Home with GCH blog today.  I totally get it!  When I originally saw a similar recipe that inspired this one, I thought, ‘ummm, yeah, right! I am NOT going to be able to ‘sneak’ this one in!’  But, I did…and he thoroughly enjoyed it!

And since then, we have had different versions of this…it is such an adaptable recipe!  Maybe you also include some pasta (traditional or gluten free).  Or make this ‘chili mac-style’ by adding some finely diced hot peppers or chilis. This is really good with a tomato base, too: add a couple of tablespoons of tomato paste and a can of Rotel-type tomatoes.  But my favorite version is this simple one.  I would love to hear back from you if you adapt it and make it your own!  Oh…and just a bit of finely chopped, cooked bacon finishes this off amazingly; just saying!  Enjoy!

Cauliflower-Cheeseburger Mac ‘n Cheese

2015-06-05 19.43.56

1+1/2 pounds ground beef (or turkey)
1-2 tablespoons finely chopped garlic (I use jarred)
1 medium-sized cauliflower
handful grape tomatoes, halved
2 teaspoons dried parsley (or oregano)
1 tablespoon spicy mustard
1 teaspoon or so sea salt and freshly ground black pepper, to taste
1 cup (or more) coarsely shredded cheese (sharp cheddar, colby jack, spicy monterey jack)
chopped avocado, optional

  • remove the thickest part of the cauliflower stem (freeze to add to veggie soup); coarsely chop the rest of the head of cauliflower keeping your pieces in similar sizes
  • steam or boil cauliflower ‘til just al dente (about 12-15 minutes); drain completely
  • while the cauliflower is cooking, in a large pan, saute the ground meat ‘til almost done adding the minced garlic and the tomatoes in the final minute; reduce heat to low
  • stir in the seasonings and then add the cooked cauliflower to the cooked ground meat, folding together gently
  • scatter all the shredded cheese across the top and stir in
  • optional: top each serving with a little chopped avocado

♥    ♥    ♥    ♥    ♥

God loves you!  ♥  (Don’t ever forget that!)

  coleen

Salmon Cakes

Salmon Cakes

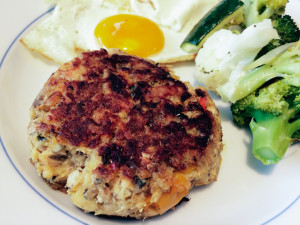
Not as fancy as crab cakes, but higher up the gourmet rankings than a tuna melt, these Salmon Cakes make a quick, protein-filled lunch that can be dressed up or down, depending on your mood.

Dressing up?  Stack them with a poached egg and hollandaise sauce, along with a side of steamed or grilled asparagus.  Going casual?  Serve the salmon cakes in a salad with a vinaigrette and some goat cheese, or with a fried egg and a side of roasted vegetables.  These would go great with tartar sauce or remoulade.  Any way you plate these up, you’ll love these savory salmon cakes!

Salmon Cakes

Ingredients:

  • 1 (14.75 ounce) can of boneless salmon
  • 2 teaspoons mayonnaise
  • 1 teaspoon mustard
  • 1/2 teaspoon celery salt
  • 1/2 teaspoon dried dill
  • 1/2 cup chopped roasted bell peppers and onions (or 1/2 cup diced bell pepper and 1/2 cup diced onion, cooked in olive oil until soft)
  • 10 large crackers (use saltines, Ritz, or whatever plain cracker you have around)
  • 1 tablespoon butter
  • 2 tablespoons olive oil

Directions:

  1. Combine the salmon, mayo, mustard, celery salt, dill, peppers, and onions in a large bowl.  Crumble the crackers into crumbs and mix into  the salmon.
  2. Using a bowl or a cup (I used a half-cup measuring cup), pack the salmon mixture into 4 ounce portions.  Remove the salmon cakes from the cup and place them all on a plate.  Refrigerate for 30 minutes.
  3. In a large frying pan, heat the butter and oil together.  Cook the salmon cakes for about 8-10 minutes on one side over medium heat, until they have a nice golden crust.  Flip them carefully, and cook again for about 8 minutes.  Remove and serve warm.

Explore, experiment, enjoy! — Dana


To view even more of Dana’s unique recipe, you can visit her at Frugal Girlmet
Sweet Potato-Turkey Burgers

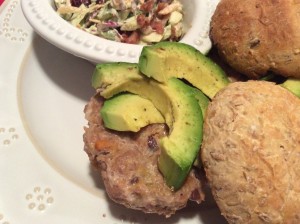
We really enjoy grilled burgers! How about you? But rarely (haha…punny!) do we have a beef burger anymore…turkey burgers have become our favorites. However, they can easily become dried out. This recipe—with the addition of roasted sweet potato and black beans—is one that practically guarantees a moist result. And tasty? Oh yes!

The preparation of these burgers takes a little bit of time…but one way to cut down on the time is to roast the sweet potatoes at an earlier time when you already have something going on in the oven. (After cooling) they can be stored in the ‘fridge for a few days. Also, I always prepare a double batch of these, then quick freeze them (raw) on a baking sheet. Wrap ‘em up well when frozen and keep them on hand for a quick, healthy but oh-so-yummy meal!  Enjoy!

Sweet Potato – Turkey Burgers

2015-04-04 21.34.47

ingredients:

1 large sweet potato, cut into ½-inch cubes (approx 2 cups)
1 teaspoon olive oil
1 cup canned black beans, drained and rinsed
20 ounce pkg ground turkey breast
2 tablespoons minced garlic (I use jarred w/ oil)
2 tablespoons finely chopped fresh cilantro or parsley
1 teaspoon ground cumin
1 teaspoon smoked paprika
1/4 teaspoon chipotle powder (or more!)
1 tablespoon brown sugar (optional)
plenty of freshly ground black pepper

to serve: (options)
burger buns, or lettuce (Butter or romaine) leaves
sliced cheese (cheddar, jack, maybe something spicy)
thinly sliced tomato
thinly sliced red onion
avocado, sliced or mashed
condiments
sea salt, freshly ground black pepper

directions:

  • preheat oven to 400; line a large baking sheet with parchment paper (or foil)
  • put cubed sweet potatoes in a mixing bowl, add olive oil and toss to coat .  pour onto lined baking sheet and bake for approximately 20 minutes ‘til they are just tender.  remove from oven (keep the oven on)
  • combine the cooked sweet potatoes and black beans in a food processor or blender—pulse just a few times ‘til just combined but still a little chunky
  • combine the ground turkey and seasonings in another large bowl
  • add the bean/sweet potato mixture to the meat and seasonings; use your hands to mix together ’til just combined
  • refrigerate the mixture for 15 minutes to firm up
  • with slightly damp hands, shape into patties and place on the lined baking sheet: 1/4 cup for sliders (bake for 15 minutes)…1/2 cup for small burgers (bake for 22-23 minutes)…1 cup for he-man sized (bake for 26-27 minutes) testing to make sure they are cooked through
  • serve burgers warm with assorted toppings, condiments, and buns or lettuce wraps

♥    ♥    ♥    ♥    ♥

God loves you!  ♥  (Don’t ever forget that!)

♥  coleen

Roasted Chickpeas

Roasted Chickpeas

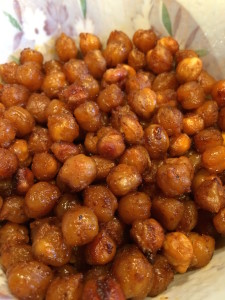
I’m a nibbler.  Are you?  I can sit for an hour with a book, popping snacks into my mouth!  If you are a nibbler like me, it’s best to have some healthy treats around the house.  Popcorn is usually my go-to, but this recipe for Roasted Chickpeas may be my new favorite!

Get two cans of chickpeas (or do you like to call them garbanzo beans?).  Pick out your favorite flavors to add:  curry powder, a spice rub, a lemon pepper shake, even taco seasoning or a Ranch dressing packet.  Mix, roast, crunch!  These guys are like healthier Corn Nuts.  Yum!

Roasted Chickpeas

Ingredients:

  • 2 cans chickpeas
  • 2 tablespoons olive oil
  • 2 teaspoons (or more) of your favorite spice powder mix – see above for ideas

Directions:

  1. Drain the chickpeas and rinse in a colander.  Let dry for about half an hour.
  2. Preheat oven to 400*F.
  3. In a bowl, mix together chickpeas, oil, and spices.  Add salt if your spice mix doesn’t include it (curry powder never has salt in it, so you will want to add about half a teaspoon of salt.)
  4. Line a baking sheet with parchment paper or aluminum foil.  Spread out the chickpeas into one layer and place the sheet pan on the middle rack.  Bake for 20 minutes.  Stir to make sure they’re not sticking or burning, then bake for another 15 minutes or so (maybe another 5 minutes more or less, depending on your oven.)
  5. Remove from the oven and let cool, then munch away!

Explore, experiment, enjoy! — Dana


To view even more of Dana’s unique recipe, you can visit her at Frugal Girlmet!

Mediterranean Topping for Fish

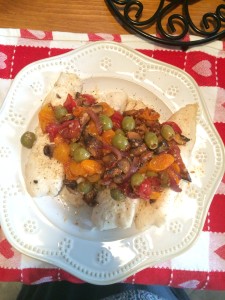
Sometimes I think that I could be a pescatarian!  (A pescatarian is simply someone whose diet does not include meats or poultry but does include fish.)  Seafood and fish are just so much more to my liking lately than meat.  This eating lifestyle falls easily into our healthy but oh-so-yummy POV since it—for the most part—is high protein, low fat.  As with meat, it is important to purchase the highest quality fish that your budget can afford.

This recipe is really quick to put together!  And it is on the lighter side…making it a nice choice for the warmer summer months.  And, cooked on the stovetop…not the oven…will keep the kitchen (and the cook!) cooler.  We enjoyed this with tilapia fillets but it would be great with cod or flounder or sole…or even shrimp!  Enjoy!

Mediterranean Olive Topping for Fish

2015-06-02 18.21.38

ingredients

4 teaspoons olive oil, divided
1 small red onion, cut into half moons
8 ounces baby bella mushrooms, thickly sliced
2 cups grape tomatoes, halved
1 heaping tablespoon garlic, finely minced
1/2 cup pitted green olives with juice, halved
4 skinless tilapia filets (approximately 4 ounces each)
lemon pepper seasoning

directions

  • heat 2 teaspoons olive oil in large saute pan over medium-high heat
  • place onion pieces in pan and saute for 3 minutes or so, ‘til starting to soften
  • add mushrooms in a single layer and cook, without stirring, for about 5 minutes ‘til they begin to brown on one side
  • stir and make sure each is flipped over; cook about 5 minutes more ‘til other side is browned, too
  • add tomatoes (cut-side down) and heat for another 3-4 minutes
  • reduce heat and add garlic, stirring gently for just one minute
  • remove from heat; season w/lemon-pepper seasoning, and stir in green olives; remove to a separate bowl and keep warm
  • using the same pan, heat remaining 2 teaspoons olive oil over medium heat
  • season the fish with sea salt & lemon pepper seasoning on both sides and place in the pan
  • cook for 3-4 minutes ‘til nicely browned, gently turn and cook another 2-3 minutes’ don’t overcook!  fish is done when white throughout…no longer transparent
  • remove to a serving platter and top with the vegetable mixture

♥    ♥    ♥    ♥    ♥

God loves you!  ♥  (Please don’t ever forget that!)

♥  coleen

Protein Powder Cookie Bars

Protein Powder Cookie Bars

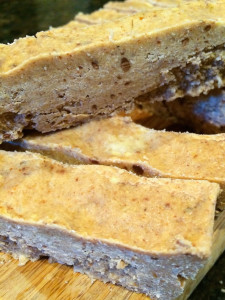
Have you ever used protein powder?  My husband loves the stuff, so we always have a few mongo-sized tubs of it in the pantry.  There are  dozens of varieties – whey, casein, hemp, or pea, to name and few – and as many different flavors, though for most recipes, I would suggest you stick with vanilla.  When you need a sweet treat (and come on, we ALL do sometimes) but don’t want to feel overly guilty, whip up a batch of these Protein Powder Cookie Bars.

Sometimes you know you need protein and you just don’t want to fry some eggs or eat that leftover chicken breast.  Protein powder to the rescue!  I’m normally a champion of whole foods, but sometimes there really is better living through chemistry.  This recipe comes together completely in the food processor and takes just a few minutes to make.  Hold out for the bars to firm up in the fridge or freezer, and you have a candy bar that doesn’t break the calorie bank.  This is totally customizable and deserves a go.  Ready?

Protein Powder Cookie Bars

Ingredients:

  • 1 cup roasted, salted almonds (leave skins on for extra fiber)
  • 1/2 cup coconut oil
  • 2 cups oats
  • 1 cup protein powder (vanilla casein or whey both work here)
  • 1/2 cup shredded coconut
  • 1/2 cup mini chocolate chips

Directions:

  1. In the food processor, add the coconut oil to the almonds and make almond butter.  Then add the ingredients, one by one, and mix after each addition.
  2. When you have a mixture that feels like heavy, wet sand, pour it out into a metal loaf pan.  Flatten it out with your hands or a spatula and freeze or refrigerate until very firm.  Cut into 4″ x 1″ bars.  (You could go crazy and drizzle these bars with melted chocolate!)  Store in the fridge or freezer until ready to eat.

Explore, experiment, enjoy! — Dana


To view even more of Dana’s unique recipe, you can visit her at Frugal Girlmet!

Raspberry-Lemon Cookie Cups (paleo, dairy-free, gluten-free)

We recently celebrated the birthday of one of my favorite people in the whole world—my daughter, Kassia!  She continually inspires me with her healthy eating lifestyle.  She endeavors to feed her loved ones (and the rest of us!) with the best quality foods she can find.  So I wanted to {attempt} to do likewise for her.  This healthy but-oh-so-yummy dessert is one that she had mentioned looked good* …and it was!

2015-06-07 15.48.38

These cookie cups are raw…but could also be baked if you prefer.  They have no refined sugar in them, nor any dairy, and are also gluten-free.  They fit perfectly into a paleo-style eating plan, too!  And they are vegan!   They are very delicate, though…so keep the shells refrigerated ’til just ready to serve them.  Then pipe (or scoop) the delicious filling into them, top with a lucious fresh raspberry…and serve.

So, next time you find yourself needing to find the perfect dessert that meets the dietary needs & wants of your guests…try this!  We thoroughly enjoyed them.  Hope you do, too!

Lemon-Raspberry Cookie Cups

raspberry

ingredients:

2 lemons, zested and juiced (you will need the zest from both along with 1 tablespoon of juice)

cookie cups:
1 cup almond flour
1/2 cup coconut flour
2 tablespoons 100% maple syrup
2 tablespoons coconut oil, room temperature
2 teaspoons pure vanilla extract
1 tablespoon lemon juice
1/2 of the lemon zest
pinch of salt

raspberry filling:
2 ounces freeze-dried raspberries
1 can (14 ounce) coconut cream, full fat variety
1 teaspoon sweetener of choice (I used maple syrup)
1/2 teaspoon pure vanilla extract
12 perfectly ripe raspberries

directions:

cookie cups:

  • line a standard size (12)  muffin tin with plastic wrap (this is a little tricky and will shift around a bit; that is expected
  • zest and juice the lemons; set aside
  • place all of the ingredients for the cookie cups in your  food processor.
  • pulse ’til well-blended and the mixture starts to come together
  • use a 1-1/2 inch or 2 inch cookie scoop (about 2 tablespoon size) and  divide the mixture up into the lined muffin tin
  • gently press mixture into each cup along the bottom and about halfway up the sides. I used my ‘barely damp’ fingers to do this
  • chill the cookie crust cups in the refrigerator for at least 6 hours (or even overnight)

raspberry filling:

  •  pulse the freeze dried raspberries in your food processor ’til finely ground (you will have a powder); set aside
  • remove the can of coconut cream from refrigerator and drain off any liquid…but not the cream! then scoop out all the thick coconut cream into the bowl of your stand mixer.
  • using the whisk attachment, whisk for about 30 seconds; then add in the sweetener and vanilla. continue to whisk until fluffy (about a minute)
  • (with mixer OFF) slowly add in the raspberry powder using a sifter or small sieve.  you can discard the dried raspberry seeds that remain in the sieve…or add ’em
  • start up mixer again, on medium speed, and whisk ’til well blended and fluffy
  • gently remove cookie cups from muffin tin, using the plastic wrap to lift them.  place on serving dish and pipe or scoop the raspberry filling into each, dividing equally among the 12 cups.  top each with one perfect raspberry and a pinch of the leftover lemon zest
  • (for best texture) serve immediately

♥    ♥    ♥    ♥    ♥

God loves you!  ♥  (Please don’t ever forget that!)

♥  coleen

* I used this recipe as my guideline and made adaptations.


Sweet and Sour Cucumber Salad

Sweet and Sour Cucumber Salad

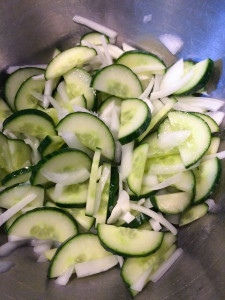
Happy Summer!  Today was my daughter’s last day of school.  Memorial Day is in the past, and it’s quickly heating up.  That means it’s BBQ time!  Next cookout you go to—bring this Sweet and Sour Cucumber Salad.

This is an alternative to that played-out coleslaw.  Feel free to double or triple this recipe.  The cucumbers keep it light and crunchy.  You can adjust the balance of sweet to sour to suit your own taste.  I like this salad fresh, but the longer you leave it to mix and mature – up to two or three days – the more pickled and nuanced the flavors get.  Ready?  Let’s go!

Sweet and Sour Cucumber Salad

Ingredients:

  • 1 large cucumber (I like English in this recipe)
  • 1/2 sweet onion
  • 2 tablespoons vinegar – white or rice
  • 3 tablespoons sugar
  • 4 tablespoons whole milk
  • salt and pepper to taste

Directions:

  1. Cut the cucumber in half lengthwise, then slice into thin half-moons.  Place in a large bowl
  2. Slice the onion as fine as possible.  Add to the cucumber.
  3. Mix together the vinegar, sugar, and milk.  Taste, and add more of what you like, or leave it as-is.  Pour over the cucumber and onion.  Season with salt and pepper.  Keep refrigerated until ready to eat.  This is great the next day, and even more pronounced after two days.  Eat with spicy foods, BBQ’d meat, or really salty foods.

Explore, experiment, enjoy! — Dana


To view even more of Dana’s unique recipe, you can visit her at Frugal Girlmet!


Fruit Crisp

Nothing says summer to me more than the fruits that are available just during this season!  Blueberries, raspberries, strawberries, peaches and plums; oh my!  My most favorite is cherries; I just love cherries!  They are not in season for very long so indulge while you can!  We are!

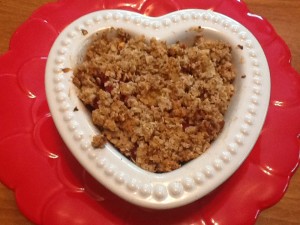
Here on our At Home with GCH blog, Monday’s are always focused on healthy but oh-so-yummy! recipes. This week I have a recipe for a delicious, light Fruit Crisp featuring some of these great in-season produce. Our featured ingredient(s) this week are peaches and cherries!!!  Here are a couple of links to the  nutritional value along with some incredible health benefits  of these delicious fruits (peachesand cherries)—besides the fact that they are just yummy!

2013-08-02 09.21.43

This is delicious served with a dollop of whipped cream…or a scoop of vanilla ice cream.  Enjoy!

Summer Fruit Crisp

2013-08-02 09.52.20

ingredients:

3 large peaches, sliced
1 cup (18-20) cherries, pitted* and halved
1/2 cup raspberries (optional)
1/4 cup plus 1 tablespoon sugar
1/2 teaspoon almond extract
3/4  cup oats
3/4 cup almond flour
1 teaspoon cinnamon
1/2 teaspoon salt
6 tablespoons cold butter, cut into cubes

directions:

  • preheat the oven to 375
  • cube up the butter and place in refrigerator until ready for it
  • in a baking dish or pie plate, toss the cut-up fruit with 1 tablespoon of the sugar and the almond extract; set aside.
  • place the oats, 1/4 cup sugar, almond flour, cinnamon and salt into the large bowl of a food processor.  pulse a couple of times to combine.
  • add the cold butter, pulsing just until it comes together and forms clumps.  (of course, you can mix this by hand, too!)
  • mound the oat mixture on top of the prepared fruit being sure to cover it completely; bake for 35 to 40 minutes
  • serve warm or cold

*  Here is how I pitted the cherries—with a drinking straw.  Yes, ma’am!  Now I am a girl who l-o-v-e-s her gadgets!  And, of course, you can go out and buy a cherry pitter.  But sometimes simple is the better answer.  And besides, then one can save her pennies to buy an incredible kitchen tool!  ;-)

2013-08-02 09.01.35

Just do it like this:
– remove the stem from a cherry
– place the end of the straw over the indentation of the cherry
– firmly, but gently, wiggle the straw straight through the cherry; the pit will pop right out!  Easy-peasy!

 ♥  ♥  ♥  ♥  ♥

God loves you!  ♥   (Don’t ever forget that!)

♥  coleen