November 17, 2024

Peppers and Sausage

Here on our At Home with GCH blog, Monday’s are always focused on healthy but oh-so-yummy! recipes. We continue this series of recipes featuring in-season summer produce. Our featured ingredients this week are sweet, or bell, peppers.  We (by that I mean, Robert!) have successfully grown them in our garden this year!  And, yes, bell peppers are available shipped in from around the country all year long…but as a locally grown in-season veggie…this is the height of the season in the Northeast.  Here are some nutrition facts about bell peppersPeppers are a pretty common veggie found in my refrigerator and incorporated into at least 1 or 2 recipes every week.  Our recipe this week highlights them and shows off their yumminess to the max!

2013-09-04 19.55.37

Peppers and Sausage

Ingredients:
1/4 cup olive oil, additional if needed 2013-09-04 19.33.28
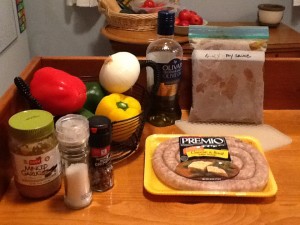
1# Italian sausage*
2 yellow Bell peppers, cored and sliced thin
2 red Bell peppers, cored and sliced thin
1 green Bell pepper, cored and sliced thin
1 large sweet onion, sliced into halfmoons
3 cups pasta sauce (I used homemade from the freezer)
3 tablespoons chopped garlic (I use jarred)
2 teaspoons each kosher salt, freshly ground black pepper
1-2 teaspoons each dried oregano, basil (or use fresh!)
3 tablespoons freshly grated Parmesan cheese
1/4 cup shredded Mozzarella

Directions:

  • Heat 1 tablespoon of olive oil in a medium-sized saute pan.
  • Cook the sausage ‘til lightly browned on both sides.
  • Add 1 cup of pasta sauce, and simmer on low ‘til veggies are done.
  • In your largest saute pan (or dutch oven), heat the balance of the olive oil.
  • Add the sliced onions and saute on medium for 4-5 minutes.
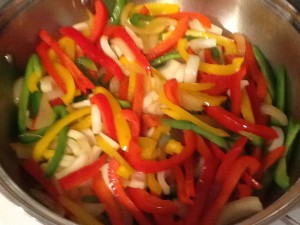
  • Add in all of the sliced peppers; mix well with the onions coating with a bit of the olive oil.
  • Continue to saute the veggies for approximately 15 minutes or so, stirring as needed.  They should be barely crisp…more on the softened side.
  • Stir in the chopped garlic and the seasonings; saute for just 1-2 minutes stirring frequently.
  • Pour in 2 cups of the pasta sauce making sure to thoroughly mix everything together.
  • Reduce heat to low…just so the sauce is gently simmering.
  • Cut up the sausage into bite-sized pieces and add to the veggies.
  • Continue to simmer for 5-10 minutes, just so the flavors can meld together.
  • Garnish with the shredded cheeses.
  • Serve with bread or over pasta.  Enjoy!

2013-09-04 21.03.23

* Use what your family likes: fully cooked Italian chicken sausage, sweet Italian pork sausage, Italian turkey sausage… I used thin links of Italian pork sausage called ‘luganica.’

♥  ♥  ♥  ♥  ♥

God loves you!  ♥  (Don’t ever forget that!)

♥  coleen
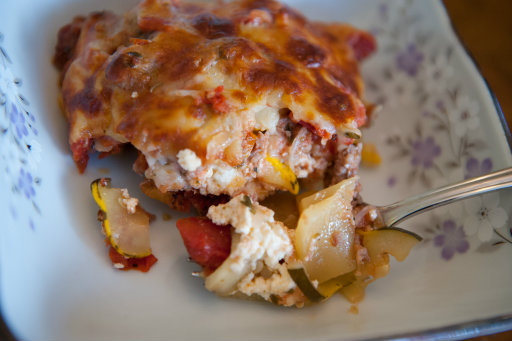
Zucchini Lasagna

Zucchini Lasagna Resize


This recipe came about, as many do, in my house:  I start with an ingredient and brainstorm what in the world I’m going to do with it.  I had a bag of summer squash from the farmer’s market – it was so inexpensive, I couldn’t pass it up.  But aside from making zucchini bread, I couldn’t think of how to use it.  That was when I stumbled upon a recipe for Homemade Ricotta, and it came to me:  Zucchini Lasagna!

The zucchini stands in for traditional noodles in this recipe, so if you are following a low-carb diet, or if you are avoiding gluten, you’re in luck!  If you are making ricotta, drain and squeeze it to keep any extra liquid out of the casserole.  Nobody likes a soggy lasagna!  Feel free to saute and add other veggies or herbs to the lasagna, too – baby spinach, bell peppers, black olives, or fresh basil would all be lovely!

This is a small casserole, so we ate it with a big salad for dinner.  You can easily double or quadruple this recipe to serve more people.  Hope you like it!

Zucchini Lasagna

Ingredients:

  • 1 or 2 zucchinis or other summer squash, about 3/4 pound
  • cooking spray
  • 1/2 pound sausage
  • 1/2 small onion
  • 1 clove garlic
  • 1 can diced tomatoes, drained (I used fire-roasted canned tomatoes)
  • 1/2 teaspoon Italian herbs, or oregano
  • salt and pepper
  • 1 cup Homemade Ricotta, or store-bought
  • 1 cup shredded mozzarella cheese

Directions:

  1. Preheat oven to 400*F.  Line a baking sheet with aluminum foil and spray lightly with cooking spray.  Chop the zucchini into thin coins – about 1/8″-thick.  Lay out on the baking sheet and bake for about 8 minutes.  They don’t need to be cooked through at all – you just want to dry them out a little bit.  Remember, no one likes a soggy lasagna!
  2. While the zucchini is drying out, dice the onion, and mince the clove of garlic.  In a large pan, brown the sausage with the onion and garlic.  Drain any fat that accumulates.  Add in the drained tomatoes, oregano, and salt and pepper, and heat through.
  3. In a casserole dish, spray a little cooking spray so nothing sticks.  Layer half the zucchini slices to cover the bottom of the casserole dish.  Spread half the ricotta over the zucchini, then spread half the sausage mixture over the ricotta.  Repeat with the rest of the zucchini, then ricotta, then sausage.  Cover with the shredded mozzarella.
  4. Cover with a lid or aluminum foil, and bake for 20 minutes.  Remove lid and bake for another ten minutes, until the cheese is golden and melty.

Explore, experiment, enjoy! — Dana


To view even more of Dana’s unique recipe, you can visit her at Frugal Girlmet!

HOW do I Homeschool?

The answers to this question are infinite. There are hundreds of ways to educate your children at  home! Curriculum companies and learning resources now abound, unlike the days when the idea of home education was foreign to most parents and educators alike. Today I will tell you just a bit about how we have approached homeschooling in our family.

HOW Do I Homeschool? www.GirlfriendsCoffeeHour.com #homeschool

A View of Homeschooling in my Family

When our family began our homeschooling journey, we were still in a very schoolish place. We were coming straight out of a private school and I expected to do school at home. I did not have anyone telling me that it could or should look any differently. So I began my search for appropriate curriculum for my children on the internet. I ended up going with a workbook type of program for my son and a Charlotte Mason, kind of a *unit study program, for my daughter.

*Click on the link for a thorough explanation of the term unit study, but this is basically studying a particular topic or time period for a specified amount of time before moving on to a different topic or time period.

“A good unit study involves learning about one topic in an interesting and engaging way that will captivate the student and make them want to learn more and continue to think about the things that they are learning.” ~Amanda Bennett

Neither I nor my son enjoyed the workbooks. I did not like the separation that it created and he didn’t either. We both felt that he was missing out on what was happening with my daughter and I. We loved the unit study! I learned alongside my daughter and I was able to see the world that opened up to her through learning to read and in being read to daily by me.

By the end of our first year of homeschooling I knew that we were not a workbook family.

We ended up using another unit study curriculum with both children the following year, and I actually included our youngest child when possible, too. It was a wonderful year! It involved a lot of work, and our home still seemed like a school many days, but we all relished our afternoon reading and Q & A times. There were days when I would choke up from the stories I was reading aloud to them, and I was so proud of my children for their participation. We all learned so much that year!

It was a time of growth for me in particular, as we had moved that year and were living  in an area where we knew absolutely no one. Our reliance on God grew. I was also learning more about what homeschooling could be. Many families love and thrive with school-at-home methods. That is wonderful! For us, it did not work well. It simply was not what I desired for my family, nor did I feel it was what God was calling me to. Near the end of my first year of homeschooling I had acquired a few booklets from Lifestyle of Learning. Little did I know it at the time, but the words within those pages would spark a change in my thinking that has grown and changed over the last 7 years. My thoughts about education are very different from what they were when I first began this journey. And God is still changing me as we continue.

Though we are not a ‘workbook’ family, that is not to say that we never use workbooks or textbooks. We have, and do. It really depends on the child, the season of our lives, and the topic about which we are trying to learn. For example, we moved and added two babies to our family between March of 2009 and October of 2010.  During that time my children did a lot of learning on their own, and used several textbooks to facilitate their learning. I didn’t even always keep up with the grading. You want to know what happened? They still excelled on their end-of-year tests! Big surprise. I can say that now, as I am more ‘seasoned’, but in the earlier years of this journey those were things that I worried about. They are valid concerns to new homechooling parents. I want to encourage you that your children are learning, even on the days when it may not seem that way. There are a multitude of ways to learn and things to learn about. Most of them are not even learned sitting at  desk listening to a lecture! So when you have a day, or even several, that you think “all is lost” and that you need to make it up, do not despair. God redeems the time!

Our family is living proof.

Now that we are entering our 8th year of homeschooling, we are planning and preparing a bit differently for our homeschooling year than we did in years past. For the first time, I asked my children what they wanted to learn about and actually ordered resources based on their answers! We will be watching dvd’s as part of our family learning this year. The topics are as varied as cooking, crafting a great sentence, and nutrition. My older three children are taking art classes each Friday at the local homeschool co-op; my younger daughters will tag along and learn to be patient while we wait on their siblings. My children will also meet new friends, play games, help prepare lunches, take care of younger siblings, continue to help maintain our home, enjoy movies and video games, utilize apps on the iPad, write posts for their own blogs, and participate in field trips and park days planned by one of the other homeschool groups in which we are involved. This is all a part of learning!

It is how we homeschool.

Next week  I will share a bit about various homeschooling methods, curriculum, and other useful resources. I hope you will join me to learn more about HOW to homeschool with Homeschooling Methods, Curriculum, and Resources.

My Favorite Fruit Salad Recipe

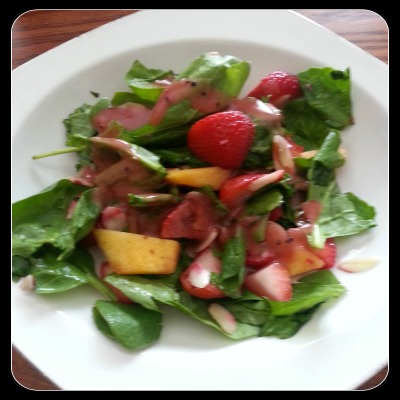
Yummy is the best way to describe this dish. It is perfect for the summertime when you have fresh fruit readily available. You can make a meal of it or it is a perfect healthy side dish too.

Boyd1


Ingredients:
Bag of fresh spinach leaves
Pint of strawberries
2-3 Peaches
Bag of sliced almonds
Raspberry Vinaigrette Dressing

Directions:

  • Rinse the spinach leaves and the fruit.
  • Cut up the strawberries and peaches in bite size pieces.
  • Combine the spinach leaves, fruits and almonds in a bowl. You can also add fresh blueberries or any other of your favorite fruits. You can use sunflower seeds or pecans instead of almonds.
  • Toss the salad and drizzle with the dressing. Any type of vinaigrette dressing tastes great with this salad. I have also used balsamic vinaigrette and strawberry vinaigrette.

This salad keeps well in a Tupperware container overnight. If you know you will have leftovers, it is best to add the dressing per serving instead of on the entire salad directly. Approximately 6 servings.

Serve and Enjoy! 🙂
Amy

Basil Pesto

Here on our At Home with GCH blog, Monday’s are always focused on healthy but oh-so-yummy! recipes. We are continuing our series of summer recipes featuring in-season produce. Our featured ingredient this week is basil!  We can all identify the pungent aroma of basil…mmmm!  Basil has all kinds of health benefits <who knew?!>; check out some info here.  While basil is definitely ‘in-season’ here at the height of the summer growing season, it actually is easily grown as a houseplant.  Consider purchasing a small pot of basil (even in the grocery store) and keeping it in a cute little pot right on your sunniest windowsill.  Easily you could be pinching off a handful of leaves to make into pesto, or scatter some into a Caprese Salad, or slicing them up to finish off your best pot of spaghetti sauce all winter long!  Enjoy!

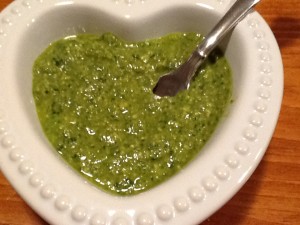
2013-08-29 22.52.06

Pesto

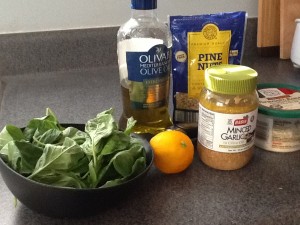
Ingredients:
2 cups basil2013-08-28 17.06.40
2 cups baby spinach leaves
3 tablespoons (or more!) chopped garlic (I use jarred)
2/3 cup pine nuts
1 cup freshly grated Parmesan
1 teaspoon kosher salt
1 teaspoon freshly ground black pepper
1/2 lemon, juiced
2/3 cup olive oil

Directions:

  • Place the  pine nuts and garlic in the bowl of a food processor and blend for 15 seconds.
  • Add the basil, spinach, salt, and pepper.
  • With the food processor running, slowly pour the olive oil and the lemon juice into the bowl through the feed tube.
  • Process until the pesto is thoroughly pureed.
  • Add the Parmesan and puree ‘til thoroughly incorporated (30-40 seconds).
  • Use immediately. *See below for hints on storing the extra pesto.  Enjoy!

2013-08-28 18.05.05

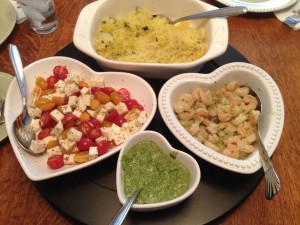
This is how we enoyed the pesto: Mix 1/4 – 1/3 cup into a pound or so of shrimp sauteed with LOTS of garlic.  Bread on the side.  As you can see, we also enjoyed a delicious Caprese salad (click link above for recipe) as well as spaghetti squash sauteed along with some zucchini.  No complaints were heard!  🙂

Store extra pesto in the refrigerator for up to 1 week in a small container with a very thin film of olive oil on top (to seal out air).  Can also be frozen in an ice cube tray, or (my favorite) in mini-muffin cups.  To do this, wipe the muffin tin compartments with a paper towel dipped in olive oil.  Spoon in a heaping tablespoon of pesto into the compartments.  Place in freezer.  After a couple of hours, remove tin from freezer.  Set gently into a sink with just a little bit of hot water; this should loosen the individual portions of pesto.  Pop them all into a freezer container…you will be so glad you did!

♥  ♥  ♥  ♥  ♥

God loves you!  ♥  (Don’t ever forget that!)

♥  coleen

Roasted Plums with Homemade Ricotta


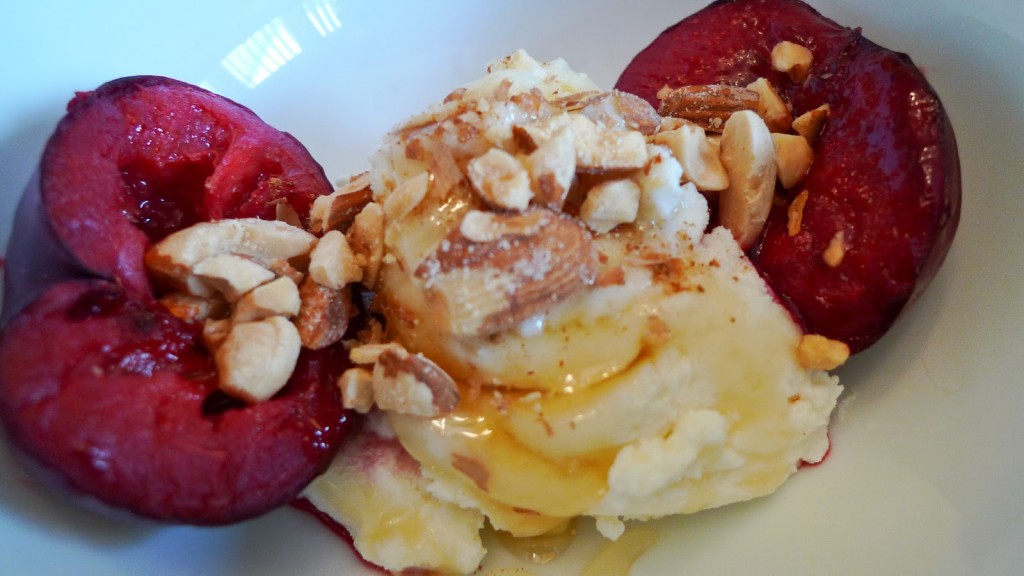
baked plums w ricotta

Last week I posted a recipe for Homemade Ricotta.  Did you try it at your house?  Did it totally blow your mind?  Now that you know how to be a Blessed Cheese Maker, here’s an idea for what to do with your ricotta:  Roasted Plums with Homemade Ricotta!

Plums will only be around for a few more weeks before autumn rolls in and we have to say goodbye to summer fruit.  You can use any other stone fruit here – peaches or nectarines would be just as yummy.  You can also play around with the toasted nuts you use.  I had almonds on hand, but you can try pistachios, hazelnuts, or even walnuts.  My older daughter is allergic to all nuts, so she goes without, and you can too, if nuts aren’t your thing.  Add a shake of cinnamon and a drizzle of honey and you have a nutritious, not-t00-sweet dessert!


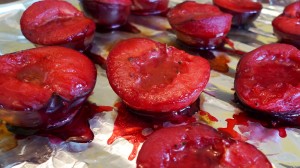
baked plums_

Roasted Plums with Homemade Ricotta

(serves 4)

Ingredients:

  • 4 plums
  • 1 teaspoon pumpkin pie spice or cinnamon
  • 2 teaspoons honey, plus more for serving
  • 1 cup Homemade Ricotta (or use store-bought)
  • 1/4 cup crushed almonds, or other nuts, or cookies (amaretti would be super!)

Directions:

  1. Preheat oven to 400*F.  Wash the plums, then cut in half and remove the stones.  Place all plum halves, cut-side up, on a foil-lined baking sheet.  Sprinkle with pumpkin pie spice or cinnamon, and drizzle with 2 teaspoons honey.  Bake for 20 minutes.
  2. Remove from oven.  When cool enough to handle, you can slip off the skins if you want.  I like the extra fiber they add, so they stay on at my house.  To serve:  Place 1/4 cup ricotta in a dish, along with two plum halves.  Top with crushed nuts and a shake of cinnamon.  Drizzle with a little honey.


Explore, experiment, enjoy! — Dana


To view even more of Dana’s unique recipe, you can visit her at Frugal Girlmet!

Why would ANYONE choose to homeschool?

Why Would ANYONE Choose to Homeschool? www.GirlfriendsCoffeeHour.com #homeschool

Why We Homeschool

When we began homeschooling, it was because our daughter was experiencing some vision problems, which had resulted in reading issues that we felt could be better addressed in a one-on-one situation.  The bigger reason was because God kept speaking to me with the following verses:

Deuteronomy 6:4-9 Hear, O Israel: The Lord our God, the Lord is one.  Love the Lord your God with all your heart and with all your soul and with all your strength. These commandments that I give you today are to be on your hearts. Impress them on your children. Talk about them when you sit at home and when you walk along the road, when you lie down and when you get up. Tie them as symbols on your hands and bind them on your foreheads. Write them on the doorframes of your houses and on your gates.

We continue to homeschool because God has not led us to make any other decision. We do pray about it often. We have also come to realize that homeschooling allows us to

  • work at our own pace
  • travel
  • know one another and extended family members
  • to cater to our special needs child and the allergies of some of our children
  • to allow our two oldest children to pursue their interests of drawing, photography, and writing

We see no reason to stop homeschooling now, outside of God calling us to do so. We are totally sold on this way of life!

Why Others Homeschool

There are many other compelling reasons to choose homeschooling over public or private schools.

  • Your child has special needs, such as food allergies, giftedness, learning delays, or a diagnosis such as Autism or Sensory Processing Disorder. While many children living with the above challenges do attend public or private school, families are increasingly choosing homeschooling as the best educational choice for them!
  • You feel called by God to homeschool. I can attest to the fact that obedience is the best choice when you hear God speaking to you. And though the road may not be an easy one, He will travel with you the entire journey!
  • Your family desires to travel and the ‘traditional’ school schedule would inhibit your freedom to do so. Many families have taken time to travel the country or even the world, learning through life as they explore their immediate surroundings. What better way to learn than through complete immersion in a culture and its foods, history, and people!
  • Your child has a deep passion for a specific sport or artistic pursuit. Homeschooling will allow your child to immerse herself in that pursuit in a way that traditional schooling will not.
  • You desire to spend more time with your children. There is nothing quite like being home with your family all day. Yes, there are difficulties, but the rewards far outweigh them in my opinion! My youngest children know their older siblings in a way that they would not if my older children were heading off to school each day. I find much joy in the delight on my little girls’ faces as they greet their siblings each day.
  • You or another family member suffers from an illness. Homeschooling could be an option for you, as well. Many families still homeschool even they have been diagnosed with cancer, heart disease, or some other life-threatening ailment.

Why do YOU Homeschool?

There are likely even more reasons families choose to homeschool.  What is your reason? Will you share it with us in the comments below?

Please join me again next week for my post,  HOW do I Homeschool?

How to Make “Game Day” Shakers

It’s that time of year again when the kids have gone back to school and started playing sports. My nephew, Timmy, has started his football season.  So we decided to make shakers to take the game to help cheer him on. This is a great project to do with kids.  My son, Tristan, helped me fill up the shakers and my niece, Chloe, helped me decorate them.  We want to make some NOISE!! 🙂

Items needed:
Construction paper
Markers
Scotch tape
Scissors
Empty containers with lids.
Rocks, rice or other fillers

STEP ONE:

Rinse and dry containers.
Cover with construction paper.
Tape in place.
Decorate with team name,  player’s name and number. Try to use the team colors.

STEP TWO:

Put rocks or rice in the containers.
Replace lid.

STEP THREE:

SHAKE! SHAKE!! SHAKE!!!   LET’S MAKE SOME NOISE!!!!

GAMEDAYSHAKERS
It’s a great way to show the kids in your life you are rooting for them.
Have Fun & Happy Crafting!!

Amy

Clafouti (Nectarine-Raspberry Fruit Bake)

Here on our At Home with GCH blog, Monday’s are always focused on healthy but oh-so-yummy! recipes.  We are continuing our series of summer recipes featuring in-season produce. Our featured ingredient this week is nectarines—so good for you!   And our recipe is for a yummy baked dessert which includes nectarines AND raspberries.   This is a classic French dessert (think ala Julia Child) with the fancy French name Clafouti (cla-foo-tea).   Clafouti is a delicious sort-of-cake, sort-of-custard, very light, perfect for summer dessert (but oh-so-simple).   As typical I have made it gluten free (dairy free, too) but it can also be made with traditional all-purpose flour.  You can make clafouti with practically any type of ripe, juicy fruit.  In the past, we have enjoyed pear, cherry, and blueberry variations.   You might remember a few weeks ago we had a recipe for Fruit Crisp.  These two recipes both feature yummy, ripe, juicy, seasonal fruits but differ in their texture.  The Crisp is just that…a crispy, oatmeal-based topping for the fruit; while this Bake (clafouti) is more tender and delicate.  *** I’d love to know which presentation your family enjoys most!

2013-08-23 11.02.23


Nectarine-Raspberry Clafouti (Fruit Bake)

Ingredients:
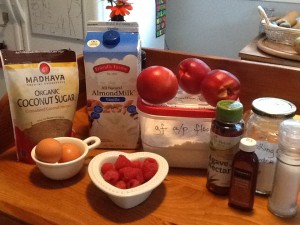
1 tablespoon coconut oil (or butter)  2013-08-23 10.06.49
3 large ripe nectarines
1 (6 ounce) container raspberries
3/4 cup gluten free all-purpose flour
1 teaspoon baking powder
pinch of salt
3 tablespoons agave nectar
2 large eggs
1 cup almond milk
1 teaspoon almond extract

Directions:

  • Preheat oven to 400.
  • Grease a 1+1/2 – 2 quart ceramic baking dish with a small amount of coconut oil (or butter).
  • Pit the nectarines and then roughly chop.
  • In a blender container, mix all ingredients except for the fruit ‘til smooth and foamy, just a minute or so.
  • Pour about 1/4″ of batter into the baking dish. Place in oven ‘til batter looks slightly set (about 2 minutes).  Remove from oven.
  • Add chopped nectarines on top and pour in the balance of the batter;  scatter the raspberries on top, pushing them down gently into the batter with your finger.
  • Put baking dish back into oven; REDUCE HEAT to 350,  and bake for 45 minutes.
  • The clafouti is done when it has puffed and lightly browned; check by using a thin knife inserted into the center that comes out clean.
  • Set aside to cool slightly.  Can be eaten warm or cold.    Enjoy!

♥  ♥  ♥  ♥  ♥

God loves you!    (Don’t ever forget that!)

♥  coleen
Homemade Ricotta

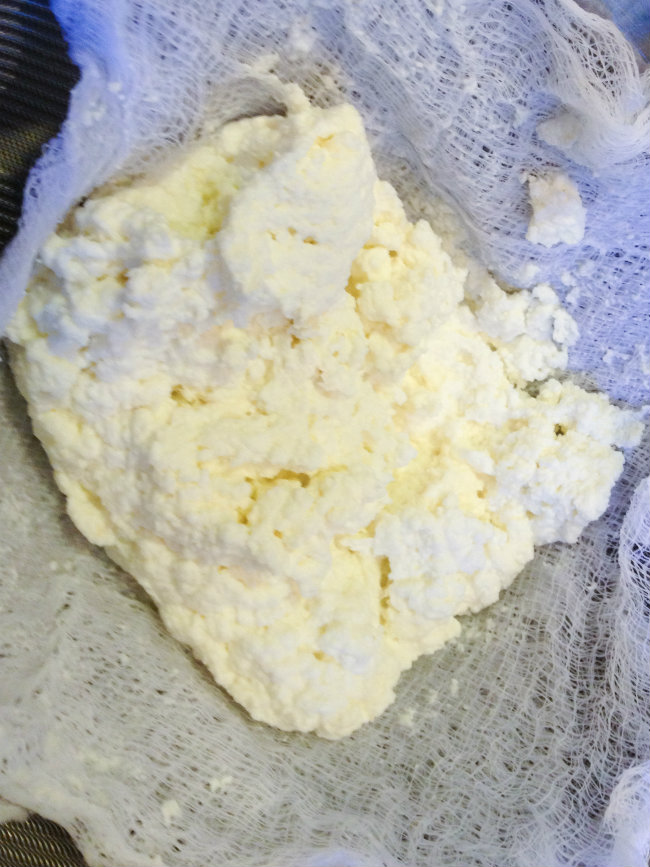
Homemade Ricotta Resized

When I was in high school, 25 years ago, I thought the funniest movies in the world were Monty Python movies.  Yes, I was one of those nerds who could rattle off quotes from all the movies (in the intervening years, my skills have gotten rusty, but I still have a few).  One of my favorite scenes in the movie “The Life of Brian” was when a group of people are listening to the Sermon on the Mount.  Unfortunately, they are way, way at the back of the crowd and can’t hear well. When Jesus says, “Blessed are the peacemakers,” the crowd in back misinterpret it as “Blessed are the cheese makers.”  So when I came across this recipe for Homemade Ricotta, I immediately started giggling.  I want to be a blessed cheese maker, and you can be too!

You already have the ingredients you need.  Use whole milk, or else the ricotta won’t set up.  One lemon, a little salt, and a tablespoon of white vinegar – what could be easier?  You’ll also need a thermometer.  I have a candy thermometer that clips to the side of the pan, but you could use a meat thermometer, or one of those fancy infrared ones too!  The only equipment you might need to buy is cheesecloth.  I found it at my regular grocery store, and have used it before in making Homemade Coconut Milk.

Ricotta is one of those amazing ingredients that can be used in either sweet or savory recipes.  In the following two weeks, I’ll have recipes that use fresh ricotta in a zucchini “lasagna” (with no noodles!), and in a dessert with fresh summer fruit.  Until then, you can serve fresh ricotta as an appetizer, spread on thin slices of bread, with either cracked pepper and minced herbs, or with a light drizzle of honey and crushed walnuts.  Ready?  Let’s make some cheese!

Homemade Ricotta  (Makes one cup of ricotta)

Ingredients:

  • 4 cups whole milk
  • 1/2 teaspoon salt
  • 1 tablespoon lemon juice
  • 1 tablespoon white vinegar (you may need more, but I didn’t)

Directions:

  1. In a pot, heat milk and salt over medium-high heat.  Stir occasionally to make sure it’s not burning on the bottom.
  2. Prepare your utensils:  Line a mesh sieve with a double-layer of cheesecloth.  If you want to save the whey, place the sieve over a large bowl.  (I saved my whey – next week I’ll show you how I used it.)
  3. When the temperature of the milk reaches 185*F, turn off the heat and pour in the lemon juice and vinegar.  Stir gently.  You just made what Little Bo Peep was eating – curds and whey!  Let it sit for about ten minutes, and stir again.  If you see any milk in your pot that hasn’t curdled, you can add another teaspoon of vinegar, stir, and let sit another ten minutes.  Mine didn’t need any extra and separated easily.
  4. Pour the curds and whey into the cheesecloth-lined sieve.  The whey, the yellowish liquid, will end up in the bowl.  Let cool and refrigerate for later use.  Let the cheese curds, aka your lovely homemade ricotta, drain in the cheesecloth.  If you want it soft and moist, let it drain for about ten minutes.  This is good for spreading on bread, or in dessert applications.  I let mine drain for much longer – about half an hour – because I was baking it in a “lasagna” and didn’t want extra water in the casserole.
  5. This keeps for about 5 days, refrigerated.  I challenge you to make it last more than a few hours!

Explore, experiment, enjoy! — Dana


To view even more of Dana’s unique recipe, you can visit her at Frugal Girlmet!