November 5, 2024

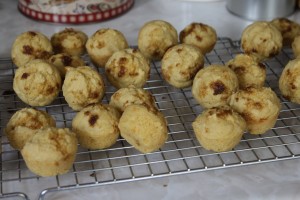
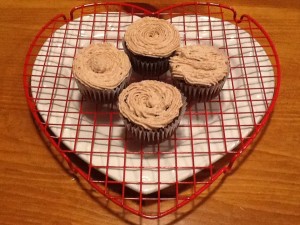
GF Sour Cream Chocolate Cupcakes w/ Frosting

Here on our At Home with GCH blog, Monday’s are always focused on healthy but oh-so-yummy! recipes.  This week’s recipe is for my husband.  (Actually, he is the guinea pig for all of my recipes.  Now he would tell you he is the ‘welcome recipient’ of the firstfruits of all my blog foods.)  So, we were at the store the other day, stocking up on a few gluten free flour varieties when he spotted one we don’t have in our pantry—quinoa flour.  That got my attention…but so did the price!  Oh. My.  But before I was done being aghast about the cost, he had spied a recipe on the back of the package for Sour Cream Chocolate Cupcakes.  Even though I nixed the purchase of the flour, I promised to still make the cupcakes.  Here we go!

2013-09-10 21.00.47

Sour Cream Chocolate Cupcakes

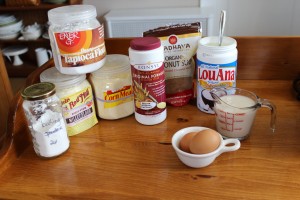
Ingredients:
1+1/2 cups gluten free flour blend *
1+1/2 teaspoons baking powder  2013-09-10 15.44.34
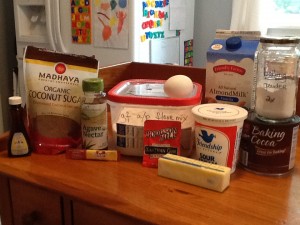
3/4 teaspoon instant coffee granules
1/2 teaspoon kosher salt
1 teaspoon ground cinnamon
1/2 teaspoon xanthan gum
1/2 cup warmed almond milk
1/2 cup cocoa powder
1/2 cup sour cream
6 tablespoons unsalted butter, room temperature
1/2 cup agave nectar
1/4 cup coconut (or palm) sugar
1 large egg
1 teaspoon vanilla extract

Directions:

  • Preheat oven to 325.
  • Line regular sized 12 cup muffin tin with liners.
  • In a medium sized bowl, whisk together the first six ingredients—the dry ingredients—and set aside.
  • In a small bowl, whisk together the warm milk and the cocoa powder.  Then stir in the sour cream; set aside.
  • Set up a stand mixer with the paddle attachment; add the butter and beat for 3 or 4 minutes on medium ‘til light and fluffy.
  • Beat in the agave nectar.  Add the coconut sugar, and beat ‘til light and fluffy again.
  • Add the egg and vanilla extract beating ‘til the egg is totally incorporated.
  • Stir in the sour cream/chocolate mixture.
  • Add the dry ingredients to the wet ingredients mixing on the slowest speed just ‘til they are thoroughly mixed together.
  • Divide the batter into the paper-lined muffin tin filling to about 3/4 full (this is a stiff batter).
  • Bake for 15-20 minutes ‘til tops spring back when lightly touched and toothpick comes out clean.
  • Cool for just 3 or 4 minutes in muffin tin then remove and set gently onto a wire rack to cool completely.

Chocolate Cream Cheese/Whipped Cream Frosting

Ingredients:
1 cup + 2 tablespoons heavy cream, cold
8 ounce package cream cheese, at room temperature
2 tablespoons agave nectar
1 teaspoon vanilla extract , pinch of kosher salt
4 tablespoons cocoa powder
1/2 cup powdered sugar

Directions:

  • Chill bowl and beaters in freezer for 10 minutes.
  • Beat 1 cup heavy cream in chilled bowl ‘til stiff peaks form.  Set aside.
  • In separate bowl, beat softened cream cheese along with agave nectar, vanilla , and salt for 3 minutes ‘til light.
  • Sift in the cocoa powder and the powdered sugar. Beat on low for 30-45 seconds ‘til smooth.
  • Add in the rest of the heavy cream and beat ‘til light and creamy.
  • Take 1/3 of the whipped heavy cream and mix in on lowest speed ‘til incorporated.
  • Remove bowl from stand mixer and fold in the rest of the whipped heavy cream ‘ til combined.
  • Pipe (or spread) onto top of cupcakes.  Enjoy!

♥  ♥  ♥  ♥  ♥

God loves you!  ♥  (Don’t ever forget that!)

♥  coleen
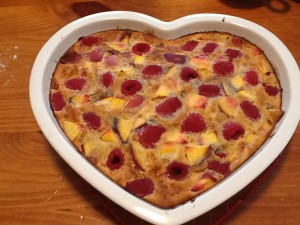
Clafouti (Nectarine-Raspberry Fruit Bake)

Here on our At Home with GCH blog, Monday’s are always focused on healthy but oh-so-yummy! recipes.  We are continuing our series of summer recipes featuring in-season produce. Our featured ingredient this week is nectarines—so good for you!   And our recipe is for a yummy baked dessert which includes nectarines AND raspberries.   This is a classic French dessert (think ala Julia Child) with the fancy French name Clafouti (cla-foo-tea).   Clafouti is a delicious sort-of-cake, sort-of-custard, very light, perfect for summer dessert (but oh-so-simple).   As typical I have made it gluten free (dairy free, too) but it can also be made with traditional all-purpose flour.  You can make clafouti with practically any type of ripe, juicy fruit.  In the past, we have enjoyed pear, cherry, and blueberry variations.   You might remember a few weeks ago we had a recipe for Fruit Crisp.  These two recipes both feature yummy, ripe, juicy, seasonal fruits but differ in their texture.  The Crisp is just that…a crispy, oatmeal-based topping for the fruit; while this Bake (clafouti) is more tender and delicate.  *** I’d love to know which presentation your family enjoys most!

2013-08-23 11.02.23


Nectarine-Raspberry Clafouti (Fruit Bake)

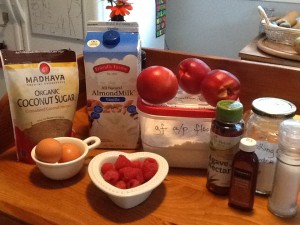
Ingredients:
1 tablespoon coconut oil (or butter)  2013-08-23 10.06.49
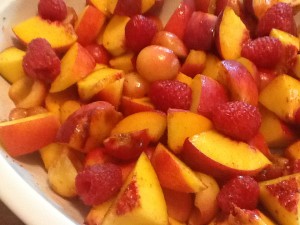
3 large ripe nectarines
1 (6 ounce) container raspberries
3/4 cup gluten free all-purpose flour
1 teaspoon baking powder
pinch of salt
3 tablespoons agave nectar
2 large eggs
1 cup almond milk
1 teaspoon almond extract

Directions:

  • Preheat oven to 400.
  • Grease a 1+1/2 – 2 quart ceramic baking dish with a small amount of coconut oil (or butter).
  • Pit the nectarines and then roughly chop.
  • In a blender container, mix all ingredients except for the fruit ‘til smooth and foamy, just a minute or so.
  • Pour about 1/4″ of batter into the baking dish. Place in oven ‘til batter looks slightly set (about 2 minutes).  Remove from oven.
  • Add chopped nectarines on top and pour in the balance of the batter;  scatter the raspberries on top, pushing them down gently into the batter with your finger.
  • Put baking dish back into oven; REDUCE HEAT to 350,  and bake for 45 minutes.
  • The clafouti is done when it has puffed and lightly browned; check by using a thin knife inserted into the center that comes out clean.
  • Set aside to cool slightly.  Can be eaten warm or cold.    Enjoy!

♥  ♥  ♥  ♥  ♥

God loves you!    (Don’t ever forget that!)

♥  coleen

Gluten Free Zucchini Bread

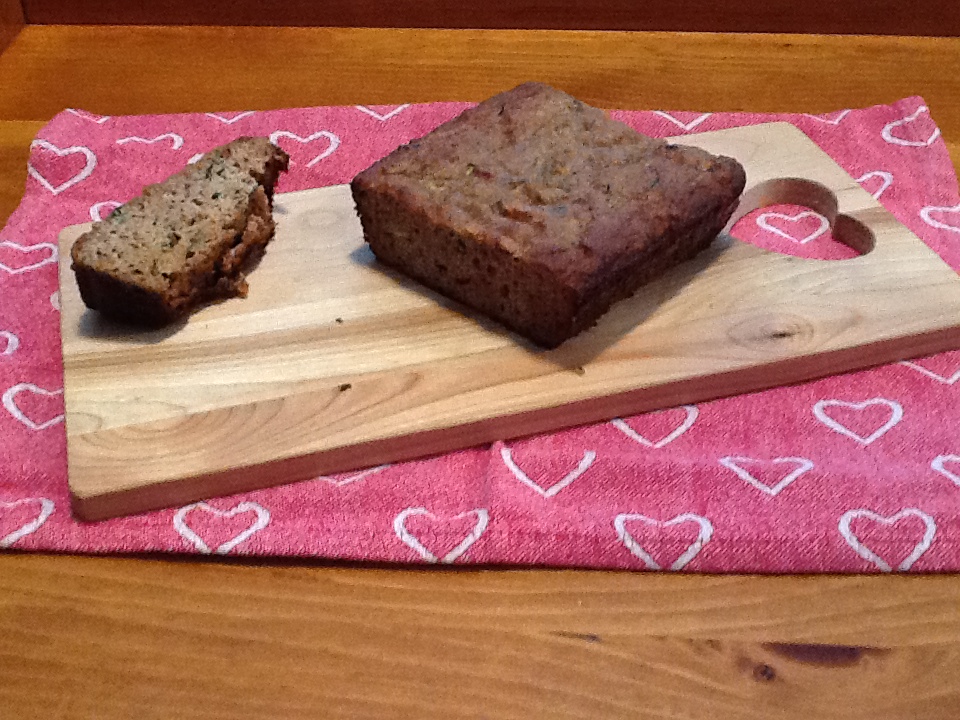
Here on our At Home with GCH blog, Monday’s are always focused on healthy but oh-so-yummy! recipes. Today our series on summer recipes featuring in-season produce continues. Our featured ingredient—again—this week is zucchini!  Our own little garden (ok, honestly, it is Robert’s garden) is pumping out the zucchinis.  How about you?  Are you checking Pinterest or roaming the internet looking for yummy zucchini recipes?  This zucchini bread recipe uses almond flour so it is low in carbs, high in protein…very paleo-friendly, too!  Enjoy!

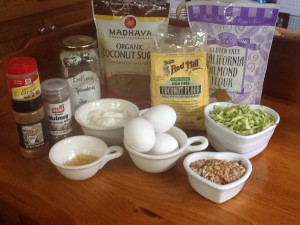
2013-08-16 10.34.44

Gluten Free Zucchini Bread

Ingredients:
1+1/2 cups blanched almond flour
1 teaspoon baking soda
1/4 teaspoon salt
1+1/2 teaspoon cinnamon
1/2 cup chopped walnuts or 1/2 cup chocolate chips (optional)
1 medium-to-large sized zucchini
2 large eggs
2-3 tablespoons honey or agave nectar
1 very ripe banana, mashed
1 tablespoon melted coconut oil

Directions:
Preheat oven to 350.  Grease a loaf pan and set aside.
Grate the zucchini (sans the seeds!) onto a tea towel; you should have about 1 cup.  Roll the towel up and squeeze to remove excess moisture from the zucchini. Set aside.
Whisk dry ingredients together in a medium bowl.
In a larger bowl, mash the banana and then whisk in the eggs, agave, and coconut oil.  Stir in the zucchini.
Add dry ingredients to wet, whisking until well combined.
Pour batter into greased loaf pan and bake for 35-40 minutes, or ‘til a toothpick inserted into the center comes out clean.

♥  ♥  ♥  ♥  ♥

God loves you!  ♥  (Don’t ever forget that!)

♥  coleen
Summer Fruit Crisp (Gluten Free)

Here on our At Home with GCH blog, Monday’s are always focused on healthy but oh-so-yummy! recipes. We are continuing our series of summer recipes featuring in-season produce. Our featured ingredient(s) this week are peaches and cherries!!!  Here are a couple of links to the  nutritional value along with some incredible health benefits  of these delicious fruits (peaches and cherries)—besides the fact that they are just yummy!

Nothing says summer to me more than the fruits that are available just during this season!  My most favorite is cherries; I just love cherries!  They are not in season for very long so indulge while you can!  We are!

2013-08-02 09.21.43

Summer Fruit Crisp

Ingredients:2013-08-02 09.52.20
3 large peaches, sliced
1 cup (18-20) cherries, pitted* and halved
1/2 cup raspberries (optional)
1/4 cup plus 1 tablespoon sugar
1/2 teaspoon almond extract
3/4  cup oats
3/4 cup almond flour
1 teaspoon cinnamon
1/2 teaspoon salt
6 tablespoons cold butter, cut into cubes

Directions:
Preheat the oven to 375.
Cube up the butter and place in refrigerator until ready for it.
In a baking dish or pie plate, toss the cut-up fruit with 1 tablespoon of the sugar and the almond extract; set aside.
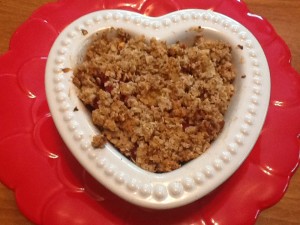
Place the oats, 1/4 cup sugar, almond flour, cinnamon and salt into the large bowl of a food processor.  Pulse a couple of times to combine.  Add the cold butter, pulsing just until it comes together and forms clumps.  (Of course, you can mix this by hand, too!)
Mound the oat mixture on top of the prepared fruit.
Bake for 35 to 40 minutes.
Serve warm or cold; a nice scoop of vanilla ice cream completes this!  Enjoy!

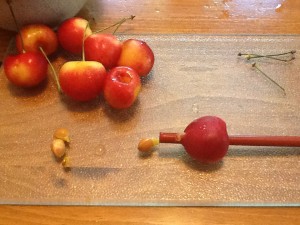
*  Here is how I pitted the cherries—with a drinking straw.  Yes, ma’am!  2013-08-02 09.01.35Now I am a girl who l-o-v-e-s her gadgets!  And, of course, you can go out and buy a cherry pitter.  But sometimes simple is the better answer.  And besides, then one can save her pennies to buy an incredible kitchen tool!  😉   Just do it like this:
Remove the stem from a cherry.
Place the end of the straw over the indentation of the cherry.
Firmly, but gently wiggle the straw straight through the cherry; the pit will pop right out!  Easy-peasy!

 ♥  ♥  ♥  ♥ 

God loves you!  ♥   (Don’t ever forget that!)

coleen

_________________________________

If you would like to send a personal message to Coleen concerning this series, you may email her at: Coleen@girlfriendscoffeehour.com

At Home with GCH: Gluten Free Zucchini Muffins

Here on our At Home with GCH blog, Monday’s are always focused on healthy but oh-so-yummy! recipes.  Today’s recipe fits into this category being it is low in fat (uses greek yogurt and a small amount of coconut oil or butter), is gluten-free (uses no grains) and is full of really good for you ingredients.

Have you ever used crystallized ginger?  If not, I would like to introduce you to it!  I just love crystallized ginger, and always have some stored in a sealed container in the freezer.  It is a great ingredient in many spicy foods.  We especially enjoy it in Thai food!  Try adding a bit to any baked goodies that have cinnamon, or nutmeg, in them.  I buy mine in the grocery store; look for it either in the Asian food aisle, or the baking goods aisle.  Below I have posted a couple of links for you so that you can check it out!  Enjoy!

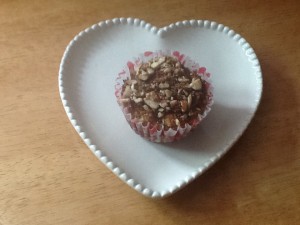
2013-05-10 12.11.00

Zucchini Muffins (Gluten Free)    – makes one dozen

Topping Ingredients:
1/4 cup chopped almonds
1 tablespoon sugar (I use coconut sugar)
1 teaspoon cinnamon
2 tablespoons almond flour
2 tablespoons cold butter, cut into little cubes 2013-05-10 11.09.39

Muffin Ingredients:
1/2 cup sugar (I use coconut sugar)
3 eggs
3/4 cup greek yogurt
1/4 cup softened coconut oil
1+1/2 cup shredded zucchini
1 teaspoon cinnamon
1/8 teaspoon powdered ginger
1 cube crystallized ginger*, grated fine
1/4 teaspoon nutmeg
1+1/2 cup almond flour
1/2 cup coconut flour
1 teaspoon baking powder

  • Heat oven to 325
  • Place muffin cup papers in muffin tin
  • Make topping first: mix all dry components of topping together; then drop in the cold butter and quickly use your fingers to incorporate the butter ’til crumbly.  Set aside.
  • In a medium-sized bowl, whisk together first 4 muffin ingredients until sugar is dissolved
  • Add shredded zucchini (and crystallized ginger, if using) to the wet ingredients; stir well
  • In a large bowl, mix together the flours, spices, and baking soda
  • Add wet ingredients to the dry, mixing until incorporated
  • Divide batter into muffin cups evenly
  • Sprinkle on almond topping
  • Bake for 30-35 minutes ’til toothpick comes out clean

*Here is where you can buy crystallized ginger .  I have bought this brand before; it is a very nice product.  NOTE: the price listed is for a “12 pack.”  When you buy them individually at WalMart, they run approximately $1.89 or so.  And the grocery store price runs just about the same.

Here is Alton Brown’s recipe to make your own!  I am going to use this recipe this week!

♥  ♥  ♥  ♥  ♥

God loves you!  ♥  (Don’t ever forget that!)

  coleen

_________________________________

If you would like to send a personal message to Coleen concerning this blogpost, you may email her at: Coleen@girlfriendscoffeehour.com

At Home with GCH: Strawberry Shortcake (Gluten-Free)


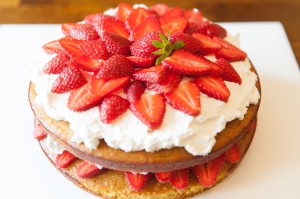
Strawberry Shortcake Whole

Strawberry Shortcake is one of those comfort food recipes that everyone’s Mom or Grandmom makes a version of.  When Spring arrives and berries finally come to the store, what better way to dress up a plain old cake than with sweet, juicy fruit?  I wanted to make a healthier version, so I adapted a recipe for a coconut flour cake, spruced up with orange zest, from Nourishing Days.  Add whipped cream and a basket of berries and you’re in business!


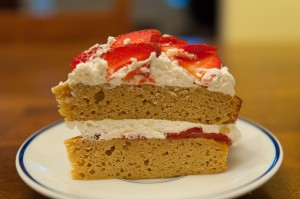
Strawberry Shortcake Cut
Strawberry Shortcake (Gluten-Free)

Ingredients:

  • 12 eggs
  • 1/2 cup coconut oil (or butter), softened
  • 1/2 cup coconut milk (or regular milk)
  • 1/4 cup honey (or more, if you like)
  • 2 teaspoons vanilla extract
  • 1 teaspoon grated orange zest
  • 2 tablespoon orange juice
  • 1 cup coconut flour
  • 1 teaspoon baking powder
  • 1 teaspoon salt
  • 1 cup strawberries, sliced thin
  • 1 pint heavy whipping cream
  • 1 teaspoon vanilla extract
  • optional – 1 or 2 teaspoons sugar (I didn’t use them, since my berries were really sweet.  If your strawberries aren’t as sweet as you’d like, add the sugar to the whipping cream)

Directions:

  1. Preheat the oven to 350*F.  Grease two 8-inch round cake pans, and then cut a circle of parchment paper for the bottom of each pan, and grease that too.  (You can do this without parchment paper, but you will need to be really liberal with the coconut oil / butter / cooking spray on the bottom of the pan.  The cake stuck the first time I made it, so the next time I used parchment paper, and it was perfect!)
  2. In a very large bowl, using a stand mixer or a hand mixer, beat the eggs until frothy.  Beat in the softened coconut oil and milk, blending well.  Mix in the honey, vanilla, orange zest and orange juice.  Beat until foamy again.
  3. In a small bowl, stir together the coconut flour, baking powder and salt.  Then, a little at a time, blend the flour mixture into the egg mixture.  Mix well, making sure there are no lumps.
  4. Divide the batter between the two prepared pans and bake for 35-40 minutes.  When a toothpick comes out dry, remove from the oven and cool for ten minutes.  Remove from pans, and finish cooling on a rack.
  5. While the cake is cooling, place the beaters of your hand mixer and a metal mixing bowl in the freezer for half an hour.  Slice the strawberries and put back in the fridge until ready to use.
  6. When the beaters and bowl are very cold, beat the whipping cream with the vanilla (and optional sugar) until stiff peaks form.  To decorate:  spread a very thin layer of whipped cream on the top of one cake.  Make concentric circles of strawberry slices (use half the strawberries, saving the other half for the top), then cover with a thick layer of whipped cream.  Place the other cake on top of this, cover with the rest of the whipped cream and the rest of the strawberries.  Refrigerate until ready to serve.

This is not a very sweet cake, since it relies on the berries for sweetness.  If your berries are not sweet enough for your taste, you can add more honey to the cake, and the optional sugar to the whipped cream.

Explore, experiment, enjoy! — Dana


To view even more of Dana’s unique recipe, you can visit her at Frugal Girlmet!


At Home with GCH: Gluten-Free Cornbread Mini-Muffins

Here on our At Home with GCH blog, Monday’s are always focused on healthy but oh-so-yummy! recipes. This week we are making Gluten-free Cornbread Mini-Muffins.

IMG_0218


They fit right into our healthy but oh-so-yummy category because they are:

  • full of fiber
  • low in sugar—and non-refined sugar, at that!
  • very low in fat
  • gluten-free

Last month, a few friends and I began a journey of reducing excess in our lives.  The first area we tackled was food.  Uh-huh…you read that right.  So, right off the bat, sugar, flour, and caffeine were eliminated.  (Can you say detox?  We did…and it was good!)  I learned many things over those four weeks one of which was that I knew that refined white sugar and wheat flour were permanently removed from our eating lifestyle.  My husband, Robert, and I purged our pantry of all wheat: pasta, cake and cookie mixes, all-purpose wheat flour, crackers, snacks, cookies, and a few stray cans of condensed soup were even found and tossed!

I had been dipping my toe into the gluten-free baking world for awhile.  My daughter, Kassia,  exclusively bakes with gluten-free flours and is a fantastic baker.  She is my hands-on instructor in the field and has taught me so much!  (Thank you, Kassia!!!  Love you!)  So, after purging the bad out…I found I had quite a few basics to get started with.  For those of you considering doing the same, there are any number of really good websites to peruse and follow.  At the bottom of this post, I have listed just a few of my favorites.  These women all are quite knowledgeable, their recipes can be trusted, they are very skilled, and have been baking gluten-free for many years.  Please consider trying a few of their recipes, and wandering around their websites where you can learn and experiment!  Each of them also has tons of valuable information on how to set-up a gluten-free pantry, the types of flours and starches to buy (and why you should consider those particular products).

You will probably be surprised to know that, to get started, you won’t need to go out and spend tons of money…. I would suggest buying a few products that are new to your pantry each week.  Each of the ingredients that I used in this recipe can be purchased at Super Wal-Mart, or Whole Foods, and probably at your favorite grocery store also.  May I suggest, too, that you do not hesitate to purchase some of these products online; I have and will continue to do so.

So, here is this week’s gluten-free recipe.  We are having these with my Veggie Chili…oh, yum!  Enjoy!

Gluten-free Cornbread Mini-Muffins   (makes approximately 32-36)

IngredientsIMG_0212
1 cup cornmeal
1/2 cup millet flour
1/2 cup tapioca flour/starch
1 teaspoon xanthan gum
1 teaspoon psyllium husk (unflavored metamucil!)
3 tablespoons sugar, of your choice
1 tablespoon baking powder
1/2 teaspoon salt
2 large eggs
1 cup milk, of your choice
1/4 cup melted butter, slightly cooled

1 tablespoon sugar, to sprinkle (optional)

Directions:
Preheat oven to 425.  Thoroughly grease mini-muffin pan (this recipe makes 30-36).   Melt butter; set aside to cool slightly.  Combine dry ingredients; stir well.  In a small bowl, whisk eggs; then add milk and melted butter.  Whisk together ‘til combined.  Add wet ingredients to dry ingredients.  Stir ‘til smooth but don’t overbeat.  Fill muffin tins 2/3 full.  If desired, sprinkle a tiny bit of sugar over top of batter.  Bake for 12-15 minutes, ‘til just slightly browned and springs back when lightly touched with finger.  Keep your eye on them; don’t overbake.  Cool in pan for 2 minutes.  Loosen by running small spatula around edge.  Remove to cooling rack.  Enjoy plain, or with butter, honey, or marmalade.  Excellent toasted, too!

Here are links to a few of my trusted gluten-free websites:

http://www.elanaspantry.com/

http://simplysugarandglutenfree.com/

http://glutenfreeonashoestring.com/

God loves you!   ♥   (Don’t ever forget that!)

 coleen

_________________________________

If you would like to send a personal message to Coleen concerning this recipe, you may email her at: Coleen@girlfriendscoffeehour.com

At Home with GCH: Coconut Flour Pancakes

coconut flour pancakes

Through my gym, I am doing a Paleo Challenge.  For 5 weeks I am cutting all processed foods out of my diet, as well as some other “irritant” foods, so no sugar, no grains, no legumes, no dairy, and no alcohol.  The goal is to eat the way our “caveman” ancestors ate, with the belief that all the chemicals and lab-created foods we eat are not good for us, and that our bodies work the way they’re supposed to when we only eat meat, vegetables, fruits, nuts, and fats (like olive oil, coconut oil, and avocado).  Just the way God created us!

Does that mean that all the “fun” foods are off limits?  No!  No grains mean no flour, no oatmeal, no corn—and that takes a lot of American food off the table.  Coconut flour, to the rescue!  This is flour made from the dried and ground flesh of the coconut.  It’s full of protein, has lots of fiber, is gluten-free, and is pretty all-around great for you.  It’s much coarser than wheat flour, so when you make these pancakes, they won’t be the cakey, smooth type you get at a diner.  These are more substantial, and they keep and reheat well.  The next day after I make them, I like to nibble on them, slathered in homemade almond butter.  Yum!

Coconut flour can be found at Whole Foods, other health food stores, and online at Amazon.  I like Bob’s Red Mill brand, but there are others out there too.  A one-pound bag will last you a while, so don’t think you’re getting cheated.  Just keep it in a Ziploc bag in your pantry, and stay tuned for more coconut flour recipes from me.  I’m in love with the stuff, and I can’t wait to share.

Coconut Flour Pancakes

(Recipe courtesy paleospirit.com)

Ingredients:

  • 4 eggs, room temperature
  • 1 cup coconut milk (you can use regular milk too!)
  • 2 teaspoons vanilla extract
  • 1 tablespoon coconut nectar (or honey, or 1 packet of stevia)
  • 1/2 cup coconut flour
  • 1 teaspoon baking soda
  • 1/2 teaspoon salt
  • 1/4 teaspoon cinnamon (or pumpkin pie spice!)
  • coconut oil for frying (you can use cooking spray to coat a non-stick pan, too)

Directions:

  1. Beat eggs in a stand mixer (or just whisk mightily!) until frothy.  Mix in milk, vanilla, and sweetener.
  2. In a small bowl combine coconut flour, baking soda, salt and cinnamon.  Mix together.
  3. Whisk flour mixture into egg mixture and blend well so there are no lumps.
  4. Grease pan with coconut oil (my favorite!) or, if you are a using a good non-stick pan, spray with cooking spray.  (Side note:  Trader Joe’s sells both coconut oil in a jar, and coconut oil cooking spray.  Love!)  When the pan is hot, use a large tablespoon to pour out pancakes.  I make mine about 4 inches in diameter.  These are thick, and you may need to smooth them out a bit.  Cook until dry on top, just like regular pancakes, about 2 or 3 minutes, then flip and cook for another minute or so.  Serve hot!

This recipe makes 12-16 pancakes, depending on the size.  Store any leftovers in a Tupperware container in the fridge – they reheat nicely in the microwave, or eat them cold with nut butter, cream cheese, whatever you like.  My older daughter is a traditionalist and likes hers with butter and maple syrup.  My younger daughter likes her with fruit and maple syrup.  I  like them with sliced bananas, walnuts, and some flaked, unsweetened coconut on top – tastes like Hawaii.  😉


Explore, experiment, enjoy! — Dana


To view even more of Dana’s unique recipes, you can visit her at Frugal Girlmet!

At Home with GCH: Appetizers Again – Mini Quiche

Here on our At Home with GCH blog, Monday’s are always focused on healthy but oh-so-yummy! recipes.  This month we are doing a series on appetizers…I love ‘em!!  How about you?   I would love for you to leave a comment below sharing with us YOUR favorite appetizer(s)!

This week we are making bite-size crustless mini quiche; have you ever had them? Pop-‘em-in-your-mouth yumminess!  These little appetizers are excellent to make ahead of time and freeze, then pull out to warm for a quick breakfast.

I made two types: Spinach&Swiss with Bacon, and Broccoli-Cheddar with Ham.  I have given you the basics—for both types—and then a few suggestions for optional fillings.  Whether you do them crustless (low-fat, gluten-free) like these or wrapped in some yummy, flaky crust, these are delicious!  You can let your imagination and taste buds lead you to making a variety or two that your loved ones will enjoy!

And I would suggest doubling or quadrupling the recipe (as I did); these go fast!  My husband can eat almost the whole batch (one dozen mini quiche) by himself… I’m just sayin’!  🙂

IMG_0161

Mini Quiche (makes one dozen)

Egg Filling

3 large eggs
1/2 cup milk
1/4 teaspoon kosher salt, freshly ground black pepper

Whisk these 4 ingredients together, thoroughly blending the eggs.  Pour into a container with a spout (for ease in filling muffin tin) and set aside.

Spinach&Swiss with Bacon

1/2 cup frozen chopped spinach, defrosted
2 slices bacon, cooked and crumbled (option: packaged, cooked bacon)
4 tablespoons chopped onion
1+ tablespoons dried dill or tarragon (optional)
1/2-3/4 cup finely grated Swiss cheese

Preheat oven to 375.  Grease with melted butter (or spray with cooking spray) your mini muffin tin; be thorough.  Place spinach in colander, allow to defrost, and then squeeze dry (with your hands); set aside.  Cook bacon, cool, and crumble.  Saute onion in a bit of the bacon drippings until soft.  When done, mix with spinach and herbs.

Evenly distribute the veggies, the bacon, and the cheese among the muffin cups; these should be at least 1/2 full. Then carefully pour the prepared Egg Filling mixture into each muffin cup.  Fill almost full.  Bake @ 375 for approximately 12-15 minutes until the eggs puff and are lightly golden brown.  Remove from oven; let sit for 10 minutes, then carefully remove from muffin tin.  If you have thoroughly greased your muffin tin in preparation, this shouldn’t be too hard.  I used a small, flexible spatula—but a teaspoon or small knife will do—and just run it around the edge of each quiche to loosen.  Serve immediately.

Broccoli-Cheddar with Ham

4 tablespoons chopped onion
olive oil
1/2 cup frozen, chopped broccoli (cooked and cooled)
1/2 cup ham, chopped small
1+ tablespoons dried crushed rosemary or marjoram (optional)
1/2-3/4 cup of finely grated sharp Cheddar

Preheat oven to 375.  Grease with melted butter (or spray with cooking spray) your mini muffin tin; be thorough. Cook frozen broccoli in small saucepan, drain and cool; set aside.  Saute onion in a small amount of olive oil until soft; when done, mix with broccoli, and herbs.

Evenly distribute the veggies, the chopped ham, and the cheese among the muffin cups; these should be at least 1/2 full. Then carefully pour the prepared Egg Filling mixture into each muffin cup.  Fill almost full.  Bake @ 375 for 12-15 minutes until the eggs puff and are golden.  Remove from oven; let sit for 10 minutes, then carefully remove from muffin tin.  If you have thoroughly greased your muffin tin in preparation, this shouldn’t be too hard.  I used a small, flexible spatula—but a teaspoon or a small knife will do—and just run it around the edge of each quiche to loosen.  Serve immediately.

Filling Variations (choose one from each category)

  • Veggies:(1/2 cup) of either sauteed mushrooms, peppers, seeded tomatoes, zucchini, butternut squash
  • Cheese: (1/2-3/4 cup) of your favorite Cheddar, Monterey Jack, goat cheese, Gruyere, Parmesan, Fontina, Provolone, Gouda
  • Herbs: (1+ tablespoon) of your choice of parsley, chives, tarragon, basil, dill, rosemary,  marjoram
  • Meat: (1/2-3/4 cup) finely chopped ham, cooked&crumbled breakfast sausage or bacon

Crust Options  OK, should you want to make your mini quiche with a crust (oh yum!) you have options, too.  This is a little ditzy and time-consuming but well worth the effort for those that love crust!

After choosing (and preparing, if necessary) your option, cut out into approximately 2+1/2″ diameter rounds; I used a juice glass.  Gently fit into mini-muffin tin cups.  Bake @ 400 for 20 minutes or so ’til egg is puffed and crust is lovely and golden.  Allow to sit in the muffin tin for 2-3 minutes; remove to a cooling rack OR serve immediately.

God loves you!   ♥  (Don’t ever forget that!)

♥  coleen
_________________________________

If you would like to send a personal message to Coleen concerning this series, you may email her at: Coleen@girlfriendscoffeehour.com