November 18, 2024

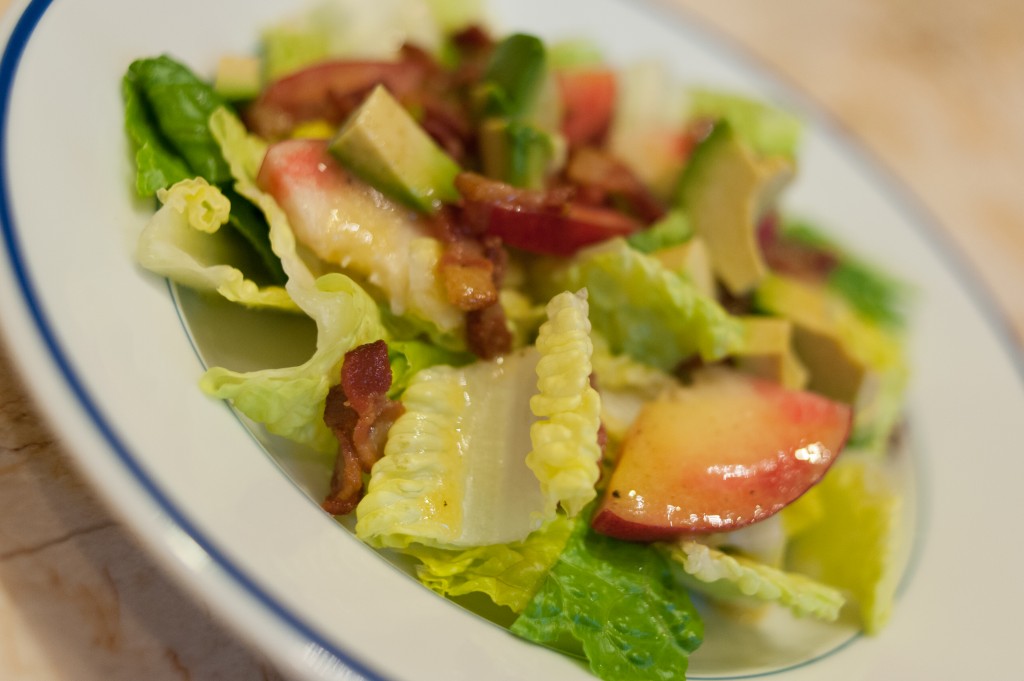
Bacon and Peach Salad


Bacon Peach Salad

When it’s hot, I crave a nice cool salad.  This Bacon and Peach Salad would be great, with some sweet and spicy barbecued chicken, perfect for your Memorial Day BBQ!  My husband brought home some ripe avocados and sweet little peaches from the farmer’s market this past weekend.  If you can’t find peaches yet, give it a few weeks – this salad is worth the wait!

For the dressing, you can use any mild vinaigrette you have in the fridge, or use my recipe below.  I used romaine lettuce, but I bet spinach, or even arugula, would be tasty too.  This salad is based on an Emeril Lagasse recipe, and he adds feta.  I didn’t have any, but next time I make it, I’ll sprinkle on a little feta or crumbled goat cheese.  And this dish was so delicious, there WILL be a next time!

Bacon and Peach Salad

Makes four small starter salads or two larger side dish salads

Ingredients:

  • 4-5 slices bacon
  • 2 tablespoons rice vinegar
  • 1/2 teaspoon honey
  • 1/2 teaspoon Dijon mustard
  • salt and pepper
  • 1/8 teaspoon garlic powder
  • 3 tablespoons olive oil
  • 2 heads romaine lettuce, torn into pieces
  • 1 ripe peach, diced
  • 1 ripe avocado, diced
  • 1 tablespoon crumbled feta for each plate

Directions:

  1. Dice the bacon and cook until crispy.  Drain on paper towels and set aside.
  2. While the bacon is cooking, add the vinegar, honey, mustard, salt and pepper, garlic powder, and olive oil in a small container with a lid, and shake vigorously to combine.
  3. To serve, divide the lettuce among the plates and top with bacon, peach, and avocado.  Drizzle with the dressing and sprinkle with feta.

Explore, experiment, enjoy! — Dana


To view even more of Dana’s unique recipes, you can visit her at Frugal Girlmet!
Italian Almond Cookies, Gluten-Free by Coleen Hayden

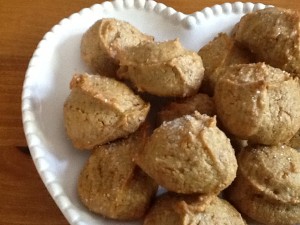
Here on our At Home with GCH blog, Monday’s are always focused on healthy but oh-so-yummy! recipes.  Today’s recipe makes a delicious, slightly decadent sweet which still fits into this category!  This recipe has no oil or butter, uses gluten-free almond flour which is high in protein, and can be made very successfully using alternative, unrefined sugars.

These yummy little almond cookies are so reminiscent to me of Italian bakery cookies called ‘amaretti.’  Going to make a confession here: I just l-o-v-e Italian bakery pastries!  For my birthday, thank you but no birthday cake, please!  Just a platter of mini pastry and almond cookies.  For sure!  So when my darling daughter, Kassia, called and told me that she had made ‘amaretti’ and they were gluten free—happy me!  Perhaps you will find these little cookies as delightful as I do; maybe even turn you into an amaretti fan!  Enjoy!

IMG_1567

Italian Almond Cookies      makes approximately 3 dozen cookies

Ingredients:
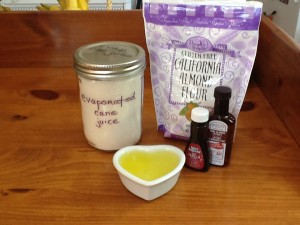
2+1/2 cups almond flourIMG_1563
1+1/4 cups superfine* sugar
3 room temperature egg whites
1/2 teaspoon vanilla extract
1 teaspoon almond extract
extra sugar for dusting


Preheat oven to 300.  Line 2 baking sheets with parchment paper.

Using a food processor, blend together the almond flour and sugar for 30 seconds.  Add both extracts, and pulse 5 or 6 times to blend.  Add the egg whites ONE at a time, and continue to process the mixture ‘til the dough is nice and smooth.

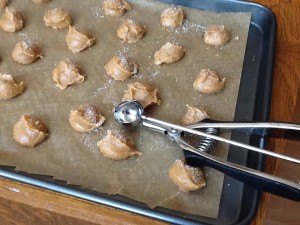
Using a small cookie scoop, place teaspoons of the dough onto the lined cookie sheets, approximately 1″ apart.  These cookies do not spread.  Sprinkle the tops of the cookies with the extra sugar.  Bake for 20-24 minutes for chewy cookies; 24-30 minutes for a slightly crispy cookie.  Remove to a cooling rack.  Easily stored in your favorite cookie jar!

IMG_1565

*If, like me, you are using alternative sugars, put them into the food processor first and give them a 20 second whirl to pulverize them and make the sugar “super fine.”  I used a mix of coconut sugar and evaporated cane juice sugar.

♥  ♥  ♥  ♥  ♥

God loves you!    (Don’t ever forget that!)

♥  coleen

_________________________________

If you would like to send a personal message to Coleen concerning this blogpost, you may email her at: Coleen@girlfriendscoffeehour.com

Balsamic Roasted Chicken by Dana Kim

Balsamic Roasted Chicken


I had a hard time figuring out what to call this recipe.  In my head, I call it “Quarter Cup Chicken,” and you’ll see why when you look at the ingredients; but that wasn’t very descriptive.  This is one of those everyday, basic dishes that you end up falling in love with for its simplicity and ease of preparation.

I didn’t have any on hand this time around, but I like to add in quartered onions and baby potatoes, cut in half.  The onions get soft and smooth, the potatoes get a little roasted crust, and they both play nicely with the chicken.  Feel free to make this recipe with all drumsticks, or all breasts—whatever you like best.  Just make sure you use bone-in, skin-on chicken.  Also, dried rosemary works fine…but fresh rosemary really makes this dish sing!

Balsamic Roasted Chicken

Ingredients:

  • 1/4 cup soy sauce
  • 1/4 cup balsamic vinegar
  • 1/4 cup honey
  • 1/4 cup olive oil
  • 1 tablespoon chopped rosemary needles
  • 1 chicken, cut into pieces (or any combination of bone-in, skin-on chicken pieces)

Directions:

  1. In a large Ziploc bag, add the soy sauce, vinegar, honey, oil, and rosemary.  Squish around to combine, then add the chicken pieces.  Squish around some more, making sure all the chicken pieces are coated in the marinade.  Refrigerate for 1 – 8 hours.  (You could do this in the morning and cook it at night, but I wouldn’t let it marinate overnight, or the chicken might break down too much.)
  2. Preheat oven to 400*F.  In a large Dutch oven or roasting pan, empty the bag – get all the marinade in there too!  You can add quartered red or white onions, halved baby potatoes, 2-inch chunks of regular potato, or even large chunks of sweet potato.  Toss to coat everything.  Bake for 45 minutes, or until internal temperature of chicken reaches 170*F.

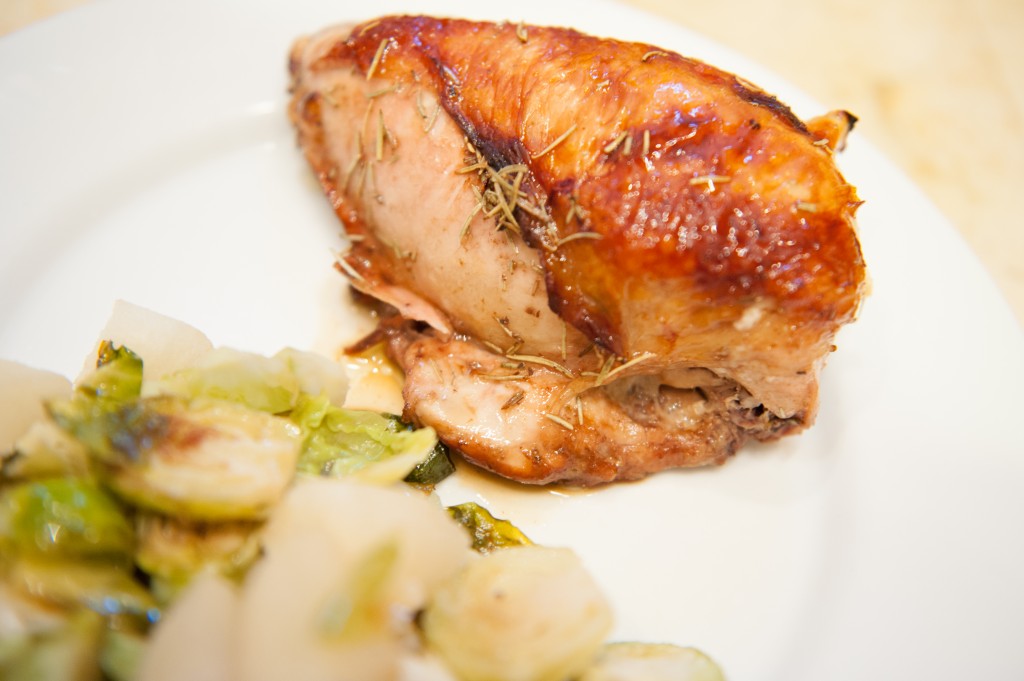
That’s it!  I served this with roasted Brussels Sprouts and Korean Pear.

Explore, experiment, enjoy! — Dana


To view even more of Dana’s unique recipes, you can visit her at Frugal Girlmet!
At Home with GCH: Gluten Free Zucchini Muffins

Here on our At Home with GCH blog, Monday’s are always focused on healthy but oh-so-yummy! recipes.  Today’s recipe fits into this category being it is low in fat (uses greek yogurt and a small amount of coconut oil or butter), is gluten-free (uses no grains) and is full of really good for you ingredients.

Have you ever used crystallized ginger?  If not, I would like to introduce you to it!  I just love crystallized ginger, and always have some stored in a sealed container in the freezer.  It is a great ingredient in many spicy foods.  We especially enjoy it in Thai food!  Try adding a bit to any baked goodies that have cinnamon, or nutmeg, in them.  I buy mine in the grocery store; look for it either in the Asian food aisle, or the baking goods aisle.  Below I have posted a couple of links for you so that you can check it out!  Enjoy!

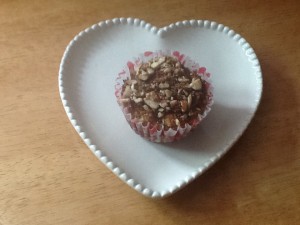
2013-05-10 12.11.00

Zucchini Muffins (Gluten Free)    – makes one dozen

Topping Ingredients:
1/4 cup chopped almonds
1 tablespoon sugar (I use coconut sugar)
1 teaspoon cinnamon
2 tablespoons almond flour
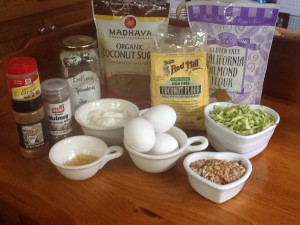
2 tablespoons cold butter, cut into little cubes 2013-05-10 11.09.39

Muffin Ingredients:
1/2 cup sugar (I use coconut sugar)
3 eggs
3/4 cup greek yogurt
1/4 cup softened coconut oil
1+1/2 cup shredded zucchini
1 teaspoon cinnamon
1/8 teaspoon powdered ginger
1 cube crystallized ginger*, grated fine
1/4 teaspoon nutmeg
1+1/2 cup almond flour
1/2 cup coconut flour
1 teaspoon baking powder

  • Heat oven to 325
  • Place muffin cup papers in muffin tin
  • Make topping first: mix all dry components of topping together; then drop in the cold butter and quickly use your fingers to incorporate the butter ’til crumbly.  Set aside.
  • In a medium-sized bowl, whisk together first 4 muffin ingredients until sugar is dissolved
  • Add shredded zucchini (and crystallized ginger, if using) to the wet ingredients; stir well
  • In a large bowl, mix together the flours, spices, and baking soda
  • Add wet ingredients to the dry, mixing until incorporated
  • Divide batter into muffin cups evenly
  • Sprinkle on almond topping
  • Bake for 30-35 minutes ’til toothpick comes out clean

*Here is where you can buy crystallized ginger .  I have bought this brand before; it is a very nice product.  NOTE: the price listed is for a “12 pack.”  When you buy them individually at WalMart, they run approximately $1.89 or so.  And the grocery store price runs just about the same.

Here is Alton Brown’s recipe to make your own!  I am going to use this recipe this week!

♥  ♥  ♥  ♥  ♥

God loves you!  ♥  (Don’t ever forget that!)

  coleen

_________________________________

If you would like to send a personal message to Coleen concerning this blogpost, you may email her at: Coleen@girlfriendscoffeehour.com

At Home with GCH: Strawberry Shortcake (Gluten-Free)


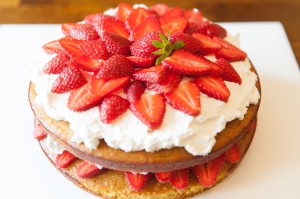
Strawberry Shortcake Whole

Strawberry Shortcake is one of those comfort food recipes that everyone’s Mom or Grandmom makes a version of.  When Spring arrives and berries finally come to the store, what better way to dress up a plain old cake than with sweet, juicy fruit?  I wanted to make a healthier version, so I adapted a recipe for a coconut flour cake, spruced up with orange zest, from Nourishing Days.  Add whipped cream and a basket of berries and you’re in business!


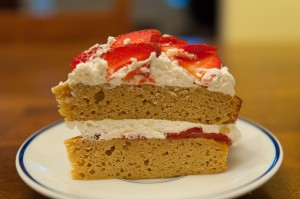
Strawberry Shortcake Cut
Strawberry Shortcake (Gluten-Free)

Ingredients:

  • 12 eggs
  • 1/2 cup coconut oil (or butter), softened
  • 1/2 cup coconut milk (or regular milk)
  • 1/4 cup honey (or more, if you like)
  • 2 teaspoons vanilla extract
  • 1 teaspoon grated orange zest
  • 2 tablespoon orange juice
  • 1 cup coconut flour
  • 1 teaspoon baking powder
  • 1 teaspoon salt
  • 1 cup strawberries, sliced thin
  • 1 pint heavy whipping cream
  • 1 teaspoon vanilla extract
  • optional – 1 or 2 teaspoons sugar (I didn’t use them, since my berries were really sweet.  If your strawberries aren’t as sweet as you’d like, add the sugar to the whipping cream)

Directions:

  1. Preheat the oven to 350*F.  Grease two 8-inch round cake pans, and then cut a circle of parchment paper for the bottom of each pan, and grease that too.  (You can do this without parchment paper, but you will need to be really liberal with the coconut oil / butter / cooking spray on the bottom of the pan.  The cake stuck the first time I made it, so the next time I used parchment paper, and it was perfect!)
  2. In a very large bowl, using a stand mixer or a hand mixer, beat the eggs until frothy.  Beat in the softened coconut oil and milk, blending well.  Mix in the honey, vanilla, orange zest and orange juice.  Beat until foamy again.
  3. In a small bowl, stir together the coconut flour, baking powder and salt.  Then, a little at a time, blend the flour mixture into the egg mixture.  Mix well, making sure there are no lumps.
  4. Divide the batter between the two prepared pans and bake for 35-40 minutes.  When a toothpick comes out dry, remove from the oven and cool for ten minutes.  Remove from pans, and finish cooling on a rack.
  5. While the cake is cooling, place the beaters of your hand mixer and a metal mixing bowl in the freezer for half an hour.  Slice the strawberries and put back in the fridge until ready to use.
  6. When the beaters and bowl are very cold, beat the whipping cream with the vanilla (and optional sugar) until stiff peaks form.  To decorate:  spread a very thin layer of whipped cream on the top of one cake.  Make concentric circles of strawberry slices (use half the strawberries, saving the other half for the top), then cover with a thick layer of whipped cream.  Place the other cake on top of this, cover with the rest of the whipped cream and the rest of the strawberries.  Refrigerate until ready to serve.

This is not a very sweet cake, since it relies on the berries for sweetness.  If your berries are not sweet enough for your taste, you can add more honey to the cake, and the optional sugar to the whipped cream.

Explore, experiment, enjoy! — Dana


To view even more of Dana’s unique recipe, you can visit her at Frugal Girlmet!


At Home with GCH: Homemade Body Scrub

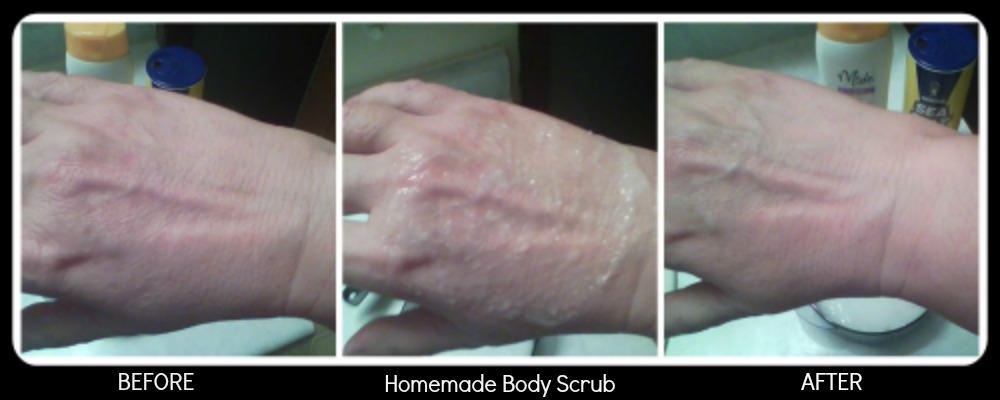
We all know, as women, that Body Scrubs can be expensive; ranging anywhere from $10 to $50+ per bottle!  How about if I show you a way to make a Homemade Body Scrub that costs far less than you would pay for retail?  It’s easy, of course, and it works like a charm!  Why spend top dollar for a product that you can make at home; one that works beautifully!  The proof is in the pictures below.


Homemade Body Scrub

Ingredients:

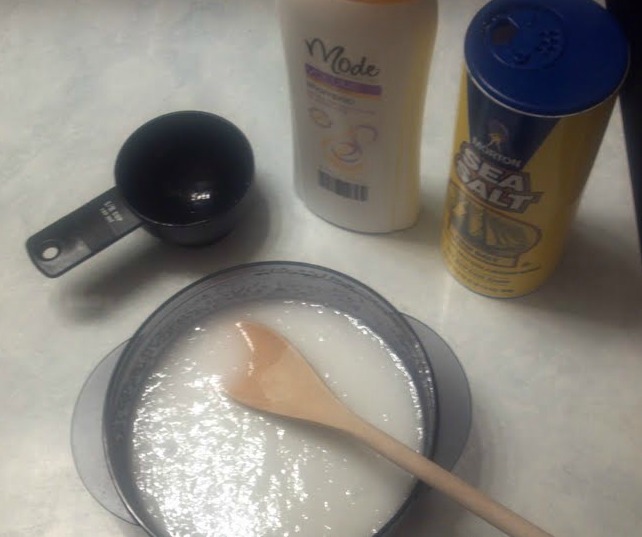
1/2 cup Sea Salt

1/2 cup Shampoo (I use the 99-cent brand)


Directions:

Mix both ingredients together in a small bowl until well blended.

 Ingredients_Mixed


That’s it!  Apply the scrub to a part of your body that is dry or scaly, and needs rejuvenating!  You will definitely see, and feel, a huge difference in your skin after application!  Your skin will not only feel softer, but look a lot younger, too!  It’s definitely a keeper in my bath routine!  I hope you will love it as much as I do!

I hope you will give this a try, and then let me know what you thought of it!  I’m all about things that are EASY, and Cost-Effective!  This recipe definitely fits the bill for both!

 Before_After


Happy Scrubbing!

Christi

*****

If you would like to send an email to Christi in regards to this recipe, you can email her at:

 Christi@girlfriendscoffeehour.com

At Home with GCH: Caprese Salad

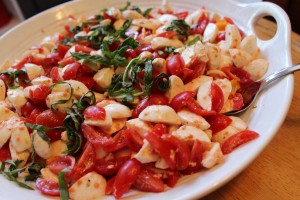
Here on our At Home with GCH blog, Monday’s are always focused on healthy but oh-so-yummy! recipes.  This week I am sharing a dish that I often prepare for gatherings—Caprese Salad, aka Fresh Mozzarella and Tomato Salad.  Here we are thick in the season of bridal showers and graduation parties and Mother’s Day  and Father’s Day celebrations.  Today I made this for a bridal shower, and so I multiplied the recipe 4X.  It served over 40 ladies as a side dish on the salads table.  If you are preparing this in advance, add the vinegar and olive oil just prior to serving.

IMG_0222

Caprese Salad

8 ounces fresh mozzarella
1/2 pint grape or cherry tomatoes
basil * (fresh is best); if using dried, 1/2-3/4 teaspoon)
kosher salt, freshly ground black pepper

2 tablespoons balsamic vinegar (I use ‘white’ balsamic)
1-2 teaspoons extra-virgin olive oil

IMG_0220

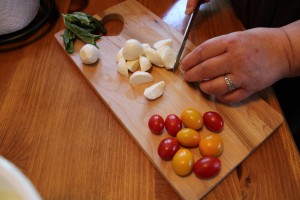
Easy-peasy!  Depending on the size of the fresh mozzarella you have bought, you might need to cut the balls of mozzarella into small, bite-size pieces; halve the tomatoes, and sprinkle with salt and pepper, to taste.  Thinly slice the basil*.  Add the sliced basil to the seasoned tomatoes and cheese.  Pour a small amount of olive oil and some of the balsamic vinegar over and gently mix. Taste; add more vinegar and olive oil, if necessary.  Serve immediately.

*tip: stack 3-4 basil leaves; tightly roll-up (like a tiny cigar!); then carefully slice into very thin slices. You have now accomplished the technique known as ‘chiffonade!’  You are amazing!  🙂


God loves you!  ♥  (Don’t ever forget that!)

coleen

_________________________________

If you would like to send a personal message to Coleen concerning this series, you may email her at: Coleen@girlfriendscoffeehour.com

HAPPY ANNIVERSARY Girlfriends Coffee Hour!!!

GCH_Anniversary


Woo Hoo!! Happy Anniversary to GCH!!!

1-year ago today, Girlfriends Coffee Hour published its first LIVE Online Bible Study on this website! We had just a few women sign-up for that study, and we had a blast!

Today, GCH, as we all so fondly call it, is now in 150+ Countries across the globe!! Never in a million years would I have ever dreamed that God could use a simple housewife from Southeast Wisconsin to help spread the Gospel!! Many times, I had to be reminded God’s God This!!  Don’t ever think that God can’t use just ordinary people!!  He can, and He will, if you let Him!!

Today, we have 20 women on our Ministry Leadership Team, who help keep this ministry functioning on a daily basis! Thank God, because there is no way this housewife from Wisconsin could do this on her own! I am so very BLESSED by this amazing Team of women who give so graciously of their time, prayers, support, and LOVE!! Truly without these women …. wow!

God has blessed this ministry in so many ways. Each day we dedicate GCH to Him in our prayers, and we give Him thanks for all that He has done, and continues to do.

The scripture that God gave us for this ministry is Proverbs 27:17 (NLT) “…as iron sharpens iron, so a friend sharpens a friend.” In this ministry, we are blessed to sharpen each other. We are blessed to hold each other accountable to building our relationship with our Heavenly Father, and being the Leaders that He has called us all to be! We are blessed to have such a Sisterhood in this ministry, where faith, friends, and fellowship flourish in our Fellowship & Study Groups!

I give God all praise, honor, and glory, for Girlfriends Coffee Hour! I hope you will help us celebrate this week! We will be giving away some amazing prizes this week in honor of our anniversary! Stay tuned … on Monday (tomorrow) we will announce the first prize!! These prizes are going to bless your socks off!!

Be sure to leave a comment below to let us know how GCH has been a blessing in YOUR life! We’d love to hear from you!

Thank You ALL so very much for joining us this last year! We hope to see you around for many more years to come!!

May the Good Lord Bless You,

Christi Wilson
Founder of Girlfriends Coffee Hour

At Home with GCH: Broccoli Bacon Salad


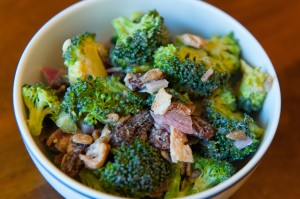
Broccoli Bacon Salad

Bacon!  Did that get your attention?  (My husband’s ears always perk up when he hears that word.)  This salad is a family favorite.  I love vegetables of every kind, but it’s nice to take a break from lettuce-based salads.  You probably have everything you need for this salad at home already.  If not, pick up some broccoli and let’s get to it!

Broccoli Bacon Salad

Ingredients:

  • one pound small broccoli florets, about 7 cups
  • 1/4 cup minced red onion
  • 1/4 cup sunflower seeds
  • 1/4 cup raisins
  • 4 strips bacon
  • 3/4 cup mayonnaise
  • 1 teaspoon lemon juice or apple cider vinegar
  • 1 teaspoon sugar, honey, or other sweetener of choice
  • salt and pepper

Directions:

  1. In a large bowl, gently toss together the broccoli, onion, sunflower seeds, and raisins.
  2. Cook the bacon until done – I like it crunchy rather than chewy.  Drain and dice.  Add to the bowl and combine.
  3. Mix together the mayonnaise, lemon juice, sugar, and salt and pepper.  Pour over the broccoli mix and toss to combine.  Taste for seasoning – I usually add a little more lemon juice over the top.  Chill for an hour before serving.That’s it!  This salad is nice the next day, too, since the broccoli softens up a bit.


Explore, experiment, enjoy! — Dana


To view even more of Dana’s unique recipes, you can visit her at Frugal Girlmet!
Easy Healthy Lunch to Go by Crystal Breaux, Wellness Coach/Fitness Designer


One of the biggest challenges for busy women can be finding the perfect healthy lunch. Packing the same old sandwich or salad every day can become boring and frustrating. When at a loss, it is easy to slip into old habits such as grabbing whatever is available or eating at the mercy of your nearest fast food restaurant. For busy women, we want variety and an easy healthy lunch to go. One of my new favorites is a Black Bean Power Salad.

RECIPE:

• 1 cup whole-kernel corn

• 2 cans (16oz each) of black beans, rinsed and drained

• ¼ cup chopped parsley

• 2 TBS minced red onion

• ¼ cup balsamic vinegar

• 2 TBS olive oil

• 1 tsp lemon juice

• 1 tsp minced garlic

• 1 tsp honey or brown sugar

• Salt and pepper

DIRECTIONS:

In a large bowl, combine the corn, beans, parsley, onions, vinegar, oil, lemon juice, garlic, and honey or brown sugar. Let it marinade for the 30 minutes. Add salt and pepper to taste.

NUTRITIONAL VALUE:

Calories 417.6

Fat 6.9

Sodium 220.3

Protein 21.7

Fiber 21.3

It is so delicious and look at the fiber and protein…..a guarantee to keep you full and satisfied. I make it right after church on Sunday to prepare for my upcoming week. It just takes a few minutes each morning or the night before to pack my easy healthy lunch to go. To add a little more protein, I add any leftover grilled chicken (nutritional value not included with chicken). For variety, I reduce my serving size and add cheese and crackers. All together, here is my lunch to go.

photo (2)

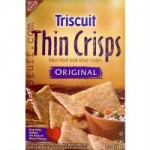
Don’t forget your calories with crackers which can add up quickly. My favorite cracker that gives me the most bang for the buck is Triscuits Thin Crisp. At only 150 calories for 15 crackers, half of a serving is perfect.

TriscuitThinCrispsOriginal8_5oz240g500Combine with string cheese at 80 calories and you Black Bean Power Salad and you have an easy healthy lunch to go.


Eating Healthy, 

Crystal Breaux

Wellness Coach/Fitness Designer