March 29, 2024

Easy Healthy Lunch to Go by Crystal Breaux, Wellness Coach/Fitness Designer


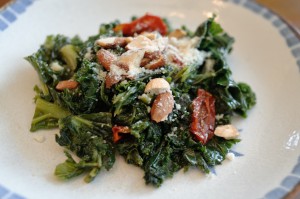
One of the biggest challenges for busy women can be finding the perfect healthy lunch. Packing the same old sandwich or salad every day can become boring and frustrating. When at a loss, it is easy to slip into old habits such as grabbing whatever is available or eating at the mercy of your nearest fast food restaurant. For busy women, we want variety and an easy healthy lunch to go. One of my new favorites is a Black Bean Power Salad.

RECIPE:

• 1 cup whole-kernel corn

• 2 cans (16oz each) of black beans, rinsed and drained

• ¼ cup chopped parsley

• 2 TBS minced red onion

• ¼ cup balsamic vinegar

• 2 TBS olive oil

• 1 tsp lemon juice

• 1 tsp minced garlic

• 1 tsp honey or brown sugar

• Salt and pepper

DIRECTIONS:

In a large bowl, combine the corn, beans, parsley, onions, vinegar, oil, lemon juice, garlic, and honey or brown sugar. Let it marinade for the 30 minutes. Add salt and pepper to taste.

NUTRITIONAL VALUE:

Calories 417.6

Fat 6.9

Sodium 220.3

Protein 21.7

Fiber 21.3

It is so delicious and look at the fiber and protein…..a guarantee to keep you full and satisfied. I make it right after church on Sunday to prepare for my upcoming week. It just takes a few minutes each morning or the night before to pack my easy healthy lunch to go. To add a little more protein, I add any leftover grilled chicken (nutritional value not included with chicken). For variety, I reduce my serving size and add cheese and crackers. All together, here is my lunch to go.

photo (2)

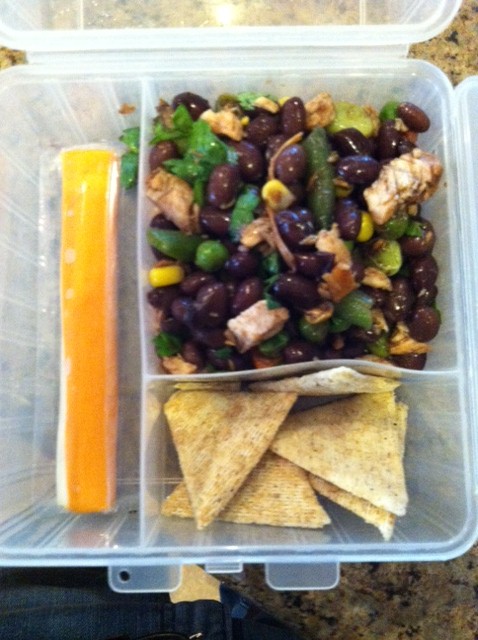
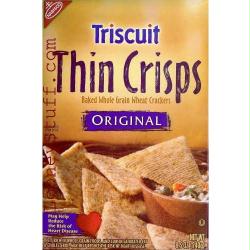
Don’t forget your calories with crackers which can add up quickly. My favorite cracker that gives me the most bang for the buck is Triscuits Thin Crisp. At only 150 calories for 15 crackers, half of a serving is perfect.

TriscuitThinCrispsOriginal8_5oz240g500Combine with string cheese at 80 calories and you Black Bean Power Salad and you have an easy healthy lunch to go.


Eating Healthy, 

Crystal Breaux

Wellness Coach/Fitness Designer


At Home with GCH: Focus on Health

kale saute

When it comes to New Year’s resolutions, I am a champ.  Every year, I swear I’m going to lose weight, exercise more, and eat healthier.  This year, so far, I’ve done really well on one front—eating better.  There probably isn’t anyone in the world who couldn’t stand to give their daily diet a tune-up, and one of the biggest improvements we can make is to eat less “bad stuff” and more “good stuff.”  What’s the good stuff?  Vegetables, of course!  (Don’t roll your eyes at me!)

Let’s introduce the star of this show:  KALE.  It’s a hearty green vegetable in the Brassica family, related to cabbage, broccoli, and Brussels sprouts.  Any veggie you eat in the Brassica family is going to help you. Kale is the the best, and most-studied, of the group.  Kale has been shown to reduce the likelihood of many different types of cancer, and is now being investigated as a treatment for cancer and other diseases as well.  If an apple a day keeps the doctor away, imagine what a serving of kale can do!

Where I live, kale is in season now.  I’ve seen it at my local farmer’s market lately, as well as at my regular grocery store.  Whole Foods and other health food stores will always have it in stock, and if you are lucky enough to live near a Trader Joe’s, you can find it stemmed, cleaned, and bagged, all ready for your culinary prowess!

Here’s what you need to know to cook with kale:  the stem, which goes all the way up the middle of each leaf, is too tough to eat.  Your best bet is to wash it, then hold the stem in your hand.  Fold the leaf in half and hold the stem with one hand, and pull off the leafy part with your other hand.  Then rip the leaf into bite-sized pieces.  Now what?

Kale is a hearty leaf, and can stand up to long cooking and strong flavors.  Because it is an excellent source of Vitamin K, it is best served with a little fat to aid absorption of  the important nutrients.  Use either olive oil, butter, or (get ready for it)—BACON!  But don’t boil it to death.  Saute it, add it to soups, toss it into salads, or, my favorite, kale chips.  Are you ready for some inspiration?  Let’s go!

kale bag


Let’s start with my favorite, and the most “snacky,” Kale Chips.  (You can probably get your kids to eat these!)

http://www.foodnetwork.com/recipes/melissa-darabian/crispy-kale-chips-recipe/index.html

_____
Here’s one from me, featuring sautéed kale, sun dried tomatoes, and almonds:

http://frugalgirlmet.blogspot.com/2012/08/superfoods-salad-warm-kale-and-oven.html

_____
Kale plays well with others!  Try it in Coleen’s yummy soup recipe:

http://girlfriendscoffeehour.com/2013/01/07/gch-whats-on-your-plate-souppalooza-part-two/

_____

Here’s a salad, for you hearty souls who are ready to take it to the next level and EAT.  YOUR.  GREENS!  (PS: I make a salad similar to this once a week and it is delicious and filling!)

http://www.tastebook.com/recipes/1835410-Emerald-Sesame-Kale

_____

Here is another great way to get your greens in!  It will also work for the kids, too! A lot of people think Green Smoothies are going to taste bad.  Not at all!  Especially when you add  fruit to your ingredients!  I always add a banana, or strawberries, blueberries, blackberries, an apple, and more.  Once all of the ingredients are blended together, the main thing you will taste is the fruit!  So don’t be afraid to try this recipe!  I think you’ll be glad you did!

GREEN SMOOTHIE

Green Smoothie

1 handful of kale or spinach ( I use a combination of both)

1 tbsp of almonds

1 tbsp flaxseed

2 scoops of your favorite protein powder

1 banana

16 oz of filtered water

6 ice cubes

Directions

Using a high-power blender, blend all ingredients on high for at least 1 minute.  If you are using a lower power blender, you will want to blend on high for at least 3 to 4 minutes.  Ingredients should smooth and creamy!  Pour yourself a glass of this delicious drink, and keep the rest of it stored in a Mason jar until you’re ready for your afternoon Smoothie!  Makes just over 1 quart.


Explore, experiment, enjoy! — Dana


Please visit me at Frugal Girlmet for more unique recipes!


If you would like to contact Dana in regards to this blog, please email her at Dana@girlfriendscoffeehour.com

GCH:What’s on Your Plate? – Eat Your Greens

EAT YOUR GREENS

by Renee Porter Sullivan, CHt

Popeye-With-Spinach-The-Belgravia-Centre

_________

Ingredients

1 quart Filtered Water
1/4 tsp. Unrefined Sea Salt or Real Salt
1-2 Bunches Kale, Chard, Spinach, Collards, Mustard, or Turnip greens
Cool Filtered Water plus 1 tray of ice cubes to cool greens
Dressing Options:
Olive oil and lemon juice
Vinaigrette
Tahini or peanut dressing 
Your choice of Gluten-Free, Sugar-Free dressing be creative and experiment!
 

Cooking Instructions


  1. Bring the water and salt to a boil in a large pot.  Stainless Steel is best in this case. If you have a smaller size pot, cook the greens in two batches
  2. Wash the greens well.  Run your fingers down the leaves and stems to make certain there is no sand left on the greens.  It only takes a little remaining sand to ruin some really great food.
  3. Hold on to the bottom of the stem firmly and run your circled fingers backward down the stem to remove the tough stem from the leaves of the greens.  If you would be more comfortable trimming the stem away with a knife, that works too.
  4. Tear the leaves into large pieces. The leaves can be cooked whole and cut later as well.  Either way will work fine.
  5. Immerse the  greens in boiling water. Boil uncovered over medium-high heat. The greens will cook in 3-7 minutes.  Chard and Spinach take less time to cook than Collards or other more hardy greens, stir the greens and continue cooking until tender and vibrant green.
  6. When the greens are done, remove them from the pot and plunge them in ice water to stop the cooking.
  7. Toss with Extra Virgin Olive Oil and a squeeze of fresh lemon juice. This is my favorite way to have greens.  Plain and simple.  Bursting with vitamins and fiber.  Or, experiment with your favorite gluten-free dressing combination.
  8. Refrigerate the left overs in glass or stainless steel.  Use within 3 Days.

Variations:

You can use these green leaves whole for Gluten Free Roll-ups. Collards work really well for this because of their size and strength. Cook the leaves whole without removing the stems.  Just cut off the tough bottom section. Omit the dressing and place 2-3 tablespoons chicken, tuna or egg salad, a meat ball, or sliced steak on each leaf.  Fold in the sides, roll up the Package, secure with a toothpick.  Chill if desired and serve.  Be creative and add colorful blanched vegetables to the mix like red bell peppers, or sun dried tomatoes, onions, anything at all.  These rolls can even be sliced and served for snacks.  

GCH:What’s on Your Plate? – Mac and Cheese

Coleen’s Mac & Cheese

Mac and Cheese.  C’mon, who does not like mac and cheese?  I read a poll, and Mac and Cheese was voted overwhelmingly as ‘favorite comfort food!’  Now I am hoping that your favorite version doesn’t come out of a blue box. 😉   But, if it does, perhaps you might try my version and see if it does not convince you to try it versus the blue box, in the future.

This version of Mac & Cheese has lots of veggies hidden in there.  Some of the pasta is made with pureed carrots and tomatoes, and there is butternut squash throughout the cheese sauce.  I love this because it makes the cheese sauce even more colorful causing the eaters to ‘think’ it is more cheesy!  Also, there is only 6 ounces of shredded cheese in the whole dish which helps to ‘healthify’ this recipe.

Have you ever made a white, or Bechamel, sauce?  Well, today you will!  It is very easy, and a great technique to add to your repertoire!  In a future post, I will share some recipes that need a white sauce and by then you will be a pro at making it!

The following recipe makes an abundantly filled 9×13 pan…enough to feed 6-8 hungry folks.  (or, if you have a husband who LOVES leftovers like mine, lunch for 2-3 days.)  This recipe is easily doubled, and I always make a double batch.  A menu suggestion: M&C, steamed broccoli, grilled ham steak.  a big, delicious salad is often our only accompaniment.

Macaroni:
1# box small macaroni (shells, penne)
12-oz box veggie pasta (I used penne made with carrots and tomato) *

Cheese Sauce:
1/2 small onion, diced
2 T butter
2 T flour
1 cup 2 percent milk
1 cup chicken or vegetable broth
2 (10-ounce) packages frozen pureed winter squash, thawed
1/2 cup part-skim ricotta cheese
4-oz sharp Cheddar, shredded (about 1+1/3 cup)
2-oz Monterey jack cheese, shredded (about 2/3 cup)
1 tsp salt, 1 tsp fresh ground pepper
1 tsp ground (dry) mustard

Topping:
2 slices stale bread, crumbled into fine crumbs
2 Tbsp freshly grated Parmesan cheese
1 tsp olive oil

Pre-heat your oven to 375.  Coat a 9 by 13-inch baking pan with small amount of  butter.  Bring a large pot of water to a boil; add 1 tsp of salt and the macaroni;  cook  according to package directions.  Drain in a colander and place back into the  cooled pot (this is where you will mix the macaroni and all that cheesy goodness together!)

Meanwhile, over medium heat, melt the butter in a medium saucepan, adding the  diced onion. Cook ‘til the onion is soft and translucent, approximately 5 minutes.  Then sprinkle the flour over the cooked onion and, using a whisk, stir constantly for  1 minute.  Adjust the heat to very low, and cook for 2-3 minutes to get the starchy taste out of the mixture.  Do not let the mixture brown.

Increase the heat back to  medium and immediately slowly pour in 1/4 cup or so of milk while whisking briskly.  Just keep stirring!  As this is absorbed, continue to slowly add the balance of the  milk in a steady stream, followed by the broth; stirring constantly as the liquid  becomes absorbed.  This will take about 3 minutes.  Adjust the heat lower again and  let this mixture simmer slowly for another 5  minutes, stirring occasionally.  (You  have now made a white sauce!! Congratulations!!!)

At this point, add in the thawed  butternut squash, stirring ‘til it is incorporated, allowing the mixture to come back  to a simmer.  Remove the saucepan from the heat.  Stir in the ricotta, and the  other cheeses, along with the ground mustard, salt & pepper.  Carefully taste (it’s hot!) the  cheese sauce, adjusting for seasoning.

Pour cheese mixture over the macaroni in the large pot and stir gently to combine.  Transfer the macaroni and cheese to the 9×13 baking dish and bake for 20 minutes.  Remove from oven.  Adjust the top rack in the oven to a higher position, and turn  the broiler on.  Combine bread crumbs, Parmesan cheese and oil in a small bowl.  Mix with your fingers; get a little messy!  Then sprinkle over the top of the cooked  mac and cheese.  Carefully place the baking dish back in the oven and broil for 3  minutes.  Keep your eye on it; you want the breadcrumbs to brown but not burn and  for some of the macaroni to get just a little crispy (my husband loves that part!).  Again, carefully remove from the oven…and you are ready to serve!

*here is a link to the type of veggie macaroni I used.  Check it out!

http://barilla.com/content/prodottobarilla/veggie-penne-freshly-pureed-tomatoes-and-carrots

God loves you…and I do, too! <3

Coleen


______________


Are you interested in joining us for one of our Women’s or Teens Online Bible Studies?  Click HERE for more details, and to sign up!

GCH: What’s on Your Plate? Launches TOMORROW!!


Beginning tomorrow, we will take the next two days to introduce you to our six bloggers who will be bringing you some amazing recipes each day here on GCH: What’s On Your Plate?!


Monday:  

Coleen Hayden will bring you “Good for You…and Yummy, too” recipes!

Tuesday:  

Shauna Jared will bring you “Southern Comfort” recipes!

Wednesday:

Liz Lanza will bring you “Family-Style” recipes!

Thursday:

Dana Kim will bring you “Ethnic Cuisine” recipes!

Friday:

Renee Sullivan will bring you “Gluten-Free” recipes!

Saturday:  

Shandy Showers will bring you delicious “Dessert” recipes!


Tomorrow, to get us started off to a great start, we are hosting an awesome GIVEAWAY!!  This tool will help you greatly, in the kitchen!!  You won’t want to miss this!  It happens to be one of my most favorite tools in my own kitchen!  So be sure to check out our blog on both Thursday AND Friday for more details!!


Until then, What’s on Your Plate?

Christi