April 20, 2024

Chicken Enchiladas (Gluten-free)

Who loves Tex-Mex food?  Raise your hand!  Me, too!  And the crazy thing—my husband, Robert, has said for years now, ’Um, no thanks!’  Somehow he got it in his head that all Mexican, Tex-Mex, Cal-Mex food had to be spicy.  (And Robert does not enjoy SPICY!)  So, recently I have been preparing an occasional dish to try and introduce him to one of my most favorite cuisines…successfully, I might add!  Olé!

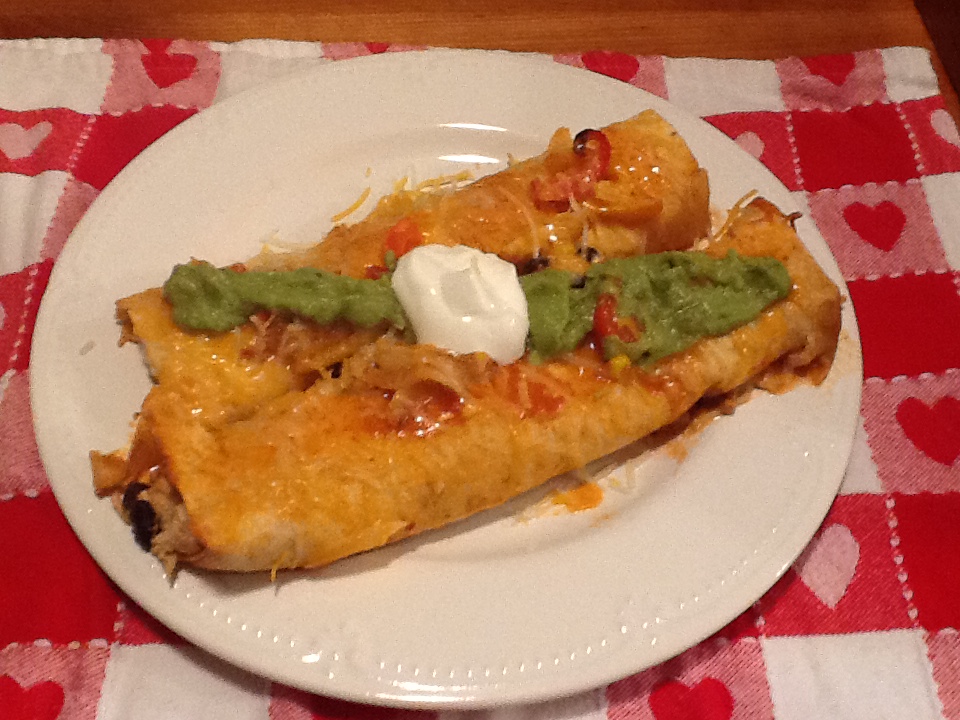
Recently, Aldi (Do you shop there?  You should!)  introduced a new line of gluten-free products…really quite good, very good quality!  One of the items is a ‘flour’ tortilla.  They are amazing…just like a really good wheat flour tortilla that I remember (soft, pliable, thin) from before we went gluten free.  So I went back and bought not one, not two, but three packages…oh the options!  These Chicken Enchiladas were my first choice!  I prepared them with a tomatillo salsa (oh, yum!) but certainly they can be made with traditional salsa equally well.   (And, please, make this recipe using traditional ingredients (NOT gluten-free) as well!  Enjoy!

2014-05-22 20.25.09

Chicken Enchiladas

ingredients:
1/2 red pepper, sliced thin
1 medium sweet onion, sliced into halfmoons
2 tablespoons olive oil
sea salt, freshly ground pepper
2 tablespoons (divided) chipotle chili powder
3 cups cooked chicken, shredded
2+ cups enchilada sauce  **gf recipe below
1 cup frozen corn (defrosted)
1 cup tomatillo salsa (or traditional salsa)
1 can (15 ounces) black beans, rinsed and drained
1 cup sour cream
1 cup shredded Mexican-blend cheese

directions:

  • preheat oven to 350
  • lightly oil the bottom of a large (9 x 13) baking pan, and pour in ½ cup of the enchilada sauce
  • saute the veggies with the olive oil for 7 or 8 minutes ‘til softened.  season with salt, pepper, and 1 tablespoon of the chipotle chili powder.  set aside
  • in a large mixing bowl, combine the shredded chicken, corn, black beans, sour cream, 1 tablespoon chili powder, ½ cup of the enchilada sauce, ½ cup of the salsa, ½ cup of the shredded cheese; mix well
  • pour 1 cup of the enchilada sauce into a shallow saute pan (or a bowl)
  • now, set up a little production line with the baking pan, the chicken mixture, the pan with enchilada sauce, and an empty plate…this gets messy; you’ll thank me for it!  😉
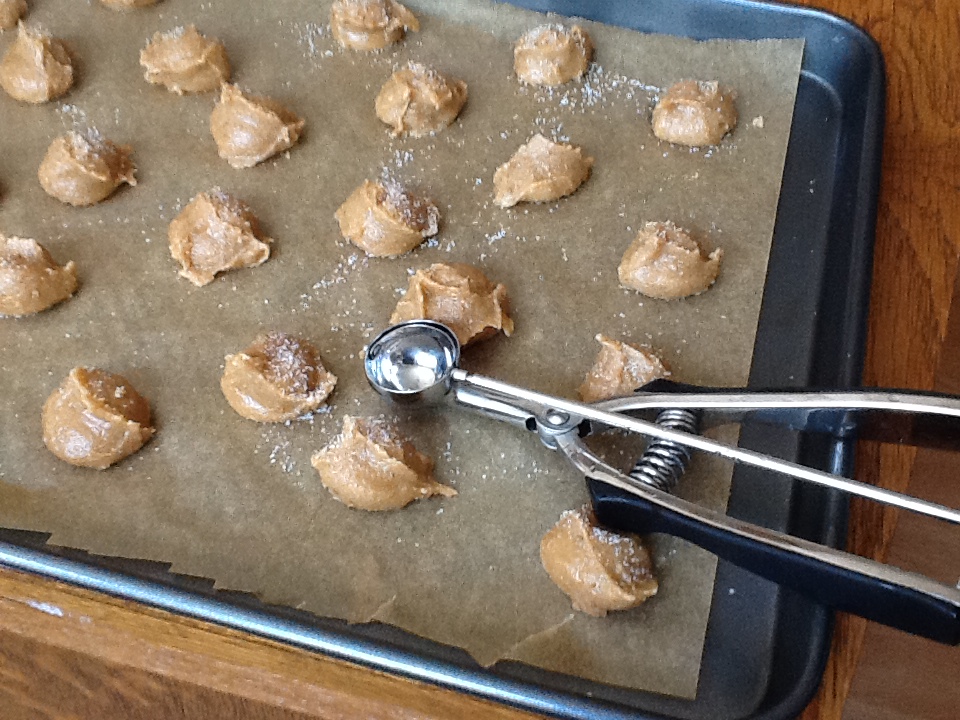
  • take 1 tortilla, run it through the enchilada sauce to coat; place it on the plate.  take 1 good handful (1/3-1/2 cup) of the chicken mixture and spread it down the center of the tortilla; roll the tortilla up; place in baking pan with seam-side down.  repeat ‘til all tortillas are filled. (*tip: you might want to trim the edges of the filled tortillas to fit nicely into the baking pan)
  • pour the sauteed veggies across the top of the filled tortillas
  • (if there is any enchilada sauce left, pour that over the top…don’t want to waste that!)
  • sprinkle the remaining shredded cheese over the top, too
  • bake for 15-20 minutes ‘til bubbly and cheese is melted
  • serve with sour cream, salsa, and guacamole

** here are two really good, homemade, gluten-free, chemical and additive-free recipes for enchilada sauce.  also, Nicole from GFOAS has a nice recipe for homemade ‘flour’ tortillas!

http://glutenfreeonashoestring.com/enchiladas-saucy-smokin/
http://glutenfreehomemaker.com/enchilada-sauce/


♥  ♥    ♥  ♥

God loves you!  ♥  (Don’t ever forget that!)

♥  coleen

Chocolate Cranberry Quinoa Biscotti

CCQ Biscotti Close Tray resize

Girlfriends Coffee Hour runs on prayer and  coffee, and sometimes coffee needs biscotti!  If you’ve ever paid $2 for a biscotti at your local coffee shop and thought, “It can’t be that hard to make these,” you are right!  This recipe for Chocolate Cranberry Quinoa Biscotti takes a few extra steps, but if you are looking for a gluten-free, nut-free treat for your afternoon coffee break, read on!

I was looking for nut-free biscotti recipes online, and I found one using quinoa flour, which I’d never heard of or used.  Time to experiment!  It turns out that quinoa flour is incredibly easy to make, and exceeds wheat flour in fiber, protein, and nutrients.  If you don’t want to make your own at home, I understand – you can find it in health food stores and online, and Bob’s Red Mill makes it (I really like and trust their products.)  I used red quinoa, so the biscotti has a darker color, but feel free to use the regular white kind.  To make quinoa flour at home, pour one cup of quinoa on a baking sheet and bake for 12-15 minutes at 300*F.   When cool, grind in a spice grinder, grain mill, or superpowerful blender.  I have a hand-crank grain mill that made short work of the job!  One cup of dry quinoa will yield one and a quarter to one and a third cups of flour.  If you don’t want to go through the trouble, you can use regular or whole wheat flour instead.

Everything else in this recipe is pretty customizable.  Don’t like chocolate chips?  Leave them out or use white chocolate or even butterscotch chips.  Add in any kind of nut, like almonds, pecans or pistachios.  Replace the dried cranberries with cherries, apricots, or just lemon zest.  Drizzle with white or dark chocolate.  These make great gifts, too, because they are pretty hearty and don’t get stale too quickly.  After rigorous and exhaustive testing, I can report that these stand up well to dunking in coffee.  The things I do for you ladies!  😉

If you have a friend who loves coffee, make these as a treat for her (and keep a few for yourself!)


CCQ Biscotti Close up Resize

Chocolate Cranberry Quinoa Biscotti

Ingredients:

  • 1+ 1/3 cups quinoa flour (you can use whole wheat flour instead)
  • 2 tablespoons coconut flour
  • 1 teaspoon baking powder
  • 1/4 teaspoon salt
  • 2 eggs
  • 1/4 cup melted coconut oil (or use butter)
  • 2 teaspoons vanilla extract
  • 3/4 cup coconut sugar (or use brown sugar)
  • 3/4 cup dried cranberries (or cherries or diced apricots)
  • 3/4 cup chocolate chips
  • White chocolate for drizzling (Confession:  I was out of white chocolate, but I found a cookies and cream white chocolate bar that fit the bill.)

Directions:

  1. Preheat oven to 300*F.  Line a baking sheet with parchment paper.
  2. Combine quinoa flour, coconut flour, baking powder, and salt in a bowl.
  3. In a large bowl, combine the eggs, coconut oil, vanilla, and coconut sugar together.  Mix well, then stir in chocolate chips and cranberries.  Stir in the flour mixture a little at a time until thoroughly combined.
  4. Turn the dough out onto the parchment, and using damp hands, mold into a log that measures about 4 or 5 inches wide, one inch high, and about 15 inches long.  Bake until firm, about 25 minutes.
  5. Remove pan from oven, then pick up the parchment with the biscotti log on it, and let it cool on a rack.  You want this cooled to room temperature, so it won’t crumble too much.  With a serrated knife, slice the log into 1/2 inch biscotti.
  6. Place the biscotti back on the baking sheet and bake for about 15 minutes until dry and crunchy.  Let cool completely, then drizzle with white chocolate.  Store in an airtight container to keep them crisp.

Explore, experiment, enjoy! — Dana


To view even more of Dana’s unique recipe, you can visit her at Frugal Girlmet!

Flourless Oatmeal Peanut Butter Cookies (Gluten Free)

Here on our At Home with GCH blog, Monday’s are always focused on healthy but oh-so-yummy! recipes.  As promised, we have been sharing some gluten free treats that you can bring to all of your summer festivities: bbqs, camping trips, picnics, hoedowns, and block parties.  This week we are making  Oatmeal Peanut Butter Cookies.  You can include the add-ins that your loved ones enjoy such as chocolate chips, craisins, chopped walnuts, etc.

2013-07-05 10.39.13

Ingredients:

1/2 cup dried cranberries
2 teaspoons baking soda2013-07-05 09.16.32
4+1/2 cups rolled oats
1+1/2 cups peanut butter (or crunchy peanut butter!)
1/2 cup coconut oil, or butter
3/4 cup packed brown sugar
3/4 cup coconut sugar, or white sugar
3 eggs
1/2 teaspoon vanilla extract
1 cup chocolate chips
optional (suggested!) 1 cup chopped walnuts

Directions:

In a medium sized bowl, mix together the oats, baking soda, and dried cranberries; set aside.  Using a stand mixer, cream the peanut butter, other ‘butter,’ and sugars together ‘til light and fluffy.  Add eggs, one at a time, and also the vanilla.  Mix to blend well.  Slowly pour in the dry ingredients, mixing just until everything is combined.  By hand, stir in  the chocolate chips, and walnuts (if including), too.  Place in refrigerator for 10-15 minutes to firm up.  Preheat the oven to 350.  Line a baking sheet with parchment paper.  Using a small cookie scoop or a tablespoon, scoop the cookie batter and drop it onto lined cookie sheet, 2 inches apart.  Bake for 9 to 12 minutes until light golden brown and just getting firm. (If you enjoy your cookies a little on the softer side, underbake by one minute.)   Makes approximately 4 dozen cookies.

Note: this dough is sticky because of the peanut butter, so I strongly suggest using your hands as little as possible.  Cooling the dough in the refrigerator is a great help here!

♥  ♥  ♥  ♥  ♥

God loves you!  ♥  (Don’t ever forget that!)

♥  coleen

_________________________________

If you would like to send a personal message to Coleen concerning this blog post, you may email her at: Coleen@girlfriendscoffeehour.com

Gluten Free Chocolate Chip Cookies (and a Mix!)

Here on our At Home with GCH blog, Monday’s are always focused on healthy but oh-so-yummy! recipes.   Being we are now in full-swing summertime, for the next few weeks we are going to focus on gluten free treats that you can share at your bbq’s, picnics, hoedowns, and block parties.  Look forward to graham crackers for s’mores, brownies, sheet cake and maybe some more cookie recipes, too!

2013-06-13 21.24.57

Gluten Free Chocolate Chip Cookies
(makes 4 dozen regular cookies)

Ingredients:

1 batch Chocolate Chip Cookie Mix * see below
8 tablespoons unsalted butter or shortening, at room temperature
2 eggs, room temperature, lightly beaten
1+ ½ teaspoons vanilla extract

Directions:

  • Line 2 baking sheets with parchment paper and set aside
  • Place cookie mix in bowl of stand mixer; give a stir to get out any lumps
  • Add butter, eggs, and vanilla to bowl; mix on low until combined, approximately 30-40 seconds
  • Scrape down bowl with spatula; then mix batter for 2 minutes on medium speed
  • Drop balls of dough about 1+1/2 inches in diameter about 1 inch apart onto one baking sheet
  • Place in freezer for 5 minutes (this will help the cookies to not spread too thin)
  • Preheat oven to 325; and fill other baking sheet in the meantime
  • Once the dough has chilled, place 1st baking sheet into preheated oven; bake until cookies are beginning to brown underneath, about 10-12 minutes
  • Remove from oven and place cookies on cooling racks
  • Try not to eat them until they have cooled; oh, go ahead!  enjoy!

A few notes:

  • I made my batch dairy free by using shortening, Earth Balance non-dairy butter substitute, and coconut oil.
  • This is a very stiff batter; it will give your mixer a good workout!
  • I made these in a ‘manly’ size cookie. I got 26 cookies out of the recipe.


Chocolate Chip Cookie Mix

Ingredients:
2+1/4 cups Gluten free flour
Consisting of:
1/2 cup Brown Rice Flour
1/2 cup Oat Flour
1/2 cup Almond Flour
3/4 cup Cornstarch
1/2 teaspoon Xanthan gum
2 teaspoon Psyllium husk
1 teaspoon Baking soda
1/2 teaspoon Sea salt
1 cup Coconut sugar or brown sugar
1/2 cup Sugar
12 ounces Semisweet chocolate chips (I use dairy-free)

Directions:
Place all ingredients, except chocolate chips, in a bowl, stir until well combined.  Pour into any airtight container—glass jar, plastic storage container or bag.  Tamp down to really get it snugly in there!  This fits well into a quart sized Mason jar (looks cute, too!).  Add chocolate chips on top and seal.  Use entire batch for the above recipe.

♥  ♥  ♥  ♥  ♥

God loves you!  ♥  (Don’t ever forget that!)

♥  coleen

_________________________________

If you would like to send a personal message to Coleen concerning this blog post, you may email her at: Coleen@girlfriendscoffeehour.com

Strawberry Poundcake Cupcakes (GF)

Here on our At Home with GCH blog, Monday’s are always focused on healthy but oh-so-yummy! recipes.  Today’s recipe is for Strawberry Poundcake Cupcakes with Whipped Cream & Cream Cheese Frosting.  Oh yeah!

2013-06-02 20.08.14

I made these as a special indulgent treat for a family get-together this past weekend…we celebrated my daughter, Kassia’s 32nd birthday along with my stepmom, Betsy’s, birthday AND honored our little ballerina, Kaylie Joy, as she performed in her third recital!  Big doings, I am telling you!  So, we splurged a little bit in the healthy category, and oh boy…did we enjoy the yummy category!  These were a hit with the gluten-free crowd…AND the crowd that can eat their gluten.

These delightful cupcakes are based on a ‘perfect’ poundcake recipe from Shirley Braden at glutenfreeeasily.com  You should definitely check out Mrs. Braden’s website and blog!  Her recipes are tried&true!  I’ve never had a failure using her recipes and she has much insight to share regarding gluten-free baking and cooking.

*NOTE*  You will need only one other ingredient to complete these beautiful, delicious cupcakes: some perfectly ripe small-sized whole strawberries.  It is important that you choose small strawberries because if you were to insert cut strawberries into the tops of your cupcakes, the moisture would ruin the consistency of your lovely poundcake cupcakes!  Trust me…you can ask me how I know  ;-{

Poundcake Cupcakes

2013-06-01 15.56.21Cupcake Ingredients:
2+1/4 cups gluten-free flour
1+1/2 teaspoons xanthan gum
1+1/4 teaspoons salt
1 teaspoon baking powder
3/4 cup light olive oil
1+1/2 cups coconut sugar (your choice of sugar)
2 tablespoons orange or grapefruit juice
2 teaspoons almond extract
3 large eggs
2/3 cup coconut milk (your choice of milk)

Directions for cupcakes:

  • Preheat oven to 350; line muffin tins with 24 cupcake papers
  • Whisk together the dry ingredients in a bowl; set aside
  • Pour olive oil into mixing bowl, with mixer running slowly add sugar,  juice, and extract ‘til combined well
  • Add eggs—one at a time—stirring after each addition
  • Add milk, and mix for two minutes
  • Gradually add dry ingredients into wet ingredients, mixing well
  • Scoop batter into lined tins
  • Bake for 22–24 minutes, testing with toothpick for doneness
  • Remove from tins, and cool completely on rack

Whipped Cream and Cream Cheese Frosting

Frosting Ingredients:
1 pint (2 cups) heavy whipping cream
2 tablespoons powdered sugar
1+1/2 teaspoons almond extract

8 ounces cream cheese, room temperature
1/2 cup powdered sugar

Directions for frosting:
Cream whips best when it is cold. Keep the whipping cream in the refrigerator ‘til ready to whip.  Also chill your mixing bowl AND whisk or beaters (refrigerate for at least 15 minutes).

  • Add cold whipping cream to chilled bowl
  • Whisk using electric mixer ‘til soft peaks form
  • Then sprinkle the sugar over the whipping cream and continue to beat; as sugar is blended in, slowly pour in the extract
  • Important to keep an eye on the cream as it heads towards done; don’t overbeat!  Set aside
  • In a separate large bowl, beat the cream cheese ‘til fluffy
  • Crefully add in the 1/2 cup powdered sugar blending well
  • Using a spatula, gently fold the whipped cream into the cream cheese mixture ‘til they are completely incorporated.  Nice job!

Assembling directionsplease see *NOTE* above.

  • Wash and dry the strawberries, slicing off the green cap
  • Carefully carve out a small indentation in the top of each cooled cupcake
  • Insert—pointside down—a small strawberry into each indentation
  • It is perfectly acceptable that the strawberries stick up just a bit above the top edge of the cupcake
  • Now frost the cupcake with the whipped cream mixture.  Done!  Enjoy!

♥  ♥  ♥  ♥  ♥

God loves you!  ♥  (Don’t ever forget that!)

♥  coleen

_________________________________

If you would like to send a personal message to Coleen concerning this blogpost, you may email her at: Coleen@girlfriendscoffeehour.com

Gluten Free Chewy Chocolatey Gingery Cookies

Here on our At Home with GCH blog, Monday’s are always focused on healthy but oh-so-yummy! recipes.  Today we have another cookie recipe!  This recipe makes a delicious and not-so-sweet cookie which still fits into this category!  Included in the recipe are healthy ingredients like sunflower and chia seeds, coconut oil instead of butter or shortening, and non-refined sweeteners.  Also to note, these are flourless and grainless (as I know that is important to some of you).

I am thinking this would make for a great ice cream sandwich with chocolate or caramel homemade ice cream!

2013-05-25 17.38.30

Chewy Chocolately Gingery Cookies  
(makes approximately 3 dozen medium-sized cookies)

ingredients:
1+1/2 cups sunflower seeds
1 cube crystallized ginger
2 tablespoons coconut oil2013-05-25 16.18.42
2 tablespoons honey or maple syrup
1 tablespoon chia seeds
3/4 cup coconut sugar (or sugar of your choice)
3 tablespoons cocoa powder
1 teaspoon ground ginger
1/2 teaspoon ground cinnamon
1/2 teaspoon baking soda
1/4 teaspoon kosher salt
1 large egg PLUS 1 egg yolk

directions:

  • preheat oven to 350; line 2 baking sheets with parchment paper; fit a food processor with a mixing blade
  • place sunflower seeds, crystallized ginger, coconut oil, honey, and chia seeds into the bowl of the food processor
  • process for 2 minutes, stopping a few times as needed to scrape down the sides of the bowl ‘til all is finely ground (the mixture will look like nut butter)
  • add the coconut sugar, cocoa powder, ginger, cinnamon, baking soda, and salt;  process ‘til thoroughly combined
  • keeping the food processor running, add the egg and egg yolk; and process just ‘til dough forms
  • using a small cookie scoop, drop dollops of dough onto the lined baking sheets about 2″apart (if doing by hand*, a small cookie scoop holds approximately 2 teaspoons of dough)
  • bake for approximately 9-10 minutes ‘til the cookies are almost firm to the touch; do not overbake
  • remove from baking sheet and cool completely on a rack
  • best stored in an airtight container; enjoy!

* this is a sticky dough, as are most gluten free doughs.  if rolling by hand, you might need to occasionally rinse your hands with cold water.

*** I dusted mine with a little bit of powdered sugar.  To make these an extra-special treat, melt ½ cup of chocolate chips in the microwave; dip a portion of your Chewy Chocolatey Gingery Cookie into the melted chocolate while it is still hot.  Let cool on a rack for the chocolate to harden.

♥  ♥  ♥  ♥  ♥

God loves you!  ♥  (Don’t ever forget that!)

♥  coleen

_________________________________

If you would like to send a personal message to Coleen concerning this blogpost, you may email her at: Coleen@girlfriendscoffeehour.com

Italian Almond Cookies, Gluten-Free by Coleen Hayden

Here on our At Home with GCH blog, Monday’s are always focused on healthy but oh-so-yummy! recipes.  Today’s recipe makes a delicious, slightly decadent sweet which still fits into this category!  This recipe has no oil or butter, uses gluten-free almond flour which is high in protein, and can be made very successfully using alternative, unrefined sugars.

These yummy little almond cookies are so reminiscent to me of Italian bakery cookies called ‘amaretti.’  Going to make a confession here: I just l-o-v-e Italian bakery pastries!  For my birthday, thank you but no birthday cake, please!  Just a platter of mini pastry and almond cookies.  For sure!  So when my darling daughter, Kassia, called and told me that she had made ‘amaretti’ and they were gluten free—happy me!  Perhaps you will find these little cookies as delightful as I do; maybe even turn you into an amaretti fan!  Enjoy!

IMG_1567

Italian Almond Cookies      makes approximately 3 dozen cookies

Ingredients:
2+1/2 cups almond flourIMG_1563
1+1/4 cups superfine* sugar
3 room temperature egg whites
1/2 teaspoon vanilla extract
1 teaspoon almond extract
extra sugar for dusting


Preheat oven to 300.  Line 2 baking sheets with parchment paper.

Using a food processor, blend together the almond flour and sugar for 30 seconds.  Add both extracts, and pulse 5 or 6 times to blend.  Add the egg whites ONE at a time, and continue to process the mixture ‘til the dough is nice and smooth.

Using a small cookie scoop, place teaspoons of the dough onto the lined cookie sheets, approximately 1″ apart.  These cookies do not spread.  Sprinkle the tops of the cookies with the extra sugar.  Bake for 20-24 minutes for chewy cookies; 24-30 minutes for a slightly crispy cookie.  Remove to a cooling rack.  Easily stored in your favorite cookie jar!

IMG_1565

*If, like me, you are using alternative sugars, put them into the food processor first and give them a 20 second whirl to pulverize them and make the sugar “super fine.”  I used a mix of coconut sugar and evaporated cane juice sugar.

♥  ♥  ♥  ♥  ♥

God loves you!    (Don’t ever forget that!)

♥  coleen

_________________________________

If you would like to send a personal message to Coleen concerning this blogpost, you may email her at: Coleen@girlfriendscoffeehour.com