November 24, 2024

Blueberry Almond Muffins (Gluten Free)

Here on our At Home with GCH blog, Monday’s are always focused on healthy but oh-so-yummy! recipes.  As promised, for the next few weeks I am sharing some gluten free treats that you can bring to your bbq’s, picnics, hoedowns, and block parties.  Perhaps your family loves to hike or go backpacking—this recipe is perfect for you!  

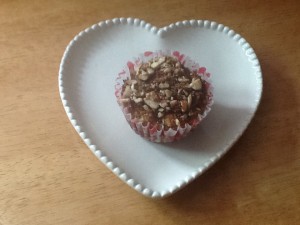
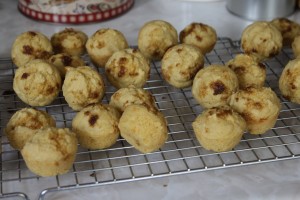
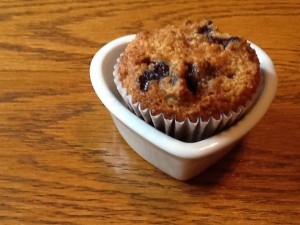
2013-06-25 16.18.01

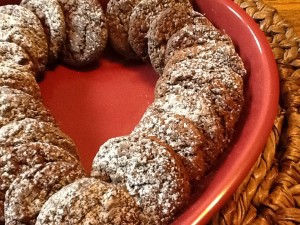
Today’s recipe is for gluten free Blueberry Almond Muffins.  These are full of protein, contain no refined sugars, and have no added fat (except the 1 tablespoon used for the topping).   Also, a nice substitution for the blueberries would be raspberries…don’t forget to see the tip about freezing them!

Blueberry Almond Muffins

makes 10 muffins

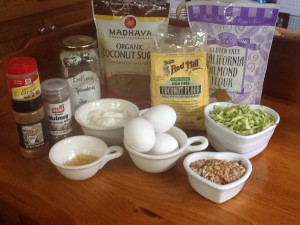
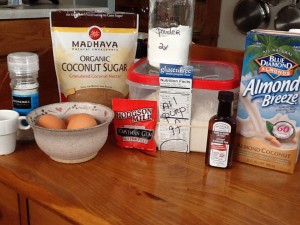
Ingredients2013-06-25 15.23.16
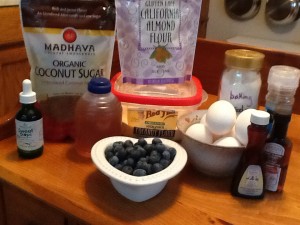
• 2 cups almond flour
• 1/2 cup coconut flour
• 1/2 teaspoon sea salt
• 1/2 teaspoon baking soda
• 6 eggs
• 1/2 cup honey, agave nectar or maple syrup
• 12 drops liquid vanilla stevia (or additional sweetener of your choice)
• 1 teaspoon vanilla extract
• 1 teaspoon almond extract
• 1 cup blueberries, frozen*

Topping Ingredients
• 1 tablespoon butter, softened
• 1 tablespoon coconut sugar

Directions

  1. Put blueberries into freezer
  2. Preheat oven to 350. Put liners into muffin tin
  3. In a large mixing bowl, whisk together almond flour, coconut flour, salt and baking powder
  4. In a separate bowl, whisk eggs; then add honey, stevia, and extracts
  5. Stir liquid ingredients into dry ingredients and blend thoroughly
  6. Gently fold in frozen blueberries*
  7. Spoon batter into lined muffin cups
  8. Lightly pat tops down into rounded heaps; use a pastry brush to dab with butter and sprinkle with coconut sugar
  9. Bake for 22-25 minutes; the tops should be springy yet firm when they are done
  10. Remove from muffin tin immediately and let cool on a rack
  11. Keep in the refrigerator, or place into freezer storage bags or a container

* The purpose of freezing (or using pre-frozen) blueberries is that this batter is very thick; if you used non-frozen berries, they would smoosh. 🙂

♥  ♥  ♥  ♥  ♥

God loves you!  ♥  (Don’t ever forget that!)

♥  coleen

_________________________________

If you would like to send a personal message to Coleen concerning this blog post, you may email her at: Coleen@girlfriendscoffeehour.com
Gluten Free Chocolate Chip Cookies (and a Mix!)

Here on our At Home with GCH blog, Monday’s are always focused on healthy but oh-so-yummy! recipes.   Being we are now in full-swing summertime, for the next few weeks we are going to focus on gluten free treats that you can share at your bbq’s, picnics, hoedowns, and block parties.  Look forward to graham crackers for s’mores, brownies, sheet cake and maybe some more cookie recipes, too!

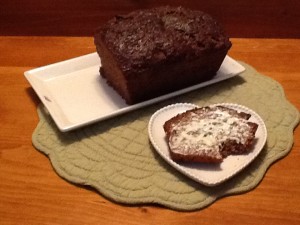
2013-06-13 21.24.57

Gluten Free Chocolate Chip Cookies
(makes 4 dozen regular cookies)

Ingredients:

1 batch Chocolate Chip Cookie Mix * see below
8 tablespoons unsalted butter or shortening, at room temperature
2 eggs, room temperature, lightly beaten
1+ ½ teaspoons vanilla extract

Directions:

  • Line 2 baking sheets with parchment paper and set aside
  • Place cookie mix in bowl of stand mixer; give a stir to get out any lumps
  • Add butter, eggs, and vanilla to bowl; mix on low until combined, approximately 30-40 seconds
  • Scrape down bowl with spatula; then mix batter for 2 minutes on medium speed
  • Drop balls of dough about 1+1/2 inches in diameter about 1 inch apart onto one baking sheet
  • Place in freezer for 5 minutes (this will help the cookies to not spread too thin)
  • Preheat oven to 325; and fill other baking sheet in the meantime
  • Once the dough has chilled, place 1st baking sheet into preheated oven; bake until cookies are beginning to brown underneath, about 10-12 minutes
  • Remove from oven and place cookies on cooling racks
  • Try not to eat them until they have cooled; oh, go ahead!  enjoy!

A few notes:

  • I made my batch dairy free by using shortening, Earth Balance non-dairy butter substitute, and coconut oil.
  • This is a very stiff batter; it will give your mixer a good workout!
  • I made these in a ‘manly’ size cookie. I got 26 cookies out of the recipe.


Chocolate Chip Cookie Mix

Ingredients:
2+1/4 cups Gluten free flour
Consisting of:
1/2 cup Brown Rice Flour
1/2 cup Oat Flour
1/2 cup Almond Flour
3/4 cup Cornstarch
1/2 teaspoon Xanthan gum
2 teaspoon Psyllium husk
1 teaspoon Baking soda
1/2 teaspoon Sea salt
1 cup Coconut sugar or brown sugar
1/2 cup Sugar
12 ounces Semisweet chocolate chips (I use dairy-free)

Directions:
Place all ingredients, except chocolate chips, in a bowl, stir until well combined.  Pour into any airtight container—glass jar, plastic storage container or bag.  Tamp down to really get it snugly in there!  This fits well into a quart sized Mason jar (looks cute, too!).  Add chocolate chips on top and seal.  Use entire batch for the above recipe.

♥  ♥  ♥  ♥  ♥

God loves you!  ♥  (Don’t ever forget that!)

♥  coleen

_________________________________

If you would like to send a personal message to Coleen concerning this blog post, you may email her at: Coleen@girlfriendscoffeehour.com
Gluten-Free Hearty Whole Grain Bread

Here on our At Home with GCH blog, Monday’s are always focused on healthy but oh-so-yummy! recipes.  We’ve been on a gluten-free kick for quite a while now.  This week I am going to share my husband’s favorite gluten-free loaf of bread.  Shhhhh… (it is made from a mix)!  Really truly!  And it is incredible!  Very hearty…nice, thick crust…tasty…and full of such good-for-you ingredients.

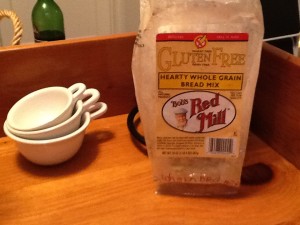
This mix Hearty Whole Grain Bread Mix is made by a wonderful company, Bob’s Red Mill.  They offer an extensive line of gluten-free baking products as well as many other items.  You should check their website out!  Many grocery stores and ‘big-box’ stores carry their products.

IMG_1621

Here’s the list from the label (note there are no preservatives or ingredients with 14 letters):

  • whole grain buckwheat
  • garbanzo bean flour
  • potato starch
  • cornstarch  IMG_1617
  • sunflower seeds
  • sesame seeds
  • whole grain sorghum flour
  • tapioca flour
  • cocoa powder
  • evaporated cane juice
  • fava bean flour
  • dried molasses
  • xanthan gum
  • caraway seeds
  • active dry yeast
  • sea salt
  • whole grain teff
  • potato flour
  • onion powder
  • guar gum
  • soy lecithin

If your home is like ours…this will be gone within 2-3 days.  This bread has no preservatives so you might consider keeping it in the refrigerator.  Slice as needed.

Additional Ingredients: IMG_1615
1+3/4 cups warm (110 degrees) water
1/4 cup oil
2 eggs, room temperature
1 teaspoon cider vinegar

Directions:

  1. Dissolve enclosed packet of yeast in the warm (110 degrees) water; let stand for 5 minutes ‘til foamy
  2. Grease a 9X5 loaf pan; then line with parchment paper, cut to fit.  also grease parchment paper
  3. Pour dry mix into stand mixer bowl
  4. Add yeasty water mixture and run mixer for 15 seconds
  5. Add eggs, oil, cider vinegar
  6. With mixer on low, blend ‘till batter is smooth and all ingredients are incorporated
  7. Turn mixer to medium speed and beat for 15-20 seconds
  8. Pour batter into loaf pan; smooth top of batter with wet fingers or spatula
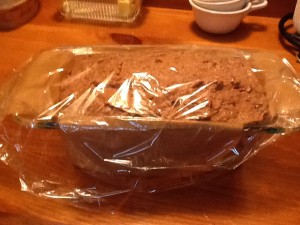
  9. Cover loaf pan with plastic wrap and put in a warm (75-80 degrees) place to rise for 40-45 minutes; I place mine into the microwave.  Allow dough to rise so it is level with the top edge of pan
  10. Preheat oven to 375
  11. When dough has risen, bake for 60-65 minutes or ‘til internal temperature of bread is 205 degrees (I use an instant – read thermometer)
  12. Cover bread with a loose tent of foil after approximately 35-40 minutes as it starts to brown
  13. Remove from oven; allow to cool for 5 minutes
  14. Then loosen edges of bread with a knife or small spatula
  15. Using parchment paper strips, lift bread from pan and place on wire rack to cool completely before slicing
  16. As the bread is cooling, I rub the top ONLY of the loaf with about a 1/2 tablespoon of butter; this just softens the top crust of this very hearty loaf of bread


♥  ♥  ♥  ♥  ♥

God loves you!  ♥  (Don’t ever forget that!)

♥  coleen

_________________________________

If you would like to send a personal message to Coleen concerning this blog post, you may email her at: Coleen@girlfriendscoffeehour.com
Strawberry Poundcake Cupcakes (GF)

Here on our At Home with GCH blog, Monday’s are always focused on healthy but oh-so-yummy! recipes.  Today’s recipe is for Strawberry Poundcake Cupcakes with Whipped Cream & Cream Cheese Frosting.  Oh yeah!

2013-06-02 20.08.14

I made these as a special indulgent treat for a family get-together this past weekend…we celebrated my daughter, Kassia’s 32nd birthday along with my stepmom, Betsy’s, birthday AND honored our little ballerina, Kaylie Joy, as she performed in her third recital!  Big doings, I am telling you!  So, we splurged a little bit in the healthy category, and oh boy…did we enjoy the yummy category!  These were a hit with the gluten-free crowd…AND the crowd that can eat their gluten.

These delightful cupcakes are based on a ‘perfect’ poundcake recipe from Shirley Braden at glutenfreeeasily.com  You should definitely check out Mrs. Braden’s website and blog!  Her recipes are tried&true!  I’ve never had a failure using her recipes and she has much insight to share regarding gluten-free baking and cooking.

*NOTE*  You will need only one other ingredient to complete these beautiful, delicious cupcakes: some perfectly ripe small-sized whole strawberries.  It is important that you choose small strawberries because if you were to insert cut strawberries into the tops of your cupcakes, the moisture would ruin the consistency of your lovely poundcake cupcakes!  Trust me…you can ask me how I know  ;-{

Poundcake Cupcakes

2013-06-01 15.56.21Cupcake Ingredients:
2+1/4 cups gluten-free flour
1+1/2 teaspoons xanthan gum
1+1/4 teaspoons salt
1 teaspoon baking powder
3/4 cup light olive oil
1+1/2 cups coconut sugar (your choice of sugar)
2 tablespoons orange or grapefruit juice
2 teaspoons almond extract
3 large eggs
2/3 cup coconut milk (your choice of milk)

Directions for cupcakes:

  • Preheat oven to 350; line muffin tins with 24 cupcake papers
  • Whisk together the dry ingredients in a bowl; set aside
  • Pour olive oil into mixing bowl, with mixer running slowly add sugar,  juice, and extract ‘til combined well
  • Add eggs—one at a time—stirring after each addition
  • Add milk, and mix for two minutes
  • Gradually add dry ingredients into wet ingredients, mixing well
  • Scoop batter into lined tins
  • Bake for 22–24 minutes, testing with toothpick for doneness
  • Remove from tins, and cool completely on rack

Whipped Cream and Cream Cheese Frosting

Frosting Ingredients:
1 pint (2 cups) heavy whipping cream
2 tablespoons powdered sugar
1+1/2 teaspoons almond extract

8 ounces cream cheese, room temperature
1/2 cup powdered sugar

Directions for frosting:
Cream whips best when it is cold. Keep the whipping cream in the refrigerator ‘til ready to whip.  Also chill your mixing bowl AND whisk or beaters (refrigerate for at least 15 minutes).

  • Add cold whipping cream to chilled bowl
  • Whisk using electric mixer ‘til soft peaks form
  • Then sprinkle the sugar over the whipping cream and continue to beat; as sugar is blended in, slowly pour in the extract
  • Important to keep an eye on the cream as it heads towards done; don’t overbeat!  Set aside
  • In a separate large bowl, beat the cream cheese ‘til fluffy
  • Crefully add in the 1/2 cup powdered sugar blending well
  • Using a spatula, gently fold the whipped cream into the cream cheese mixture ‘til they are completely incorporated.  Nice job!

Assembling directionsplease see *NOTE* above.

  • Wash and dry the strawberries, slicing off the green cap
  • Carefully carve out a small indentation in the top of each cooled cupcake
  • Insert—pointside down—a small strawberry into each indentation
  • It is perfectly acceptable that the strawberries stick up just a bit above the top edge of the cupcake
  • Now frost the cupcake with the whipped cream mixture.  Done!  Enjoy!

♥  ♥  ♥  ♥  ♥

God loves you!  ♥  (Don’t ever forget that!)

♥  coleen

_________________________________

If you would like to send a personal message to Coleen concerning this blogpost, you may email her at: Coleen@girlfriendscoffeehour.com
Gluten Free Chewy Chocolatey Gingery Cookies

Here on our At Home with GCH blog, Monday’s are always focused on healthy but oh-so-yummy! recipes.  Today we have another cookie recipe!  This recipe makes a delicious and not-so-sweet cookie which still fits into this category!  Included in the recipe are healthy ingredients like sunflower and chia seeds, coconut oil instead of butter or shortening, and non-refined sweeteners.  Also to note, these are flourless and grainless (as I know that is important to some of you).

I am thinking this would make for a great ice cream sandwich with chocolate or caramel homemade ice cream!

2013-05-25 17.38.30

Chewy Chocolately Gingery Cookies  
(makes approximately 3 dozen medium-sized cookies)

ingredients:
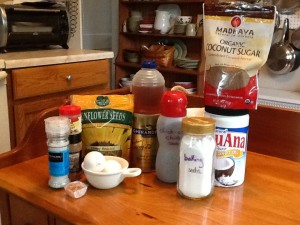
1+1/2 cups sunflower seeds
1 cube crystallized ginger
2 tablespoons coconut oil2013-05-25 16.18.42
2 tablespoons honey or maple syrup
1 tablespoon chia seeds
3/4 cup coconut sugar (or sugar of your choice)
3 tablespoons cocoa powder
1 teaspoon ground ginger
1/2 teaspoon ground cinnamon
1/2 teaspoon baking soda
1/4 teaspoon kosher salt
1 large egg PLUS 1 egg yolk

directions:

  • preheat oven to 350; line 2 baking sheets with parchment paper; fit a food processor with a mixing blade
  • place sunflower seeds, crystallized ginger, coconut oil, honey, and chia seeds into the bowl of the food processor
  • process for 2 minutes, stopping a few times as needed to scrape down the sides of the bowl ‘til all is finely ground (the mixture will look like nut butter)
  • add the coconut sugar, cocoa powder, ginger, cinnamon, baking soda, and salt;  process ‘til thoroughly combined
  • keeping the food processor running, add the egg and egg yolk; and process just ‘til dough forms
  • using a small cookie scoop, drop dollops of dough onto the lined baking sheets about 2″apart (if doing by hand*, a small cookie scoop holds approximately 2 teaspoons of dough)
  • bake for approximately 9-10 minutes ‘til the cookies are almost firm to the touch; do not overbake
  • remove from baking sheet and cool completely on a rack
  • best stored in an airtight container; enjoy!

* this is a sticky dough, as are most gluten free doughs.  if rolling by hand, you might need to occasionally rinse your hands with cold water.

*** I dusted mine with a little bit of powdered sugar.  To make these an extra-special treat, melt ½ cup of chocolate chips in the microwave; dip a portion of your Chewy Chocolatey Gingery Cookie into the melted chocolate while it is still hot.  Let cool on a rack for the chocolate to harden.

♥  ♥  ♥  ♥  ♥

God loves you!  ♥  (Don’t ever forget that!)

♥  coleen

_________________________________

If you would like to send a personal message to Coleen concerning this blogpost, you may email her at: Coleen@girlfriendscoffeehour.com

At Home with GCH: Gluten Free Zucchini Muffins

Here on our At Home with GCH blog, Monday’s are always focused on healthy but oh-so-yummy! recipes.  Today’s recipe fits into this category being it is low in fat (uses greek yogurt and a small amount of coconut oil or butter), is gluten-free (uses no grains) and is full of really good for you ingredients.

Have you ever used crystallized ginger?  If not, I would like to introduce you to it!  I just love crystallized ginger, and always have some stored in a sealed container in the freezer.  It is a great ingredient in many spicy foods.  We especially enjoy it in Thai food!  Try adding a bit to any baked goodies that have cinnamon, or nutmeg, in them.  I buy mine in the grocery store; look for it either in the Asian food aisle, or the baking goods aisle.  Below I have posted a couple of links for you so that you can check it out!  Enjoy!

2013-05-10 12.11.00

Zucchini Muffins (Gluten Free)    – makes one dozen

Topping Ingredients:
1/4 cup chopped almonds
1 tablespoon sugar (I use coconut sugar)
1 teaspoon cinnamon
2 tablespoons almond flour
2 tablespoons cold butter, cut into little cubes 2013-05-10 11.09.39

Muffin Ingredients:
1/2 cup sugar (I use coconut sugar)
3 eggs
3/4 cup greek yogurt
1/4 cup softened coconut oil
1+1/2 cup shredded zucchini
1 teaspoon cinnamon
1/8 teaspoon powdered ginger
1 cube crystallized ginger*, grated fine
1/4 teaspoon nutmeg
1+1/2 cup almond flour
1/2 cup coconut flour
1 teaspoon baking powder

  • Heat oven to 325
  • Place muffin cup papers in muffin tin
  • Make topping first: mix all dry components of topping together; then drop in the cold butter and quickly use your fingers to incorporate the butter ’til crumbly.  Set aside.
  • In a medium-sized bowl, whisk together first 4 muffin ingredients until sugar is dissolved
  • Add shredded zucchini (and crystallized ginger, if using) to the wet ingredients; stir well
  • In a large bowl, mix together the flours, spices, and baking soda
  • Add wet ingredients to the dry, mixing until incorporated
  • Divide batter into muffin cups evenly
  • Sprinkle on almond topping
  • Bake for 30-35 minutes ’til toothpick comes out clean

*Here is where you can buy crystallized ginger .  I have bought this brand before; it is a very nice product.  NOTE: the price listed is for a “12 pack.”  When you buy them individually at WalMart, they run approximately $1.89 or so.  And the grocery store price runs just about the same.

Here is Alton Brown’s recipe to make your own!  I am going to use this recipe this week!

♥  ♥  ♥  ♥  ♥

God loves you!  ♥  (Don’t ever forget that!)

  coleen

_________________________________

If you would like to send a personal message to Coleen concerning this blogpost, you may email her at: Coleen@girlfriendscoffeehour.com
At Home with GCH: Caprese Salad

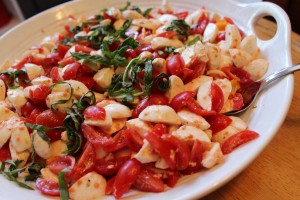
Here on our At Home with GCH blog, Monday’s are always focused on healthy but oh-so-yummy! recipes.  This week I am sharing a dish that I often prepare for gatherings—Caprese Salad, aka Fresh Mozzarella and Tomato Salad.  Here we are thick in the season of bridal showers and graduation parties and Mother’s Day  and Father’s Day celebrations.  Today I made this for a bridal shower, and so I multiplied the recipe 4X.  It served over 40 ladies as a side dish on the salads table.  If you are preparing this in advance, add the vinegar and olive oil just prior to serving.

IMG_0222

Caprese Salad

8 ounces fresh mozzarella
1/2 pint grape or cherry tomatoes
basil * (fresh is best); if using dried, 1/2-3/4 teaspoon)
kosher salt, freshly ground black pepper

2 tablespoons balsamic vinegar (I use ‘white’ balsamic)
1-2 teaspoons extra-virgin olive oil

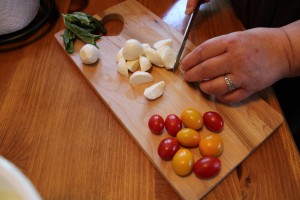
IMG_0220

Easy-peasy!  Depending on the size of the fresh mozzarella you have bought, you might need to cut the balls of mozzarella into small, bite-size pieces; halve the tomatoes, and sprinkle with salt and pepper, to taste.  Thinly slice the basil*.  Add the sliced basil to the seasoned tomatoes and cheese.  Pour a small amount of olive oil and some of the balsamic vinegar over and gently mix. Taste; add more vinegar and olive oil, if necessary.  Serve immediately.

*tip: stack 3-4 basil leaves; tightly roll-up (like a tiny cigar!); then carefully slice into very thin slices. You have now accomplished the technique known as ‘chiffonade!’  You are amazing!  🙂


God loves you!  ♥  (Don’t ever forget that!)

coleen

_________________________________

If you would like to send a personal message to Coleen concerning this series, you may email her at: Coleen@girlfriendscoffeehour.com
At Home with GCH: Gluten-Free Cornbread Mini-Muffins

Here on our At Home with GCH blog, Monday’s are always focused on healthy but oh-so-yummy! recipes. This week we are making Gluten-free Cornbread Mini-Muffins.

IMG_0218


They fit right into our healthy but oh-so-yummy category because they are:

  • full of fiber
  • low in sugar—and non-refined sugar, at that!
  • very low in fat
  • gluten-free

Last month, a few friends and I began a journey of reducing excess in our lives.  The first area we tackled was food.  Uh-huh…you read that right.  So, right off the bat, sugar, flour, and caffeine were eliminated.  (Can you say detox?  We did…and it was good!)  I learned many things over those four weeks one of which was that I knew that refined white sugar and wheat flour were permanently removed from our eating lifestyle.  My husband, Robert, and I purged our pantry of all wheat: pasta, cake and cookie mixes, all-purpose wheat flour, crackers, snacks, cookies, and a few stray cans of condensed soup were even found and tossed!

I had been dipping my toe into the gluten-free baking world for awhile.  My daughter, Kassia,  exclusively bakes with gluten-free flours and is a fantastic baker.  She is my hands-on instructor in the field and has taught me so much!  (Thank you, Kassia!!!  Love you!)  So, after purging the bad out…I found I had quite a few basics to get started with.  For those of you considering doing the same, there are any number of really good websites to peruse and follow.  At the bottom of this post, I have listed just a few of my favorites.  These women all are quite knowledgeable, their recipes can be trusted, they are very skilled, and have been baking gluten-free for many years.  Please consider trying a few of their recipes, and wandering around their websites where you can learn and experiment!  Each of them also has tons of valuable information on how to set-up a gluten-free pantry, the types of flours and starches to buy (and why you should consider those particular products).

You will probably be surprised to know that, to get started, you won’t need to go out and spend tons of money…. I would suggest buying a few products that are new to your pantry each week.  Each of the ingredients that I used in this recipe can be purchased at Super Wal-Mart, or Whole Foods, and probably at your favorite grocery store also.  May I suggest, too, that you do not hesitate to purchase some of these products online; I have and will continue to do so.

So, here is this week’s gluten-free recipe.  We are having these with my Veggie Chili…oh, yum!  Enjoy!

Gluten-free Cornbread Mini-Muffins   (makes approximately 32-36)

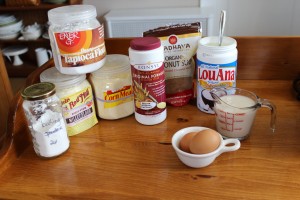
IngredientsIMG_0212
1 cup cornmeal
1/2 cup millet flour
1/2 cup tapioca flour/starch
1 teaspoon xanthan gum
1 teaspoon psyllium husk (unflavored metamucil!)
3 tablespoons sugar, of your choice
1 tablespoon baking powder
1/2 teaspoon salt
2 large eggs
1 cup milk, of your choice
1/4 cup melted butter, slightly cooled

1 tablespoon sugar, to sprinkle (optional)

Directions:
Preheat oven to 425.  Thoroughly grease mini-muffin pan (this recipe makes 30-36).   Melt butter; set aside to cool slightly.  Combine dry ingredients; stir well.  In a small bowl, whisk eggs; then add milk and melted butter.  Whisk together ‘til combined.  Add wet ingredients to dry ingredients.  Stir ‘til smooth but don’t overbeat.  Fill muffin tins 2/3 full.  If desired, sprinkle a tiny bit of sugar over top of batter.  Bake for 12-15 minutes, ‘til just slightly browned and springs back when lightly touched with finger.  Keep your eye on them; don’t overbake.  Cool in pan for 2 minutes.  Loosen by running small spatula around edge.  Remove to cooling rack.  Enjoy plain, or with butter, honey, or marmalade.  Excellent toasted, too!

Here are links to a few of my trusted gluten-free websites:

http://www.elanaspantry.com/

http://simplysugarandglutenfree.com/

http://glutenfreeonashoestring.com/

God loves you!   ♥   (Don’t ever forget that!)

 coleen

_________________________________

If you would like to send a personal message to Coleen concerning this recipe, you may email her at: Coleen@girlfriendscoffeehour.com
At Home with GCH: Chicken Shepherds Pie with Cauliflower – Parmesan Topping

Now that title’s a mouthful, hmmm?  Pun FULLY intended!  My husband loves Shepherd’s Pie—and any variation I can come up with!  And so I indulge him!   This recipe fits into our healthy but oh-so-yummy category in a couple of ways:

  • it is low-carb (with the absence of mashed potato topping)
  • it  is made with natural ingredients that you can pronounce (as the gravy is made from scratch)
  • it is low in fat/high in protein (using boneless chicken breast as the protein and just 1/3 cup of shredded cheese and 1/3 cup Parmesan)

This recipe could easily be doubled and baked in an 11 x 13 baking dish.

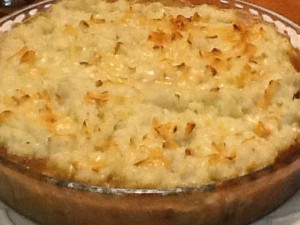
Chicken Shepherd’s Pie with Parmesan-Cauliflower Topping

2012-12-05 19.56.17

Filling Ingredients:

1 sweet (vidalia-type) onion, chopped in pieces about 1/2 inch
4 ounces baby bella mushrooms, wiped clean sliced chunky
2-3 tablespoons chopped garlic in oil (from a jar)
3+ teaspoons olive oil
1# boneless chicken breast, pounded flat, cut into 1″ cubes

1 tablespoon butter
2 tablespoons flour
1/4 cup white wine (or broth)
1+1/4 cups chicken broth

1 bag frozen mixed vegetables (your choice) set out to defrost

Topping Ingredients:

1 medium-sized head of cauliflower, cored and chopped into small pieces
1/4 cup milk
1/3 cup finely grated parmesan cheese
salt and freshly ground black pepper to taste

1/3 cup shredded cheese (sharp cheddar, smoked gouda) *use a flavorful cheese

Instructions:

Preheat the oven to 375.  Bring a medium-sized pot of salted water to a boil. Chop cauliflower into small pieces and simmer ‘til  soft enough to mash easily (10-12 minutes). Drain cauliflower very well in a colander; place back into pot and  use an immersion blender or hand beater to “mash” the cauliflower with the milk and Parmesan. Season very well with salt and pepper to taste.

While the cauliflower cooks, heat 2 tablespoons of olive oil in a large frying pan and saute the cut-up chicken adding the chopped garlic for the last minute (don’t let the garlic burn).  Saute ’til just getting brown but don’t overcook.  Remove pan from stove; set aside cooked chicken.  Wipe frying pan with paper towels to remove bits. Then add 2 additional tablespoons olive oil; heat over medium, and saute chopped onions for 3 minutes.  Add chopped mushrooms and saute for 4-5 minutes more to caramelize.  Reduce heat to low; add 1 tablespoon butter, and sprinkle flour over the mushroom-onion mixture, stirring with a whisk.  Cook this mixture for 3 minutes occasionally scraping the pan.  Then gradually whisk in the wine ’til the mixture is smooth.  Gradually whisk in the  broth and your gravy will come together.  Gently simmer for 5 minutes.  Add back the cooked chicken and the defrosted veggies and heat together for 1-2 minutes.

Spread the chicken-vegetable-gravy mixture in the bottom of a 8 cup casserole dish.  Top with the cauliflower mixture, and spread across the pan almost to the edges.  Bake for 20 minutes, and then top with the grated cheese.  Continuing baking another 10 minutes or so ’til bubbly.  If top is not lightly browned, can be carefully placed under broiler for 2-3 minutes.  Enjoy!

God loves you!   ♥  (Don’t ever forget that!)

  coleen

______________________

If you would like to send a personal message to Coleen, in regards to this blog, please email her at: Coleen@girlfriendscoffeehour.com.

At Home with GCH – Perfect Soft Boiled Eggs

Here on our At Home with GCH  blog, Monday’s are always focused on healthy but oh-so-yummy! recipes.  This month I am on a “7” month journey with a few friends AND my husband!  We are fasting from some of the excess in our lives, and endeavoring to establish better boundaries to help us keep God as the focus of our hearts.  It is a ‘mutiny against excess!’ Our journey has certainly come along with quite a variety of challenges…but not necessarily setbacks!

This month, our journey is focusing on dealing with excess in the category of food.  In keeping with the “7” theme, we are choosing seven (ONLY!) foods.  That comprises our menu choices for breakfast, lunch, dinner, and snacks.  Total.  So here’s what Robert and I are keeping in our NON-excessive food list for 30 days (20 down…10 to go).  (Ready? it really is a short list.) Eggs, chicken, salad greens, grapes (me) and strawberries (him), potatoes, broccoli, -and- protein bars/smoothies.  Also, I am endeavoring to have everything that my husband and I eat be UNprocessed and made from fresh ingredients.

Needless to say, I am becoming very proficient in different methods of cooking eggs.  (Practice makes perfect, y’know!  If you made eggs virtually every day….)  But I have never prepared the PERFECT soft-boiled egg.  You know…firm, tender white with runny, yummy yolk.  I perused the Internet and found out that *Cook’s Illustrated and America’s Test Kitchen had set out to accomplish this task and communicate it to all of us.*  I am here to tell you that you, too, can perform this task in your own kitchen…here’s how!

Perfect Soft-Boiled Eggs

Be sure your eggs have no cracks and are straight out of the refrigerator. You can use this method for one to six large, extra-large, or jumbo eggs without changing the timing.

tools:
medium saucepan, with lid
tongs

ingredients: 
4 large- or extra large-size eggs
kosher salt, freshly ground pepper

frozen hash-brown patties

directions: 
Follow package directions for baking the desired number of hash-brown patties.

Bring 1/2 inch water to boil in medium saucepan over medium-high heat. Using the tongs, gently place eggs into the boiling water (eggs will NOT be submerged). Cover saucepan and cook eggs for 6+1/2 minutes ONLY. Remove saucepan from stovetop.

Bring saucepan to sink, remove lid and run cold water over eggs for 30 seconds to stop cooking. Remove eggs from saucepan and serve, liberally seasoning with salt and pepper to taste.  Perfect!

IMG_0211

God loves you!   ♥  (Don’t ever forget that!)

coleen

______________________

If you would like to send a personal message to Coleen, in regards to this blog, please email her at: Coleen@girlfriendscoffeehour.com.

************************************

* Read all about it!  This is a link to the article from Cook’s Illustrated.  Very informative!   http://www.cooksillustrated.com/recipes/article.asp?docid=41579