November 25, 2024

Leftover Link-aPalooza

My girls, admiring the turkey!

My girls, admiring the turkey!

Esteemed Ladies of Girlfriends Coffee Hour, I come to you with my apron in hand.  I ask for your mercy.  I don’t have a new recipe for you on this Black Friday…this day after Thanksgiving.  Let me explain.

We moved to Austin, Texas two week ago, from sunny Los Angeles.  This was our first Thanksgiving apart from family, friends, and “home”.  I didn’t make any new recipes, and I didn’t even make anything that challenging:  mashed potatoes, roasted vegetables, and pumpkin pie.  My husband made the turkey and gravy, and we bought rolls from the grocery store.  And you know what?  I was pretty happy with it!  Sometimes it’s nice to not stress over big events.  So instead of jumping through hoops to make a new recipe specifically for a blog post today, I’m just going to post links to stuff I MIGHT make.

That’s right.  I’ve got the turkey carcass on the stove already, making a delicious-smelling stock.  I’m not sure what I’ll do with the rest of the meat, mashed potatoes, cranberry sauce, and gravy.  But here are some recipes I’ll probably be checking out tomorrow, Saturday, and Sunday.  And instead of worrying about it, I’m going to focus more on my kids, my husband, my health, and my sleep.  🙂

Ready for Link-aPalooza?  Let’s go!

This is for breakfast, minus the corn, and plus a little cranberry sauce:

http://www.foodnetwork.com/recipes/danny-boome/bubble-and-squeak-with-corn-puree-recipe.html

Still more mashed potatoes?  Maybe some Colcannon!

http://frugalgirlmet.blogspot.com/2012/03/colcannon.html

Lots of leftover cranberry sauce?  Go Ikea-style!

http://www.epicurious.com/articlesguides/holidays/thanksgiving/leftovers-cranberry-sauce/recipes/food/views/Swedish-Meatballs-350172

Stuffing from last week’s Thanksgiving Burger?

http://www.kraftrecipes.com/recipes/stuffing-topped-vegetable-bake-138240.aspx

And if you have extra pie?  EAT IT UP!!!

God Bless you all.  — Dana

Beef Stroganoff

Beef Stroganoff GCH resizeThis recipe is one of my favorites in the “Comfort Food” category.  Beef Stroganoff is easy and filling, especially if you serve it over rice or noodles.  We just eat it straight from the bowl, paired with a salad or roasted vegetables.

Now before you think I’m crazy for using so much wine in a stew, remember that all the alcohol cooks off. You will not get tipsy from your entree, I promise!  Make sure you use a wine that you will want to drink, because this recipe leaves you enough for a glass or two with dinner.  You can use red – like cabernet sauvignon, merlot, or pinot noir – or white – like pinot grigio or chardonnay.  Don’t use anything sweet, though.  Nice and dry is the secret.  And if you are really, really opposed to wine…you can use beef broth instead.

This recipe also calls for dried mushrooms.  I get big bags of dried, sliced shiitake mushrooms at the Korean supermarket.  Any Asian grocery store should carry dried mushrooms for cheap.  If you can’t find them, you can use fresh button or cremini mushrooms.  The difference will be the cooking time – you’ll need to sauté them for longer so that you can cook most of the water out of them.  Just experiment until it looks right – it’s not rocket science.

Ready for a fall stew that will warm your belly and delight your tastebuds?  Let’s go!

Beef Stroganoff

Ingredients:

  • 1 1/2 to 2 pounds ground beef
  • 1 large onion, sliced
  • 1 cup dried, sliced mushrooms (or use one pound fresh mushrooms, sliced)
  • 2 cups dry red or white wine
  • 1 tablespoon fresh snipped dill (or use 1/2 teaspoon dried dill)
  • 1/4 teaspoon smoked paprika (optional, but nice)
  • 1 teaspoon Dijon mustard
  • 1 cup whole milk yogurt (or use sour cream or creme fraiche)

Directions:

  1. If using dried mushrooms:  In a bowl, pour in one cup of the wine.  Microwave for about a minute so it’s hot, or at least very warm.  Add the dried mushrooms to the hot wine to rehydrate them.  Place another bowl on top so the mushrooms stay submerged in the wine.  Let steep until Step 3.
  2. In a large pot, brown the ground beef.  You don’t need to add any extra fat, since the fat will melt out of the meat.  When brown, remove beef with a slotted spoon to a bowl.  Leave the fat and juices in the pot.
  3. Add the sliced onion to the pot and sauté over medium.  If using fresh mushrooms, add them together with the onion.  If using dried mushrooms, add the mushrooms AND the wine they were soaking in when the onion starts to turn golden, about 8 minutes.
  4. When the mushrooms and onion are soft and golden, add the beef back to the pot, along with the other cup of wine, the dill, paprika, and mustard.  Cover with a lid and turn the heat to low.  Simmer for 5 minutes to combine.
  5. Turn off the heat, stir in the yogurt, and serve hot.

Explore, experiment, enjoy! — Dana


To view even more of Dana’s unique recipe, you can visit her at Frugal Girlmet!

Pumpkin Chia Pudding

Pumpkin Chia Pudding resize

It seems like when we turn the calendar page to October, we all mysteriously start craving PUMPKIN!   I am not immune.   However, I didn’t want to make a big sugar bomb, so I searched around for something to satisfy the pumpkin craving and not spike my insulin.  Bingo:  Pumpkin Chia Pudding!

If you’ve never made chia pudding, now’s your chance.  I love it – the texture is a crazy blend of creamy and crunchy—like tapioca with attitude!  I make it with coconut milk, but you can try another nut milk or soy milk if that’s your thing.  This was ready to eat in an hour, and tastes just like pumpkin pie.  What more can you ask for?!

Pumpkin Chia Pudding

Ingredients:

  • 1 can full-fat coconut milk (about 2 cups)
  • 1/2 can pumpkin puree (about 1 cup, or use one cup of roasted and mashed pumpkin)
  • 1/2 teaspoon pumpkin pie spice (or combine cinnamon, nutmeg, allspice and cloves)
  • 1/2 teaspoon vanilla extract
  • 2 tablespoons honey or maple syrup
  • 1/4 cup chia seeds

Directions:

  1. In a blender or food processor, blend the coconut milk, pumpkin puree, pumpkin pie spice, vanilla, and honey together.
  2. Pour into a Tupperware container with a tight-fitting lid, or a very large jar with a lid.  Add the chia seeds and Shake!  Shake!  Shake!
  3. Refrigerate.  After another hour, shake again!  If it’s cold, go ahead and eat it!  Garnish with a little whipped cream if you like.

Explore, experiment, enjoy! — Dana


To view even more of Dana’s unique recipe, you can visit her at Frugal Girlmet!

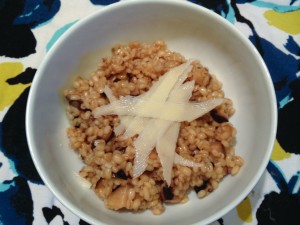
Barley Shiitake Risotto

Barley Shiitake Risotto resize

Sometimes I have to peek in my pantry and decide, “Enough is enough!”  Time to use up those odds and ends of things.  I had about a cup of barley left in a bag, so I went in search of a recipe for it.  I found one, made some tweaks, and now I present to you:  Barley Shiitake Risotto!

Barley has a fantastic texture:  firmer than rice, closer to a chewy and delicious wheat berry.  It is wonderful in stews and soups, but it is strong enough to be a star on its own.  This recipe calls for dried mushrooms.  You can use any kind of dried mushroom.  I buy dried shiitake mushrooms at the Korean market, and they’re much cheaper there than what you’ll pay for dried mushrooms at a regular grocery store.  For the broth, I made bone broth…but you can use any kind—chicken, beef, or even vegetable broth, that you like.  The original recipe called for grated parmesan, which I didn’t have.  I used a very hard white cheddar.  You can use any hard cheese you like – if you can grate it, you can use it here!

This is not a forget-it-type recipe.  You do need to stir it every few minutes to get the right texture.  Just start this on the stove while you’re making a salad or prepping the rest of your dinner and it will all work out…I promise!

Barley Shiitake Risotto

Ingredients:

  • 1 cup dried shiitake mushrooms (or other dried mushroom)
  • 1 cup white wine
  • 1 tablespoon olive oil
  • 1/2 small onion
  • 2 cloves garlic
  • 1 cup barley
  • 4-5 cups broth
  • salt and pepper to taste
  • 1/4 cup grated hard cheese (parmesan, very firm white cheddar, or other cheese)

Directions:

  1. Put the dried shiitake mushrooms in a bowl.  Pour over the white wine.  Put another bowl on top of the mushrooms so that they remain submerged in the wine and microwave for 30-60 seconds.  Let the mushrooms rehydrate while you work on step 2.
  2. Mince the onion fine.  In a large, heavy-bottomed pot, heat the olive oil, and add the onion.  Stir over medium heat.  You want the onions to turn golden.  Meanwhile, in a smaller pot, heat the broth to a simmer.  Keep it simmering over low heat.
  3. Mince the garlic, and add garlic and barley to the pan with the onions.  Stir to combine, cooking for 3 minutes.
  4. Squeeze the mushrooms over the bowl and chop.  Add the mushrooms and the wine from the bowl to the barley.
  5. When the wine is almost all absorbed, add a ladle-full of broth.  Stir to combine.  Repeat this process, adding more broth every five minutes or so, when the last addition of broth is nearly absorbed.  You don’t want the pan to get dry, but you don’t want to make soup either.  This should take about 30 minutes for all of the broth to be added, stirred, and absorbed.
  6. After all the broth is added, taste a bit of the barley.  It should be firm and chewy.  If it’s still dry and not al dente, add more stock or water.
  7. When barley is done—chewy and al dente—season with salt and pepper.  Stir in grated cheese and serve hot. (Garnish with extra cheese and take a photo – optional.)

Explore, experiment, enjoy! — Dana


To view even more of Dana’s unique recipe, you can visit her at Frugal Girlmet!

Cheesecake Baked Apples

Cheesecake Baked Apples resize

I love baked apples.  They’re tender yet sturdy, and you can fill them with lovely loads of raisins, spices and nuts.  Since my girl is allergic to nuts, I needed to find something different.  Ta-da!  Cheesecake Baked Apples!

I used Gala apples, and I would suggest you use either Galas or Fujis.  You can top these with whatever you like – nuts, crumbled cookies, or even ice cream!  We kept it simple and added some whipped cream.

You know a dessert is a winner when it suddenly grows quiet in the dining room.  My girls were so serious eating these healthy treats they stopped their near-constant girl chatter.  Try these easy baked apples today!

Cheesecake Baked Apples

Ingredients:

  • 6 apples (use Gala or Fuji)
  • 8 ounces cream cheese, softened
  • 1/4 cup sugar
  • 1 teaspoon vanilla
  • 1 egg
  • 1 teaspoon cinnamon (I added a little ground nutmeg, too)

Directions:

  1. Slice off the top of the apples.  With a knife, cut out the core and scoop out the apple flesh. You want to leave at least 1/4 inch of apple “wall.”   Make sure you don’t cut through the bottom!
  2. In a bowl, blend together the cream cheese, sugar, vanilla, egg, and cinnamon.  If you like, you can add a little bit of the scooped-out apple flesh; just chop it up and stir it in.  Fill the apples about 3/4 full.
  3. Bake for about 20 minutes in a 350*F oven.  Remove and chill in the refrigerator until ready to serve.

Explore, experiment, enjoy! — Dana


To view even more of Dana’s unique recipe, you can visit her at Frugal Girlmet!

Maple-Roasted Chicken and Vegetables

Maple-Roasted Chicken and Vegetables resize

This recipe is one of those great finds:  Nutritious?  Absolutely…and Paleo too (if that’s your thing).  Easy?  You bet!  It’s a one-pot masterpiece with a quick prep time and easy clean-up.  Delicious?  Incredibly!  My family ate it all and there were no leftovers.  What is this delightful dinner?  Maple-Roasted Chicken and Vegetables!

For this recipe, you need chicken thighs with the bone and the skin still on.  Rubbed with a little olive oil, the skin crisps up and keeps the meat tender.  You can use whatever root vegetables you like.  I used baby carrots, Korean sweet potatoes (red skin with white flesh) and onions.  You could also try parsnips, turnips, butternut squash, apples, or even beets!  This recipe also calls for smoked paprika, which gives it a little smoky bite but not a lot of heat.  If you don’t have it, try a sprinkle of dried herbs instead, or even some curry powder!  Ready?  Let’s go!

Maple-Roasted Chicken and Vegetables

Ingredients:

  • 2 pounds chicken thighs, bone-in, skin on
  • 1 cup baby carrots
  • 3 sweet potatoes, peeled and sliced into baby carrot-sized fingers
  • 1 onion, cut into small wedges
  • 2 tablespoons olive oil
  • 2 tablespoons maple syrup
  • salt and pepper
  • 1/2 teaspoon sweet smoked paprika

Directions:

  1. Heat the oven to 400*F.  Use a large Dutch oven or large baking dish.  On the bottom of the pan, toss together the baby carrots, sliced sweet potato, and sliced onion.  Add one tablespoon olive oil and toss with the root vegetables.  Season with salt and pepper.
  2. Place the chicken thighs on top of the vegetables, skin side up.  Pat the skin dry with a paper towel.  Drip a little oil onto the thighs and rub it in with your fingers.  You want a thin coating of oil over all the skin.  Drizzle the maple syrup over the chicken, then season with salt, pepper, and the paprika.
  3. Cook uncovered for one hour or more, until the chicken registers at least 165*F on a meat thermometer.
  4. Serve with the vegetables.

Explore, experiment, enjoy! — Dana


To view even more of Dana’s unique recipe, you can visit her at Frugal Girlmet!

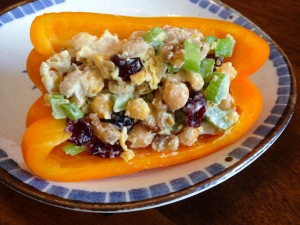
Chickpea Cranberry Salad

Chickpea Salad resize

When I was in 10th grade, I decided to become a vegetarian.  My mom made no objections, but she did make it known that it was up to me to make sure I was eating a balanced diet, and that I should do some research.  “You can’t live on cheese sandwiches!” she told me more than once.  So I read up (in actual books.  It would have been so much easier to go online, but the internet hadn’t been invented yet!) and found out which foods were good sources of vegetable protein.  Chickpeas are your meatless champions!  Try this Chickpea Cranberry Salad and see for yourself!

Whether you are a vegetarian (or making lunch for someone who is), or if you just want a few meatless options, chickpeas are your friend.  Stock up on canned chickpeas for making hummus or adding to soups and salads.  I like to buy them dried.  They’re cheap and they pretty much last forever in your pantry.  Soaking them the night before you make this will cut down on cooking time, and also helps eliminate some of the chemicals that can cause gas and bloating in more sensitive tummies.  I like them better this way, because you can cook them to your preference—you can make them soft like the canned kind, or (and I highly recommend this) a little bit al dente.  The toothsome texture makes them seem more filling to me.

Serve this Chickpea Cranberry Salad between slices of bread, like a sandwich, or wrap it in lettuce.  Out of lettuce, like I was?  Use half of a sweet bell pepper as a taco shell!  Crunchy, delicious, meatless, marvelous!

Chickpea Cranberry Salad

(makes two servings)

Ingredients:

  • 1/2 cup dried chickpeas (or use 1 regular can of chickpeas)
  • 1 stalk celery
  • 1/4 cup walnuts
  • 1/4 cup dried cranberries
  • 1-2 tablespoons mayonnaise
  • salt and pepper to taste
  • squeeze of lemon juice

Directions:

  1. The night before you make the salad, pour the chickpeas into a large bowl and cover with water by at least an inch or two.  Cover the bowl with a plate and leave on the counter overnight.
  2. After soaking, drain the chickpeas.  Place in a pan and cover with water.  Simmer, covered, for about an hour.  Taste one and see if you like the texture.  Cook longer if you like.  When done, drain off the water and pour the chickpeas into a bowl.  Mash with a potato masher or the back of a fork.  I like to leave them a little chunky.
  3. Add in the rest of the ingredients and stir to combine.  Refrigerate until ready to serve.

Explore, experiment, enjoy! — Dana


To view even more of Dana’s unique recipe, you can visit her at Frugal Girlmet!

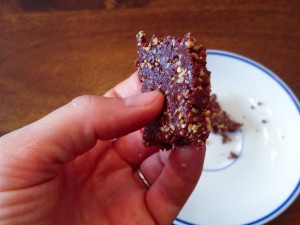
Fruity Energy Bars

Fruity Energy Bars resize

I’ve got a lot of hoops to jump through when it comes to making snacks for my girls.  I try to eat Paleo myself, and while I do serve my girls grains and legumes, I am always searching for recipes that rely on Paleo ingredients first.  Next, my older daughter is allergic to peanuts and tree nuts.  That eliminates a giant swath of choices in the Paleo category, which excludes grains in favor of nuts.  So for baking, that leaves me either coconut products (which we love and use often), or seeds, like pepitas or sunflower seeds.  I found a recipe that sounded good, reconfigured it for our needs, and now I proudly present:  Fruity Energy Bars!

In the grocery store, you’ll find half an aisle dedicated to energy and granola bars.  I love them and I love that, for the most part, they’re healthy and nutritious.  They are, however, kind of pricy – sometimes two or three dollars a bar!  And it seems like the ones with the fewer ingredients are even more expensive!  (I’m looking at you, Larabar!)  Now, these Fruity Energy Bars couldn’t be quicker – just three minutes in the food processor, and about half an hour to chill and firm up.  I think you could easily exchange the dried cranberries for another dried fruit – apples, apricots, raisins, prunes, or cherries would all work.  If you want to use nuts instead of sunflower seeds, try almonds or walnuts.  They do warm up very quickly and get soft, so keep them in the fridge until ready to eat.  Ready?  Get energized!

Fruity Energy Bars

Ingredients:

  • 1 cup pitted dates
  • 1 cup dried cranberries
  • 1 cup sunflower seeds (I used roasted and salted)
  • 1/4 cup unsweetened flaked coconut
  • 1/4 cup chocolate chips

Directions:

  1. Pour all the ingredients into the bowl of  your food processor.  Pulse to blend, then mix for about 3 minutes.  You can blend it all the way together and it will form a ball, but I took mine out before that so I could still have a little texture to the bars – kind of like the consistency of sticky sand.
  2. Line an 8×8 pan with plastic wrap, or grease with a little coconut oil.  Press the mixture into the pan and press down with the back of a big spoon.  Refrigerate for at least half an hour.  Cut into 1″x4″ bars.  Get energized and go be productive!

Explore, experiment, enjoy! — Dana

—————————————————————————————————
To view even more of Dana’s unique recipes, you can visit her at Frugal Girlmet!

Homemade Strawberry Ice Cream (No Ice Cream Machine Needed!)

rsz_homemade_strawberry_ice_cream

A few months ago, my daughter made vanilla ice cream in her kindergarten class.  She raved about how fun it was to make it, and how the finished product was delicious.  Well, I took her story with a grain of salt (unintentional pun!) because 6 year-olds aren’t really known for their discriminating pallets.  But I researched online, found a recipe, and decided to give it a whirl.  And you know what?  If anything, she undersold it!  This stuff is fantastic!  Here’s my recipe for Homemade Strawberry Ice Cream.

We don’t have an ice cream machine.  It sounds like kind of a waste of space, because it’s not something I’d use too often.  The only equipment this recipe needs is two Ziploc bags!  The technique is easy and is perfect for kids to make.  All the recipes online were the same, so I used one (of several) you can find with a Google search.  But what’s even better than vanilla ice cream?  Strawberry ice cream!  Instead of just sprinkling chopped fruit on top, I made a strawberry puree that, when mixed into the vanilla ice cream, makes a strawberry ice cream as good (or better!) than anything you can get at the grocery store.  Also, the serving size is just right.  It’s big enough that you can satisfy two kids with this recipe, and get a taste or two for yourself.  But it’s small enough that you won’t beat yourself up if you eat the whole thing yourself!

Becky puts in some sweat equity

Becky puts in some sweat equity

Homemade Strawberry Ice Cream (No Ice Cream Machine Needed!)

Ingredients:

For the Strawberry Puree:

  • 1 pint strawberries
  • 1 tablespoon honey
  • 1/4 cup water

For the Ice Cream:

  • 1 cup half-and-half (or use 1/2 cup whipping cream and 1/2 cup whole milk)
  • 2 tablespoons sugar
  • 1/2 teaspoon vanilla
  • 1/2 cup rock salt or kosher salt (whatever you can find that has big grains of salt, the bigger the better)
  • ice
  • sandwich-sized Ziploc bag
  • gallon-sized Ziploc bag

Directions:

  1. First make the strawberry puree:  Wash, hull, and quarter the strawberries.  Over medium-low heat, mix together the strawberries, honey, and water.  Mash with a wooden spoon or potato masher, but leave some chunks.  Cook on low for about 20 minutes until reduced and thickened a little.  Don’t let it burn!  Take off the heat.  (You can do this the day before, if you want.  Just pop it in the fridge when you’re done letting it cool.)
  2. For the ice cream:  In a bowl, stir together the half-and-half, sugar, and vanilla.  Pour the mixture into the small Ziploc bag and make double sure it’s sealed well.
  3. Fill the large Ziploc bag halfway with ice and the salt.  Add the small bag to the ice, then cover with a little more ice.
  4. Shake!
  5. Shake!
  6. Shake!  (My bag got really cold, really fast, so I had to wrap it in a towel so it didn’t hurt my hands.)  Shake for about ten minutes.  You can squeeze the ice cream bag and tell when it’s frozen.
  7. Serve the vanilla ice cream with the strawberry puree.  Voila!
Sweet success!

Sweet success!


Explore, experiment, enjoy! — Dana


To view even more of Dana’s unique recipe, you can visit her at Frugal Girlmet!

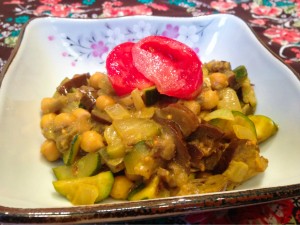
Summer Vegetable Curry

Summer Vegetable Curry resize

If you think about it, there is a lot of overlap between summer produce here in the United States, and what shows up on Indian food menus.  That’s because what grows where it’s hot there is also what grows in the summer here.  Lots of Indian dishes feature zucchini (also called courgettes), onions, eggplants, and tomatoes – all things coming into season now!  Why not try this Summer Vegetable Curry?

You really can’t mess this up or go wrong.  Don’t like garbanzo beans?  Use another bean, or switch them out for green peas or bite-sized green beans.  Like it spicy?  Add some chopped jalapeños or another chili of your choice.  Use whatever curry powder you have.  Out of coconut milk?  Use water or broth instead.  I didn’t have any cilantro, or I would have chopped up a few tablespoons to stir in right before serving.  See?  There is no wrong way.

For a vegetarian meal, double the amount of beans and serve over basmati rice.  Paleo?  Skip the beans altogether and serve this curry as a side dish to your favorite protein.  Ready?  Let’s go!

Summer Vegetable Curry

Ingredients:

  • 1 large onion
  • 2 tablespoons ghee, butter, or oil
  • 1 tablespoon mustard seeds
  • 1 tablespoon cumin seeds
  • 1 tablespoon curry powder (or more, to taste)
  • 1/2  can coconut milk
  • 2 skinny eggplants
  • 3 zucchinis
  • 1 can garbanzo beans or 1 cup of rehydrated and cooked dried garbanzos
  • cilantro, raw tomato, and rice (optional)  for serving

Directions:

  1. In a very large pot, heat the ghee or butter.  Chop the onion and add to the pot, along with the mustard and cumin seeds.  Fry on medium heat for about 5 minutes, until the onion becomes translucent.  Then add the curry powder and coconut milk and reduce heat.
  2. Cut the eggplants and zucchinis into thin half-moons.  Add to the pot, stir to mix, and cover.  Cook over low heat for about 25 minutes until the vegetables are soft, stirring occasionally to ensure nothing sticks to the bottom of the pot.
  3. Taste for seasoning – add salt or more curry powder if you like.  Stir in the garbanzos and heat through.
  4. Serve with chopped tomato and minced cilantro.  Serve over rice if you like.

This is definitely one of those recipes that is even better the next day, and it’s easy to reheat.  Have some for dinner tonight and save some for lunch tomorrow!

Explore, experiment, enjoy! — Dana


To view even more of Dana’s unique recipes, you can visit her at Frugal Girlmet!