November 21, 2024

Twice-Baked Sweets

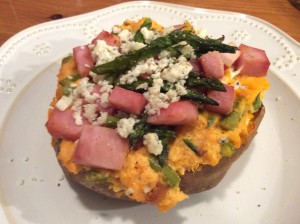
Oh, now this was comfort food!  I guess I was just ‘in a mood’ for something like this—filling, creamy, sweet yet tangy—and it smelled so good!  AND still stayed within the healthy but oh-so-yummy parameters.  This is an easy, quick (minus the baking time for the potatoes) meal to prepare…and could be a simple meatless meal, too.

The “twice-baked” potatoes of my past have been big ol’ russets…with butter a-n-d sour cream.  (how about you?)  The sweet potatoes, while yes, still containing lots of carbs also are high in fiber and lots of good vitamins and minerals i.e., beta-carotene and anti-oxidants.  Enjoy!

2015-10-30 19.46.12

Twice-Baked Sweet Potatoes

ingredients:

2 large – extra large sweet potatoes
1/2 small red onion, diced small
1/2 red or yellow bell pepper, diced small
1/4 – 1/3#  asparagus, trimmed and cut into 1/2-inch pieces
6 ounces ham, diced (I used a ham steak)
1/2 cup Greek yogurt (or sour cream)
4 ounces gorgonzola cheese, crumbled, divided
1/4 teaspoon salt
1/4 teaspoon white or black pepper

directions:

  • bake sweet potatoes at 400 for 35-45 minutes, depending on size ’til soft.  when done, set out to cool for 3 or 4 minutes.  slice off the very tops and, carefully, scoop out the majority of the baked potato. leave the shells to one side and place the filling into a large bowl and mash up.
  • meanwhile, in a large saute pan over medium high heat, heat oil and add the cutup veggies.  cook, stirring occasionally, for 6-8 minutes ’til asparagus pieces are just tender when poked with a sharp knife tip. remove from pan and add to bowl with mashed sweets
  • add the ham chunks to the pan and cook 5 minutes or so, allowing to brown up just a bit
  • add to the bowl with the  veggies
  • add the Greek yogurt along with most of the gorgonzola (save a bit out for topping); mix together completely. season to taste with s&p.
  • place the potato shells into a baking dish and add back the potato mash with veggies and ham (they will be very well-stuffed.)
  • top each stuffed potato with a bit of the remaining cheese
  • place in oven for 10 minutes or so ’til cheese is melting and filling heated piping hot

♥   ♥   ♥   ♥   ♥

God loves you!  ♥  (Don’t ever forget that!)

♥  coleen
Beef Stew…with a Mexican Twist

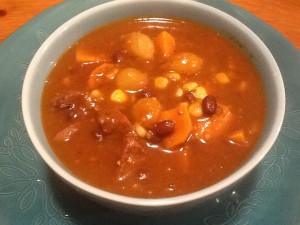
Perhaps Beef Stew sounds as if it would be complicated and difficult to make—just the opposite.  Simple, easy-peasy!  The key is slow-cooking.  You can either let it come together in a crockpot for a few hours or just as easily on the stovetop. Low heat and gentle, slow cooking gives the stew a roasted flavor, and ensures that the meat and veggies are fall-apart tender. And in addition, the liquids will come together into a thick, smooth gravy.  Yumm-O!

This time, instead of the usual stew, I added some salsa verde (yup, the green kind!), sweet potatoes, black beans, and Mexican seasonings.  And I baked some mini-corn muffins for you-know-who to indulge in! It was a great comfort food meal…since we still have frozen solid piles of snow and ice.  This meal fits well into our healthy but oh-so-yummy POV.  I like to make stews using a piece of bottom round steak from the butcher counter.  This cut doesn’t have much extra fat but still becomes tender due to the low heat and gentle simmering for 90 minutes or so.  Then load it up with lots of veggies…healthy and oh-so-yummy!  Enjoy!

2015-02-24 19.46.38

 Mexican Beef Stew

ingredients:

2 tablespoons +/- olive or coconut oil
2 pounds beef stew meat, cut into bite-size chunks
2 tablespoons brown rice flour (optional)
1/2 teaspoon EACH sea salt, freshly ground pepper
3 tablespoons minced garlic (I use jarred)
1 cup dry red wine (or additional broth)
1 quart beef broth
1 cup water
1 jar (10-12 ounces) salsa verde
1 teaspoon +/- ground chipotle pepper
1 teaspoon dried thyme
3 medium sweet potatoes, peeled and chopped into bite-sized chunks
1/2 bag frozen pearl onions
1/2 # baby carrots, sliced in half length-wise
5 ounce can chopped green chilies (optional)
1 (15 ounce) can black beans, drained and rinsed
1 cup frozen sweet corn (optional)
additional sea salt and pepper

directions:

  • heat the oil in a large Dutch oven over medium heat
  • add the 1/2 teaspoon each of salt and pepper to the flour
  • dredge the meat in the flour mixture (if you eat grain free, you could skip this step)
  • brown the meat, working in 3-4 batches, just ‘til the cubes are lightly browned
  • remove meat from pot and set aside
  • lower heat and add garlic to pan drippings; stir constantly for about 1 minute ‘til fragrant
  • increase heat back to medium-high, stir in the wine, and scrape the bottom of the pan to loosen all the bits. allow to simmer ‘til liquid is reduced about half
  • add in the beef broth, the seasonings, and the browned meat cubes; stir well
  • lower heat to a simmer; cover and allow to cook for about an hour ‘til meat is getting tender
  • add in the sweet potatoes and carrots. raise heat, cover, and bring back to a simmer
  • cook for an additional 30 minutes ‘til potatoes are cooked through and the liquids have become a smooth, thick gravy
  • stir in the chopped chilies, black beans (and corn, if using); simmer ’til heated through
  • taste for seasoning
  • (if the ‘gravy’ needs any additional thickening, use 1 tablespoon of cornstarch with equal amount of cold water…stir ’til completely smooth; then pour into hot liquid (your stew) stirring constantly ’til liquid has thickened.  allow to boil for an additional minute.)

    ♥    ♥    ♥    ♥    ♥

    God loves you!  ♥  (Don’t ever forget that!)

    ♥  coleen
Sweet Potato – Spinach Mash

Like many of you, I am sure, we have refocused our healthy eating lifestyle. Preparing and eating LOTS of soup in January was so helpful! One good habit we are working on is having half the plate (or more!) full of veggies. Often that works out just fine. And a side salad is always a good and simple answer. But I find myself desiring some ‘comfort food’ especially during these cold and snowy months. And most of the dishes that I consider ‘comfort food’ don’t easily fall into the ‘healthy but oh-so-yummy’ parameters. However, the other night a recipe came together that fit the bill perfectly!

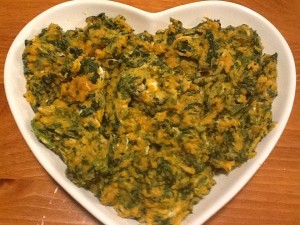
Sweet Potato and Spinach Mash…oh, yeah!

2015-02-03 20.46.17

I think that this is a ‘non’-recipe…you know…a basic idea where you can tweak it using what you have on hand. Like this: the frozen spinach could be switched out for finely sliced fresh spinach or some baby arugula or kale. You could use ricotta or greek yogurt or even cream cheese for the goat cheese. Try some different spices…cinnamon or nutmeg would be good; even your favorite curry spice blend. And I used some leftover baked sweet potatoes…that made it super quick and simple! If you try this recipe, I would love to hear of your variations!  Enjoy!

ingredients:
12 ounce bag frozen chopped spinach
1/2 cup chicken broth
1 teaspoon minced garlic (I use jarred)
1-2 teaspoons dried herbs (thyme or marjoram or tarragon)
6 small baked sweet potatoes, skins removed
additional 1/2 cup broth or milk (use if mixture is too dry)
sea salt, freshly ground pepper (I use lemon-pepper blend)
3-4 ounces goat cheese, crumbled

2015-02-03 20.32.19

directions:

  • place the spinach and broth in a medium-sized saute pan with a lid; cover and bring to a boil, then reduce heat and simmer for 5 minutes
  • stir in the minced garlic, s&p, and herbs
  • add the sweet potatoes and mash the whole mixture together
  • cover again and simmer gently ‘til heated through
  • taste for seasoning, and add in the goat cheese
  • remove from heat and serve

♥  ♥  ♥  ♥ 

God loves you!  ♥  (Don’t ever forget that!)

♥  coleen
Cauliflower Mac and Cheese

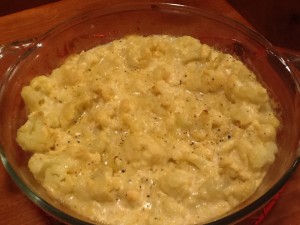
Ok…I am really excited about this recipe…hope you like it, too!  Cauliflower Mac and Cheese!  Oh, yeah.  This has all kinds of tags associated with it: healthy but oh-so-yummy, paleo, low-carb, gluten free, low fat, vegetarian, comfort food (if you think of any additional, let me know, please!).
Here on our Monday installment of At Home w/ GCH, we have been featuring recipes which include Fall in-season fruits and veggies.  This week is our final blog on the subject. Our featured veggie is Cauliflower. Here are some nutritional facts about this ‘superfood.’
“We” love cauliflower here in our household.  I say, “we” because every time I tell my husband, Robert, that I have a new way to fix cauliflower, he never (may I repeat, never) responds enthusiastically.  But I am happy to report that every time (may I repeat, every time) he eats the dish I’ve prepared, his response is always (may I repeat, always) enthusiastic.  Ok—it’s taken me a while to figure this out but apparently the cauliflower dishes he grew up eating were just boiled, (overcooked), soggy, gray cauliflower-yucky!   I trust that if you have had experiences similar to Robert’s, you will try this Cauliflower Mac and Cheese and have a new yummy experience!  Enjoy!

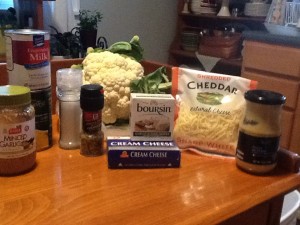
Cauliflower Mac and Cheese2013-11-01 19.11.26

Ingredients:

1 large head cauliflower, cut into small florets
1 can evaporated milk
1/2 cup chicken or vegetable broth 2013-11-01 17.36.09
2 ounces cream cheese, cubed (or goat cheese, or Boursin)
2 teaspoons Dijon mustard
1 tablespoon chopped garlic
1/2 cup shredded sharp Cheddar cheese, plus 1/4 cup for topping the casserole
kosher salt, freshly ground black pepper
1/4 teaspoon nutmeg (freshly grated, if possible)

Directions:

  • Preheat the oven to 375.
  • Bring a large pot of water to a boil, seasoning the water with salt.
  • Lightly grease a 2 quart baking dish with butter or cooking spray.
  • When the water comes to a full boil, toss in the cut-up cauliflower; return to a boil and parboil ‘til crisp-tender, about 5 minutes.
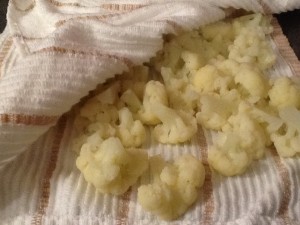
  • Drain well in colander, and then lay out on a clean dishtowel and pat dry. <The drier the cauliflower, the better the cheese sauce will cling to it.>

2013-11-01 18.33.57

  • Transfer the cauliflower to the baking dish and set aside.
  • Bring the evaporated milk and broth to a simmer in a small saucepan over medium low heat.
  • Whisk in the cream cheese, mustard, chopped garlic; continuously whisking ‘til smooth.
  • Add the 1/2 cup of shredded cheese, along with the seasonings and whisk just ‘til the cheese melts, about 2 minutes.
  • Pour the cheese sauce over the cauliflower, and stir gently to combine thoroughly.
  • Top with the remaining 1/4 cup cheese and bake for approximately 15 to 20 minutes. Turn up the oven temp to 425, and bake for 5 additional minutes; just ‘til it begins to brown.
  • Let cool 5 minutes before serving.

♥  ♥  ♥  ♥  ♥

God loves you!  ♥  (Don’t ever forget that!)

♥  coleen

Stuffed Peppers

Here on Mondays on our At Home w/GCH blog we usually focus on recipes that are healthy but oh-so-yummy!  We have been making some very yummy dishes using in-season veggies; and this week will be our last one—Stuffed Peppers.  I actually consider this week’s recipe a nice bridge into the fall as it is such a comfort food dish!  Have you ever made Stuffed Peppers on the stovetop instead of in the oven?  That is how we are doing it this week.  Get yourself some nice firm large green bell peppers…maybe from the Farmers Market, and let’s get started.  Enjoy!

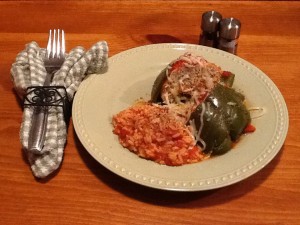
Stove Top Stuffed Peppers2013-09-11 20.06.03

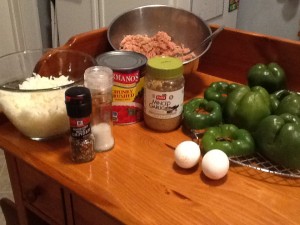
Ingredients:
1 cup rice
1/2 tablespoon butter  2013-09-11 19.05.00
1 cup water
1 cup chicken broth

4 large green bell peppers
1# ground chicken (or turkey or beef)
1/2# raw chicken sausage
1 large egg
kosher salt, freshly ground pepper
3 (or more) tablespoons chopped garlic
1 (28 ounce) can crushed tomatoes
1 cup chicken broth
Shredded cheese, or grated Parmesan (optional)

Directions:

  • In a small saucepan, heat the butter over medium heat.  Add the raw rice, and saute, stirring constantly for one minute.  Carefully add in the liquids and bring quickly to a boil.  Reduce the heat to very low, cover, and let cook (approximately 15 minutes) ‘til all liquid is absorbed.  Empty the cooked rice out onto a plate or pan, and allow to cool.
  • While the rice is cooking, take a large dutch oven (I used an 8 quart pan) and place your peppers in to make sure they fit sitting upright. Once you have the right sized pan, fill 3/4 with water, cover and bring to a boil.  Cut the lids from the peppers (perhaps save the lids to cut up into a salad) and clean them out.  When the water is boiling, put the peppers in for 5-7 minutes depending on how large they are to parboil them.  Carefully remove from the water, and drain upside down.
  • Empty the pot of water, and place back on stove over low heat.  Add the crushed tomatoes, the broth and the remaining 2 tablespoons chopped garlic; bring to a simmer.
  • Meantime, in a large bowl, break up the eggs and add the chopped garlic and the meat; generously season with the salt and pepper; mix thoroughly.  Stir in about half of the cooled rice (save the rest to serve alongside the stuffed peppers).
  • Now to fill the peppers: just before you fill the parboiled peppers, use a knife tip to poke a hole into each of the “bumps” on the pepper bottoms.  This will allow the sauce to ooze up into the peppers while simmering.  Scoop up some of the meat/rice mixture.  Fill them firmly but don’t really pack it down; if you do, it will be too dense when cooked.  Carefully ease the filled peppers–right side up–into the heated tomato sauce.  Take care to sit them up so they won’t fall over…spilling out the meat.
  • Using a large spoon or gravy ladle, scoop up some tomato sauce and pour over each of the filled peppers totally covering the meat.  Increase the heat so that the sauce begins to boil, place a lid on the pot and then reduce the heat to a simmer.  Every 10 minutes or so, again pour a little sauce over the top of each pepper, replacing the lid on the pot.  They should be done in 45 minutes or less, depending on their size.  The meat in the stuffed peppers should be firm when done.  I use a thermometer to verify that they have reached at least 160 degrees, just to be safe.
  • Oh, and add some of the leftover delicious tomato sauce to the rice you set aside; serve that along with the Stuffed Peppers!  Yummy!

♥  ♥  ♥  ♥  ♥

God loves you!  ♥  (Don’t ever forget that!)

♥  coleen
GCH:What’s on Your Plate? – Chicken Shepherd’s Pie with Parmesan Cauliflower Topping

Now that title’s a mouthful, hmmm?  Pun FULLY intended!  My husband loves Shepherd’s Pie—and any variation I can come up with!  And so I indulge him! 🙂  This recipe fits into our healthy but oh-so-yummy category in a couple of ways:

  • it is low-carb (with the absence of mashed potato topping)
  • it  is made with natural ingredients that you can pronounce (as the gravy is made from scratch)
  • it is low in fat/high in protein (using boneless chicken breast as the protein)

This recipe could easily be doubled and baked in an 11 x 13 baking dish.

Chicken Shepherd’s Pie with Parmesan-Cauliflower ToppingIMG_1310

Filling Ingredients:

4 tablespoons olive oil, divided
1# boneless chicken breast, pounded evenly, cut into 1″ cubes
1 sweet (vidalia-type) onion, chopped in pieces about 1/2 inch
4 ounces baby bella mushrooms, wiped clean sliced chunky
2 tablespoons chopped garlic in oil (from a jar)
16 ounce package frozen mixed veggies (your choice), set out to defrost

1 tablespoon butter
2 tablespoons flour
1/4 cup white wine (or broth)
1 + 1/4 cups chicken broth

Topping Ingredients:

1 medium-sized head of cauliflower, cored and chopped into small pieces
1/4 cup milk
1/2 cup finely grated parmesan cheese
salt and freshly ground black pepper to taste

1/3 cup shredded cheese (sharp cheddar, smoked gouda) *use a flavorful cheese

Instructions:

Preheat the oven to 375.  Bring a medium-sized pot of salted water to a boil. Chop cauliflower into small pieces and simmer ‘til  soft enough to mash easily (10-12 minutes). Drain cauliflower very well in colander; place back into pot and  use an immersion blender or hand beater to “mash” the cauliflower with the milk and Parmesan. Season very well with salt and pepper to taste.

While the cauliflower cooks, heat 2 tablespoons of olive oil in a large frying pan and saute the cut-up chicken adding the chopped garlic for the last minute (don’t let garlic burn).  Saute ’til just getting brown but don’t overcook.  Remove pan from stove; set aside cooked chicken.  Wipe frying pan with paper towels to remove bits. Then add 2 additional tablespoons olive oil; heat over medium, and saute chopped onions for 3 minutes.  Add chopped mushrooms and saute for 4-5 minutes more to caramelize.  Reduce heat to low; add 1 tablespoon butter, and sprinkle flour over the mushroom-onion mixture, stirring with a whisk.  Cook this mixture for 3 minutes occasionally scraping the pan.  Then gradually whisk in the wine ’til the mixture is smooth.  Gradually whisk in the  broth and your gravy will come together.  Gently simmer for 5 minutes.  Add back the cooked chicken and the defrosted veggies and heat together for 1-2 minutes.

Spread the chicken-vegetable-gravy mixture in the bottom of an 8 cup casserole dish.  Top with the cauliflower, and spread across the pan almost to the edges.  Bake for 20 minutes, and then top with the grated cheese.  Continuing baking another 10 minutes or so ’til bubbly.  If top is not lightly browned, can be carefully placed under broiler for 2-3 minutes.  Enjoy!

God loves you!  and I do too.  <3 Coleen

GCH: What’s on Your Plate? – Moroccan Vegetable Stew

Let me start off by saying, I have NO idea if this stew actually has anything to do with Morocco. That’s what my Mom called it, and since I never saw the recipe written down, I took her word on it and the name stuck. Apologies if you are of Moroccan descent and you don’t recognize this as something you would ever eat!

Whatever you end up calling this, the fact remains that a simple vegetable stew is always a welcome dinner at our house, especially in the fall. The combination of lentils and butternut squash gets all soft and earthy-sweet, while the green beans add texture. The only things besides veggies are chicken broth (or vegetable broth, if you are vegan) and Madras curry paste.

A quick note about curry (and next week I’ll get into more depth): curry comes from the Indian word “kari”, which simply means “sauce”. There is no one kind of curry – rather, there are hundreds of variations, and you can buy prepared curry in powder, paste, or sauce form. In this recipe, I use Madras curry paste, which is pretty mellow and has a good balance of tangy, spicy, and a little sour. Feel free to use any curry powder or paste you like, but not Thai curry, since most of that is coconut-based.

As far as the veggies you use, feel free to add, subtract, or substitute here. I think diced carrots or tiny cauliflower florets would be good, and you could double up on the tomatoes if you wanted to. If you don’t like lentils, try it with a can of chickpeas instead. Have fun with it!

.
Moroccan Vegetable Stew

Ingredients:

  • 2 tablespoons vegetable oil
  • 1 small butternut squash, or 1 pound fresh butternut squash chunks, cut into 1/2-inch pieces
  • 1 cup lentils, any kind (I used red, but brown or french green work well too)
  • 1 small onion, chopped
  • 1 large potato, any kind, cut into 1/2-inch pieces
  • 1 14-oz. can tomatoes (I like fire-roasted, but any diced tomatoes work)
  • 1 32-oz. carton chicken broth
  • 1 heaping tablespoon Madras curry paste (if using curry powder, use 2 tablespoons)
  • 12 oz. fresh green beans (or frozen) cut into 1-inch pieces
  • salt and pepper to taste

Directions:

  1. Prepare the squash: cut off the peel, remove the seeds, and chop into bite-sized pieces. In a large pot with a lid, heat the vegetable oil, then sauté the squash, onion, and potato for 5 minutes.
  2. Add the lentils and stir to combine, then stir in the tomatoes. Cover with chicken broth – about 1 – 2 cups, just level with the top of the vegetables. Turn the heat to low and let simmer for 30 minutes, stirring occasionally.
  3. Stir in the curry paste and green beans. Make sure the curry gets broken up and doesn’t sink to the bottom of the pot! Add more broth if you need to. Cover and let cook until green beans are just done – you want them to be al dente – about 15 – 25 minutes. If you are using frozen green beans, stir them in frozen, but only cook for 5 or 10 minutes – they shouldn’t be mushy.
  4. Taste for salt and pepper. Add more curry if you like!

If you are a vegetarian, or are making this for Meatless Mondays, serve it with bread and some sliced fruit. You could also make it a side dish, with grilled chicken and a salad. And like most stews, this is even better the next day!

_______________

— Dana Kim (also blogs as the Maven of Make-Do at http://frugalgirlmet.blogspot.com)

GCH:What’s on Your Plate? – Mac and Cheese

Coleen’s Mac & Cheese

Mac and Cheese.  C’mon, who does not like mac and cheese?  I read a poll, and Mac and Cheese was voted overwhelmingly as ‘favorite comfort food!’  Now I am hoping that your favorite version doesn’t come out of a blue box. 😉   But, if it does, perhaps you might try my version and see if it does not convince you to try it versus the blue box, in the future.

This version of Mac & Cheese has lots of veggies hidden in there.  Some of the pasta is made with pureed carrots and tomatoes, and there is butternut squash throughout the cheese sauce.  I love this because it makes the cheese sauce even more colorful causing the eaters to ‘think’ it is more cheesy!  Also, there is only 6 ounces of shredded cheese in the whole dish which helps to ‘healthify’ this recipe.

Have you ever made a white, or Bechamel, sauce?  Well, today you will!  It is very easy, and a great technique to add to your repertoire!  In a future post, I will share some recipes that need a white sauce and by then you will be a pro at making it!

The following recipe makes an abundantly filled 9×13 pan…enough to feed 6-8 hungry folks.  (or, if you have a husband who LOVES leftovers like mine, lunch for 2-3 days.)  This recipe is easily doubled, and I always make a double batch.  A menu suggestion: M&C, steamed broccoli, grilled ham steak.  a big, delicious salad is often our only accompaniment.

Macaroni:
1# box small macaroni (shells, penne)
12-oz box veggie pasta (I used penne made with carrots and tomato) *

Cheese Sauce:
1/2 small onion, diced
2 T butter
2 T flour
1 cup 2 percent milk
1 cup chicken or vegetable broth
2 (10-ounce) packages frozen pureed winter squash, thawed
1/2 cup part-skim ricotta cheese
4-oz sharp Cheddar, shredded (about 1+1/3 cup)
2-oz Monterey jack cheese, shredded (about 2/3 cup)
1 tsp salt, 1 tsp fresh ground pepper
1 tsp ground (dry) mustard

Topping:
2 slices stale bread, crumbled into fine crumbs
2 Tbsp freshly grated Parmesan cheese
1 tsp olive oil

Pre-heat your oven to 375.  Coat a 9 by 13-inch baking pan with small amount of  butter.  Bring a large pot of water to a boil; add 1 tsp of salt and the macaroni;  cook  according to package directions.  Drain in a colander and place back into the  cooled pot (this is where you will mix the macaroni and all that cheesy goodness together!)

Meanwhile, over medium heat, melt the butter in a medium saucepan, adding the  diced onion. Cook ‘til the onion is soft and translucent, approximately 5 minutes.  Then sprinkle the flour over the cooked onion and, using a whisk, stir constantly for  1 minute.  Adjust the heat to very low, and cook for 2-3 minutes to get the starchy taste out of the mixture.  Do not let the mixture brown.

Increase the heat back to  medium and immediately slowly pour in 1/4 cup or so of milk while whisking briskly.  Just keep stirring!  As this is absorbed, continue to slowly add the balance of the  milk in a steady stream, followed by the broth; stirring constantly as the liquid  becomes absorbed.  This will take about 3 minutes.  Adjust the heat lower again and  let this mixture simmer slowly for another 5  minutes, stirring occasionally.  (You  have now made a white sauce!! Congratulations!!!)

At this point, add in the thawed  butternut squash, stirring ‘til it is incorporated, allowing the mixture to come back  to a simmer.  Remove the saucepan from the heat.  Stir in the ricotta, and the  other cheeses, along with the ground mustard, salt & pepper.  Carefully taste (it’s hot!) the  cheese sauce, adjusting for seasoning.

Pour cheese mixture over the macaroni in the large pot and stir gently to combine.  Transfer the macaroni and cheese to the 9×13 baking dish and bake for 20 minutes.  Remove from oven.  Adjust the top rack in the oven to a higher position, and turn  the broiler on.  Combine bread crumbs, Parmesan cheese and oil in a small bowl.  Mix with your fingers; get a little messy!  Then sprinkle over the top of the cooked  mac and cheese.  Carefully place the baking dish back in the oven and broil for 3  minutes.  Keep your eye on it; you want the breadcrumbs to brown but not burn and  for some of the macaroni to get just a little crispy (my husband loves that part!).  Again, carefully remove from the oven…and you are ready to serve!

*here is a link to the type of veggie macaroni I used.  Check it out!

http://barilla.com/content/prodottobarilla/veggie-penne-freshly-pureed-tomatoes-and-carrots

God loves you…and I do, too! <3

Coleen


______________


Are you interested in joining us for one of our Women’s or Teens Online Bible Studies?  Click HERE for more details, and to sign up!