December 23, 2024

At Home with GCH: Homemade Body Scrub

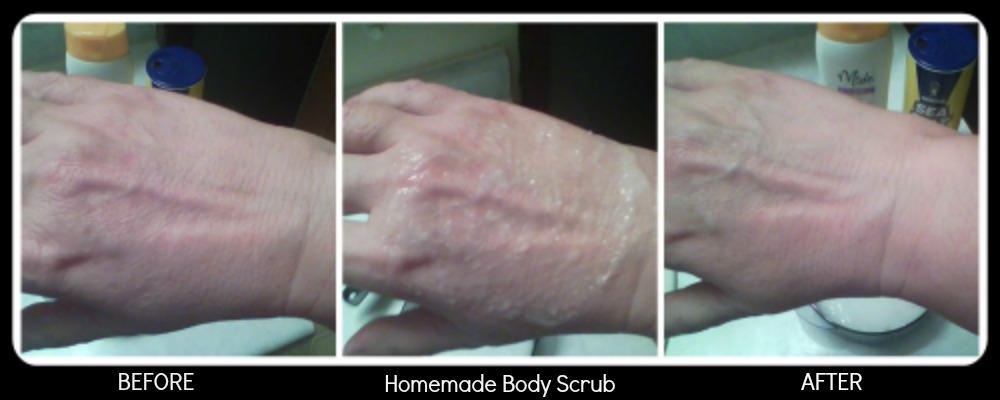
We all know, as women, that Body Scrubs can be expensive; ranging anywhere from $10 to $50+ per bottle!  How about if I show you a way to make a Homemade Body Scrub that costs far less than you would pay for retail?  It’s easy, of course, and it works like a charm!  Why spend top dollar for a product that you can make at home; one that works beautifully!  The proof is in the pictures below.


Homemade Body Scrub

Ingredients:

1/2 cup Sea Salt

1/2 cup Shampoo (I use the 99-cent brand)


Directions:

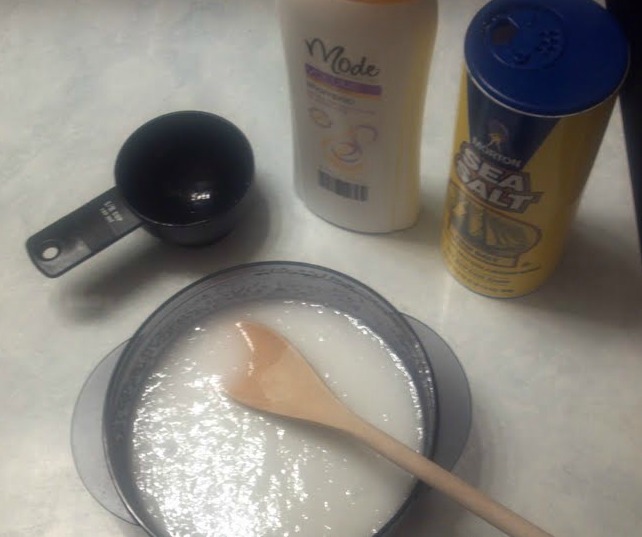
Mix both ingredients together in a small bowl until well blended.

 Ingredients_Mixed


That’s it!  Apply the scrub to a part of your body that is dry or scaly, and needs rejuvenating!  You will definitely see, and feel, a huge difference in your skin after application!  Your skin will not only feel softer, but look a lot younger, too!  It’s definitely a keeper in my bath routine!  I hope you will love it as much as I do!

I hope you will give this a try, and then let me know what you thought of it!  I’m all about things that are EASY, and Cost-Effective!  This recipe definitely fits the bill for both!

 Before_After


Happy Scrubbing!

Christi

*****

If you would like to send an email to Christi in regards to this recipe, you can email her at:

 Christi@girlfriendscoffeehour.com

At Home with GCH: Caprese Salad

Here on our At Home with GCH blog, Monday’s are always focused on healthy but oh-so-yummy! recipes.  This week I am sharing a dish that I often prepare for gatherings—Caprese Salad, aka Fresh Mozzarella and Tomato Salad.  Here we are thick in the season of bridal showers and graduation parties and Mother’s Day  and Father’s Day celebrations.  Today I made this for a bridal shower, and so I multiplied the recipe 4X.  It served over 40 ladies as a side dish on the salads table.  If you are preparing this in advance, add the vinegar and olive oil just prior to serving.

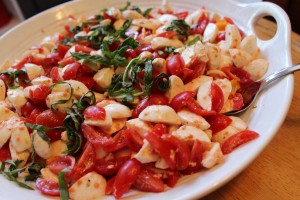
IMG_0222

Caprese Salad

8 ounces fresh mozzarella
1/2 pint grape or cherry tomatoes
basil * (fresh is best); if using dried, 1/2-3/4 teaspoon)
kosher salt, freshly ground black pepper

2 tablespoons balsamic vinegar (I use ‘white’ balsamic)
1-2 teaspoons extra-virgin olive oil

IMG_0220

Easy-peasy!  Depending on the size of the fresh mozzarella you have bought, you might need to cut the balls of mozzarella into small, bite-size pieces; halve the tomatoes, and sprinkle with salt and pepper, to taste.  Thinly slice the basil*.  Add the sliced basil to the seasoned tomatoes and cheese.  Pour a small amount of olive oil and some of the balsamic vinegar over and gently mix. Taste; add more vinegar and olive oil, if necessary.  Serve immediately.

*tip: stack 3-4 basil leaves; tightly roll-up (like a tiny cigar!); then carefully slice into very thin slices. You have now accomplished the technique known as ‘chiffonade!’  You are amazing!  🙂


God loves you!  ♥  (Don’t ever forget that!)

coleen

_________________________________

If you would like to send a personal message to Coleen concerning this series, you may email her at: Coleen@girlfriendscoffeehour.com

At Home with GCH: Broccoli Bacon Salad


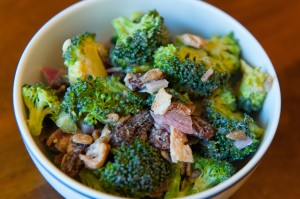
Broccoli Bacon Salad

Bacon!  Did that get your attention?  (My husband’s ears always perk up when he hears that word.)  This salad is a family favorite.  I love vegetables of every kind, but it’s nice to take a break from lettuce-based salads.  You probably have everything you need for this salad at home already.  If not, pick up some broccoli and let’s get to it!

Broccoli Bacon Salad

Ingredients:

  • one pound small broccoli florets, about 7 cups
  • 1/4 cup minced red onion
  • 1/4 cup sunflower seeds
  • 1/4 cup raisins
  • 4 strips bacon
  • 3/4 cup mayonnaise
  • 1 teaspoon lemon juice or apple cider vinegar
  • 1 teaspoon sugar, honey, or other sweetener of choice
  • salt and pepper

Directions:

  1. In a large bowl, gently toss together the broccoli, onion, sunflower seeds, and raisins.
  2. Cook the bacon until done – I like it crunchy rather than chewy.  Drain and dice.  Add to the bowl and combine.
  3. Mix together the mayonnaise, lemon juice, sugar, and salt and pepper.  Pour over the broccoli mix and toss to combine.  Taste for seasoning – I usually add a little more lemon juice over the top.  Chill for an hour before serving.That’s it!  This salad is nice the next day, too, since the broccoli softens up a bit.


Explore, experiment, enjoy! — Dana


To view even more of Dana’s unique recipes, you can visit her at Frugal Girlmet!

Easy Healthy Lunch to Go by Crystal Breaux, Wellness Coach/Fitness Designer


One of the biggest challenges for busy women can be finding the perfect healthy lunch. Packing the same old sandwich or salad every day can become boring and frustrating. When at a loss, it is easy to slip into old habits such as grabbing whatever is available or eating at the mercy of your nearest fast food restaurant. For busy women, we want variety and an easy healthy lunch to go. One of my new favorites is a Black Bean Power Salad.

RECIPE:

• 1 cup whole-kernel corn

• 2 cans (16oz each) of black beans, rinsed and drained

• ¼ cup chopped parsley

• 2 TBS minced red onion

• ¼ cup balsamic vinegar

• 2 TBS olive oil

• 1 tsp lemon juice

• 1 tsp minced garlic

• 1 tsp honey or brown sugar

• Salt and pepper

DIRECTIONS:

In a large bowl, combine the corn, beans, parsley, onions, vinegar, oil, lemon juice, garlic, and honey or brown sugar. Let it marinade for the 30 minutes. Add salt and pepper to taste.

NUTRITIONAL VALUE:

Calories 417.6

Fat 6.9

Sodium 220.3

Protein 21.7

Fiber 21.3

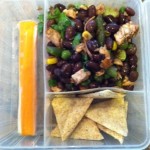
It is so delicious and look at the fiber and protein…..a guarantee to keep you full and satisfied. I make it right after church on Sunday to prepare for my upcoming week. It just takes a few minutes each morning or the night before to pack my easy healthy lunch to go. To add a little more protein, I add any leftover grilled chicken (nutritional value not included with chicken). For variety, I reduce my serving size and add cheese and crackers. All together, here is my lunch to go.

photo (2)

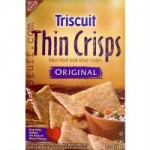
Don’t forget your calories with crackers which can add up quickly. My favorite cracker that gives me the most bang for the buck is Triscuits Thin Crisp. At only 150 calories for 15 crackers, half of a serving is perfect.

TriscuitThinCrispsOriginal8_5oz240g500Combine with string cheese at 80 calories and you Black Bean Power Salad and you have an easy healthy lunch to go.


Eating Healthy, 

Crystal Breaux

Wellness Coach/Fitness Designer


At Home with GCH: Gluten-Free Cornbread Mini-Muffins

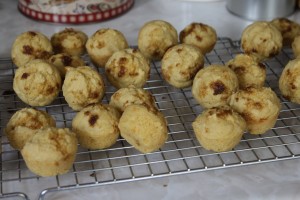
Here on our At Home with GCH blog, Monday’s are always focused on healthy but oh-so-yummy! recipes. This week we are making Gluten-free Cornbread Mini-Muffins.

IMG_0218


They fit right into our healthy but oh-so-yummy category because they are:

  • full of fiber
  • low in sugar—and non-refined sugar, at that!
  • very low in fat
  • gluten-free

Last month, a few friends and I began a journey of reducing excess in our lives.  The first area we tackled was food.  Uh-huh…you read that right.  So, right off the bat, sugar, flour, and caffeine were eliminated.  (Can you say detox?  We did…and it was good!)  I learned many things over those four weeks one of which was that I knew that refined white sugar and wheat flour were permanently removed from our eating lifestyle.  My husband, Robert, and I purged our pantry of all wheat: pasta, cake and cookie mixes, all-purpose wheat flour, crackers, snacks, cookies, and a few stray cans of condensed soup were even found and tossed!

I had been dipping my toe into the gluten-free baking world for awhile.  My daughter, Kassia,  exclusively bakes with gluten-free flours and is a fantastic baker.  She is my hands-on instructor in the field and has taught me so much!  (Thank you, Kassia!!!  Love you!)  So, after purging the bad out…I found I had quite a few basics to get started with.  For those of you considering doing the same, there are any number of really good websites to peruse and follow.  At the bottom of this post, I have listed just a few of my favorites.  These women all are quite knowledgeable, their recipes can be trusted, they are very skilled, and have been baking gluten-free for many years.  Please consider trying a few of their recipes, and wandering around their websites where you can learn and experiment!  Each of them also has tons of valuable information on how to set-up a gluten-free pantry, the types of flours and starches to buy (and why you should consider those particular products).

You will probably be surprised to know that, to get started, you won’t need to go out and spend tons of money…. I would suggest buying a few products that are new to your pantry each week.  Each of the ingredients that I used in this recipe can be purchased at Super Wal-Mart, or Whole Foods, and probably at your favorite grocery store also.  May I suggest, too, that you do not hesitate to purchase some of these products online; I have and will continue to do so.

So, here is this week’s gluten-free recipe.  We are having these with my Veggie Chili…oh, yum!  Enjoy!

Gluten-free Cornbread Mini-Muffins   (makes approximately 32-36)

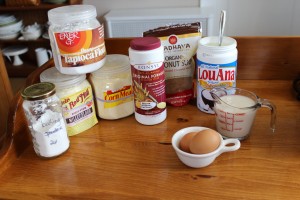
IngredientsIMG_0212
1 cup cornmeal
1/2 cup millet flour
1/2 cup tapioca flour/starch
1 teaspoon xanthan gum
1 teaspoon psyllium husk (unflavored metamucil!)
3 tablespoons sugar, of your choice
1 tablespoon baking powder
1/2 teaspoon salt
2 large eggs
1 cup milk, of your choice
1/4 cup melted butter, slightly cooled

1 tablespoon sugar, to sprinkle (optional)

Directions:
Preheat oven to 425.  Thoroughly grease mini-muffin pan (this recipe makes 30-36).   Melt butter; set aside to cool slightly.  Combine dry ingredients; stir well.  In a small bowl, whisk eggs; then add milk and melted butter.  Whisk together ‘til combined.  Add wet ingredients to dry ingredients.  Stir ‘til smooth but don’t overbeat.  Fill muffin tins 2/3 full.  If desired, sprinkle a tiny bit of sugar over top of batter.  Bake for 12-15 minutes, ‘til just slightly browned and springs back when lightly touched with finger.  Keep your eye on them; don’t overbake.  Cool in pan for 2 minutes.  Loosen by running small spatula around edge.  Remove to cooling rack.  Enjoy plain, or with butter, honey, or marmalade.  Excellent toasted, too!

Here are links to a few of my trusted gluten-free websites:

http://www.elanaspantry.com/

http://simplysugarandglutenfree.com/

http://glutenfreeonashoestring.com/

God loves you!   ♥   (Don’t ever forget that!)

 coleen

_________________________________

If you would like to send a personal message to Coleen concerning this recipe, you may email her at: Coleen@girlfriendscoffeehour.com

At Home with GCH: Two Breakfasts for Health

Kale Sweet Potato Eggs

My Mom always said, “Breakfast is the most important meal of the day.”  Yours too?  It’s actually true!  Breakfast is the meal we should pay the most attention to, because it has the most dramatic affect on our bodies.  You haven’t eaten in ten or twelve hours, and your body is in need of fuel and nutrition!  Are you going to give it a danish and a mocha?  No!  That’s the worst breakfast you can have!  You’ll have an insulin spike, a sugar crash, and a deficit of the things your body wants: protein, a little fat, and slow-release carbs.  The best breakfast?  Eggs and vegetables.

Please check out  Coleen’s recipe for a delicious frittata, or consider these two ideas:  Spinach Scramble, and, Kale and Sweet Potato Hash with Eggs.  A frittata can be made for dinner, with the leftovers reheated for breakfast; both the Spinach Scramble and Kale and Sweet Potato Hash can be made ahead of time, and reheated with eggs added at the end.  All of these breakfast ideas are great ways to start your day, with a big dose of protein, a little healthy fat (which helps your body absorb Vitamins A, D, E, and K) and slow-release carbohydrates to keep your energy levels stable.  Plus, if you make them the night before, you won’t have to think so hard in the morning.  And that’s a good thing!


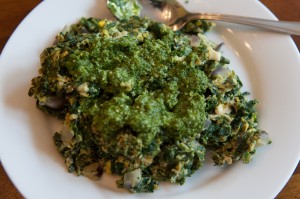
Spinach Scramble with Pesto

Spinach Scramble

Ingredients (per person / per serving):

  • 1/4 red or white onion, minced
  • 1 tablespoon butter
  • 4 oz. frozen chopped spinach (from a one pound bag – just estimate a quarter of the bag)
  • salt and pepper
  • 2 eggs
  • optional:  1 ounce cheese (I like feta or goat cheese), 1 tablespoon pesto, or 1/2 an avocado

Directions:

  1. In a non-stick pan, add the minced onion and butter.  Over medium heat. stir and cook for 2 or 3 minutes until the onion turns translucent.  Add the frozen spinach, stir to combine, and cover with a lid.  Cook for 3 minutes.  Remove lid, stir again, and season with salt and pepper.
  2. In a small bowl, beat the two eggs, then add to the pan.  If you are using cheese, add it now.  Turn down the heat to medium-low and stir to scramble.  Cook for two or three minutes until done.  Serve with pesto or half an avocado, sliced, if you like.  Serve with sliced fruit.

To make ahead:  Mince the whole onion, cook like in Step 1 with 2 tablespoons butter.  Add the whole bag of spinach, cover, and cook until done, about 4 or 5 minutes, stirring to break up any frozen clumps.  Hey, you just made four servings!  Put three-quarters of the pan away in the fridge, and eat one-quarter of the pan with the ingredients in Step 2.  Every day, scoop out a serving of spinach and onions, microwave for one minute until hot, then add to the pan and continue to Step 2.

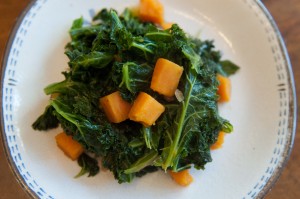
Kale Sweet Potato Hash


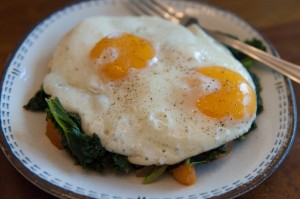
Kale and Sweet Potato Hash with Eggs

Ingredients:

  • 2 sweet potatoes, peeled and chopped into 1/2-inch cubes
  • 1/2 red onion, minced fine
  • 2 tablespoons butter or coconut oil
  • 2 bunches kale, washed, ribs discarded, and torn into small pieces
  • 1/2 teaspoon ground cumin
  • 1/4 teaspoon smoked paprika
  • salt and pepper
  • 2 eggs

Directions:

  1. In a large pan with a lid, cook the sweet potatoes and onion in the butter or coconut oil over medium heat.  After 5 minutes, add a few teaspoons of water and cover with the lid.  Stir every few minutes to make sure nothing sticks, adding more water if necessary.  (I’ve found sometimes I only need to add water once, and sometimes I need to add it again.  Not sure why, maybe some sweet potatoes are drier than others?)  
  2. When you can break up a sweet potato chunk with a rubber spatula or wooden spoon, add the kale and spices.  If your kale is still wet from washing, carry on; if not, add another tablespoon of water.  Cover and cook for 3 minutes, then stir.  Continue to cook until the kale is tender, about 5 more minutes.
  3. You just made 5 servings!  From here, you can serve this as a side dish, or use it as a bed for fried eggs.  To eat for breakfast, reheat about one cup of kale and sweet potatoes on a plate in the microwave, and serve with two eggs, sunny-side up.  Break open the eggs so the yolk coats everything and dig in!


Explore, experiment, enjoy! — Dana


To view even more of Dana’s unique recipes, you can visit her at Frugal Girlmet!

At Home with GCH: “Painted” Mason Jars

I LOVE Mason Jars….there I said it!  It’s off my chest now! 🙂  Mason jars can be so much FUN!    I’ve seen them used for organizing pantries, for holding green smoothies, drill holes in the lid to put a straw in and use it as a drinking glass, change jars, cookie jars, pasta jars, and so much more!  All of those ideas seemed pretty understandable…. But, then I saw this next idea, and I got excited!

I’m so excited to show you this next project!  When I first saw it on Pinterest, I thought “NO WAY….Painted Mason Jars??”  But oh my goodness, just wait until you see just how beautiful this project turns out!

So let’s get to work!


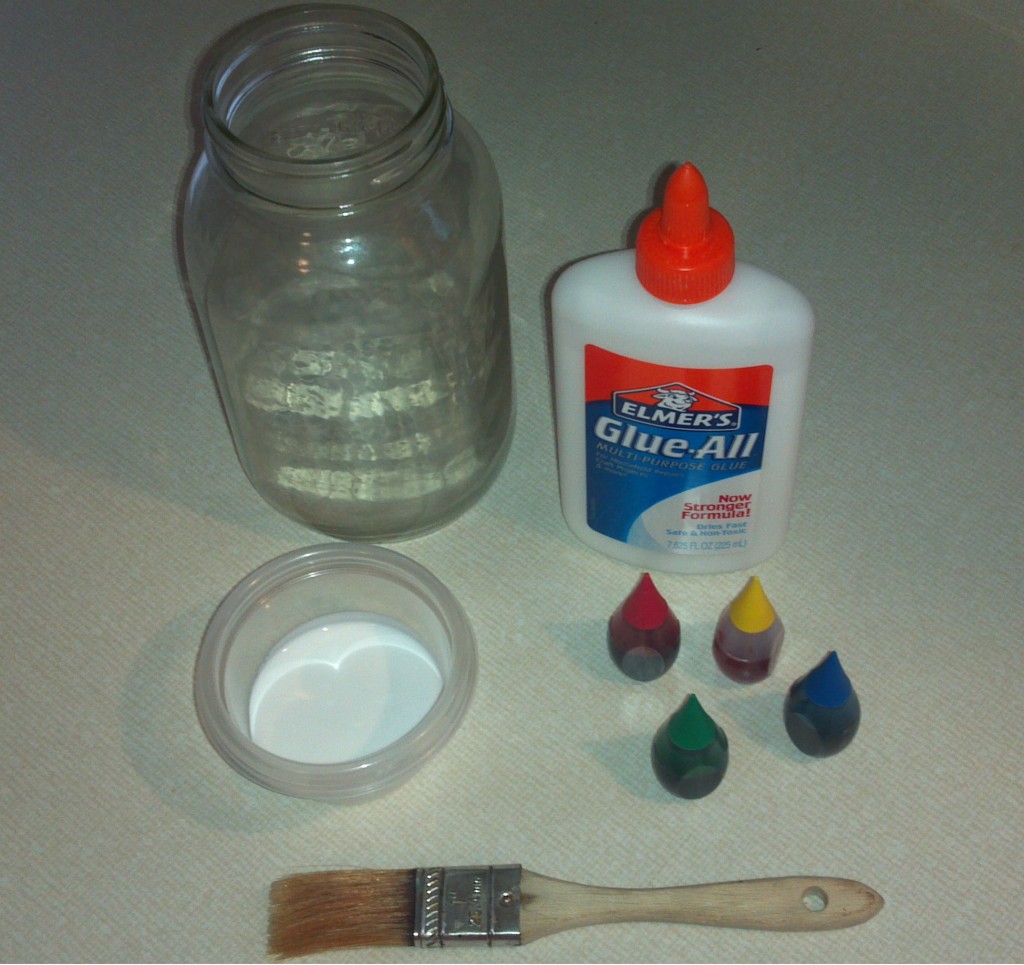
Here is what you will need for this project:  Jar Paint_Ingredients

1 clear glass Mason Jar

½ cup of Elmer’s Glue

5 -10 drops of your favorite food coloring (depending on how dark you want the color)

1-inch paint brush


Jar Paint_Step 1

Directions:

Stir the glue and food coloring together until well blended.  Grab your favorite 1-inch paint brush and then start painting the glue onto the jar.  After the whole jar is covered, set the jar aside and allow drying, and then watch what happens!          


The fun part of this project is that you are not limited to just one color!  Once the jar has dried with the first color, mix up more “paint” using a different food color.  Using a smaller brush, you can take this 2nd color and draw all kinds of squiggly lines, or geometric designs, or circles, or whatever you want onto the jar.  Once again, after you’ve painted the jar, set aside to allow drying.  If you want to add a 3rd color…you know what to do now! 

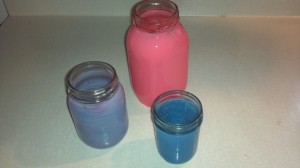
Then to finalize this project, find some amazingly beautiful flowers and viola…you have a perfect homemade vase to hold your beautiful flowers…or whatever else you want to use these jars for.  I love the flowers because, well, I just love fresh flowers, and the jars and flowers together make for a beautiful centerpiece.  If you want, you can use three different jar sizes…make them all different colors and then use as a centerpiece on your table!

Jar Paint_AFTER

Now that you know what you can do with JARS, don’t throw away your old jars.  Save those mayonnaise or pickle jars, and turn them into something beautiful.  I’m sure a friend would love to receive one of these amazingly beautiful jars filled with flowers or candy, or … or … or.  The possibilities are endless!

If you have been following my blog for any length of time, you know that I like projects that are simple!  You can’t get much simpler than this for a beautiful set of jars or a centerpiece!

I’d love to see YOUR projects!  You can email your pictures to me at Christi@girlfriendscoffeehour.com.

Happy Painting!

Christi

_________________________

*Cleaning Tip 1:  Wash your brush out with water as soon as you are finished painting your jar.

**Cleaning Tip 2: As your jars are drying, you will see some of the glue slide down the jar, onto the countertop or whatever you are placing the jars on to dry.  USE PAPER TOWELS TO WIPE THIS UP.  Otherwise, whatever you use will get stained with the food coloring.  (Don’t ask me how I know this!!)   🙂


At Home with GCH: Chicken Shepherds Pie with Cauliflower – Parmesan Topping

Now that title’s a mouthful, hmmm?  Pun FULLY intended!  My husband loves Shepherd’s Pie—and any variation I can come up with!  And so I indulge him!   This recipe fits into our healthy but oh-so-yummy category in a couple of ways:

  • it is low-carb (with the absence of mashed potato topping)
  • it  is made with natural ingredients that you can pronounce (as the gravy is made from scratch)
  • it is low in fat/high in protein (using boneless chicken breast as the protein and just 1/3 cup of shredded cheese and 1/3 cup Parmesan)

This recipe could easily be doubled and baked in an 11 x 13 baking dish.

Chicken Shepherd’s Pie with Parmesan-Cauliflower Topping

2012-12-05 19.56.17

Filling Ingredients:

1 sweet (vidalia-type) onion, chopped in pieces about 1/2 inch
4 ounces baby bella mushrooms, wiped clean sliced chunky
2-3 tablespoons chopped garlic in oil (from a jar)
3+ teaspoons olive oil
1# boneless chicken breast, pounded flat, cut into 1″ cubes

1 tablespoon butter
2 tablespoons flour
1/4 cup white wine (or broth)
1+1/4 cups chicken broth

1 bag frozen mixed vegetables (your choice) set out to defrost

Topping Ingredients:

1 medium-sized head of cauliflower, cored and chopped into small pieces
1/4 cup milk
1/3 cup finely grated parmesan cheese
salt and freshly ground black pepper to taste

1/3 cup shredded cheese (sharp cheddar, smoked gouda) *use a flavorful cheese

Instructions:

Preheat the oven to 375.  Bring a medium-sized pot of salted water to a boil. Chop cauliflower into small pieces and simmer ‘til  soft enough to mash easily (10-12 minutes). Drain cauliflower very well in a colander; place back into pot and  use an immersion blender or hand beater to “mash” the cauliflower with the milk and Parmesan. Season very well with salt and pepper to taste.

While the cauliflower cooks, heat 2 tablespoons of olive oil in a large frying pan and saute the cut-up chicken adding the chopped garlic for the last minute (don’t let the garlic burn).  Saute ’til just getting brown but don’t overcook.  Remove pan from stove; set aside cooked chicken.  Wipe frying pan with paper towels to remove bits. Then add 2 additional tablespoons olive oil; heat over medium, and saute chopped onions for 3 minutes.  Add chopped mushrooms and saute for 4-5 minutes more to caramelize.  Reduce heat to low; add 1 tablespoon butter, and sprinkle flour over the mushroom-onion mixture, stirring with a whisk.  Cook this mixture for 3 minutes occasionally scraping the pan.  Then gradually whisk in the wine ’til the mixture is smooth.  Gradually whisk in the  broth and your gravy will come together.  Gently simmer for 5 minutes.  Add back the cooked chicken and the defrosted veggies and heat together for 1-2 minutes.

Spread the chicken-vegetable-gravy mixture in the bottom of a 8 cup casserole dish.  Top with the cauliflower mixture, and spread across the pan almost to the edges.  Bake for 20 minutes, and then top with the grated cheese.  Continuing baking another 10 minutes or so ’til bubbly.  If top is not lightly browned, can be carefully placed under broiler for 2-3 minutes.  Enjoy!

God loves you!   ♥  (Don’t ever forget that!)

  coleen

______________________

If you would like to send a personal message to Coleen, in regards to this blog, please email her at: Coleen@girlfriendscoffeehour.com.

At Home with GCH: Chicken en Papillote with Pesto

chicken en papillote

I know chicken breasts are good for me.  I know I should eat lots of lean protein.  But sometimes the idea of choking down a dry, mealy, overcooked hunk of chicken makes me shudder.  Yuck!  The trick to cooking chicken breasts is to keep them moist and flavorful, because once they get dry, they’re only good for throwing on top of a salad and drenching with dressing.  So I needed something to keep the moisture locked in.  If you have all day, use a crock pot.  If you only have an hour, use parchment paper!

Cooking something “en papillote” is French for cooking “in paper.”  You might already have parchment paper if you do a lot of baking, but if not, you can find it near the aluminum foil in the baking aisle.  This recipe is infinitely customizable—just use whatever combination of vegetables you like, plus chicken breasts, and some seasoning on top.  Bake for an hour, open and enjoy!

This recipe is even better slathered with homemade pesto.  Basil is pretty easy to grow in the yard, so if you have a garden, you can make pesto this summer!  The recipe has the proportions that I like.  You may want to use less garlic, or more oil, to make a thinner sauce.  Also, most pesto recipes add a little parmesan cheese – maybe a tablespoon, grated – to the mix; but I left it out since I am still eating on the Paleo diet.  If you have leftovers, pesto goes great over pasta of any kind.  I had a little pesto leftover and I ate it on scrambled eggs – delicious!

pesto


Chicken en Papillote with Pesto

Ingredients:

  • 4 boneless, skinless chicken breasts
  • 1 cup baby carrots
  • 2 large zucchini, cut the same size as the baby carrots
  • salt and pepper
  • 2 teaspoons butter

For the pesto:

  • 2 cups basil leaves
  • 2 cloves garlic
  • 1/4 – 1/2 cup olive oil
  • 2 tablespoons pine nuts (keep in the freezer so they won’t go rancid)
  • 1 lemon
  • salt and pepper

Directions:

  1. Preheat the oven to 400*F.  Cut two pieces of parchment paper, about 12 x 24 inches.  Fold them in half width-wise, then open.  On one half of the paper, make a bed of half the carrots and zucchini slices; repeat on the second paper.  Season with salt and pepper.  Top each bed of vegetables with two chicken breasts, and season with salt and pepper again.  Divide the butter and drop half a teaspoon of butter on each chicken breast.
  2. Fold the paper in half, to cover the chicken.  Now you should have an envelope or packet.  Fold over the long end a few times, then make a triangular fold at each of the corners.  Now fold over the two short ends several times.  (There are many ways you can fold the paper to keep it shut.  I’ve even gotten frustrated before and stapled them shut!  Here are some ideas for folding the paper.)  When you have the two packets closed up, place on a cookie sheet and put them in the oven.  Cook for one hour, rotating the cookie sheet halfway through to make sure the packets cook evenly.

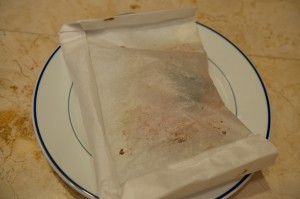
papillote packet


  1. While the chicken is cooking, make the pesto:  In a food processor, blend the basil leaves, garlic, and 1/4 cup of olive oil.  Scrape down the sides, add the pine nuts, and blend again.  Scrape down the sides again, cut the lemon in half, and add the juice to the pesto.  If you want the pesto thinner, add more oil.  Taste…if you want a stronger lemon flavor, you can add the zest from the lemon too.  If you are adding parmesan cheese, now is the time!  Blend again.
  2. To serve, open the packets—carefully!  Don’t get burned on the steam!  You can put the packets on a plate, or open them in the kitchen and throw out the paper if you like.  Pass the pesto!

Explore, experiment, enjoy! — Dana


To view even more of Dana’s unique recipes, you can visit her at Frugal Girlmet!

A Snack Schedule to Help Keep You Healthy by Crystal Breaux, Wellness Coach/Fitness Designer

Have you ever rushed out the door in the morning with nothing more than a mug of coffee in hand? Then when hunger hits, you discover you are at the mercy of someone or something else for something to eat.  You may even decide to skip a snack which only slows down your metabolism and leaves you famished at your next meal with no control over what you eat.

One of the biggest pitfalls I see with women is not planning healthy snacks. Snacks can be the key in weight management by helping you:

  • Meet your daily nutrient requirements
  • Regulate your metabolism
  • Keep you from overeating at your next meal

I believe conquering this ONE behavior—creating a snack schedule—can lead to a lifetime of weight management and feeling at peace with food.  If the right snacks are not chosen, it can lead to feeling unsatisfied by eating empty, unnecessary calories.

Building My Snack Schedule

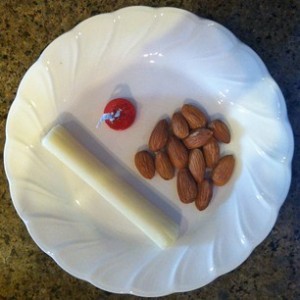
I like to build my snacks around nutrient dense foods (foods that have a lot of nutrients) but relatively few calories. At times, I may combine them with a smaller serving of something that is less nutritious.   For example, I love a handful of nuts, string cheese and end with a Hershey’s Kiss.

 cheese almond kiss


Sound crazy? The nuts and cheese are nutrient dense, and the Kiss fills my desire for chocolate. I am not tempted to over indulge because I am satisfied and have built my sweet “treat” into my daily requirement.

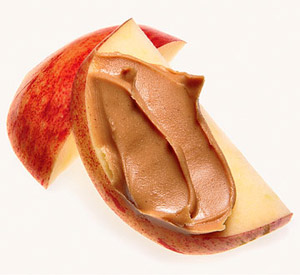
Another favorite is 1 tablespoon of peanut butter with a banana or apple.


 apple and peanut butter


Daily Motivation

My prayer each day is that I view what I eat and how I exercise the same way I do other areas in my life.  It is a way to honor God.

The Bible says in I Corinthians 10:31: So whether you eat or drink or whatever you do, do it all for the glory of God.   

Of course, I am not perfect. There are plenty of times I eat things that were not the best choice; but I take it as an opportunity to give myself a little grace and learn how to do it differently the next time. Have you ever thought about how you eat as a way to bring honor to God? It may give you a new motivation for eating healthy that may include planning a snack schedule.