November 25, 2024

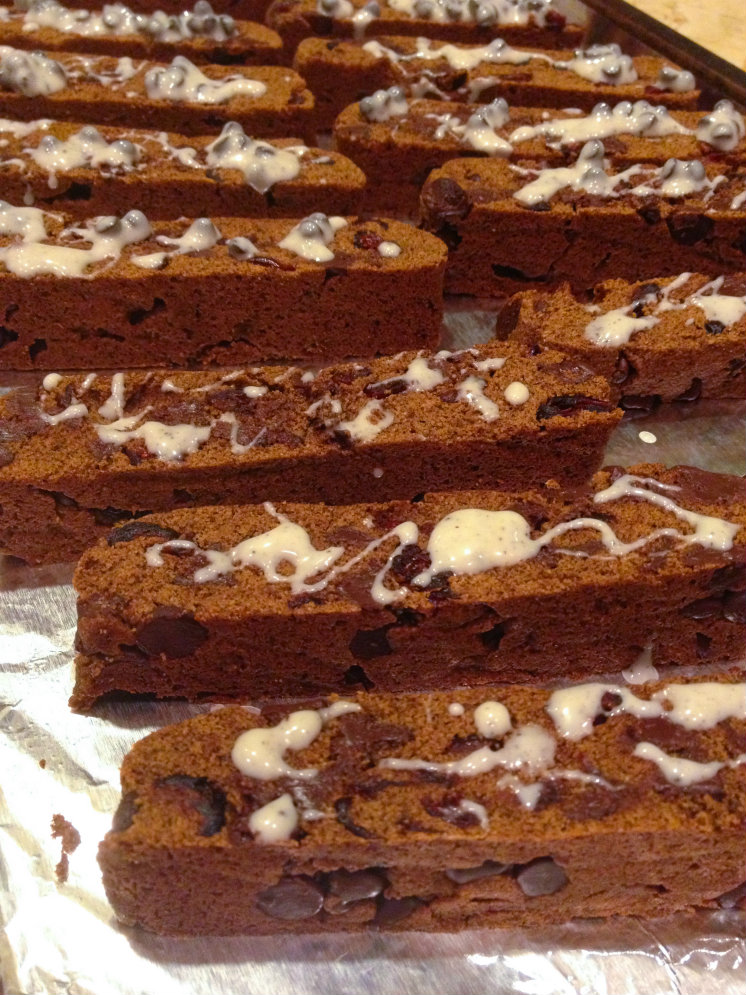
Chocolate Cranberry Quinoa Biscotti

CCQ Biscotti Close Tray resize

Girlfriends Coffee Hour runs on prayer and  coffee, and sometimes coffee needs biscotti!  If you’ve ever paid $2 for a biscotti at your local coffee shop and thought, “It can’t be that hard to make these,” you are right!  This recipe for Chocolate Cranberry Quinoa Biscotti takes a few extra steps, but if you are looking for a gluten-free, nut-free treat for your afternoon coffee break, read on!

I was looking for nut-free biscotti recipes online, and I found one using quinoa flour, which I’d never heard of or used.  Time to experiment!  It turns out that quinoa flour is incredibly easy to make, and exceeds wheat flour in fiber, protein, and nutrients.  If you don’t want to make your own at home, I understand – you can find it in health food stores and online, and Bob’s Red Mill makes it (I really like and trust their products.)  I used red quinoa, so the biscotti has a darker color, but feel free to use the regular white kind.  To make quinoa flour at home, pour one cup of quinoa on a baking sheet and bake for 12-15 minutes at 300*F.   When cool, grind in a spice grinder, grain mill, or superpowerful blender.  I have a hand-crank grain mill that made short work of the job!  One cup of dry quinoa will yield one and a quarter to one and a third cups of flour.  If you don’t want to go through the trouble, you can use regular or whole wheat flour instead.

Everything else in this recipe is pretty customizable.  Don’t like chocolate chips?  Leave them out or use white chocolate or even butterscotch chips.  Add in any kind of nut, like almonds, pecans or pistachios.  Replace the dried cranberries with cherries, apricots, or just lemon zest.  Drizzle with white or dark chocolate.  These make great gifts, too, because they are pretty hearty and don’t get stale too quickly.  After rigorous and exhaustive testing, I can report that these stand up well to dunking in coffee.  The things I do for you ladies!  😉

If you have a friend who loves coffee, make these as a treat for her (and keep a few for yourself!)


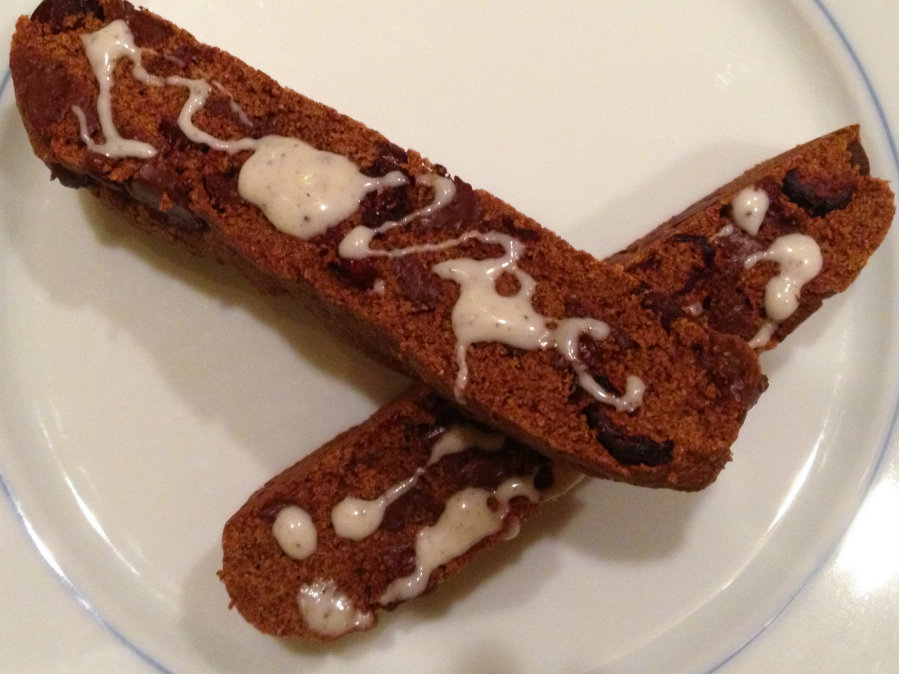
CCQ Biscotti Close up Resize

Chocolate Cranberry Quinoa Biscotti

Ingredients:

  • 1+ 1/3 cups quinoa flour (you can use whole wheat flour instead)
  • 2 tablespoons coconut flour
  • 1 teaspoon baking powder
  • 1/4 teaspoon salt
  • 2 eggs
  • 1/4 cup melted coconut oil (or use butter)
  • 2 teaspoons vanilla extract
  • 3/4 cup coconut sugar (or use brown sugar)
  • 3/4 cup dried cranberries (or cherries or diced apricots)
  • 3/4 cup chocolate chips
  • White chocolate for drizzling (Confession:  I was out of white chocolate, but I found a cookies and cream white chocolate bar that fit the bill.)

Directions:

  1. Preheat oven to 300*F.  Line a baking sheet with parchment paper.
  2. Combine quinoa flour, coconut flour, baking powder, and salt in a bowl.
  3. In a large bowl, combine the eggs, coconut oil, vanilla, and coconut sugar together.  Mix well, then stir in chocolate chips and cranberries.  Stir in the flour mixture a little at a time until thoroughly combined.
  4. Turn the dough out onto the parchment, and using damp hands, mold into a log that measures about 4 or 5 inches wide, one inch high, and about 15 inches long.  Bake until firm, about 25 minutes.
  5. Remove pan from oven, then pick up the parchment with the biscotti log on it, and let it cool on a rack.  You want this cooled to room temperature, so it won’t crumble too much.  With a serrated knife, slice the log into 1/2 inch biscotti.
  6. Place the biscotti back on the baking sheet and bake for about 15 minutes until dry and crunchy.  Let cool completely, then drizzle with white chocolate.  Store in an airtight container to keep them crisp.

Explore, experiment, enjoy! — Dana


To view even more of Dana’s unique recipe, you can visit her at Frugal Girlmet!
{Dairy Free} Cranberry and Cocoa ‘Nib’ Oatmeal Cookies

My inspiration cookie recipe for today is found here, and is one of my own creations. The cookie recipe listed below underwent a few changes, but the basic idea is the same. Enjoy!

{Dairy Free} Cranberry and Cocoa 'Nib' Oatmeal Cookies www.GirlfriendsCoffeeHour.com #christmascookies

Ingredients List

  • 1/4 cup pure maple syrup
  • 1/2 cup granulated sugar
  • 1 cup coconut oil OR Earth Balance
  • 2 eggs
  • 1 tsp vanilla
  • 1 1/2 cups all purpose flour
  • 1/2 tsp salt
  • 1 tsp baking soda
  • 3 cups steel-cut oats
  • 1/2 cup cocoa ‘nibs’ (Can’t find nibs in your area? Substitute chocolate chips or walnuts for a slightly different texture and flavor!)
  • 3/4 cup fresh or frozen cranberries

Preparation Instructions

  1. Maple syrup, sugar, and coconut oil (or Earth Balance) should be placed in mixer bowl and blended well.
  2. Add eggs and vanilla. Briefly mix again.
  3. Add all dry ingredients to bowl. Mix well.
  4. Remove mixer bowl from stand and add berries and cocoa ‘nibs’.
  5. Stir until just combined.
  6. Measure dough onto sheet pans by rounded tablespoon.
  7. Bake in 350 degree oven for 12 to 15 minutes.
  8. Let cool on wire racks.

Enjoy these cookies with a cold glass of milk (dairy free or regular, your choice!) or a hot cup of coffee. Delicious and healthy!

Pignoli Cookies

One of the ways I like to mix up the variety of baked goodies included on a cookie platter is to include some cookies traditionally made in other countries.  Spritz cookies from the Scandanavian region, and Pfefferneuse from Germany, and French Madelines are among the varieties that we enjoy!  But the following cookies are a must-have!

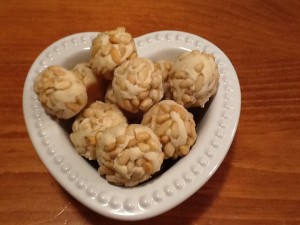
Pignoli (pronounce it peen-yO-lee) cookies…a traditional Italian cookie. Their name comes from the delicious tiny pine nuts that are the outer layer of these yummy cookies.  Have you ever had one?  They are very decadent  with a softish, creamy almond paste middle and a slightly crunchy exterior surrounded by those delectable pine nuts. And these are very easy to put together. They are a tiny mouthful and so cute with all those toasted pine nuts on the outside. I think that they are a must for our cookie platter!  Be sure to hide a couple away for yourself!  They disappear quickly!

2013-12-18 00.20.30

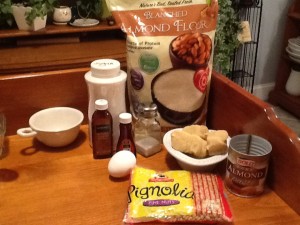
These little morsels have a pronounced almond flavor that comes from the hit of almond three ways: the almond paste, almond extract, and almond flour. They are gluten free, grain free, dairy free but not sugar free!  You can bake them to be just a little on the softer side, so that just the outsides are crisp and the insides are super soft and moist; or, the way my husband, Robert, likes them—a little crispier and chewier by baking just 2-3 minutes longer.  Just keep an eye on them…the pine nuts can burn…you DEFINITELY do not want that!   Enjoy!

Pignoli Cookies

Ingredients:
1 can almond paste  *** 2013-12-17 22.49.02
1/4 cup granulated sugar
1/8 teaspoon salt
1/2 teaspoon almond extract
1/2 teaspooon vanilla extract
1/2 cup blanched almond flour
1 extra-large egg white, lightly beaten
6 ounces pine nuts
confectioners (powdered) sugar, optional

*** be sure to purchase almond paste not pie filling

Directions:

  • preheat oven to 325
  • line a baking sheet with parchment paper
  • place the nuts onto a dinner plate
  • in a food processor, break up the almond paste into small pieces, and pulse with the sugar, salt, and almond flour
  • once the mixture is finely ground, slowly add the extracts and egg white just ‘til the dough comes together
  • dump the dough onto a piece of waxed paper
  • use a tablespoon measure to figure out the correct amount of dough and then pinch off pieces this size dropping them into the nuts (keeping your fingertips just slightly wet helps so much!)
  • then, working quickly, roll a piece of dough covered with nuts into a small ball and place it on the lined baking sheet
  • form all of the dough into cookies in this manner, placing them 1+1/2 inches apart
  • bake the cookies 20 to 25 minutes
  • remove from oven and allow to cool 5 minutes on pan and then completely cool on a rack
  • optional: dust with confectioners sugar before serving

   ♥  ♥  ♥ 

God loves you!  ♥  (Don’t ever forget that!)

Merry Christmas to you and your loved ones!

♥  coleen

Christmas Strawberry Spinach Salad

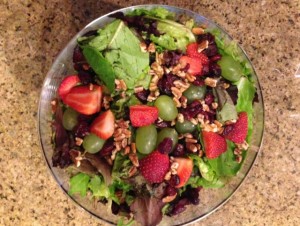
It is no secret what I will bring when asked to provide a salad for any social gathering.  It is a party favorite, delicious AND a nice change from your standard salad.  It has actually been a staple for me this holiday season and provides a little color and healthy option to fill your plate and leave room for a few treats. Not only is it a great option for dinner parties, but this Strawberry Spinach Salad is my favorite for weekday lunches with leftover grilled chicken.

There are no specific measurements—just throw in the amount of your favorites depending on the  number of servings you have planned.

  • Bunch of Mixed greens or Spinach
  • Sliced Strawberries
  • Grapes
  • Avocados
  • Dried cranberries
  • Sliced almonds or pecans
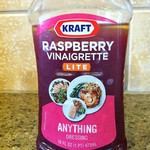
  • Lite Raspberry Vinaigrette Dressing

Mix all together and top with cheese such as mozzarella or feta (optional).

straberry salad

If you want to use for a quick lunches, prepare all ingredients ahead of time without the nuts  and add a couple of tablespoons of them right before eating.  The Raspberry Vinaigrette is not only delicious, but does not need to stay refrigerated so it is easy to pack and carry with you for a lunch to go.

salad dressing

To avoid extra pounds this Christmas, bring this as your healthy option to any gathering.  Fill your plate with this delicious, low-calorie salad to save a little room for those not-so-healthy options that you might choose to indulge in. Allow the salad to be your filler and enjoy smaller portions of your favorite holiday treats.  But I have to warn you, this Strawberry Spinach Salad may just become your favorite!


In Good Health,

Crystal

Cookie Week – GF Chocolate Chip Cookies

2013-12-15 23.12.46

Cookies.  A lovely tradition of giving during the Christmas holidays.  There are cookies to make for exchanges.  There are cookies to make to fill tins and baskets that are given to friends and loved ones.  There are cookies to make for the cookie monsters in your own home! (I have one of those…do you, too?)

Our own Dana, Wendy, Amy (and me!) who blog here for At Home w/ GCH are each sharing a favorite cookie recipe!  Dana started us off last Friday with her Monkey Bites (Paleo Banana Chocolate Chip cookies).  They looked so moist and yummy!  And today I am sharing Gluten Free Chocolate Chip cookies. *See below for adaptation for a dairy-free version.*  Can’t wait to see Wendy and Amy’s delicious contributions later in the week, too!

AND…we will be having a ‘virtual’ cookie exchange over among our Girlfriends Coffee Hour – Fellowship group.  Come join us Tuesday through Friday as our sisters post a picture of their own homemade cookies…and possibly share their recipe, too!

My recipe for Gluten-Free Chocolate Chip Cookies starts off with putting together a basic mix.  I would strongly suggest doubling the ingredients so that you can make a batch AND have the basics mix set to go to quickly throw together another batch!  Or perhaps you could take the second batch and put into a large Mason jar and gift someone with it!  Just sayin’!!!

Gluten Free Chocolate Chip Cookie Mix2013-12-15 21.10.34

(makes approximately 4 cups; enough for 4 dozen cookies)

Ingredients:
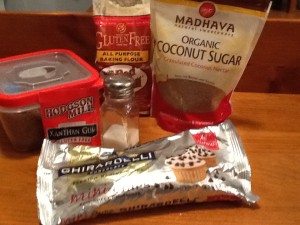
2+1/4 cups good quality all-purpose gluten-free flour blend
1 teaspoon baking soda
1 teaspoon xanthan gum
1/2 teaspoon salt
3/4 cup dark brown sugar
3/4 cup coconut sugar
12 ounce bag semi-sweet chocolate chips

Directions:

Place all ingredients (NOT the chocolate chips) into a large bowl and whisk together well.  If using immediately, pour in the chocolate chips.  If not, pour the mix into a storage jar and add the chocolate chips right on top.  Seal well.

Gluten Free Chocolate Chip Cookies

Ingredients:2013-12-15 21.25.04
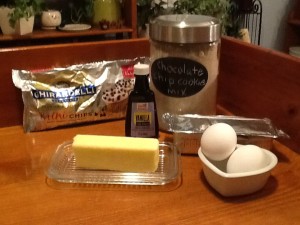
1 batch of above GF Chocolate Chip Cookie Mix
8 tablespoons butter (unsalted), room temperature
2 extra-large eggs, room temperature
1+1/2 teaspoons vanilla extract (NOT imitation, please!)

Directions:

  • Preheat oven to 325.  Line two (2) large baking sheets with parchment paper; set aside.
  • Beat together the room temperature butter and eggs to thoroughly incorporate; stir in the vanilla.
  • Pour 4 cups (or one batch) of the cookie mix into a very large bowl.  Stir in the liquid ingredients and thoroughly blend.
  • Drop balls of dough (approximately 1+1/4″) onto the prepared baking sheets.  Place the baking sheets (one at a time) into the freezer for 5 minutes to firm up.
  • After the chill time, put cookies (one sheet at a time) into the oven.  Bake for 12-14 minutes (depending on the size of your cookie balls) or ‘til the bottoms are beginning to brown.
  • Remove from the oven.  (I carefully remove the cookies ON the parchment paper from the cookie sheet directly onto a cooling rack—works beautifully!)
  • Store in an airtight tin or jar.  Enjoy!

*To make these cookies dairy-free, simply substitute 1 stick of butter-flavor shortening for the 8 tablespoons of butter; and purchase chocolate chips with no milk or milk products.  I use the Ghiradelli or the Enjoy Life brands.

 ♥  ♥  ♥  ♥  ♥

God loves you ♥  (Don’t ever forget that!)

Merry Christmas from mr. hayden and i!

♥  coleen

Christmas Crafts and Coloring Fun with Preschoolers

As we near Christmas Day, our family has finally begun to decorate our home a bit. We spent some time over the weekend putting up wreaths and digging out our ornaments in preparation for decorating our tree. One part of the excitement of Christmas for my 3 and 4 year olds has been the opportunity to make their own ornaments and decorate their own little personal tree for their room. Now, I have never considered myself to be a crafty kind of mom. However, I do what I must for my little girls, so we pulled out construction paper, scissors, plain white paper, crayons, and began creating!

Christmas Crafts and Coloring Fun with Preschoolers www.GirlfriendsCoffeeHour.com #christmascrafts

What we came up with was fairly simple.

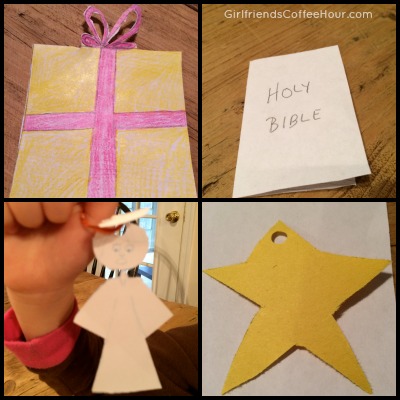
  1. The gift you see above was simply a square with my feeble attempts at drawing a bow on top. If you are that crafty mom, then I am sure you could use pretty craft papers and cutting tools to make a much more beautiful gift than this one, but I think you at least get the idea. My children were very pleased with the result, and my 3 year old, especially, was thrilled to see “a little present” on their tree when she entered the bedroom.
  2. Next you can see that I made a tiny Holy Bible. It would have been nicer if I had used black construction paper and perhaps cut out tiny letters in gold to spell out the title. However, I was making use of the scraps we had leftover from the project immediately preceding this activity, so we ended up with a very plain Bible for the tree.
  3. This sweet little angel is the ornament of which I am most proud. I have never claimed to be an artist, but as I began to sketch, it wasn’t as difficult as I had expected. I basically drew a head attached to a choir robe, then attached one more circle up top to act as the halo (bend so it will ‘hover’ over the angel’s head). Maybe you could be a bit more creative? Use yellow construction paper or some sort of ribbon to create a pretty halo or spend some time coloring the hair. For me, just getting it done was the priority, because my little ones were more interested in hanging the items on their tree than in how ‘prettied up’ they were. I have hopes that, as the years pass, we can continue making ornaments and get a bit more elaborate with our creations. We shall see. I may become that crafty mom yet!
  4. The last ornament is a yellow star. My 3 year old adores the color yellow and stars, so this is obviously her favorite kind of ornament. I drew a 5-point star. Some of you may be able to simply cut one out of the construction paper but my attempt at that did not turn out well. A fun addition to this would be some gold glitter glue. Then your star will sparkle when any sort of light hits it!

For all of the ornaments we created, I used a simple single hole punch to create a hole at the top, and then used bread ties as hangers. That was my 4 year old’s idea. Brilliant!

Christmas Crafts and Coloring Fun with Preschoolers www.GirlfriendsCoffeeHour.com #christmascrafts

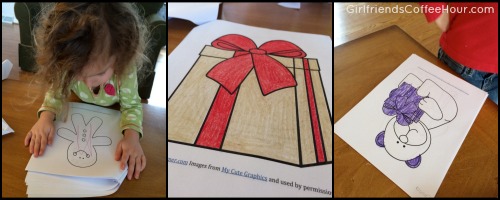
Another activity we have enjoyed is coloring together. I have always loved this particular activity, and I have made a point to sit down with all of my children at times to be a part of this bit of fun with them. Since it is the Christmas season, we have been coloring Christmas-themed pages that I created. I’ve listed those below for you, as well as a few free printables from others, in case you would like to do the same with your own children (many can also be used with older children!).

FREE Christmas Coloring Pages

Free 12 Days of Christmas Pack

FREE Printable Writing Prompt

Free Nativity PreK-K Printable Pack (Limited Time)

FREE Copy Work~ Sing Unto the Lord!

FREE Christmas PreK/K pack {Updated and Expanded}

Need more ideas for making this season fun and meaningful for your preschool children?

  • take a field trip to a Christmas tree farm
  • pick up Christmas-themed books from the local bookstore or library (try One December Night, brand new on Amazon and written by a friend of mine!)
  • bake sugar cookies and decorate (and eat!) them together
  • help your child pick out gifts for siblings or his other parent/grandparents and wrap them together
  • read the Christmas story from the Bible, discussing together how Jesus is the TRUE Gift of Christmas

Are you a crafty mom? What kinds of fun and meaningful activities do you do during this season with your children?  Please share in the comments! 


Yummy Christmas Candy

photo3

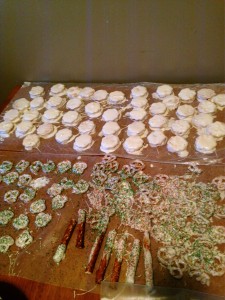
My sister, Nicole, and our kids and I made some delicious, easy, and kid-friendly Christmas treats this weekend. You just need a few simple ingredients and you are ready to go.


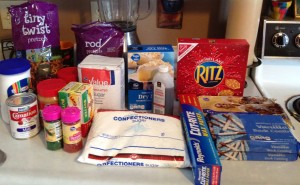
Items Needed: photo2

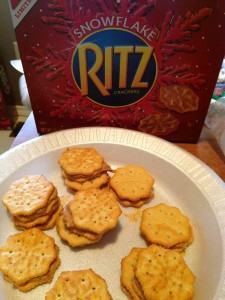
Snowflake Ritz crackers
Creamy Peanut Butter
Pretzels – 2 types: Rods and Tiny Twists
White Chocolate Bark – 2 Packages
Red and Green Sprinkles

Wax Paper


Directions:

  • First make peanut butter sandwiches out of your Ritz crackers and Peanut Butter photo1
  • Second, lay down wax paper on the table or cabinet to place the candy for drying.
  • Next, melt your white chocolate in the microwave or on the stove top. Make sure you stir thoroughly during the melting process. We used two packages for all of the candy we made. We melted each package separately to make the melting process easier.
  • Once the chocolate is melted, put the peanut butter sandwiches in the chocolate and remove with a spoon once it is coated. Do the same thing with the pretzel twists. For the pretzel rods, break in half, and just dip the tip into the chocolate.
  • Place the candy on wax paper.
  • Now, sprinkle the pretzels with either the red or green sprinkles of your choice.
  • Let the chocolate harden and enjoy this tasty treat.

Happy Candy Making!

Amy

Cream of ‘Just About Anything’ Soup and Sauce Mix

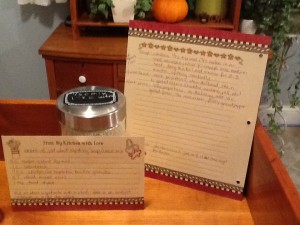
2013-12-08 20.35.59So, if you are like me, you are in the thick-of-it-all…the sewing/knitting/painting of gifts; the baking of cookies (and more cookies); the caroling and school concerts; the shopping (online AND out in the stores); and the wrapping of all these treasures you have shopped for and made with love!  But supper is still expected (I KNOW, right?) on our tables each evening by our loved ones.  Most of us really don’t want to be going through the drive-thru and bringing home ‘less than the best’ to feed our families.  However, time escapes us some days and we have not prepared for suppertime!

2013-12-08 21.36.25


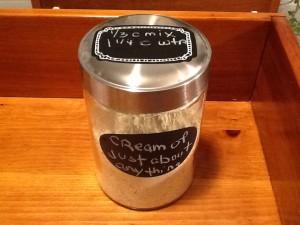
One great solution to this dilemma is to put together a yummy CrockPot meal early in the day.  At this time of year, my CrockPot remains out on the counter…handy and ready to be filled with yummy goodness.  However, I find that many recipes designed for the CrockPot call for a can of condensed soup of one variety or another.  And that creates a problem in our household: 1) canned condensed soup contains wheat (we eat gluten free, remember), and 2) there is just too much sodium (and a few other not-so-good-for-you ingredients) in a can of condensed soup.  Below is a recipe for a mix you can put together and keep in your pantry (OR gift to someone else in a cute little jar with a label giving directions).  Here, too, is a link to a great resource for quite a few ways to use thisCream of Just About Anything’ soup and sauce mix.  Enjoy!

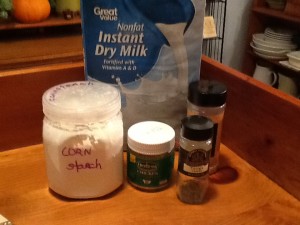
Ingredients: 2013-12-08 20.23.15
3 cups nonfat instant dry milk
1 cup cornstarch
1/3 cup chicken bouillon granules
2 tablespoons dried minced onion
1 teaspoon dried thyme

Directions:

  • Mix all the above ingredients in a large bowl with a whisk.
  • Store in an airtight container in a cool dry place.

On our menu for this week are two recipes using the CrockPot and a portion of this healthy but oh-so-yummy ‘cream of just about anything’ soup.  One will be Chicken and Mushrooms in Wine Sauce and the other will be Beef Stroganoff.  How about you?  Are you already planning on utilizing your CrockPot to save you time but still feed your loved ones a yummy, healthy, satisfying meal?  Please share with us about what’s on your menu this week in the comments below!

 ♥  ♥  ♥  ♥  ♥

God loves you ♥  (Don’t ever forget that!)

♥  coleen

Roasted Red Pepper Aioli

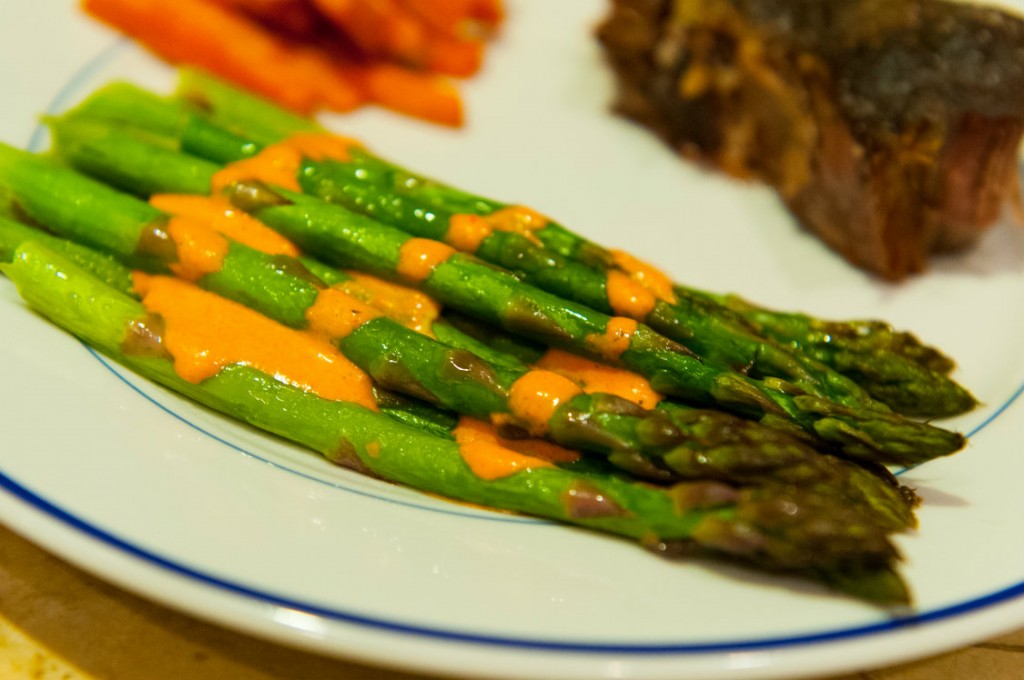
Roasted Red Pepper Aioli Resize… or as it’s known at my house—Magic Sauce!  This recipe for Roasted Red Pepper Aioli is easy to whip up at a moment’s notice, and is infinitely customizable.  Like it spicy?  Add some hot sauce of your choice, or a spoonful of adobo sauce from a jar of chipotle peppers.   Depending on my mood and what else I have laying around, this aioli also gets a few shakes of smoked paprika, or a half a teaspoon of ground cumin.  Mix it up in your blender, taste it, and then see where you want to take it.

We eat this on roasted asparagus.  My husband dips steamed broccoli in it.  I love it on oven-roasted sweet potato fries.  And it’s the best sandwich spread in the world!  Try it in place of regular mayonnaise on your next turkey sandwich or veggie wrap and you’ll ditch that jar of Miracle Whip for good!

Roasted Red Pepper Aioli

Ingredients:

  • 2 cloves garlic
  • 1/2 cup roasted red peppers from a jar, drained and patted dry (or roast your own!)
  • juice of half a lemon
  • 1/4 teaspoon salt or more to taste
  • 1/3 cup mayonnaise (make your own!  Or use store-bought, but not low-fat mayo)
  • optional:  paprika, cumin, hot sauce

Directions:

  1. In a blender or small food processor, blend together the garlic, red pepper, lemon juice and salt until almost smooth.  Add the mayonnaise and optional ingredients and blend again.  Keep refrigerated.

Explore, experiment, enjoy! — Dana


To view even more of Dana’s unique recipe, you can visit her at Frugal Girlmet!
Christmas Ornaments

amyornaments01

It’s that time of year again, when Christmas decorations go up and we begin to celebrate the birth of our Lord and Savior, Jesus Christ. On our tree, we have ornaments with different sayings, initials, or ones with our names on them but I realized this year we didn’t have any Christian themed ornaments. So I decided to make some. Here is a way to do just that:

amyornamentsphoto3

  • Round Ornaments
  • Paint Markers – various colors.

 Directions:

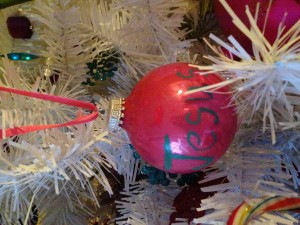
First decide what you want to write or draw on your ornament. I made two different ones. The first one I wrote: “Glory to God in the highest and Peace to His people on Earth.”  The second one I made an ornament just for Jesus with His name on it.

Take your paint marker and shake well. If it is new, you will have to prime it to make sure the paint is all the way to the tip. You do so, by placing the tip on a piece of paper and push it up and down until the paint colors the tip. Now, you know you are ready.

Now just write your bible verse or Jesus’ name on the ornament with the paint marker. You can paint other things on your ornaments as well. I did polka dots on one of mine, but you could add stars, swirls, or whatever you like. The great thing is that the paint markers dry really quickly.

Hang it on the tree. Instead of using a hook, you can use a tiny ribbon and tie it together to make a loop. You can purchase these premade in the store as well.

amyornamentsphoto2

Happy Crafting!

Amy