December 17, 2024

Good-For-You Shamrock Shake

It is tradition to celebrate St. Paddy’s Day in our family…heritage and all, y’know!  (Your name can’t be coleen ann brigit mcelroy hayden…and not recognize your Irish background!)  So while we have a really nice gluten-free ‘almost’ rye bread, and some lovely oven-roasted cabbage steaks to serve with the corned beef and other veggies, this little healthy indulgence fits in perfectly, too!  We enjoyed it in the morning.

So, I have to admit to indulging <in the past!> in a Shamrock Shake or two 😉 from a certain fast food place…uh-huh…you know what i mean!  But that just does NOT fit into our healthier eating lifestyle now…by God’s grace!…and so I took a little peek ‘n see about the nutrition facts (from the manufacturer) for that minty shake of my past.  Can you say “Holy Saint Paddy!”  530 calories, 86 grams of carbs (of which 73 were sugar carbs, mostly corn syrup), and 15 grams of fat in a 16 ounce cup!   If you were here, I would share these healthy but-oh-so-yummy! green minty “shakes” with you!

I think you will find this version equally satisfying and delicious.  I would love to hear from you if you decide to try this recipe!  Enjoy!

Good-for-you Shamrock Shake

2015-03-16 23.09.40

ingredients:
1 scoop protein powder
2 cups almond milk (or sub some full-fat coconut milk)
1/2 teaspoon almond extract
1/2 teaspoon peppermint extract (or 2 drops peppermint essential oil)
1 packet of stevia sweetener
1 cup greek yogurt (sweetened or unsweetened, your choice)
1 ripe avocado
2 handfuls of raw spinach
2 very ripe bananas, cut up and frozen
4 or 5 ice cubes

directions:

  • start off with the first six ingredients; blend for 10-15 seconds
  • pile in the balance of the ingredients and whirl away ‘til nicely blended!

This made more than enough for two big servings; the glasses pictured hold more than 14 ounces each.  You certainly can prepare this shake/smoothie in a standard blender, too. i would suggest doing it in two batches, however, using 1/2 of the ingredients at a time.

Also, check out this link…here are a few other options for making a healthier Shamrock Shake—one includes kale instead of spinach!— (note that some of these do include food coloring).

♥  ♥  ♥  ♥  ♥

may the road rise up to meet you.
may the wind be always at your back.
may the sun shine warm upon your face;
the rains fall soft upon your fields
and, until we meet again,
may God hold you in the palm of His hand.

God loves you!  ♥  (Don’t ever forget that!)

♥  coleen

Chimichuri Sauce

Chimichuri Sauce

Here’s the thing:  You probably cook for your family a lot.  Or maybe you’re cooking a chicken breast for one.  Doesn’t matter.  What matters is:  Sometimes, you overcook the meat.  I know, it happens to the best of us.  (Okay, especially me, since I have a fear of giving my kids undercooked meat that gives them food poisoning.)  So what do you do?  Trash the whole thing?  NO WAY.  I’m frugal.  I scrape the black off toast.  So when you get dry chicken – or fish or beef or pork or even tofu – you sauce that thing.  Enter Chimichuri Sauce.

It sounds spicy, right?  It’s not.  It’s a milder, slimmer cousin to pesto.  Aside from being healthy for you (olive oil, parsley, garlic, and vinegar are all great for your health) – this sauce is mild enough to dress up any protein, and macho enough to save the day.

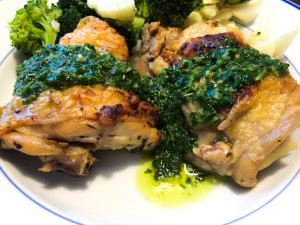
This photo is of my Chimichuri Sauce over chicken thighs.  (Yes, I cook A LOT of chicken thighs.)  Try it on beef (like the Argentinians do), chicken breasts, or the salmon filet I may or may not have just overcooked in the oven for dinner …

Chimichuri Sauce

Ingredients:

  • 1 cup parsley
  • 4 cloves garlic
  • 1/3 cup olive oil
  • salt and pepper
  • 1/2 teaspoon dried Italian herbs (or just dried oregano)
  • 3 tablespoons vinegar (or use lemon juice in a pinch)
  • optional:  hot sauce, diced jalapeño, or chile powder, to taste

Directions:

  1. In a food processor or blender, combine all ingredients.  That’s it!  Serve cold or at room temperature over protein of your choice.

Explore, experiment, enjoy! — Dana


To view even more of Dana’s unique recipes, you can visit her at Frugal Girlmet!

Lemon-y, Garlic-y Tilapia with Avocado Salsa

Oh…it is getting close! For some of you, spring has already sprung. Here in Upstate NY, the daylight is increasing, the temps are warmer, the piles of snow are beginning to melt! And <slowly…> the fruits and veggies are getting increasingly more tempting in the produce department of our grocery stores. This past week, I could actually smell the fragrance of the ripe strawberries as I shopped my list! And so, two packages of them were added to our shopping cart!

One thing that I determined to prepare was a fruity avocado salsa…so easy-peasy! And so good for us (you, too!). And fits perfectly into our healthy but oh-so-yummy POV! We all are aware of the benefits of eating fresh fruits…loaded with vitamin and fiber. And avocados—such a great addition to your healthy eating plan! Here is some info on the benefits and the nutrition received from eating avocados.

We had this cauliflower rice dish alongside.  This salsa would be delish on quite a variety of seafood…from fillets to shrimp to scallops! What’s your favorite?

LemonyGarlicky Tilapia with Avocado Salsa


ingredients:
salsa:
1 mango, peeled and cut into smallish cubes
1 avocado, peeled and cut into smallish cubes
handful of strawberries, cut up
2 teaspoons red onion, finely minced
1 lemon (or lime), juiced
sea salt, freshly ground pepper (I use a lemon-pepper blend)
red pepper flakes (optional)

fish:
4 tilapia fillets (4-5 ounces each)
2 tablespoons red onion, finely minced
4 tablespoons chopped garlic (I use jarred)
2 tablespoons butter
1 large lemon or lime, zested and juiced
3 teaspoons dried parsley
1 teaspoon dried tarragon
salt and pepper to taste
olive (or coconut) oil

directions:

salsa

  • mix all ingredients together in a glass or ceramic dish; set aside

fish

  • preheat oven to 400
  • lightly coat the bottom of a glass baking dish with oil
  • in a small saucepan, melt butter
  • add red onion and saute for 3-4 minutes to soften
  • add garlic and saute on low for an additional minute stirring constantly
  • remove from heat and add lemon juice
  • lay out the tilapia in the pan
  • sprinkle with the herbs, zest, and a generous amount of salt and pepper
  • pour the butter mixture over top the fish
  • bake for 10-20 minutes (depending on the thickness of the fillets) ‘til flaky

serve fish with avocado salsa on the side…perhaps with quinoa, or rice; enjoy!

♥    ♥    ♥        ♥

God loves you!  ♥  (Don’t ever forget that!)

♥  coleen
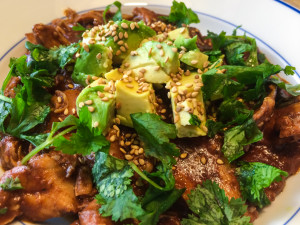
Easy Chicken Mole

Easy Chicken Mole

The first time I had mole (say moe-lay) it was at a small but very well-regarded Mexican restaurant in Los Angeles, La Loteria.  I had heard of mole poblano before and decided to take a chance.  Que rico!  What a glorious taste!  It was rich, a tiny bit spicy, a little bitter, and a little fruity.  It was really a savory fiesta in my mouth.  However, when I went home with the intent to find out more about this magical dish and how to make it, all the recipes I saw were 40 ingredients long and took days to make.  No me gusta – I just didn’t have time to mess with that.  So after some more research, I came up with this recipe – my Easy Chicken Mole!

The two ingredients that most moles share to give them such depth of flavor are dried chiles and chocolate.  Really!  Buy the darkest chocolate you can find.  You can use baker’s unsweetened chocolate, but that will make it bitter, and you’ll probably want to bring it back around with some added honey or brown sugar.  I used bittersweet chocolate, 63% cacao.  I think it worked well, and next time I might even add a little more.

As far as the chiles go, it gets a little confusing.  Oftentimes a chile will have one name when it’s fresh and a different name when it’s dried (I guess kind of like grapes vs. raisins.)  To be honest, I think I bought ancho chiles, but I’m not sure – there were two kinds and neither were labeled!  You want chiles that are a very dark reddish-brown—like the color of dried blood—and about fist-sized.  I used two but I may use three or even four next time.  I removed the seeds, and that’s where the heat resides, so you only get the smoky, fruity flavor of the chiles and not the spiciness.

Try this recipe.  If you’ve never had mole, this is a great place to start.  If you are a mole aficionado, go ahead and tweak my recipe to get the taste you like.  Either way, I bet you’ll say, Que sabor!  (Or if you don’t habla espanol, ‘So tasty!’)

Easy Chicken Mole

Ingredients:

  • 2-4 dried chiles (use ancho, pasilla, or guajillo)
  • 2 onions, chopped
  • 4 tablespoons butter
  • 4 cloves garlic, minced
  • 1/4 cup sesame seeds (or use pepitas, peanuts, or almond butter)
  • 1/4 cup dark chocolate chips
  • 1/4 cup raisins
  • 1/2 teaspoon ground cinnamon
  • 1/2 teaspoon salt
  • 1/2 teaspoon dried oregano
  • 2 cups chicken stock
  • 1/2 cup brewed coffee
  • 2 slices bread
  • 2 pounds boneless, skinless chicken thighs (or use breasts, up to you!)
  • diced avocado, cilantro, sesame seeds to serve
  • rice or tortillas to serve, optional

Directions:

  1. Put the dried chiles in a bowl and cover with boiling water.  Put a plate over the bowl and let the chiles soak for about 15 minutes.  When they have softened, remove the stem and seeds and roughly chop.  Discard the stem, keep some seeds if you want some heat.
  2. While the chiles are soaking, cook the onion in the butter in a very large pot or Dutch oven.  Stir to make sure they don’t burn.
  3. Add the chopped chiles, minced garlic, and sesame seeds.  Stir and cook for 3 minutes.
  4. Add the chocolate, raisins, cinnamon, salt, and oregano.  Stir to combine and cook for another 2 minutes.
  5. Add the chicken stock and coffee.  Crumble in the bread.  Cover the pot with a lid and simmer for 10 minutes.
  6. CAREFULLY transfer sauce to a blender and blend until pretty smooth.  You could use an immersion blender, too.
  7. Return the sauce to the pot and add the chicken thighs.  Tuck them into the sauce and stir.  Make sure the chicken is covered in sauce, then cover with the lid.  Let simmer for about 25 minutes.
  8. The chicken is done when you can shred it with forks.  To serve, ladle the chicken and lots of mole into a bowl.  Garnish with lots of avocado, cilantro and sesame seeds.  You can also eat this in tortillas – just serve with less sauce if you are making tacos.  You can also serve it over rice to soak up the sauce.

Explore, experiment, enjoy! — Dana


To view even more of Dana’s unique recipes, you can visit her at Frugal Girlmet!

Beef Stew…with a Mexican Twist

Perhaps Beef Stew sounds as if it would be complicated and difficult to make—just the opposite.  Simple, easy-peasy!  The key is slow-cooking.  You can either let it come together in a crockpot for a few hours or just as easily on the stovetop. Low heat and gentle, slow cooking gives the stew a roasted flavor, and ensures that the meat and veggies are fall-apart tender. And in addition, the liquids will come together into a thick, smooth gravy.  Yumm-O!

This time, instead of the usual stew, I added some salsa verde (yup, the green kind!), sweet potatoes, black beans, and Mexican seasonings.  And I baked some mini-corn muffins for you-know-who to indulge in! It was a great comfort food meal…since we still have frozen solid piles of snow and ice.  This meal fits well into our healthy but oh-so-yummy POV.  I like to make stews using a piece of bottom round steak from the butcher counter.  This cut doesn’t have much extra fat but still becomes tender due to the low heat and gentle simmering for 90 minutes or so.  Then load it up with lots of veggies…healthy and oh-so-yummy!  Enjoy!

2015-02-24 19.46.38

 Mexican Beef Stew

ingredients:

2 tablespoons +/- olive or coconut oil
2 pounds beef stew meat, cut into bite-size chunks
2 tablespoons brown rice flour (optional)
1/2 teaspoon EACH sea salt, freshly ground pepper
3 tablespoons minced garlic (I use jarred)
1 cup dry red wine (or additional broth)
1 quart beef broth
1 cup water
1 jar (10-12 ounces) salsa verde
1 teaspoon +/- ground chipotle pepper
1 teaspoon dried thyme
3 medium sweet potatoes, peeled and chopped into bite-sized chunks
1/2 bag frozen pearl onions
1/2 # baby carrots, sliced in half length-wise
5 ounce can chopped green chilies (optional)
1 (15 ounce) can black beans, drained and rinsed
1 cup frozen sweet corn (optional)
additional sea salt and pepper

directions:

  • heat the oil in a large Dutch oven over medium heat
  • add the 1/2 teaspoon each of salt and pepper to the flour
  • dredge the meat in the flour mixture (if you eat grain free, you could skip this step)
  • brown the meat, working in 3-4 batches, just ‘til the cubes are lightly browned
  • remove meat from pot and set aside
  • lower heat and add garlic to pan drippings; stir constantly for about 1 minute ‘til fragrant
  • increase heat back to medium-high, stir in the wine, and scrape the bottom of the pan to loosen all the bits. allow to simmer ‘til liquid is reduced about half
  • add in the beef broth, the seasonings, and the browned meat cubes; stir well
  • lower heat to a simmer; cover and allow to cook for about an hour ‘til meat is getting tender
  • add in the sweet potatoes and carrots. raise heat, cover, and bring back to a simmer
  • cook for an additional 30 minutes ‘til potatoes are cooked through and the liquids have become a smooth, thick gravy
  • stir in the chopped chilies, black beans (and corn, if using); simmer ’til heated through
  • taste for seasoning
  • (if the ‘gravy’ needs any additional thickening, use 1 tablespoon of cornstarch with equal amount of cold water…stir ’til completely smooth; then pour into hot liquid (your stew) stirring constantly ’til liquid has thickened.  allow to boil for an additional minute.)

    ♥    ♥    ♥    ♥    ♥

    God loves you!  ♥  (Don’t ever forget that!)

    ♥  coleen
Strawberry Shortcake (Gluten-Free)

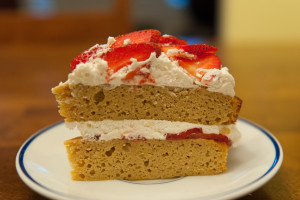
Strawberry-Shortcake-Whole-300x199This is a recipe I shared here on GCH 2 years ago.  I love it and plan on making it soon.  Spring can’t come soon enough for me, and I look forward to farmer’s markets brimming with fresh berries!  If you can’t wait either, read on for my Gluten-Free Strawberry Shortcake!

Strawberry-Shortcake-Cut


Strawberry Shortcake (Gluten-Free)

Ingredients:

  • 12 eggs
  • 1/2 cup coconut oil (or butter), softened
  • 1/2 cup coconut milk (or regular milk)
  • 1/4 cup honey (or more, if you like)
  • 2 teaspoons vanilla extract
  • 1 teaspoon grated orange zest
  • 2 tablespoon orange juice
  • 1 cup coconut flour
  • 1 teaspoon baking powder
  • 1 teaspoon salt
  • 1 cup strawberries, sliced thin
  • 1 pint heavy whipping cream
  • 1 teaspoon vanilla extract
  • optional – 1 or 2 teaspoons sugar (I didn’t use them, since my berries were really sweet. If your strawberries aren’t as sweet as you’d like, add the sugar to the whipping cream)

Directions:

  1. Preheat the oven to 350*F. Grease two 8-inch round cake pans, and then cut a circle of parchment paper for the bottom of each pan, and grease that too. (You can do this without parchment paper, but you will need to be really liberal with the coconut oil / butter / cooking spray on the bottom of the pan. The cake stuck the first time I made it, so the next time I used parchment paper, and it was perfect!)
  2. In a very large bowl, using a stand mixer or a hand mixer, beat the eggs until frothy. Beat in the softened coconut oil and milk, blending well. Mix in the honey, vanilla, orange zest and orange juice. Beat until foamy again.
  3. In a small bowl, stir together the coconut flour, baking powder and salt. Then, a little at a time, blend the flour mixture into the egg mixture. Mix well, making sure there are no lumps.
    Divide the batter between the two prepared pans and bake for 35-40 minutes. When a toothpick comes out dry, remove from the oven and cool for ten minutes. Remove from pans, and finish cooling on a rack.
  4. While the cake is cooling, place the beaters of your hand mixer and a metal mixing bowl in the freezer for half an hour. Slice the strawberries and put back in the fridge until ready to use.
    When the beaters and bowl are very cold, beat the whipping cream with the vanilla (and optional sugar) until stiff peaks form. To decorate: spread a very thin layer of whipped cream on the top of one cake. Make concentric circles of strawberry slices (use half the strawberries, saving the other half for the top), then cover with a thick layer of whipped cream. Place the other cake on top of this, cover with the rest of the whipped cream and the rest of the strawberries. Refrigerate until ready to serve.

This is not a very sweet cake, since it relies on the berries for sweetness. If your berries are not sweet enough for your taste, you can add more honey to the cake, and the optional sugar to the whipped cream.

Explore, experiment, enjoy! — Dana


To view even more of Dana’s unique recipes, you can visit her at Frugal Girlmet!

Roasted Asparagus

Have you noticed?  Are you starting to see spring vegetables in the produce department of your fav grocery store?  I KNOW…very exciting!   Yes, even here in the frozen tundra of the NorthEast!  Hip-hip-hooray!  Now, if you have followed our ‘healthy but oh-so-yummy’ portion of the At Home w/ GCH foodblog, you know I am a huge fan of winter veggies…especially the squashes.  But spring and summer veggies…such abundance and variety!  Yes!  Here they come!

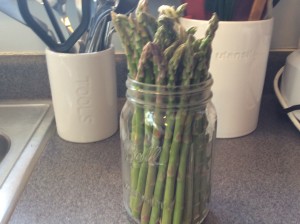
2015-02-23 12.53.00

A favorite of ours is asparagus.  There are so many dishes in which asparagus can either be the main attraction…or easily fit into a supporting role.  (Sorry…my newsfeed, yours too i would imagine, is just inundated with comments and pics from the Oscars last evening!)  Ok…back to asparagus!  Here are some nutrition facts to check out.

Today’s recipe is a super easy way to prepare a bunch (or two!) of asparagus.  Prep time…maybe five minutes.  I usually put as many stalks as will fit on the baking sheet; they can be slightly crowded as they will shrink up just a bit as they roast.

Leftovers will keep well in a covered container in the refrigerator and can be incorporated into breakfast, lunch, or supper!  They are delish for a quick breakfast tossed in with some scrambled eggs or underneath a couple of sunnyside-up eggs; yum!  Or mix up a melange of other leftovers along with the roasted asparagus (chicken, veggies, quinoa or rice) and you have a simple hot lunch.

I’d love to hear how you use this yummy recipe to feed your loved ones!  Enjoy!

 Roasted Asparagus

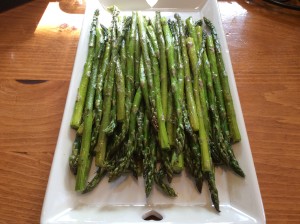
2015-02-23 13.33.42

ingredients:
1 or 2 bunches (usually about one pound each) of fresh asparagus
olive or coconut oil
sea salt, freshly ground pepper (I use lemon-pepper blend)

directions:

  • preheat oven to 400
  • line a large baking sheet pan with parchment paper (or foil)
  • break or cut off the woody, dry end of the stalks
  • place asparagus on the lined baking pan, and season VERY well
  • drizzle 1-1+1/2 teaspoon(s) oil evenly over the asparagus and then roll back and forth on the baking sheet to distribute
  • bake for 10-20 minutes (depending on the thickness of the asparagus) JUST ’til a sharp knife easily pokes through the thickest of the stalks; remove from oven (try not to overcook)

here are two recipes of ours that you could use the roasted asparagus in…and of course, you simply could sit down and eat a handful, too!

Dana’s Roasted Red Pepper Aioli 

Shrimp and Asparagus over Red Quinoa

♥   ♥   ♥   ♥   ♥

God loves you!  ♥  (Don’t ever forget that!)

♥  coleen

Italian Vegetable Cheese Soup

Italian Vegetable Cheese Soup


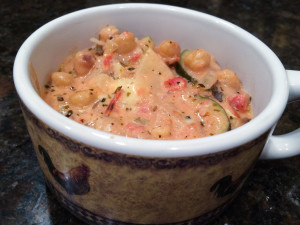
I remember my Mom made a version of this dish probably 25 years ago, and it was FANTASTIC.  It was one of those things that was so rich and luxurious that the memory stayed with me for a quarter century!  I asked my sister, who is now in possession of my mother’s recipe box, to find the recipe, but to no avail.  After some hunting online, I think I found something close.  As is my modus operandi, I tweaked it and made it my own, and now I’m sharing with you:  Italian Vegetable Cheese Soup!

It’s a very simple recipe, and of course, I always encourage you to make it how you and your family will like it best.  Feel free to add more vegetables to the soup.  This recipe is pretty basic, but please keep the zucchini, lots of onions and garlic, and the garbanzo beans.  I guess you could sub in another bean – Great Northerns would work – but I like the firm texture of dried garbanzos that have been cooked just to al dente.  Do NOT skip the wine in this recipe.  You only need half a cup, but it adds so much flavor.  As for the cheese, I used a combination of cream cheese, goat cheese, and a very sharp white cheddar.  You use what you like – maybe some Asiago would be nice, and Fontina would definitely be delicious.

This is not diet food, but a small bowl will fill you up, so it’s okay!  Eat this for lunch with a green salad and enjoy!

Italian Vegetable Cheese Soup

Ingredients:

  • 1/2 pound dried garbanzo beans (or use one can of garbanzos)
  • 2 onions, diced
  • 1/2 stick butter
  • 6 cloves garlic, minced
  • 2 zucchini, sliced into half-moons
  • 1 can crushed or diced tomatoes (I used fire-roasted with peppers, and it added a welcome spicy kick!)
  • 1 teaspoon dried Italian herbs (or use a combo of dried oregano and basil)
  • 1/2 cup white wine
  • 1/2 cup whole milk
  • 4 ounces cream cheese
  • 1 ounce goat cheese (or more!)
  • 2 ounces sharp cheddar or other cheese (parmesan, mozzarella, fontina, gouda, asiago…)

Directions:

  1. If you are using dried garbanzos, pour them into a pot, cover with a  few inches of water, and simmer for about an hour.  If you are using canned, skip to step 2.
  2. In a large pot, cook the onions in the butter for about five minutes until soft.  Add the zucchini and garlic and cook for another 3 minutes.  Drain the water from the beans and add to the vegetables.
  3. Add in the can of tomatoes and the dried Italian herbs.  Add the wine, cover the pot and let simmer for 5 minutes.
  4. Add the milk and cheeses. Stir to combine and cover, over medium low heat.  Let simmer for five minutes, then stir again.  Don’t let the cheese stick to the bottom of the soup!
  5. I like it thick, but you can thin this out more with either milk or wine.  Serve hot!

Explore, experiment, enjoy! — Dana


To view even more of Dana’s unique recipes, you can visit her at Frugal Girlmet!


Roasted Apples and Sweet Potatoes

In my continuing quest to find new and yummy ways to serve more veggies, I have had some successes…and a few failures.  Like roasted cauliflower with a healthier spinach-artichoke dip topping.  Ummm, yeah…it did NOT come together on the plate like it did in my head.  But this—the Roasted Sweets and Apples—so yummy!

We enjoyed this alongside a roasted chicken.  This is healthy but-oh-so-yummy comfort food!   I prepared this for supper on the coldest day I think I have ever experienced…with the windchill factor, our temps never got out of the below zero range.  So when my husband walked in, I literally heard him say, ‘ahhhhh….’  (Made me happy, too!)

This recipe makes enough for leftovers.  We enjoyed this a day or two later for lunch accompanied with breakfast sausage and a nice, runny sunny-side up egg. However you serve it, I hope you and your loved ones enjoy it!

Roasted Sweet Potatoes and Apples

2015-02-16 20.34.38

ingredients:
2# sweet potatoes, peeled and cubed about 1″
1 red onion, diced small
3 tablespoons olive or coconut oil
1/2 teaspoon cinnamon
3 apples, peeled, cored, and cubed about 1″
1 teaspoon lemon juice
1 teaspoon dried crushed rosemary (or thyme)
sea salt, freshly ground pepper (I use lemon-pepper blend)

directions:

  • preheat oven to 400
  • line baking sheet pan with parchment paper
  • in a large mixing bowl, combine sweet potatoes, cinnamon, onions, generous amount of s&p, and 2 tablespoons olive oil ‘til potatoes are thoroughly coated
  • pour onto lined baking sheet
  • place in oven and bake for 20-25 minutes or so
  • in same bowl, combine apples, lemon juice, 1 tablespoon olive oil, and rosemary
  • add to sweet potatoes
  • roast for additional 15-20 minutes, ‘til sweet potatoes are tender
  • taste for additional s&p

♥   ♥   ♥   ♥   ♥

God loves you!    (Don’t ever forget that!)

  coleen

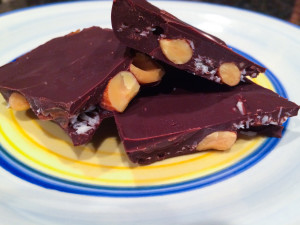
Almond Joy Chocolate Bark

Almond Joy Chocolate Bark

What’s Valentine’s Day without some chocolate?  This is pretty healthy stuff though, so as long as you don’t eat the whole batch in one sitting, you can have a treat and not be naughty.  Almond Joy Chocolate Bark is the way to go!

I love dark chocolate and I use the darkest I can find in the grocery store.  Here I used a bag (11.5 oz) of 63% cacao Guittard chocolate chips, but feel free to use whatever dark chocolate you like.  I also used roasted, salted almonds because that little bit of salt really offsets the sweet and makes the flavors pop.  If you want a sweeter bark, you can use “Angel Flake” coconut that has sugar added.  I used unsweetened coconut flakes and it’s quite yummy!  I also used 2 tablespoons of coconut oil.  I like that it makes the chocolate a little smoother, and I think it tastes great too.  You can leave it out if you don’t have it.

Give some to your sweeties, treat your friends at work, or just nibble on this chocolate bark and enjoy some quiet time.  Happy Valentines Day!

Almond Joy Chocolate Bark

Ingredients:

  • 1 bag of semi-sweet chocolate chips (use the darkest chocolate you can find, with the highest percent of cacao)
  • 2 tablespoons coconut oil
  • 1 cup whole, roasted, salted almonds
  • 1/3 cup shredded, unsweetened coconut

Directions:

  1. In an oven-safe bowl, microwave the chocolate and coconut oil together for 30 seconds.  Stir very well with a rubber spatula, then microwave again.  Keep doing this until your chocolate and coconut oil are smooth and blended.  Mine took 3 blasts of 30 seconds each.
  2. Line an 8×8 baking pan with plastic wrap.  Pour in 1/3 of the melted chocolate and spread over the bottom of the pan.
  3. Spread the almonds over the chocolate layer and sprinkle with coconut.
  4. Pour the rest of the chocolate over the almonds and coconut and lightly spread to cover.  Put in the freezer for about 2 hours until solid.  Cut or break into 2″ pieces.

Explore, experiment, enjoy! — Dana


To view even more of Dana’s unique recipe, you can visit her at Frugal Girlmet!