November 18, 2024

At Home with GCH: Carrot and Raisin Salad

Carrot Raisin Salad

When I was a kid, we used to have Carrot and Raisin salad all the time.  I’m pretty sure the sole ingredients were shredded carrots, raisins, and mayonnaise.  I loved it!  But these days I want something a little healthier.  Also, I want something I can take to a potluck or family gathering and not have to worry about it sitting out unrefrigerated.  Food poisoning is a real bummer.  Time for a make over!

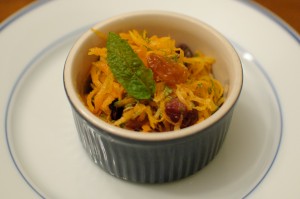
This recipe is about as simple as it comes, but with a few twists to make it sophisticated and different.  Mint is easy to find (and pretty easy to grow, even on a window sill) and is what sets this Carrot and Raisin salad apart.  This recipe can easily be doubled or tripled so it’s great for parties.  Make this for dinner, or bring to your next potluck, and you’ll be a hero!

Carrot and Raisin Salad

(From Martha Stewart’s Living Cookbook)

Ingredients:

  • 1 pound large carrots
  • 3 tablespoons golden raisins (I usually use closer to 1/4 cup – I love raisins!)
  • 2/3 cup fresh mint leaves, cut into 1/4-inch strips
  • 2 teaspoons fresh lemon juice
  • 1 tablespoon olive oil
  • salt and pepper to taste

Directions:

  1. Grate the carrots on the large holes of a box grater or with a food processor using the grater blade.  In a large  bowl, combine the carrots with the raisins, mint, lemon juice, and olive oil.  Season with salt and pepper and  toss to combine well.  Keep in the refrigerator until ready to serve (I think it tastes better chilled.)

Explore, experiment, enjoy! — Dana


To view even more of Dana’s unique recipe, you can visit her at Frugal Girlmet!


If you would like to contact Dana in regards to this blog, please email her at Dana@girlfriendscoffeehour.com
Meet Wellness Coach and Fitness Designer – Crystal Bush Breaux

I Can Handle It


“I can handle it and figure it all out on my own. If I mess up, I do not need anyone to help me.  I am strong enough and capable to turn it around and make it right.  I know the exact time when things need to be done according to the clock, day, week, month and even year.” That WAS the story of my life. I had a need to be morally perfect and in control; which, of course, caused me internal frustration, hopelessness, and missed opportunities for a deeper relationship with God and others.

Perfection

All of my life, I have had a desire to do the right thing by pleasing God and other people.  However, when I could not keep it together and failed, I was too embarrassed to ask for help.  I knew if I tried really hard I could do it without the help of anyone, including God.  This struggle left me feeling like a failure more than once.  It was only when I realized I was powerless by myself and could admit my imperfections, I became secure and confident in whom I was as a woman in Christ.

Control

After many years of infertility, multiple miscarriages, and trying to “fix” things in my marriage on my own, I had to realize there are things in my life I can not control.  I had to be willing to submit those things to God and give up my fears, my timelines, and plans of how I think it should be done. For someone who prided herself on being organized, on time, and prepared for any situation, the lack of control in certain areas of my life left me feeling hopeless.

What a happy day when I really understood my life’s scripture.Phil1_6

What a relief. I am not expected to have it all together. God knows we are going to fail, so why shouldn’t we expect it of our self.

As a fitness and wellness coach, my purpose in life is to work with women who want to overcome the helpless feeling of not knowing how to maintain their weight and consistency in their fitness.  I understand the feeling of having control and discipline in so many areas of life, yet struggling internally in one area that is so important to a woman. It can leave you feeling powerless.

My heart is to empower women to feel confident in their choices with food and exercise, and guide them toward a life of balance physically, mentally and spiritually, no matter how busy life gets.

*****

Crystal will be blogging for At Home with GCH on the 1st and 3rd Wednesday of each month.

You can follow Crystal’s business blog at www.yourfitnessdesigner.com and/or follow her on www.facebook.com/yourfitnessdesigner.

For a personal Fitness and Food Design, you can email her at crystal@yourfitnessdesigner.com to schedule a free telephone consultation.

At Home with GCH: Mac and Cheese

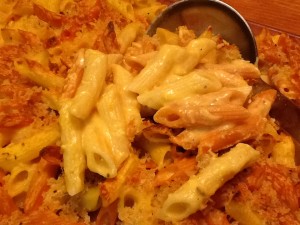
Here on our At Home with GCH blog, Mondays are always focused on healthy but oh-so-yummy! recipes.  This week we are going to bake a yummy mac and cheese that is loaded with veggies, and low on the calories by reducing the amount of cheese.

macncheese

Mac and Cheese. C’mon, who does not like Mac and Cheese?  I read a poll, and Mac and Cheese was voted overwhelmingly as ‘favorite comfort food!’  Now I am hoping that your favorite version does NOT come out of a blue box 😉 but, if it does, perhaps you might consider my recipe and see if it does not convince you to try it instead of the blue box version in the future. 🙂 

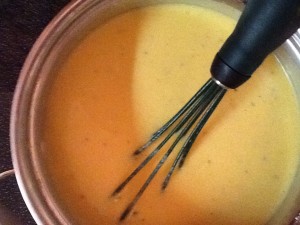
This version of Mac & Cheese has lots of veggies snuck in there.  Some of the pasta is made with pureed carrots and tomatoes, and there is butternut squash throughout the cheese sauce.  I love this because it makes the cheese sauce even more colorful (ORANGE)  causing the eaters to ‘think’ it is more cheesy!  Also, there is only 6-ounces of shredded cheese in the whole dish which helps to keep this recipe in our ‘healthy-but-oh-so-yummy!’ category.

Have you ever made a white, or bechamel, sauce?  Well, today you will!  It is very easy, and a great technique to add to your repertoire!  In a future post, I will share some recipes that need a white sauce, and by then you will be a pro at making it!

The following recipe makes an abundantly filled 9×13 pan…enough to feed 6-8 hungry folks, )or, if you have a husband who LOVES leftovers like mine does, lunch for 2-3 days.)  This recipe is easily doubled, and I always make a double batch.  A menu suggestion:  Mac & Cheese, steamed broccoli, grilled ham steak.  A big, delicious salad is often our only accompaniment.

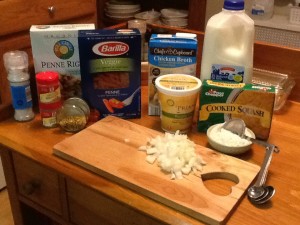
Macaroni:
1#box small macaroni (shells, penne)
12oz box veggie pasta (i used penne made with carrots and tomato) *2012-11-03 19.21.38

Cheese Sauce:
1/2 small onion, diced
2T butter
2T flour
1c 2 percent milk
1c chicken or vegetable broth
2 (10-ounce) packages frozen pureed winter squash, thawed
1/2c part-skim ricotta cheese
4oz sharp Cheddar, shredded (about 1+1/3c)
2oz Monterey jack cheese, shredded (about 2/3c)
1tsp salt, 1 tsp fresh ground pepper
1tsp ground (dry) mustard

Topping:
2 slices stale bread, crumbled into fine crumbs
2T freshly grated Parmesan cheese
1tsp olive oil

Preheat your oven to 375.  Coat a 9 by 13-inch baking pan with a small amount of  butter.  Bring a large pot of water to a boil; add 1 tsp of salt and the macaroni; cook  according to package directions.  Drain in a colander and place back into the cooled pot (this is where you will mix the macaroni and all that cheesy goodness together!)

Meanwhile, over medium heat, melt the butter in a medium saucepan, adding the  diced onion. cook ‘til the onion is soft and translucent, approximately 5 minutes.  Then sprinkle the flour over the cooked onion and, using a whisk, stir constantly for one minute.  Adjust the heat to very low, and cook for 2-3 minutes to get the starchy taste out of the mixture.  Do not let the mixture brown.   Increase the heat back to  medium and immediately slowly pour in 1/4 cup or so of milk while whisking briskly.  Just keep stirring!  As this is absorbed, continue to slowly add the balance of the  milk in a steady stream, followed by the broth; stirring constantly as the liquid  becomes absorbed.  This will take about 3 minutes.  Adjust the heat lower again and  let this mixture simmer slowly for another 5  minutes, stirring occasionally.  (You  have now made a white, or bechamel, sauce; congratulations!!!)  At this point, add in the thawed  butternut squash, stirring ‘til it is incorporated, allowing the mixture to come back  to a simmer.  Remove the saucepan from the heat.  Stir in the ricotta, and the  other cheeses, along with the ground mustard, and salt & pepper.  Carefully taste (it’s hot!) the  cheese sauce, adjusting for seasoning.

2012-11-03 20.00.28

Pour cheese mixture over the macaroni in the large pot and stir gently to combine.  Transfer the macaroni and cheese to the 9×13 baking dish and bake for 20 minutes.  Remove from oven.  Adjust the top rack in the oven to a higher position, and turn  the broiler on.  Combine bread crumbs, parmesan cheese and oil in a small bowl.  Mix with your fingers; get a little messy!  Then sprinkle over the top of the cooked mac and cheese.  Carefully place the baking dish back in the oven and broil for 3  minutes.  Keep your eye on it; you want the breadcrumbs to brown but not burn and  for some of the macaroni to get just a little crispy (my husband loves that part!).  Again, carefully remove from the oven…and you are ready to serve!

*Here is a link to the type of veggie macaroni I used.  Check it out!
http://barilla.com/content/prodottobarilla/veggie-penne-freshly-pureed-tomatoes-and-carrots


God loves you!  ♥  (Don’t ever forget that!)

  coleen

*****

If you would like to send a personal message to Coleen, in regards to this blog, please email her at: Coleen@girlfriendscoffeehour.com.


At Home with GCH: Soba Noodles with Salmon and Miso

Soba Noodles with Salmon and Miso


I know some people give up meat on Fridays, especially during Lent, so to celebrate the end of Lent, the coming of Easter, and the arrival of Spring, I have a fresh and tasty fish recipe for you!

The two “ethnic” ingredients you’ll need for this recipe are both Japanese.  Soba noodles are thick, chewy buckwheat noodles, with a wonderful nutty taste.  They come dried and are widely available, so if your grocery store has an Asian section, there’s a good chance they’ll be there.  (You could substitute whole wheat spaghetti if you really can’t find the soba noodles.)  The other ingredient is miso paste.  It’s made of fermented soy beans and adds a mild soy sauce-like flavor.  Check the refrigerated section of the store, maybe by the tofu.  (If you can’t find it, use soy sauce instead, but the flavor will be more pronounced.)  As for the vegetables, I like baby Bok Choi, but if you can’t find that, you could use 5 ounces of spinach instead, or Napa cabbage, or even bean sprouts and strips of bell pepper.  Be creative!  This recipe serves two, but you can easily double it if you like.

Soba Noodles with Salmon and Miso

(Adapted from a recipe in the book Homestyle Asian)

Ingredients:

  • 2 ounces dried soba noodles
  • 1 heaping teaspoon miso paste (or one teaspoon soy sauce)
  • 3 tablespoons honey
  • 4 teaspoons sesame oil, divided
  • 1 pound salmon filets
  • 1 teaspoon chopped fresh garlic (use 2 cloves)
  • 1 tablespoon grated fresh ginger
  • 1 carrot, cut into matchsticks
  • 3 green onions, thinly sliced
  • 4 heads of baby bok choi, separated into individual leaves (or use one 5 ounce bag baby spinach)
  • 2 tablespoons rice vinegar
  • 1 tablespoon soy sauce
  • 1 tablespoon sesame seeds

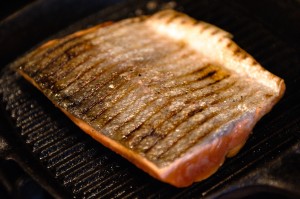
Salmon Grill Pan


Directions:

  1. Preheat the oven to 350*F.  Cook the soba noodles according to the package directions.  Drain, add back to the pot you cooked them in, and toss with a teaspoon of the sesame oil, so the noodles won’t stick together.  Set aside.
  2. Whisk together the miso, honey, one teaspoon sesame oil, and one teaspoon water to form a paste.  Brush over the salmon.  Sear on a hot grill pan or frying pan for 30 seconds.  Brush salmon with any remaining glaze and place on a foil-lined baking tray.  Bake for 6 minutes, then cover and leave to rest in a warm place.
  3. Heat one teaspoon of sesame oil in a frying pan.  Add the garlic, ginger, carrot, green onion, and bok choi and sauté for one minute.  The vegetables should not brown, but remain bright and crisp.  Add the noodles, rice vinegar, soy sauce, and last teaspoon of sesame oil, and stir to combine for another 30 seconds.
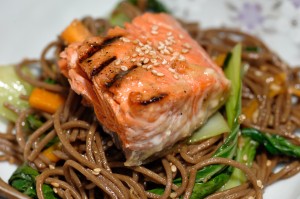
  4. To serve, place the noodles and vegetables on the plate.  Top with salmon and sprinkle with sesame seeds.


Explore, experiment, enjoy! — Dana

*****

To view even more of Dana’s unique recipes, you can visit her at Frugal Girlmet!

At Home with GCH: Homemade Fabric Softener

To finish off our month of “All Things Green“, I want to focus on saving you money today, by giving you a recipe of a product that most of use every day in our home!  Anytime I can save the GREEN in my wallet, I’m a happy camper! 🙂


Homemade Fabric Softener

Makes 151.6 ounces
I have used this homemade recipe several times in the last week, and I have to say, “I LOVE IT!”  You can choose whichever fragrance of Suave conditioner that you wish!  It works perfectly on making your laundry soft and gentle, and it beats static cling!  Can’t ask for more than that, right?
________________________________

Ingredients: 
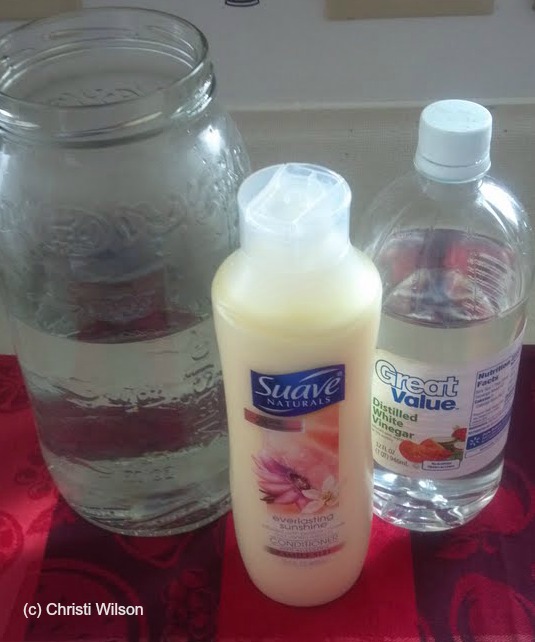
6 cups HOT water
3 cups White Vinegar
2 cups Suave Conditioner (your choice)

 FabricSoftener1

Directions:

(I had to split this recipe in half to begin with to be able to make the recipe in my blender.)

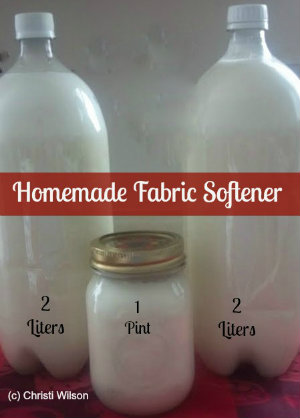
Blend 3 cups of HOT water and 1-cup of Suave Conditioner in a blender until the conditioner is dissolved. Add in 1-1/2 cups of white vinegar, and blend another 30 seconds. Pour into a 2 liter bottle. Mix remaining ingredients into a blender as directed above and repeat the same process. Pour into 2nd 2-liter bottle and into a 1-pint jar.

Pour into a downy ball… or use approximately 2 Tbsp. in the fabric softener section in your washing machine, then wash and dry the load. Shake well before each use.

FabricSoftener4

I paid 96-cents for a bottle of Suave Conditioner.

I paid $1.00 for a bottle of White Vinegar

The water…well, that didn’t cost me anything!!

The recipe makes 151.6 ounces.

Total cost per ounce: $.0129 

That fits my pocketbook perfectly!

*****

At Home with GCH: Spring Salad Side Dishes

Here on our At Home with GCH blog, Mondays are always focused on healthy but oh-so-yummy! recipes.  This month we are spotlighting vegetarian dishes.  Each Monday will actually be a Meatless Monday!

So, I was talking with my dad about what to make for our family’s get-together on Easter Sunday.  Now, something you should know about us—every event is a food event. 😉  Is your family like that, too?  My contributions this year will be for dinnertime.  By request, I have been relegated the side dishes.  Two of them will be vegetarian salads: Broccoli-Craisin Salad and New Old-Fashioned Carrot Slaw.  Both fit into our healthy but-oh-so-yummy! category nicely!  Yes, there is a good amount of mayonnaise in the broccoli salad, but I think that you will find it balanced out by the rest of the healthy ingredients.  Plus this recipe provides 6-8 servings.  And in the carrot slaw, fat-free greek yogurt is substituted for the majority of the mayo that traditional ‘old-fashioned’ carrot slaw usually contains.  Enjoy!

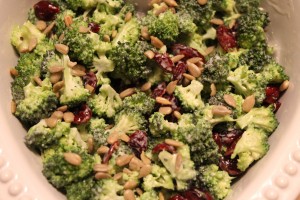
Broccoli-Craisin SaladIMG_0196

dressing:
3/4 cup good mayonnaise
3 tablespoons honey
3 tablespoons white balsamic vinegar (red wine vinegar also yummy)
freshly ground pepper, to taste

salad:
3 heads broccoli crowns, cut up into small florets – no stems
1/2 cup finely chopped red onion
1/2 cup sunflower kernels/seeds
1 cup craisins (dried cranberries)

Combine dressing ingredients in a small bowl.  Mix together ‘til emulsified;  set aside.

In a salad bowl, toss all salad ingredients ‘til well distributed. Pour dressing over and stir ‘til everything is nicely coated.  Put completed salad into a storage container or bag and refrigerate for a minimum of 2 hours to meld the flavors together (overnight is optimum).

Notes:
The smaller you chop the florets, the nicer this salad will be.  Takes a little time…but so worth it!  I use less mayo than most recipes call for; feel free to add more if you desire. ALSO, for your meat-loving family members, you can add 2-3 slices of crumbled, crispy, cooked bacon; makes for a nice addition!

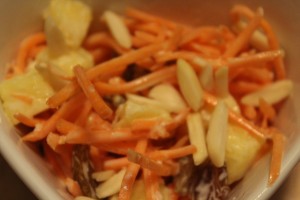
New Old-Fashioned Carrot SlawIMG_0200

dressing:
1 container lemon greek yogurt
2 teaspoons freshly squeezed lemon juice
2 tablespoons mayonnaise
freshly ground black pepper, to taste

salad:
2 cups julienned carrots *
1/2 cup fresh pineapple, cut in 1/2″ cubes
1/4 cup sliced or slivered almonds
1/4 cup golden raisins

Combine dressing ingredients together in a small bowl; set aside.

Mix all the salad ingredients together in a large bowl, and then pour on the dressing; mix together well.  Place in a storage container or bag; refrigerate for at least 2 hours or overnight so that the flavors can blend together.

Notes:
I buy bagged ‘matchstick’ carrots; usually available with the baby carrots in the produce section of your grocery store.

————————————————-

God loves you! (Don’t ever forget that!)

coleen

_________________________________

If you would like to send a personal message to Coleen concerning this series, you may email her at: Coleen@girlfriendscoffeehour.com, or leave a comment below.

At Home with GCH: Eggplant Dip (Baba Ghanouj)

Baba Ghanouj  2

While I am a huge fan of french onion dip – you know, the kind made with a tub of sour cream and a packet of french onion soup – I know it is not the healthiest for me.  I firmly believe that when it comes to your diet, you should eat as well as possible, load up on veggies and lean protein, and avoid processed foods. That said, you gotta enjoy life, and I think it’s okay to have a treat every once in a while.  The problem is when “every once in a while” turns into “I deserve it now” which eventually becomes an everyday habit.  I speak from experience!  So one way I’ve found to subvert those cravings for treats is to find delicious alternatives that are nutritious as well.  Move over potato chips and french onion dip, here comes baba ghanouj!

Baba ghanouj (pronounced “gah-noosh”) is a roasted eggplant dip.  You can usually find it alongside hummus and pita wedges in Middle Eastern restaurants.  The only ingredient you may not have on hand is tahini, which is sesame seed paste.  I can buy it in my regular Vons and, depending on how well-stocked your grocery store is, you can find it with the Indian/Middle Eastern food, or with the Kosher foods.  It’s rich and creamy—almost like peanut butter made from sesame seeds.  It keeps well in the fridge, and I use it to make salad dressings, too (like this one for a kale salad.)  This recipe also adds a roasted bell pepper.  It isn’t necessary, but  it adds another layer of smoky sweetness that I really enjoy.  Ready?  Let’s get dipping!

Baba Ghanouj_
Eggplant Dip (Baba Ghanouj)

Ingredients:

  • 3 Japanese eggplants, or one very large regular eggplant
  • 1 tablespoon olive oil
  • 2 cloves garlic
  • 2-3 tablespoons tahini (I like to add a lot!)
  • 1/2 lemon, juiced
  • 1 teaspoon ground toasted cumin
  • salt and pepper
  • 1 roasted bell pepper  (Trader Joe’s has some great ones in a jar)

Directions:

  1. Preheat the oven to 400*F.  Line a baking sheet with aluminum foil.  Poke some holes in the eggplant with a fork or knife and drizzle with the oil.  Bake for 30 minutes.  Turn off the heat and let sit in the oven for 30 minutes to cool.
  2. When the eggplant is cool enough to handle, slit it open and scoop out all the insides.  Transfer the eggplant to the bowl of a food processor.  Add the remaining ingredients and blend together.  Keep refrigerated until ready to eat.

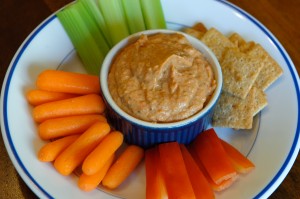
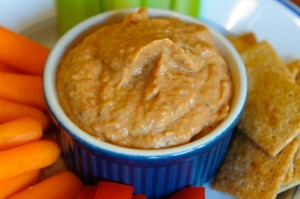
I serve this with veggie sticks.  The kids like pita bread, Wheat Thins, and any other cracker or pretzel I give them!


Explore, experiment, enjoy! — Dana


To view even more of Dana’s unique recipes, you can visit her at Frugal Girlmet!


If you would like to contact Dana in regards to this blog, please email her at Dana@girlfriendscoffeehour.com

At Home with GCH: “All Things Green” — Green Food!! :)

I know St Patty’s Day is done and over with, but I just had to share these FUN recipes with you!!  It doesn’t have to be a GREEN holiday to share them, right??!!  🙂  ENJOY!


AllThingsGreen


Green Velvet Cake Pops

http://www.lovefromtheoven.com/2011/03/07/green-velvet-cake-pops-more-st-pattys-day-baking-ideas/


Grasshopper Cupcakes

http://www.luulla.com/product/13648/grasshopper-cupcake-in-a-jar-5


Green Tollhouse Cookies

http://pinterest.com/pin/75224256245963297/


Split Pea and Ham Soup

http://clarefare.com/2012/02/24/split-pea-and-ham-soup/


Green Rice Krispie Treats

http://pinterest.com/pin/179299628886835822/


Shamrock Shakes

http://smells-like-home.com/2011/03/shamrock-shakes/


Enjoy sharing these fun recipes with your family!


Be Blessed,

Christi

_____________________

If you would like to send a private message to Christi regarding this blog,

please email her at: Christi@GirlfriendsCoffeeHour.com

At Home with GCH – Meatless Mondays – HashBrown Crusted Quiche

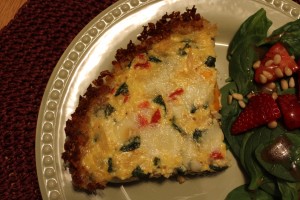
Here on our At Home with GCH blog, Mondays are always focused on healthy but oh-so-yummy! recipes.  This month we are going to spotlight vegetarian dishes.  Each Monday will actually be a Meatless Monday!  This week we are making quiche!  Oh, yum!  But in light of our healthy but oh-so-yummy inclination, we are substituting a shredded potato crust for a pastry crust.  So delicious…so easy…so nice and crispy!  I took a peek at a few similar recipes, and calorie counts on ingredients like those below will add up to approximately 250-300 for each wedge of this quiche.  This along with a simple salad (we had spinach-strawberry salad with ours) makes for a filling yet light supper.  You certainly can exchange different veggies and cheeses for the spinach-tomato-fresh mozzarella combination in this recipe.  During the spring and summer, we often have quiche once each week on our menu.  It is quick and nutritious; and, if I prepare different varieties from time to time, no one gets bored!  I would love to hear about your quiche if you make a different variety!  Enjoy! 

IMG_0184

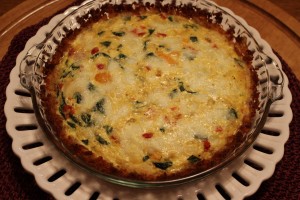
Caprese Quiche with Hash Brown Crust (makes 4 generous servings)

Crust:
3 cups frozen hash browns, thawed
2 tablespoons butter, melted
1/4 cup grated Parmesan cheese
1/2 teaspoon kosher salt
1/2 teaspoon freshly ground black pepper
Preheat oven to 425. Thaw hash brown potatoes, and blot between paper towels to remove excess moisture.  Combine in mixing bowl with melted butter, Parmesan cheese, and seasonings.  Lightly grease 9″ glass pie plate.  Pour potatoes mixture into pie plate and press down onto bottom and up sides of pie plate…go all the way up to the rim.  Bake for 15-20 minutes until lightly browned; do not let burn!  When done, remove from oven.  Place on a cooling rack and allow to cool slightly.  Reduce oven temp to 350.

Filling:
1 medium sweet onion, diced
2 teaspoons olive oil
good-sized handful (12-14 grape tomatoes), chopped
1/2-3/4 cup fresh spinach leaves, sliced 1/4″ slices
1 heaping tablespoon chopped garlic (I use jarred)
Heat olive oil in medium-sized saute pan over medium heat.  Add diced onions and cook for 6-7 minutes until softened but just slightly browned.  While onions are cooking, chop tomatoes (drain away any excess juice).  To slice spinach, stack a number of leaves, and then just carefully slice down through them into 1/4″ slices; repeat until all spinach is sliced.  When onions are ready, add tomatoes, spinach, and garlic.  Saute for 1-2 minutes, stirring constantly, until spinach has wilted.  Remove from stovetop and allow to cool.IMG_0189

Egg Custard:

4 large eggs, lightly beaten
3/4 cup 2% milk
1/2 cup ricotta
dash of Kosher salt
1/2-1 teaspoon freshly ground black pepper
1/4 cup breadcrumbs
1 cup fresh mozzarella balls, rough chopped
To the eggs, add the milk, ricotta, seasonings, and breadcrumbs; whisk together until smooth.

To assemble:
Once baked crust has cooled slightly, layer in filling ingredients and then pour the custard on top.  Add chopped cheese and swirl with fork to evenly distribute ingredients.  Carefully place in middle of 350 oven, and bake until eggs are set and cheese is slightly browned, approximately 30 minutes or so.  Let stand for 10 minutes to set up and finish cooking.  Cut into four wedges.

————————————————-

God loves you! ♥  (Don’t ever forget that!)

coleen

_________________________________

If you would like to send a personal message to Coleen concerning this series, you may email her at: Coleen@girlfriendscoffeehour.com, or leave a comment below.

At Home with GCH: Irish Colcannon

Irish Soul Food!

Irish Soul Food!

St. Patrick’s Day is this weekend.  Now if you’re like me, your carefree days are behind you and you will not be found in a pub, swilling green beer!  But it is fun to partake in a little luck of the Irish, wear something green, and eat some Irish soul food.  If Corned Beef and Cabbage is more effort than you want to put in, have I got the recipe for you!

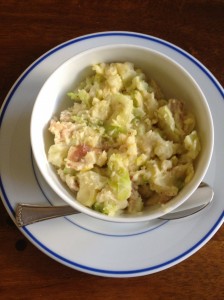
Colcannon is classic folk food, meaning it’s what the poor villagers could throw together in a pot to feed a large, hungry family.  This is not a fancy dish, but it’s filling, easy, and incredibly tasty!  If it’s still cold where you live, this will warm your tummy!

Irish Colcannon

Ingredients:

  • 4 slices of bacon, diced
  • 3 large or 4 small potatoes, scrubbed, peeled if desired, and cut into 1-inch chunks
  • 1/2 head green cabbage, thinly sliced
  • 3 tablespoons butter
  • 1/2 to 3/4 cup milk
  • 2 green onions, diced
  • salt and pepper

Directions:

  1. Put bacon in a large pot over high heat.  Cook until crispy, then remove the pan from the heat.
  2. While the bacon is cooking, simmer the potatoes in a little water and cover with a lid.  When you can break the chunks of potato with a fork, add the cabbage and simmer until the potatoes are done, about 3 minutes more.  You want the potatoes to be cooked through but not mushy.
  3. Lift the potatoes and cabbage from the water and add to the pot with the bacon in it.  Yes, leave the grease in the pot!  Over medium-low heat, fold in the butter and milk, stirring to combine and break up the potatoes.  Season with salt and pepper and stir in the green onions.

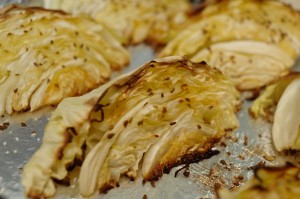
Now…if you made this recipe, you have half a head of cabbage left over.  May I suggest Roasted Cabbage Wedges?  With a little olive oil, salt, and fennel seed, the cabbage becomes sweet, tender, and delicious!  An unexpected way to eat this nutritious green veggie!


Roasted Cabbage Wedges

Ingredients:

  • 1 head green cabbage (or half a head)
  • olive oil
  • salt and pepper
  • 1 tablespoon fennel or anise seeds (optional, but I really like it!)
  • 1/2 lemon

Directions:

  1. Preheat oven to 375*F.  Cut the cabbage in half from top to bottom.  Cut out the core, and cut each half into four wedges.
  2. Line a baking sheet with aluminum foil.  Arrange cabbage wedges on the sheet and drizzle with olive oil.  Sprinkle with salt and pepper, and fennel or anise seeds, if using.  Bake for 10 minutes, or until the edges of the leaves take on some color.  With a spatula, flip over the wedges and bake for another ten minutes.  The cabbage wedges should be soft, with crispy edges.  Serve with a squeeze of lemon if desired.

Explore, experiment, enjoy! — Dana


To view even more of Dana’s unique recipes, you can visit her at Frugal Girlmet!


If you would like to contact Dana in regards to this blog, please email her at Dana@girlfriendscoffeehour.com