November 18, 2024

Gluten Free Chocolate Chip Cookies (and a Mix!)

Here on our At Home with GCH blog, Monday’s are always focused on healthy but oh-so-yummy! recipes.   Being we are now in full-swing summertime, for the next few weeks we are going to focus on gluten free treats that you can share at your bbq’s, picnics, hoedowns, and block parties.  Look forward to graham crackers for s’mores, brownies, sheet cake and maybe some more cookie recipes, too!

2013-06-13 21.24.57

Gluten Free Chocolate Chip Cookies
(makes 4 dozen regular cookies)

Ingredients:

1 batch Chocolate Chip Cookie Mix * see below
8 tablespoons unsalted butter or shortening, at room temperature
2 eggs, room temperature, lightly beaten
1+ ½ teaspoons vanilla extract

Directions:

  • Line 2 baking sheets with parchment paper and set aside
  • Place cookie mix in bowl of stand mixer; give a stir to get out any lumps
  • Add butter, eggs, and vanilla to bowl; mix on low until combined, approximately 30-40 seconds
  • Scrape down bowl with spatula; then mix batter for 2 minutes on medium speed
  • Drop balls of dough about 1+1/2 inches in diameter about 1 inch apart onto one baking sheet
  • Place in freezer for 5 minutes (this will help the cookies to not spread too thin)
  • Preheat oven to 325; and fill other baking sheet in the meantime
  • Once the dough has chilled, place 1st baking sheet into preheated oven; bake until cookies are beginning to brown underneath, about 10-12 minutes
  • Remove from oven and place cookies on cooling racks
  • Try not to eat them until they have cooled; oh, go ahead!  enjoy!

A few notes:

  • I made my batch dairy free by using shortening, Earth Balance non-dairy butter substitute, and coconut oil.
  • This is a very stiff batter; it will give your mixer a good workout!
  • I made these in a ‘manly’ size cookie. I got 26 cookies out of the recipe.


Chocolate Chip Cookie Mix

Ingredients:
2+1/4 cups Gluten free flour
Consisting of:
1/2 cup Brown Rice Flour
1/2 cup Oat Flour
1/2 cup Almond Flour
3/4 cup Cornstarch
1/2 teaspoon Xanthan gum
2 teaspoon Psyllium husk
1 teaspoon Baking soda
1/2 teaspoon Sea salt
1 cup Coconut sugar or brown sugar
1/2 cup Sugar
12 ounces Semisweet chocolate chips (I use dairy-free)

Directions:
Place all ingredients, except chocolate chips, in a bowl, stir until well combined.  Pour into any airtight container—glass jar, plastic storage container or bag.  Tamp down to really get it snugly in there!  This fits well into a quart sized Mason jar (looks cute, too!).  Add chocolate chips on top and seal.  Use entire batch for the above recipe.

♥  ♥  ♥  ♥  ♥

God loves you!  ♥  (Don’t ever forget that!)

♥  coleen

_________________________________

If you would like to send a personal message to Coleen concerning this blog post, you may email her at: Coleen@girlfriendscoffeehour.com

Asian Pasta Salad

Asian Pasta Salad

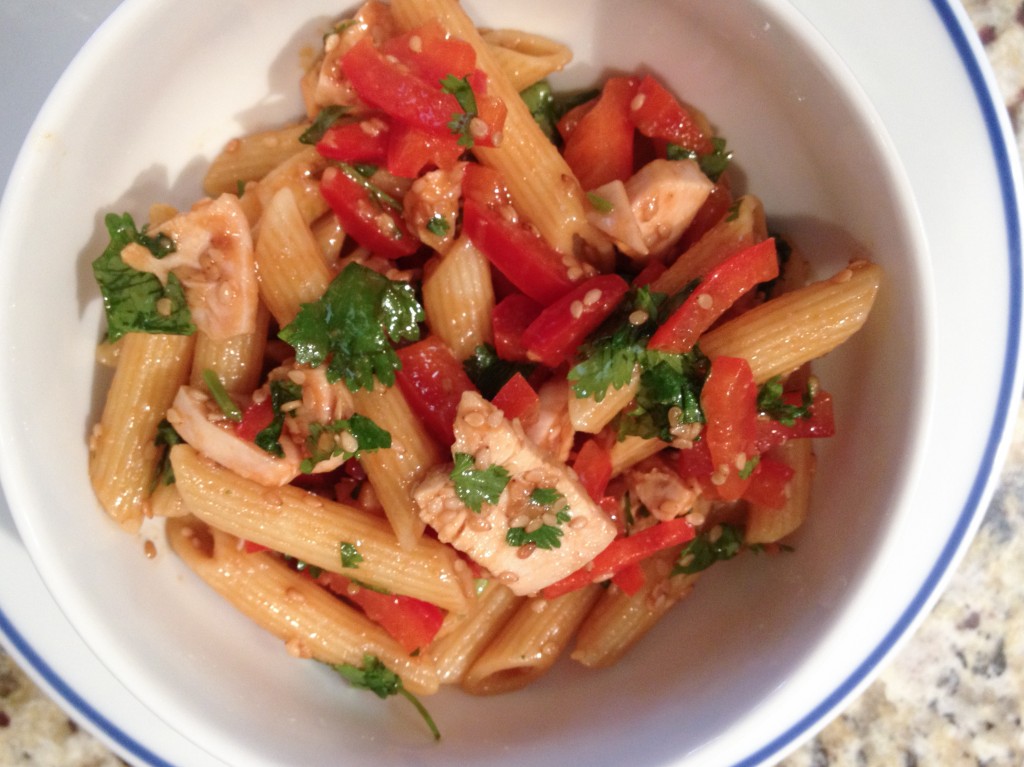
This is a recipe my sister used to make 20 years ago.  I think it came from a cookbook she had, which has since been lost in the shuffle of life.  I replicated as closely as I could when I had to bring a dish for a potluck at my daughter’s school.  This Asian Pasta Salad is great alternative to macaroni salad, especially in the summer, since there’s no mayonnaise to worry about.

Use any small pasta shape you like.  I usually like to use bow-ties, but I was out of them for this go around.  To save time, you can cook the chicken the night before you plan to eat this.  I think next time I make this, I will add pea pods and diced green onion.   Those weren’t in the original recipe, but I bet they’d add some sweet, crunchy interest!

Hoisin sauce is widely available, and if your grocery store has an Asian section, I’m sure you can find it – look for a little jar, next to the soy sauce.  You could substitute a jar of Plum Sauce if you can’t find Hoisin.  Hoisin sauce is great for any kind of stir fry you make at home, so I doubt it will go to waste.  The dressing for the Asian Pasta Salad is also tasty on a more traditional “Chinese chicken salad” with shredded cabbage, diced chicken, green onions, slivered almonds, and mandarin orange segments.

Asian Pasta Salad

Ingredients:

  • 4 tablespoons Hoisin sauce
  • 1 tablespoon rice vinegar
  • 3 tablespoons sesame oil
  • 1 pound box of dried pasta, small shape preferred (macaroni, mini-shells, or bow-ties work well)
  • 2 chicken breasts, cooked, cooled, and chopped
  • 2 bell peppers (try to get at least one red bell pepper), cut into very thin slices
  • 1/2 bunch fresh cilantro, chopped
  • salt and pepper
  • 2 tablespoons sesame seeds

Directions:

  1. Boil the pasta, following the directions on the box.   Don’t overcook!
  2. While the pasta is cooking, in a small container with a lid, shake together the Hoisin, vinegar, and oil.  When the pasta is done, drain and pour into a very large bowl.  Pour the dressing over the pasta and toss well.
  3. Add the chicken, peppers, and cilantro to the bowl and toss to combine.  Taste for seasoning, as you will probably need salt, and may prefer a little pepper.  Sprinkle with sesame seeds and toss again.  Chill for at least an hour, or until ready to serve.


Explore, experiment, enjoy! — Dana


To view even more of Dana’s unique recipes, you can visit her at Frugal Girlmet!


How to Organize Your Incoming Mail

Several months back, our normal routine for bringing the mail was to simply lay it on the counter in the kitchen, until we found the time to go through it.  Sometimes the stack would just get bigger and bigger; it was always in the way of things I had to do in the kitchen; and I was getting more and more frustrated!

A friend of mine suggested the following organization tip for sorting my daily mail, and I have to tell you — THIS IS AMAZING, and IT WORKS!!

Today, when we bring in the mail, we have a spot in our kitchen that is used specifically for mail. It took a matter of about 3 days to get in the habit of using it, but once we saw how much better this process works, it was so easy to get in the habit of making it part of our daily routine!

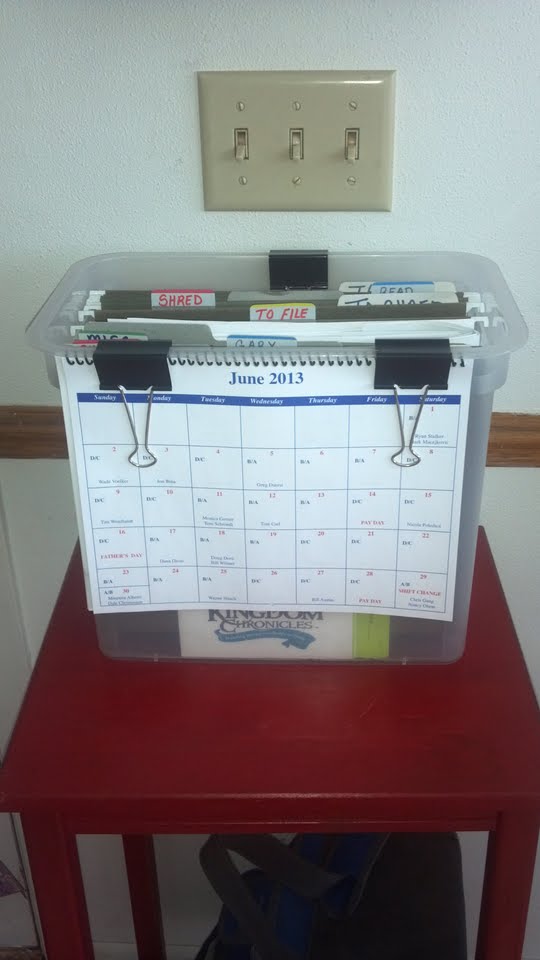
So what is this fabulous organization tip, you ask?  I want to first share a picture of it with you to show you how little space it takes up in my kitchen!  Then I will tell you how to set it up.  (The picture is really all you need to learn how to set it up…it is THAT EASY to set up!)

Box2


This little table sits right next to the door that comes into our kitchen from the outside.  So this makes an excellent spot for this box to sit!

What you will need:

Iris(R) Clear Open Top File Storage

Smead Hanging File Folders, Letter, 1/5 Cut Tab, Assorted Primary Colors, 25 Per Box (64059)

Post-it Tabs, 2-Inches, Angled Lined, 4 Assorted Primary Colors, 6-Tabs/Color, 24-Tabs/Pack

Insert all of the file folders into your new Mail Storage Bin.

Mark each tab as:

  • Persons name receiving mail
  • To Be Paid
  • To Be Filed
  • To Be Read
  • To Be Shredded
  • Taxes
  • Miscellaneous

Once you have marked all of your labels, attach them to the individual file folders.

Box1


VIOLA!!!  Your new Mail Storage Bin is ready to be used!!  So now what?

Each day that you retrieve your mail, get in the habit of coming inside and going directly to your Mail Storage Bin!  Sort the mail right then!!  Place inside the folders what needs to be kept, and then TOSS anything else IMMEDIATELY!  I promise you, you will LOVE this system!!  At least two or three times a week, set aside some time to go through each file folder; file what needs to be filed; shred what needs to be shredded; pay what needs to be paid, and so on.

You’re Very Welcome!! 

Christi

Gluten-Free Hearty Whole Grain Bread

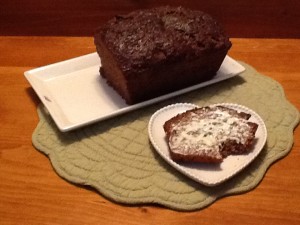
Here on our At Home with GCH blog, Monday’s are always focused on healthy but oh-so-yummy! recipes.  We’ve been on a gluten-free kick for quite a while now.  This week I am going to share my husband’s favorite gluten-free loaf of bread.  Shhhhh… (it is made from a mix)!  Really truly!  And it is incredible!  Very hearty…nice, thick crust…tasty…and full of such good-for-you ingredients.

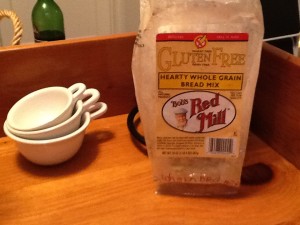
This mix Hearty Whole Grain Bread Mix is made by a wonderful company, Bob’s Red Mill.  They offer an extensive line of gluten-free baking products as well as many other items.  You should check their website out!  Many grocery stores and ‘big-box’ stores carry their products.

IMG_1621

Here’s the list from the label (note there are no preservatives or ingredients with 14 letters):

  • whole grain buckwheat
  • garbanzo bean flour
  • potato starch
  • cornstarch  IMG_1617
  • sunflower seeds
  • sesame seeds
  • whole grain sorghum flour
  • tapioca flour
  • cocoa powder
  • evaporated cane juice
  • fava bean flour
  • dried molasses
  • xanthan gum
  • caraway seeds
  • active dry yeast
  • sea salt
  • whole grain teff
  • potato flour
  • onion powder
  • guar gum
  • soy lecithin

If your home is like ours…this will be gone within 2-3 days.  This bread has no preservatives so you might consider keeping it in the refrigerator.  Slice as needed.

Additional Ingredients: IMG_1615
1+3/4 cups warm (110 degrees) water
1/4 cup oil
2 eggs, room temperature
1 teaspoon cider vinegar

Directions:

  1. Dissolve enclosed packet of yeast in the warm (110 degrees) water; let stand for 5 minutes ‘til foamy
  2. Grease a 9X5 loaf pan; then line with parchment paper, cut to fit.  also grease parchment paper
  3. Pour dry mix into stand mixer bowl
  4. Add yeasty water mixture and run mixer for 15 seconds
  5. Add eggs, oil, cider vinegar
  6. With mixer on low, blend ‘till batter is smooth and all ingredients are incorporated
  7. Turn mixer to medium speed and beat for 15-20 seconds
  8. Pour batter into loaf pan; smooth top of batter with wet fingers or spatula
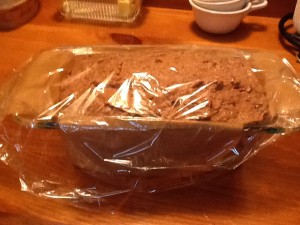
  9. Cover loaf pan with plastic wrap and put in a warm (75-80 degrees) place to rise for 40-45 minutes; I place mine into the microwave.  Allow dough to rise so it is level with the top edge of pan
  10. Preheat oven to 375
  11. When dough has risen, bake for 60-65 minutes or ‘til internal temperature of bread is 205 degrees (I use an instant – read thermometer)
  12. Cover bread with a loose tent of foil after approximately 35-40 minutes as it starts to brown
  13. Remove from oven; allow to cool for 5 minutes
  14. Then loosen edges of bread with a knife or small spatula
  15. Using parchment paper strips, lift bread from pan and place on wire rack to cool completely before slicing
  16. As the bread is cooling, I rub the top ONLY of the loaf with about a 1/2 tablespoon of butter; this just softens the top crust of this very hearty loaf of bread


♥  ♥  ♥  ♥  ♥

God loves you!  ♥  (Don’t ever forget that!)

♥  coleen

_________________________________

If you would like to send a personal message to Coleen concerning this blog post, you may email her at: Coleen@girlfriendscoffeehour.com
Sweet Potato Pizzas

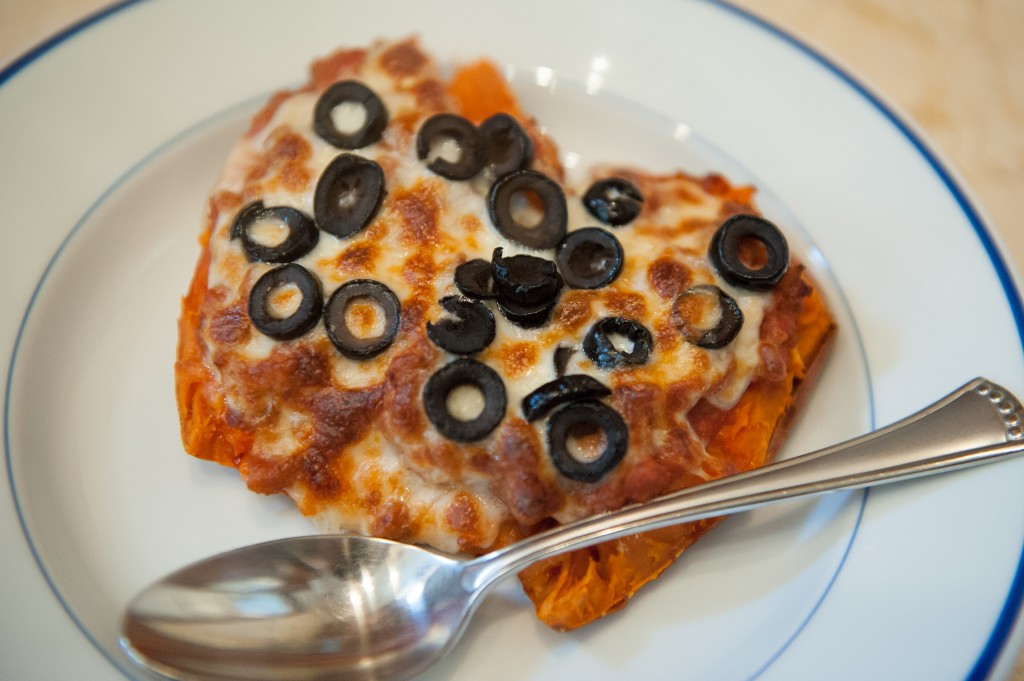
Sweet Potato Pizza

My husband is a big inspiration to me.  He made a resolve to take his fitness seriously, and keeps me on the right track when I am tempted to go off the rails.  As I was searching online for dinner inspiration, he looked over my shoulder and said, “OOH, I want THAT!”  It sounded weird and unappetizing to me, but I humored him and made it anyway.  What was it?  Sweet Potato Pizzas!

And boy am I glad I listened to him!  Whether you are craving pizza or just want a healthy, fun side dish, this is the way to go!  For the sweet potatoes, choose medium-sized ones that are not too skinny.  They should be about the size of your hand.  I recommend using Italian sausage, because the fennel seed adds a fantastic contrast to the sweet potato.  Use any toppings you like – kids love pepperoni!  In the summer, I microwave the sweet potatoes and then finish them in the toaster oven, but you can do the whole thing in your regular oven if you like.

We eat these as a side dish, with a salad and baked chicken breasts.  Take a chance, like I did, and try this tonight!

Sweet Potato Pizzas

(Makes 2 servings)

Ingredients:

  • 2 medium — large sweet potatoes
  • 1 cup tomato sauce, canned or homemade
  • 1/2 pound ground Italian sausage
  • 1 cup shredded mozzarella cheese
  • 1 small can sliced black olives

Directions:

  1. Wash the sweet potatoes.  Scrape off any eyes or weirdness on the outside, then poke several times with a fork.  Wrap in a slightly damp dish towel and microwave until done.  (My microwave takes about 6 – 10 minutes depending on the size of the potatoes.  You’ll know they’re done when you can squeeze them and they yield to your hand – kind of squishy inside.)  Remove from the microwave, unwrap and let cool a bit.
  2. While the sweet potatoes are cooking, crumble the sausage into a frying pan.  Cook until no longer pink.  Drain away any grease, then add the tomato sauce.  Heat over low heat until the sauce is hot.
  3. Slice the sweet potatoes in half lengthwise.  Place them on a foil-lined baking sheet, and mash up the insides.  (I kind of cut-and-fluff them.)  Spoon half the sausage-sauce mixture over each potato.  Cover with shredded mozzarella, then sprinkle with black olives.  Bake or broil until the cheese melts.  Serve hot!

Explore, experiment, enjoy! — Dana


To view even more of Dana’s unique recipes, you can visit her at Frugal Girlmet!

Homemade Laundry Soap

Over the past few months, I have gained an interest in making all of my cleaning products at home.  I’ve heard so much about women saving money by making their own cleaning products. So I branched out onto the Internet to find a recipe that I liked.  I have found several recipes out there, but the one I’ve shared below is the one that I like the best!  My clothes, towels, and sheets come out clean and soft (soft, mainly because I make my own softener, as well).

If you are looking for a great way to save $$ in your own home, this recipe is for you.  If you would like to make your own laundry detergent & save a few dollars, I highly recommend this recipe.

Homemade Laundry Soap

Ingredients:

1 – (4lb – 12 oz) box of Borax

1 – (3lb – 7 oz) box of Arm & Hammer Super Washing Soda

1 – (3lb) container of OxiClean

2 – (14.1 oz) bars of Fels-Naphta soap

1 – (5lb) bag of Arm & Hammer Baking Soda

All of these ingredients can be found at your local grocery story in the detergent aisle; with the exception of the baking soda, which can be found in the cooking aisle. 

*Adding 20 drops of your favorite essential oil is a nice addition

Directions:

1. Grate the Fels-Nephta soap in a food processor until it’s a powder.  You can also use a blender.

2. Add the Fels-Neptha powder to a kitchen size garbage bag, and then add remaining ingredients.  Shake well.

3. Store in an air-tight container.  I use a small canister in my laundry room, and just refill when needed.

Use 1 Tbsp for small load; 2 Tbsp for medium sized load; 3 Tbsp for large or heavily soiled load. (I use the scoop that came inside the OxiClean container.)  You will want to start your washing machine and allow it to fill it 1/3 full of water before adding soap.  This detergent will not make suds or bubble, but don’t worry it IS cleaning your clothes!

Since homemade laundry detergent doesn’t contain a sudsing agent it is safe and can also be used in front loading HE washing machines!  For front-loading machines, use about two Tbsp of your homemade detergent and mix the detergent with two Tbsp of hot water before adding to the dispenser.

Making your own laundry soap has many benefits.  I’ve listed some of them in the picture below.

soap


If you decide to try this recipe and use it in your own home, I would love to hear from you!

Happy Cleaning!

Christi

Strawberry Poundcake Cupcakes (GF)

Here on our At Home with GCH blog, Monday’s are always focused on healthy but oh-so-yummy! recipes.  Today’s recipe is for Strawberry Poundcake Cupcakes with Whipped Cream & Cream Cheese Frosting.  Oh yeah!

2013-06-02 20.08.14

I made these as a special indulgent treat for a family get-together this past weekend…we celebrated my daughter, Kassia’s 32nd birthday along with my stepmom, Betsy’s, birthday AND honored our little ballerina, Kaylie Joy, as she performed in her third recital!  Big doings, I am telling you!  So, we splurged a little bit in the healthy category, and oh boy…did we enjoy the yummy category!  These were a hit with the gluten-free crowd…AND the crowd that can eat their gluten.

These delightful cupcakes are based on a ‘perfect’ poundcake recipe from Shirley Braden at glutenfreeeasily.com  You should definitely check out Mrs. Braden’s website and blog!  Her recipes are tried&true!  I’ve never had a failure using her recipes and she has much insight to share regarding gluten-free baking and cooking.

*NOTE*  You will need only one other ingredient to complete these beautiful, delicious cupcakes: some perfectly ripe small-sized whole strawberries.  It is important that you choose small strawberries because if you were to insert cut strawberries into the tops of your cupcakes, the moisture would ruin the consistency of your lovely poundcake cupcakes!  Trust me…you can ask me how I know  ;-{

Poundcake Cupcakes

2013-06-01 15.56.21Cupcake Ingredients:
2+1/4 cups gluten-free flour
1+1/2 teaspoons xanthan gum
1+1/4 teaspoons salt
1 teaspoon baking powder
3/4 cup light olive oil
1+1/2 cups coconut sugar (your choice of sugar)
2 tablespoons orange or grapefruit juice
2 teaspoons almond extract
3 large eggs
2/3 cup coconut milk (your choice of milk)

Directions for cupcakes:

  • Preheat oven to 350; line muffin tins with 24 cupcake papers
  • Whisk together the dry ingredients in a bowl; set aside
  • Pour olive oil into mixing bowl, with mixer running slowly add sugar,  juice, and extract ‘til combined well
  • Add eggs—one at a time—stirring after each addition
  • Add milk, and mix for two minutes
  • Gradually add dry ingredients into wet ingredients, mixing well
  • Scoop batter into lined tins
  • Bake for 22–24 minutes, testing with toothpick for doneness
  • Remove from tins, and cool completely on rack

Whipped Cream and Cream Cheese Frosting

Frosting Ingredients:
1 pint (2 cups) heavy whipping cream
2 tablespoons powdered sugar
1+1/2 teaspoons almond extract

8 ounces cream cheese, room temperature
1/2 cup powdered sugar

Directions for frosting:
Cream whips best when it is cold. Keep the whipping cream in the refrigerator ‘til ready to whip.  Also chill your mixing bowl AND whisk or beaters (refrigerate for at least 15 minutes).

  • Add cold whipping cream to chilled bowl
  • Whisk using electric mixer ‘til soft peaks form
  • Then sprinkle the sugar over the whipping cream and continue to beat; as sugar is blended in, slowly pour in the extract
  • Important to keep an eye on the cream as it heads towards done; don’t overbeat!  Set aside
  • In a separate large bowl, beat the cream cheese ‘til fluffy
  • Crefully add in the 1/2 cup powdered sugar blending well
  • Using a spatula, gently fold the whipped cream into the cream cheese mixture ‘til they are completely incorporated.  Nice job!

Assembling directionsplease see *NOTE* above.

  • Wash and dry the strawberries, slicing off the green cap
  • Carefully carve out a small indentation in the top of each cooled cupcake
  • Insert—pointside down—a small strawberry into each indentation
  • It is perfectly acceptable that the strawberries stick up just a bit above the top edge of the cupcake
  • Now frost the cupcake with the whipped cream mixture.  Done!  Enjoy!

♥  ♥  ♥  ♥  ♥

God loves you!  ♥  (Don’t ever forget that!)

♥  coleen

_________________________________

If you would like to send a personal message to Coleen concerning this blogpost, you may email her at: Coleen@girlfriendscoffeehour.com
Chicken Satay with Spicy Peanut Sauce


Chicken Satay

Finally, summer is here!  That means lots of grilling at our house.  One of my favorite things to grill are skewers.  You can get so creative with what you thread on those sticks!  Veggie kabobs are a must, with juicy mushrooms, sweet-and-spicy onions, and bell peppers.  Keep the skewers close at hand for this easy recipe:  Chicken Satay with Spicy Peanut Sauce!

I use boneless, skinless chicken thighs here, although you could use skinless breasts instead. Everything else should be easy to procure.  These are best when they’ve had a chance to marinate for at least 2 hours, but don’t let the chicken marinate more than eight hours, or the chicken will start to break down.

If you have any leftover skewers, these mildly spiced chicken bites make a fantastic salad!  Just chop them up and toss with salad greens, lots of cucumber, and red or yellow bell pepper.  Make the peanut sauce into a salad dressing by buzzing in a blender with a little water or more oil. Delightful!

Chicken Satay with Spicy Peanut Sauce

Ingredients:

Chicken Satay:

  • 1 pound boneless, skinless chicken thighs
  • 1 cup plain yogurt
  • 1 teaspoon curry powder
  • 1 teaspoon fresh grated ginger (use powdered if you can’t find fresh)
  • 2 cloves garlic, minced
  • 2 tablespoon minced fresh cilantro
  • juice from 1/2 lemon or lime
  • wooden skewers, soaked in water for 30 minutes, or use metal skewers

Peanut Sauce:

  • 1/2 cup chunky peanut butter
  • 1/2 teaspoon soy sauce
  • 1 clove garlic
  • 3 tablespoon brown sugar
  • 1/2 teaspoon minced ginger
  • 1/2 teaspoon Sriracha or hot sauce of your choice
  • juice from 1/2 lemon or lime
  • 1 teaspoon coconut oil or olive oil
  • optional:  a few dashes of nam pla (Thai fish sauce)

Directions:

  1. Slice the chicken thighs into 1″-wide strips
  2. Mix together the rest of the chicken satay ingredients and stir in the chicken.  Cover and refrigerate for two hours (or longer, up to 8 hours).
  3. While the chicken is marinating, make the Spicy Peanut Sauce.  Place all the ingredients in a blender or food processor and blend until smooth.  Refrigerate until ready to serve.
  4. When the grill is hot, thread the marinated chicken onto the skewers.  Grill for 5-8 minutes per side.  Serve with Spicy Peanut Sauce and more chopped cilantro.


Explore, experiment, enjoy! — Dana


To view even more of Dana’s unique recipe, you can visit her at Frugal Girlmet!

Tamale Pie

I wanted to share a recipe by my friend Irene Ladd.  I haven’t tried this yet, but it looks delicious!!

TAMALE PIE

Ingredients:

1 tablespoon olive oil
1 cup chopped yellow onion
2 cloves garlic, finely minced
1 1/2 pounds lean shredded beef
1 (29 ounce) can tomato puree
1 small can of enchilada sauce
1 (15 ounce) can pinto beans, drained and rinsed
2 cups whole kernel corn (drained & rinsed)
1 (4 ouncez) can diced green chilies
1 package of chili seasoning
4 ounces shredded Monterey Jack and Cheddar Cheese


Directions:

Saute onions, and then add garlic last minute in olive or coconut oil.  Add the shredded beef and reduce heat.

Stir in tomato puree and enchilada sauce.  Simmer for 1 minute.  Add chili seasoning package. Stir and simmer for about 10 minutes on low.  Add in beans, corn, and green chilies; simmer while preparing Tamale crust.

Tamale Crust

Ingredients:

2 cups masa harina

½ cup salted butter, cold and diced into pieces

1 teaspoon baking powder

½ teaspoon salt

1 ½ cups hot water

Directions:

In a food processor or mixing bowl, mix together masa harina, baking soda, and salt; cut in butter.  The mixture will resemble coarse crumbs.  Stir in hot water.

Divide mixture into 8 Ramekin cups and add about 1/2 cup of chili mixture; top with cheese and bake for 30 minutes at 350 degrees.  Top with chopped green onions, chopped cilantro, and sour cream.

*****


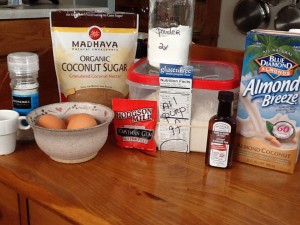
Gluten Free Chewy Chocolatey Gingery Cookies

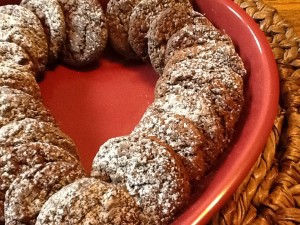
Here on our At Home with GCH blog, Monday’s are always focused on healthy but oh-so-yummy! recipes.  Today we have another cookie recipe!  This recipe makes a delicious and not-so-sweet cookie which still fits into this category!  Included in the recipe are healthy ingredients like sunflower and chia seeds, coconut oil instead of butter or shortening, and non-refined sweeteners.  Also to note, these are flourless and grainless (as I know that is important to some of you).

I am thinking this would make for a great ice cream sandwich with chocolate or caramel homemade ice cream!

2013-05-25 17.38.30

Chewy Chocolately Gingery Cookies  
(makes approximately 3 dozen medium-sized cookies)

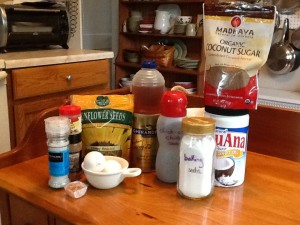
ingredients:
1+1/2 cups sunflower seeds
1 cube crystallized ginger
2 tablespoons coconut oil2013-05-25 16.18.42
2 tablespoons honey or maple syrup
1 tablespoon chia seeds
3/4 cup coconut sugar (or sugar of your choice)
3 tablespoons cocoa powder
1 teaspoon ground ginger
1/2 teaspoon ground cinnamon
1/2 teaspoon baking soda
1/4 teaspoon kosher salt
1 large egg PLUS 1 egg yolk

directions:

  • preheat oven to 350; line 2 baking sheets with parchment paper; fit a food processor with a mixing blade
  • place sunflower seeds, crystallized ginger, coconut oil, honey, and chia seeds into the bowl of the food processor
  • process for 2 minutes, stopping a few times as needed to scrape down the sides of the bowl ‘til all is finely ground (the mixture will look like nut butter)
  • add the coconut sugar, cocoa powder, ginger, cinnamon, baking soda, and salt;  process ‘til thoroughly combined
  • keeping the food processor running, add the egg and egg yolk; and process just ‘til dough forms
  • using a small cookie scoop, drop dollops of dough onto the lined baking sheets about 2″apart (if doing by hand*, a small cookie scoop holds approximately 2 teaspoons of dough)
  • bake for approximately 9-10 minutes ‘til the cookies are almost firm to the touch; do not overbake
  • remove from baking sheet and cool completely on a rack
  • best stored in an airtight container; enjoy!

* this is a sticky dough, as are most gluten free doughs.  if rolling by hand, you might need to occasionally rinse your hands with cold water.

*** I dusted mine with a little bit of powdered sugar.  To make these an extra-special treat, melt ½ cup of chocolate chips in the microwave; dip a portion of your Chewy Chocolatey Gingery Cookie into the melted chocolate while it is still hot.  Let cool on a rack for the chocolate to harden.

♥  ♥  ♥  ♥  ♥

God loves you!  ♥  (Don’t ever forget that!)

♥  coleen

_________________________________

If you would like to send a personal message to Coleen concerning this blogpost, you may email her at: Coleen@girlfriendscoffeehour.com