January 11, 2025

What IS homeschooling, anyway?

www.girlfriendscoffeehour.com What IS homeschooling, anyway? #homeschool

Now that you know my story, and how our family came to homeschooling, you may be asking yourself this question.

What IS homeschooling, anyway?

Trust me, anyone who has ever considered taking this faith leap has asked themselves that question! The answer can be simple or quite complicated, and it depends on many things.

Are you new to homeschooling?

How many children are you homeschooling?

In which state are you living?

Is this a permanent decision, year-by-year, or definitely temporary?

What is your teaching and learning style?

What is your child’s learning style?

Does your child have a great interest in a certain topic or activity?

The definition

Are you ready for the basic, simple definition of homeschooling?

Homeschooling is the educating of a child by his or her parents.

Ready for the more complicated answer?

Homeschooling is:

Reading, baking, singing, playing, writing, building, creating, resting, thinking, gardening, swinging, digging, swimming, changing, committing, adjusting, listening, praying, following, obeying….to name just a few verbs. Notice how it is an active, living thing?

I posed this question in a couple Facebook groups of which I’m a part, as well. Below are some of the answers I received from mamas who are currently in the trenches of homeschooling!

“A learning lifestyle” ~ Inger from Hiding the Peas

taking personal responsibility for their [your child’s] educational outcome” ~ Amber from Adventure Hollow

“Living and learning WITH your children.” ~ Heather from Upside Down Homeschooling

“We think of homeschooling as learning together as a family, doing our best to equip and prepare our children for what God calls them to in career, family, and Great Commission.” ~ Tauna Meyer from Proverbial Homemaker

“Homeschooling is a lifestyle. It is not school at home, but rather a way we choose to live our life.” ~ Stephanie from Multi Taskin’ Mom

It is simply choosing to raise our children ourselves.” Cindy from Get Along Home

“It’s doing life together! Pouring the love of Jesus into them every moment and making him the center of all we do! “~ Jennifer from Godly Glimpses

“Homeschooling is the gift of nurturing relationships with your children, crafting learning opportunities to meet their needs, and blending life and learning together. ~ Anne from learning table

An opportunity for parents to be at the helm of providing intellectual, moral, social and spiritual instruction to their children by choosing to guide them through learning outside of traditional public, private and charter schools. ~ Martianne from Training Happy Hearts

“Homeschooling is about discipling our children the same way Jesus discipled his apostles — by being with them every day, talking with them, teaching, training, and setting the example.” ~ Marcy from Ben and Me

Here are some quotes from a few unschoolers, too:

“….my definition of homeschooling has grown over the years. I believe it is the original design for families. Children learn naturally from their parents through daily interaction, guidance, participation in the community in meaningful ways, and working through issues.” ~ Aadel from These Temporary Tents

“For our family, homeschooling is not defined as what we do. It’s just that we keep our kids home from school. I actually had a “Yes!” moment recently as I was flipping through David Guterson’s “Family Matters” and that he had written something very similar to the above sentiment. I had finally found something that made sense. What unites all homeschoolers, regardless of their educational philosophy, is that they have traded in the ideal of public education to keep their kids home and to educate them in a way that seems natural and makes sense to them. Homeschooling is about choosing something different for your family.” ~ Rebecca from Raven Threads

“I believe that parents owe it to our children to step out of that world and seek first, God and then seek freedom. Freedom to think for themselves without fear of rejection, freedom to learn the world outside the textbooks, freedom to feel the world…not just read about it. Freedom to become discovers again! ~ Margret

Tabitha, over at Meet Penny, also helped me out by polling her readers. Here are some of the answers she received:

“A method of educating the whole child.”

“Homeschooling is a lifestyle.”

“Homeschooling is providing my children with the best education I can for them to become happy, intelligent adults.”

“I am heart-schooling!”

Personally, I love that last one.

I may need to begin describing our homeschool that way. After all, it is the reason I began homeschooling. To capture their hearts, direct them toward Him!

Did these quotes give you a good picture of what homeschooling is? Of what it can be?

I look forward to digging deeper next week with Why would ANYONE choose to homeschool? I hope you’ll join me!


Random Do It Yourself Tips

One day this week I felt like I had a complete do-it-yourself day.  I’m a single mom of two boys ages 11 and 1. I’ve had to learn to do a lot of things on my own that normally I would have gotten help with.

Today started out with us going shopping.  I’m a guru about finding stuff on sale. I found sunblock for $3, and a bathing suit top for $5.00. Remember to shop the clearance items to save money.  I also did a complete balancing act with a sleepy baby trying to check out.  It’s amazing the things a mom can do with one hand.

After I picked up my son from school, I had to go home and mow the yard.  Thankfully, my son and my nephew helped babysit the baby while I did this.  For two days now, I have been trying to start the lawn mower and it would not start no matter what I did.  I remembered one time my neighbor sprayed some starter fluid into my lawn mower engine and it started right up.  So while I was at Walmart, I bought some engine starter fluid for $3.  I sprayed the starter fluid where the air filter went down into the carburetor and I was amazed all it took was 2-3 seconds of  spraying and it started right up.  You have to remove the air filter and replace it after spraying.  I was able to mow the yard and not have to ask someone for help or not have to take the lawn mower in to get it fixed.  I have to say it was pretty amazing that I was able to fix an engine.

My oldest son had gone camping with his dad over the weekend and he got chiggers.  His little legs are broken out very badly.  I have used a home remedy before on myself and it definitely works.  I used clear fingernail polish to cover every chigger bite. The nail polish will suffocate the chiggers and they will go away.  Needless to say,  I didn’t have time to complete the craft I was going to use for the blog.  So that will be on my to-do list for next week.  The important thing to remember is that we all are able to do things on our own as long as we know how to do it and we just keep trying.  Having faith and believing that you can do things for yourself is a huge self- esteem booster and knowing that God will help you in every step of the way has helped me to believe in myself. The smiles on my boys faces are definitely worth it.

AmysBoys

I hope my tips were helpful for you today!  I would love to hear some of YOUR tips, too!!

Enjoy!!

Amy


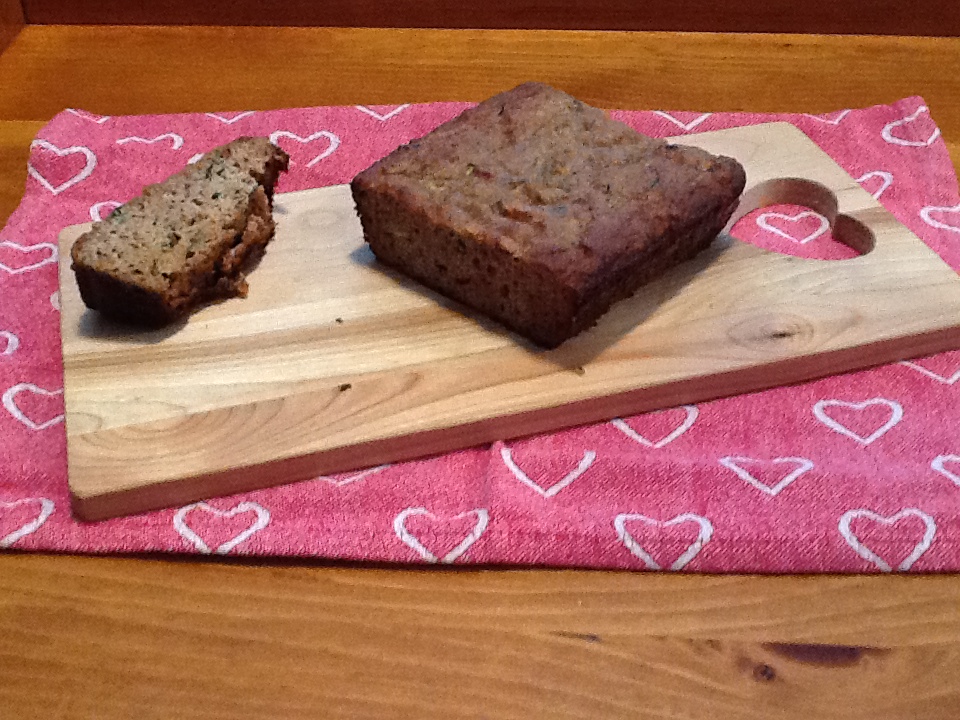
Gluten Free Zucchini Bread

Here on our At Home with GCH blog, Monday’s are always focused on healthy but oh-so-yummy! recipes. Today our series on summer recipes featuring in-season produce continues. Our featured ingredient—again—this week is zucchini!  Our own little garden (ok, honestly, it is Robert’s garden) is pumping out the zucchinis.  How about you?  Are you checking Pinterest or roaming the internet looking for yummy zucchini recipes?  This zucchini bread recipe uses almond flour so it is low in carbs, high in protein…very paleo-friendly, too!  Enjoy!

2013-08-16 10.34.44

Gluten Free Zucchini Bread

Ingredients:
1+1/2 cups blanched almond flour
1 teaspoon baking soda
1/4 teaspoon salt
1+1/2 teaspoon cinnamon
1/2 cup chopped walnuts or 1/2 cup chocolate chips (optional)
1 medium-to-large sized zucchini
2 large eggs
2-3 tablespoons honey or agave nectar
1 very ripe banana, mashed
1 tablespoon melted coconut oil

Directions:
Preheat oven to 350.  Grease a loaf pan and set aside.
Grate the zucchini (sans the seeds!) onto a tea towel; you should have about 1 cup.  Roll the towel up and squeeze to remove excess moisture from the zucchini. Set aside.
Whisk dry ingredients together in a medium bowl.
In a larger bowl, mash the banana and then whisk in the eggs, agave, and coconut oil.  Stir in the zucchini.
Add dry ingredients to wet, whisking until well combined.
Pour batter into greased loaf pan and bake for 35-40 minutes, or ‘til a toothpick inserted into the center comes out clean.

♥  ♥  ♥  ♥  ♥

God loves you!  ♥  (Don’t ever forget that!)

♥  coleen

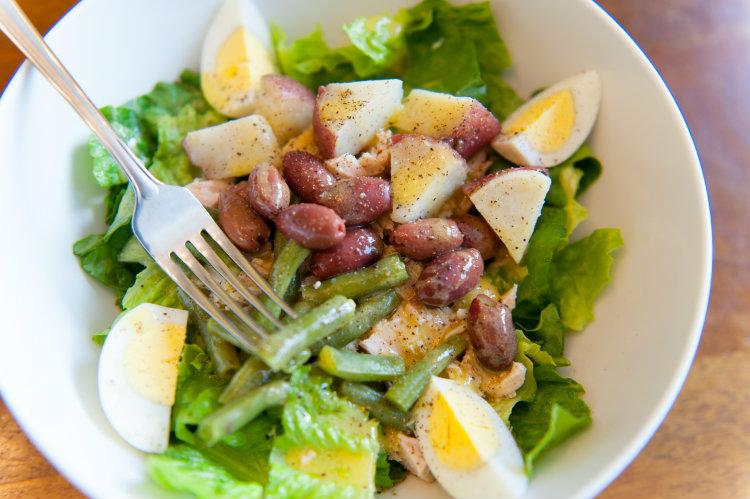
Salad Nicoise

Salad Nicoise small


Salad Nicoise sounds fancy, doesn’t it?  It makes me picture Paris fashion, little bistros with snooty waiters, and dining on vin and fromage by candlelight.  In reality, Salad Nicoise is just a dressed-up tuna salad!  This is one of my favorite dinner salads, combining satisfying protein, crunchy vegetables, and a few extra surprises.

Nothing too exotic to buy at the store here.  You probably don’t have Nicoise olives at your store (I’ve never seen them grocery shopping around Los Angeles), but you can easily find a jar of juicy black Kalamata olives.  I use romaine lettuce (it’s my absolute favorite!) but you can use any green lettuce, and I’ve eaten this on baby spinach too.  You don’t want to use anything too bitter, though, so stay away from a salad mix that has a lot of frisee, arugula, or escarole.  I didn’t have any in my fridge, but a couple of teaspoons of minced parsley would be nice sprinkled over the top.  You can use this as a jumping off point, and add in other ingredients you like:  tomatoes, diced bell pepper, pistachios, or capers.  Let your imagination run wild, French-style!

Salad Nicoise

(Makes 2 dinner salads.  Serve with bread and white wine if desired.)

Ingredients:

  • 1 teaspoon Dijon mustard
  • 2 tablespoons fresh lemon juice or wine vinegar (red or white is fine) plus one tablespoon reserved for potatoes
  • a pinch of sugar or one drop of honey
  • 1/4 cup olive oil
  • 1 5-oz. bag of salad mix or 2 heads of romaine lettuce, washed and chopped
  • 3 or 4 hard-boiled eggs
  • 2 cans tuna, drained
  • 1 large red- or white-skinned potato (Russet potatoes aren’t as nice and fall apart – save them for baked potatoes)
  • 8 oz. fresh green beans
  • 1 jar kalamata or other large black olives
  • salt and pepper
  • optional:  minced parsley, basil or tarragon to sprinkle over top

Directions:

  1. Make the vinaigrette:  In a small container with a lid, add the mustard, 2 tablespoons lemon juice or vinegar, pinch of sugar, and olive oil, and shake to combine.  (The pinch of sugar offsets the mustard and vinegar – you don’t need to add it, but I think it mellows out the dressing a little.)
  2. Boil a large pot of water on the stove.  Wash the potato and green beans.  Chop the potato into one-inch chunks, and cut the green beans into one-inch pieces.  Add to the boiling water and simmer the potatoes for about ten minutes, then add the green beans and cook for 3 minutes more.  You should be able to just pierce a potato with a knife or a fork, but you don’t want the potatoes to break apart.  When the potatoes are done and just cooked through, drain the water, and sprinkle with the reserved tablespoon of vinegar.  Set aside.
  3. While the potatoes are cooking, make a bed of the lettuce in 2 large salad bowls.  Peel the hardboiled eggs and slice into quarters, lengthwise.  Drain the cans of tuna and flake with a fork.  Layer the tuna and eggs over the lettuce.
  4. Top the tuna with green beans, potatoes, and olives.  Season with salt and pepper.  Drizzle with the dressing and optional chopped herbs.


Explore, experiment, enjoy! — Dana


To view even more of Dana’s unique recipe, you can visit her at Frugal Girlmet!

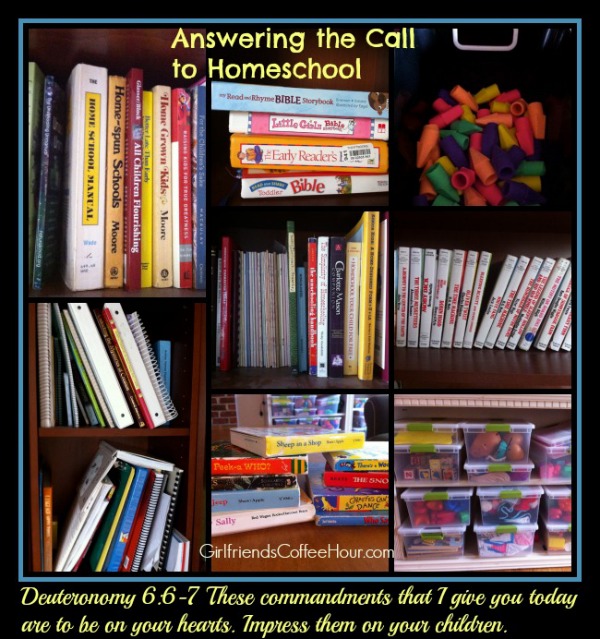
Answering the Call to Homeschool

Answering the Call to Homeschool www.girlfriendscoffeehour.com

Homeschooling was never on my radar. When our first child was about 15 months old, my husband graduated from college and we moved south to central Florida. We soon found a wonderful church where we became heavily involved. We loved it there! We were making close friends, I was serving in the children’s ministry, and together we took some of the marriage classes offered, to grow closer to God and to one another as a couple.

The church had a preschool and was also starting an elementary school. My ‘plan’ was to send my kids to preschool and elementary school there, and to eventually teach there myself. When my oldest was 3 years old, he entered the preschool program. My daughter was only 2 years younger and soon followed. By the time we had added our third child to the family, my son was entering kindergarten and we were wondering how we would afford private school for three children!

We decided to try public school. That lasted all of about 6 weeks, due to an illness in the family which required travel. My son was “missing too much school” and we were told he would fail the year if he missed more than 9 days in a semester. We decided to try homeschooling for the first time. Although it was going well, and I enjoyed teaching my children at home, it was not a permanent decision. By the beginning of the second semester, we had found a way to cut costs enough to swing tuition, and we re-enrolled our son and daughter in private school.

I began volunteering at the school because I wanted to be involved and be ‘in the know’ about school happenings. As my children learned and grew, we became ensconced in the school setting. We made great friends, participated in field trips, and generally enjoyed our time there. I missed my children, but kept busy with my baby and enjoyed our time together when they were home. As they each moved into their next grades, I found a sitter for my youngest and was able to spend even more time at the school. I was the ‘Friday Folder’ mom in my son’s 1st grade class. I saw what they were working on each week, listened to the teacher as she taught various lessons, and sometimes I graded papers. I even began walking with my son’s teacher some evenings because we lived near one another, and it was a great time of fellowship for me!

The end of the year came and went, and we were well into summer when there were rumblings about a temporary move. We were not sure if we should all move or if my husband should go alone, but eventually came to the decision to take everyone. Thus began our second, and very short, stint in the homeschooling world. With a 2nd grader, kindergartener, and 2.5 year old, I found it difficult to ‘do school’ and keep everyone happy. After 4 short weeks, I threw in the towel and put the kids in the neighborhood public school. Their time there ended up being very short as well, as the company shut down the program my husband was working on and our family headed back to Florida after just 9 weeks away!

Working My Plan

There were openings in the children’s grades, as well as an opening for a preschool teacher’s aide and an after-care worker, at the private school where our kids had been enrolled before. I accepted both. My dream to teach was about to come true! We began school just after Thanksgiving that year. My children were at the school from 8 a.m. to 6 p.m. every day. I had found a daycare for my youngest son and I had also enrolled in college classes. I was preparing to get the teaching degree that I had always wanted.

We were all very busy and actually not very happy. My husband was the one to pick up my youngest from the sitter and he also often began dinner preparations. What a blessing he was! Still, that was not his role, it was mine. By February, I knew things weren’t working. We held a family meeting and decided that I would stick the year out with my teaching and classes but that the next year I would be done at 3 p.m. when my children were. I was thrilled with our plan, and I even had a real teaching job lined up for the following school year. I would teach 3 year olds from 8 to 12 and be able to pick up my kiddos  at 3 p.m., just as I had promised!

Surrendering My Plan to God

Over the summer I continued to take classes and left my children in daycare. I still didn’t get it, and God began to whisper to me:

How do you feel about missing your son perform during his Christmas play,  and for Mother’s Day? Shouldn’t you be teaching him?

He also brought to mind the verses from Deuteronomy 6: 4-9, and I wondered, how will I teach him if I am not with him?

We had also learned that our daughter had a vision problem and could not read, a requirement for the first grade environment. She would need more help than would be available. These two things caused me to consider homeschooling yet again.

It was a hard sell to my husband. I promised to stick out the entire year, even if I hated it. He hesitantly agreed. It was tough, but I knew that this time I had heard a clear call from God to do this. That is what made the difference! I have had to surrender some dreams, but answering the call to homeschool has given me new dreams, far and above anything I could have dreamed up on my own. We are entering our 8th year of homeschooling and I wouldn’t trade it for the world!

Please be sure to join me again next week, when I will answer the question: What IS homeschooling, anyway?

Blessings,

Wendy

Personalized Coffee Mugs

Here at Girlfriends Coffee Hour, we are all about coffee!!  So, today’s blog gives us an interesting and fun way to decorate our coffee mugs!

Items needed:

Solid color coffee mug (make sure it is microwave safe)
Bic(TM) marker(s)

Directions:

Think of an idea that you would like to write on the mug—a word, a picture, a Bible verse, a prayer, etc.  For my coffee mug, I wrote “Dear God, please make me harmless as a dove.  Amen!” I also drew a picture of a dove and decorated the bottom of the mug with hearts, the handle with polka dots and I drew a cross under the handle.

Use your BIC marker(s) to decorate the mug any way you would like.  I used a silver marker on a black coffee mug. The color choices are endless.

Bake it in the oven at 350 degrees for 30 minutes. This will keep the marker from coming off.

Let cool, wash and enjoy!

mugs

Have fun and Be Creative 🙂

Amy

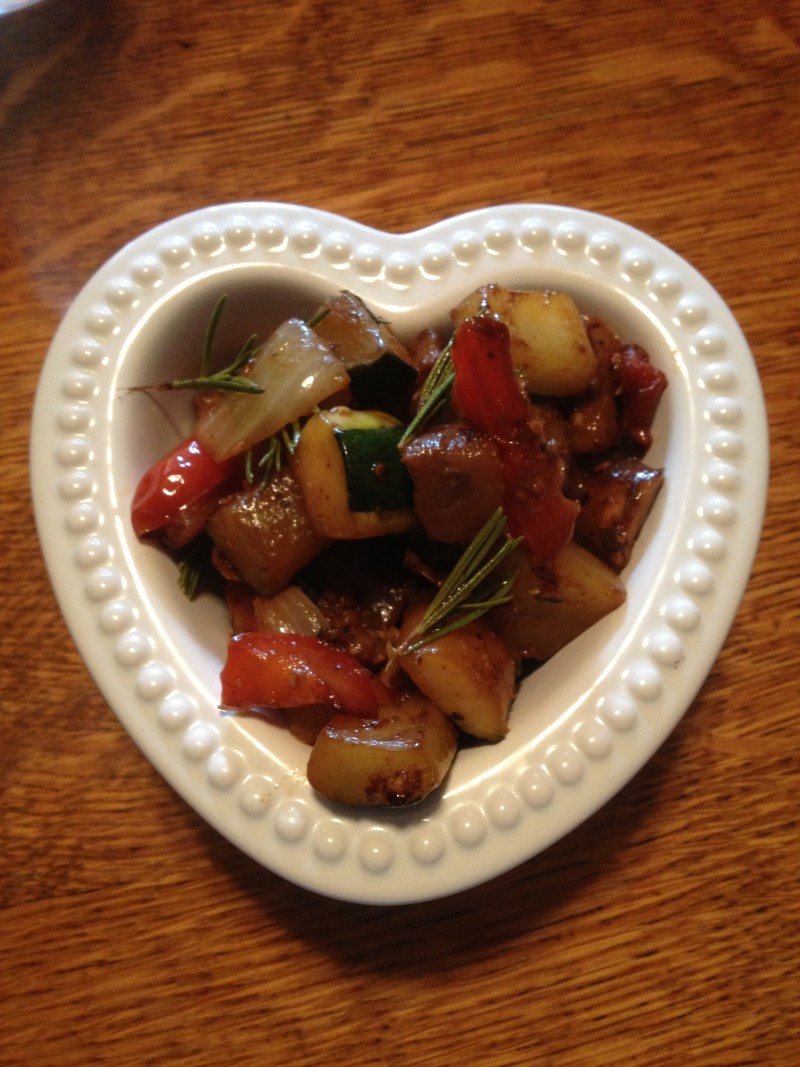
Ratatouille

Here on our At Home with GCH blog, Monday’s are always focused on healthy but oh-so-yummy! recipes.  Today our series of summer recipes featuring in-season produce continues. Our featured ingredient this week is zucchini!  Here is a link showing the nutritional value of this summer squash as well as it’s health benefits.

As prolific as zucchini is both in our own gardens as well as the farmstands from which we purchase some of our produce, I suppose we could continue for the rest of the summer with recipes utilizing zucchini.  Earlier this year, I posted a recipe for Gluten Free Zucchini Muffins; check it out!

Today’s recipe is for Ratatouille—a yummy melange (mixture) of zucchini and other seasonal veggies!  Ratatouille can be served hot, room temp (my favorite), or even cold.  It can be a delicious side dish served with something yummy off the grill.  It is a tasty alternative as a pizza topping, too.  Our favorite way to enjoy Ratatouille is as a vegetarian entree with the addition of fresh mozzarella pieces; oh yum!   And bread…don’t forget some bread!  A nice crusty baguette or loaf of Italian bread is great!  This is also a dish which can be served—and enjoyed by all—when you have any combo of vegetarians, vegans, and meat eaters.

And, of course, I would be remiss to fail to mention my favorite (yours, too?) Ratatouille… Actually, a little rat who yearned to be a French chef.  Remember him?

Ratatouille2013-07-31 18.56.35

Ingredients:
1/4 cup olive oil, plus more as needed
Kosher salt and ground lemon pepper*
1 medium-sized eggplant, cut into cubes
2 medium-sized zucchini, halved and cut into halfmoons
1 red pepper, cubed
1 yellow pepper, cubed
1 large sweet onion, chopped
8 ounces baby bella mushrooms, chopped
3-4 medium tomatoes, chopped
3 tablespoons chopped garlic
2 teaspoons chopped fresh thyme
1 stem fresh rosemary, pulled into sprigs
3 tablespoons good balsamic vinegar
optional: 8 ounce container of fresh mozzarella balls

Directions:
Heat 2 tablespoons of olive oil in a large saute pan.  Cook the vegetables, individually, (separately) for 5 or 6 minutes each, seasoning lightly with kosher salt and a few grinds of lemon pepper.  Remove each and place into one large bowl to hold ‘til remainder of veggies (eggplant, zucchini, peppers, onion, mushrooms) are finished. Add additional olive oil as needed.  Combine all of the cooked vegetables back together in the pan, and then stir in the chopped tomatoes, garlic, thyme, and rosemary.  Allow to gently simmer for 20 minutes.  Finally, add the balsamic vinegar, and taste for additional salt and pepper.  Enjoy!

♥  ♥  ♥  ♥  ♥

God loves you!  ♥  (Don’t ever forget that!)

♥  coleen

_________________________________

If you would like to send a personal message to Coleen concerning this blogpost, you may email her at: Coleen@girlfriendscoffeehour.com

Baked Italian Cauliflower

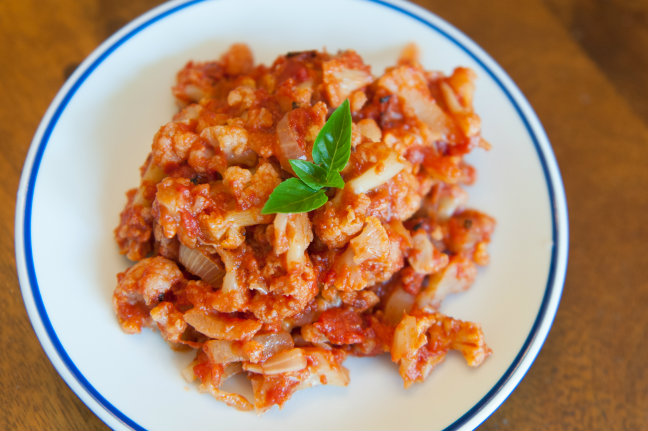
Baked Italian CauliflowerResize


After I had my second daughter, my friend Sunita brought over dinner for my family.  Not only was that a lovely, thoughtful gesture, but it was a tasty one too!  Sunita made a huge casserole of baked rigatoni  and cauliflower in a spicy tomato sauce, spiked with gobs of melty cheese.  I won’t tell you how quickly I ate up dinner (and all the leftovers) – but it was fast!  Here is a link to the original recipe.  However, my husband and I don’t eat pasta anymore, and my girls aren’t really that into it either.  I wanted to see if I could make the same tasty dish, simplified a little, without the noodles.  I think I did!

Baked Italian Cauliflower is a tasty side dish and will go well with baked meatballs, chicken breasts, whatever you have going!  The only ingredient that may be a little difficult to locate is the cheese.  The recipe calls for 8 oz. of fontina, which is a semi-soft, creamy cheese.  It melts like a dream!  If you can’t find it, you could substitute 2/3 cup shredded mozzarella and 1/3 cup shredded swiss cheese.  It won’t be exactly the same, but you’ll still get the gooey, smooth texture from the mozzarella and a little bite from the swiss.  As for the pepper, I used one of those red pepper flake packets that always comes to your house when you order pizza.  Do you have as many of those packets in a kitchen drawer as I do?  If not, use other red pepper flakes, or even a 1/2 teaspoon of Sriracha or other hot pepper sauce.  I’ll let you decide how spicy you want your dish to be.  For me, the pizza pepper packet was enough!

Once you make this (and love it!) you can add in other things to your cauliflower casserole:  cooked Italian sausage or ground beef, slices of summer squash, or some very finely chopped herbs – basil and parsley would be yummy.  Bake this tonight and tell me how you like it!

Baked Italian Cauliflower

Ingredients:

  • 1 large head of cauliflower
  • 1 onion
  • 8 ounces fontina cheese
  • 1-14 ounce can fire-roasted tomatoes
  • 1-6 ounce can tomato paste
  • 1/2 teaspoon red pepper flakes, or more, to taste
  • salt and pepper

Directions:

  1. Preheat the oven to 400*F.  Wash the cauliflower and cut out the core, then chop into bite-sized florets.  Microwave in a covered bowl, with a few tablespoons of water, for 8-10 minutes.  The cauliflower should be cooked but still firm.
  2. Drain the water off and add the cauliflower to a very large mixing bowl.  Chop the onion into very thin slices and add to the cauliflower.  Dice the cheese into tiny cubes, about 1 centimeter square, and add to the bowl.  Mix in tomatoes, tomato paste, red pepper flakes, and salt and pepper.  Stir to combine.
  3. Pour cauliflower mixture into a large casserole dish and bake for 45 minutes.  Keep an eye on it towards the end to make sure any exposed cheese doesn’t get too brown.  Serve hot!

Explore, experiment, enjoy! — Dana


To view even more of Dana’s unique recipe, you can visit her at Frugal Girlmet!

Detox Water

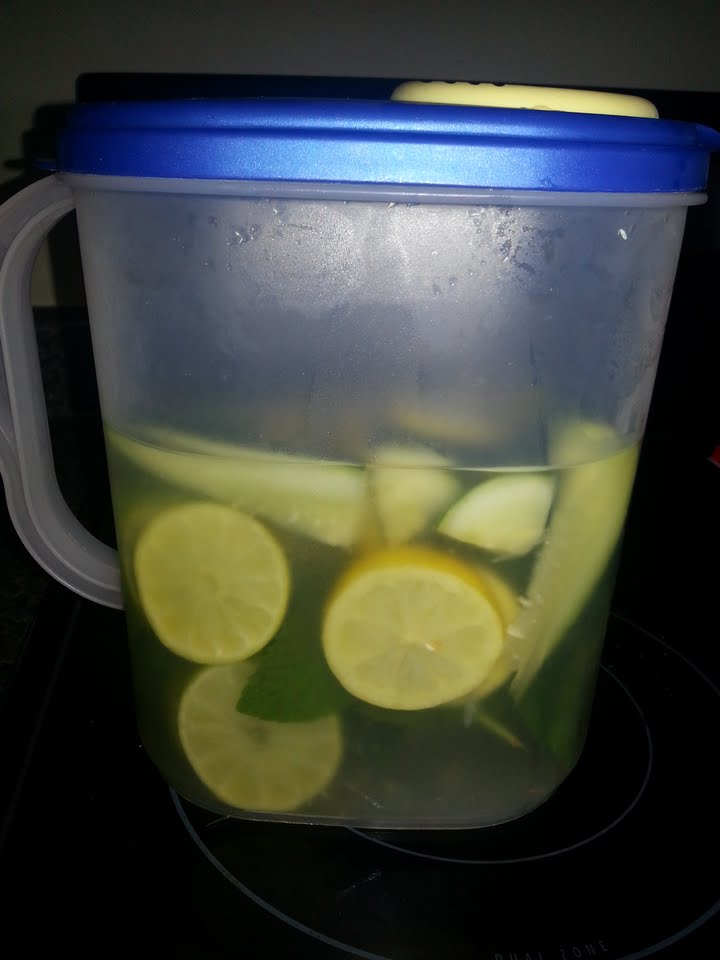
If you’re like me, you have seen a lot lately about cleanses and detoxes for your body to keep you healthy.  I have found a solution to make your own healthy all natural cleanse at home. This is something you can drink once a month or once a week.
detox
Items needed:
4 limes
4 lemons
1 cucumber
1 package of fresh mint
1 gallon of water
1 gallon pitcher
Directions:
Fill the gallon pitcher up with water.  Slice the lemons, limes, and cucumbers, and place in water.  Add 3-4 stalks of the fresh mint to the water. Let chill 1-2 hours in the refrigerator. Drink up to 8 glasses a day.
Enjoy.

Summer Fruit Crisp (Gluten Free)

Here on our At Home with GCH blog, Monday’s are always focused on healthy but oh-so-yummy! recipes. We are continuing our series of summer recipes featuring in-season produce. Our featured ingredient(s) this week are peaches and cherries!!!  Here are a couple of links to the  nutritional value along with some incredible health benefits  of these delicious fruits (peaches and cherries)—besides the fact that they are just yummy!

Nothing says summer to me more than the fruits that are available just during this season!  My most favorite is cherries; I just love cherries!  They are not in season for very long so indulge while you can!  We are!

2013-08-02 09.21.43

Summer Fruit Crisp

Ingredients:2013-08-02 09.52.20
3 large peaches, sliced
1 cup (18-20) cherries, pitted* and halved
1/2 cup raspberries (optional)
1/4 cup plus 1 tablespoon sugar
1/2 teaspoon almond extract
3/4  cup oats
3/4 cup almond flour
1 teaspoon cinnamon
1/2 teaspoon salt
6 tablespoons cold butter, cut into cubes

Directions:
Preheat the oven to 375.
Cube up the butter and place in refrigerator until ready for it.
In a baking dish or pie plate, toss the cut-up fruit with 1 tablespoon of the sugar and the almond extract; set aside.
Place the oats, 1/4 cup sugar, almond flour, cinnamon and salt into the large bowl of a food processor.  Pulse a couple of times to combine.  Add the cold butter, pulsing just until it comes together and forms clumps.  (Of course, you can mix this by hand, too!)
Mound the oat mixture on top of the prepared fruit.
Bake for 35 to 40 minutes.
Serve warm or cold; a nice scoop of vanilla ice cream completes this!  Enjoy!

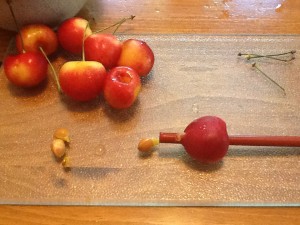
*  Here is how I pitted the cherries—with a drinking straw.  Yes, ma’am!  2013-08-02 09.01.35Now I am a girl who l-o-v-e-s her gadgets!  And, of course, you can go out and buy a cherry pitter.  But sometimes simple is the better answer.  And besides, then one can save her pennies to buy an incredible kitchen tool!  😉   Just do it like this:
Remove the stem from a cherry.
Place the end of the straw over the indentation of the cherry.
Firmly, but gently wiggle the straw straight through the cherry; the pit will pop right out!  Easy-peasy!

 ♥  ♥  ♥  ♥ 

God loves you!  ♥   (Don’t ever forget that!)

coleen

_________________________________

If you would like to send a personal message to Coleen concerning this series, you may email her at: Coleen@girlfriendscoffeehour.com