November 16, 2024

Roasted Beet Salad with Goat Cheese Medallions

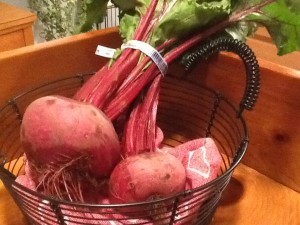
2014-03-02 19.11.32

It is almost spring!!!  Yes, yes…I KNOW…it is still snowy (I have looked outside!).

In the produce department, we are starting to see the return of the spring vegetables!  So here we go!  For the next few weeks, we will do a mini-series featuring spring vegetables…last week we featured an Asparagus Pasta Bake.   Today’s recipe is a salad with roasted beets, and baby lettuces such as arugula and kale.  YUMMMMMY!  Enjoy!

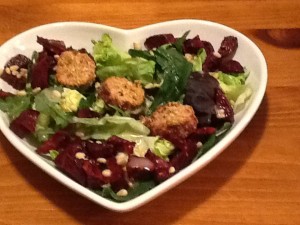
Roasted Beet Salad with Warm Goat Cheese Medallions

2014-03-03 00.58.19

Ingredients:
1/4 cup balsamic vinegar (I used honey balsamic)
1 tablespoon honey
1/3 cup extra-virgin olive oil, plus 2 tablespoons
Kosher salt and freshly ground black pepper
3-4 medium beets, peeled and cut into bite-size pieces
2 cups fresh arugula
2 cups baby kale
1 head romaine, chopped (or your favorite lettuce blend)
1/2 cup sliced almonds or pignoli
8 ounce log of goat cheese
1 egg
1 tablespoon water
1/2 cup almond meal/flour
1/2 cup sliced almonds, finely chopped (by hand or with a food processor)

Directions:
Goat Cheese Medallions:

  • Place the goat cheese log into the freezer ‘til firm (10-15 minutes).
  • Remove from freezer and carefully slice with thin, sharp knife into 8 rounds.
  • Preheat oven to 350.
  • Whisk together the egg and water.
  • Spread the almond flour on a paper plate, and the chopped almonds onto a separate plate.  Coat each goat cheese round with almond flour.
  • Dip each round in the egg wash and then roll in the chopped almonds to coat.
  • Place the coated goat cheese rounds on a parchment-lined baking sheet.
  • Bake for 10 minutes. Turn them over and broil on the top rack of the oven for 2-3 minutes, until the almonds turn golden brown. (Watch carefully!) Remove from oven and set aside.

Beets:

  • Line a baking sheet with foil. Raise oven temp to 450.
  • Whisk the balsamic vinegar and honey together in a small bowl to blend.
  • Slowly whisk in the oil. Season the vinaigrette with plenty of salt and LOTS of pepper.
  • Toss the beets in a small bowl with the 2 T of evoo and just a drizzle of the vinaigrette; thoroughly coat.
  • Place the beets on the foil-lined baking sheet and roast ‘til the beets are slightly caramelized, stirring once or twice, for about 30 minutes. Set aside to cool.

Salad:

  • Toss the lettuces along with a small amount of the vinaigrette in a large bowl ‘til lightly coated.
  • Season the salad, to taste, with additional salt and pepper. Place the dressed salad onto a large serving plate.
  • Arrange the beets around the salad.
  • Sprinkle with the nuts and top with the warm goat cheese medallions.
  • Serve with the extra vinaigrette on the side.

♥  ♥  ♥  ♥  ♥

God loves you!  ♥  (Don’t ever forget that!)

♥  coleen
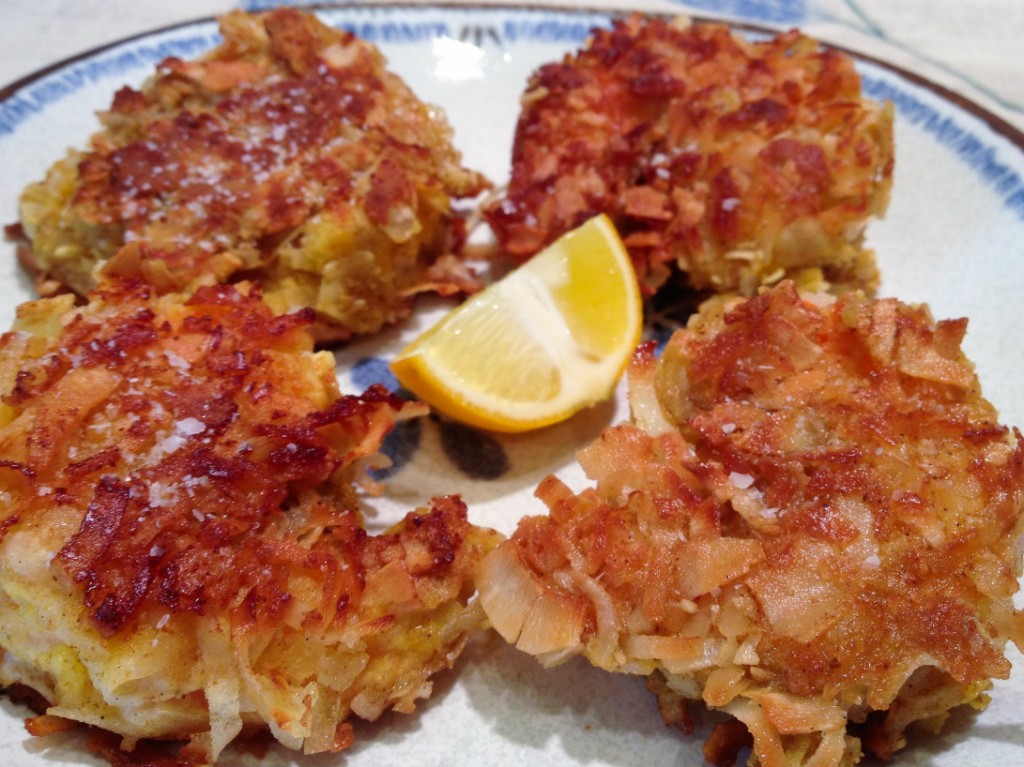
Mondo Coconut Shrimp

Mondo Coconut Shrimp Resize

Yes, MONDO!  With four, count ’em, FOUR different coconut products, you too can make your favorite appetizer from that restaurant you go to with your girlfriends!  Mondo Coconut Shrimp are really quite easy to make, and, a fun and tasty appetizer for a party.

You’ll want to use BIG shrimp for this recipe—the larger the better.  I found  some 13-15 count shrimp on sale, and they worked really well.  If you are using smaller shrimp, decrease your cooking time so you don’t make these guys all tough and rubbery.  I coated these in both sweetened AND unsweetened coconut.  Feel free to use one or the other if you don’t have both.  I was going to make this recipe just with the unsweetened kind, but I found a cup of sweetened coconut in my freezer and decided to use it up – and I’m glad I did!

To be  honest, these are fantastic with just some salt sprinkled on top when they come off the stove.  I took a photo of them with a lemon slice, and found out they didn’t even need that to be delicious!  So make these for friends, or as part of a funky dinner, and go MONDO!

MONDO Coconut Shrimp

Ingredients:

  • 1 pound large shrimp, shelled and deveined
  • 3 eggs
  • 1 cup coconut flour
  • 1 cup sweetened shredded coconut
  • 1 cup unsweetened shredded coconut
  • 1 teaspoon curry powder
  • coconut oil, for frying
  • salt for serving

Directions:

  1. Set up a breading station.  In the first bowl, beat the 3 eggs with a tablespoon of water.  In the second bowl, pour in the coconut flour.  In the third bowl, mix together the two coconut shreds and the curry powder.
  2. Start breading:  Dip a shrimp into the egg, then the coconut flour, then back into the egg, and then the coconut shreds.  Place on a plate while you complete the breading.
  3. In a large non-stick frying pan, heat one heaping teaspoon of coconut oil over medium heat.  When  hot, carefully add the breaded shrimp.  You’ll probably have to do this in at least two batches.  Let them cook for about six minutes, then flip and cook again for another five minutes.  Watch your heat here – you want it medium to medium-low, so that the shrimp cooks evenly and the breading doesn’t burn before the shrimp are done.
  4. Remove cooked shrimp to a plate and immediately sprinkle with kosher or sea salt.  Add another teaspoon of coconut oil  to the pan, if necessary, and cook the next batch.  Serve hot!

I texted my husband a photo of the shrimp and he said, “Oooh, looks yummy!” so I saved him some.  Unfortunately, they aren’t as nice the second time around.  They still taste great, but you can’t get them crispy on the outside a second time.  That means Carpe Diem – Gather ye rosebuds while ye may – and eat your shrimp while they’re hot.

Explore, experiment, enjoy! — Dana


To view even more of Dana’s unique recipe, you can visit her at Frugal Girlmet!

Is There Something You Need to Let Go to Have a Life of Balance Physically, Mentally and Spiritually?

let it goDo you eat healthy and exercise, yet struggle with consistency?  Do you struggle to overcome anxiety from the stresses in your life?  If so, have you thought that it may not be the external circumstances such as time, schedules, business, or other people, but your thoughts and emotions about the situation?

To have a consistent exercise and healthy eating program as well as not allow stress to overrule your life, I encourage you to stop for a moment and tackle what could be the root:

Is there something you need to LET GO
in order to have a life of balance
physically, mentally and spiritually?

Your Exercise

“I used to exercise every day, now I can’t seem to find the time or energy!”   Sound familiar?  Think back to what may have been different when you did exercise regularly.  Now, how are things different today?  You may be trying to follow an exercise program that is no longer conducive to your lifestyle.  Is it time to LET IT GO and develop a routine that works for you now?  I recently had a client say she now has a program that “fits her lifestyle.”  Yea!  By letting go of certain expectations, she is now exercising consistently.

God’s word says in Isaiah 43:18Forget the former things; do not dwell on the past.  See, I am doing a new thing! Now it springs up; do you not perceive it?

Look ahead and plan a new program that is fresh and works for you now.

Your Food

Do you ever say, “I know what I should do, but I just can’t seem to do it.”  Could it be there is an underlying emotion that you have ignored that is the root cause for what triggers you to make unhealthy eating decisions?  For example, is it time to for you to LET GO of

  • The need to gain approval of others which leads to insecurity
  • What others have said to or about you in your past which is hidden through food
  • The fear of imperfection or gaining weight which leads to not eating at all

How comforting and encouraging to remember that God, our Creator,  says in Psalm 139:14 that we are “wonderfully made.”  When we focus on what HE says about us, it can bring comfort, peace, and confidence that meets our deepest need.  We, as women, must come to the place where we not only know, but BELIEVE, what God says about each of us.

Your Mental Well-being

I remember when I came to the point where I realized the root cause of most of my stress was my own way of thinking.  To manage my stress, I exercised and ate healthy, but why did I let things get to me sometime?  Root cause…trying to control every situation in my life.  I had to LET GO of some things.  So that you can have a life of complete well being and manage your stressful situations, is it time for you to LET GO of

  • The way you think things should be done
  • The way you think the schedule should be
  • Expectations of yourself or others

As David says in Psalm 31:14-15, we are to give our everything including our time to God and trust Him with it.  But I trust you, O Lord, I Say, you are my God.  My times are in your hands.

In one of my favorite books, Let It Go by Karen Ehman, the first chapter (entitled “God Called and He Wants His Job Back”) really hit me where I needed it.  She reminds us it is not our job to manipulate or micro-manage the circumstances around us.  We are to change our attitude and trust God for with our time, circumstances, and those who are closest to us.

My kids love the movie Frozen and are constantly singing the song “Let it Go.”  I have to say, it is a great upbeat lyric—they seem to sing it right when I need to hear it.  Check it out.  It may be refreshing and give you a little tune you can’t get out of your head as a reminder, just like me.   <Sorry!>

For today, think about the possibilities of what it could be like if you left the past, focused on what God says about you, and gave up trying to control every situation in your life.

What can you LET GO to have a life of balance physically, mentally and spiritually?

In Good Health,

Crystal

Asparagus Pasta Bake

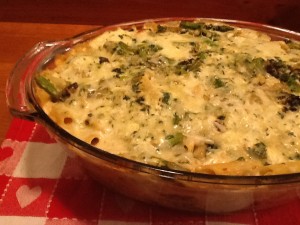
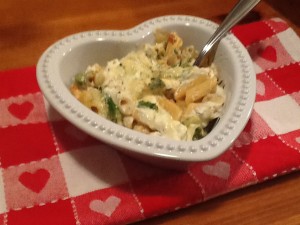
Have you noticed?  In the produce department, we are starting to see the return of the spring vegetables!  Hip-hip-hooray!  Oh, don’t get me wrong…I love winter veggies, too!  If you have followed the Monday installment of the At Home w/ GCH blog for any length of time, you KNOW we are big fans of butternut squash, brussels sprouts, and other winter veggies.  But, it’s almost spring!  So here we go! For the next few weeks, we will do a mini-series featuring spring vegetables… starting today with asparagus!  Oh, yum!  Today’s recipe features asparagus in a pasta bake.  This recipe could also be prepared using lasagna noodles, if you prefer.

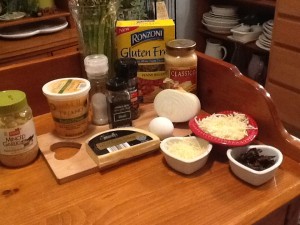
A question and a tip for our gluten-free friends: Have you tried the new pasta that RONZONI has recently brought to the market?  It is fantastic!  Truly the best gluten-free pasta we have tried (and we have tried m-a-n-y different brands).  It is a multi-grain blend of white rice, brown rice, corn, and quinoa.  It cooks up well, holds sauce well, bakes well, even reheats fairly well!  Now it is still pasta so, of course, it has carbs!  But a serving, according to the facts label on the box, has 2g of fiber (8% DV) and 4g of protein even. I highly recommend this product.

2014-02-23 22.10.12

Asparagus Pasta Bake

Ingredients:

1 (12 ounce) box gluten free penne pasta2014-02-23 20.50.20
1 (15 ounce) jar alfredo sauce (I use ‘Classico’ brand; has no additives)
1 cup chicken or vegetable broth
2 tablespoons olive oil
1/2 cup sliced sun-dried tomatoes
1/2 cup fresh basil leaves, packed
1 cup baby spinach, packed
1/2 cup grated Parmesan cheese, plus additional 1/2 cup
1 medium onion, diced
1# asparagus, trimmed and cut into 1-inch pieces
2 tablespoons chopped garlic (I use jarred)
1 large egg
1 (15-ounce) container part skim ricotta cheese
1 tablespoon dried basil
1 teaspoon freshly ground black pepper
2 cups shredded part skim mozzarella cheese, divided

Directions:

  • Pasta:  Cook pasta following directions on box. Drain and set aside.
  • Preheat oven to 350.
  • Heat the Alfredo sauce and the chicken broth together. Set aside.
  • In a food processor combine the sun-dried tomatoes, basil, and baby spinach. Pulse until the mixture is combined.
  • In a medium-sized bowl, whisk the egg and then add in the ricotta, dried basil, 1 cup of shredded mozzarella, and freshly ground pepper.  Stir well; then add in the sun-dried tomato mixture.  Set aside.
  • In a large saute pan, heat 2 tablespoons olive oil over medium heat. Add the diced onion, and cook 4-5 minutes.
  • Add in the cut up asparagus and cook ‘til still crisp-tender, another 5 minutes or so.
  • And finally add in the chopped garlic and cook for 1 more minute, stirring constantly. Turn heat off.
  • In a 9 by 13-inch baking dish, ladle about 1/2 cup of the heated alfredo sauce onto the bottom; spread to cover. Place 1/3 of the cooked pasta, then 1/3 of the ricotta mixture, 1/3 of the cooked veggies, and a sprinkling of shredded mozzarella. Repeat this in order for 2 additional layers.
  • Cover tightly with aluminum foil and bake until the ingredients are just starting to bubble and the cheeses are melting, about 25 minutes.
  • Remove the foil and bump heat up to 425 and heat for 5 more minutes.
  • Remove from oven and let set for 10 minutes; then serve with additional sauce and shredded parmesan alongside.  Enjoy!

2014-02-23 22.13.10


♥  ♥  ♥  ♥  ♥

God loves you!  ♥  (Don’t ever forget that!)

♥  coleen
Crustless Kale Quiche

Crustless Kale Quiche Resize

Talk about a tongue twister!  It’s worth the effort to say, and the little bit to make, because this Crustless Kale Quiche hits the spot.

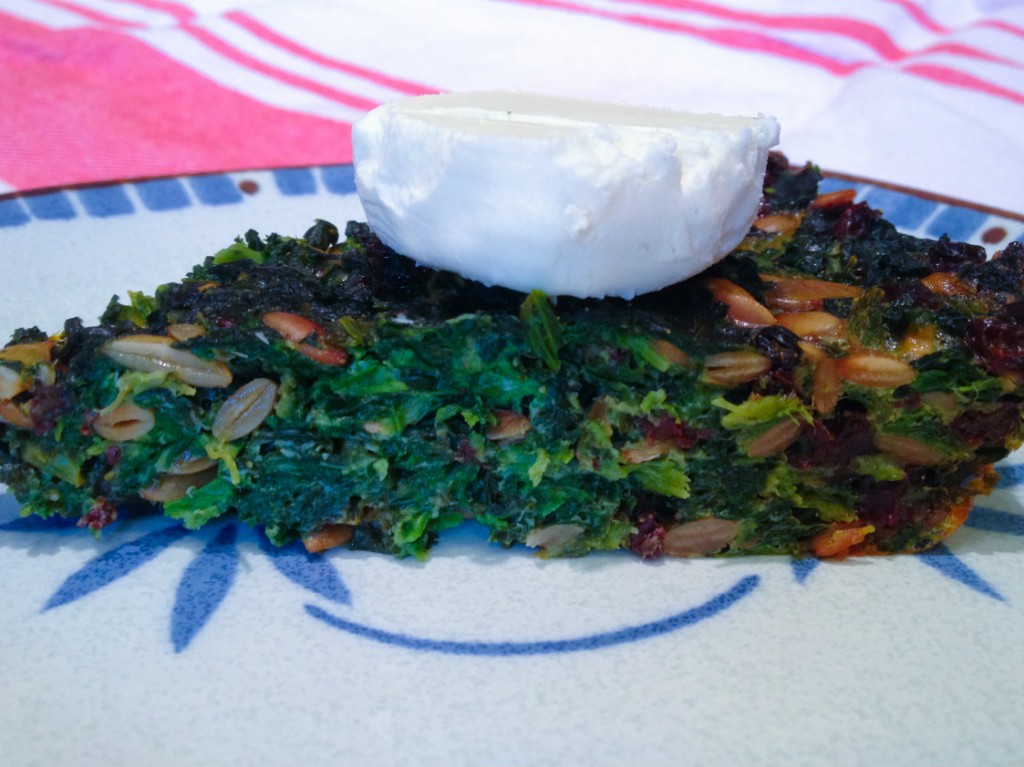
I’ve only made this once … and I’ve already eaten almost half of it.  The kale adds a little bitterness and chew to what would otherwise be a run-of-the-mill spinach pie.  Nutmeg, currants, and pepitas add an almost sweet, Middle Eastern flavor profile.  The three eggs are just enough to combine the ingredients without becoming heavy or custardy like a regular spinach quiche.  Don’t get me wrong – a traditional spinach and swiss cheese quiche is wonderful, but this one is lighter, with an unexpected combination of flavors that will have you craving it again.

I ate this hot, and I ate it cold, cut right out of the fridge.  I ate this with a big slab of goat cheese on top and I ate it plain.  I’m going to eat more of it with dinner tonight and see if I can’t discover some new way to enjoy it.  If you want your greens, with a little extra zing, try this instead of a salad tonight!

Crustless Kale Quiche

Ingredients:

  • 1 pound bag of frozen chopped spinach
  • 1 large bunch of kale
  • 3/4 cup pepitas (or try pine nuts or sunflower seeds)
  • 1 tablespoon coconut oil (or butter) plus more for greasing the pie plate
  • 1 teaspoon chopped garlic (about 2 cloves)
  • 1/2 cup currants or raisins (next time I’m trying golden raisins!)
  • 1/8 teaspoon ground nutmeg
  • 1/2 teaspoon salt
  • 3 eggs
  • Goat cheese, to serve, if desired

Directions:

  1. Wash the kale and remove from the stem, tearing it into smaller-than-bite-sized pieces.  Saute on medium heat in a large pot with a lid.  Don’t add any extra water or oil – just the damp kale by itself.  Stir occasionally until it gets soft, about 15 minutes.  When it appears soft and has reduced in volume, pour in the bag of frozen spinach.  Stir to combine and replace the lid.  Cook on medium-low for another five minutes until the spinach is thawed.  Remove from the heat and let cool.
  2. Preheat the oven to 350*F.  While the spinach and kale are cooling, heat the coconut oil over medium and add the pepitas.  Stir frequently for 5 minutes, then add the garlic and currants.  Stir for another 3 minutes.
  3. Squeeze out as much water from the kale mixture as possible, then dump it into a large bowl.  Pour over the pepita mixture and combine.  Add nutmeg and salt.
  4. Beat 3 eggs well and mix into kale mixture.  Grease a pie plate, then fill with the kale mixture.  Smooth it down so you have a flat top.  Bake for 35 minutes or until not wet in the middle.  Serve warm or cold, with goat cheese or without.

Explore, experiment, enjoy! — Dana


To view even more of Dana’s unique recipe, you can visit her at Frugal Girlmet!

Eat Healthy……On a Budget

fruit

Do you ever feel eating healthy will cost you too much money and time?  Do you get frustrated and feel it is not worth it?  There is hope and I can relate.

Eating healthy is very important to me, but so is being wise with the money and resources that have been given to me.  It takes a little time and effort, initially, to eat healthy on a budget, but the rewards are great by saving time and money.

With a little thought and practice, you can do it by implementing just a few tricks to get started.  Here are a few of my strategies.

1. Focus on Produce First                                                                                         

As you put together your budget, allocate your money in the produce first to ensure you get the most nutritious items.  Not only will it ensure that you are getting your fruits and vegetables, but will eliminate processed and package foods, because you simply do not have enough cash.

2. Look for Sales and Seasonal Foods

Look through your weekly sale papers to find what items are on sale at your favorite grocery store and plan your meals around those items.  For your fruits and vegetables, choose those that are in season as they are cheaper and will provide a variety of color to your diet.

3. Substitute Packaged Items for Ones that Can be Prepared at Home

Do you buy healthy frozen waffles or pancakes?  Why not make homemade and double your recipe on the weekend to freeze extra for the week?  Do you grab a protein bar to go on busy mornings? I have found my homemade protein bars that I shared last week are more delicious, nutritious, and cheaper to make than any I could buy at the store.

Today be a “Well Woman!”  Eat and live healthy as a way to bring honor to God with your body and resources.  Don’t give up.  You can eat healthy on a budget.

In Good Health,

Crystal

Homemade Chicken Noodle Soup

Feeling badly that I cannot just pop over to your house and bring you a nice big container of steamy, homemade chicken noodle soup….  🙁  But you live in Michigan, and Florida, and Texas, and Colorado, and South Carolina.  So this recipe and my prayers for your healing will have to suffice, my friends!

Chicken Noodle Soup truly is good medicine!  Raise your <sanitized> hand if you agree!  And truly so easy to make…lots of variations, too.  Here is my “Not from a Box, Nor from a Can” Homemade Chicken Broth recipe to start with.  Even just the aroma of this simple broth wafting through your home is going to make you feel a teeny bit better!

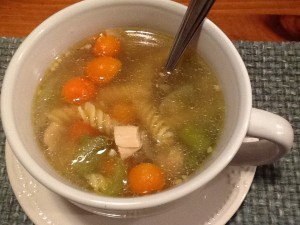
2014-02-16 19.29.02

Homemade Chicken Noodle Soup  (makes 2+ quarts, approximately 4 servings)

Ingredients:
1 tablespoon butter
1/2 medium sweet onion
2 small carrots, peeled
1 stalk celery
1 (or more!) tablespoon chopped garlic (I use jarred)
2 quarts of your amazing Homemade Chicken Broth
1+1/2- 2 cups (or so) of chicken bits
6-8 ounces egg noodles (we use gluten free noodles)
2 tablespoons chopped parsley

Directions:

  • Melt the butter over medium heat in a 3-4 quart sized saucepan.
  • Slice the onions, carrots (diagonally is nice), and celery into 1/4-inch-thick pieces and add to the pan.
  • Cook until the onions are translucent—about 7 or 8 minutes.
  • Add the chopped garlic and cook, stirring constantly, for an additional minute.
  • Pour in the broth; cover the pan and bring to a boil.
  • Reduce heat and simmer the soup until the vegetables are almost tender approximately 30-45 minutes.
  • Increase heat back to medium and add in the desired amount of chicken along with the egg noodles; bring back to a boil and simmer ‘til the noodles are tender—about 10 more minutes.
  • Carefully taste for seasoning, adding salt and pepper if necessary.
  • Sprinkle with chopped parsley and serve hot. Enjoy!

♥  ♥  ♥  ♥  ♥

God loves you!  ♥  (Don’t ever forget that!)

♥  coleen
Chocolate-Covered Strawberries

Chocolate-Covered Strawberries Resize

Nothing says Valentine’s Day like Chocolate-Covered Strawberries!  Surprise your sweetie – or sweeties, because my kids went cuckoo for these!  If you can get your hands on some nice strawberries (and I know it’s still very much winter in some places, but go with me on this), you can make these for dessert and watch their eyes light up!

My trick here is to use a teaspoon of coconut oil in the chocolate.  It keeps the chocolate from becoming brittle and adds the lightest hint of tropical flavor.  Instead of shattering when you bite into it, this chocolate holds tight to the strawberry so you can eat every last bite.  No worries if you don’t have coconut oil.  You can go without and just use the chocolate, but you will definitely want to make sure your berries are blemish-free and thoroughly dried.

Ready to make your loved ones’ hearts go pitter-pat?  Bring out these healthy and gorgeous treats tonight!

Chocolate-Covered Strawberries

Ingredients:

  • 18 strawberries
  • 1 cup semisweet chocolate chips
  • 1 teaspoon coconut oil

Directions:

  1. Wash the strawberries and dry very carefully.  Pull up the stem leaves so they point up; otherwise you’ll get them covered in chocolate!  Make sure you don’t have any open, weepy spots on the berries, or the chocolate won’t stick.
  2. In a small but deep bowl, microwave the chocolate chips and coconut oil for 30 seconds at a time, and stir after each 30 seconds.  It took three 30-second bursts to get everything melted and smooth.
  3. Line a baking sheet or tray with parchment paper.  Holding onto the stem of the berry, dip in chocolate and place on the parchment paper.  When all berries are dipped, place the tray in the fridge (or freezer if you are short on time!)  Serve cold.

I had a little leftover chocolate in my bowl.  I dipped cashews and banana pieces in there to get every last drop.  My 2 year-old’s chocolate mustache was a sight to behold!

Explore, experiment, enjoy! — Dana


To view even more of Dana’s unique recipe, you can visit her at Frugal Girlmet!


Homemade Protein Bars

AskCrystal.jpg

This month, I am focusing on sharing some of my favorite easy healthy recipes and options as with my mashed cauliflower recipe last week.  Protein bars are a quick option for women on the go.   However, trying to determine which one is the best option can be confusing.  We need something that is high in protein, low in sugar with a healthy amount of calories and taste good.  If you have found a particular bar that you purchase often, you may have noticed that it can get a little pricey.  After evaluating how much I spend on protein bars, I realize there has to be a way for me to make my own homemade protein bars.  I tried several different recipes and finally discovered my own combination that is high in protein, low in sugar and taste good.

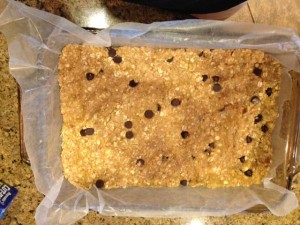
photo (3)

Peanut Butter Chocolate Chip Chewy Protein Bars

  • 2 cups quick oats
  • 5 scoops of Whey Chocolate Peanut Butter powder
  • 5 tablespoons peanut butter
  • 1/2 cup raw almonds
  • 1/2 cup Skim milk
  • 3 tablespoons dark chocolate chips

Choose your favorite oats, peanut butter, and chocolate chips.  For those who are new to Whey vanilla protein powder, you can find it at most large grocery stores.

Directions
In a large bowl, combine oats and protein powder. Add peanut butter and stir till peanut butter is coated. Slowly add 1/2 cup skim milk, stirring throughout (add just enough liquid to the mix so that it forms a batter-like consistency). Grind almonds in food processor or blender to your liking. Add almonds and chocolate chips and stir into mixture.

Line an 8×8 pan with wax paper, add mixture to pan. Cover mixture with another layer of wax paper and press down till the mixture is pressed flat. Refrigerate 4 hrs, then cut into bars. Store bars in container kept in refrigerator or freezer.  (I have found they stay together better in freezer and thaw enough to eat within a minute.)

Cut into 9 pieces.

Nutritional info per bar

Calories: 258

Protein: 20gms

Sugar: 5gms

Breakfast can be hard to figure out when in a rush. If you don’t prepare or think it through, you can end up skipping an important meal which can lead to an unhealthy decision on the way to work or overeating at lunch. Take a few minutes on the weekend to put these together so you are prepared for those crazy mornings when you do not have time for breakfast. When feeling rushed, grab one of your homemade protein bars and a banana and you are ready to go.

In Good Health,

Crystal

Valentines Day Cookies – By Request

Y’know, the way to a man’s heart is through his tummy!  😉 Or so the saying goes!  Actually I checked out a few survey’s and survey says: yes! One survey from Tango led off saying, “We were thrilled to discover that almost 80% of people felt preparing a meal for someone is a significant act of love!”

So as I was making a menu for the next week, I asked my husband what he would like for a special meal on Valentine’s Day… I was surprised as to his answer since I was sure he would say ‘lasagna!’  or ‘eggplant parmigiana!’ or perhaps some meat-y, manly steak dish!   No, he was much less concerned about the entrée  than about dessert.  His response?  Cookies!  I began offering suggestions but this is what he wants— Italian Almond Cookies.  This would be my significant act of love!  Happy   s Day, Robert!    

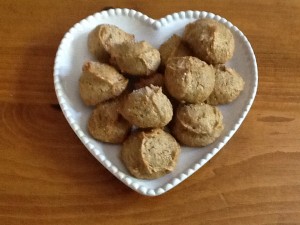
2013-05-17 17.41.18

Here on our At Home w/ GCH blog, Monday’s are always focused on healthy but oh-so-yummy! recipes.   Today’s recipe makes a delicious, slightly decadent sweet which still fits into this category!  This recipe has no oil or butter, uses gluten-free almond flour which is high in protein, and can be made very successfully using alternative, unrefined sugars.

Ingredients:
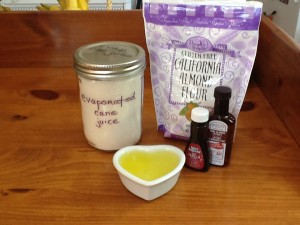
2+1/2 cups almond flourIMG_1563
1+1/4 cups superfine sugar
3 room temperature egg whites
1/2 teaspoon vanilla extract
1 teaspoon almond extract
extra sugar for dusting

Directions:

  • Preheat oven to 300.  Line 2 baking sheets with parchment paper.
  • Blend together the almond flour and sugar for 30 seconds in a food processor.  Add both extracts, and pulse 5 or 6 times to blend.  Add the egg whites ONE at a time, and continue to process the mixture ‘til the dough is nice and smooth.
  • Using a small cookie scoop, place teaspoons of the dough onto the lined cookie sheets, approximately 1″ apart.  (These cookies do not spread.)  Sprinkle the tops of the cookies with the extra sugar.
  • Bake for 20-24 minutes for chewy cookies; 24-30 minutes for a slightly crispy cookie.  Remove to a cooling rack.  Easily stored in your favorite cookie jar!

♥  ♥  ♥  ♥  ♥

God loves you!  ♥  (Don’t ever forget that!)

♥  coleen