December 25, 2024

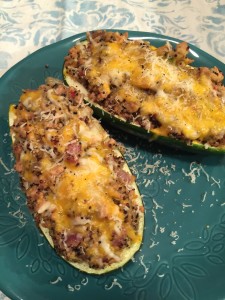
Quinoa-Sausage Stuffed Zucchini

{hu·mon·gous}
(h)yo͞oˈmäNGɡəs,-ˈməNG-/
huge; enormous; extraordinarily large

Yup…that describes the two zucchini that have been (literally)  hanging out on our kitchen counter for a while now.  What to do…what to do…what to do with them; I think I have asked myself this almost every day for a week.  So, this is what I did.

2015-09-05 20.14.08

Quinoa-Sausage Stuffed Zucchini

And they were sooo yummy!  They made a complete meal.  I think that this ‘stuffing’ mixture would work equally well in any number of ways: in portobello mushroom caps, in stuffed peppers, in acorn squash.  Anything else you can think of?  (I’d love to hear your suggestions in the comments below!)

Here’s the other thing about this recipe (besides fitting perfectly into our healthy but oh-so-yummy POV!) — really quick and so easy!   Enjoy!

ingredients:

1/2 cup quinoa
1 cup water
1 humongous (or 2 medium) zucchini
1/4 teaspoon (each) sea salt, freshly ground pepper
1/2 tablespoon extra virgin olive oil
12-16 ounces italian seasoned chicken sausage (sweet or hot)
1 small red onion, diced
2 tablespoons of minced garlic
1 teaspoon dried marjoram
1 cup halved grape or cherry tomatoes
4 tablespoons (or more) shredded mozzarella or Monterey Jack cheese
2 tablespoons freshly grated Asiago (or Parmesan) cheese

directions:

  • get the quinoa going right away (cook according to package directions)
  • cut the humongous zucchini in half lengthwise (if needed, cut a thin slice off the bottom to get them to sit firmly);  scoop out the pulp, leaving a 1/4″ shell
  • put the zucchini boats on a microwave safe plate, season with s&p, and microwave on high for 3-4 minutes, ’til just tender.  place the zucchini onto a broiler-safe pan
  • chop the scooped out zucchini into 1/2″-sized chunks; set aside
  • heat the olive oil in a large saute pan over medium-high heat
  • add the sausage, onion, and zucchini chunks; cook for about 5-6 minutes (’til there’s no pink left), breaking the sausage into bits as it cooks
  • reduce heat to low; add the garlic stirring constantly for 1 minute
  • toss in the tomatoes and marjoram; stir to combine and turn the heat off
  • preheat the broiler of your oven and place a rack in the top position
  • (when quinoa is done) combine with the sausage-veggie mixture
  • scoop into the zucchini boats and sprinkle with the mozz or monterey jack
  • place under broiler ’til the cheese is melted, 1-2 minutes
  • plate and sprinkle the grated Asiago or Parm over top

♥   ♥   ♥   ♥   ♥

God loves you!  ♥  (Please don’t ever forget that!)

♥  coleen
Gluten Free Zucchini Bread

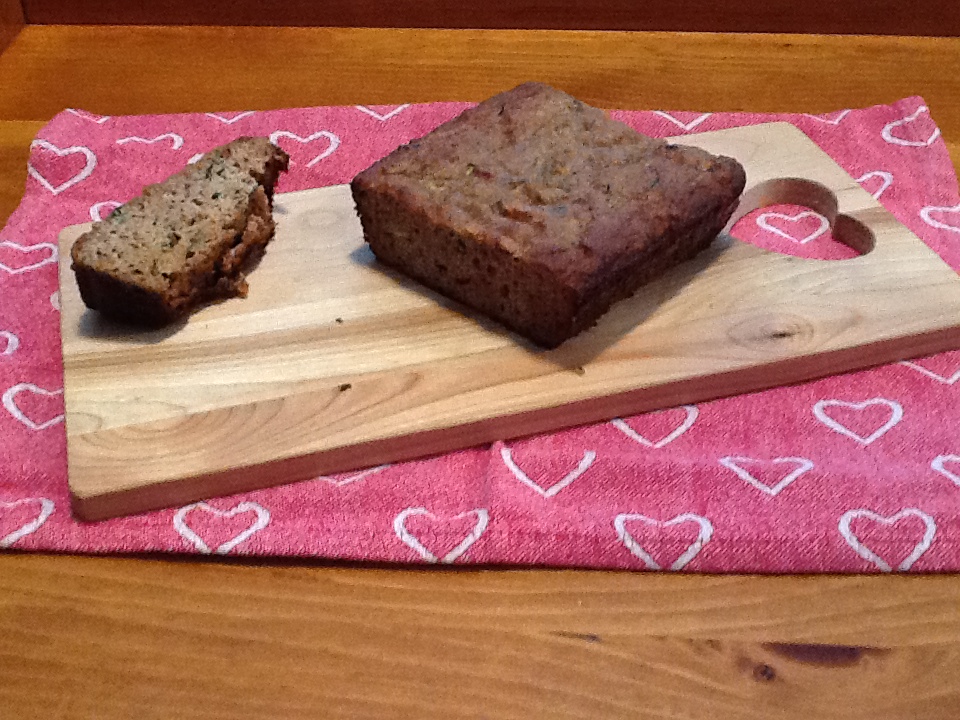
Here on our At Home with GCH blog, Monday’s are always focused on healthy but oh-so-yummy! recipes. Today our series on summer recipes featuring in-season produce continues. Our featured ingredient—again—this week is zucchini!  Our own little garden (ok, honestly, it is Robert’s garden) is pumping out the zucchinis.  How about you?  Are you checking Pinterest or roaming the internet looking for yummy zucchini recipes?  This zucchini bread recipe uses almond flour so it is low in carbs, high in protein…very paleo-friendly, too!  Enjoy!

2013-08-16 10.34.44

Gluten Free Zucchini Bread

Ingredients:
1+1/2 cups blanched almond flour
1 teaspoon baking soda
1/4 teaspoon salt
1+1/2 teaspoon cinnamon
1/2 cup chopped walnuts or 1/2 cup chocolate chips (optional)
1 medium-to-large sized zucchini
2 large eggs
2-3 tablespoons honey or agave nectar
1 very ripe banana, mashed
1 tablespoon melted coconut oil

Directions:
Preheat oven to 350.  Grease a loaf pan and set aside.
Grate the zucchini (sans the seeds!) onto a tea towel; you should have about 1 cup.  Roll the towel up and squeeze to remove excess moisture from the zucchini. Set aside.
Whisk dry ingredients together in a medium bowl.
In a larger bowl, mash the banana and then whisk in the eggs, agave, and coconut oil.  Stir in the zucchini.
Add dry ingredients to wet, whisking until well combined.
Pour batter into greased loaf pan and bake for 35-40 minutes, or ‘til a toothpick inserted into the center comes out clean.

♥  ♥  ♥  ♥  ♥

God loves you!  ♥  (Don’t ever forget that!)

♥  coleen

Ratatouille

Here on our At Home with GCH blog, Monday’s are always focused on healthy but oh-so-yummy! recipes.  Today our series of summer recipes featuring in-season produce continues. Our featured ingredient this week is zucchini!  Here is a link showing the nutritional value of this summer squash as well as it’s health benefits.

As prolific as zucchini is both in our own gardens as well as the farmstands from which we purchase some of our produce, I suppose we could continue for the rest of the summer with recipes utilizing zucchini.  Earlier this year, I posted a recipe for Gluten Free Zucchini Muffins; check it out!

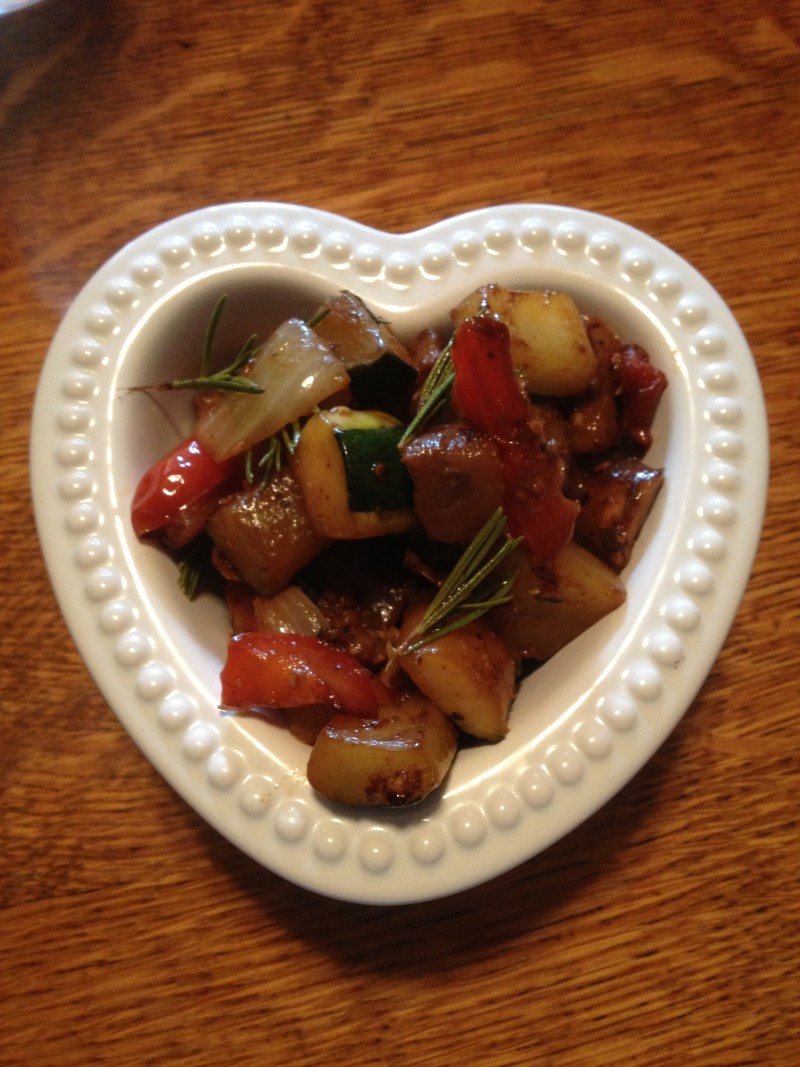
Today’s recipe is for Ratatouille—a yummy melange (mixture) of zucchini and other seasonal veggies!  Ratatouille can be served hot, room temp (my favorite), or even cold.  It can be a delicious side dish served with something yummy off the grill.  It is a tasty alternative as a pizza topping, too.  Our favorite way to enjoy Ratatouille is as a vegetarian entree with the addition of fresh mozzarella pieces; oh yum!   And bread…don’t forget some bread!  A nice crusty baguette or loaf of Italian bread is great!  This is also a dish which can be served—and enjoyed by all—when you have any combo of vegetarians, vegans, and meat eaters.

And, of course, I would be remiss to fail to mention my favorite (yours, too?) Ratatouille… Actually, a little rat who yearned to be a French chef.  Remember him?

Ratatouille2013-07-31 18.56.35

Ingredients:
1/4 cup olive oil, plus more as needed
Kosher salt and ground lemon pepper*
1 medium-sized eggplant, cut into cubes
2 medium-sized zucchini, halved and cut into halfmoons
1 red pepper, cubed
1 yellow pepper, cubed
1 large sweet onion, chopped
8 ounces baby bella mushrooms, chopped
3-4 medium tomatoes, chopped
3 tablespoons chopped garlic
2 teaspoons chopped fresh thyme
1 stem fresh rosemary, pulled into sprigs
3 tablespoons good balsamic vinegar
optional: 8 ounce container of fresh mozzarella balls

Directions:
Heat 2 tablespoons of olive oil in a large saute pan.  Cook the vegetables, individually, (separately) for 5 or 6 minutes each, seasoning lightly with kosher salt and a few grinds of lemon pepper.  Remove each and place into one large bowl to hold ‘til remainder of veggies (eggplant, zucchini, peppers, onion, mushrooms) are finished. Add additional olive oil as needed.  Combine all of the cooked vegetables back together in the pan, and then stir in the chopped tomatoes, garlic, thyme, and rosemary.  Allow to gently simmer for 20 minutes.  Finally, add the balsamic vinegar, and taste for additional salt and pepper.  Enjoy!

♥  ♥  ♥  ♥  ♥

God loves you!  ♥  (Don’t ever forget that!)

♥  coleen

_________________________________

If you would like to send a personal message to Coleen concerning this blogpost, you may email her at: Coleen@girlfriendscoffeehour.com

At Home with GCH: Chicken en Papillote with Pesto

chicken en papillote

I know chicken breasts are good for me.  I know I should eat lots of lean protein.  But sometimes the idea of choking down a dry, mealy, overcooked hunk of chicken makes me shudder.  Yuck!  The trick to cooking chicken breasts is to keep them moist and flavorful, because once they get dry, they’re only good for throwing on top of a salad and drenching with dressing.  So I needed something to keep the moisture locked in.  If you have all day, use a crock pot.  If you only have an hour, use parchment paper!

Cooking something “en papillote” is French for cooking “in paper.”  You might already have parchment paper if you do a lot of baking, but if not, you can find it near the aluminum foil in the baking aisle.  This recipe is infinitely customizable—just use whatever combination of vegetables you like, plus chicken breasts, and some seasoning on top.  Bake for an hour, open and enjoy!

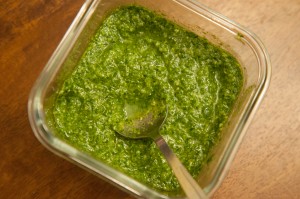
This recipe is even better slathered with homemade pesto.  Basil is pretty easy to grow in the yard, so if you have a garden, you can make pesto this summer!  The recipe has the proportions that I like.  You may want to use less garlic, or more oil, to make a thinner sauce.  Also, most pesto recipes add a little parmesan cheese – maybe a tablespoon, grated – to the mix; but I left it out since I am still eating on the Paleo diet.  If you have leftovers, pesto goes great over pasta of any kind.  I had a little pesto leftover and I ate it on scrambled eggs – delicious!

pesto


Chicken en Papillote with Pesto

Ingredients:

  • 4 boneless, skinless chicken breasts
  • 1 cup baby carrots
  • 2 large zucchini, cut the same size as the baby carrots
  • salt and pepper
  • 2 teaspoons butter

For the pesto:

  • 2 cups basil leaves
  • 2 cloves garlic
  • 1/4 – 1/2 cup olive oil
  • 2 tablespoons pine nuts (keep in the freezer so they won’t go rancid)
  • 1 lemon
  • salt and pepper

Directions:

  1. Preheat the oven to 400*F.  Cut two pieces of parchment paper, about 12 x 24 inches.  Fold them in half width-wise, then open.  On one half of the paper, make a bed of half the carrots and zucchini slices; repeat on the second paper.  Season with salt and pepper.  Top each bed of vegetables with two chicken breasts, and season with salt and pepper again.  Divide the butter and drop half a teaspoon of butter on each chicken breast.
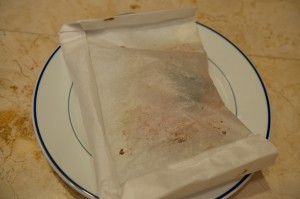
  2. Fold the paper in half, to cover the chicken.  Now you should have an envelope or packet.  Fold over the long end a few times, then make a triangular fold at each of the corners.  Now fold over the two short ends several times.  (There are many ways you can fold the paper to keep it shut.  I’ve even gotten frustrated before and stapled them shut!  Here are some ideas for folding the paper.)  When you have the two packets closed up, place on a cookie sheet and put them in the oven.  Cook for one hour, rotating the cookie sheet halfway through to make sure the packets cook evenly.

papillote packet


  1. While the chicken is cooking, make the pesto:  In a food processor, blend the basil leaves, garlic, and 1/4 cup of olive oil.  Scrape down the sides, add the pine nuts, and blend again.  Scrape down the sides again, cut the lemon in half, and add the juice to the pesto.  If you want the pesto thinner, add more oil.  Taste…if you want a stronger lemon flavor, you can add the zest from the lemon too.  If you are adding parmesan cheese, now is the time!  Blend again.
  2. To serve, open the packets—carefully!  Don’t get burned on the steam!  You can put the packets on a plate, or open them in the kitchen and throw out the paper if you like.  Pass the pesto!

Explore, experiment, enjoy! — Dana


To view even more of Dana’s unique recipes, you can visit her at Frugal Girlmet!

At Home with GCH: Vegetable Pancakes

Vegetable Pancakes

My Jewish friends call them “latkes” and my Korean friends call them “jeon.”  I call them veggie pancakes, and I wonder why I don’t make them more often!  Kind of like hash browns, these crispy little guys are a great way to get more vegetables in your diet.  I also like them for cleaning out my fridge and getting rid of my “singleton” vegetables – you know, that ONE zucchini in a plastic bag, or the last carrot in the sack.  Frugal, I say!

If you have a food processor with a shredder attachment, you can have this recipe mastered in minutes.  If not, you’ll have to get out the box grater and put some muscle into it.  You can experiment with a large variety of firm vegetables—roots are best—like potatoes, carrots, yams, parsnips, or turnips.  You can also mix in some softer veggies, like zucchini, and any kind of minced herbs you like.  I usually just use green onions, because I always have those on hand, but feel free to try thyme, tarragon, or very finely minced rosemary.  Top with sour cream or plain yogurt and you have a nutritious, unusual side dish that’s at home next to a salad or a steak.  These make a great breakfast, too—add eggs, bacon, and fruit, and you’re in business!

Vegetable Pancakes

Ingredients:

  • 2 small potatoes (Russet or white), peeled
  • 1 large carrot, peeled
  • 1 smallish zucchini
  • salt and pepper
  • 1 egg, beaten
  • 2 teaspoons flour, optional
  • vegetable oil for frying

Directions:

  1. In the food processor with shredder attachment, shred the potatoes, carrot and zucchini.  If you are using a box grater, use the largest holes and coarsely shred all the vegetables.  Season with salt and pepper and set aside, in a large bowl, for ten minutes.  
  2. After ten minutes, squeeze out the water accumulating in the bottom of the bowl.  This will keep your pancakes from getting soggy!  Then mix in the beaten egg – I just use my hand.  If it’s still really watery, you can add a teaspoon or two of flour.
  3. In a large non-stick pan over medium heat, add about 3 tablespoons of the vegetable oil.  You aren’t deep-frying the pancakes, but you do want to make sure there’s plenty of oil, so they don’t stick to the pan.  Drop quarter-cup sized dollops of pancake mixture into the pan, and make sure they don’t touch each othe… they are hard to separate, and won’t cook evenly.  Fry for 3 to 5 minutes per side, so they are crispy and firm.  Repeat with the rest of the pancake mixture, adding more oil to the pan if necessary.  Drain on a paper bag or paper towels and sprinkle with a little salt.  Serve with sour cream.

Explore, experiment, enjoy! — Dana


To view even more of Dana’s unique recipes, you can visit her at Frugal Girlmet!


If you would like to contact Dana in regards to this blog, please email her at Dana@girlfriendscoffeehour.com

At Home with GCH: More Appetizers

Here on our At Home with GCH blog, Monday’s are always focused on healthy but oh-so-yummy! recipes. And this month we are doing a series of looks at appetizers. Here in the NorthEast, we are in the middle of a snowstorm. So,  I thought…’summery food!’  🙂  This week’s appetizer selections are Caprese Salad and Zucchini Fritters. We enjoyed these as a vegetarian supper tonight!

IMG_0149

I hope you enjoy these fritters as much as we do! They go along with our healthy but oh-so-yummy category because they are loaded with zucchini, and a good shot of whole grains in the cornbread. And, even though lightly fried in a bit of oil, they are no greasier than your weekend pancakes!

As I confessed last week: I love appetizers! Whether you call them tapas, small bites, hors d’ouerves, antipasto, or simply appetizers; no matter what you call ‘em…I like ‘em!  I would love for you to leave a comment below sharing with us YOUR favorite appetizer!

Zucchini Fritters

1 box of Jiffy Cornbread mix  IMG_1404
1 medium zucchini, shredded (do not peel!)
1/2 cup milk
good squeeze of juice from a fresh lemon
1 egg
1 tablespoon of melted butter
1/4 teaspoon freshly ground pepper
dash of ground nutmeg
Oil of your choice (but NOT olive oil)
Kosher salt

Preheat oven to 250. Place an oven-safe platter into the oven.

Shred zucchini into a colander; sprinkle with a small amount of kosher salt. Let sit to drain 5 minutes or so. Then dump onto a double layer of paper towels. Blot with a couple of additional paper towels, removing as much moisture as possible.

Stir milk and lemon juice together = buttermilk!  Lightly beat egg in a small mixing bowl. Stir in buttermilk, zucchini, seasonings, melted butter and, finally, cornbread mix. DO NOT overmix; there might be a small lump or two. Let sit for 3 minutes.

While mixture is resting, add a small amount of oil to a large nonstick frying pan; bring up to medium heat; then reduce heat to low. Add the fritter mix by scoops, spacing apart for easier turning. When edges appear dry, and there are a few little bubbles on the surface of the fritters, carefully flip. Once cooked, remove to platter in oven, sprinkle with a bit of salt and keep warm while remainder of batter is cooked.

  • For larger size fritters: use 1/4 cup-sized measuring cup or a large cookie scoop.
  • For smaller, bite-size fritters, use a tablespoon measure or a small cookie scoop.

These can be served hot or warm. Serving options are many: Caprese Salad (recipe below); guacamole, sour cream, salsa…

********************************

Continuing our “bit of summer in the midst of a snowstorm” theme, I prepared a quick Caprese Salad, aka Fresh Mozzarella and Tomato Salad. Not much tastes more like summer to me than a yummy, ripe, delicious tomato. Not so easy to find in the wintertime though! However, I find that the tiny tomatoes (grape, cherry, mini—whichever varieties your grocery store carries) are usually very flavorful and yummy all winter long!

Caprese Salad

various sizes of fresh mozzarella from my favorite brand—Belgioso!

8 ounces fresh mozzarella
1/2 pint tomatoes
Basil * (fresh is best)
Kosher salt, freshly ground black pepper
1-2 teaspoons extra-virgin olive oil.   Easy-peasy!  Depending on the size of the fresh mozzarella you have bought, you might need to cut the mozzarella into small, bite-size pieces; halve the tomatoes, and sprinkle with salt and pepper, to taste.  Thinly slice the basil*.  Add the sliced basil to the seasoned tomatoes and cheese.  Pour a small amount of olive oil over and gently mix. Serve immediately.*Gourmet tip: stack 3-4 basil leaves; tightly roll-up (like a tiny cigar!); then carefully slice into very thin slices. You have now accomplished the technique known as ‘chiffonade!’  You are amazing!


God loves you!    (Don’t ever forget that!)

coleen

_________________________________

If you would like to send a personal message to Coleen concerning this series, you may email her at: Coleen@girlfriendscoffeehour.com