December 22, 2024

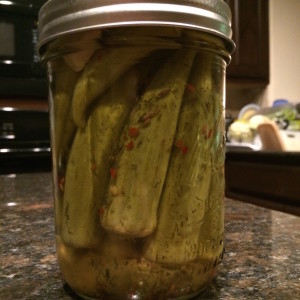
Pickled Okra


Pickled Okra

When we moved to Texas last year, I wanted to find some plants to grow in the flower bed.  I put in some basil, which I have to water nearly every day to keep alive and healthy, and the rosemary is pretty hardy.  The other edible that does well here in the sun is okra, but I hadn’t eaten enough of it last year to really decide if it was something I wanted to grow.  Then I had a Bloody Mary at a Cajun restaurant – and instead of olives on my toothpick, I found Pickled Okra!  It was love at first bite.

This is really my first time doing anything with these little guys, and I still have a  lot to learn.  They turned out tangy, crunchy, and delicious…and make me want to experiment more with them.  So, if you like a good cheese plate, add some of these offbeat pickles and keep everyone on their toes!

Pickled Okra

Ingredients:

  • 1 large clamshell small fresh okra (between 1 and 2 pounds)
  • 2 cups water
  • 2 cups white vinegar
  • 1/2 cup salt – use Kosher if you have it
  • 6 cloves garlic, peeled and smashed
  • 1 tablespoon mustard seeds
  • 1 teaspoon dried dill
  • 2 tablespoon sugar
  • 2 chopped hot peppers, or 1 teaspoon dried pepper flakes (optional)

Directions:

  1. Prepare the okra:  wash them and trim the tops.  You still want a little stem left, but not too much – I think between 1/4 – 1/2″ inch is good.
  2. Make the brine:  Add the rest of the ingredients to a large pot and bring to a boil.
  3. Pack the cleaned and trimmed okra into pint jars for canning.  First make a layer that point up, with the stems on the bottom.  Fill the jar with more okra, pointing down with the stems facing up, and jam them in there.  Depending on the size of the okra and how tight you pack them in, this will fill 2 or 3 pint jars.
  4. When the brine is boiling, pour the brine over the okra.  Make sure to spoon in the garlic cloves and spices – don’t waste that flavor!  If you don’t have enough brine to cover your okra, add boiling water to the jar so all your jars are filled to the top.
  5. At this point you can either hot water process them so they are shelf-stable, or just put the lids on tight and store in the fridge.  They’ll be good for a couple weeks in there if the brine goes to the top of the container.

Explore, experiment, enjoy! — Dana


To view even more of Dana’s unique recipe, you can visit her at Frugal Girlmet
Lemon – Mustard Roasted Baby Potatoes

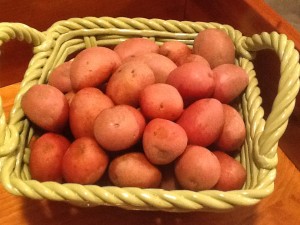
2014-03-29 20.57.45Sometimes I find that I am preparing the same boring side dishes to serve with our meals.  How about you?  So I always have my eye open for little tweaks or twists on the ‘same old, same old’ standards…like roasted potatoes.  These were on my menu this week. So I planned on buying some red potatoes.  And then, when I was at the grocery store, I found some lovely baby red potatoes.  Oh, happy me!

2014-03-29 20.08.29

Take a look around in the produce aisle at the grocery store or at the Farmer’s market.  They come in either red or yellow (Yukon Gold) or (my favorites!) even purple varieties.  When you find them, buy ‘em!  You will not regret it!  They can be boiled, steamed, roasted, baked, grilled…I suppose you could even microwave them.

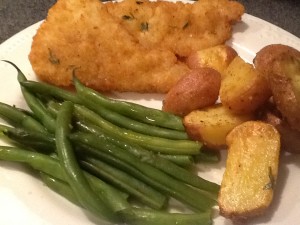
These Lemon-Mustard Potatoes will get some crispy edges and have a yummy coating baked right on!  We enjoyed them with baked tilapia filets and steamed fresh green beans.  This recipe makes approximately 4 servings…easily doubled!

2014-03-29 21.05.09

Lemon – Mustard Roasted Baby Potatoes

Ingredients:
3 tablespoons extra-virgin olive oil
Zest of 1 large lemon
Juice of that lemon (approximately 3 tablespoons)
2 tablespoons Dijon mustard
1 tablespoon fresh thyme (or dried, if that is all you have)
1/2 teaspoon sea salt
1/2 teaspoon freshly ground black pepper (I used lemon pepper)

1 1/2 pounds baby red potatoes
1/2 teaspoon kosher salt
1/2 teaspoon freshly ground black pepper

Directions:

  • Preheat oven to 375. Line a heavy baking sheet with foil. Set aside.

For the vinaigrette:

  • Zest and juice the lemon.
  • In a large bowl, whisk together the lemon juice, lemon zest, olive oil, mustard, thyme, salt, and pepper until smooth. Remove 2 tablespoons of the vinaigrette and set aside. (I used this extra bit to coat the fish filets.)

Prepare the potatoes:

  • Scrub the potatoes.
  • Cut in half any that are larger so that all of the potatoes are approximately the same size.
  • Place the prepared potatoes into the bowl along with the vinaigrette.
  • Stir to thoroughly coat them.
  • Pour out onto the lined baking sheet.
  • Bake for 15 minutes, then turn over.
  • Check the potatoes with a thin-bladed knife after 25 minutes. They are done when the knife easily slides right through the potato. They might take up to 45 minutes depending on their size. (If not quite done, continue roasting.)
  • When done, scoop into a serving bowl and sprinkle with a bit more salt and pepper. Enjoy!

♥  ♥  ♥  ♥  ♥

God loves you!  ♥  (Don’t ever forget that!)

♥  coleen


At Home with GCH: Broccoli Bacon Salad


Broccoli Bacon Salad

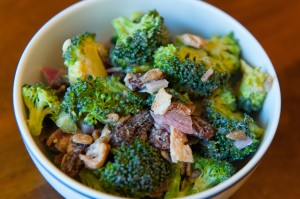
Bacon!  Did that get your attention?  (My husband’s ears always perk up when he hears that word.)  This salad is a family favorite.  I love vegetables of every kind, but it’s nice to take a break from lettuce-based salads.  You probably have everything you need for this salad at home already.  If not, pick up some broccoli and let’s get to it!

Broccoli Bacon Salad

Ingredients:

  • one pound small broccoli florets, about 7 cups
  • 1/4 cup minced red onion
  • 1/4 cup sunflower seeds
  • 1/4 cup raisins
  • 4 strips bacon
  • 3/4 cup mayonnaise
  • 1 teaspoon lemon juice or apple cider vinegar
  • 1 teaspoon sugar, honey, or other sweetener of choice
  • salt and pepper

Directions:

  1. In a large bowl, gently toss together the broccoli, onion, sunflower seeds, and raisins.
  2. Cook the bacon until done – I like it crunchy rather than chewy.  Drain and dice.  Add to the bowl and combine.
  3. Mix together the mayonnaise, lemon juice, sugar, and salt and pepper.  Pour over the broccoli mix and toss to combine.  Taste for seasoning – I usually add a little more lemon juice over the top.  Chill for an hour before serving.That’s it!  This salad is nice the next day, too, since the broccoli softens up a bit.


Explore, experiment, enjoy! — Dana


To view even more of Dana’s unique recipes, you can visit her at Frugal Girlmet!

At Home with GCH: Eggplant Dip (Baba Ghanouj)

Baba Ghanouj  2

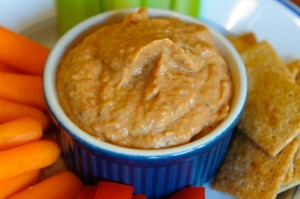
While I am a huge fan of french onion dip – you know, the kind made with a tub of sour cream and a packet of french onion soup – I know it is not the healthiest for me.  I firmly believe that when it comes to your diet, you should eat as well as possible, load up on veggies and lean protein, and avoid processed foods. That said, you gotta enjoy life, and I think it’s okay to have a treat every once in a while.  The problem is when “every once in a while” turns into “I deserve it now” which eventually becomes an everyday habit.  I speak from experience!  So one way I’ve found to subvert those cravings for treats is to find delicious alternatives that are nutritious as well.  Move over potato chips and french onion dip, here comes baba ghanouj!

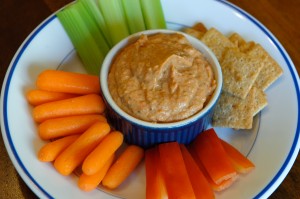
Baba ghanouj (pronounced “gah-noosh”) is a roasted eggplant dip.  You can usually find it alongside hummus and pita wedges in Middle Eastern restaurants.  The only ingredient you may not have on hand is tahini, which is sesame seed paste.  I can buy it in my regular Vons and, depending on how well-stocked your grocery store is, you can find it with the Indian/Middle Eastern food, or with the Kosher foods.  It’s rich and creamy—almost like peanut butter made from sesame seeds.  It keeps well in the fridge, and I use it to make salad dressings, too (like this one for a kale salad.)  This recipe also adds a roasted bell pepper.  It isn’t necessary, but  it adds another layer of smoky sweetness that I really enjoy.  Ready?  Let’s get dipping!

Baba Ghanouj_
Eggplant Dip (Baba Ghanouj)

Ingredients:

  • 3 Japanese eggplants, or one very large regular eggplant
  • 1 tablespoon olive oil
  • 2 cloves garlic
  • 2-3 tablespoons tahini (I like to add a lot!)
  • 1/2 lemon, juiced
  • 1 teaspoon ground toasted cumin
  • salt and pepper
  • 1 roasted bell pepper  (Trader Joe’s has some great ones in a jar)

Directions:

  1. Preheat the oven to 400*F.  Line a baking sheet with aluminum foil.  Poke some holes in the eggplant with a fork or knife and drizzle with the oil.  Bake for 30 minutes.  Turn off the heat and let sit in the oven for 30 minutes to cool.
  2. When the eggplant is cool enough to handle, slit it open and scoop out all the insides.  Transfer the eggplant to the bowl of a food processor.  Add the remaining ingredients and blend together.  Keep refrigerated until ready to eat.

I serve this with veggie sticks.  The kids like pita bread, Wheat Thins, and any other cracker or pretzel I give them!


Explore, experiment, enjoy! — Dana


To view even more of Dana’s unique recipes, you can visit her at Frugal Girlmet!


If you would like to contact Dana in regards to this blog, please email her at Dana@girlfriendscoffeehour.com

At Home with GCH: Vegetable Pancakes

Vegetable Pancakes

My Jewish friends call them “latkes” and my Korean friends call them “jeon.”  I call them veggie pancakes, and I wonder why I don’t make them more often!  Kind of like hash browns, these crispy little guys are a great way to get more vegetables in your diet.  I also like them for cleaning out my fridge and getting rid of my “singleton” vegetables – you know, that ONE zucchini in a plastic bag, or the last carrot in the sack.  Frugal, I say!

If you have a food processor with a shredder attachment, you can have this recipe mastered in minutes.  If not, you’ll have to get out the box grater and put some muscle into it.  You can experiment with a large variety of firm vegetables—roots are best—like potatoes, carrots, yams, parsnips, or turnips.  You can also mix in some softer veggies, like zucchini, and any kind of minced herbs you like.  I usually just use green onions, because I always have those on hand, but feel free to try thyme, tarragon, or very finely minced rosemary.  Top with sour cream or plain yogurt and you have a nutritious, unusual side dish that’s at home next to a salad or a steak.  These make a great breakfast, too—add eggs, bacon, and fruit, and you’re in business!

Vegetable Pancakes

Ingredients:

  • 2 small potatoes (Russet or white), peeled
  • 1 large carrot, peeled
  • 1 smallish zucchini
  • salt and pepper
  • 1 egg, beaten
  • 2 teaspoons flour, optional
  • vegetable oil for frying

Directions:

  1. In the food processor with shredder attachment, shred the potatoes, carrot and zucchini.  If you are using a box grater, use the largest holes and coarsely shred all the vegetables.  Season with salt and pepper and set aside, in a large bowl, for ten minutes.  
  2. After ten minutes, squeeze out the water accumulating in the bottom of the bowl.  This will keep your pancakes from getting soggy!  Then mix in the beaten egg – I just use my hand.  If it’s still really watery, you can add a teaspoon or two of flour.
  3. In a large non-stick pan over medium heat, add about 3 tablespoons of the vegetable oil.  You aren’t deep-frying the pancakes, but you do want to make sure there’s plenty of oil, so they don’t stick to the pan.  Drop quarter-cup sized dollops of pancake mixture into the pan, and make sure they don’t touch each othe… they are hard to separate, and won’t cook evenly.  Fry for 3 to 5 minutes per side, so they are crispy and firm.  Repeat with the rest of the pancake mixture, adding more oil to the pan if necessary.  Drain on a paper bag or paper towels and sprinkle with a little salt.  Serve with sour cream.

Explore, experiment, enjoy! — Dana


To view even more of Dana’s unique recipes, you can visit her at Frugal Girlmet!


If you would like to contact Dana in regards to this blog, please email her at Dana@girlfriendscoffeehour.com

At Home with GCH: “All Things Green” Month!! — Green Smoothies

Just for the month of March, every Wednesday here on At Home with GCH, I will be blogging about “All Things Green.”  I hope you enjoy it!

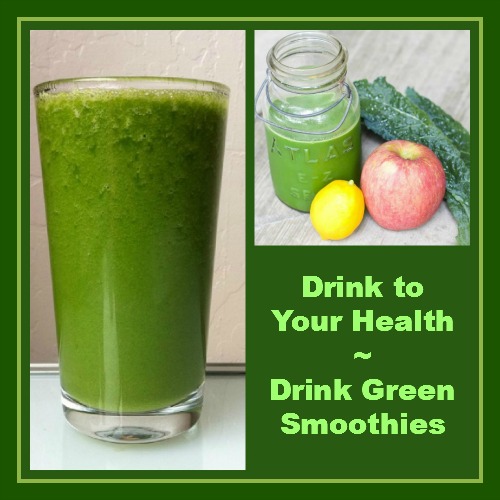
Today, I want to share my all-time favorite Green Smoothie recipe.  If you’ve never had a Green Smoothie before, don’t let the color scare you off!  Green Smoothies are not only healthy for you, they taste delicious, and are a GREAT way to get your fruits and veggies in for the day!  God gave us these awesome fruits and vegetables, so why not put them to good use!

Let’s start by talking about Green Smoothies and why they are so good for you!  My dear friend Sandra Castillo turned me onto these deliciously healthy smoothies.  She is the Green Smoothie guru that I go to if I have any questions about them!  She has been drinking Green Smoothies for nearly 4 years and has not been sick one time during this time.  When everyone else is suffering from the flu, colds, sinus infections, and more…Sandra is like the Energizer battery and just keeps going, and going, and going!  She has taught me so much about these delicious drinks, and I can’t wait to share some of what I have learned from her!

ToYourHealth

The benefits of Green Smoothies:

  • Promotes blood purification
  • Cancer prevention
  • Improves circulation
  • Strengthens immune system
  • Promotes healthy intestinal flora
  • Promotes extra energy
  • Lifts spirits and reduces/eliminates depression
  • Improves liver, gall bladder and kidney functions
  • Clears congestion, especially in lungs by reducing mucus

This is what you will find in each Green Smoothie:

  • protein
  • calcium
  • folate
  • iron, magnesium, manganese, zinc, copper
  • vitamin C, vitamin K, vitamin A
  • vitamin B1, vitamin B2, vitamin B3, vitamin B5, vitamin B6
  • vitamin E
  • omega 3 fatty acids
  • potassium
  • tryptophan
  • dietary fiber
  • and much more!

My favorite Green Smoothie recipe:

  • 1 large frozen banana
  • 1/2 cup frozen strawberries
  • 1 tbsp ground flax seed
  • 16 oz of purified water
  • 2 handfuls of fresh kale
  • 6 ice cubes

Blend until smooth and enjoy.

I always use kale in my smoothies.  I’m not much of a fan of spinach, but I can tolerate it if I have to.  But my favorite for my Green Smoothies is kale.  Kale has a ton of health benefits, too! 

Here are just a few of the health benefits of kale:

  • very versatile and nutritious green leafy vegetable
  • low calories
  • high in fiber
  • zero fat
  • high in iron
  • high in vitamins A, C, and K
  • filled with powerful antioxidants
  • anti-inflammatory
  • great for cardiovascular support
  • high in calcium
  • great detox food
  • strengthens immune system
  • binds bile acids and helps lower blood cholesterol levels and reduces the risk of heart disease
  • can reduce the overall risk of developing or dying from cancer, according to a study in the American Journal of Clinical Nutrition
  • notably good in many B-complex groups of vitamins such as niacin, vitamin B-6(pyridoxine), thiamin, pantothenic acid, etc., that are essential for substrate metabolism in the body
  • believed to protect from cardiovascular diseases, and colon and prostate cancers

One warning that I have found on kale:

  • Because of its high vitamin K content, patients taking anti-coagulants such as Warfarin are encouraged to avoid kale since it increases the vitamin K concentration in the blood, which is what the drugs are attempting to lower. This effectively raises the dose of the drug and causes toxicity.

For more information on the benefits of Green Smoothies, check out GreenSmoothieGirl.com.  You can also read more information from my friend Sandra on her Facebook page.  Pinterest also has a ton of great Green Smoothie recipes!  I have gotten many of the ones I use today from Pinterest!

I hope this blog will entice you to give Green Smoothies a try!  They truly are delicious, and oh so healthy for you!!

Come back next week, when I cover another topic that includes “All Things Green“!!  🙂


Go Green!!

Christi

***************

If you would like to email Christi in regards to this blog, you may send it to:

Christi@GirlfriendsCoffeeHour.com


At Home with GCH: Focus on Health

beet and goat cheese salad

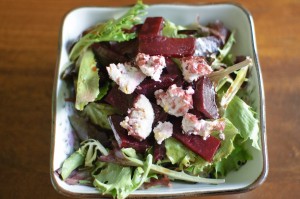
In writing this blog series, “Focus on Health.” I am reminded of several articles I read around the start of the year, listing “The Healthiest Foods You’re Not Eating.”  Basically, all the lists were comprised of super foods—those veggies, fruits, grains and other ingredients that we know are good for us but that we avoid for whatever reason.  One that we’ll be looking at this month is BEETS.  Yay, beets!

Beets are high in folic acid, which is crucial during pregnancy.  They are also chock full of vitamins and minerals, including magnesium, calcium and iron.  They are being studied for their cancer and heart disease prevention properties.  Especially of interest to scientists is the pigment that gives beets their bright red color—Betacyanin—because it has been shown to fight cancer and possesses powerful antioxidants.

Perhaps you had them prepared the wrong way, like boiled to death.  Perhaps you see them in the store and just don’t know what to do with them.  In any case, beets are in season now, just waiting for you at your local farmer’s market or grocery store.  Let’s look closer!

There are two main varieties:  common red beets, and golden beets.  Both are delicious and are prepared the same way, but golden beets have a milder flavor, while red beets have a stronger, earthier and sweeter taste.  When you buy them, look for bright, strong leafy greens attached.  The greens are edible and are highly nutritious themselves—don’t throw them out! If you aren’t going to cook the beets the day you buy them, keep them in the fridge, with the greens wrapped in a damp paper towel.  The beets can last quite a while in your fridge, but the greens must be eaten quickly, like within a day or two, or they get limp and gross.

My favorite way to cook beets is to roast them in the oven.  Wash the beets, remove leaves and stems, and place them on a large square of aluminum foil.  Drizzle with olive oil, bake for 45 minutes at 375F, and let cool.  The skins will slip right off in your hands.  One warning:  beet juice stains!  You might want to wear gloves or an apron, and wipe up any spilled beet juice quickly.  Okay, ready for some recipes to try?  Here we go!

Twenty years ago I was a vegetarian and living on my own for the first time.  My go-to snack?  A can of beets and a spoonful of orange marmalade, simmered until hot and the juice is thick and sweet.  Better than dessert!

————-

This might be my favorite salad of all time:

http://frugalgirlmet.blogspot.com/2011/02/roasted-beet-and-goat-cheese-salad.html

————-
I am making this salad on Valentines Day because I love the pink color:

http://paleospirit.com/2012/roasted-beet-and-cucumber-salad-with-yogurt-dressing/

————-

This recipe for Pennsylvania Dutch pickled red beets and eggs is one my Mom made all my life.  Now that she’s gone, my sister has taken on the tradition.  She makes them every year for Easter.  The color of the eggs – maroon on the outside, white and yellow inside – is shocking and delightful!

http://www.yankeemagazine.com/recipe/for/pennsylvania-dutch-pickled-beets-and-eggs/106

————-
Beets can be shredded and eaten raw, too!  Here’s a very minimalist raw beet salad:

http://content.markbittman.com/recipes/raw-beet-salad

————-
When I think of Russian food, my mind immediately goes to Borscht.  Ever had it?

http://www.foodnetwork.com/recipes/tyler-florence/roasted-beet-borscht-recipe/index.html

————-
And for you juicers out there, beet juice is the best!  Try out a combination of beets, carrots, and apples for a sweet and healthy treat.

Explore, experiment, enjoy! — Dana


Please visit me at Frugal Girlmet for more unique recipes!


If you would like to contact Dana in regards to this blog, please email her at Dana@girlfriendscoffeehour.com

At Home with GCH: Focus on Health

kale saute

When it comes to New Year’s resolutions, I am a champ.  Every year, I swear I’m going to lose weight, exercise more, and eat healthier.  This year, so far, I’ve done really well on one front—eating better.  There probably isn’t anyone in the world who couldn’t stand to give their daily diet a tune-up, and one of the biggest improvements we can make is to eat less “bad stuff” and more “good stuff.”  What’s the good stuff?  Vegetables, of course!  (Don’t roll your eyes at me!)

Let’s introduce the star of this show:  KALE.  It’s a hearty green vegetable in the Brassica family, related to cabbage, broccoli, and Brussels sprouts.  Any veggie you eat in the Brassica family is going to help you. Kale is the the best, and most-studied, of the group.  Kale has been shown to reduce the likelihood of many different types of cancer, and is now being investigated as a treatment for cancer and other diseases as well.  If an apple a day keeps the doctor away, imagine what a serving of kale can do!

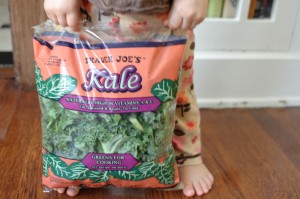
Where I live, kale is in season now.  I’ve seen it at my local farmer’s market lately, as well as at my regular grocery store.  Whole Foods and other health food stores will always have it in stock, and if you are lucky enough to live near a Trader Joe’s, you can find it stemmed, cleaned, and bagged, all ready for your culinary prowess!

Here’s what you need to know to cook with kale:  the stem, which goes all the way up the middle of each leaf, is too tough to eat.  Your best bet is to wash it, then hold the stem in your hand.  Fold the leaf in half and hold the stem with one hand, and pull off the leafy part with your other hand.  Then rip the leaf into bite-sized pieces.  Now what?

Kale is a hearty leaf, and can stand up to long cooking and strong flavors.  Because it is an excellent source of Vitamin K, it is best served with a little fat to aid absorption of  the important nutrients.  Use either olive oil, butter, or (get ready for it)—BACON!  But don’t boil it to death.  Saute it, add it to soups, toss it into salads, or, my favorite, kale chips.  Are you ready for some inspiration?  Let’s go!

kale bag


Let’s start with my favorite, and the most “snacky,” Kale Chips.  (You can probably get your kids to eat these!)

http://www.foodnetwork.com/recipes/melissa-darabian/crispy-kale-chips-recipe/index.html

_____
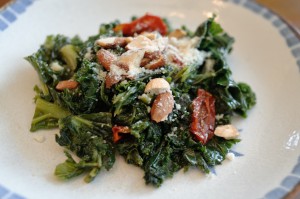
Here’s one from me, featuring sautéed kale, sun dried tomatoes, and almonds:

http://frugalgirlmet.blogspot.com/2012/08/superfoods-salad-warm-kale-and-oven.html

_____
Kale plays well with others!  Try it in Coleen’s yummy soup recipe:

http://girlfriendscoffeehour.com/2013/01/07/gch-whats-on-your-plate-souppalooza-part-two/

_____

Here’s a salad, for you hearty souls who are ready to take it to the next level and EAT.  YOUR.  GREENS!  (PS: I make a salad similar to this once a week and it is delicious and filling!)

http://www.tastebook.com/recipes/1835410-Emerald-Sesame-Kale

_____

Here is another great way to get your greens in!  It will also work for the kids, too! A lot of people think Green Smoothies are going to taste bad.  Not at all!  Especially when you add  fruit to your ingredients!  I always add a banana, or strawberries, blueberries, blackberries, an apple, and more.  Once all of the ingredients are blended together, the main thing you will taste is the fruit!  So don’t be afraid to try this recipe!  I think you’ll be glad you did!

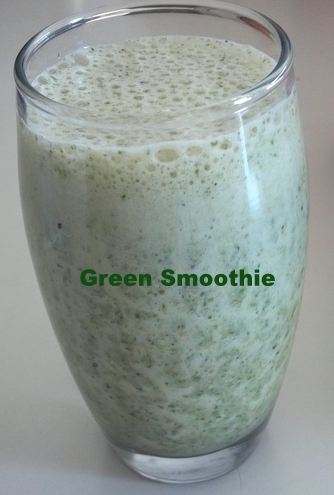
GREEN SMOOTHIE

Green Smoothie

1 handful of kale or spinach ( I use a combination of both)

1 tbsp of almonds

1 tbsp flaxseed

2 scoops of your favorite protein powder

1 banana

16 oz of filtered water

6 ice cubes

Directions

Using a high-power blender, blend all ingredients on high for at least 1 minute.  If you are using a lower power blender, you will want to blend on high for at least 3 to 4 minutes.  Ingredients should smooth and creamy!  Pour yourself a glass of this delicious drink, and keep the rest of it stored in a Mason jar until you’re ready for your afternoon Smoothie!  Makes just over 1 quart.


Explore, experiment, enjoy! — Dana


Please visit me at Frugal Girlmet for more unique recipes!


If you would like to contact Dana in regards to this blog, please email her at Dana@girlfriendscoffeehour.com

GCH:What’s on your Plate? — Old Fashioned Chicken Pot Pie

I get all giddy when the weather starts to turn cooler. My favorite seasons are fall and winter, so I am totally in my element from September to April! I am a huge sucker for comfort food. Roasts, casseroles and other heartier foods is definitely what I prefer. One of my favorite, and a favorite of my family, is chicken pot pie.

The flaky crust and hot,creamy filling loaded with veggies is always a welcome addition to our table. Laden with calories, but good for the soul!  This recipe is very forgiving.You can add any veggies you have on hand. I usually add carrots, peas, green beans, potatoes, broccoli, and onions.  Anything goes. The filling is creamy,thick and perfect to nestle the veggies in . Can easily be doubled. I made 12 of these one year to feed our church congregation. So yummy!

Old Fashioned Chicken Pot Pie by Liz Lanza

OLD FASHIONED CHICKEN POT PIE

Ingredients:

1 Tablespoon butter

2 garlic cloves, minced

1/4 cup diced onion

2/3 cup sliced or diced carrots

1 teaspoon salt (or more, depending on taste)

1/4 teaspoon pepper

1 1/2 cups chicken broth

2/3 cup frozen peas

2/3 cup frozen corn

2/3 cup diced potato

2/3 cups milk

1/2 cup flour

2 cups cubed cooked chicken

1 refrigerated pie crust (from a pack of 2)

Directions:
1. In saucepan on stove top, combine butter, garlic, onion, carrots,potatoes, salt, pepper, and chicken broth. Bring to a boil and simmer until carrots and potatoes are tender

2. When carrots and potatoes are tender, add peas and corn and simmer for about 5 more minutes. Whisk together the flour and milk. Add to boiling mixture and return to a boil, stirring constantly; boil for 1-2 minutes or until thickened. Add chicken and stir.

4. Pour filling into a pie dish.

5. Roll out the pie crust and place over the chicken mixture,sealing the edges.Cut slits in the middle for ventilation.

6. Bake at 425 degrees for 30-35 minutes or until crust is golden brown and filling is hot and bubbly.


Happy Eating,

Liz