November 24, 2024

At Home with GCH – Protein Bites and Bars

Here on our At Home with GCH blog, Monday’s are always focused on healthy but oh-so-yummy! recipes.  This month, along with the next six months also, I am on a “7” journey with a few friends.  We are fasting from some of the excess in our lives, and endeavoring to establish better boundaries to help us keep God as the focus of our hearts.  We are, it has been said, having a ‘mutiny against excess!’ It has been very good but not without challenges!  But I think challenges and trials are a necessary part of the journey when you are making lifestyle changes.  If you would like to take a peek at what we have committed to do, please follow this link and visit my friend Megan’s website,  The Future

Also here is a link to Jen Hatmaker’s book we are reading on our journey:  7 Experimental Mutiny Against Excess

This month, we have begun the journey dealing with excess in the category of food.  (Say, WHAT?!?) Yes, yes…. So here’s what Robert and I are keeping in our NON-excessive food list for the next 18 days (ready? it is a short list): eggs, chicken, salad greens, grapes (me) and strawberries (him), potatoes, broccoli, -and- protein bars and smoothies.  Also, I am endeavoring to have everything* that my husband and I eat be UNprocessed and made from fresh ingredients.

A few of my friends are supporting their desire to keep to this discipline of  “7by having protein shakes and bars as part of their foods.  ‘Wow,” I thought, “that is a great idea…why didn’t I think about that?!?”  So, I did think about it!  And found some incredible ideas out there!  The two recipes that follow are adaptations of what I found.

I think that these bites and bars are healthy and satisfying on so many levels!

IMG_0207

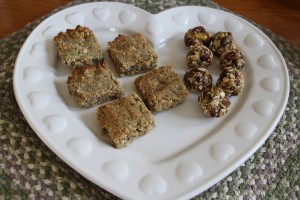
  • The bites are “raw;” so good for you.  The bars are only lightly baked.
  • They are loaded with protein.
  • They are chock full of nutritious dried fruits.
  • Use ‘better-for-you’ alternative sweetener.
  • Great chew factor – ok, maybe only important to me 😉
  • Easily adaptable to fit almost any eating style (vegan: substitute agave nectar for honey; gluten-free: substitute chia seeds–or just more flax–for wheat germ)

This recipe comes together almost more quickly than you can gather the ingredients!  Super simple, easy…and in the end…super healthy but oh-so-yummy!

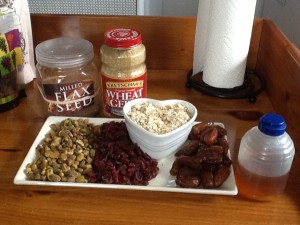
Pistachio-Cranberry Energy Bites (makes 48 or so)2013-04-07 10.20.51
Ingredients:
8 ounces (about 1 packed cup) chopped dates
1/2 cup honey
1 tablespoon flax seeds
1 tablespoon wheat germ
pinch of kosher salt
1+1/2 cups old-fashioned oats (dry, not cooked)
1 cup shelled pistachios
1 cup dried cranberries

Directions:
Combine the dates, honey, flax seeds, wheat germ and salt in a food processor, and pulse until smooth and combined. You should be able to stir the mixture—if it is too thick, add in another tablespoon or two of honey.

Transfer this mixture to a large bowl and add in the oats, pistachios, dried cranberries until well combined. Cover with plastic wrap and refrigerate for at least 30 minutes.

Once the mixture has been refrigerated (so much easier to work with), use a spoon or cookie scoop to portion out the energy balls, and give a quick roll to them.  (Mine were about 1-inch in diameter.)  Occasionally, you should rinse your hands and dry them; then start rolling the mixture again.  Store covered in the refrigerator for up to 2 weeks. (Storing them in the refrigerator especially helps the bites keep their shape.)

Note: Instead you can line a small baking pan with parchment paper, and press the mixture evenly into the pan, let it cool, and then cut into bars.

  * ————————————- *

Now, these bars are of a totally different consistency…more like a cereal bar.  Very filling, tasty and delicious!

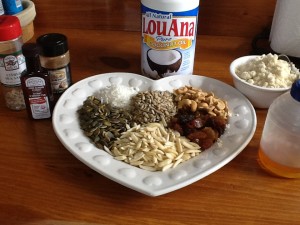
Breakfast Protein Bars (Paleo-friendly)2013-04-07 11.54.51
Ingredients:
1 cup blanched almond flour**
1/4 teaspoon sea salt
1/2 cup coconut oil
2 tablespoons honey
1 tablespoon water
1 teaspoon almond extract
1/4 cup unsweetened shredded coconut
1/2 cup pumpkin seeds
1/2 cup sunflower seeds
1/4 cup blanched slivered almonds
1/2 cup raisins

Directions:
Preheat oven to 350.  In a food processor combine almond flour and salt.  Pulse in coconut oil, honey, water, and almond extract.  Pulse in coconut, pumpkin seeds, sunflower seeds, almonds and raisins.
Press dough into a 8x8inch baking dish, (your hands should be slightly damp to pat dough down.)  Bake at 350 for 20 minutes. Cool.  Cut into 16 pieces.

NOTES: *The only “processed” thing that I am including in anything that I am preparing is protein powder for our bars and smoothies.

God loves you!  ♥  (Don’t ever forget that!)

♥  coleen

______________________

If you would like to send a personal message to Coleen, in regards to this blog, please email her at: Coleen@girlfriendscoffeehour.com.
At Home with GCH: Mac and Cheese

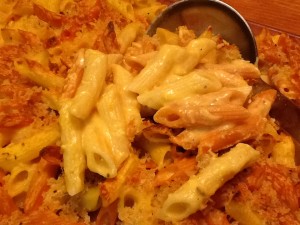
Here on our At Home with GCH blog, Mondays are always focused on healthy but oh-so-yummy! recipes.  This week we are going to bake a yummy mac and cheese that is loaded with veggies, and low on the calories by reducing the amount of cheese.

macncheese

Mac and Cheese. C’mon, who does not like Mac and Cheese?  I read a poll, and Mac and Cheese was voted overwhelmingly as ‘favorite comfort food!’  Now I am hoping that your favorite version does NOT come out of a blue box 😉 but, if it does, perhaps you might consider my recipe and see if it does not convince you to try it instead of the blue box version in the future. 🙂 

This version of Mac & Cheese has lots of veggies snuck in there.  Some of the pasta is made with pureed carrots and tomatoes, and there is butternut squash throughout the cheese sauce.  I love this because it makes the cheese sauce even more colorful (ORANGE)  causing the eaters to ‘think’ it is more cheesy!  Also, there is only 6-ounces of shredded cheese in the whole dish which helps to keep this recipe in our ‘healthy-but-oh-so-yummy!’ category.

Have you ever made a white, or bechamel, sauce?  Well, today you will!  It is very easy, and a great technique to add to your repertoire!  In a future post, I will share some recipes that need a white sauce, and by then you will be a pro at making it!

The following recipe makes an abundantly filled 9×13 pan…enough to feed 6-8 hungry folks, )or, if you have a husband who LOVES leftovers like mine does, lunch for 2-3 days.)  This recipe is easily doubled, and I always make a double batch.  A menu suggestion:  Mac & Cheese, steamed broccoli, grilled ham steak.  A big, delicious salad is often our only accompaniment.

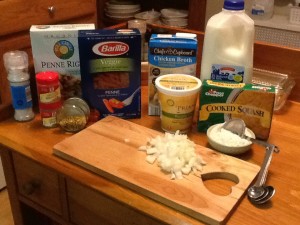
Macaroni:
1#box small macaroni (shells, penne)
12oz box veggie pasta (i used penne made with carrots and tomato) *2012-11-03 19.21.38

Cheese Sauce:
1/2 small onion, diced
2T butter
2T flour
1c 2 percent milk
1c chicken or vegetable broth
2 (10-ounce) packages frozen pureed winter squash, thawed
1/2c part-skim ricotta cheese
4oz sharp Cheddar, shredded (about 1+1/3c)
2oz Monterey jack cheese, shredded (about 2/3c)
1tsp salt, 1 tsp fresh ground pepper
1tsp ground (dry) mustard

Topping:
2 slices stale bread, crumbled into fine crumbs
2T freshly grated Parmesan cheese
1tsp olive oil

Preheat your oven to 375.  Coat a 9 by 13-inch baking pan with a small amount of  butter.  Bring a large pot of water to a boil; add 1 tsp of salt and the macaroni; cook  according to package directions.  Drain in a colander and place back into the cooled pot (this is where you will mix the macaroni and all that cheesy goodness together!)

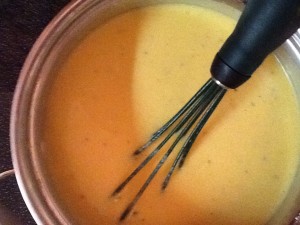
Meanwhile, over medium heat, melt the butter in a medium saucepan, adding the  diced onion. cook ‘til the onion is soft and translucent, approximately 5 minutes.  Then sprinkle the flour over the cooked onion and, using a whisk, stir constantly for one minute.  Adjust the heat to very low, and cook for 2-3 minutes to get the starchy taste out of the mixture.  Do not let the mixture brown.   Increase the heat back to  medium and immediately slowly pour in 1/4 cup or so of milk while whisking briskly.  Just keep stirring!  As this is absorbed, continue to slowly add the balance of the  milk in a steady stream, followed by the broth; stirring constantly as the liquid  becomes absorbed.  This will take about 3 minutes.  Adjust the heat lower again and  let this mixture simmer slowly for another 5  minutes, stirring occasionally.  (You  have now made a white, or bechamel, sauce; congratulations!!!)  At this point, add in the thawed  butternut squash, stirring ‘til it is incorporated, allowing the mixture to come back  to a simmer.  Remove the saucepan from the heat.  Stir in the ricotta, and the  other cheeses, along with the ground mustard, and salt & pepper.  Carefully taste (it’s hot!) the  cheese sauce, adjusting for seasoning.

2012-11-03 20.00.28

Pour cheese mixture over the macaroni in the large pot and stir gently to combine.  Transfer the macaroni and cheese to the 9×13 baking dish and bake for 20 minutes.  Remove from oven.  Adjust the top rack in the oven to a higher position, and turn  the broiler on.  Combine bread crumbs, parmesan cheese and oil in a small bowl.  Mix with your fingers; get a little messy!  Then sprinkle over the top of the cooked mac and cheese.  Carefully place the baking dish back in the oven and broil for 3  minutes.  Keep your eye on it; you want the breadcrumbs to brown but not burn and  for some of the macaroni to get just a little crispy (my husband loves that part!).  Again, carefully remove from the oven…and you are ready to serve!

*Here is a link to the type of veggie macaroni I used.  Check it out!
http://barilla.com/content/prodottobarilla/veggie-penne-freshly-pureed-tomatoes-and-carrots


God loves you!  ♥  (Don’t ever forget that!)

  coleen

*****

If you would like to send a personal message to Coleen, in regards to this blog, please email her at: Coleen@girlfriendscoffeehour.com.
 

At Home with GCH: Spring Salad Side Dishes

Here on our At Home with GCH blog, Mondays are always focused on healthy but oh-so-yummy! recipes.  This month we are spotlighting vegetarian dishes.  Each Monday will actually be a Meatless Monday!

So, I was talking with my dad about what to make for our family’s get-together on Easter Sunday.  Now, something you should know about us—every event is a food event. 😉  Is your family like that, too?  My contributions this year will be for dinnertime.  By request, I have been relegated the side dishes.  Two of them will be vegetarian salads: Broccoli-Craisin Salad and New Old-Fashioned Carrot Slaw.  Both fit into our healthy but-oh-so-yummy! category nicely!  Yes, there is a good amount of mayonnaise in the broccoli salad, but I think that you will find it balanced out by the rest of the healthy ingredients.  Plus this recipe provides 6-8 servings.  And in the carrot slaw, fat-free greek yogurt is substituted for the majority of the mayo that traditional ‘old-fashioned’ carrot slaw usually contains.  Enjoy!

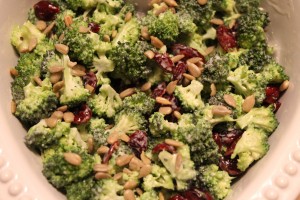
Broccoli-Craisin SaladIMG_0196

dressing:
3/4 cup good mayonnaise
3 tablespoons honey
3 tablespoons white balsamic vinegar (red wine vinegar also yummy)
freshly ground pepper, to taste

salad:
3 heads broccoli crowns, cut up into small florets – no stems
1/2 cup finely chopped red onion
1/2 cup sunflower kernels/seeds
1 cup craisins (dried cranberries)

Combine dressing ingredients in a small bowl.  Mix together ‘til emulsified;  set aside.

In a salad bowl, toss all salad ingredients ‘til well distributed. Pour dressing over and stir ‘til everything is nicely coated.  Put completed salad into a storage container or bag and refrigerate for a minimum of 2 hours to meld the flavors together (overnight is optimum).

Notes:
The smaller you chop the florets, the nicer this salad will be.  Takes a little time…but so worth it!  I use less mayo than most recipes call for; feel free to add more if you desire. ALSO, for your meat-loving family members, you can add 2-3 slices of crumbled, crispy, cooked bacon; makes for a nice addition!

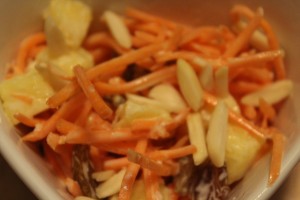
New Old-Fashioned Carrot SlawIMG_0200

dressing:
1 container lemon greek yogurt
2 teaspoons freshly squeezed lemon juice
2 tablespoons mayonnaise
freshly ground black pepper, to taste

salad:
2 cups julienned carrots *
1/2 cup fresh pineapple, cut in 1/2″ cubes
1/4 cup sliced or slivered almonds
1/4 cup golden raisins

Combine dressing ingredients together in a small bowl; set aside.

Mix all the salad ingredients together in a large bowl, and then pour on the dressing; mix together well.  Place in a storage container or bag; refrigerate for at least 2 hours or overnight so that the flavors can blend together.

Notes:
I buy bagged ‘matchstick’ carrots; usually available with the baby carrots in the produce section of your grocery store.

————————————————-

God loves you! (Don’t ever forget that!)

coleen

_________________________________

If you would like to send a personal message to Coleen concerning this series, you may email her at: Coleen@girlfriendscoffeehour.com, or leave a comment below.

At Home with GCH – Meatless Mondays – HashBrown Crusted Quiche

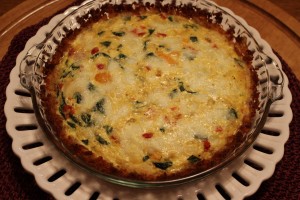
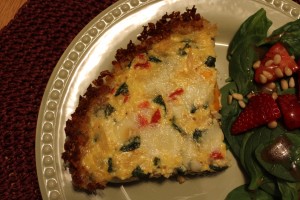
Here on our At Home with GCH blog, Mondays are always focused on healthy but oh-so-yummy! recipes.  This month we are going to spotlight vegetarian dishes.  Each Monday will actually be a Meatless Monday!  This week we are making quiche!  Oh, yum!  But in light of our healthy but oh-so-yummy inclination, we are substituting a shredded potato crust for a pastry crust.  So delicious…so easy…so nice and crispy!  I took a peek at a few similar recipes, and calorie counts on ingredients like those below will add up to approximately 250-300 for each wedge of this quiche.  This along with a simple salad (we had spinach-strawberry salad with ours) makes for a filling yet light supper.  You certainly can exchange different veggies and cheeses for the spinach-tomato-fresh mozzarella combination in this recipe.  During the spring and summer, we often have quiche once each week on our menu.  It is quick and nutritious; and, if I prepare different varieties from time to time, no one gets bored!  I would love to hear about your quiche if you make a different variety!  Enjoy! 

IMG_0184

Caprese Quiche with Hash Brown Crust (makes 4 generous servings)

Crust:
3 cups frozen hash browns, thawed
2 tablespoons butter, melted
1/4 cup grated Parmesan cheese
1/2 teaspoon kosher salt
1/2 teaspoon freshly ground black pepper
Preheat oven to 425. Thaw hash brown potatoes, and blot between paper towels to remove excess moisture.  Combine in mixing bowl with melted butter, Parmesan cheese, and seasonings.  Lightly grease 9″ glass pie plate.  Pour potatoes mixture into pie plate and press down onto bottom and up sides of pie plate…go all the way up to the rim.  Bake for 15-20 minutes until lightly browned; do not let burn!  When done, remove from oven.  Place on a cooling rack and allow to cool slightly.  Reduce oven temp to 350.

Filling:
1 medium sweet onion, diced
2 teaspoons olive oil
good-sized handful (12-14 grape tomatoes), chopped
1/2-3/4 cup fresh spinach leaves, sliced 1/4″ slices
1 heaping tablespoon chopped garlic (I use jarred)
Heat olive oil in medium-sized saute pan over medium heat.  Add diced onions and cook for 6-7 minutes until softened but just slightly browned.  While onions are cooking, chop tomatoes (drain away any excess juice).  To slice spinach, stack a number of leaves, and then just carefully slice down through them into 1/4″ slices; repeat until all spinach is sliced.  When onions are ready, add tomatoes, spinach, and garlic.  Saute for 1-2 minutes, stirring constantly, until spinach has wilted.  Remove from stovetop and allow to cool.IMG_0189

Egg Custard:

4 large eggs, lightly beaten
3/4 cup 2% milk
1/2 cup ricotta
dash of Kosher salt
1/2-1 teaspoon freshly ground black pepper
1/4 cup breadcrumbs
1 cup fresh mozzarella balls, rough chopped
To the eggs, add the milk, ricotta, seasonings, and breadcrumbs; whisk together until smooth.

To assemble:
Once baked crust has cooled slightly, layer in filling ingredients and then pour the custard on top.  Add chopped cheese and swirl with fork to evenly distribute ingredients.  Carefully place in middle of 350 oven, and bake until eggs are set and cheese is slightly browned, approximately 30 minutes or so.  Let stand for 10 minutes to set up and finish cooking.  Cut into four wedges.

————————————————-

God loves you! ♥  (Don’t ever forget that!)

coleen

_________________________________

If you would like to send a personal message to Coleen concerning this series, you may email her at: Coleen@girlfriendscoffeehour.com, or leave a comment below.

At Home with GCH: Meatless Mondays – Broccoli & Garlic White Pizza

Here on our At Home with GCH blog, Mondays are always focused on healthy but oh-so-yummy! recipes.  This month we are spotlighting vegetarian dishes.  Each Monday will actually be a Meatless Monday!

One of my favorite veggies is BROCCOLI!  What is your favorite way of preparing broccoli?  Mine is simply steaming it!  A pinch of salt and a grind or two of pepper…yummy!  I have been known to forsake utensils and use my fingers to eat it, too. IMG_0178

This week’s recipe is for Broccoli-Garlic White Pizza…ever had it?  Oh, I do l-o-v-e  a yummy, tomato-y, cheesy traditional pizza—but—equally love pizza of this genre!  This recipe fits our healthy but oh so yummy! category because 1) it has lots of healthy, no fat, few caloried, full of nutrition broccoli, 2) there is a tiny bit of olive oil on it, and 3) the calories contributed by the cheeses total approximately 850 for the whole pie!  Now divide that by the 3-4 servings this pizza offers, and you’ve got healthy…check!  Yummy…check!

Also you will see that I don’t make my own dough…I stop by my favorite pizza shop and purchase 1 pound of their dough!  (I already know how good it is!)  And it only costs me…$1.  Here’s my only suggestion for baking your pizza: use a pizza stone.  They are relatively inexpensive ($8-15 range, I would say) and can be bought in just about any big box store or kitchen goods store.  Mine came from Pampered Chef.  If not using a pizza stone, you will need a round pizza pan, or a large enough baking sheet to handle the size of your crust.

OK!  Here we go!  Pizza Pizza!

Broccoli -Garlic White Pizza (serves 3-4)IMG_0174

1 (1#) package of pizza dough
2-3 tablespoons of flour to handle the dough
2-3 tablespoons of cornmeal
2 heads (no stems) of broccoli, chopped into florets (about 3 cups)
3+ tablespoons chopped garlic (I use the jarred variety)
15 ounce container of part-skim Ricotta cheese, let come to room temp
1+1/2 cup shredded cheese (Mozzarella, Provolone, Monterey jack—or a mixture)
3 tablespoons freshly grated Parmesan
1 tablespoon olive oil
salt, freshly ground pepper, to taste
Crushed red pepper flakes (optional)

Choose the pizza dough of your preference.  If making from scratch…you better get going! If  purchased from your local pizza shop, you are set to go!

If using a pizza stone, get it into the oven so that it can heat up!

Preheat the oven to 500.

Heat 2-3 cups water in a medium saucepan to boiling.  While the water is coming to a boil, fill a medium-sized mixing bowl with very cold water and a few ice cubes; set aside.  When the water in the saucepan comes to a boil, add the broccoli florets.  Cook for just 3-4 minutes, no longer; watch carefully. When the broccoli is ready, it will still be bright green and still crisp. It is better for it to be undercooked than overcooked. Remove from the heat and drain. Then immediately place the cooked broccoli into the ice water to stop the cooking process; then drain again. Blot the broccoli with a couple of paper towels. You don’t want to add wet broccoli onto your pizza crust!  Extra moisture = soggy crust!

When you are ready to shape the dough, put a couple of tablespoons of flour onto a large cutting board (or your scrupulously clean countertop). Coat the dough ball with flour all around. Flatten the ball into a disc. Then with your fingertips, work your way around the edges, stretching it all out as you go. You can also put your fist in the middle of the growing circle and raise it off of the board, letting the sides stretch down. Then work your fingers around the edge of the circle one more time.  I find it easier (safer) to keep my dough flat and just keep working it.*

When your crust is ready, sprinkle a little cornmeal onto a large cookie sheet.  You will use this to transfer the pizza onto the VERY HOT pizza stone.  Carefully slide the formed pizza crust onto the cookie sheet.

Spread the olive oil all over the pizza crust, even onto the rim.  Use just the 1 tablespoon; remember, extra moisture = soggy crust!

Add the ricotta onto the crust and using the back of a spoon, spread the ricotta evenly over the pizza. Then sprinkle the garlic all around.  Arrange the broccoli pieces over the surface evenly. Sprinkle with the Mozzarella and Parmesan. Season with salt and pepper.

Bake 10-15 minutes. Watch carefully. If the cheese starts to brown too quickly (before the crust has had a chance to brown), reduce the heat to 475 or so. When the cheese and the crust are just starting to brown, remove from the oven and let cool for 2 minutes. Then slice and serve immediately.

Another veggie topping we like on a white pizza is Caramelized Onions and Mushrooms.

Easy-peasy!IMG_0177

2 tablespoons olive oil
½ good sized onion, sliced thinly
6-7 medium to large Baby Bella mushrooms, cleaned and sliced

Place a medium-sized saute pan on medium heat; add olive oil. Add onions and mushrooms to pan, and cook until they are lightly caramelized, approximately 6-8 minutes.  Remove from heat; allow to cool slightly.

Then proceed with the above recipe adding the onion/mushroom mixture in place of the broccoli.  That’s all!

*There are lots of videos that you can watch to give you tons of tips and tricks how-to make a perfect pizza crust…check ‘em out!

————————————————-

God loves you!  ♥  (Don’t ever forget that!)

♥  coleen

_________________________________

If you would like to send a personal message to Coleen concerning this series,
you may email her at: Coleen@girlfriendscoffeehour.com, or leave a comment below.

At Home with GCH: Veggie Stuffed Peppers

Here on our At Home with GCH blog, Mondays are always focused on healthy but oh-so-yummy! recipes.  This month we are going to spotlight vegetarian dishes.  Each Monday will actually be a Meatless Monday!  Now that we are <finally!> out of the winter months and moving towards S-P-R-I-N-G, we will have many more seasonal veggies available to us.  I’m thinking asparagus, baby salad greens, oh and my onion-of-choice, the Vidalia, has it’s best offerings in the spring! IMG_0164

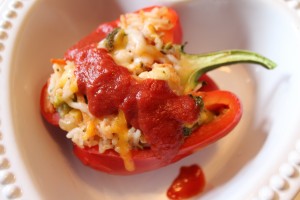
This week we are making Veggie Stuffed Peppers!  This dish allows you to use the veggies that you already have in your refrigerator and the ones that you know your family will enjoy (and eat!).  We have these rice-stuffed peppers regularly in our meal rotation because they are so adaptable, and the variety keeps them from being boring.

Consider using red and yellow and orange (or even purple, if you can find them) bell peppers rather than plain green ones as their taste is much milder than traditional green peppers.  If you are having the stuffed peppers as your main dish, plan on 2 halves per hungry adult; but if serving as a side dish, then half of a pepper will probably suffice.  The proportions in this recipe are for four whole peppers.

Veggie Stuffed Peppers (makes eight halves)

cooked rice  (see recipe below)

olive oil
5 big red, yellow, or orange bell peppers
1 green bell pepper
2 medium Vidalia onions, diced small
5-6 good-sized Baby Bella mushrooms, diced small
3 tablespoons chopped garlic (I use jarred)
2 cups (your choice) chopped veggies*
½ of a 10 ounce box frozen chopped spinach–or kale! (defrost)
Kosher salt, freshly ground black pepper
2 teaspoons herbs (thyme, basil, tarragon)
1 cup (or more) shredded cheese, plus 1/4 cup to finish
4 cups cooked rice (see below)
1 cup vegetable broth (or water)
1 cup seasoned tomato puree or sauce

Get the rice cooking…wash your veggies…preheat oven to 425.  Lightly coat a large baking sheet with a small amount of olive oil.  Take (4) of the brightly colored peppers and cut in half, down through the stem.  Important to keep the stem on so that the peppers hold their shape during cooking.  Remove seeds and any whitish parts of the insides.  Place the halved peppers, cut side down, on the baking sheet and roast for 15 minutes…just ‘til they start to get a teeny bit browned.  Remove from oven to cool.  Reduce oven temperature to 350.

Cut the other two peppers (one brightly colored, one green) in half, remove seeds, and chop into ½” dice.  Heat 2 tablespoons olive oil in a large saute pan over medium heat, then add onions and chopped peppers. Saute for 5 minutes; then add mushrooms, along with any veggies that need a little precooking (i.e., carrots, zucchini).  Cook for an additional 5 minutes or so.  Stir in other veggies of your choice along with the cooled rice; mix together well.  Season with salt, pepper, and herbs. Stir in shredded cheese.

Using your hands, scoop up rice/veggie/cheese mixture and stuff firmly into precooked pepper halves, mounding up slightly.  Distribute all mix among the pepper halves.  Place filled peppers into a 13X9 baking pan, filled side UP.  Pour broth inside the bottom of the baking pan.  Lastly, pour the tomato sauce over the tops of the filled peppers.  Cover tightly with aluminum foil.  Bake for 20-25 minutes.  Remove foil and sprinkle with just a bit more shredded cheese.  Place back in oven for 5 minutes ‘til cheese is melted.  DONE!  Serve immediately.

*zucchini, carrots, cauliflower and/or broccoli florets, butternut squash, corn, baby peas, grape tomatoes, etc.IMG_0165

Cooked Rice
1 teaspoon butter or olive oil
1+1/2 cups rice (lots of choices out there!)
3 cups water or broth
salt, pepper

Easy-peasy!   In a medium saucepan, heat the butter or olive oil.  Add the rice and stir for one minute making sure all of the rice is coated.  Add 1 teaspoon each salt and pepper along with the water or broth.  Raise heat and stir well.  Bring to a quick boil, and immediately reduce heat to very low; cover pan.  Cook until water is completely incorporated into the rice.  Remove from heat, give a quick stir to fluff; set aside to cool.


God loves you!  ♥  (Don’t ever forget that!)

  coleen

_________________________________

If you would like to send a personal message to Coleen concerning this series, you may email her at: Coleen@girlfriendscoffeehour.com

At Home with GCH: Appetizers Again – Mini Quiche

Here on our At Home with GCH blog, Monday’s are always focused on healthy but oh-so-yummy! recipes.  This month we are doing a series on appetizers…I love ‘em!!  How about you?   I would love for you to leave a comment below sharing with us YOUR favorite appetizer(s)!

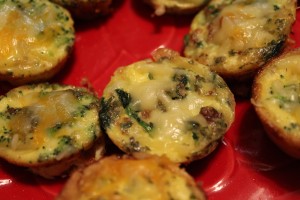
This week we are making bite-size crustless mini quiche; have you ever had them? Pop-‘em-in-your-mouth yumminess!  These little appetizers are excellent to make ahead of time and freeze, then pull out to warm for a quick breakfast.

I made two types: Spinach&Swiss with Bacon, and Broccoli-Cheddar with Ham.  I have given you the basics—for both types—and then a few suggestions for optional fillings.  Whether you do them crustless (low-fat, gluten-free) like these or wrapped in some yummy, flaky crust, these are delicious!  You can let your imagination and taste buds lead you to making a variety or two that your loved ones will enjoy!

And I would suggest doubling or quadrupling the recipe (as I did); these go fast!  My husband can eat almost the whole batch (one dozen mini quiche) by himself… I’m just sayin’!  🙂

IMG_0161

Mini Quiche (makes one dozen)

Egg Filling

3 large eggs
1/2 cup milk
1/4 teaspoon kosher salt, freshly ground black pepper

Whisk these 4 ingredients together, thoroughly blending the eggs.  Pour into a container with a spout (for ease in filling muffin tin) and set aside.

Spinach&Swiss with Bacon

1/2 cup frozen chopped spinach, defrosted
2 slices bacon, cooked and crumbled (option: packaged, cooked bacon)
4 tablespoons chopped onion
1+ tablespoons dried dill or tarragon (optional)
1/2-3/4 cup finely grated Swiss cheese

Preheat oven to 375.  Grease with melted butter (or spray with cooking spray) your mini muffin tin; be thorough.  Place spinach in colander, allow to defrost, and then squeeze dry (with your hands); set aside.  Cook bacon, cool, and crumble.  Saute onion in a bit of the bacon drippings until soft.  When done, mix with spinach and herbs.

Evenly distribute the veggies, the bacon, and the cheese among the muffin cups; these should be at least 1/2 full. Then carefully pour the prepared Egg Filling mixture into each muffin cup.  Fill almost full.  Bake @ 375 for approximately 12-15 minutes until the eggs puff and are lightly golden brown.  Remove from oven; let sit for 10 minutes, then carefully remove from muffin tin.  If you have thoroughly greased your muffin tin in preparation, this shouldn’t be too hard.  I used a small, flexible spatula—but a teaspoon or small knife will do—and just run it around the edge of each quiche to loosen.  Serve immediately.

Broccoli-Cheddar with Ham

4 tablespoons chopped onion
olive oil
1/2 cup frozen, chopped broccoli (cooked and cooled)
1/2 cup ham, chopped small
1+ tablespoons dried crushed rosemary or marjoram (optional)
1/2-3/4 cup of finely grated sharp Cheddar

Preheat oven to 375.  Grease with melted butter (or spray with cooking spray) your mini muffin tin; be thorough. Cook frozen broccoli in small saucepan, drain and cool; set aside.  Saute onion in a small amount of olive oil until soft; when done, mix with broccoli, and herbs.

Evenly distribute the veggies, the chopped ham, and the cheese among the muffin cups; these should be at least 1/2 full. Then carefully pour the prepared Egg Filling mixture into each muffin cup.  Fill almost full.  Bake @ 375 for 12-15 minutes until the eggs puff and are golden.  Remove from oven; let sit for 10 minutes, then carefully remove from muffin tin.  If you have thoroughly greased your muffin tin in preparation, this shouldn’t be too hard.  I used a small, flexible spatula—but a teaspoon or a small knife will do—and just run it around the edge of each quiche to loosen.  Serve immediately.

Filling Variations (choose one from each category)

  • Veggies:(1/2 cup) of either sauteed mushrooms, peppers, seeded tomatoes, zucchini, butternut squash
  • Cheese: (1/2-3/4 cup) of your favorite Cheddar, Monterey Jack, goat cheese, Gruyere, Parmesan, Fontina, Provolone, Gouda
  • Herbs: (1+ tablespoon) of your choice of parsley, chives, tarragon, basil, dill, rosemary,  marjoram
  • Meat: (1/2-3/4 cup) finely chopped ham, cooked&crumbled breakfast sausage or bacon

Crust Options  OK, should you want to make your mini quiche with a crust (oh yum!) you have options, too.  This is a little ditzy and time-consuming but well worth the effort for those that love crust!

After choosing (and preparing, if necessary) your option, cut out into approximately 2+1/2″ diameter rounds; I used a juice glass.  Gently fit into mini-muffin tin cups.  Bake @ 400 for 20 minutes or so ’til egg is puffed and crust is lovely and golden.  Allow to sit in the muffin tin for 2-3 minutes; remove to a cooling rack OR serve immediately.

God loves you!   ♥  (Don’t ever forget that!)

♥  coleen

_________________________________

If you would like to send a personal message to Coleen concerning this series, you may email her at: Coleen@girlfriendscoffeehour.com

At Home with GCH: Appetizers Week 3

Here on our At Home with GCH blog, Monday’s are always focused on healthy but oh-so-yummy! recipes.  This month we are doing a series on appetizers.  As I confessed last week: I love appetizers! Whether you call them tapas, small bites, hors d’ouerves, antipasto, or simply appetizers; no matter what you call ‘em…I like ‘em!  One of my favorite things to do on a weekend evening is to have some folks over, set up a board game, put appetizers and beverages on the buffet…relax and have fun!  But that’s me! I would love for you to leave a comment below sharing with us YOUR favorite appetizer(s)!

This week we are making Guacamole and Six Layer Mexican DipVamanos! (Let’s go!)

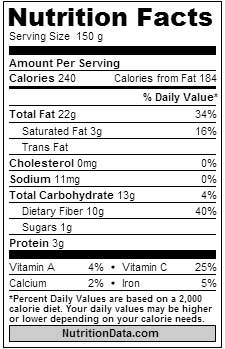
Guacamole is so simple to prepare from fresh ingredients.  And when you make it at home you are able to leave out any preservatives or other unhealthy additions.  The main ingredient in any guacamole recipe is AVOCADO.  Avocados, which are fruit, are considered a very healthy plant-based fat which is comprised of monounsaturated (the good stuff) fat that is easily metabolized (burned).  Here are some nutrition facts (based on one whole avocado):

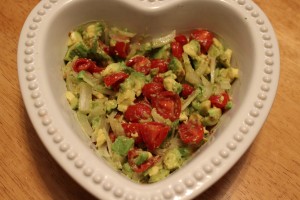
Guacamole DipIMG_0154

1 ripe avocado
juice of ½ small lemon (try Mayer lemons!)
Kosher salt, freshly ground pepper
1/2 ripe tomato, seeded and chopped
OR 12-15 grape tomatoes, halved
1/8 small Vidalia onion, very thinly sliced

Halve the avocado; remove pit very carefully.

Scoop out the fruit into a glass or ceramic bowl, and mash roughly with the lemon juice and approximately 1 teaspoon kosher salt and pepper to taste.

Stir in the cut-up tomatoes and onions.  Taste for seasoning, adding if necessary.

Should be served immediately.

_________

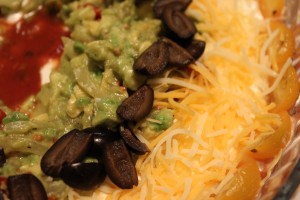
Six Layer Mexican DipIMG_0159

1 (16 ounce) can refried beans
8 ounces of jarred salsa (I used black bean & corn variety)
12 ounces sour cream
2-3 tablespoons homemade taco seasoning*
Guacamole (see above recipe)
8-12 ounces shredded sharp cheddar or colby jack
1 (6 ounce) can black olives, sliced

Heat refried beans in the microwave for approximately 1 minute in a 1/2—2 quart clear glass  container just ‘til warm.  Remove from microwave.  Spread into an even layer.

Pour salsa over beans and smooth into an even layer.

Mix homemade taco seasoning with sour cream; spoon onto the salsa layer, spreading gently.

Spoon guacamole evenly over the sour cream mixture; spreading if necessary.

Scatter shredded cheese on top of the guacamole; and then distribute olive slices on the very top.

Serve with your favorite tortilla chips!

Homemade Taco Seasoning Mix

1/4 cup chili powder
3 tablespoons dried minced onion
1 tablespoon garlic powder
1+1/2 teaspoons salt (optional, I do not include it)
2 teaspoons dried oregano
2 teaspoons ground cumin
1 teaspoon ground chipotle pepper
2 teaspoons paprika
1 teaspoon black pepper
½ teaspoon cayenne pepper
1/3 cup cornstarch

Place all ingredients in a small glass jar; shake really well ‘til all ingredients appear to be evenly distributed.  (To substitute for the mix that comes in a yellow package: use 3 tablespoons of mix and 1/3 cup water for each pound of meat.)

God loves you!   ♥  (Don’t ever forget that!)

 ♥   coleen

_________________________________

If you would like to send a personal message to Coleen concerning this series, you may email her at: Coleen@girlfriendscoffeehour.com

At Home with GCH: More Appetizers

Here on our At Home with GCH blog, Monday’s are always focused on healthy but oh-so-yummy! recipes. And this month we are doing a series of looks at appetizers. Here in the NorthEast, we are in the middle of a snowstorm. So,  I thought…’summery food!’  🙂  This week’s appetizer selections are Caprese Salad and Zucchini Fritters. We enjoyed these as a vegetarian supper tonight!

IMG_0149

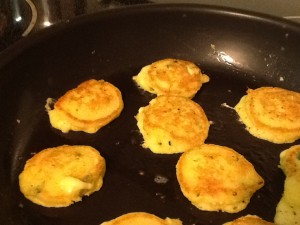
I hope you enjoy these fritters as much as we do! They go along with our healthy but oh-so-yummy category because they are loaded with zucchini, and a good shot of whole grains in the cornbread. And, even though lightly fried in a bit of oil, they are no greasier than your weekend pancakes!

As I confessed last week: I love appetizers! Whether you call them tapas, small bites, hors d’ouerves, antipasto, or simply appetizers; no matter what you call ‘em…I like ‘em!  I would love for you to leave a comment below sharing with us YOUR favorite appetizer!

Zucchini Fritters

1 box of Jiffy Cornbread mix  IMG_1404
1 medium zucchini, shredded (do not peel!)
1/2 cup milk
good squeeze of juice from a fresh lemon
1 egg
1 tablespoon of melted butter
1/4 teaspoon freshly ground pepper
dash of ground nutmeg
Oil of your choice (but NOT olive oil)
Kosher salt

Preheat oven to 250. Place an oven-safe platter into the oven.

Shred zucchini into a colander; sprinkle with a small amount of kosher salt. Let sit to drain 5 minutes or so. Then dump onto a double layer of paper towels. Blot with a couple of additional paper towels, removing as much moisture as possible.

Stir milk and lemon juice together = buttermilk!  Lightly beat egg in a small mixing bowl. Stir in buttermilk, zucchini, seasonings, melted butter and, finally, cornbread mix. DO NOT overmix; there might be a small lump or two. Let sit for 3 minutes.

While mixture is resting, add a small amount of oil to a large nonstick frying pan; bring up to medium heat; then reduce heat to low. Add the fritter mix by scoops, spacing apart for easier turning. When edges appear dry, and there are a few little bubbles on the surface of the fritters, carefully flip. Once cooked, remove to platter in oven, sprinkle with a bit of salt and keep warm while remainder of batter is cooked.

  • For larger size fritters: use 1/4 cup-sized measuring cup or a large cookie scoop.
  • For smaller, bite-size fritters, use a tablespoon measure or a small cookie scoop.

These can be served hot or warm. Serving options are many: Caprese Salad (recipe below); guacamole, sour cream, salsa…

********************************

Continuing our “bit of summer in the midst of a snowstorm” theme, I prepared a quick Caprese Salad, aka Fresh Mozzarella and Tomato Salad. Not much tastes more like summer to me than a yummy, ripe, delicious tomato. Not so easy to find in the wintertime though! However, I find that the tiny tomatoes (grape, cherry, mini—whichever varieties your grocery store carries) are usually very flavorful and yummy all winter long!

Caprese Salad

various sizes of fresh mozzarella from my favorite brand—Belgioso!

8 ounces fresh mozzarella
1/2 pint tomatoes
Basil * (fresh is best)
Kosher salt, freshly ground black pepper
1-2 teaspoons extra-virgin olive oil.   Easy-peasy!  Depending on the size of the fresh mozzarella you have bought, you might need to cut the mozzarella into small, bite-size pieces; halve the tomatoes, and sprinkle with salt and pepper, to taste.  Thinly slice the basil*.  Add the sliced basil to the seasoned tomatoes and cheese.  Pour a small amount of olive oil over and gently mix. Serve immediately.*Gourmet tip: stack 3-4 basil leaves; tightly roll-up (like a tiny cigar!); then carefully slice into very thin slices. You have now accomplished the technique known as ‘chiffonade!’  You are amazing!


God loves you!    (Don’t ever forget that!)

coleen

_________________________________

If you would like to send a personal message to Coleen concerning this series, you may email her at: Coleen@girlfriendscoffeehour.com

At Home with GCH – Dips!

Here on our At Home with GCH  blog, Monday’s are always focused on healthy but oh-so-yummy! recipes. This month we are going to do a series of looks at appetizers.

I am here to confess: I love appetizers!  Whether you call them tapas, small bites, hors d’ouerves, antipasto, or simply appetizers; no matter what you call ‘em…I like ‘em!  My favorite type of casual get-together has appetizers as the food component.  Oftentimes, when hubby and I go out to eat I prefer a couple of appetizers over almost anything else offered on the menu.  So that’s me!  I would love for you to leave a comment below sharing with us YOUR favorite appetizer(s).

Now this week we are going to be making dips: two very different ones—one is chilled and one is warm! The first is homemade Lemon PineNut Hummus.  And our second recipe is for Spinach Artichoke Dip.  Remember we always endeavor to make our recipes as healthy as we can but keeping them oh-so-yummy.  The Lemon PineNut Hummus is relatively naturally healthy with chickpeas as the main protein.  Now the Spinach Artichoke Dip is notorious for being incredibly high in calories (mostly fat calories).  You will notice as you peruse the recipe that we have reduced the fat by using less cheese (but still enough; you’ll see!), and choosing Greek yogurt in place of most of the mayonnaise.

Lemony PineNut Hummus

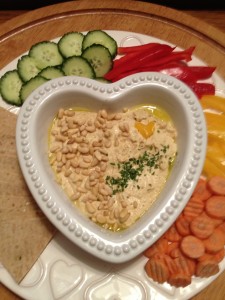
2013-02-03 18.47.55

I toasted the pine nuts in a small skillet for 3 minutes before adding them to the food processor. The pine nuts give the hummus a rich, sweet flavor that is oh-so-yummy!

1 (15 ounce) can chickpeas, drained and rinsed
1 heaping Tablespoon chopped garlic (I use jarred)
1/4 cup filtered water

¾ cup pine nuts, lightly toasted (reserve 1/4 cup for garnish)
2 tablespoons of tahini
juice of 1 small lemon (try Mayer lemons, if you can find them)
1/4 cup unflavored Greek yogurt
2 tablespoons olive oil
pinch EACH of tarragon, thyme
dash of crushed red pepper (optional)
1 teaspoon salt, freshly ground black pepper
1 teaspoon dried parsley (plus more for garnish

In a food processor, blend the chickpeas, garlic, and water. Add ½ cup of the pine nuts.  Blend until very smooth.  Add tahini, lemon juice, yogurt, olive oil, herbs, and salt until the ingredients come together into a paste-like consistency.  Pour into a 2 cup serving bowl; garnish with any remaining parsley and 1/4 cup pine nuts.  Cover and refrigerate about an hour.  Serve with fresh veggies (carrot sticks, sliced red and yellow peppers, cucumber rounds, sliced radishes) and Pita’s (nice if toasted), or flatbread.

Warm Spinach Artichoke Dip

2013-02-03 18.50.00

2 (8.5 ounce) cans artichoke hearts packed in water (drained)
1 (10 ounce) package frozen chopped spinach (thawed and squeezed dry)
1/4 cup Vidalia onions, chopped
2 heaping tablespoons chopped garlic (I use jarred)
8 ounces unflavored Greek yogurt
½ cup mayonnaise
4 ounces part-skim shredded Mozzarella cheese, reserve
6 ounces freshly grated Parmesan cheese   Kosher salt, freshly ground black pepper

Remove chopped spinach from package, place in sieve or colander, and rinse gently with cold water, breaking up into chunks.  Let it defrost completely and then squeeze dry with your hands. (I try to remember to do this step earlier in the day.)

Preheat oven to 375.  Lightly grease or use olive oil cooking spray on a 1+1/2 – 2 quart baking dish; set aside.

In a food processor, coarsely chop the artichokes along with the garlic and onions.  Add the dry spinach, yogurt and mayonnaise. Pulse a few times until all is incorporated together.  Pour into ovenproof bowl or baker, and stir in cheeses, salt, and pepper.  Sprinkle top with a pinch or two of additional cheese.  Bake for 20-25 minutes until hot and cheeses are melted.*  Serve immediately.  We like cubed pumpernickel bread or Italian/French bread cut on the diagonal into thin slices; or thin crispy chips (tortilla are great); or carrot sticks.

* You can also heat the dip in a small crockpot for 2-3 hours on low; just be sure it is hot and the cheeses are melted.

God loves you!   ♥  (Don’t ever forget that!)

♥  coleen

_________________________________

If you would like to send a personal message to Coleen concerning this series, you may email her at: Coleen@girlfriendscoffeehour.com