November 26, 2024

At Home with GCH: Broccoli Bacon Salad


Broccoli Bacon Salad

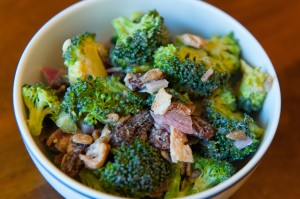
Bacon!  Did that get your attention?  (My husband’s ears always perk up when he hears that word.)  This salad is a family favorite.  I love vegetables of every kind, but it’s nice to take a break from lettuce-based salads.  You probably have everything you need for this salad at home already.  If not, pick up some broccoli and let’s get to it!

Broccoli Bacon Salad

Ingredients:

  • one pound small broccoli florets, about 7 cups
  • 1/4 cup minced red onion
  • 1/4 cup sunflower seeds
  • 1/4 cup raisins
  • 4 strips bacon
  • 3/4 cup mayonnaise
  • 1 teaspoon lemon juice or apple cider vinegar
  • 1 teaspoon sugar, honey, or other sweetener of choice
  • salt and pepper

Directions:

  1. In a large bowl, gently toss together the broccoli, onion, sunflower seeds, and raisins.
  2. Cook the bacon until done – I like it crunchy rather than chewy.  Drain and dice.  Add to the bowl and combine.
  3. Mix together the mayonnaise, lemon juice, sugar, and salt and pepper.  Pour over the broccoli mix and toss to combine.  Taste for seasoning – I usually add a little more lemon juice over the top.  Chill for an hour before serving.That’s it!  This salad is nice the next day, too, since the broccoli softens up a bit.


Explore, experiment, enjoy! — Dana


To view even more of Dana’s unique recipes, you can visit her at Frugal Girlmet!

At Home with GCH: Chicken en Papillote with Pesto

chicken en papillote

I know chicken breasts are good for me.  I know I should eat lots of lean protein.  But sometimes the idea of choking down a dry, mealy, overcooked hunk of chicken makes me shudder.  Yuck!  The trick to cooking chicken breasts is to keep them moist and flavorful, because once they get dry, they’re only good for throwing on top of a salad and drenching with dressing.  So I needed something to keep the moisture locked in.  If you have all day, use a crock pot.  If you only have an hour, use parchment paper!

Cooking something “en papillote” is French for cooking “in paper.”  You might already have parchment paper if you do a lot of baking, but if not, you can find it near the aluminum foil in the baking aisle.  This recipe is infinitely customizable—just use whatever combination of vegetables you like, plus chicken breasts, and some seasoning on top.  Bake for an hour, open and enjoy!

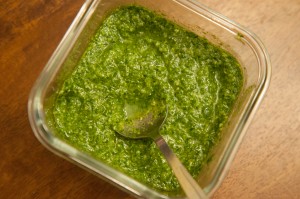
This recipe is even better slathered with homemade pesto.  Basil is pretty easy to grow in the yard, so if you have a garden, you can make pesto this summer!  The recipe has the proportions that I like.  You may want to use less garlic, or more oil, to make a thinner sauce.  Also, most pesto recipes add a little parmesan cheese – maybe a tablespoon, grated – to the mix; but I left it out since I am still eating on the Paleo diet.  If you have leftovers, pesto goes great over pasta of any kind.  I had a little pesto leftover and I ate it on scrambled eggs – delicious!

pesto


Chicken en Papillote with Pesto

Ingredients:

  • 4 boneless, skinless chicken breasts
  • 1 cup baby carrots
  • 2 large zucchini, cut the same size as the baby carrots
  • salt and pepper
  • 2 teaspoons butter

For the pesto:

  • 2 cups basil leaves
  • 2 cloves garlic
  • 1/4 – 1/2 cup olive oil
  • 2 tablespoons pine nuts (keep in the freezer so they won’t go rancid)
  • 1 lemon
  • salt and pepper

Directions:

  1. Preheat the oven to 400*F.  Cut two pieces of parchment paper, about 12 x 24 inches.  Fold them in half width-wise, then open.  On one half of the paper, make a bed of half the carrots and zucchini slices; repeat on the second paper.  Season with salt and pepper.  Top each bed of vegetables with two chicken breasts, and season with salt and pepper again.  Divide the butter and drop half a teaspoon of butter on each chicken breast.
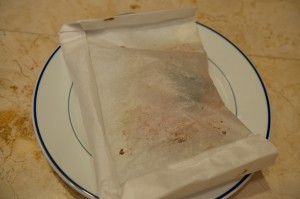
  2. Fold the paper in half, to cover the chicken.  Now you should have an envelope or packet.  Fold over the long end a few times, then make a triangular fold at each of the corners.  Now fold over the two short ends several times.  (There are many ways you can fold the paper to keep it shut.  I’ve even gotten frustrated before and stapled them shut!  Here are some ideas for folding the paper.)  When you have the two packets closed up, place on a cookie sheet and put them in the oven.  Cook for one hour, rotating the cookie sheet halfway through to make sure the packets cook evenly.

papillote packet


  1. While the chicken is cooking, make the pesto:  In a food processor, blend the basil leaves, garlic, and 1/4 cup of olive oil.  Scrape down the sides, add the pine nuts, and blend again.  Scrape down the sides again, cut the lemon in half, and add the juice to the pesto.  If you want the pesto thinner, add more oil.  Taste…if you want a stronger lemon flavor, you can add the zest from the lemon too.  If you are adding parmesan cheese, now is the time!  Blend again.
  2. To serve, open the packets—carefully!  Don’t get burned on the steam!  You can put the packets on a plate, or open them in the kitchen and throw out the paper if you like.  Pass the pesto!

Explore, experiment, enjoy! — Dana


To view even more of Dana’s unique recipes, you can visit her at Frugal Girlmet!
At Home with GCH: Coconut Flour Pancakes

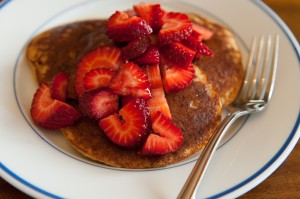
coconut flour pancakes

Through my gym, I am doing a Paleo Challenge.  For 5 weeks I am cutting all processed foods out of my diet, as well as some other “irritant” foods, so no sugar, no grains, no legumes, no dairy, and no alcohol.  The goal is to eat the way our “caveman” ancestors ate, with the belief that all the chemicals and lab-created foods we eat are not good for us, and that our bodies work the way they’re supposed to when we only eat meat, vegetables, fruits, nuts, and fats (like olive oil, coconut oil, and avocado).  Just the way God created us!

Does that mean that all the “fun” foods are off limits?  No!  No grains mean no flour, no oatmeal, no corn—and that takes a lot of American food off the table.  Coconut flour, to the rescue!  This is flour made from the dried and ground flesh of the coconut.  It’s full of protein, has lots of fiber, is gluten-free, and is pretty all-around great for you.  It’s much coarser than wheat flour, so when you make these pancakes, they won’t be the cakey, smooth type you get at a diner.  These are more substantial, and they keep and reheat well.  The next day after I make them, I like to nibble on them, slathered in homemade almond butter.  Yum!

Coconut flour can be found at Whole Foods, other health food stores, and online at Amazon.  I like Bob’s Red Mill brand, but there are others out there too.  A one-pound bag will last you a while, so don’t think you’re getting cheated.  Just keep it in a Ziploc bag in your pantry, and stay tuned for more coconut flour recipes from me.  I’m in love with the stuff, and I can’t wait to share.

Coconut Flour Pancakes

(Recipe courtesy paleospirit.com)

Ingredients:

  • 4 eggs, room temperature
  • 1 cup coconut milk (you can use regular milk too!)
  • 2 teaspoons vanilla extract
  • 1 tablespoon coconut nectar (or honey, or 1 packet of stevia)
  • 1/2 cup coconut flour
  • 1 teaspoon baking soda
  • 1/2 teaspoon salt
  • 1/4 teaspoon cinnamon (or pumpkin pie spice!)
  • coconut oil for frying (you can use cooking spray to coat a non-stick pan, too)

Directions:

  1. Beat eggs in a stand mixer (or just whisk mightily!) until frothy.  Mix in milk, vanilla, and sweetener.
  2. In a small bowl combine coconut flour, baking soda, salt and cinnamon.  Mix together.
  3. Whisk flour mixture into egg mixture and blend well so there are no lumps.
  4. Grease pan with coconut oil (my favorite!) or, if you are a using a good non-stick pan, spray with cooking spray.  (Side note:  Trader Joe’s sells both coconut oil in a jar, and coconut oil cooking spray.  Love!)  When the pan is hot, use a large tablespoon to pour out pancakes.  I make mine about 4 inches in diameter.  These are thick, and you may need to smooth them out a bit.  Cook until dry on top, just like regular pancakes, about 2 or 3 minutes, then flip and cook for another minute or so.  Serve hot!

This recipe makes 12-16 pancakes, depending on the size.  Store any leftovers in a Tupperware container in the fridge – they reheat nicely in the microwave, or eat them cold with nut butter, cream cheese, whatever you like.  My older daughter is a traditionalist and likes hers with butter and maple syrup.  My younger daughter likes her with fruit and maple syrup.  I  like them with sliced bananas, walnuts, and some flaked, unsweetened coconut on top – tastes like Hawaii.  😉


Explore, experiment, enjoy! — Dana


To view even more of Dana’s unique recipes, you can visit her at Frugal Girlmet!
At Home with GCH: Carrot and Raisin Salad

Carrot Raisin Salad

When I was a kid, we used to have Carrot and Raisin salad all the time.  I’m pretty sure the sole ingredients were shredded carrots, raisins, and mayonnaise.  I loved it!  But these days I want something a little healthier.  Also, I want something I can take to a potluck or family gathering and not have to worry about it sitting out unrefrigerated.  Food poisoning is a real bummer.  Time for a make over!

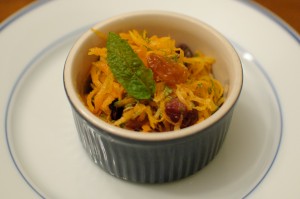
This recipe is about as simple as it comes, but with a few twists to make it sophisticated and different.  Mint is easy to find (and pretty easy to grow, even on a window sill) and is what sets this Carrot and Raisin salad apart.  This recipe can easily be doubled or tripled so it’s great for parties.  Make this for dinner, or bring to your next potluck, and you’ll be a hero!

Carrot and Raisin Salad

(From Martha Stewart’s Living Cookbook)

Ingredients:

  • 1 pound large carrots
  • 3 tablespoons golden raisins (I usually use closer to 1/4 cup – I love raisins!)
  • 2/3 cup fresh mint leaves, cut into 1/4-inch strips
  • 2 teaspoons fresh lemon juice
  • 1 tablespoon olive oil
  • salt and pepper to taste

Directions:

  1. Grate the carrots on the large holes of a box grater or with a food processor using the grater blade.  In a large  bowl, combine the carrots with the raisins, mint, lemon juice, and olive oil.  Season with salt and pepper and  toss to combine well.  Keep in the refrigerator until ready to serve (I think it tastes better chilled.)

Explore, experiment, enjoy! — Dana


To view even more of Dana’s unique recipe, you can visit her at Frugal Girlmet!


If you would like to contact Dana in regards to this blog, please email her at Dana@girlfriendscoffeehour.com

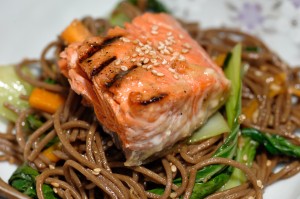
At Home with GCH: Soba Noodles with Salmon and Miso

Soba Noodles with Salmon and Miso


I know some people give up meat on Fridays, especially during Lent, so to celebrate the end of Lent, the coming of Easter, and the arrival of Spring, I have a fresh and tasty fish recipe for you!

The two “ethnic” ingredients you’ll need for this recipe are both Japanese.  Soba noodles are thick, chewy buckwheat noodles, with a wonderful nutty taste.  They come dried and are widely available, so if your grocery store has an Asian section, there’s a good chance they’ll be there.  (You could substitute whole wheat spaghetti if you really can’t find the soba noodles.)  The other ingredient is miso paste.  It’s made of fermented soy beans and adds a mild soy sauce-like flavor.  Check the refrigerated section of the store, maybe by the tofu.  (If you can’t find it, use soy sauce instead, but the flavor will be more pronounced.)  As for the vegetables, I like baby Bok Choi, but if you can’t find that, you could use 5 ounces of spinach instead, or Napa cabbage, or even bean sprouts and strips of bell pepper.  Be creative!  This recipe serves two, but you can easily double it if you like.

Soba Noodles with Salmon and Miso

(Adapted from a recipe in the book Homestyle Asian)

Ingredients:

  • 2 ounces dried soba noodles
  • 1 heaping teaspoon miso paste (or one teaspoon soy sauce)
  • 3 tablespoons honey
  • 4 teaspoons sesame oil, divided
  • 1 pound salmon filets
  • 1 teaspoon chopped fresh garlic (use 2 cloves)
  • 1 tablespoon grated fresh ginger
  • 1 carrot, cut into matchsticks
  • 3 green onions, thinly sliced
  • 4 heads of baby bok choi, separated into individual leaves (or use one 5 ounce bag baby spinach)
  • 2 tablespoons rice vinegar
  • 1 tablespoon soy sauce
  • 1 tablespoon sesame seeds

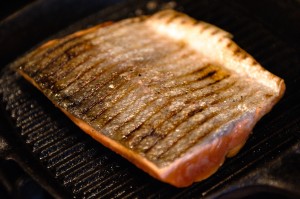
Salmon Grill Pan


Directions:

  1. Preheat the oven to 350*F.  Cook the soba noodles according to the package directions.  Drain, add back to the pot you cooked them in, and toss with a teaspoon of the sesame oil, so the noodles won’t stick together.  Set aside.
  2. Whisk together the miso, honey, one teaspoon sesame oil, and one teaspoon water to form a paste.  Brush over the salmon.  Sear on a hot grill pan or frying pan for 30 seconds.  Brush salmon with any remaining glaze and place on a foil-lined baking tray.  Bake for 6 minutes, then cover and leave to rest in a warm place.
  3. Heat one teaspoon of sesame oil in a frying pan.  Add the garlic, ginger, carrot, green onion, and bok choi and sauté for one minute.  The vegetables should not brown, but remain bright and crisp.  Add the noodles, rice vinegar, soy sauce, and last teaspoon of sesame oil, and stir to combine for another 30 seconds.
  4. To serve, place the noodles and vegetables on the plate.  Top with salmon and sprinkle with sesame seeds.


Explore, experiment, enjoy! — Dana

*****

To view even more of Dana’s unique recipes, you can visit her at Frugal Girlmet!

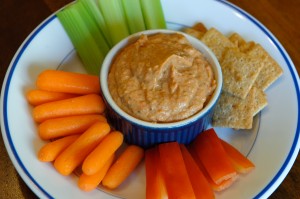
At Home with GCH: Eggplant Dip (Baba Ghanouj)

Baba Ghanouj  2

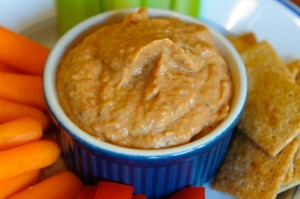
While I am a huge fan of french onion dip – you know, the kind made with a tub of sour cream and a packet of french onion soup – I know it is not the healthiest for me.  I firmly believe that when it comes to your diet, you should eat as well as possible, load up on veggies and lean protein, and avoid processed foods. That said, you gotta enjoy life, and I think it’s okay to have a treat every once in a while.  The problem is when “every once in a while” turns into “I deserve it now” which eventually becomes an everyday habit.  I speak from experience!  So one way I’ve found to subvert those cravings for treats is to find delicious alternatives that are nutritious as well.  Move over potato chips and french onion dip, here comes baba ghanouj!

Baba ghanouj (pronounced “gah-noosh”) is a roasted eggplant dip.  You can usually find it alongside hummus and pita wedges in Middle Eastern restaurants.  The only ingredient you may not have on hand is tahini, which is sesame seed paste.  I can buy it in my regular Vons and, depending on how well-stocked your grocery store is, you can find it with the Indian/Middle Eastern food, or with the Kosher foods.  It’s rich and creamy—almost like peanut butter made from sesame seeds.  It keeps well in the fridge, and I use it to make salad dressings, too (like this one for a kale salad.)  This recipe also adds a roasted bell pepper.  It isn’t necessary, but  it adds another layer of smoky sweetness that I really enjoy.  Ready?  Let’s get dipping!

Baba Ghanouj_
Eggplant Dip (Baba Ghanouj)

Ingredients:

  • 3 Japanese eggplants, or one very large regular eggplant
  • 1 tablespoon olive oil
  • 2 cloves garlic
  • 2-3 tablespoons tahini (I like to add a lot!)
  • 1/2 lemon, juiced
  • 1 teaspoon ground toasted cumin
  • salt and pepper
  • 1 roasted bell pepper  (Trader Joe’s has some great ones in a jar)

Directions:

  1. Preheat the oven to 400*F.  Line a baking sheet with aluminum foil.  Poke some holes in the eggplant with a fork or knife and drizzle with the oil.  Bake for 30 minutes.  Turn off the heat and let sit in the oven for 30 minutes to cool.
  2. When the eggplant is cool enough to handle, slit it open and scoop out all the insides.  Transfer the eggplant to the bowl of a food processor.  Add the remaining ingredients and blend together.  Keep refrigerated until ready to eat.

I serve this with veggie sticks.  The kids like pita bread, Wheat Thins, and any other cracker or pretzel I give them!


Explore, experiment, enjoy! — Dana


To view even more of Dana’s unique recipes, you can visit her at Frugal Girlmet!


If you would like to contact Dana in regards to this blog, please email her at Dana@girlfriendscoffeehour.com

At Home with GCH: Irish Colcannon

Irish Soul Food!

Irish Soul Food!

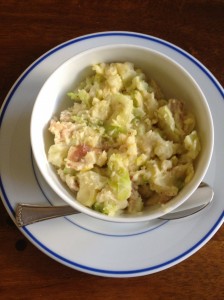
St. Patrick’s Day is this weekend.  Now if you’re like me, your carefree days are behind you and you will not be found in a pub, swilling green beer!  But it is fun to partake in a little luck of the Irish, wear something green, and eat some Irish soul food.  If Corned Beef and Cabbage is more effort than you want to put in, have I got the recipe for you!

Colcannon is classic folk food, meaning it’s what the poor villagers could throw together in a pot to feed a large, hungry family.  This is not a fancy dish, but it’s filling, easy, and incredibly tasty!  If it’s still cold where you live, this will warm your tummy!

Irish Colcannon

Ingredients:

  • 4 slices of bacon, diced
  • 3 large or 4 small potatoes, scrubbed, peeled if desired, and cut into 1-inch chunks
  • 1/2 head green cabbage, thinly sliced
  • 3 tablespoons butter
  • 1/2 to 3/4 cup milk
  • 2 green onions, diced
  • salt and pepper

Directions:

  1. Put bacon in a large pot over high heat.  Cook until crispy, then remove the pan from the heat.
  2. While the bacon is cooking, simmer the potatoes in a little water and cover with a lid.  When you can break the chunks of potato with a fork, add the cabbage and simmer until the potatoes are done, about 3 minutes more.  You want the potatoes to be cooked through but not mushy.
  3. Lift the potatoes and cabbage from the water and add to the pot with the bacon in it.  Yes, leave the grease in the pot!  Over medium-low heat, fold in the butter and milk, stirring to combine and break up the potatoes.  Season with salt and pepper and stir in the green onions.

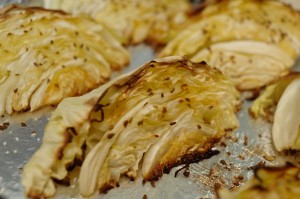
Now…if you made this recipe, you have half a head of cabbage left over.  May I suggest Roasted Cabbage Wedges?  With a little olive oil, salt, and fennel seed, the cabbage becomes sweet, tender, and delicious!  An unexpected way to eat this nutritious green veggie!


Roasted Cabbage Wedges

Ingredients:

  • 1 head green cabbage (or half a head)
  • olive oil
  • salt and pepper
  • 1 tablespoon fennel or anise seeds (optional, but I really like it!)
  • 1/2 lemon

Directions:

  1. Preheat oven to 375*F.  Cut the cabbage in half from top to bottom.  Cut out the core, and cut each half into four wedges.
  2. Line a baking sheet with aluminum foil.  Arrange cabbage wedges on the sheet and drizzle with olive oil.  Sprinkle with salt and pepper, and fennel or anise seeds, if using.  Bake for 10 minutes, or until the edges of the leaves take on some color.  With a spatula, flip over the wedges and bake for another ten minutes.  The cabbage wedges should be soft, with crispy edges.  Serve with a squeeze of lemon if desired.

Explore, experiment, enjoy! — Dana


To view even more of Dana’s unique recipes, you can visit her at Frugal Girlmet!


If you would like to contact Dana in regards to this blog, please email her at Dana@girlfriendscoffeehour.com

At Home with GCH: Vegetable Pancakes

Vegetable Pancakes

My Jewish friends call them “latkes” and my Korean friends call them “jeon.”  I call them veggie pancakes, and I wonder why I don’t make them more often!  Kind of like hash browns, these crispy little guys are a great way to get more vegetables in your diet.  I also like them for cleaning out my fridge and getting rid of my “singleton” vegetables – you know, that ONE zucchini in a plastic bag, or the last carrot in the sack.  Frugal, I say!

If you have a food processor with a shredder attachment, you can have this recipe mastered in minutes.  If not, you’ll have to get out the box grater and put some muscle into it.  You can experiment with a large variety of firm vegetables—roots are best—like potatoes, carrots, yams, parsnips, or turnips.  You can also mix in some softer veggies, like zucchini, and any kind of minced herbs you like.  I usually just use green onions, because I always have those on hand, but feel free to try thyme, tarragon, or very finely minced rosemary.  Top with sour cream or plain yogurt and you have a nutritious, unusual side dish that’s at home next to a salad or a steak.  These make a great breakfast, too—add eggs, bacon, and fruit, and you’re in business!

Vegetable Pancakes

Ingredients:

  • 2 small potatoes (Russet or white), peeled
  • 1 large carrot, peeled
  • 1 smallish zucchini
  • salt and pepper
  • 1 egg, beaten
  • 2 teaspoons flour, optional
  • vegetable oil for frying

Directions:

  1. In the food processor with shredder attachment, shred the potatoes, carrot and zucchini.  If you are using a box grater, use the largest holes and coarsely shred all the vegetables.  Season with salt and pepper and set aside, in a large bowl, for ten minutes.  
  2. After ten minutes, squeeze out the water accumulating in the bottom of the bowl.  This will keep your pancakes from getting soggy!  Then mix in the beaten egg – I just use my hand.  If it’s still really watery, you can add a teaspoon or two of flour.
  3. In a large non-stick pan over medium heat, add about 3 tablespoons of the vegetable oil.  You aren’t deep-frying the pancakes, but you do want to make sure there’s plenty of oil, so they don’t stick to the pan.  Drop quarter-cup sized dollops of pancake mixture into the pan, and make sure they don’t touch each othe… they are hard to separate, and won’t cook evenly.  Fry for 3 to 5 minutes per side, so they are crispy and firm.  Repeat with the rest of the pancake mixture, adding more oil to the pan if necessary.  Drain on a paper bag or paper towels and sprinkle with a little salt.  Serve with sour cream.

Explore, experiment, enjoy! — Dana


To view even more of Dana’s unique recipes, you can visit her at Frugal Girlmet!


If you would like to contact Dana in regards to this blog, please email her at Dana@girlfriendscoffeehour.com

At Home with GCH: Chinese Tofu Stir-Fry

Tofu Stir Fry Plate


I call it “reverse-engineering” – when you eat something you really like at a restaurant, and then go home and figure out how to make it from scratch.  Have you ever done that?  It can be quite a challenge, especially if it’s a dish from a cuisine you are not all that familiar with.  But sometimes it’s good to challenge yourself, save some money, and make something healthy for your family that doesn’t need a trip to the strip mall!

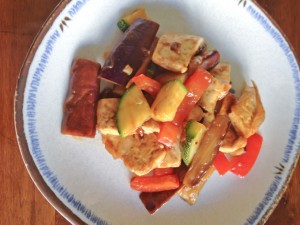
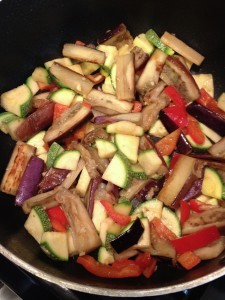
Case in point:  There is a chain of Chinese take-out restaurants with locations all across the country.  I won’t name names, so let’s call it “Black-and-White Animal Express.”  They make a fantastic stir fry with tofu, Chinese eggplant, and onions.  I love it, and I figured I could recreate it at home.  I think I got pretty close!  The only ingredient that you may not have at home is Hoisin sauce, but I bet it’s in your grocery store’s “ethnic” aisle.  It’s sweet and a little spicy and is a great sauce with just about any vegetable and meat combo stir fry—chicken and broccoli, beef and snow peas, you name it.  If you can’t find it, you can try Plum sauce – it’s a little sweeter, and you may want to add a splash of hot sauce to it to offset the sweetness.  If you can’t find Chinese eggplants—they’re the long skinny kind—you can use a regular eggplant, or just substitute a different vegetable altogether.  I had planned on adding 8 ounces of mushrooms to this recipe; and then realized I’d used them the day before.  There’s always next time!

If you are looking for a Meatless Monday meal, or are craving Chinese take-out, why not give this a try at home?  Serve over rice and crack open a fortune cookie!

Tofu Stir Fry Pan

Before the sauce is added – I love the colors!

Chinese Tofu Stir-Fry

Ingredients:

  • 1 package firm or extra firm tofu
  • vegetable oil
  • 2 cloves garlic
  • 1 Chinese eggplant
  • 1 small onion
  • 1 red bell pepper
  • 1 zucchini
  • 1 tablespoon Hoisin sauce, or more to taste

Directions:

  1. Open the tofu, drain water, and place the tofu on a small plate.  Place another plate on top and gently squeeze out the water.  Leave the plate on top while you cut up the veggies.  Slice all the vegetables into bite-sized pieces: 2-inch strips for the eggplant, thin slices for the onion and pepper, and either strips or coins for the zucchini.  Mince the garlic.  When the vegetables are sliced, squeeze the tofu again, and then cut—first in half, then into squares, and then into smaller rectangles; they should end up around the same size as the eggplant.
  2. Heat 2 tablespoons of vegetable oil in a large non-stick pot.  Cook the tofu for five minutes until it’s golden, then flip and cook the other side.  When cooked and a little crispy on both sides, remove to a bowl.
  3. Add the rest of the vegetables to the pot, adding a little more oil if necessary to keep everything from sticking.  Sauté for five to eight minutes over medium heat, stirring occasionally.  When the onion is translucent, and the eggplant is soft and taking on a little color, add the tofu back to the pan.  Cook for another 2 or 3 minutes.
  4. Turn off the heat and stir in the sauce.  You want everything coated in sauce, but not smothered!

Explore, experiment, enjoy! — Dana


To view even more of Dana’s unique recipes, you can visit her at Frugal Girlmet!


If you would like to contact Dana in regards to this blog, please email her at Dana@girlfriendscoffeehour.com

At Home with GCH: Spaghetti Carbonara


Spaghetti Carbonara

Inspiration can strike anywhere, at any time.  I was reading a magazine in the bathtub last night.  It had a page about eggs as super foods, and the different ways to prepare them.  As I was looking at photos of beautifully poached eggs, it came to me:  Spaghetti Carbonara!

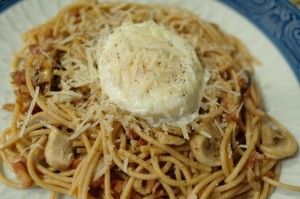
Let me back up a minute.  Spaghetti Carbonara is usually made with pancetta (or bacon), onions, and is finished by adding whipped eggs to the hot pasta at the very end.  The resulting sauce is smooth, creamy, and delicious – but it’s also a little risky, since the eggs aren’t really cooked all the way.  For most people, eating uncooked or underdone eggs is not a big deal, but I thought I might be able to make it my way, and improve the food safety quotient in the process.  Instead of an egg sauce, this recipe uses poached eggs—serve with one or two, your choice.

The ingredients for this recipe are probably in your house right now.  I used whole wheat spaghetti in this recipe, but honestly, I like regular spaghetti better.  You could also use another long noodle—fettucini or linguini—if that’s what’s in your pantry.  If you want to splurge on the pancetta, feel free, but I had bacon ready to go.

This recipe serves two.  Make it for dinner tonight, with a green salad.  (Don’t worry, I don’t have an Italian Grandmother who’s rolling over in her grave right now.  Unorthodox?  Maybe, but that doesn’t mean it’s not tasty!)  Mangia!

Spaghetti Carbonara Egg

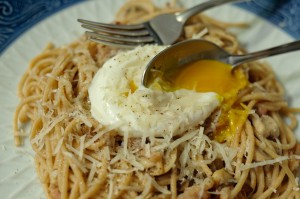
The Poached Egg, aka The Sauce Bomb!

 Spaghetti Carbonara

Ingredients:

  • 1/2 pound spaghetti
  • 1 teaspoon butter or olive oil
  • 4 slices bacon, diced
  • 1/2 onion, diced (use a sweet onion, if you have it)
  • 1/2 pound mushrooms, chopped
  • 2 eggs
  • salt and pepper
  • 1/4 cup grated Parmesan cheese
  • 1/2 lemon

Directions:

  1. Place a large pot of salted water on the stove.  When it boils, add the spaghetti and cook until almost al dente.  
  2. While the pasta boils, cook the bacon and onion together in the olive oil in a large, high-sided pot.  After five minutes, when the bacon is getting crispy and the onion is turning golden, add the mushrooms.  Stir and continue to cook.
  3. When the pasta is just barely underdone, remove from the water and place in the bacon pot, but DO NOT drain the water!  Keep the pasta water simmering over very low heat.  Stir the pasta and bacon mix together over the lowest heat.  Turn off the heat and continue to combine.
  4. In a teacup or small bowl, carefully crack an egg.  Gently lower the egg into the pasta water, and poach.  This will take 3 or so minutes over low heat.  Use a slotted spoon to keep the egg white together.
  5. While the egg is poaching, plate your pasta—make a big pile of spaghetti carbonara, and make a little nest in the top.  When the egg is done—still jiggly but cohesive—place on top of the spaghetti.  Sprinkle generously with Parmesan cheese, and season with salt and pepper.  Squeeze half a lemon lightly over the whole thing.
  6. To eat:  break open the egg, and stir to combine and mix together.

Explore, experiment, enjoy! — Dana


To view even more of Dana’s unique recipe, you can visit her at Frugal Girlmet!


If you would like to contact Dana in regards to this blog, please email her at Dana@girlfriendscoffeehour.com