November 25, 2024

Tropical Granita

Tropical Granita

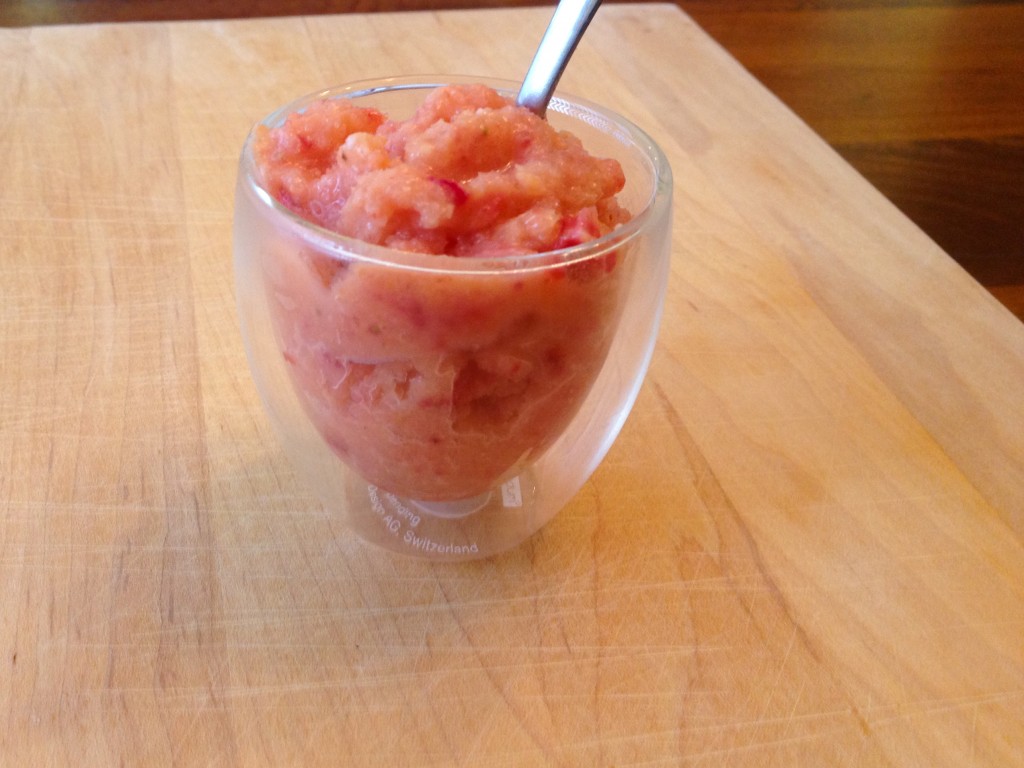
In my last post on the joys of Homemade Coconut Milk, we’ll look at the most traditional use of coconut:  Dessert!  Coconut milk can be used in savory or sweet dishes, but I think most people like to find coconut mingling with chocolate or fruit.  Here’s a recipe that will satisfy your sweet tooth in a healthy way – Tropical Granita!

For some reason, my girls won’t try new fruits readily, but if I put them in a smoothie or in this granita, they love it!  A granita, if you don’t know, is like a cross between a sorbet and shaved ice.  It’s icy, flaky, and refreshing!  You can use any fresh, juicy fruit you want here – mangoes, peaches, any berries – but be sure you add at least one banana.  The bananas create a thicker texture and enough sweetness that you don’t need to add any sugar!  You could use frozen fruit too – pineapple and raspberries would be lovely!  I used nectarines, bananas, and strawberries.

As with all homemade recipes, there are pros and cons.  The pro, of course, is there are no sweeteners, preservatives, artificial color, etc.  The con is that since there are no stabilizers and gums, this granita is a little more difficult to scoop than commercial ice cream.  I take it out of the freezer about half an hour before we eat it, so it can soften up a little.  It’s a great motivator – I tell my daughter I’m taking dessert out of the freezer, so if she wants to eat some, she better start eating that broccoli on her plate!

Tropical Sorbet

Ingredients:

  • 1 cup dessicated coconut and 1 1/2 cups water (or one can coconut milk)
  • 3 nectarines or peaches
  • 1 ripe banana
  • 1 cup strawberries
  • optional toppings:  whipped cream, shredded coconut, strawberry jam

Directions:

  1. In a blender, blend the coconut and water.  Strain through a colander and cheese cloth.  Return coconut milk to the blender.  (If using canned coconut milk, just pour it in the blender!)
  2. Boil a pot of water.  Score an X on the bottom of each peach or nectarine.  Drop each nectarine into the water and let it boil for 30 seconds.  Remove the nectarines to an ice bath.  When cool, peel off the skin.  Cut the flesh from the pits and add to the blender.
  3. Add the banana to the blender and blend for 30 seconds.  Remove stems from strawberries and cut in half.  Add to blender and pulse a few times – I like to see chunks of berries!
  4. Pour into a large, shallow container and cover with plastic wrap.  Freeze until firm, at least 6 hours.  To serve, let thaw for about half an hour, and then scrape up with a spoon or fork.  Mound in a dish and serve with whipped cream, more diced berries or coconut flakes, or a dollop of strawberry jam!

These make great popsicles too!

Explore, experiment, enjoy! — Dana


To view even more of Dana’s unique recipe, you can visit her at Frugal Girlmet!
At Home w/ GCH: Going “Green” with Cleaning Products

For several years, I owned and operated a home cleaning business.  Some of my customers were very adamant about using all-natural, non-toxic, cleaning products in their homes, so I had to do some major research to find the perfect cleaning products for their homes.  I’m glad I found these customers because they introduced me to a whole new way of cleaning, AND a healthier way of cleaning!

One thing I cannot stand to see is someone using bleach to clean their kitchen countertops where they prepare the foods they will then serve to their family!  Bleach….  Do you know what is in bleach? Harsh Chemicals!  A product that they advise you to use rubber gloves when you use it.  A product that can blind you if it gets in your eyes.  A product that will literally burn your throat if you accidentally swallow it.  But yet, we use it to clean an area where food is prepped for our families.  I’ve never understood that!

One ingredient that I found that is safe to use, and works rather well is white vinegar.  It can be used in your laundry, on windows, countertops, toilets, floors, and more!  When used on windows, it leaves no streaks!  When I use it, I mix it at a ratio of 3:1…3 parts water to 1 part vinegar.

Another ingredient that works really well is baking soda.  This little beauty is not just for baking/cooking!  It can be used as a scrub for your tub, or made into a soft-scrub for stainless steel sinks, and more!

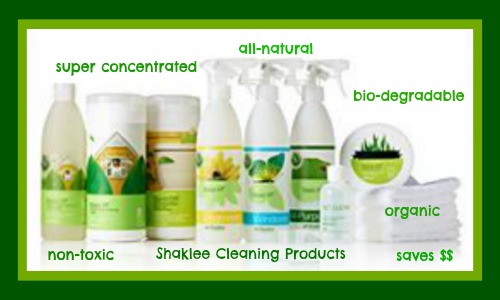
I also use Shaklee cleaning products in my home.  These products are amazing when it comes to cleaning AND saving you money!!  For my window cleaner, I use 1/4 tsp of Shaklee Basic H, to 16 ounces of water!  The old saying “if a little works good, a lot ought to work a whole lot better” doesn’t apply to Shaklee products! When they say use 1/4 tsp, they mean it!   A 16 ounce bottle of Basic H will last you a LONG, LONG time!  It is well worth the price!!

Shaklee Basic H is an awesome concentrate. It’s non-toxic, all-natural, and doubly concentrated.  By using it to mix your cleaners it costs less than $.01 cent to make a 16 ounce bottle of window cleaner, only $.03 to make a 16 ounce bottle of all-purpose cleaner, and only $.17 to make a 16 ounce bottle of degreaser.  It will definitely save you money on cleaning products!  Normally each of those products would cost me $3.00+ at my retail store!

I’m not a representative of Shaklee; I am only a customer!  A happy customer!  So if you are interested in using Shaklee products, you will need to find a representative in your area OR you can use MY rep, Jenny Utrie.  Click HERE to be taken to her website.  Tell her Christi Wilson sent you!

Shaklee

Going Green in your home with cleaning products means you will have a healthier and cleaner atmosphere for your loved ones!  Isn’t that what we all want anyway?

Join me next week, as I continue this series on “All Things Green“!

Be Blessed,

Christi


If you would like to send Christi a personal email in regards to this blog, please email her at: Christi@GirlfriendsCoffeeHour.com.


At Home w/ GCH – No More “Junk” Drawer

junk drawer

The dreaded junk drawer. What state is yours in? Before you answer that, I have a confession story to tell you, that might just make you feel better if yours is a mess.

Once upon a time, four years ago to be exact, I had not one, but TWO junk drawers. Both were the stuff-everything-in-there-until-practically-overflowing-and-if-anyone-ever-lays-eyes-on-this-I’ll-be-mortified kind of junk drawer. Screws & screwdrivers (don’t those belong in a toolbox?), old video rental cards and my college i.d. from years ago (shouldn’t those be shredded?), receipts, batteries, recipe booklets, more receipts, every writing  utensil known to man, sunglasses, report cards, pads of paper, tealights, keys to the car that was sold a couple years prior, keys that I don’t know what they opened…you name it, it was in there. {Feel better? I thought so.} Then one day, I decided to use my OCD tendencies for good instead of evil, and started living by the golden rule. No, not that one. This one: A place for everything, and everything in its place. The junk drawers were banished from the kingdom, and we all lived happily ever after.

So, again I ask, what state is your junk drawer in? Is it happily organized, a chaotic mess, or somewhere in between?

Pop quiz! What’s my golden rule? That’s right! You get a gold star! Now let’s work on finding a place for everything in YOUR drawer. Assignment: Find the time this week to clean and organize your junk drawer.

  • Empty the contents out onto the table or counter.
  • Wipe the drawer clean, including the crevices and corners of the drawer.
  • Now sort everything….
  • If it doesn’t belong in there, put it where it belongs. If it’s in there BECAUSE it doesn’t have a dedicated place where it belongs, CREATE one for it. This is, in my opinion, the number one cause for messes. If it doesn’t have a home, it will wander. Simple as that.
  • If it’s garbage, throw it away. Be selective in what you keep.
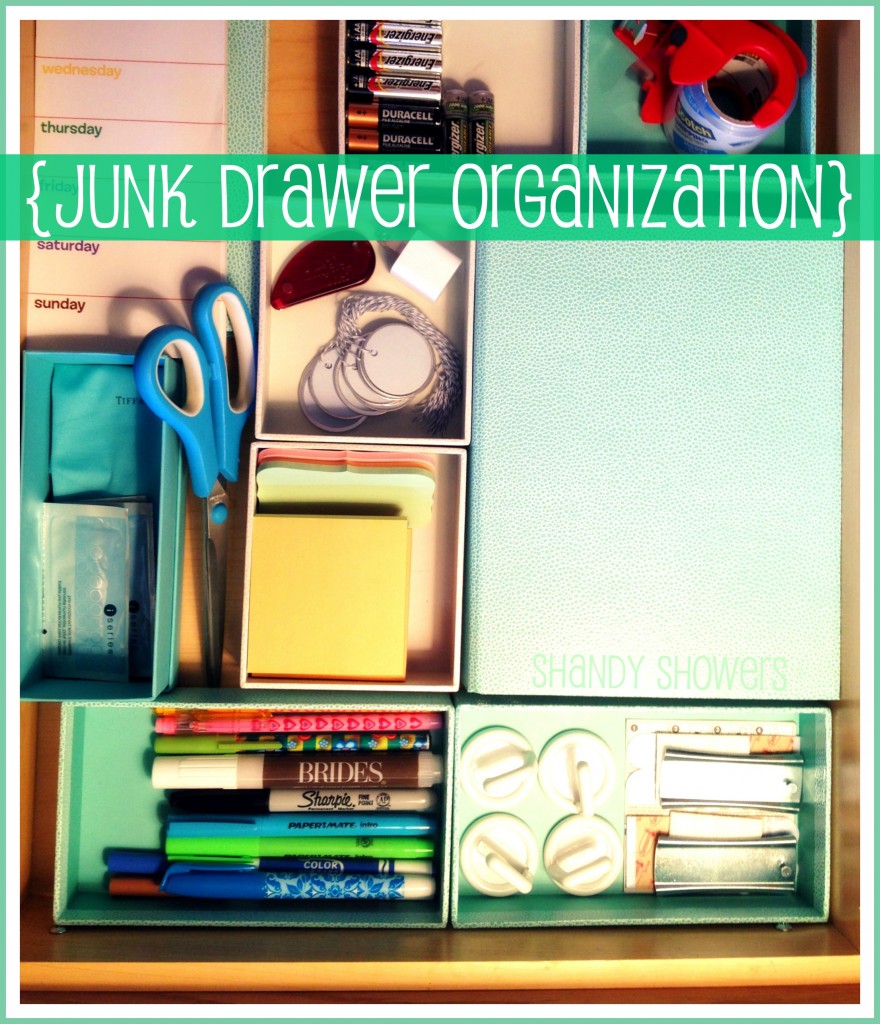
  • Put the remaining items into small boxes or baskets that will fit in your drawer. This is the biggest step you can take to make sure your junk drawer (which you can now call something else, because it doesn’t look so junky anymore) stays neat and organized! I heart boxes! As you can see, the only items I don’t have in a box are the extra notepads for my fridge, my scissors, and my coupon binder.

If you’re looking at the picture of my drawer and swoon over those boxes like I do, you can find them HERE. Not only are they pretty, but watch this: presto change-o!!! …*…*…*…*…

junk drawer 2

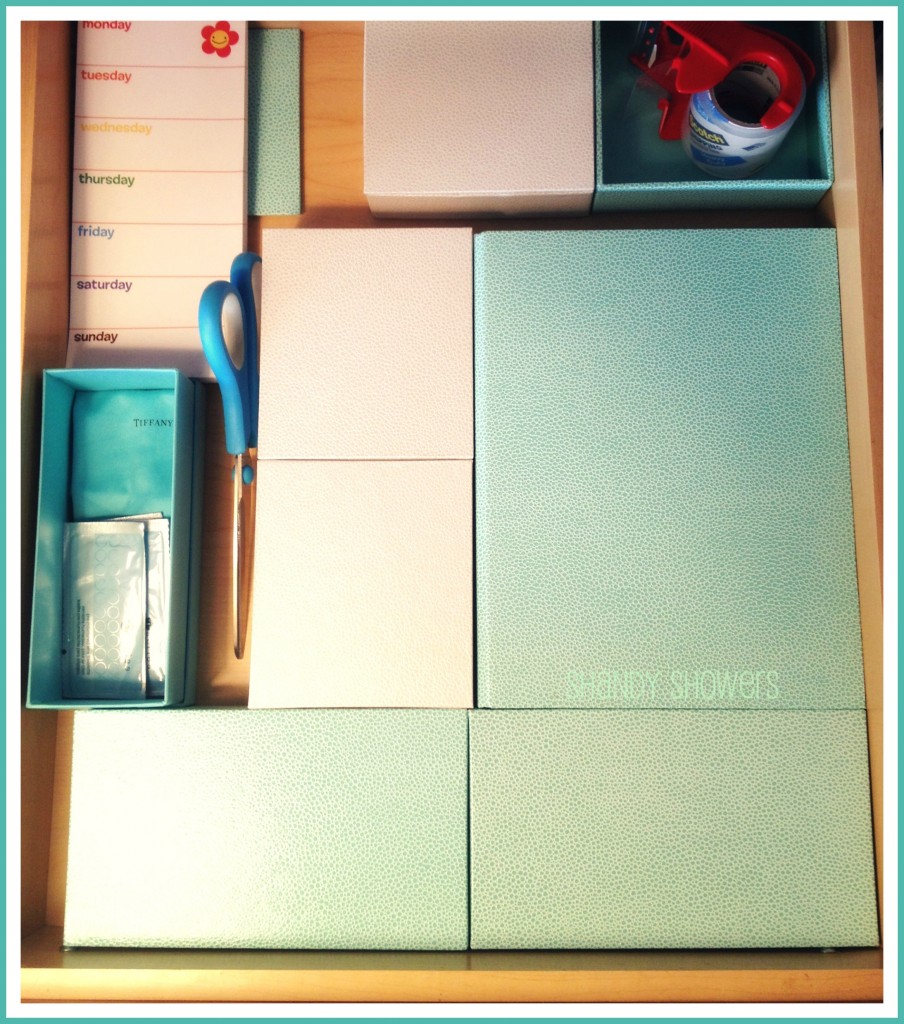
Cool, right? Not that lids are essential, but boxes like this would work GREAT for people who have a tendency to overstuff. How many pens or sticky notes do you really NEED in your drawer, right? If you have a problem corralling the clutter, make it a rule that if it doesn’t fit with the lid closed, then it’s too much for the drawer. (As you can see, my one exception is my box with the tape in it, only because the tape is too tall for the lid to fit. The other open box is for my glasses and lens cleaner, and I never bother putting the cover on that, because I know I won’t put other “stuff” in it.)

Don’t want to spend money on boxes? Improvise! Before I bought these, I used Velveeta boxes, and those worked just fine! You can even use double-sided tape to pretty them up with scrapbook paper. Beautiful spaces make me want to keep the space beautiful.

Love & Blessings,

Shandy

***********************

Be sure to visit Shandy’s personal blog Aprons ‘n Pearls for crafts, recipes, home keeping tips & more!

GCH: What’s on Your Plate? – SoupPalooza, Part Two

Soup-Palooza, Part Two

  • “Not from a Box, Nor from a Can” Chicken Broth
  • White Bean & Kale Soup with Chicken Sausage

Did you know that January is National Soup Month?  That is good news to one particular individual here in the Hayden household…my husband would eat soup e-v-e-r-y single day!  So this month I have committed to serving soup at one meal per day for the entire month (ummm, yeah…he’s a happy camper!).  And I am taking YOU along for the ride, too!

Here on our GCH:WoYP, where Monday’s are focused on healthy but oh-so-yummy! recipes, we will be promoting soup, soup, and soup for the next four weeks.  Each week we will explore the basics along with a delicious recipe for you to serve to your loved ones.

So, this week we are starting from scratch!  Homemade chicken broth.  Oh, yeah!  Now don’t be afraid, please…this is so simple, I promise!  One way to make this easy to fit into a busy schedule would be to start it as you are making your supper preparations.  Then the broth can simmer away, and you can finalize it after supper.  Just a thought!

This recipe makes a vat…well, not quite a vat…it makes 8+ quarts.  A quart of soup is the size of those aseptically sealed boxes from your grocery store (or approximately 2 cans).  Most soup recipes that feed 4-6 people require two quarts of broth.  Now you can have delicious, nutritious, chemical-free chicken broth handy right in your refrigerator or freezer!  Let’s get started!

“Not From a Can, Nor From a Box” Chicken Broth     

Makes 8+ quarts

1 8-9# ‘oven stuffer’ whole chicken, cut-up (or buy cut-up chicken)*
1 large sweet onion (Vidalia), rough chopped
4-5 stalks of celery WITH the leaves, cut in 3-4″ sized pieces
1/4# carrots (3-4 whole carrots, or ½ bag baby carrots), rough chopped
1 heaping tablespoon minced garlic
2 tablespoons whole peppercorns
1 teaspoon kosher salt

4-5 sprigs each of fresh thyme and dill, optional
9 quarts of water; I use filtered; use whatever you would drink 😉

Use the largest pot you own.**  I use a 12 quart-sized pot. You don’t want to fill your pot up to the top; this needs a little room to move around while it is boiling.

Carefully rinse the cut-up chicken (the better the chicken is rinsed…the less yuck floating around in your broth).  Then place the chicken pieces along with the vegetables, and the seasonings, into the pot and pour water over them all.  Cover pot and heat on high ‘til just coming to a boil; reduce heat and partially cover.  You want the soup to be gently boiling.  You can occasionally skim off the yucky stuff from the top of the broth.  Let everything simmer away for a half hour; remove breastmeat to cool.  Continue cooking an additional 45 minutes to 1 hour.  Remove pot from heat.  Take dark meat sections and add to breastmeat which has cooled.  You can strain your broth, if preferred; it all depends on just how clear you would like the broth to be.  CAREFULLY pour, or ladle, the broth along with the cooked veggies into storage containers, leaving enough room to add the chicken.  Cut up (or shred) the chicken into bite-size pieces; keep every last one of all the little bits!  Add back into the broth.

Let cool ‘til container is no longer HOT to the touch; refrigerate.  When thoroughly cooled, I would suggest discarding the layer of fat that will have solidified on the top of the container. This broth freezes very well.  I usually keep 2 quarts in the refrigerator (use within 1 week or so) and the rest in the freezer.

* Toss the wings in the trash…not even worth cooking.  I cut each of the breastmeat pieces in half; that way they don’t overcook.  You want tender meat in the end (but throw the bones into the pot, too).

**Should you not have a pot this size, or cannot beg or borrow one, just reduce all of the ingredients by half and proceed, ok?  Don’t let that stop you!

****************************************

Now, to actually USE that healthy but oh-so-yummy broth…

White Bean and Kale Soup with Chicken Sausage 

Makes 6 servings

IMG_0138

8 cups (2 quarts) chicken broth, divided
(1) 12 oz pkg italian chicken sausage, sliced diagonally ½” thick
2+ tablespoons olive oil
1 large sweet onion (Vidalia), sliced
1 heaping tablespoon minced garlic
½ cup white wine, or additional broth
2 cans cannellini (white kidney) beans, drained and rinsed
1 can great northern beans, drained and rinsed
1 bunch kale, stems and tough ribs removed, leaves roughly chopped
1 teaspoon kosher salt
1+1/2 teaspoon freshly ground pepper (I used lemon pepper)
½ cup Parmesan cheese, freshly grated if possible
1 lemon

Heat 1 tablespoon of olive oil in a large pot (4 quart) over medium heat. Add sausage slices and cook, stirring occasionally, until sausage is just starting to brown, about 5-6 minutes. Add onion slices and additional olive oil, if necessary.  Cook, stirring often, until onions and sausage are slightly browned, about 10 minutes more.  Reduce heat to low; stir in garlic and cook for 1 more minute.  Remove sausage, onions and garlic; set aside.  Pour wine into pot and scrape up brown bits stuck to the bottom. Let simmer for a minute or two.  Meanwhile, put 3 cups beans and 2 cups broth into a blender and purée ‘til smooth; set aside.  Add all of  the remaining broth to the liquid in pot; increase heat to medium and bring to a boil.  Add kale, reduce heat; cover and gently simmer, stirring a few times until kale is wilted and softened, about 5 minutes. Uncover, add remaining beans, bean puree, sausage and onion mixture; stir well.  Season to taste with salt and pepper.  Simmer gently until hot, about 5 minutes more.  Ladle into soup bowls; sprinkle with Parmesan cheese and a squeeze of lemon juice.

“This soup is delicious, hearty and satisfying while still light and fresh-tasting.  It definitely fits the healthy but oh-so-yummy comfort food category.”  (Comment from the hubby.)  🙂


If you would like to send a personal message to Coleen, in regards to this blog, please email her at: Coleen@girlfriendscoffeehour.com.

Balsamic Glazed Turkey Meatloaf

This week’s edition of ‘healthy…but oh-so-yummy!’ centers on another comfort food— meatloaf.  The way we have upped the healthy quotient is to use ground turkey along with <shhhh!> sliding in some veggies, like zucchini, mushrooms and onion. Also, this recipe works for gluten-free eaters as the bread crumbs are eliminated and instant mashed potatoes are substituted!   This might be a good recipe for the NON-mushroom lovers to try ‘cause you will never be able to detect them in the final product!  Balsamic Glazed Turkey Meatloaf  is also low in fat, high in protein, and simply delicious!   I almost always double this recipe ‘cause the leftovers make a great meatloaf sandwich.  Enjoy!

Balsamic Glazed Turkey Meatloaf

2012-11-27 19.17.58

Ingredients:

2 tablespoons olive oil

1 small zucchini

8 ounces baby bella mushrooms 2012-12-02 02.31.17

1 small onion

3 tablespoons chopped garlic in oil

Kosher salt and freshly ground pepper

1 large egg, lightly beaten

1 teaspoon dried thyme

2 tablespoons parsley flakes

1 pound ground turkey (15% fat)

1 pound ground turkey breast (7-10% fat)

1 cup instant mashed potatoes

1/2 cup freshly grated Parmesan cheese

1/2 cup ketchup, divided

3 tablespoons prepared mustard

1/4 cup plus 2 tablespoons balsamic vinegar

2 tablespoons dark brown sugar (alternately, I use 1 tablespoon molassses)

Directions:

Preheat the oven to 400 degrees. Line a small roasting pan with foil.

Cut up the vegetables into a “small dice”-size, approximately 1/4″ cube (or use a food processor to chop them). Heat the oil in a large saute pan over medium-high heat.

Add the zucchini, mushrooms, and onions sauteing for 4-5 minutes; take care not to allow them to burn.

Add chopped garlic, reduce heat to low and saute for 2 more minutes.

Remove pan from heat, season well with salt & pepper; set aside to cool.

Meanwhile, whisk the egg and herbs in a large bowl.

Stir in the parmesan, 1/4 cup ketchup,  mustard, 2 tablespoons balsamic vinegar.

Add the cooled vegetables; mix until just combined.

Crumble the ground turkey over the mixture in bowl and add the instant mashed potatoes.

Using care to not overmix, combine all the ingredients.

Pour the mixture onto the foil-lined pan, and shape into a rectangle (or you could use a 9-by-5-inch loaf pan).

Whisk the remaining 1/4 cup ketchup, 1/4 cup balsamic vinegar and the brown sugar/molasses  in a small bowl; brush the mixture over the entire loaf.

Bake for 1 to 1-1/4 hours.  Let rest for 10 minutes before slicing.

Our menu this night included cauliflower mash (“mock” mashed potatoes), steamed broccoli and rosemary bread.  here is a good recipe for the mock mashed potatoes  to try:  <http://laurasglutenfreepantry.com/2012/08/mock-mashed-potatoes-nightshade-free-dairy-free-option.html> <3

God loves you !

And I do, too.

Coleen