November 25, 2024

Avoid Holiday Weight Gain With Some Family Fun

For me, Christmas came quickly this year and too close to Thanksgiving. You may be like me and feel like we are now in fast motion to get everything done. I find myself with the need to slow down and stay focused on what is important. If not, the hustle and bustle of baking, shopping, and organizing holiday events will bring stress for any busy woman, which can lead to emotional eating, extra calories and feeling as though there is no time for exercise.  It can be especially difficult to keep an exercise routine or maintain a healthy diet when the kids get out of school or when hosting out-of-town guests. Allowing the stress and a lack of time to control what you eat and when you exercise can quickly bring on those holiday pounds. Instead of focusing on all of the interruptions, you can avoid the holiday weight gain with some family fun.  Try incorporating them into your exercise and holiday “to do’s.’

HOLIDAY BAKING

I don’t know about you, but I am definitely tempted to snack more if I am baking alone.  However, if someone is watching such as my kids or houseguests, I am more likely to quickly put the bowls in the sink without even a taste. It may feel like more work, but have some fun with the family and save your holiday baking to do together.

IMG_0116

FAMILY FUN EXERCISE

If you have been on a regular exercise schedule and find there’s just no way to get in a workout during the holidays, get creative and find ways to move for you and the family.

  • Forget about looking cute when out shopping. Wear you tennis shoes and walk as much as possible. See who can walk the fastest with a few extra laps at the mall. Take the stairs when possible and park in the back of the parking lot.
  • Just sitting around watching TV or playing video games can bring on a little chaotic stress which leads to more eating. Bundle up and get everyone outside with a game of football, tag, or hide and seek. Decide to take a family walk or volunteer to walk the dog.
  • If the weather is an obstacle, take a 15 minute break and get the kids together for a quick workout.  Do push ups, squats, lunges, and crunches as a family.  Make a competitive game out of it, which is always a crowd pleaser

outdoor run

This holiday season, don’t look at your to-do’s, out-of-town guests, and no school for your kids as an interruption. Throw out your normal routine and have some family fun that can help you avoid the holiday weight gain.  Get them involved in all of your baking and get them out moving with you.

turkey trot 2013

turkey trot 2013 2In Good Health,

Crystal

Hot Cocoa Mix (and more!)

“It’s the most wonderful time of the year
There’ll be much mistletoe-ing
And hearts will be glowing when loved ones are near
It’s the most wonderful time, it’s the most wonderful time
It’s the most wonderful time, ♫ ♪ ♫ it’s the most wonderful time of the year!”

Oh, don’t you know it!  There’s all that AND the celebration of God’s love come to earth—Jesus’ birth!  Oh, yes, and baking and cooking and gift-making! Lots of joy and fun and happiness!
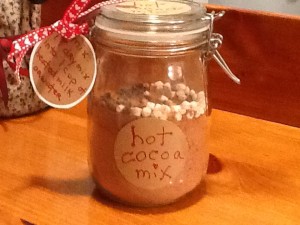
This week I am sharing a homemade Hot Cocoa mix with you. This would be great kept in your own pantry!  However, one of my favorite things to do with it is to package them up in cute little jars with handmade labels and gift them to loved ones. They pack up nicely, too, to be mailed.  If you really want to go over the top, google a recipe for ‘Chocolate Dipped Spoons’…easy-peasy!  Also here is a quick link.

2013-12-02 14.29.40
Next week, I will share a recipe for a ‘Cream of Just-About-Anything’ Soup and Sauce Mix.  What makes me happiest with these mixes is that they are all gluten-free and all fall well within our healthy but oh-so-yummy point of view!  Try them!  Gift them!  Enjoy them!

Hot Cocoa Mix

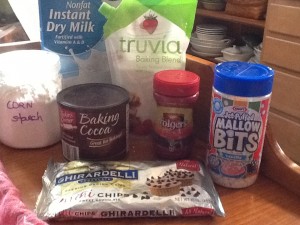
Ingredients: 2013-12-02 14.16.18
6 tablespoons unsweetened cocoa powder
1/2 cup dehydrated nonfat powdered milk
1 teaspoon cornstarch
1/2 teaspoon salt
3/4 cup baking stevia OR 1+1/2 cup “measures like sugar” sweetener (I used Truvia) * of course you can choose to use plain old sugar
Add-ins:
small peppermint candies
mini chocolate chips
tiny marshmallows
Options:
Mocha: substitute 2 tablespoons of instant coffee crystals for a like amount of cocoa powder
Peppermint: include a small jar of peppermint extract (“add 1-3 drops to each prepared cup”)

Directions (for preparing mix):
Mix everything together in a medium mixing bowl until ingredients are well combined. Pour mixture into a closed container, such as a mason jar for a beautiful and festive gift! If you are ‘adding’ anything, just pour onto the top of the mix and cover.

2013-12-02 22.53.52

Directions (print on a tag to attach):
To enjoy hot cocoa, mix 1 tablespoon dry mix with your choice of: 1 cup HOT almond milk, OR skim milk, OR water. Stir until hot cocoa mix is completely dissolved and well combined.  Add additional sweetener (if necessary).

 ♥  ♥  ♥  ♥  ♥

God loves you!  ♥  (Don’t ever forget that!)

♥  coleen

Chicken with Fennel and Olives

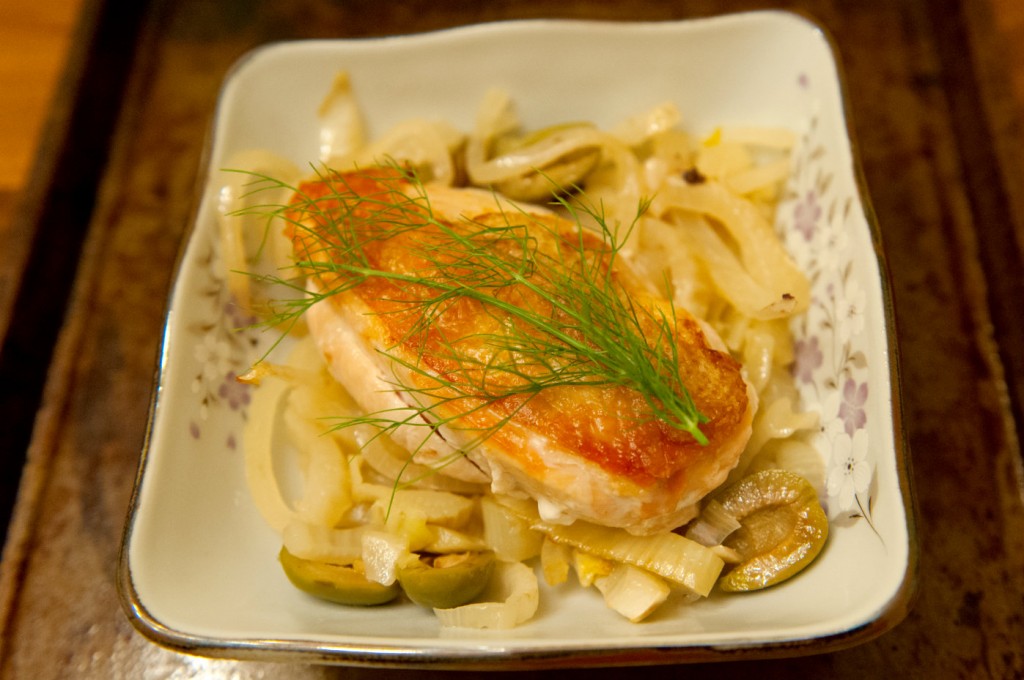
.Chicken with Fennel and Olives resize


I hope everyone had a lovely Thanksgiving yesterday!  If you have leftovers, by all means, eat those first!  Once you finish off your turkey, ham, or whatever else you had, try this recipe for Chicken with Fennel and Olives.

Fennel is in season now and has a delicious anise flavor.  When you are shopping for the olives, buy the biggest green olives in a jar you can find – sometimes they’re called Queen olives – and make sure they’re pitted.  You can find them plain, but I used a jar of large green olives stuffed with cloves of garlic.  Amazing!  You can also find them stuffed with almonds (but for this recipe, I would avoid the ones stuffed with blue cheese or hot peppers!)  This recipe also calls for a cup of white wine.  Use a chardonnay, sauvignon blanc, or pinot grigio – these are dry white wines that will pair perfectly with the chicken.  If you prefer, you can substitute chicken broth.

This is a healthy, light recipe that will warm your house and keep you from feeling like a slug after all the Thanksgiving feasting is over.  (But feel free to have that last piece of pie for dessert!)

Chicken with Fennel and Olives

Ingredients:

  • 1 whole chicken, or a package of skin-on chicken thighs, or skin-on chicken breasts
  • 2 tablespoons olive oil or bacon fat for cooking
  • 1 large fennel bulb
  • 1 large onion
  • 1 jar large green pitted olives
  • 1 cup dry white wine (or substitute chicken broth)
  • salt and pepper to taste

Directions:

  1. Preheat oven to 375F.  If you are using a whole chicken, remove the legs and breasts – you should have 4 pieces.  Reserve the rest of the chicken for soup or another use.  Season the skin with salt.
  2. In a very large oven-proof pan, heat the olive oil or bacon fat.  When very hot, add the chicken pieces skin-side down and cook over medium heat for about ten minutes.  When chicken skin is crisp, remove the chicken pieces from the pan and place skin-side up on a platter and set aside.  Set the pan aside – do not drain!
  3. While the chicken is cooking, slice the onion into thin strings.  Cut off the stalks of the fennel, but keep a few green fronds for garnish.  Cut the fennel into very thin rings or slices, about the same size as the onion.  Drain the jar of olives and slice the olives in half.
  4. Heat the pan again and add the wine, stirring to scrap up any stuck-on bits of chicken.  Add the onion, fennel and olives and stir to combine.  Remove from heat.  Place the chicken pieces skin-side up (so it stays crispy) on top of the bed of vegetables and place in the oven.
  5. Cook for 30 minutes.  Use a meat thermometer to check for doneness.  To serve, make a bed of vegetables, place a chicken piece on top, and add a sprig of fennel frond.  Season with salt and pepper

Explore, experiment, enjoy! — Dana


To view even more of Dana’s unique recipe, you can visit her at Frugal Girlmet!

Roasted Beet and Goat Cheese Salad

The countdown has begun!  The lists are made…the shopping for groceries is happening…maybe the forks and knives, plates and napkins have been counted out, too! Just a few days now ‘til we will celebrate Thanksgiving with our loved ones recognizing the goodness of our great God (and eating some yummy food, too)!

For the past few weeks, we have been sharing some of the dishes that we will be preparing to serve and share; did you take a peek at that scrump-diddly-umptious Mocha Brownie Torte that Dana gave us her recipe for?  Today I am sharing my recipe for an equally delicious dish that is in a totally different category: Roasted Beet and Goat Cheese Salad. This recipe keeps within the parameters of our healthy but oh-so-yummy point of view.  A very light vinaigrette is served on this salad.

I hope you each have a wonderful, thanks-filled, counting your blessings kind of Thanksgiving Day!  May we each always remember how very, very much we have to be thankful for and give thanks to the One Who so mercifully and abundantly and graciously provides for our every need!

Oh, that men would praise the Lord for His goodness and lovingkindness and His wonderful works to the children of men!
Let them sacrifice the sacrifices of thanksgiving and rehearse His deeds with shouts of joy and singing!
Psalms 107:21 and 22

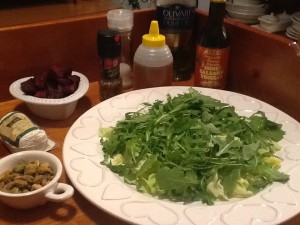
2013-11-24 18.55.52

Roasted Beet and Goat Cheese Salad

Ingredients:

1/4 cup balsamic vinegar
1 tablespoon honey
1/3 cup extra-virgin olive oil
Kosher salt and freshly ground black pepper
3-4 medium beets, peeled and cut into bite-size pieces
6 cups fresh arugula (or your favorite lettuce blend)
1/2 cup pistachios
3 ounces soft fresh goat cheese, coarsely crumbled

Directions:
Line a baking sheet with foil. Preheat oven to 450.
Whisk the balsamic vinegar and honey together in a small bowl to blend.
Slowly whisk in the oil. Season the vinaigrette with salt and pepper.
In a different bowl, toss the beets with just enough of the vinaigrette to coat.
Place the beets on the foil-lined baking sheet and roast ‘til the beets are slightly caramelized, stirring once or twice, for about 30 minutes.  Set aside and cool.
Toss the arugula (and/or other lettuces) along with a small amount of the remaining vinaigrette in a large bowl ‘til lightly coated.
Season the salad, to taste, with additional salt and pepper. Place the dressed salad onto a large serving plate.
Arrange the beets around the salad.
Sprinkle with the nuts and small dollops of the goat cheese.
Serve the balance of the vinaigrette alongside in a small pitcher.

 ♥  ♥  ♥  ♥  ♥

God loves you!  ♥  (Don’t ever forget that!)

♥  coleen

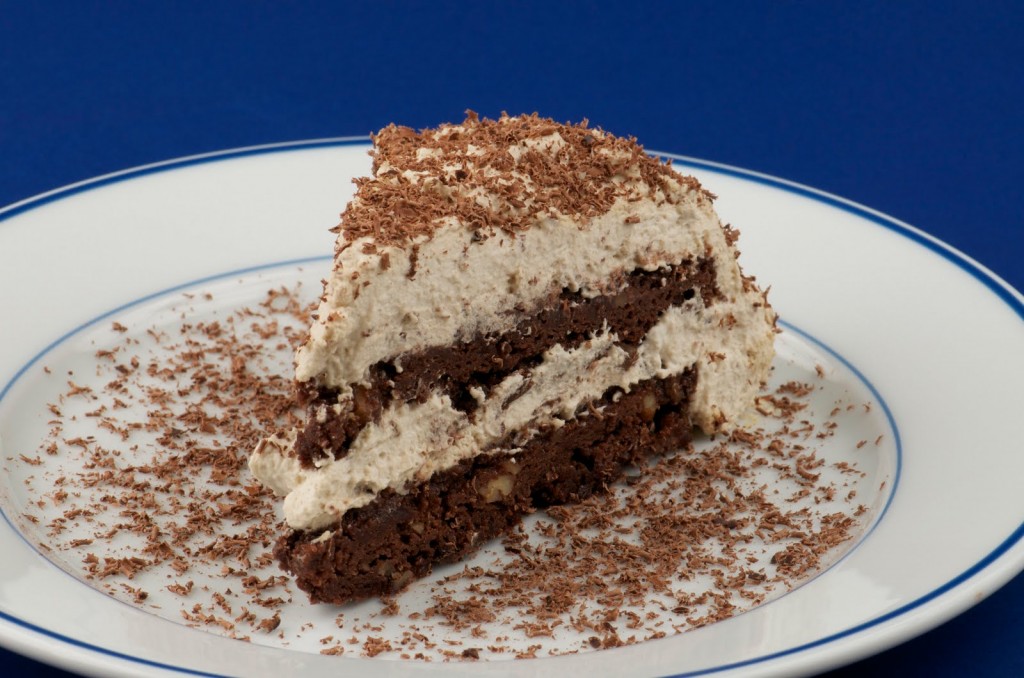
Mocha Brownie Torte

mocha brownie torte
I remember the first time I had something other than pumpkin pie for dessert at Thanksgiving, and it BLEW MY MIND.  We spent the holiday with another family when I was 12, and for dessert they had pumpkin pie and a chocolate silk pie.  It was inconceivable to me that there could even be anything else for dessert besides the standard pumpkin pie, yet here was chocolate! It was a game-changer for me.  So while I always look forward to pumpkin pie, I like to make a second dessert too.  Believe it or not, there might be someone at your table who doesn’t adore pumpkin pie.  For a change of pace, and for those non-pumpkin people, may I suggest Mocha Brownie Torte?
You can, of course, omit the nuts if you have an allergic family member, but I really recommend you leave them in – the walnuts add crunch amidst the dense and chewy brownie. And the frosting? Heck, I’d happily mix up a batch right now to eat with a spoon. I dare say I like the frosting more than ice cream. Yes, it’s that good!  To simplify your Thanksgiving day, bake the cakes the night before, cool on racks, and wrap in plastic wrap overnight.  The morning of Thanksgiving, frost the cake and let it chill in the fridge while you make the rest of your dinner.
Mocha Brownie Torte
(recipe is courtesy of my Mom’s battered and splattered 1970’s Betty Crocker Cookbook)
Ingredients:
  • 1 package (15 oz.) fudge brownie mix
  • 1/4 cup water
  • 2 eggs
  • 1/2 cup chopped walnuts (pecans would be nice too)
  • 1 1/2 cups chilled whipping cream
  • 1/3 cup packed brown sugar
  • 1 tablespoon powdered instant coffee or espresso
  • Shaved chocolate for garnish
Directions:
1.) Preheat oven to 350 F. Mix brownie mix, water and eggs. Stir in the nuts. Grease and flour (2) 8-inch cake pans. Divide the brownie mix evenly in the pans.
2.) Bake for 20 minutes. Remove from the oven and let cool in the pans for 5 minutes. Remove the cakes from the pans and let them cool completely on a baking rack.
3.) Chill a big metal bowl and your beaters in the freezer for a while. Pour the whipping cream into the cold bowl and beat with an electric mixer for 2 minutes. Gradually add the brown sugar and powdered coffee. Continue beating until stiff peaks form.
4.) Put one cake down on a serving tray, flattest side down. Top with one cup of the whipped cream frosting. Put the other cake on top of the frosting, so the flattest side is up, and use the rest of the frosting to cover the top and sides of the torte. Grate or shave some dark chocolate over the torte and chill for at least an hour before serving.

Explore, experiment, enjoy! — Dana


To view even more of Dana’s unique recipe, you can visit her at Frugal Girlmet!

Encouraging Thankfulness in Our Children

Encouraging Thankfulness in Our Children www.girlfriendscoffeehour.com #thankfulness #homeschool

Thanksgiving is quickly approaching, and many of us plan themed studies for our homeschool during this time. We take care to teach our children about our country’s history, and also encourage them to appreciate our freedoms. Being thankful for what we have, and for who God made each of us to be, is the key to gaining that appreciation.

Today I wanted to share with you some resources that you may want to use in your homeschool that will help to foster an attitude of thanksgiving, as well as a few scriptures upon which to meditate.

Resources for Cultivating Thankfulness

FREE Thanksgiving Coloring Sheets

Thanksgiving Printables: Preschool Handwriting Worksheet

“I am thankful for” Free Thanksgiving Printable

Thankful Turkey Box Tutorial

Gratitude Rolls: Special Food Tradition

Encourage Thankfulness with Scripture

O give thanks to the Lord, call on His name; make known His doings among the peoples! 1 Chronicles 16: 8

I will give to the Lord the thanks due to His rightness and justice, and I will sing praise to the name of the Lord Most High. Psalm 7: 17

At all times and for everything giving thanks in the name of our Lord Jesus Christ to God the Father. Ephesians 5: 20

Do not fret or have any anxiety about anything, but in every circumstance and in everything, by prayer and petition (definite requests), with thanksgiving, continue to make your wants known to God. Philippians 4: 6

For everything God has created is good, and nothing is to be thrown away or refused if it is received with thanksgiving. 1 Timothy 4: 4

You may choose to memorize some of these verses with your children as a family. Perhaps each of you could choose a favorite among these verses, commit them to memory, and then recite them for one another on Thanksgiving Day. Another idea is to have your child use one, or several, of these verses as copy work each day leading up to Thanksgiving, and even beyond.

Did you find these resources helpful? Do you have other tips for encouraging thankfulness in our children? Please do share in the comments!

Are you a blogger? We invite you to add your thankfulness posts to our linky party below!

Cornbread Stuffing with Apples, Sausage, and Cranberries

So…how are your Thanksgiving plans progressing? Do you have your menu for the big feast set yet? (I don’t…still trying out a few recipes.) Here on At Home w/ GCH, we have been featuring a few recipes that would make good candidates to serve as side dishes for your Thanksgiving meal.

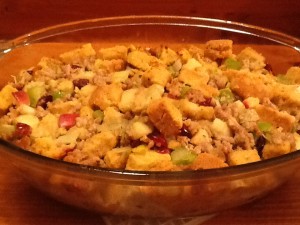
Today’s recipe is for Cornbread Stuffing with Sausage, Apples and Cranberries. OK, here’s the big question: do you call yours ‘stuffing’ or ‘dressing?’ Oh, and another question: to cook inside the bird or as a casserole? I’d love to hear your replies in the comments below!

The recipe I prepared included gluten-free cornbread but can be made in the same manner with traditional cornbread which is made with wheat flour. Also, this could be made without the sausage 🙁 to make a vegetarian side dish (as a suggestion, increase the liquids slightly and add some melted butter, too). Enjoy!

2013-11-17 19.31.18

Cornbread Stuffing with Sausage, Apples and Cranberries

Ingredients:
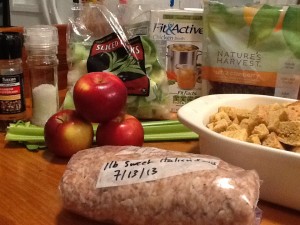
1 pound Italian sausage, casings removed 2013-11-17 18.17.16
2 tablespoons butter
1 medium onions, chopped
2 stalks celery, chopped
3 cups sliced leeks, white and pale green parts only, cleaned well (about 2 large leeks)
Kosher salt and freshly ground black pepper
2-3 apples, cored and chopped coarsely
2 teaspoons poultry seasoning *
1/2 cup apple cider
1 cup dried cranberries, soaked in boiling water for 15 minutes
2 cups turkey or chicken stock (or broth)
2 eggs, beaten
Cornbread croutons (see below)

Directions:

  • Preheat the oven to 375.
  • A day or so beforehand, prepare a 9×13 pan of cornbread. After cooling in pan, cut into smallish cubes (croutons) and set aside to dry on a large baking sheet. (I left mine out overnight.)  About an hour or so prior to preparing the stuffing, place cornbread croutons into a 350 oven and bake, to dry even further, for 20-30 minutes. (Alternately, you could purchase cubed and dried cornbread stuffing cubes.)
  • Saute the sausage in a large saute pan over medium-high heat until cooked through, breaking up with a spoon, about 10-15 minutes. Using a slotted spoon to drain, remove the cooked sausage to a very large bowl.
  • Meantime, beat the eggs lightly and then mix with the cider and 1 cup of stock or broth.
  • Add the butter to the sausage drippings, and melt over medium-high heat. Add the leeks and onions and celery to the skillet and saute until the leeks are just getting soft, about 5-6 minutes.
  • Add the chopped apples and continue to cook for 5 more minutes.
  • Mix in the soaked cranberries (with their liquid) and the poultry seasoning.
  • Add this mixture to the sausage in the bowl. Then stir in the cornbread croutons.
  • Next add the additional 1 cup of stock, 1/4 cup at a time, until the stuffing is very moist. Be careful not to overdo it; it should not be mushy. Season with salt and pepper as you are adding the stock.
  • Bake in a glass 14-inch oval or 9×13  casserole dish, uncovered, in the oven for 30 minutes ‘til the top is crispy and the middle is piping hot. Remove and serve immediately (or cover loosely with aluminum foil).

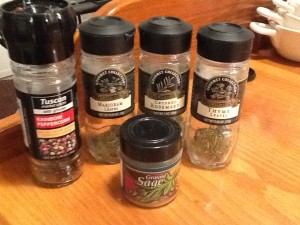
To make your own Homemade Poultry Seasoning, combine:2013-11-17 18.11.27

1 tablespoon ground sage
1/2 tablespoon ground thyme
1/2 tablespoon dried thyme leaves
1 tablespoon dried marjoram
1/2 tablespoon ground rosemary
1 tablespoon freshly ground black pepper


 ♥  ♥  ♥  ♥  ♥

God loves you ♥  (Don’t ever forget that!)

♥  coleen

4 Benefits to Sorting Activities for Young Children

Our first order of business today is to announce the Pumpkin Painting Contest winners! We ended up with only 2 entries, so we decided to feature both here on At Home w/  Girlfriends Coffee Hour.

1 Pumpkin Decorated for Both Halloween and Thanksgiving from Organized 31

3 Fine Motor Pumpkin Activities {Fine Motor Friday} from School Time Snippets

Thank you both so much for entering the contest. Your ideas were excellent, and I just may use them in our homeschool real soon!

Now on to our topic for the day! 

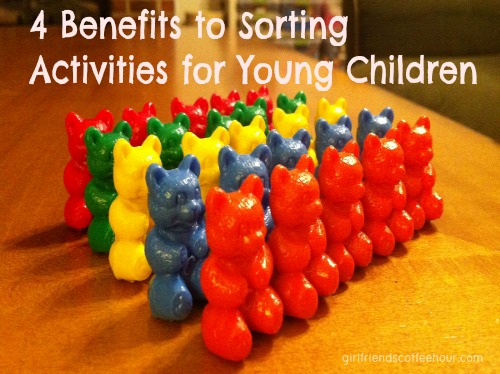
4 Benefits to Sorting Activities for Young Children www.girlfriendscoffeehour.com #homeschool

I homeschool multiple children from pre-k, elementary, middle school, on up to high school. We read various books, complete different lessons, and participate in certain types of play, all according to the age of the child, as well as the needs of the family at the moment. Much of the time we need something to keep the little ones busy while Mommy cooks or siblings are completing independent work, or simply wanting some time to themselves. One of the activities that I have found that all of my children enjoy is sorting. They sort toys, crayons, beads, books, legos, etc. This activity is especially beneficial to young children. I’ve explained the reasons why below.

4 Benefits to Sorting Activities for Young Children

  1. Sorting activities can be used to teach organization at a young age.  Grouping items by shape, color, texture, and size are all a part of learning to organize.  Allowing your child to learn this while he is young will mean he is a step ahead of the organization game as he grows older.
  2. Sorting keeps them busy! My two little ones can sit for a very long time sorting bears, crayons, colored pencils, lids, magnetic letters, especially if it is a new activity or one they have not done recently.  My 4 year old creates bear rainbows &  bear armies, and also engages in pretend play as she sorts.  I love to listen to some of the conversations she has as she sits at our table with bears in hand.
  3. Sorting also teaches early math skills. Children can see, when they line their items up, how rows and columns are formed.  They learn to count, and often begin to add and subtract without being taught.  It comes naturally!
  4. I believe sorting also teaches responsibility. We have taken great care with our sorting bears. They are very special toys in our home and are only played with in a certain way (gently) and in certain areas (at the table or during blanket time). Since we have these ‘rules’ in place, our daughters tend to take more care with their sorting toys while playing, as well as when cleaning up afterwards.

Need more ideas for bringing sorting into your day?

Have your preschooler:

  • sort silverware
  • help you sort laundry
  • separate fruit by type, color, or size
  • sort shoes by ownership
  • sort books according to softcover or hardcover

These are just a few more ideas that I hope will be helpful to you!

Do you have a favorite sorting item in your homeschool?  What benefits have you seen come to your children through sorting?

How to Make a Decorative Wreath

20131112_071346


One of my favorite things to make for my home is a decorative wreath. I have several that I have made throughout the years. This wreath is a good one to try for your first time decorating a wreath.

Items Needed:

· Grapevine Wreath – I like to use the medium size ones, but any size is fine
· 3 – 4 silk flower stems, various kinds
· Ivy or any other type of greenery
· Wire Cutters
· Hot Glue Gun
· Wreath Hanger

Directions:

· Cut off the excess flower stems, leaving about 4-6 inches of the stem.
· Arrange the flowers where you want them on the wreath. I tend to start on the edges and work my way down. Insert the stem in between the grapevine wreath. If needed, hot glue the flowers in place. A lot of times, I do not use the hot glue if the flowers are wedged in place real well.
· Wrap the greenery around the wreath and glue in place.
· Hang on a wreath hanger.   Enjoy!

Have Fun and Happy Crafting

Amy

The Five B’s: Butternut, Brussels Sprouts, Baby Bellas, Bacon, and Balsamic

2013-11-06 18.45.34


Raise your hand, please, if you—like me—are planning out and testing recipes to serve at your Thanksgiving Day meal!  Over the next few weeks, both here on the blog and also over in our FaceBook GCH-Fellowship page, we will be chatting about recipes for the big feast.  Last Friday, Dana shared that “…it is always good to have a couple of side dish recipes in mind.”  She gave us her recipe for a delicious-looking side dish salad here on the At Home with GCH blog.

So today I am giving you a recipe entitled The Five B’s: bacon (yum!), butternut (oh, yum!), brussels sprouts (yumm-o!), baby bellas (yum-yum!) and balsamic (yummy!)….silly, I know.  But seriously, consider trying this as a side dish for your Thanksgiving feast!  Easy to prepare (the veggies can be prepped the day before).  And the prepared dish can be popped into the oven the moment you take the bird out!  It will be done and piping hot when your bird has finished resting and been carved.  This dish definitely fits into our healthy but oh-so-yummy point of view!  Enjoy!

2013-11-06 18.45.52

Five B’s: Butternut, Brussels Sprouts, Baby Bellas, Bacon and Balsamic

Ingredients:

3-4 tablespoons olive oil, divided
1/2# thickly sliced bacon, chopped
1+1/2# Brussels sprouts, trimmed and halved
1 medium-large butternut squash, cleaned and cubed
8 ounce container Baby Bellas, cleaned and quartered
3 tablespoons balsamic vinegar
2 tablespoons maple syrup (the REAL stuff, please!)
1+1/2 teaspoon coarse kosher salt
1 teaspoon fresh ground pepper
1/2 teaspoon ground allspice
pinch fresh grated nutmeg

Preparation:

  • Preheat oven to 400.
  • In a medium-sized saute pan, heat 1 tablespoon of oil over medium heat. Add the chopped bacon and cook 8-10 minutes ‘til crispy. Lay out on a paper towel to drain; set aside.
  • Lightly oil a large sheet pan (or two!) with olive oil.
  • In a very large bowl, or stockpot, pour in the prepared veggies…Brussels sprouts, butternut squash, Baby Bella mushrooms…along with 1-2 tablespoons olive oil; stir well to evenly disperse the oil and season well with salt & pepper.
  • In a small bowl, whisk together balsamic vinegar, additional 1 tablespoon olive oil, and maple syrup. Drizzle this mixture over the vegetables and toss so that they are evenly coated.
  • Spread out vegetables in a single layer (very important!) in the pan(s); sprinkle with salt, pepper, allspice and nutmeg.
  • Roast in the oven for about 20 minutes; carefully remove pan(s) stir and flip over the veggies so that the other side can caramelize. Place back in over and continue to cook for an additional 10-15 minutes or ‘til the veggies are slightly brown and caramelized.
  • Remove from oven and, just before serving, top with crumbled bacon

♥  ♥  ♥  ♥  ♥

God loves you ♥  (Don’t ever forget that!)

♥  coleen