December 23, 2024

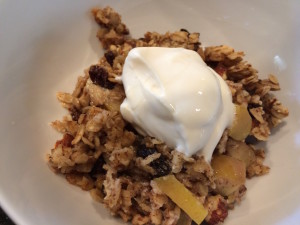
Apple Spice Baked Oatmeal

Baked Oatmeal Dish

Happy New Year, everyone!  For me, the new year is a time to reflect on change, on growth, and on being grateful for all that you have.  If you haven’t heard, we are coming to the end of Girlfriends Coffee Hour.  I hope that in the years we’ve been sharing recipes here at At Home With GCH, you’ve seen something you might want to try; that you’ve experimented a bit in your kitchen and gone outside your comfort zone; and that you thought about cooking as a way to serve God by using the time and talents He gave you.  I have certainly enjoyed challenging myself to come up with new recipes each week to introduce to you, and getting to chat a bit with some of you in the comments section.  Even though GCH is ending, my cooking (and blogging) will continue, and I hope you will find me on Facebook to chat about food and share recipes with me!

For my last entry here on At Home With GCH, I present to you:  Apple Spice Baked Oatmeal!  As usual, I read over several recipes, made a few changes, and came up with something to call my own.  This was easy to make, and serves 6-8 for a hearty breakfast.  You can also make it the night before and reheat portions in the microwave.  This is a great way to start your day (or your year).  Bon apetit, my friends, and God Bless!

Apple Spice Baked Oatmeal

Ingredients:

  • coconut oil or butter for greasing your baking dish
  • 2 apples, chopped (no need to peel)
  • 2 cups rolled oats
  • 1/2 cup brown sugar
  • 1 cup nuts, divided – Try walnuts or pecans.  I used whole almonds and let the kids crush them with my meat mallet!
  • 1/2 cup raisins
  • 1/2 teaspoon salt
  • 1 teaspoon baking powder
  • 1/2 teaspoon ground nutmeg
  • 1 1/2 teaspoons ground cinnamon
  • 2 eggs
  • 2 cups milk
  • 1 teaspoon vanilla extract
  • 1/2 stick butter, melted
  • vanilla yogurt, to serve

Directions:

  1. Preheat oven to 325*F.  Grease your baking dish – mine was an oval dish, but you can use a deep 8″ or 9″ Pyrex.
  2. Spread the chopped apples in the bottom of your dish.
  3. Mix together the oats, sugar, 1/2 cup nuts, raisins, salt, baking powder, nutmeg, and cinnamon in a small bowl.
  4. In a large bowl, beat the eggs with the milk and vanilla.  Stir in the oat mixture, then stir in the melted butter.
  5. Pour the oat mixture over the apples and sprinkle with the remaining 1/2 cup of nuts.   Bake for about 45 minutes.  You want the oatmeal to be set and the top a bit golden and crusty.  Serve warm, with a big spoonful of vanilla yogurt on top.

Explore, experiment, enjoy! — Dana


To view even more of Dana’s unique recipe, you can visit her at Frugal Girlmet!
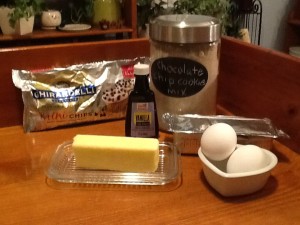
Chocolate Chip Cookie Mix

Cookies…such a lovely tradition of giving during the Christmas holidays.  There are cookies to make for exchanges. There are cookies to make to fill tins and baskets that are given to friends and loved ones.  There are cookies to make for the cookie monsters in your own home!

2013-12-15 23.12.46

Chocolate Chip cookies seem to be a big-time favorite; how about at your house?  My recipe for Gluten-Free Chocolate Chip Cookies starts off with making a basic mix. This is a great recipe to double (even triple!) so that you can make a batch AND have the basic mix ready to quickly throw together another batch!  Or perhaps you could take the second batch and put into a large Mason jar and gift someone with it! And we (the grandkids and I) have been known to leave out the chocolate chips (oh!no!) and substitute another mix-in such as mini M&M’s or some chopped nuts.   Here are a couple of recipes I found on the web for various types of mix-ins; some of these are so interesting!   Have fun!

relish.com – Chocolate Chip Cookies 7 ways
FoodNetwork.com – 10 mix-ins to update your Chocolate Chip cookies
huffingtonpost.com – 12 ways to make your Chocolate Chip cookies even better

Gluten Free Chocolate Chip Cookie MIX
(makes approximately 4 cups; enough for 4 dozen cookies)

ingredients:
2+1/4 cups good quality all-purpose gluten-free flour blend
1 teaspoon baking soda
1 teaspoon xanthan gum
1/2 teaspoon salt
3/4 cup dark brown sugar
3/4 cup coconut sugar (or table sugar)
12 ounce bag semi-sweet chocolate chips

directions:
place all ingredients (EXCEPT for the chocolate chips) into a large bowl and whisk together well.  if using immediately, pour in the chocolate chips. if not, pour the mix into a storage jar and add the chocolate chips right on top; seal well.

♥   ♥   ♥   ♥   ♥

Gluten Free Chocolate Chip Cookies

2013-12-15 21.25.04

ingredients:
1 batch of above GF Chocolate Chip Cookie Mix
8 tablespoons butter (unsalted), room temperature
2 extra-large eggs, room temperature
1+1/2 teaspoons vanilla extract (NOT imitation, please!)

directions:

  • preheat oven to 325.  line two (2) large baking sheets with parchment paper; set aside
  • using a hand or stand mixer, beat together the room temperature butter and eggs ‘til thoroughly incorporated; stir in the vanilla
  • pour 4 cups (or one batch) of the Cookie Mix into a very large bowl. by hand, stir in the liquid ingredients to thoroughly blend
    add the chocolate chips (or mix-in of your choice); stir ‘til evenly distributed
  • drop balls of dough (approximately 1+1/4″) onto the prepared baking sheets.  place the baking sheets (one at a time) into the freezer for 5 minutes to firm up
  • after the chill time, put cookies (one sheet at a time) into the oven
  • bake for 12-14 minutes (depending on the size of your dough balls) or ‘til the bottoms are beginning to brown
  • remove from the oven. (I carefully lift the parchment from the cookie sheet directly onto a cooling rack—works beautifully!)
    when cookies are thoroughly cooled, store in an airtight tin or jar.  whether you and your loved ones eat ’em or share ’em…enjoy!

*To make these cookies dairy-free, simply substitute 1 stick of butter-flavor shortening for the 8 tablespoons of butter; and purchase chocolate chips with no milk or milk products.  I use the Ghiradelli or the Enjoy Life brands.

 ♥   ♥   ♥   ♥   ♥

Merry Christmas from Mr. hayden and I!

God loves you ♥  (Don’t ever forget that!)

♥  coleen

Apricot Lamb Roast

Oh!  If only there were a way to share with you the aroma that filled the house when this was cooking away in the CrockPot…delectable! (But there is not…so…if you want to smell it you will just have to make this meal yourself!)  My husband loves lamb!  It is a bit of an indulgence, but he deserves it!  This is a super-easy meal to put together, too!  I served it with this Sweet Potato – Spinach Mash.  This meal fit well into our healthy but oh-so-yummy POV also.  Full of protein, low-carb…and delish!  And if apricots are not your thing, this is equally delicious made with dried figs…soooo good!  Enjoy!

CrockPot Apricot Lamb Roast

2015-04-06 20.16.16

ingredients:
3-4# boneless lamb roast
1 lemon, zested and juiced
2 tablespoons spicy mustard
2 tablespoons honey
2 tablespoons chopped garlic
1 teaspoon dried crushed rosemary
1 teaspoon dried thyme
1 teaspoon freshly ground pepper
1/2 cup (or more) dried apricots (or dried figs)
1 medium sweet onion, cut into thin wedges
1/2 cup pitted green olives
2-4 teaspoons cornstarch (or your favorite gravy thickener)
1/2 – 1 cup sour cream or plain Greek yogurt (optional)

directions:

  • use a small CrockPot (I used my 2-quart insert); turn it on and put the lid on to begin warming it up
  • add the onions, olives, and apricots to the bottom of the insert
  • in a small bowl, combine mustard, honey, garlic, the spices, lemon zest, and lemon juice; stir with a spoon to form a paste
  • rub this on all sides of the lamb roast; place into the CrockPot liner on top of the fruit and veggies
  • cover and cook on low for 8 hours (you can check it with a meat thermometer, if you’d like, but I usually cook ‘til it’s very tender and falling apart)
  • remove the meat; slice, and keep warm
  • skim off (and discard) as much fat as you can (just use a small ladle)
  • using an immersion blender right in the CrockPot liner, puree the fruit and veggies into a smooth sauce
  • you can add the cornstarch to thicken as you puree, and/or a bit of sour cream

NOTE: the juices can be served as a simple au jus spooned over the meat, or you could even make a quick gravy!

♥    ♥    ♥    ♥    ♥

God loves you!  ♥  (Don’t ever forget that!)

♥  coleen

Roasted Potato and Cabbage Salad

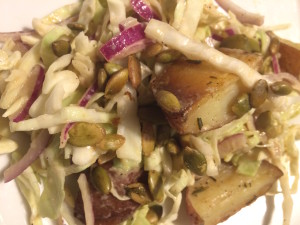
potato cabbage salad

I found this delicious recipe here and I’m so glad I did!  This Roasted Potato and Cabbage Salad makes use of winter veggies to create a hearty and healthy side dish.  Next time I make this, I plan to add either raisins or another dried fruit, maybe diced apricots; I think a bit of added sweetness would set off the herbs and cabbage wonderfully.  Eat this with eggs cooked to your liking for a light supper.

Roasted Potato and Cabbage Salad
(recipe courtesy of www.eyecandypopper.com)

Ingredients:

  • 8 small potatoes (use different colors!)
  • 1 sweet potato
  • 1 or two tablespoons of olive oil
  • 1/2 head savoy cabbage, thinly sliced
  • 1 red onion, thinly sliced
  • 2 tablespoons Dijon mustard
  • 1/4 cup apple cider vinegar
  • 2 tablespoons tahini
  • 2 tablespoons honey or maple syrup
  • 1/3 cup olive oil
  • salt and pepper to taste
  • handful of almonds, crushed or chopped coarsely (I used pumpkin seeds)
  • fresh cilantro (optional)

Directions:

  1. Preheat oven to 450*F.  Wash potatoes and sweet potato, slice thickly, and toss with a tablespoon of olive oil.  Line a pan with parchment paper and bake for about 25 minutes.  Take care they don’t burn!
  2. While the potatoes bake, prepare the dressing:  in a resealable container, shake together the mustard, vinegar, tahini, maple syrup, olive oil, and salt and pepper.
  3. Slice the cabbage and onion very thinly.  Put them in a large bowl and toss with the dressing.
  4. When the potatoes are roasted, remove from the oven and let cool 5-10 minutes, then toss into the salad.  Top salad with almonds and cilantro (and next time I’m adding dried fruit here too!)

Explore, experiment, enjoy! — Dana


To view even more of Dana’s unique recipe, you can visit her at Frugal Girlmet!

Thanksgiving Leftovers – Stuffing with Baked Eggs

Sometimes eating Thanksgiving leftovers can be just as enjoyable as the original meal…AND without all the work!  Do you agree?  Dana shared some great ideas with us for the leftover turkey (click here to see her post).  And, with leftovers, you can get a little more creative and imaginative than with the original, traditional meal sometimes.

This Stuffing with Baked Eggs is a VERY simple way to use some of the leftover stuffing.  Here is a link to a recipe for Cornbread Stuffing  that I shared a couple of weeks ago.

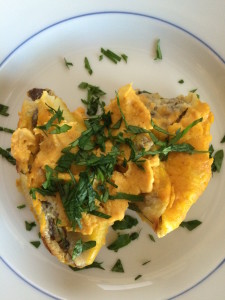
And who doesn’t like a nice runny egg? (Ok, maybe someone…but you know!)  The eggs just add a richness to the stuffing.  So tasty and comforting!  I simply baked this in an ovenproof skillet…but it would be so cute baked in individual ramekins, don’t you think?  Oh…I would love to hear of y.o.u.r. favorite way to serve the Thanksgiving leftovers!  Enjoy!

2015-11-23 20.22.29

Leftover Stuffing with Baked Eggs

ingredients:
4-5 cups (or more!) leftover stuffing
2 tablespoons butter
chicken stock
4-6 eggs (2 per customer!)
freshly grated Parmesan cheese
sea salt, freshly ground black pepper

directions:

  • preheat oven to 400
  • over medium-high heat melt butter in a large OVENPROOF saute pan/skillet
  • when pan is hot, crumble the stuffing into the pan and gently press down into a thick patty (if the stuffing is dry, add some of the chicken stock around the edges to help steam it)
  • cook for 5 minutes or so to crisp up the underside of the stuffing and warm it through
  • turn heat off and gently break the eggs right onto the top of the stuffing patty (be sure to keep them separated)
  • season the eggs generously with s&p
  • place ovenproof skillet into oven and bake for 10-12 minutes or so…but JUST ’til the egg whites have firmed up keeping the yolks slightly runny
  • remove from oven and sprinkle the cheese over top
  • allow to sit for 5 minutes or so before serving.

♥   ♥   ♥   ♥   ♥ 

God loves you!  ♥  (Don’t ever forget that!)

♥  coleen

Sausage & Mushroom Stuffed Shells with Pumpkin Sage Béchamel

sausage pumpkin shells

Whoo, that’s a long title!  And I’ll be honest – this does take a bit of time to prepare.  But if you have an extra hour on a Sunday night and want to make a delicious dinner with generous portions that you can eat the whole week through and not stop loving – try these Sausage and Mushroom Stuffed Shells with Pumpkin Sage Béchamel.

I was going to post my take on this recipe, since I made a few changes for my family, but I didn’t take careful note of my measurements. Food blogger fail!  So I’m just giving you the recipe I found at A Beautiful Bite.  I do want to note that I switched out cottage cheese for ricotta in this recipe, and it worked great.  Just buzz it in the food processor for a few seconds and it’s indistinguishable from the pricier ricotta.  Also, I ran out of sage and I had to garnish with parsley.  In any case, this recipe was a big hit, and it reheats well, so we’ll be seeing this again in our house.

 Sausage and Mushroom Stuffed Shells with Pumpkin Sage Béchamel

(Recipe Courtesy of A Beautiful Bite)

Ingredients:

  • 1 pound pasta shells, cooked al dente
  • 32-ounce ricotta cheese (or use cottage cheese)
  • 2/3 cup Parmesan cheese, grated
  • 1 egg
  • 1 teaspoon salt
  • ground pepper to taste
  • 1 pound Italian sausage (I used sage breakfast sausage)
  • 2 large yellow onion, diced
  • 2 cloves garlic, minced
  • 2 cups fresh mushrooms, sliced
  • 4 fresh sage leaves, thinly sliced
  • 3 tablespoons butter
  • 2 tablespoons flour
  • 3 cups milk
  • 1 cup pumpkin puree
  • 1 cup Greek yogurt
  • 1/2 cup Parmesan cheese, grated
  • 1/3 cup ricotta cheese
  • 6 fresh sage leaves, thinly sliced
  • 1 1/2 teaspoon salt
  • pepper to taste
  • 1/2 cup Parmesan cheese, grated for topping (I skipped this)

Directions:

  1. In a large mixing bowl, combine ricotta cheese, Parmesan, egg, salt and pepper.  Set aside.
  2. Cook shells according to directions on box.  Drain and let cool.
  3. While shells are cooking, brown sausage in a large skillet.  Remove from skillet and place meat on a paper towel to drain.  Reserve 1 tablespoon of the fat to cook the onions in.
  4. Cook onions in fat over medium heat until translucent.  Add garlic and cook for just a minute.  Add mushrooms and sage and cook for another four to five minutes.  Remove from heat and add cooked sausage.   Allow to cool for several minutes.
  5. Stuff shells with ricotta mixture, then top with sausage mixture.  Place shells in a 9×13 baking dish.  Set aside while you prepare béchamel sauce.
  6. In a large heavy pot, melt butter over medium heat.  Add flour and cook, stirring, for several minutes.  Add milk, pumpkin, yogurt, Parmesan, and ricotta.  Cook for a few minutes to thicken.  Add sage, salt and pepper.
  7. Pour béchamel over shells.  Top with extra grated Parmesan.  Bake at 350*F for forty minutes.

Explore, experiment, enjoy! — Dana


To view even more of Dana’s unique recipe, you can visit her at Frugal Girlmet!
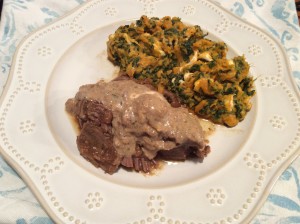
Cornbread Stuffing with Sausage and Veggies

Yummmm…stuffing!  Call me crazy but, if I had to choose just ONE carb-y dish for Thanksgiving dinner, it wouldn’t be pie, or rolls, or potatoes.  It would be stuffing!

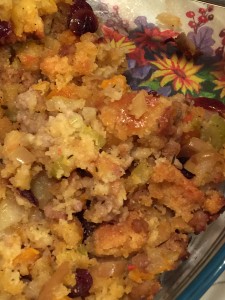
This recipe fits well within our healthy but oh-so-yummy POV since it is made with chicken sausage (low in fat) and is loaded with lots of veggies.  Feel free to make this to your family’s preferences:  change up the sausage (spicy is great!), substitute different veggies, season with other varieties of herbs.  This can be made with your favorite cornbread: whether gluten-free or traditional, from scratch or a boxed mix, or even a bag of cubes you purchase.  I would love to hear how you switched it up to please your loved ones!  Enjoy!

2015-11-15 18.25.34

Cornbread Stuffing with Sausage and Veggies

ingredients:

1 batch of your favorite cornbread (I used a GF mix)

coconut or olive oil
1 onion, cut into a small dice
2 stalks celery, sliced thinly
1 fennel bulb, chopped into small pieces
sea salt, freshly ground pepper
1# uncooked sausage, (I used chicken sausage)
2 teaspoons garlic, finely chopped
1 teaspoon each dried thyme, rosemary, sage
1 large apple, cubed
1 cup dried cranberries
3 to 4 cups chicken broth/stock

directions :

  • first thing you need to do is make a batch of cornbread.  you can make this a day or two before.  after removing from baking pan, cool thoroughly, wrap loosely, and store in a cool, dry place.
  • when ready to prepare the stuffing, cut up the cornbread into small-ish cubes and place on a rimmed baking sheet. bake at 250-275 for 30 minutes or so ‘til the cubes are getting crispy and drying out. pour into a very large bowl and set aside
  • heat the oil in a large saute pan, over medium heat, warm the oil
    then add the onions and celery and fennel; season well with s&p and cook until the vegetables start to become soft
  • push to the edges of the pan and add the sausage into the middle; cook ‘til the sausage begins to brown
  • add in the garlic, herbs, and apples; stir all together for a minute or so; remove from heat
  • increase oven temp to 375
  • into the bowl holding the cornbread, add the cranberries along with the cooked sausage/veggie mixture and stir together
  • pour 2 cups of the chicken broth evenly over the whole bowl; knead together with your hands (adding additional broth ‘til the bread is very moist but not mushy)
  • taste to check for seasoning, adding additional s&p if needed
    transfer to a large ovenproof dish/casserole and cover with foil
  • bake the stuffing until it is hot all the way through about 30 minutes.
  • if your family likes some crispy bits, too, remove foil and increase oven temp to 425; bake for additional 10 minutes

♥   ♥   ♥   ♥   ♥ 

God loves you!  ♥  (Don’t ever forget that!)

♥  coleen

Easy Chicken Mole

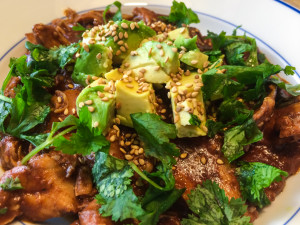
Easy Chicken Mole
The first time I had mole (say moe-lay) it was at a small but very well-regarded Mexican restaurant in Los Angeles, La Loteria.  I had heard of mole poblano before and decided to take a chance.  Que rico!  What a glorious taste!  It was rich, a tiny bit spicy, a little bitter, and a little fruity.  It was really a savory fiesta in my mouth.  However, when I went home with the intent to find out more about this magical dish and how to make it, all the recipes I saw were 40 ingredients long and took days to make.  No me gusta – I just didn’t have time to mess with that.  So after some more research, I came up with this recipe – my Easy Chicken Mole!
The two ingredients that most moles share to give them such depth of flavor are dried chiles and chocolate.  Really!  Buy the darkest chocolate you can find.  You can use baker’s unsweetened chocolate, but that will make it bitter, and you’ll probably want to bring it back around with some added honey or brown sugar.  I used bittersweet chocolate, 63% cacao.  I think it worked well, and next time I might even add a little more.
As far as the chiles go, it gets a little confusing.  Oftentimes a chile will have one name when it’s fresh and a different name when it’s dried (I guess kind of like grapes vs. raisins.)  To be honest, I think I bought ancho chiles, but I’m not sure – there were two kinds and neither were labeled!  You want chiles that are a very dark reddish-brown—like the color of dried blood—and about fist-sized.  I used two but I may use three or even four next time.  I removed the seeds, and that’s where the heat resides, so you only get the smoky, fruity flavor of the chiles and not the spiciness.
Try this recipe.  If you’ve never had mole, this is a great place to start.  If you are a mole aficionado, go ahead and tweak my recipe to get the taste you like.  Either way, I bet you’ll say, Que sabor!  (Or if you don’t habla espanol, ‘So tasty!’)
Easy Chicken Mole
Ingredients:
  • 2-4 dried chiles (use ancho, pasilla, or guajillo)
  • 2 onions, chopped
  • 4 tablespoons butter
  • 4 cloves garlic, minced
  • 1/4 cup sesame seeds (or use pepitas, peanuts, or almond butter)
  • 1/4 cup dark chocolate chips
  • 1/4 cup raisins
  • 1/2 teaspoon ground cinnamon
  • 1/2 teaspoon salt
  • 1/2 teaspoon dried oregano
  • 2 cups chicken stock
  • 1/2 cup brewed coffee
  • 2 slices bread
  • 2 pounds boneless, skinless chicken thighs (or use breasts, up to you!)
  • diced avocado, cilantro, sesame seeds to serve
  • rice or tortillas to serve, optional
Directions:
  1. Put the dried chiles in a bowl and cover with boiling water.  Put a plate over the bowl and let the chiles soak for about 15 minutes.  When they have softened, remove the stem and seeds and roughly chop.  Discard the stem, keep some seeds if you want some heat.
  2. While the chiles are soaking, cook the onion in the butter in a very large pot or Dutch oven.  Stir to make sure they don’t burn.
  3. Add the chopped chiles, minced garlic, and sesame seeds.  Stir and cook for 3 minutes.
  4. Add the chocolate, raisins, cinnamon, salt, and oregano.  Stir to combine and cook for another 2 minutes.
  5. Add the chicken stock and coffee.  Crumble in the bread.  Cover the pot with a lid and simmer for 10 minutes.
  6. CAREFULLY transfer sauce to a blender and blend until pretty smooth.  You could use an immersion blender, too.
  7. Return the sauce to the pot and add the chicken.  Tuck them into the sauce and stir.  Make sure the chicken is covered in sauce, then cover the pot with a lid.  Let simmer for about 25 minutes.
  8. The chicken is done when you can shred it with forks.  To serve, ladle the chicken and lots of mole into a bowl.  Garnish with lots of avocado, cilantro and sesame seeds.  You can also eat this in tortillas – just serve with less sauce if you are making tacos.  You can also serve it over rice to soak up the sauce.

Explore, experiment, enjoy! — Dana


To view even more of Dana’s unique recipe, you can visit her at Frugal Girlmet!
Harvest Veggie Soup

Well, we are certainly into full-blown Fall around here!  (How about where you live?)  The brightly colored foliage is fading fast…and the leaves are falling almost faster!  Piles of leaves are on the curbs, our sweaters are unpacked, almost everyone is wearing socks (except me…i still am scooting around in my Birkenstocks! But not for long!)   And we are enjoying soup a few times each week.  One pot of soup that we have enjoyed a few times already is this  Harvest Veggie Soup, full of veggies and grated apples…very yummy.   It is a slightly sweet soup, very satisfying and filling.  I choose to make it vegan/vegetarian but it could easily be made with chicken broth, too.  This would make a great addition to your own menu when you have vegans, vegetarians, and meat-eaters ? sharing a meal together.

Here on our Monday installment of At Home w/ GCH, we have been featuring recipes which included Fall in-season fruits and veggies.  This week, our recipe features a few: apples, cauliflower, and (surprise!) butternut squash.  This week’s recipe fits into our healthy but-oh-so-yummy! category since it is really yummy (did I mention that before?), extremely low in fat, and full of delicious, nutritious vegetables.  Enjoy!

2013-10-15 21.49.39

Harvest Veggie Soup

ingredients:
2 butternut squash
1 large head of cauliflower
2 tablespoons coconut or olive oil
sea salt, freshly ground pepper
1 sweet onion, diced small
1 additional teaspoon olive oil
2-3 tablespoons chopped garlic
2 quarts of vegetable stock
2-3 peeled apples, grated
1 can coconut milk (shake well!)

optional toppings:
cooked, crumbled bacon
sour cream or plain Greek yogurt
shredded sharp cheese
chopped avocado
sprinkle of cinnamon (try it!)

directions:

  • preheat oven to 425; line 2 large baking sheets with parchment paper
  • peel the butternut squash; scoop out the seeds and strings and cut up into 2″ chunks.  set aside in a very large bowl
  • cut up the cauliflower into smallish-size florets; add to bowl
  • pour in oil and season veggies with s&p.  stir together well, pour out onto a baking sheet and roast for 20-25 minutes
  • meanwhile, in a large stockpot, saute onion along with 1 teaspoon olive oil over medium high heat for 5 minutes or so; reduce heat to low and add in chopped garlic, stirring constantly for 1 minute
  • pour in the stock; add additional s&p to taste and allow to simmer gently
  • when the veggies in the oven are done roasting, remove from oven and immediately pour into the stockpot; stir well to combine.  allow to simmer for 20 minutes or so, adjusting heat if necessary
  • when done, scoop out about 1/2 of the veggies and use an immersion blender to puree what is left in the stockpot.  (This could also be mashed, or pureed, very carefully,  in a standard blender in batches.)  taste (be careful…it’s hot!) for additional seasoning, and add back in the reserved veggies
  • add the grated apple and pour in the coconut milk; stir well.  done!
  • optional toppings can be added to each individual bowl of soup

♥  ♥  ♥  ♥  ♥

God loves you!    (Don’t ever forget that!)

♥  coleen

Thai Coconut Chicken Soup (Tom Kha Gai)

Thai Coconut Chicken Soup

I am convinced that every culture, every civilization, has a chicken soup recipe.  Nothing else satisfies, or feels so much like a hug to the tummy, like a big bowl of chicken soup made by someone you love.  If you are like me and are a frugal girl, you buy a whole chicken at least once a week.  I remove the breasts and legs and cook them one night, then cook the carcass for broth and about two cups of shredded chicken left on the body.  If you have a chicken body and the desire to try something new, read on – here comes Thai Coconut Chicken Soup, also known as Tom Kha Gai!

Now that you know how to make coconut milk from scratch, you’ll need about 2 cups of homemade coconut milk, or you can use one can of packaged coconut milk.  There are a few other unusual ingredients for this recipe:  ginger, cilantro, and fish sauce.  Ginger really isn’t that out of the ordinary, and goes great in smoothies and peach dishes; but if you aren’t going to use it soon, you can peel whatever is left and freeze it to use later.  Cilantro shows up in many different cuisines, so if you don’t want to waste half a bunch of cilantro, you have many options (like Mexican or Indian food), or try this  and  this.  Fish sauce is a savory liquid distillation of anchovies, sugar, and salt.  If you can’t find it, you can still make the soup, but fish sauce is the secret ingredient that really brings everything together.  It keeps in the fridge forever, and is a great flavor booster for clam chowder or a substitute for anchovy paste (think Caesar salad.)  The only other ingredients you need are a chicken, some limes, and mushrooms.  Thai restaurants use straw mushrooms (you can find them in a can), but I used dried shiitake mushrooms, and they’re delicious.  You could also use cremini mushrooms.

Try this with Jasmine rice and a green salad for a light but satisfying dinner!

Thai Coconut Chicken Soup (Tom Kha Gai)

Ingredients:

  • 1 chicken body, breasts and legs removed (or use two cooked chicken breasts, diced, plus 3 cups of chicken broth)
  • 1 large piece of ginger, 2 or 3 inches long, peeled and bashed with the handle of your knife
  • 1 can coconut milk, or about 2 cups homemade coconut milk
  • 1 ounce dried mushrooms, broken into little pieces, or 8 ounces fresh mushrooms, chopped
  • 1/2 bunch fresh cilantro, chopped
  • 1/2 teaspoon or so fish sauce (to taste – if you don’t have fish sauce, use salt)
  • 2 limes, juiced

Directions:

  1. In a large pot, cook the chicken carcass with 4 cups of water and the ginger, until the chicken is cooked through. Remove chicken to a large bowl; shred meat from bones and set aside. Strain the broth into another bowl, discarding ginger. Wash the pot and return to stove. Over medium low heat, add the dried mushrooms to the chicken broth and cook ten minutes. (If using fresh mushrooms, add them in Step 2.)
  2. Add back the chicken to the broth, and pour in coconut milk (and fresh mushrooms, if using).  Cook until simmering.  Add chopped cilantro, fish sauce, and lime juice, and stir to combine.  Taste for seasoning – may need more salt, or you may like more lime (you can add the zest of the lime too, if you want a stronger citrus flavor.)  Serve hot with more chopped cilantro.  You can also stir in a little hot sauce or chili flakes if you like!

Explore, experiment, enjoy! — Dana


To view even more of Dana’s unique recipe, you can visit her at Frugal Girlmet!