November 15, 2024

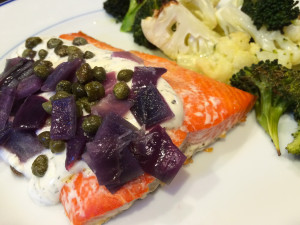
Salmon with Dill Cream Cheese Sauce

Salmon Dill Cream Cheese Sauce

I’m still struggling to find a good name for this recipe.  Two weeks ago, I had an omelet that had smoked salmon inside, and was topped by a cream cheese dill sauce.  It was so good!  It was like my favorite way to eat a bagel – without the bagel!  So I played around at home, eliminating the omelet factor in the equation, and got straight to the point—Salmon with Dill Cream Cheese Sauce!

Eat this with a salad or some roasted broccoli or asparagus.  The sauce recipe makes about half a cup, which is more than you’ll need to feed a family of four.  But fear not, it won’t go to waste!  It’s great on those same roasted vegetables, baked potatoes, and even as a dip for carrots (let it chill in the fridge for this, and maybe add a little more plain yogurt or diced green onion.)

Salmon with Dill Cream Cheese Sauce
(serves 4)

Ingredients:

  • about 1.5 pounds salmon fillets
  • drizzle of olive oil
  • 1 lemon
  • 1 heaping tablespoon cream cheese
  • 1 heaping tablespoon mayonnaise
  • 1 heaping tablespoon plain yogurt
  • 1/2 teaspoon dried dill (or use 1 teaspoon or more fresh dill)
  • salt and pepper
  • capers and diced red onion to serve

Directions:

  1. Heat the oven to 400*F.  Line a baking dish with parchment paper (optional, but it makes clean up much easier).  Lay salmon in baking dish in one layer – you may need to use another dish, or you can even use a sheet pan.  Drizzle with olive oil and season with salt and pepper.  Bake for about 14 minutes.
  2. Meanwhile, cut lemon in half and squeeze it into the bowl of a food processor.  Scoop in the cream cheese, mayo and yogurt.  Pulse to combine.  Add in dill, salt and pepper, and blend again.  Taste, adjust seasoning, and refrigerate until ready to serve.
  3. To serve, spoon a little sauce over the fish, and garnish with lots of capers and red onion.

Explore, experiment, enjoy! — Dana


To view even more of Dana’s unique recipe, you can visit her at Frugal Girlmet!
Caprese-style Stuffed Mushroom Caps

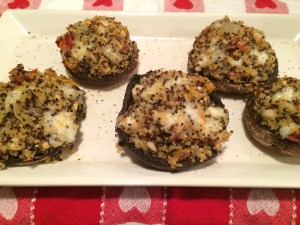
How about you and your loved ones…do you have a meatless meal in your menu plan regularly?  Some folks term it ‘Meatless Monday’ and enjoy a meal typically on Monday 😉 that has a different source of protein.  We eat at least one supper each week that does not include meat…and this past week it was these healthy but oh-so-yummy stuffed portobello caps.  These included two proteins— quinoa and a few ounces of fresh mozzarella.

This recipe is very versatile, too.  You can switch out the fresh mozz for a different cheese (goat cheese or feta would be easy and simple); a different herb could be used (mint or parsley or sage come to mind); even different veggies could be chopped small and substituted for the tomatoes.  Or perhaps you could choose a different ‘container’ for the stuffing…maybe zucchini or small peppers?  If you do choose to add this, or a variation, to your menu plan…I would love to hear about it!

Caprese-style Stuffed Mushroom Caps

2015-05-22 20.38.33


ingredients:
4-5 medium portobella mushroom caps
olive oil
balsamic vinegar
sea salt and ground pepper
1/8 to 1/4 cup of cooked quinoa per mushroom cap
1/2 red onion, sliced thin
big handful of yellow and red grape tomatoes, halved or quartered depending upon size
1 heaping tablespoon minced garlic
4 tablespoons pine nuts
4 ounces fresh mozzarella
fresh basil, sliced very thinly

directions:

  • cook quinoa according to package directions; set aside to cool slightly
  • preheat oven to 400
  • lightly oil the bottom of a baking pan
  • clean the dome of the mushroom caps with a damp paper towel
  • gently break off the stems (discard) and, using a sharp teaspoon, carefully scrape out the gills
  • place the mushrooms (rounded side down) in the baking dish
  • drizzle with a tiny amount of olive oil and a touch of balsamic vinegar; and season with a little sprinkle of sea salt and freshly ground pepper
  • pre-bake the mushrooms for about 15 minutes just to soften up a bit
  • remove from oven and set aside on the pan (there may be some liquid in the caps; carefully drain it off)
  • meanwhile, in a medium skillet, heat a tablespoon or so of olive oil over medium low heat; add red onion and tomatoes
    saute gently for 10 minutes or so ‘til the tomatoes have softened
  • add in the garlic and stir constantly for just a minute; remove from heat
  • add in the cooked quinoa and pine nuts; season to taste with salt and pepper
  • (if necessary, moisten with a bit more olive oil)
  • stir in the cut-up cheese and the basil
  • stuff each mushroom cap dividing the mixture evenly between them (either use an ice cream scoop or simply scoop up into a firm ball using moistened hands
  • bake in the oven for 15 minutes ‘til the mushroom cap is tender; remove from oven
  • if desired, run under broiler for 2 minutes
  • these can also be assembled ahead of time, refrigerated; and then baked for 30 minutes or so

♥   ♥   ♥   ♥   ♥

God loves you!  ♥  (Please don’t ever forget that!)

♥  coleen

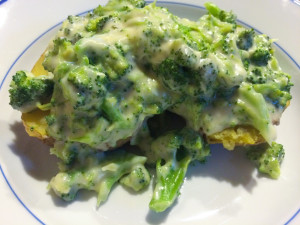
Lunch for One: Baked Potato with Broccoli and Cheese

Broccoli Cheese Potato

There are many reasons you’d want to have a stash of “table for one” recipes:  You could be a stay-at-home mom (or work-from-home mom, like me) and you don’t want hot dogs or buttered noodles or whatever it is your toddler will deign to consume this week; it could be you live alone and don’t need to make a recipe that serves 6; or it could be a case where the other people around you want something else, and you need a dish you can whip up quickly just for you.   Whatever the case, this Baked Potato with Broccoli and Cheese feeds one person perfectly!

I cooked both the potato and the broccoli in the microwave.  You could use leftover baked potatoes; you could also use frozen broccoli instead of fresh.  The important thing is the cheese sauce!  No Velveeta here – just regular ingredients you have around your house come together in 4 minutes for a creamy, healthy sauce.  I had a little Boursin cheese leftover – about an ounce – or you could use goat cheese or even cream cheese if you don’t have Boursin.  If you have none of those and are just using grated cheese, add about a quarter cup more cheese, plus a hefty shake of garlic salt or garlic powder.

Lunch for One:  Baked Potato with Broccoli and Cheese

Ingredients:

  • 1 potato (any kind – I like Yukon Gold)
  • 1 small head of broccoli (or use about 8 ounces frozen broccoli)
  • 2 tablespoon butter
  • 1 tablespoon flour
  • 1/2 cup milk
  • 1/2 cup shredded cheese
  • 1 ounce Boursin or goat cheese (or use cream cheese, plus garlic powder, salt and pepper)

Directions:

  1. Chop the broccoli into smallish pieces, and microwave until steamed.  Not too crisp, but definitely not mushy.  Set aside.
  2. Microwave the potato.  I poked holes in the potato with a fork, wrapped it in a wet dishcloth, and microwaved until soft and pliable.  Set aside.
  3. In a pan, melt the butter and add the flour over medium-low heat.  Stir together (this is a roux) for about 2 minutes.
  4. Add the milk and stir until it blends into the sauce and starts to thicken.  Add the cheeses (and spices if using) and stir until hot and melted.
  5. Stir the broccoli into the cheese sauce.  Split the potato in half and smother with broccoli and cheese.

Explore, experiment, enjoy! — Dana


To view even more of Dana’s unique recipe, you can visit her at Frugal Girlmet!
Rustic Sausage, Potatoes, and Veggies

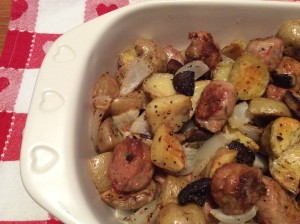
Sometimes you need a few quick and easy to fix meals in your menu plan that are still healthy but oh-so-yummy…wouldn’t you agree?  This is one of those kinds of meals for us—tiny potatoes, onions, mushrooms, and chicken sausage roast in the oven with just a drizzle of extra virgin olive oil and herbs.  Start-to-finish this took about 15 minutes or less to prep.   Oh…and only one pan to clean up!  That’s a big plus, too.

I just love sausage!   Finding these chicken sausage products from al fresco  made me very happy!  They make them in a few varieties; and  in links as well as patties.  I like to keep a package in the freezer.  Click the link above and check out the nutrition facts…you’ll be happily surprised, i think!   You can slice up the raw sausage links…(divide each link into fourths.)  I remove the meat from the casings and just dollop it around the pan in smallish little ‘meatballs.’  You choose!

This is a really easy dish to make!  Make sure to cut everything about the same size and don’t crowd the pan.    I served this alongside some steamed fresh green beans.  Enjoy!

Rustic Chicken Sausage, Potatoes, and Veggies

2015-05-15 20.08.25

ingredients:

16 ounce package fresh (raw) Italian chicken sausage
1# baby potatoes, scrubbed and halved
1 large Vidalia onion, cut into half moons
10-12 ounces Baby Bella mushrooms, cleaned and halved
2 tablespoons extra-virgin olive oil
1/2 teaspoon EACH  sea salt, freshly ground pepper

directions:

  • preheat oven to 375
  • line large baking sheet with parchment paper (optional)
  • place cut-up veggies in a large bowl with the olive oil and s&p
  • stir together to thoroughly coat the veggies
  • pour out onto the lined baking sheet
  • scatter the sausage pieces evenly around the pan
  • bake for 35-40 minutes ’til potatoes just begin to brown a bit
  • season to taste (if necessary) with s&p

♥   ♥   ♥   ♥   ♥

God loves you!  ♥  (Please don’t ever forget that!)

♥  coleen

Fruit Pizza

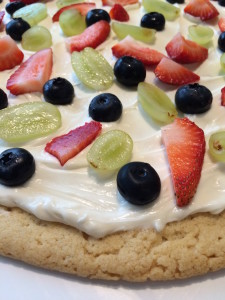
Fruit Pizza Close

My daughter turned four last week, and we had her friends over for an old-school birthday party:  pizza, some play time, and cake.  Except…instead of cake…I presented her with another pizza:  this Fruit Pizza!  All the kids thought it was hilarious – and then the glorious silence of small children who are too busy eating to talk!

This is incredibly easy.  Just make sure you give yourself enough time for the cookie to cool before you frost it.  You can use homemade sugar cookie dough, but a log of store-bought cookie dough saves time and is just as good.  Decorate with any fruits you like – the more colorful the better! – but if you think you might have a lot of leftovers, save really delicate or juicy fruits – like kiwi, mandarin oranges, or bananas – until you are ready to eat it.

Fruit Pizza

Ingredients:

  • 1 tube of refrigerated sugar cookie dough
  • 6 ounces softened cream cheese
  • 1/2 cup powdered sugar
  • 1/2 teaspoon vanilla extract
  • 2 – 4 tablespoons milk (optional, to thin out the frosting)
  • squeeze of lemon (optional, but I like a more balanced frosting)
  • 2 cups sliced fruit of your choice – berries, halved grapes, sliced kiwi, mandarin oranges, whatever you like – the more colorful, the better!

Directions:

  1. Preheat oven to 350*F.  Cover your largest baking sheet (or a pizza stone!) with parchment paper.  Spread out the cookie dough into a big circle.  (I put a plastic baggie over my hand because the dough was sticking and it worked well.)  Flatten to about 1/4″ thick.  Bake until lightly golden – it took about 22 minutes for me.  Keep in mind – the dough will spread a lot!  If you don’t have a very large baking sheet, you may want to make your pizza oval-shaped, just so it doesn’t climb up the sides of your baking sheet when it spreads.  Remove from the oven and set aside to cool.
  2. In a large mixing bowl, beat together the softened cream cheese,  vanilla extract, and powdered sugar.  If you would like a smoother frosting, add a tablespoon of milk at a time, until you reach your desired texture.  Also you can add a squeeze of lemon (it balances out the sweetness.)
  3. When the cookie crust is cool, cover with the frosting, but leave a border around the edges (so you can see the pizza “crust”).  Decorate with sliced fruit and serve.  Keep refrigerated.

Explore, experiment, enjoy! — Dana


To view even more of Dana’s unique recipe, you can visit her at Frugal Girlmet!
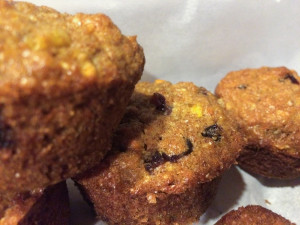
School Birthday Muffins

School Birthday Muffins

It’s nice to be able to make a healthy snack for your family.  It’s also nice to have a recipe in your arsenal that makes a LOT of healthy snacks!  This recipe for School Birthday Muffins fits that bill!

This is a recipe my daughter’s preschool gave me in case I wanted to bring a treat for her birthday.  No nuts, so we can include kids with nut allergies, and pretty healthy to boot.  The recipe specifies “6 cups of chopped fruit,” so that leaves it open to a lot of variations.  You can easily use six cups of mashed banana, if you want to make it easy on yourself!  Also try canned pumpkin, or a combination of berries and bananas.

Next time one of your little ones has a birthday, maybe bring these to share with her class.  Your child’s teacher will thank you!

School Birthday Muffins (adapted from the Moosewood Cookbook)
(makes 3 dozen)

Ingredients:

Wet

  • 2 sticks butter, or soy margarine, or vegan butter, room temperature
  • 2 1/4 cups brown sugar
  • 4 eggs
  • 2 cups milk, or soy milk
  • 1 1/2 teaspoons vanilla extract
  • 6 cups chopped fruit – I used 3 apples and 1 cup of baby carrots, chopped in the food processor, along with 2 cups of Craisins

Dry

  • 6 cups whole wheat flour
  • 3 teaspoons baking powder
  • 1 1/2 teaspoons baking soda
  • 1 1/2 teaspoons salt
  • 1 1/2 teaspoons ground cinnamon (or pumpkin pie spice)

Directions:

  1. Preheat the oven to 350*F.  Grease muffin tin or use paper liners.
  2. In a mixing bowl, cream together the butter and sugar until smooth.  Beat in the eggs; then the milk and vanilla.  With a rubber spatula, fold in the fruit.
  3. In a separate large bowl, mix the dry ingredients together.  Stir in the wet ingredients until just mixed.  Fill each muffin cup about 3/4 full of batter.
  4. Bake for about 32 minutes, or until puffy and golden.  Remove muffins from tin and cool on a baking rack.  Store in a sealed container.

Explore, experiment, enjoy! — Dana


To view even more of Dana’s unique recipe, you can visit her at Frugal Girlmet!
Tex-Mex Shrimp, Tomatoes and Olives

Tenga un feliz Cinco de Mayo!  (Have a happy 5th of May!)  From what I have read the citizens of Mexico do not really celebrate Cinco de Mayo like we here in the United States do!  (What is that all about?!?)  But nevertheless we do!  According to a number of <seemingly> reputable sources, there are more Mexican/Tex-Mexican restaurants here in the US than any other ethnic-style restaurants.
And we all have our favorites, right? Of course, tacos in all their many variations probably reign supreme. But guacamole, salsa & chips, burritos, _________ (fill in your fav!) are extremely popular also.  Do you and your loved ones plan to indulge in some Mex or Tex-Mex foods today?
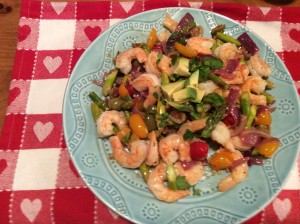
Here is a dish that Robert and I enjoyed recently which would be perfect for lunch or supper!  I served it with homemade guacamole (easy-peasy!) along with this black bean salad.  This meal fit so well into our healthy but oh-so-yummy POV—lots of fresh veggies, healthy fats, and protein low in fat and calories. But, best of all, delicioso! ¡Buen provecho! (Enjoy!)

Tex-Mex Shrimp, Tomatoes, and Olives

2015-05-04 19.15.32

ingredients:

2 teaspoons olive oil
1 medium red onion, halved and sliced into thin half moons
1 jalapeño pepper, seeded and very thinly sliced, (optional)
2 tablespoons minced garlic
1 pound shrimp, peeled and cleaned
1 cup grape tomatoes, halved
1/2 (or more!) cup pitted green olives
1 lime, zested and juiced
lemon-pepper seasoning, to taste
1/2 avocado, cubed
1 lime, cut into 4 wedges (for garnish)

directions:

  • heat oil in a large saute pan over medium heat
  • add onion and jalapeños (if using), cook for 7-8 minutes ‘til just beginning to soften
  • lower heat and add garlic; cook, stirring constantly for 1 minute
  • stir in tomato halves, cover and cook for 3 to 4 minutes’ til tomatoes begin to soften
  • add olives, lime juice, and zest; cook for 5 minutes more to allow flavors to blend
  • season well with lemon-pepper seasoning (or simply salt & pepper)
  • garnish as desired

♥   ♥   ♥   ♥   ♥

God loves you!  ♥  (Please don’t ever forget that!)

♥  coleen

Sriracha Popcorn

Sriracha Popcorn

I have a well-documented popcorn addiction.  I’m not ashamed!  I like to fiddle around with the flavorings and see if I can change it up from regular butter and salt.  I think this one is an experiment gone RIGHT:  Sriracha Popcorn!

I went pretty easy on the Sriracha because I knew my girls would want to eat some of this and I didn’t want to burn their little tongues.  But if you live in a house full of chile heads, crank it up!  I used honey to balance out the spiciness, but you could use brown sugar instead.  Ready to get poppin’?  Let’s go!

Sriracha Popcorn

Ingredients:

  • 4 tablespoons butter
  • 1 teaspoon Sriracha (or other hot sauce – use more if you like!)
  • 1 teaspoon honey
  • 1 teaspoon Mrs. Dash, Italian herb blend, or other seasoning blend
  • 3 tablespoons grapeseed oil or coconut oil for popping
  • 1/2 cup popcorn kernels
  • salt to taste

Directions:

  1. In a small pan over very low heat, melt together the butter with the Sriracha, honey, and seasoning blend.
  2. Meanwhile, pop the popcorn in the grapeseed oil.
  3. When popcorn is popped, pour the Sriracha butter over the popcorn.  Cover with a lid and shake.  Add salt to taste and shake again.  Store any leftovers in a Ziploc bag.

Explore, experiment, enjoy! — Dana


To view even more of Dana’s unique recipe, you can visit her at Frugal Girlmet!
PorkChops with Mushroom-Tarragon Sauce

Recently we were on vacation in Florida and spent a few days with my sister and brother-in-law.  We had been having meals out for a week or so…and I was really missing a home-cooked meal.  They graciously prepared supper our first night visiting them…and it was my brother-in-law’s version of this dish.  Simply delicious!  (Thank you, Tony and Brenda!)

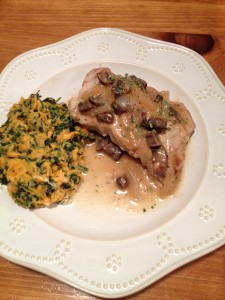
A few days after we returned home to New York, I thought about this dish.  It is simple and quick (aren’t some of your best meals just like that?).  But full of flavor from the caramelized onions and mushrooms, the abudance of garlic, and the subtle flavor that herbs—in this case, tarragon—add.   The prep and cooking time amount to just about 30 minutes or so. This fits well into our healthy but oh-so-yummy POV since the pork chops are low in fat and protein-rich.  The entire dish  includes just a small amount of olive oil…and just a little bit of carbs.  You can make this your own by increasing the quantity of mushrooms or perhaps using a variety of mushrooms!  This goes along well with quite a variety of side dishes.  We enjoyed it with our family served with black rice and broccoli; I prepared it at home with one of our current favorites, this Sweet Potato-Spinach Mash.  Enjoy!

Mushroom-Tarragon Pork Chops

2015-04-24 19.52.33

ingredients:
4 boneless pork chops (5 or 6 ounces each)
1+ teaspoon lemon-pepper blend, freshly ground
2 teaspoons olive oil, divided
3/4 pound Baby Bella mushrooms, cleaned and sliced
1 medium sweet onion, halved and sliced into half-moons
2 tablespoons minced garlic (I use jarred)
1/2 cup white wine (or chicken broth)
2 tablespoons brown rice (or all-purpose) flour
1 cup reduced-sodium chicken broth
1 teaspoon dried tarragon or 2 teaspoons minced fresh tarragon

directions:

  • coat both sides of pork chops with lemon-pepper blend
  • in a large skillet over medium-high heat, warm 1 teaspoon olive oil, and then add pork chops
  • quickly brown (about 2 minutes each side), and then remove, cover and keep warm
  • in the same pan, saute mushrooms and onion in additional teaspoon of oil ’til lightly caramelized
  • lower heat and add garlic; stirring constantly, cook for 1 minute longer
  • stir in wine; raise heat to medium and bring to a boil; cook ‘til all liquids are almost evaporated
  • lower heat again and sprinkle the flour over the onion-mushroom mixture; stir well and cook on low heat for 2-3 minutes to reduce the flour-y taste
  • stir the broth into the onion-mushroom mixture ‘til smooth
    bring to a boil; cook and stir continually for about 2 minutes ‘til thickened and a gravy has formed. (if necessary, add additional broth ‘til the gravy reaches the consistency you prefer.)
  • return the pork chops to pan along with the tarragon; cover and cook on low heat (just barely simmering) for 6-8 minutes or ‘til a thermometer reads 145
  • turn off heat and allow to sit for 5 minutes or so ‘til plating

♥  ♥  ♥  ♥ 

God loves you!    (Don’t ever forget that!)

♥  coleen

Banana Cake with Coconut Frosting

IMG_3485

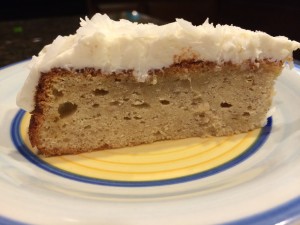
We were having friends over for dinner a few weeks back, and I’d just gotten back from the store when I realized I hadn’t planned anything for dessert.  Oh no!  I did have some bananas, and I figured I had enough staples on hand to whip up a banana cake.  I lucked out and found this delicious recipe on Epicurious.com:  Banana Cake with Coconut Frosting!

This is extremely simple and it came out perfectly.  The only kind of weird thing in the recipe is the cream of coconut.  It’s not coconut milk, and it’s not coconut cream, and in fact it’s more like a syrup for making pina coladas than anything else.  I bought some earlier in the year, because I was going to make coconut-flavored yogurt for my girl.  (It’s delicious, but it does have a lot of added sugar – not exactly healthy, but okay for a splurge.)  If you don’t have it or don’t want to use it, substitute whole coconut milk or coconut cream.  Or leave it out and double the sweetened shredded coconut.  In any case, this came together quickly but was fancy enough for company.  Can’t beat that combination!

Banana Cake with Coconut Frosting

Ingredients:

For cake

  • 1 stick (1/2 cup) unsalted butter, softened, plus additional for greasing pan
  • 1 1/2 cups all-purpose flour plus additional for dusting pan
  • 1 1/2 teaspoons baking powder
  • 1/2 teaspoon baking soda
  • 1/2 teaspoon salt
  • 3/4 cup packed light brown sugar
  • 1 large egg
  • 3/4 cup well-mashed very ripe bananas
  • 1/4 cup sour cream
  • 1/2 teaspoon vanilla

For coconut frosting

  • 3 ounces cream cheese, softened
  • 3 tablespoons unsalted butter, softened
  • 1/3 cup confectioners sugar
  • 3 tablespoons well-stirred canned cream of coconut such as Coco López (not coconut milk)
  • 1 teaspoon dark rum (optional)
  • 1/3 cup sweetened flaked coconut

Directions:

  1. Put oven rack in middle position and preheat oven to 350°F.  Lightly butter and flour a 9-inch round cake pan, knocking out excess flour.
  2. Whisk together flour (1+1/2 cups), baking powder, baking soda, and salt in a small bowl.
  3. Beat together butter (1 stick) and brown sugar in a large bowl with an electric mixer at high speed until pale and fluffy. Beat in egg until combined, then add bananas, sour cream, and vanilla and beat until combined well. Reduce speed to low and add flour mixture, mixing until just incorporated.
  4. Spread batter in cake pan and bake until pale golden and a wooden pick or skewer inserted in center comes out clean, 20 to 25 minutes.  Cool in pan on a rack 10 minutes. Run a thin knife around edge of pan, then invert rack over cake and invert cake onto rack to cool completely.
  5. Make frosting while cake cools:
    Beat together cream cheese and butter in a bowl using cleaned beaters at medium speed until smooth. Reduce speed to low, then add confectioners sugar, cream of coconut, and rum (if using) and mix until combined. Increase speed to high and beat until light and fluffy, about 2 minutes.  Frost top of cooled cake and sprinkle with coconut.


Explore, experiment, enjoy! — Dana


To view even more of Dana’s unique recipe, you can visit her at Frugal Girlmet!