November 18, 2024

At Home with GCH: Freezer/Pantry Challenge – Week 3

Freezer Pantry Challenge Header


Are you excited that we only have ONE more week left of this challenge?? 🙂  How have you done, so far?  What has been your biggest challenge?

For us, this past week, we still only needed to purchase milk and fresh produce.  We’ve been doing pretty good actually.  My trip to Aldi’s at the end of last month to stock up on canned goods and such, really helped!  I’m actually enjoying finding out just how little we can spend on groceries, and still eat good!

This last week we spent $$24.78 on groceries.  So altogether we have spent less than $200 for a family of four for this month.  I still have enough canned goods, rice, pasta, and such, to make it clearly two weeks into March.  Again, we’ll continue to buy our dairy products and produce, but other than that, we really won’t need anything else.  The boys are almost out of snacks, but I have all the ingredients to make Chocolate Chip Cookies…so no problem.  We’re almost out of juice, so I’ll have to figure out what to do there.  Hoping I can make what we have last through the end of next week! We’ll see!  Plan Your Work…Work Your Plan!!  Right?!?!

Instead of sharing our meals for the last week with you this week, I want to share a recipe with you that I made this week.  It was very good!  The first thing I thought when I took the first bite was, “I should have taken a picture, so I could have posted it on the blog!!!”   But that’s okay.  It’s good either way, with or without, a picture!  So here you go!

Creamy Vegetable Soup

5 medium sized potatoes, peeled and diced

1 dozen baby carrots, sliced

1 can whole kernel corn

1 small green pepper, diced

1 small yellow onion, diced

1 box Low-Sodium Chicken Stock

2 tsp minced garlic

1 small can of Cream of Chicken Soup

1 small can of Cream of Mushroom Soup

salt and pepper to taste


DIRECTIONS:

Mix all ingredients, with the exception of the cream soups, into a large dutch oven and cook on medium-high until vegetables are tender.  Add in cream soups and stir until smooth and creamy.  Heat through.  Top with shredded cheddar cheese and bacon bits, and serve!  This soup goes great with a large green salad made with all the trimmings, and some good ‘ole homemade bread!  It’s perfect for a cold Wisconsin winter night! 🙂

So, please add your comments below about how you are doing on the challenge. I really do want to read them!! 🙂


Blessings on Your Day,

Christi

**************

If you would like to send Christi a private message in regards to this blog, please email her at: Christi@GirlfriendsCoffeeHour.com

At Home With GCH: Cinnamon Bun Cake

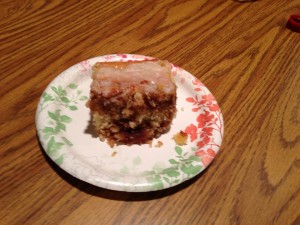
I don’t know about you, but I love the smell of cinnamon ANYTHING wafting through my house! So when I found a recipe for a cinnamon roll cake, I knew I had to take it and make it my own!  I hope you enjoy this recipe for Cinnamon Bun Cake as much as my family and I did!


Cinnamon Bun Cake

Cake:

3 cups flour

1/4 teaspoon salt

1 cup sugar

4 teaspoon baking powder

1.5 cups milk

2 eggs

2 teaspoon vanilla

.5 cup butter (1 stick), melted

Topping:

1 cup (2 sticks) butter, softened

1 cup brown sugar

3 tablespoons flour

1 tablespoons cinnamon

Glaze:

2 cups powdered sugar

5 tablespoons milk

1 teaspoon vanilla


Directions:

Preheat oven to 350 degrees. Spray a 9×13 baking pan with cooking spray, or grease and flour it. Set aside.

For Cake: In your mixer, add the flour, salt, sugar, baking powder, milk, eggs, and vanilla. When it is combined completely, slowly stir in the melted butter. Pour into the prepared pan.

For Topping: In a large bowl mix the butter, brown sugar, flour and cinnamon together until well combined and creamy. Drop spoonfuls over the batter and use a knife to marble/swirl through the cake.

566435_10151714303108858_2139789690_n

Bake at 350 for 35-40 minutes or when a toothpick inserted near the center comes out clean.


FOR GLAZE: In a small bowl, mix the powdered sugar, milk and vanilla together with a whisk. Drizzle evenly over the cake. The glaze can be drizzled when the cake is warm or cooled.  I prefer it when it is cool, but it will work either way.  Serve warm or at room temperature.

711082_10151714303003858_857873375_n

Enjoy!!

804680_10151714438033858_1929815908_n

At Home with GCH – Spring Cleaning

spring cleaning

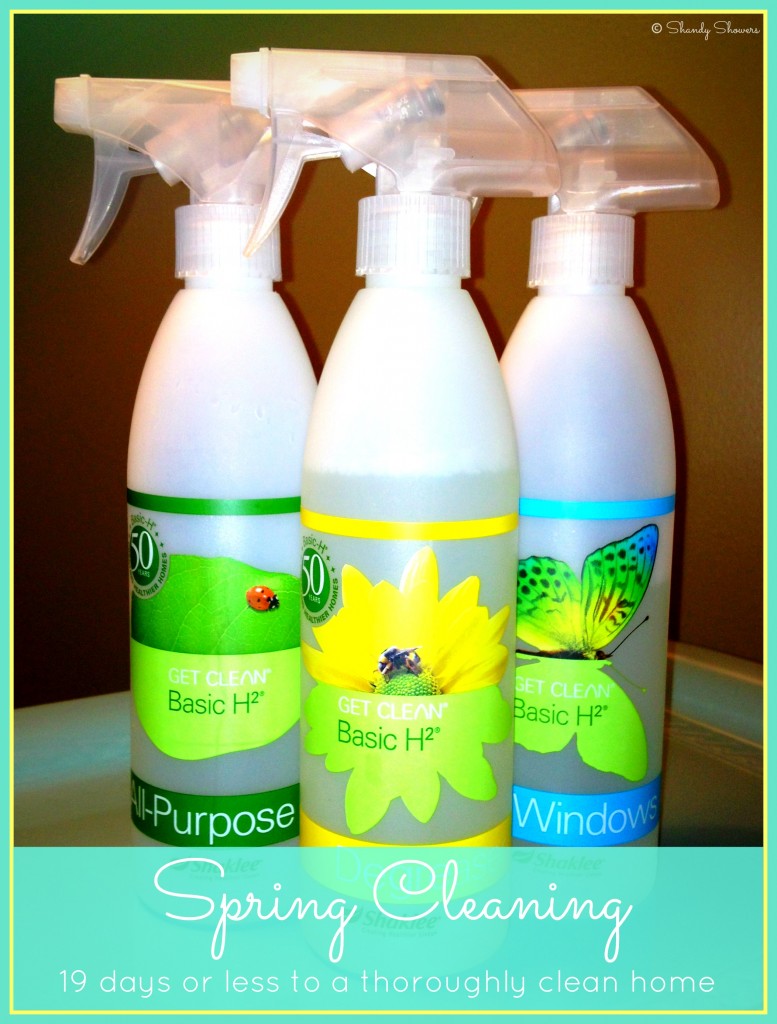
I don’t know about you, but every year around this time, I get a bad case of spring fever. I can’t wait to open the windows, letting the sunshine, fresh air, and sound of birds singing permeate our home.  I like to have the inside of my house spring-cleaned before the calendar tells me spring has arrived. That way, once the end of March rolls around, we can concentrate on spring cleaning the outside of our home, yard, and garage.

When you start is up to you, but in just nineteen days, your home can be completely clean, decorated, and ready for spring! Whether you are a domestic diva or don’t know a duster from a dishcloth, I hope you can take something away from how we spring clean our home. Not sure how to clean or organize something? Go to our Pinterest board, where you will learn how to make your own furniture polish, how to organize your kitchen, and how to clean your blinds, ceiling fan, couch, washer & dryer, dishwasher, the filter in your stove’s hood, deep clean your bathroom, and more!

Day 1. In my experience, any successful cleaning spree starts with clutter control! So, take a garbage bag and quickly go through every room in your house. Anything that needs to be thrown away, throw away! Last week’s newspaper, that drawer full of old makeup, junk mail, those shoes that should have been retired a year ago, the sweater that’s beyond repair, the bag in your teenager‘s room from last night‘s fast food run…fill up that garbage bag! Now you’re going to take a box or a bag and find 25 more things to either give away or throw away…the pile of sweaters you never wear anymore, the jeans that don’t fit or went out of style in the 80’s, the old toaster you have stashed away as a backup, the old books or magazines you’re never going to read again. 25 things. It’s really easy, and your house will start to breathe again. I love a good challenge, and after finding my first 25 items, I usually find a bunch more! It feels so good! I encourage you to have your kids do this as well. Maybe start small with them and have them put 5 things in the giveaway box. Or maybe 10. Make it a game and see who can fill up their box the fastest! The only rule: don’t overthink anything. If you have to think about it, it doesn’t mean as much to you as maybe you thought it did. Once you’re finished, you will want to remove those items from your home right away! Don’t let them hang out in the garage or next to the front door or in the coat closet. Out they go!

While you’re out, pick up any cleaning supplies you don’t have on hand, or the ingredients to make them. {We use non-toxic cleaners in our home.}

Day 2. Entryway/Foyer: clean out and organize the coat closet. Wipe down the closet door. Wipe down walls, trim, and baseboards if dirty or dusty. Wipe down light switch(es). Sweep and mop floor. Clean light fixture.

Day 3. Clean all blinds and window treatments in your living and dining rooms; clean any mirrors and picture frames you have on display…anything with glass. No sense in getting the glass cleaner out repeatedly!

Day 4. Dust living and dining rooms from the top down: ceiling fans, ceilings & walls, baseboards, and woodwork; clean TV, electronics, and remotes; dust shelves, mantles, tables, other wood furniture, decorations, lamps, etc.

Still working in just the living and dining rooms, clean all doors, doorknobs, light switches, and fingerprints/scuffmarks on walls. Get out the touch-up paint and take care of any places that need to be touched up.

Clean out and vacuum the couch and other upholstered furniture. Vacuum, or sweep and mop, the floors in your living and dining rooms, moving all the furniture.

Go through any drawers, cabinets, etc. and organize your belongings, getting rid of anything you no longer need or use.

Day 5. Time to tackle the pantry! Remove everything from your pantry. Throw away anything that is expired or questionable. Wipe down the shelves. Put in new shelf-liner if you’d like! If you have a walk-in pantry, give the walls a scrubbing if they need it, and make sure the ceiling is free of cobwebs. Wipe down the baseboards, sweep and mop the floor. Now it’s time to get organized and put everything back! I just LOVE an organized pantry! All the veggies in one place, all the breakfast items in another, all the pasta in another, etc., etc. If you have cleaning and miscellaneous supplies in your pantry, those get organized, too. Two half-empty bottles of the same cleaner? Combine them, and recycle the extra container. Cleaning rags that should’ve been thrown out long ago? Time to bid them farewell. You get the idea! This is the time I would also clean up my vacuum and disinfect my mop.

Day 6. Today we are working on our refrigerator/freezer! Start by getting rid of expired items and forgotten “science experiments” if you have any. This is definitely the time to have the dishwasher empty and ready to clean any dishes you may be taking out. Now get some hot, soapy water and clean the refrigerator shelves, followed by wiping down the inside walls and door(s). Just like with the pantry, organize as you put items back. Salad dressings go on one shelf; condiments on another, etc. While you’re cleaning the inside, make sure you are cleaning the seal and any crevices carefully. Things like to hide in there if you aren’t careful to keep it clean. Now that the outside is clean, clear off the outside—remove magnets, notes, artwork, and anything else that may be there. Wipe down all sides of the fridge, including the top! Carefully move the fridge away from the wall (careful if you have a water line!) and clear away any dust bunnies that have accumulated. Now is a good time to sweep and wipe down the floor back there before pushing it back up to the wall. Be selective in what you place on top and on the doors and side of your refrigerator. Clutter makes it look untidy, even if it’s the cleanest fridge on the block! {For ideas on how to organize your fridge, click HERE.}

Day 7. Thoroughly clean the microwave, dishwasher, and all small appliances like the toaster and coffee maker. Next, clean the oven/stove. {I personally do not use the chemical sprays in mine. I don’t like the fumes, and it’s just not a very safe method. Also remember not to use chemical cleaners in your microwave.}

Day 8. Clean your kitchen cabinets. Take everything (yes, EVERYTHING) out of your cabinets and put them on your table or kitchen island. Use hot, soapy water (or the cleaner of your choice) to clean the insides of your cabinets. Then take a clean towel to wipe them dry. Put in new shelf liner if you wish. Throw out all the things you never use. (How many empty whipped cream containers does one need anyway?) Then put everything back, organizing as you go.

On to the kitchen drawers. Follow the same procedure for cleaning the cabinets. Be very selective in what you choose to put back in the drawers. A place for everything and everything in its place. Make that your mantra, and you won’t have a junk drawer.

Day 9. Now that the insides of our cabinets and drawers are clean and organized, we are going to focus on the outsides. Get some hot, soapy water to clean them. Don’t forget the top of your cabinets and any decor that’s up there! Dry with a clean towel. And to really make a difference, use your favorite oil or furniture polish to make them shine! Once you’re finished with that, take the time to wipe down your walls & switch plates. Use touch up paint if needed. Lastly, dust wallhangings and other decor.

Day 10. Time to make those windows and patio doors sparkle! We are cleaning the windows, blinds, and window treatments today. (*Hint: crumpled up newspaper works like magic to shine those windows!) Then, move on to the sink and make it shine! I like to disinfect mine with bleach water. {One of the few times you will see me use a chemical cleaner in our home.} Then I rinse it out very, very well before freshening up my garbage disposal.

Clean kitchen light fixtures and replace bulbs if need be. Next, wipe down your counters. Move on to the baseboards, then sweep and mop. (I get down on my hands and knees and give the floor a good scrubbing since we’re deep cleaning.)

Today is also a good day to clean out your garbage can, inside and out. Recycling bin if you have one in the house, too.

Day 11. Break out those rubber gloves…we’re deep cleaning the bathrooms today! This is an important day, I kid you not. A pristine powder room is a must! Every single surface gets cleaned, from the sink and toilet, to the bathtub and mirror, to the floors, walls, and baseboards. Look up at your fan. It’s likely that needs to be cleaned as well.

Day 12. Today, we are showing our master bedroom some love. Start by stripping the bed of all linens, including the mattress cover. Throw them in the washing machine so it can work while we work. Next, take down your window treatments and blinds. Wash your blinds. Wash your window treatments once your bedding is done.

If there’s anything on your floor, or clutter on your dresser or nightstand, pick it up and put it away. We don’t want to clean around “stuff.” Once everything is picked up and organized, we’ll move on to dusting.

Dust your ceiling fan if you have one. Then dust the furniture, lamps, clocks, and decor. Wipe down walls, light switches, trim, and baseboards. Clean your light fixture, then wash the windows and mirrors. (My husband and I agreed not to have a television in our bedroom, but if you have one, now is the time to clean it. Don’t forget to clean your remote, too!)

Before making your bed, clean and flip your mattress. Very important step! Vacuum (be sure to move your furniture!) or sweep and mop if you have hardwood. Then, make your bed, taking the time to make it look nice!

Now let’s clean those closets! When you’re done, put your window treatments back up. You now have your own private retreat to relax in at the end of a long day.

Day 13. Moving on to bedroom #2… Since you’ve mastered the master bedroom, you’ll know what to do for the other bedrooms in your home!

Day 14. Bedrooms #3 & 4 are next. (If you don’t have a 3rd or 4th bedroom, you can catch up on anything you’ve missed, or take a well-deserved day off.)

Day 15. If Mt. Washmore has formed in your laundry room, today is the day to catch up. Wash, dry, fold or hang, put away, and repeat until Washmore is no more. Then, it’s time to clean, clean, clean! Laundry rooms can quickly become dusty, cluttered messes if you don’t take care of them. Toss old detergent and fabric softener containers, and clear away any clutter. I like everything to look pretty, so I use baskets to hide unpretty things and a glass container for my homemade laundry soap. I’m so blessed to have my grandma’s big wicker laundry basket, as well. It makes doing laundry more pleasant. Special even.

Let’s move on to the deep cleaning. By now, you are a pro at this! You know the drill… wiping down shelves, walls, light fixtures, etc. Just save the floor for last, because I have a couple projects for you to do first…cleaning your washer and dryer.

All done? Ok, NOW you can clean the baseboard and floors. {P.S. That homemade laundry detergent I mentioned…you can find it HERE. Check it out! I will never go back to my old favorite. It’s that awesome.}

Day 16. We are deep cleaning the craft room and/or office today, just as we’ve done in the other rooms of our homes. And it’s time to get our paper and craft clutter supplies under control. Remember your mantra: “A place for everything, and everything in its place.” It is the key to organization! Use baskets and decorative boxes whenever you can, and your home will not only be organized, but beautiful, too.

Day 17. Spend today in the basement, cleaning and organizing. For me, this means washing windows, dusting, cleaning walls, floors, and stairs, organizing shelves, and cleaning exercise equipment.

Day 18. Clean any additional areas of your house that haven’t been covered yet. If you don’t have any other rooms, take the time to go through the house and touch-up any areas that need it. Now would be a great time to have your carpeting professionally cleaned, as well!

Day 19. Decorate for spring. This is the fun part! I change out decor, floral arrangements and wreaths, blankets, candles, etc. My house is transformed from a cozy winter retreat to a light, fresh home that says “spring.”

Happy cleaning!

Love & Blessings,

Shandy

***********************

Be sure to visit Shandy’s personal blog Aprons ‘n Pearls for crafts, recipes, home keeping tips & more!

At Home with GCH: Appetizers Week 3

Here on our At Home with GCH blog, Monday’s are always focused on healthy but oh-so-yummy! recipes.  This month we are doing a series on appetizers.  As I confessed last week: I love appetizers! Whether you call them tapas, small bites, hors d’ouerves, antipasto, or simply appetizers; no matter what you call ‘em…I like ‘em!  One of my favorite things to do on a weekend evening is to have some folks over, set up a board game, put appetizers and beverages on the buffet…relax and have fun!  But that’s me! I would love for you to leave a comment below sharing with us YOUR favorite appetizer(s)!

This week we are making Guacamole and Six Layer Mexican DipVamanos! (Let’s go!)

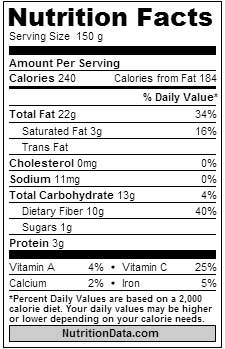
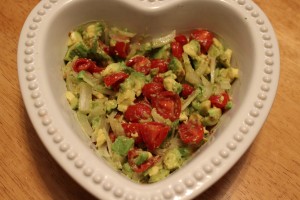
Guacamole is so simple to prepare from fresh ingredients.  And when you make it at home you are able to leave out any preservatives or other unhealthy additions.  The main ingredient in any guacamole recipe is AVOCADO.  Avocados, which are fruit, are considered a very healthy plant-based fat which is comprised of monounsaturated (the good stuff) fat that is easily metabolized (burned).  Here are some nutrition facts (based on one whole avocado):

Guacamole DipIMG_0154

1 ripe avocado
juice of ½ small lemon (try Mayer lemons!)
Kosher salt, freshly ground pepper
1/2 ripe tomato, seeded and chopped
OR 12-15 grape tomatoes, halved
1/8 small Vidalia onion, very thinly sliced

Halve the avocado; remove pit very carefully.

Scoop out the fruit into a glass or ceramic bowl, and mash roughly with the lemon juice and approximately 1 teaspoon kosher salt and pepper to taste.

Stir in the cut-up tomatoes and onions.  Taste for seasoning, adding if necessary.

Should be served immediately.

_________

Six Layer Mexican DipIMG_0159

1 (16 ounce) can refried beans
8 ounces of jarred salsa (I used black bean & corn variety)
12 ounces sour cream
2-3 tablespoons homemade taco seasoning*
Guacamole (see above recipe)
8-12 ounces shredded sharp cheddar or colby jack
1 (6 ounce) can black olives, sliced

Heat refried beans in the microwave for approximately 1 minute in a 1/2—2 quart clear glass  container just ‘til warm.  Remove from microwave.  Spread into an even layer.

Pour salsa over beans and smooth into an even layer.

Mix homemade taco seasoning with sour cream; spoon onto the salsa layer, spreading gently.

Spoon guacamole evenly over the sour cream mixture; spreading if necessary.

Scatter shredded cheese on top of the guacamole; and then distribute olive slices on the very top.

Serve with your favorite tortilla chips!

Homemade Taco Seasoning Mix

1/4 cup chili powder
3 tablespoons dried minced onion
1 tablespoon garlic powder
1+1/2 teaspoons salt (optional, I do not include it)
2 teaspoons dried oregano
2 teaspoons ground cumin
1 teaspoon ground chipotle pepper
2 teaspoons paprika
1 teaspoon black pepper
½ teaspoon cayenne pepper
1/3 cup cornstarch

Place all ingredients in a small glass jar; shake really well ‘til all ingredients appear to be evenly distributed.  (To substitute for the mix that comes in a yellow package: use 3 tablespoons of mix and 1/3 cup water for each pound of meat.)

God loves you!   ♥  (Don’t ever forget that!)

 ♥   coleen

_________________________________

If you would like to send a personal message to Coleen concerning this series, you may email her at: Coleen@girlfriendscoffeehour.com

At Home with GCH: Popcorn, Five Ways

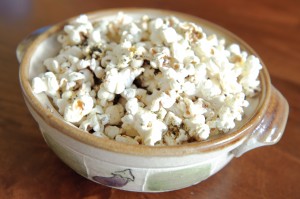
Furikake Popcorn

Furikake Popcorn

I have an admission to make:  I have a popcorn addiction.  It would be physically impossible for me to see a movie in the theater without a big bucket of buttery, salty popcorn on my lap!  When I was pregnant with my second daughter, I was eating a bag of microwave popcorn everyday—until my husband started emailing me news reports of people contracting “popcorn lung” from chemicals used in microwave popcorn.  Undeterred, I now make it on the stovetop.  I’m down to a batch a week, and I’m okay with that.

If you can, look for organic popcorn.  Trader Joe’s has it and at a good price.  You’ll also need a large, heavy-bottomed non-stick pot with a lid, and some kind of oil.  I usually use regular vegetable oil.  You can try peanut oil—it has a high smoke point, so it can withstand high heat without burning or breaking down.  Even better is coconut oil, which I use for popcorn recipes that are on the sweet side.

The technique, if you haven’t made it the old-fashioned way in a long time, is simple.  Add the oil and three kernels of popcorn, heat over medium heat, covered with the pot lid.  When you hear or see the three kernels pop, you know your oil is ready, so add the rest of the popcorn.  Cover the pot and shake every 5 or 10 seconds to keep things moving.  Just like microwave popcorn, remove from the heat when you stop hearing popping.  Add your toppings immediately; cover and shake to distribute.

Usually just salt and butter are enough for me, but sometimes I like to experiment with new flavor combinations.  Here are some of my favorite discoveries.

===========

Best Kettle Corn

Ingredients:

  • 4 tablespoons coconut oil
  • 1/2 cup popcorn kernels
  • 1 tablespoon white sugar
  • salt to taste

Directions:

  1. Add coconut oil and 3 kernels of popcorn to the pot; heat over medium until the three kernels pop.  Add the rest of the popcorn and the tablespoon of sugar.  Cover, shaking frequently, until the popping stops.  Shake on salt to taste (not a lot) and serve.

===========

Furikake Popcorn

There is a Hawaiian treat called Hurricane Popcorn that includes furikake (a mixture of sesame seeds, shredded seaweed, and other flavors) bacon, and pineapple!  It sounded amazing, but I decided to dial it back and kept it simple.

Ingredients:

  • 4 tablespoons vegetable oil
  • 1/2 cup popcorn kernels
  • 2 tablespoons butter
  • 1 teaspoon soy sauce
  • 1/2 teaspoon sugar
  • 1-2 tablespoons furikake

Directions:

  1. Heat oil and 3 tester kernels of corn.  While waiting for the tester kernels to pop, combine butter, soy sauce, and sugar and heat in the microwave for 30 seconds, or until the butter melts.  Swirl to combine.
  2. When the tester kernels pop, add the rest of the popcorn and pop as directed.  When the popping stops, pour the butter mixture over the corn and sprinkle with furikake.  Cover, shake well to distribute, and serve.

===========

Truffle Popcorn

If your “date night” this month consists of you and your man snuggling on the sofa and watching a movie, this will fancy it up.  You might even want to change into your nicest sweatpants!  Truffle oil is not that expensive, and if you make mushroom risotto, truffle oil will take it from yummy to HOT DIGGITY DOG!

Ingredients:

  • 4 tablespoons vegetable oil
  • 1/2 cup popcorn kernels
  • 2 tablespoons truffle oil
  • 1 teaspoon truffle salt or regular salt

Directions:

  1. Pop as directed in above recipes.  When done, drizzle with truffle oil, shake on truffle salt, shake to coat, and sigh with delight.

===========

Easy Cheesey Popcorn

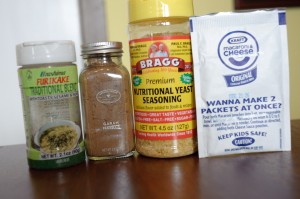
Cheese popcorn is my biggest weakness.  I found a shortcut.  I warn you, it’s not pretty.  But it is delicious.  This recipe came about because we’d bought a box of “Easy Mac” macaroni and cheese, and the kids didn’t like it.  Waste not, want not, I always say!

Ingredients:

  • 4 tablespoons vegetable oil
  • 1/2 cup popcorn kernels
  • 2 tablespoons butter
  • 1 packet cheese powder from a box of Kraft Mac and Cheese, or 2 packets from the individual Easy Mac servings
  • OR instead of cheese powder, you can use 2 teaspoons Nutritional Yeast – it has a mild, cheesy flavor, but it is vegan and full of vitamins and minerals.  It’s tasty, but not as tasty as Mac and Cheese powder.

Directions:

  1. Pop as directed in above recipes.  While the corn is popping, melt the butter in the microwave.  When popcorn is done, drizzle on butter and sprinkle on the cheese powder.  Shake well to distribute.  Wolf down popcorn, wash hands to get the orange color off, and eat broccoli for dinner.

===========

Pick your popcorn flavor!

Pick your popcorn flavor!

Indian Spiced Popcorn

Since you already have the garam masala powder in your pantry (from when you made the drumsticks last week, right?) here is another use for it.

Ingredients:

  • 4 tablespoons vegetable oil, or coconut oil (I like the coconut oil best—makes it taste more like Chai tea)
  • 1/2 cup popcorn kernels
  • 2 tablespoons butter
  • 1 teaspoon garam masala powder
  • 1/2 teaspoon sugar
  • 1/2 teaspoon salt

Directions:

  1. Add oil and 3 tester kernels to the pan over medium heat.  While waiting for the tester kernels to pop, heat the butter in the microwave to melt.  In a small bowl, stir together garam masala, sugar, and salt.
  2. Pop corn.  When done, drizzle butter over and shake garam masala powder onto popcorn.  Cover with the lid and shake to distribute.


Explore, experiment, enjoy! — Dana


To view even more of Dana’s unique recipe, you can visit her at Frugal Girlmet!


If you would like to contact Dana in regards to this blog, please email her at Dana@girlfriendscoffeehour.com

At Home with GCH: Freezer/Pantry Challenge Update – Week 2

Freezer Pantry Challenge Header

____________________________________


Happy Valentine’s Day!

I hope you have planned something special for you and your Sweetie!  My husband surprised me early this year and gave me a card, a HUGE mug filled with the cutest little bear and chocolates, and a live miniature rose bush!  Totally took me by surprise!  He’s usually the one who forgets holidays, birthdays, and anniversaries!  When I saw his gift, he looked at me with much excitement in his eyes and said, “LOOK!! I remembered!!”  Boy did he score some major brownie points!! 🙂

With Valentine’s Day in mind, did you all remember to plan for this special occasion while planning your meals for the month?  My husband works that night, so our Valentine’s dinner (Yes, candlelight and all) will be tonight!  He doesn’t know it yet, so it will be a surprise to him!

How have you done this week with the Freezer/Pantry Challenge?  Have you been able to stick with it, or has it become a real challenge?  So far, this week, the only thing I’ve needed to purchase is milk and fresh produce!  I’m pretty happy about that!  I haven’t had the desire to go out and purchase more because I truly want to stick to this challenge to the best that I can. I really want to see if this can be done!

In talking to others about this challenge, they are telling me how EASY I am making it for all of you.  They’ve been through some challenges that doesn’t allow you to purchase anything throughout the month.  They are required to use exactly what they have on hand, and nothing more!  Now THAT would be challenging!  Maybe one day I’ll be ready for that kind of challenge.  🙂

One thing I am learning about this challenge is that I am also seeing it pour into other areas of my life.  I am becoming very aware of how we are spending our money.  It’s making me think before I give in and say “Yeah, let’s just go out and eat tonight.  I don’t feel like cooking!”  I’ve even told my husband that Papa Murphy’s Pizza will have to wait until next month, OR hey, here’s an idea….how about we make our own pizza!!!  What a concept, huh?  LOL  It’s been awesome seeing how we are working together in this now.

Here is my Menu for this week

Thursday: Soup / Salad

Friday: Scalloped Potatoes w/Ham

Saturday: Date Night

Sunday: Soup / Salad

Monday: Pancakes, Sausage Links, Scrambled Eggs

Tuesday: Grilled Chicken, Baked Potatoes, Green Beans, Salad

Wednesday: LEFTOVERS

Here’s my total grocery bill for the last week:  $21.70

How is this challenge working for you?  Are you feeling challenged?  Are you working through it?  What are you doing to try and stick with the challenge?  I would love to see your comments below!!

Have a GREAT day, ladies!  See you next week!

Christi

At Home with GCH: Focus on Health

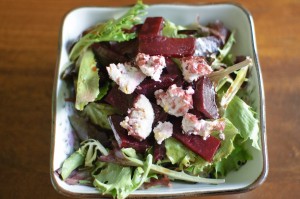
beet and goat cheese salad

In writing this blog series, “Focus on Health.” I am reminded of several articles I read around the start of the year, listing “The Healthiest Foods You’re Not Eating.”  Basically, all the lists were comprised of super foods—those veggies, fruits, grains and other ingredients that we know are good for us but that we avoid for whatever reason.  One that we’ll be looking at this month is BEETS.  Yay, beets!

Beets are high in folic acid, which is crucial during pregnancy.  They are also chock full of vitamins and minerals, including magnesium, calcium and iron.  They are being studied for their cancer and heart disease prevention properties.  Especially of interest to scientists is the pigment that gives beets their bright red color—Betacyanin—because it has been shown to fight cancer and possesses powerful antioxidants.

Perhaps you had them prepared the wrong way, like boiled to death.  Perhaps you see them in the store and just don’t know what to do with them.  In any case, beets are in season now, just waiting for you at your local farmer’s market or grocery store.  Let’s look closer!

There are two main varieties:  common red beets, and golden beets.  Both are delicious and are prepared the same way, but golden beets have a milder flavor, while red beets have a stronger, earthier and sweeter taste.  When you buy them, look for bright, strong leafy greens attached.  The greens are edible and are highly nutritious themselves—don’t throw them out! If you aren’t going to cook the beets the day you buy them, keep them in the fridge, with the greens wrapped in a damp paper towel.  The beets can last quite a while in your fridge, but the greens must be eaten quickly, like within a day or two, or they get limp and gross.

My favorite way to cook beets is to roast them in the oven.  Wash the beets, remove leaves and stems, and place them on a large square of aluminum foil.  Drizzle with olive oil, bake for 45 minutes at 375F, and let cool.  The skins will slip right off in your hands.  One warning:  beet juice stains!  You might want to wear gloves or an apron, and wipe up any spilled beet juice quickly.  Okay, ready for some recipes to try?  Here we go!

Twenty years ago I was a vegetarian and living on my own for the first time.  My go-to snack?  A can of beets and a spoonful of orange marmalade, simmered until hot and the juice is thick and sweet.  Better than dessert!

————-

This might be my favorite salad of all time:

http://frugalgirlmet.blogspot.com/2011/02/roasted-beet-and-goat-cheese-salad.html

————-
I am making this salad on Valentines Day because I love the pink color:

http://paleospirit.com/2012/roasted-beet-and-cucumber-salad-with-yogurt-dressing/

————-

This recipe for Pennsylvania Dutch pickled red beets and eggs is one my Mom made all my life.  Now that she’s gone, my sister has taken on the tradition.  She makes them every year for Easter.  The color of the eggs – maroon on the outside, white and yellow inside – is shocking and delightful!

http://www.yankeemagazine.com/recipe/for/pennsylvania-dutch-pickled-beets-and-eggs/106

————-
Beets can be shredded and eaten raw, too!  Here’s a very minimalist raw beet salad:

http://content.markbittman.com/recipes/raw-beet-salad

————-
When I think of Russian food, my mind immediately goes to Borscht.  Ever had it?

http://www.foodnetwork.com/recipes/tyler-florence/roasted-beet-borscht-recipe/index.html

————-
And for you juicers out there, beet juice is the best!  Try out a combination of beets, carrots, and apples for a sweet and healthy treat.

Explore, experiment, enjoy! — Dana


Please visit me at Frugal Girlmet for more unique recipes!


If you would like to contact Dana in regards to this blog, please email her at Dana@girlfriendscoffeehour.com

At Home with GCH – Organizing Your Fridge with Baskets

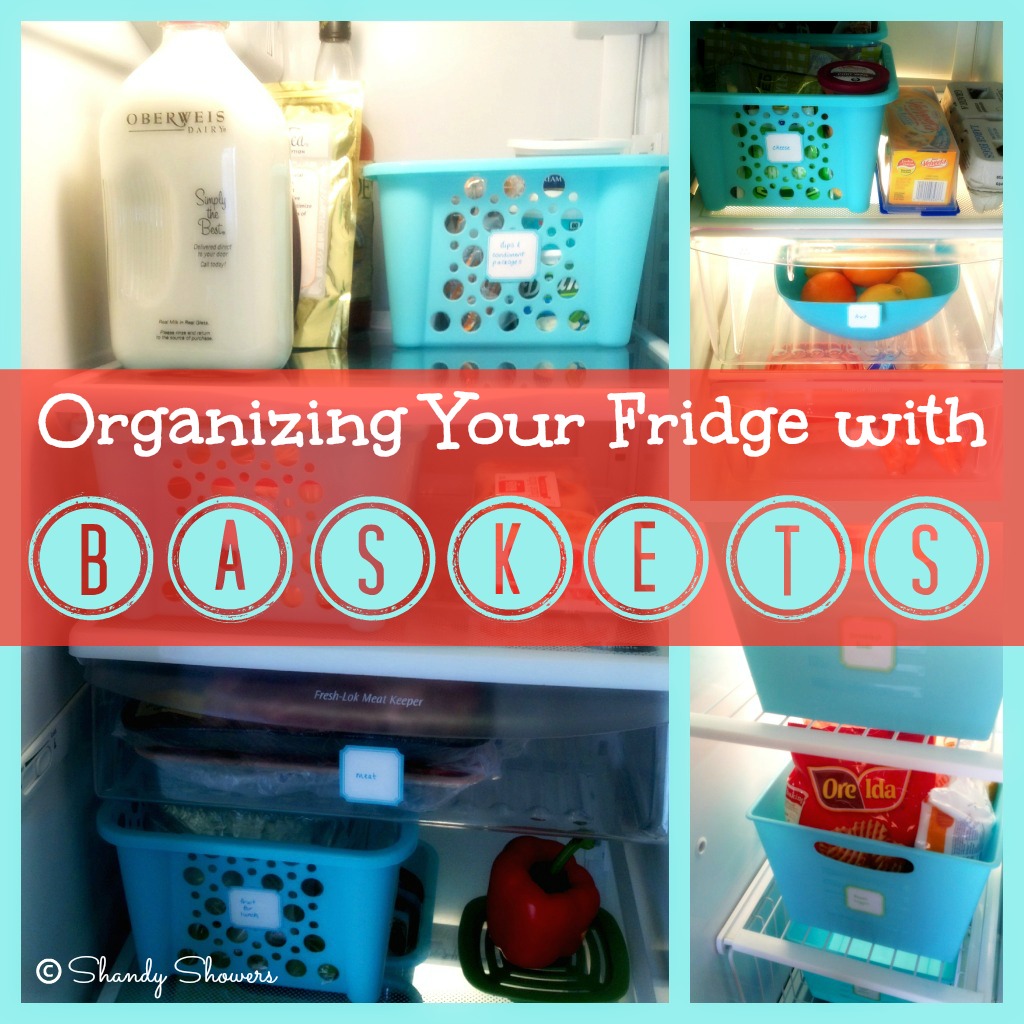
shandy's refrigerator

Is your refrigerator and freezer in need of a little TLC? Maybe you’re constantly throwing away food because you forgot it was there. Or perhaps you don’t have an organization system in place, so everyone ends up putting away items wherever they’ll fit, creating a messy looking fridge in the process. Or (whispering) maybe you know someone who has a science experiment growing in their fridge. (Not you. You would NEVER have moldy food in YOUR fridge. Right?) If you found yourself admitting to any of these things, then this is for you! {Or maybe you have a case of spring fever like me, and are getting a start on your spring cleaning and just want to freshen things up a bit after a cold, dreary winter.}

When I told my oldest daughter what I was blogging about today, she said, “I think we probably have the cutest fridge ever.” My youngest daughter agreed, “I love our fridge! It’s so cute!”

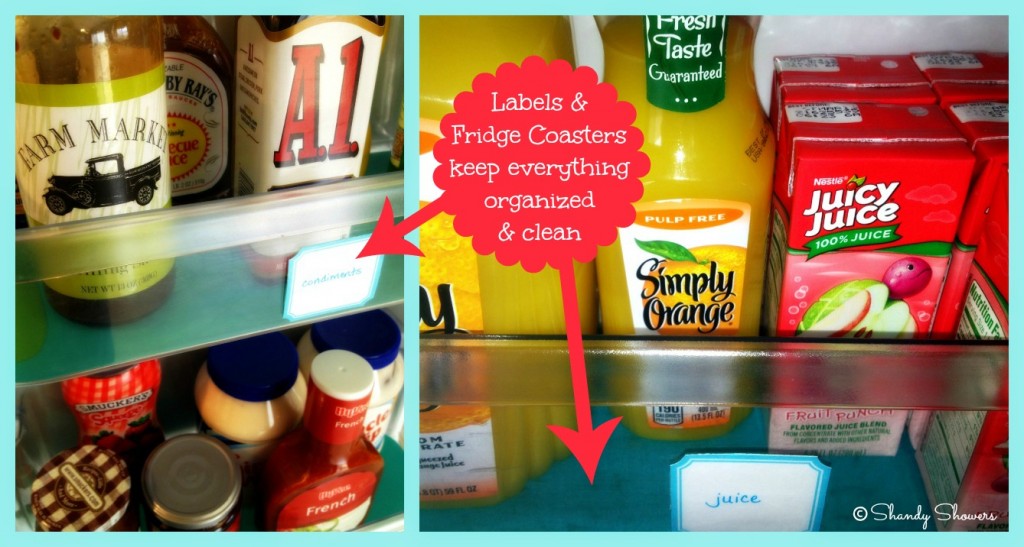
I’ll admit… we have a happy fridge. Like me, it loves the color aqua, and it appreciates that I am OCD enough to use labels and custom fridge mats/coasters/whatever you want to call them. You don’t have to label everything in your refrigerator, but it would love you for it if you did.

Ok, so you want your fridge looking fab? Here’s what you do:

  1. Toss any expired foods and science experiments.
  2. Take EVERYTHING out of your fridge. Put perishables in a cooler to keep cold.
  3. Clean the shelves, walls, and every nook & cranny.
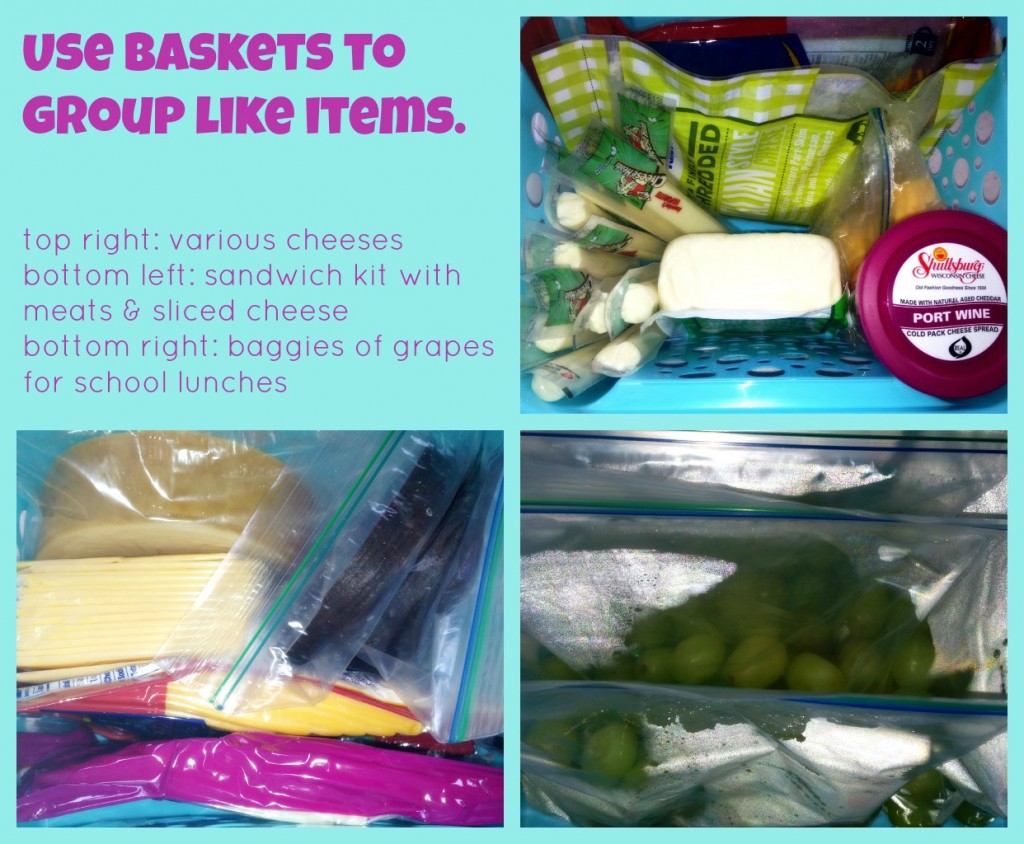
  4. Group like items, and put each “set” of like items in a basket. {Read the FAQs and Helpful Hints to learn what I do.}
  5. Label the basket if you wish.
  6. Repeat steps 4 & 5 until finished.
  7. Repeat the above steps to organize your freezer.
  8. Do a happy dance, ’cause your fridge & freezer look awesome!

Frequently Asked Questions:

1. Q: Where did you get your baskets? A: Dollar Tree. Seriously. I bought 10 baskets for a buck each. Score!

2. Q: Where did you get those labels, and how do they hold up? A: I bought the labels at Staples. They’re from the Martha Stewart Home Office collection, and measure 1 3/4″ x 1 5/8″. They hold up very well – I “laminated” them. Why did I put quotations around ‘laminated’? Because I cheated. I don’t have a fancy schmancy laminator, so I used packing tape. I also used packing tape to affix the labels to the shelves and baskets.

3. Q: What on earth is a fridge mat/coaster/whatever you want to call it? A: Great question! I was perusing Pinterest (of course!) and came across a pin for this blog, and what did I do? Well, I ran right out to the store to buy plastic placemats to make my fridge look cute, too! (Ok, a lot of stores. Eight to be exact! I couldn’t find many places that sell them, and the ones that did didn’t have a pattern or color that I liked, so I ended up getting them at Walmart for $2 each.) They serve double duty, by the way. Not only do they liven the fridge up a bit, but they make clean-up a breeze! And they are easy to make: 1. Take the shelves out of the refrigerator. 2. Trace each piece on a placemat. 3. Cut out. 4. Set it in place. 5. Put shelves back. 6. Smile! {I like these so much, I’m doing the big shelves in my fridge next!}

fridge collage 2

4. Q: What “categories” did you use for your baskets and shelves? A: I’m happy to answer this. I’ll start on the top shelf and work my way down, then over to the shelves in the door.

  • milk & other beverages (This label is on the interior wall to the left of our milk.)
  • dips & condiment packages (This basket lives on the top shelf and is home to sour cream, ranch dip, cream cheese, and all of the condiment packages we’ve collected from fast food places. Don’t judge.)
  • snacks (This is the basket where we keep individual size snacks, like pudding, applesauce, fruit cups, etc.)
  • sandwich kit (This is a basket filled with deli meat and cheese slices. I have a hubby & school-age daughter that I pack lunches for every morning. Grabbing baskets makes this so easy!)
  • meat (This is the drawer where we keep our ground beef, steaks, roasts, etc.)
  • veggies for lunches (for daughter’s and hubby’s lunches)
  • fruit for lunches (for daughter’s and hubby’s lunches)
  • dinner helpers (This basket is where we store our crescent rolls, and other items that help make up our dinner menu.)
  • cheese (This is the basket where we keep all of our shredded, block, string, and spreadable cheese, and hubby’s cheese curds. We used to live in Wisconsin. Can you tell?)
  • fruit (Our fruit drawer has a bowl in it to separate the citrus & apples from the other fruit.)
  • veggies (This drawer is where we keep our refrigerator-loving veggies.)
  • butter
  • condiments
  • jams/jellies & salad dressing
  • juice
  • pop

…and in our freezer:

  • breakfast foods (basket)
  • frozen veggies (basket)
  • crock pot meals (basket)
  • meat (slide-out bin)
  • juice (shelf in door)
  • cold packs (shelf in door)
  • ice cream (shelf in door)
  • canned goods (shelf in door)

fridge collage 3

Helpful Hints:

As soon as I get home from the grocery store, I spend 30-60 minutes (it’s well worth it to save time later!) doing the following….

1. Produce is washed and put in different containers. If it’s fruit or veggies for weekday lunches, they get portioned, put into individual baggies, and put in the appropriate basket. If it’s not for lunch, it gets washed and stored in the fruit and veggie drawers.

2. Deli meats get taken out of their packaging, put into baggies, and get placed in the sandwich kit basket.

3. Outer packaging comes off of individually wrapped cheese slices, string cheese, butter, fruit cups, pudding cups, juice boxes, etc.

4. Anything else that needs to be portioned gets portioned, put in a baggie or container, and put away…chips, trail mix, large packages of ground beef that need to get divided in half/thirds, etc.

5. Pasta, cereal, flour, sugar, etc. get put into the appropriate containers in the pantry or baking cabinet.

This really does save time in the following days and weeks! 

I’d love to hear if you’re going to put some of these ideas to use in your home! Also, feel free to share pictures of your new and improved fridge with me! Just send me a message at the email address below!

Love & Blessings,

Shandy

***********************

Be sure to visit Shandy’s personal blog Aprons ‘n Pearls for crafts, recipes, home keeping tips & more!

If you have any questions, just ask in the comment section, or send me an email at:

shandy@girlfriendscoffeehour.com

At Home with GCH: More Appetizers

Here on our At Home with GCH blog, Monday’s are always focused on healthy but oh-so-yummy! recipes. And this month we are doing a series of looks at appetizers. Here in the NorthEast, we are in the middle of a snowstorm. So,  I thought…’summery food!’  🙂  This week’s appetizer selections are Caprese Salad and Zucchini Fritters. We enjoyed these as a vegetarian supper tonight!

IMG_0149

I hope you enjoy these fritters as much as we do! They go along with our healthy but oh-so-yummy category because they are loaded with zucchini, and a good shot of whole grains in the cornbread. And, even though lightly fried in a bit of oil, they are no greasier than your weekend pancakes!

As I confessed last week: I love appetizers! Whether you call them tapas, small bites, hors d’ouerves, antipasto, or simply appetizers; no matter what you call ‘em…I like ‘em!  I would love for you to leave a comment below sharing with us YOUR favorite appetizer!

Zucchini Fritters

1 box of Jiffy Cornbread mix  IMG_1404
1 medium zucchini, shredded (do not peel!)
1/2 cup milk
good squeeze of juice from a fresh lemon
1 egg
1 tablespoon of melted butter
1/4 teaspoon freshly ground pepper
dash of ground nutmeg
Oil of your choice (but NOT olive oil)
Kosher salt

Preheat oven to 250. Place an oven-safe platter into the oven.

Shred zucchini into a colander; sprinkle with a small amount of kosher salt. Let sit to drain 5 minutes or so. Then dump onto a double layer of paper towels. Blot with a couple of additional paper towels, removing as much moisture as possible.

Stir milk and lemon juice together = buttermilk!  Lightly beat egg in a small mixing bowl. Stir in buttermilk, zucchini, seasonings, melted butter and, finally, cornbread mix. DO NOT overmix; there might be a small lump or two. Let sit for 3 minutes.

While mixture is resting, add a small amount of oil to a large nonstick frying pan; bring up to medium heat; then reduce heat to low. Add the fritter mix by scoops, spacing apart for easier turning. When edges appear dry, and there are a few little bubbles on the surface of the fritters, carefully flip. Once cooked, remove to platter in oven, sprinkle with a bit of salt and keep warm while remainder of batter is cooked.

  • For larger size fritters: use 1/4 cup-sized measuring cup or a large cookie scoop.
  • For smaller, bite-size fritters, use a tablespoon measure or a small cookie scoop.

These can be served hot or warm. Serving options are many: Caprese Salad (recipe below); guacamole, sour cream, salsa…

********************************

Continuing our “bit of summer in the midst of a snowstorm” theme, I prepared a quick Caprese Salad, aka Fresh Mozzarella and Tomato Salad. Not much tastes more like summer to me than a yummy, ripe, delicious tomato. Not so easy to find in the wintertime though! However, I find that the tiny tomatoes (grape, cherry, mini—whichever varieties your grocery store carries) are usually very flavorful and yummy all winter long!

Caprese Salad

various sizes of fresh mozzarella from my favorite brand—Belgioso!

8 ounces fresh mozzarella
1/2 pint tomatoes
Basil * (fresh is best)
Kosher salt, freshly ground black pepper
1-2 teaspoons extra-virgin olive oil.   Easy-peasy!  Depending on the size of the fresh mozzarella you have bought, you might need to cut the mozzarella into small, bite-size pieces; halve the tomatoes, and sprinkle with salt and pepper, to taste.  Thinly slice the basil*.  Add the sliced basil to the seasoned tomatoes and cheese.  Pour a small amount of olive oil over and gently mix. Serve immediately.*Gourmet tip: stack 3-4 basil leaves; tightly roll-up (like a tiny cigar!); then carefully slice into very thin slices. You have now accomplished the technique known as ‘chiffonade!’  You are amazing!


God loves you!    (Don’t ever forget that!)

coleen

_________________________________

If you would like to send a personal message to Coleen concerning this series, you may email her at: Coleen@girlfriendscoffeehour.com

At Home with GCH: Indian-Spiced Drumsticks

Indian-Spiced Drumsticks

It’s funny how some foods are relegated to specific dates on the calendar.  For instance, canned pumpkin is on the shelves in my grocery store twelve months a year, and yet we only think about pumpkin pie for one, maybe two months a year.  If you were to show up to an Easter brunch with a pumpkin pie, I guarantee you’d get some really strange looks!  Likewise, Buffalo wings have been pigeonholed into being a “party” food, and rarely show up for the family dinner.  Why is that?

Wings are not hard to make, but I feel like they’re a little hard to eat.  So I made a recipe that is a twist on the fiery-hot Buffalo wings, and is easier to eat, because it calls for drumsticks instead of wings.  There’s no frying, you control the level of heat, and they are easy to make and eat.  What’s not to love?

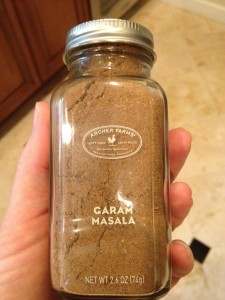
The secret ingredient is not-so-secret, since I bought it at Target!  It’s an Indian spice blend called garam masala.  Garam masala recipes vary by neighborhood and family in India, so there’s no one authentic combination of spices.  The one that I bought features black pepper, cardamon, coriander, and cinnamon.  It smells sort of like Chai tea, but is not sweet in and of itself.  If you can’t find garam masala, you can substitute one part ground cumin and one part pumpkin pie spice.

garam masala

The traditional accompaniment to Buffalo wings is carrot and celery sticks with bleu cheese dressing.  To make this a dinner, why not serve a big salad with bleu cheese dressing, or even a fancy wedge of iceberg lettuce with bleu cheese and diced bacon?

Indian-Spiced Drumsticks

Ingredients:

  • 10-12 drumsticks
  • 1/2 stick butter
  • 1/4 teaspoon granulated garlic
  • 2 tablespoons (or more!) hot pepper sauce, like Tabasco or Sriracha
  • 1 teaspoon garam masala, or 1/2 teaspoon ground cumin and 1/2 teaspoon pumpkin pie spice
  • 1/2 lime, lemon, or orange, juiced
  • a few shakes of Worcestershire sauce
  • salt and pepper

Directions:

  1. Preheat oven to 375*F.  Line a baking sheet with aluminum foil.  Spray with cooking spray, and lay out the drumsticks.  Don’t crowd them – make sure there’s plenty of room around them!  Bake for 30 minutes.  Remove from oven and lower temperature to 250*F.
  2. Make the sauce:  In a very large pot, add all the remaining ingredients.  Stir together over medium-low heat.  When the sauce is simmering, add the drumsticks and stir for 5 minutes, making sure to coat the drumsticks thoroughly.
  3. Remove wings from sauce and place back on the baking sheet.  Bake for 15 minutes.  Serve hot, with extra hot sauce if desired.

Note:  I really apologize for the shoddy quality of the photo.  I made these drumsticks on a whim for my husband and his brother for the Super Bowl.  I wanted time to set them up, make them pretty, maybe add a garnish – but no!  The men needed protein NOW!  Next week I promise to have an attractive photo for a tasty dish.


Explore, experiment, enjoy! — Dana


To view even more of Dana’s unique recipe, you can visit her at Frugal Girlmet!


If you would like to contact Dana in regards to this blog, please email her at Dana@girlfriendscoffeehour.com