November 16, 2024

Baked Beans

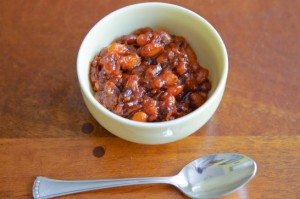
Baked Beans resize Happy Independence Day!  I’m hoping you are able to celebrate with family and friends today.  What’s on the menu? One of my guilty food pleasures is a right-off-the-grill hot dog.  I know, not the most gourmet of foods, or the healthiest, but everything in moderation, right? And what goes better with hot dogs than baked beans?  Now you could just open a can of baked beans and plop them in a saucepan, but where’s the fun in that? Make your own!

Once I decided to do just that, I found my Mom’s recipe for baked beans.  That poor note card has seen better days, but its hard-used appearance proves what a popular recipe it is.
Baked Beans Recipe Card Mom resize
 
I didn’t have any canned white beans in the pantry, but I did have a one-pound bag of dried white beans. They take more preparation than canned beans (obviously – canned beans come out ready for use) but are worth the effort.  First, dried beans are cheaper than their canned cousins, because once you soak and rehydrate them, they double in weight. (Put another way, when you buy canned beans, you are paying for water.)  Second, you are avoiding any salt, preservatives, or chemicals in the canned beans, not to mention the chance of BPA in the can itself.
 
Anyway, I soaked the beans the night before, but they double in size, so I only used half. (You could freeze the rehydrated beans in a Ziploc bag and thaw them when you have another recipe for them.)  I used my Mom’s recipe as a jumping off point, and they were just as delicious as hers were.  I realized they don’t need to bake in the oven and are great on the stovetop—that way you won’t have to heat up your kitchen on a hot summer day to make them.  These are easy, cheap to make, and will impress everyone who has them.  Hearty, smoky, and fantastic, these put those  gloopy canned baked beans to shame!

Baked Beans

Ingredients:
  • 1/2 pound dried white beans, soaked overnight in 6 cups water (or use 2 cans of white beans, reserving some of the canning liquid)
  • 5 slices bacon, diced 
  • 1 onion, diced
  • 3/4 cup ketchup
  • 1 tablespoon mustard
  • 1/4 cup BBQ sauce (optional, but I like the smokiness – you could also try a few dashes of liquid smoke)
  • 1/4 cup molasses
  • 1/4 cup dark brown sugar
Directions:
  1. If you are using canned beans, skip to Step 2.  If you are using dried beans: Drain the water from the beans you soaked overnight. Put the beans in a pot, cover with about 4 cups of water and a lid, and cook over medium heat for about 2 hours. You don’t want to cook off all the water, so check in on them every once in a while. When they’re done, save about a cup of the cooking water to use in the baked beans, in case you like them a little “saucier” than I do.  
  2. In a Dutch oven or very heavy-bottomed pot, fry the bacon. When it’s about halfway to crunchy, add the onion. When the bacon looks done, add the beans. Turn the heat down to low and stir everything together for a few minutes.
  3. Add the rest of the ingredients and stir to combine. Give it a taste and see if you need to adjust the seasonings. It likely won’t need salt, but you may like some pepper.
  4. Cover and cook on low heat for half an hour. Check the consistency – if it’s too thick, add some of the bean cooking water; too thin, take the lid off and let simmer.  Serve hot.
Explore, experiment, enjoy! — Dana


To view even more of Dana’s unique recipe, you can visit her at Frugal Girlmet!

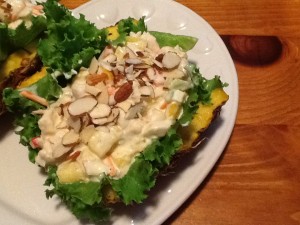
Pineapple-Chicken Salad

Y’know when a friend is on vacation and they post gorgeous photos of beautiful scenery, fun-in-the-sun…and yummy food?!! (Well maybe just a pic or two of yummy food!)  My friend, Cynda, and her family recently vacationed at the beach in Mexico. She included amongst all of the gorgeous sunrise scenes, and shots of her grandson being adorable, a pic of a delightful chicken salad that she enjoyed for lunch one day. It looked SO good that I was prompted me to make it for supper! This recipe fits the bill for our ‘healthy but oh-so-yummy’ POV since it is loaded with veggies, the fruit of an entire pineapple, and lowfat chicken breast. I also used equal portions of mayonnaise and Greek yogurt to lessen the fat grams/calories of the dressing. Perhaps this isn’t exactly the same recipe as the chef who prepared it for Cynda but we enjoyed it very much…hope you and your family do, too!

NOTE:  This salad should be put together IMMEDIATELY before serving!  Trust me.  I learned this lesson the hard way—I had to prepare this meal TWICE.  While a delightful combo when eaten fresh, pineapple and chicken do NOT marry well to sit around together!

Early one afternoon, I put this salad together and tucked it away in the refrigerator awaiting suppertime. Pulled it out, layered the pineapple shells with Boston lettuce leaves, piled in the salad, scattered the nuts atop, and proudly carried those plates to the table. We sat down, thanked our gracious God for His provision of food and His blessings, scooped up that first bite, popped it into our mouths…and then right back out. Ummm, yeah. YUCK!  Robert immediately blamed the chicken for being bad (but I knew it was just fine).

I did a little sleuthing around the internet and found out that the enzymes in the pineapple had ‘cooked’ the <already cooked> chicken and changed the texture and taste. (I can attest to that!)  EPIC failure!  But I remade the recipe…and this time added the pineapple (as the recipe NOW reads) just prior to serving.  Problem solved…it was delicious!  So, eat it all up…go ahead, I am giving you permission.  This will not be good if you save leftovers for tomorrow’s lunch.

Pineapple – Chicken Salad

2014-06-26 20.04.14

(makes 2 generous portions)

ingredients:
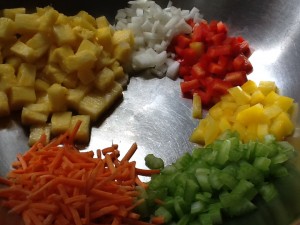
2 cups cooked chicken*, chopped 2014-06-26 15.14.28
1/3 cup shredded carrots
1/3 cup finely sliced sweet onion
1/3 cup finely chopped celery
1/3 cup EACH diced red and yellow pepper
fruit of 1 fresh pineapple (here is a great tutorial on how to cut  a pineapple)
1/3 cup mayonnaise
1/3 cup plain Greek yogurt
1/2 teaspoon garlic powder
1 teaspoon lemon-pepper seasoning, freshly ground
pineapple boats
lettuce leaves
pitas, or flour tortillas (optional)
slivered almonds (or chopped nuts of your choosing)

*I poached 1# of chicken breast but you could use leftover cooked chicken or rotisserie chicken

directions:

  • whisk together the mayo, yogurt and seasonings; set aside
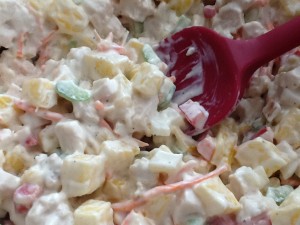
  • in a large mixing bowl, combine chicken, and all the veggies
  • pour the dressing over the chicken and veggies; combine well
  • refrigerate ‘til ready to serve
  • when ready to serve, add pineapple chunks to the dressed chicken salad
  • scatter nuts across the top

2014-06-26 15.23.40

serving suggestions:  this can be served right in the pineapple ‘shells” (boats), or you can line the pineapple with lettuce leaves, or serve the chicken salad wrapped up in a lettuce leaf, or stuffed into a pita (or folded tortilla wrap). You choose!!!  Enjoy!

♥   ♥   ♥   ♥   ♥

God loves you!    (Please don’t ever forget that!)

♥  coleen

Popsicles!

apple popsicle

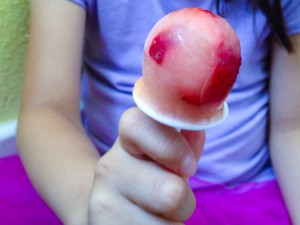
I guess this is less of a recipe, and more of an exhortation:  You should be making your own popsicles this summer!  My mom made these Popsicles for us when we were kids, and now my girls are helping me make them, and loving the results.

The most basic thing you can do is just freeze apple juice.  That’s it!  My girls like pieces of fruit in their popsicles, too.  The first run was halved cherries frozen in the apple juice, and the next batch was chopped strawberries.  You can do just about anything:  concord grape juice, lemonade, pureed watermelon!  Nearly any fruit you like can be added in—just make sure you chop it into small bits, and kind of stir it around with the juice to make sure you don’t have a just a big clump of fruit in the middle.

What’s even better than popsicles?  Jell-o Pudding Pops!  These are just like the ones I’d eat as a kid, when they still sold them in stores (remember this commercial?)  They’re easy and so good.

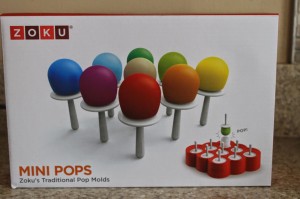
My popsicle set is this one:

zoku mini pops


I like the small size for my little girls.  You can also use it to make cake pops, but I haven’t done that (yet?).  Check online or in housewares stores to find the popsicle molds best for your family.  Let’s get freezing!

Apple Strawberry Popsicles

Makes 9 mini popsicles

Ingredients:

  • 1/2 cup minced fresh strawberries
  • 1 cup apple juice

Directions:

  1. Make sure popsicle mold is clean!  Chop strawberries and put a teaspoon of fruit in each mold.  Fill the mold to the line with apple juice and stir to distribute fruit.  Insert sticks into popsicles.
  2. Freeze for 6 hours.  Pop out of the molds and watch your kids’ faces light up!


Jell-O Pudding Pops

Ingredients:

  • 1 small package Instant Jell-O Pudding (go for the chocolate!)
  • 2 cups milk

Directions:

  1. Quickly whisk together pudding mix and milk.  Spoon into molds and insert sticks.
  2. Freeze.  Eat.  Watch reruns of The Cosby Show!


Explore, experiment, enjoy!
 — Dana


To view even more of Dana’s unique recipe, you can visit her at Frugal Girlmet!
Are You Letting Your Schedule Dictate What You Will Eat?

stress eating

One of the biggest challenges for a busy woman is knowing how to eat for her schedule. Let’s be honest…trying to plan healthy meals and snacks can sometimes be aggravating. Things get so busy; sometimes it does not seem possible to have any control over what you will eat for your next meal.

Right when you think you have your healthy eating habits together, your schedule and life changes. You may have evenings that you work late; weeks that you travel or have business dinners; or you may have weeks that you literally have an activity every night of the week with your family.  All those outside factors may leave you feeling powerless and with no control over your next meal.

I remembered the many changes in my life with the birth of my second child.  I had to re-adjust my life and schedule.  Things really began to change when he entered school.  Now he was not just tagging along to his big sister’s activities…he had his own. I now have two kids at the baseball field going in different directions, on top of all other life responsibilities.

ball season

No matter how hectic life gets, our bodies still need adequate nutrition. A few months ago, I read a story of a 17 year old girl who for many years had a diet consumed with fast food and frozen chicken nuggets, only. Her diet was completely void of fruits and vegetables. When she was hospitalized after collapsing, doctors discovered her body was so deficient in vitamins and nutrients that she had to be injected with them.

Getting adequate amounts of vitamins and nutrients for me and my family is very important. I know I will eat healthier at work and with my family when meals and snacks are prepared at home.  However, eating healthy does not just happen and it is hard to do with a crazy schedule.  As with anything in life worth having, planning and preparation is the key.

The trick:  Plan your upcoming meals and snacks on a day when you have the least amount of stress or responsibilities. Don’t wait to figure out what you are going to eat during a busy day because you have too many other things on your mind that may include a long “to do” list and who knows what other things could pop up.

Once you pick your day to make the preparations, begin putting together your strategies for your meals so that they are time efficient, yet healthy.  Follow me on Pinterest and Facebook to get more ideas and recipes.  With a few tricks you can avoid making the mistake of letting your schedule dictate what you will eat.

In Good Health,
Crystal

Lemon-y Shrimp Pasta Salad

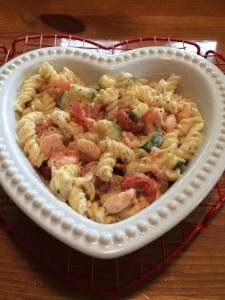
Here in the NorthEast we are still waiting for the hot days of summer to arrive (not that I am complaining one tiny little bit!).  But this is surely the season for one dish salads that will be a complete meal.  It could be a pasta salad, like this recipe, or a nice full dinner salad!  Eating lighter meals on hot days certainly seems a more welcome choice…as well as meals that don’t require turning on the oven!

We love pasta salads!  But since we’ve made the choice to eat gluten free, I have found that pasta that holds up well when it is refrigerated and coated with a dressing has been difficult to find.  However, recently I purchased some Ronzoni brand gluten free pasta that is excellent!  (Here is a link AND a coupon!)  It is made with a multi-grain blend of white rice, brown rice, corn, and quinoa—nice texture (both hot AND cold), good taste, and holds up well as leftovers.  If you have eaten gluten free pasta before, you know that these three qualities are NOT always a given!  I have served this pasta to friends and family who couldn’t tell that it was a gluten free product.  Happy me!  Perhaps you might want to give it a try!  Enjoy!

Lemon-y Shrimp Pasta Salad (makes 4-5 generous servings)

2014-06-18 12.05.42

ingredients:
3 lemons, juiced plus 1 more for serving
2 teaspoons honey
1 cup fresh dill, chopped (dried ok, too)
1/2 cup extra-virgin olive oil
1/4-1/3 cup mayonnaise (optional)
sea salt and freshly ground black pepper (I use this lemon-pepper seasoning)
1 box (1#) rotini pasta (I used gluten free)
1 # frozen cooked tiny shrimp, defrosted
2 cups grape tomatoes, halved
1 large seedless cucumber, diced

directions:

  • in a large bowl, whisk together the juice of the lemons, the honey and chopped dill. slowly whisk in the olive oil until the dressing is emulsified (or use your blender or food processor). season well with salt and pepper
  • add the shrimp to the vinaigrette, toss to coat well and set aside to marinate
  • cook pasta according to package directions; rinse and cool
  • add the mayonnaise (if using), the cooked pasta, grape tomatoes, and cucumbers to the bowl with the shrimp and toss to combine
  • season well (don’t forget to taste!) with salt and pepper
  • refrigerate ’til ready to serve

♥   ♥   ♥   ♥   ♥

God loves you!  ♥  (Don’t ever forget that!)

  coleen


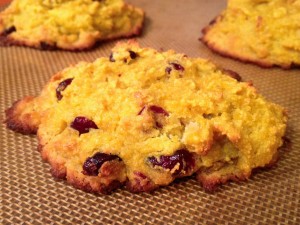
Cranberry Orange Scones (Gluten-Free)

Cranberry Orange Scones resize

If you have kids, you probably know what summer break is like:  trying to keep them busy and entertained without letting their brains turn to mush!  One of my favorite ways to do that is baking together.    I have my older girl (first grader now!) read the recipe out loud, and both girls love to stir and mix and pour ingredients.  Today’s group baking exercise?  Cranberry Orange Scones!

These are gluten-free, made with coconut flour.  If you’ve never tried it, I can’t recommend it highly enough.  For six big scones, you only need half a cup of coconut flour!  I like making treats for the girls that are single serving – that way there’s no arguing over whether the slice of bread is big enough, or having to share the last one.  These came together in a snap.  The original recipe (found on the Elana’s Pantry website) directs you to mix all the ingredients in a food processor, and I’m sure that would have made the recipe go even faster!  But because my girls wanted to help, we mixed them by hand – dry ingredients in a large bowl, wet ingredients in a smaller bowl, and then mixed wet into dry.

Try these little heaven-scented beauties today!

Cranberry Orange Scones (Gluten-Free)     makes six large scones

Ingredients:

  • 1/2 cup coconut flour
  • 1/4 teaspoon salt
  • 1/4 teaspoon baking soda
  • 1/4 cup coconut oil or softened butter
  • 1/4 cup honey
  • 4 eggs
  • 1/2 cup dried sweetened cranberries
  • zest of one orange, plus the juice of half the orange

Directions:

  1. In a large bowl, blend together the flour, salt, and baking soda.
  2. In another bowl, beat together the coconut oil or butter, honey, and eggs.
  3. Mix the egg mixture into the flour mixture.  Stir in the cranberries, orange zest, and orange juice.
  4. On a Silpat mat or parchment paper, make six mounds of dough.
  5. Bake for about 15 minutes at 350*F.

Explore, experiment, enjoy! — Dana


To view even more of Dana’s unique recipe, you can visit her at Frugal Girlmet!
Quinoa-Beef Stuffed Portabellos

2014-06-10 19.36.12

Remember that delicious and so-good-for-you red quinoa recipe from last week? Well, I was looking around for a use for the rest of it and so…these were going to be stuffed sweet peppers but the portobello caps were SUCH a good price!  (Well, y’know I could not resist!)  I par-cooked the mushroom caps on a grill pan but they would be great done on your outdoor grill too!

We enjoyed these as an entree with steamed broccoli–they were VERY filling!  I figure two caps per person unless you choose to serve these as a side dish.  This recipe fit nicely into our ‘healthy but oh-so-yummy’ point of view!  Enjoy!

Quino-Beef Stuffed Portabellos

ingredients:
4 medium-sized portabello mushroom caps plus 1 extra for chopping
1/2 # ground beef (or turkey, chicken, or lamb)
1 cup cooked quinoa
1 cup kale (or spinach), stems removed and chopped
1-2 ounces blue cheese, crumbled (I used havarti)
1 small red onion, cut into 1/2 moons
2 heaping tablespoons chopped garlic
1/2 cup red wine
2 tablespoons balsamic vinegar
olive oil

directions:

  • preheat oven to 375 (heat grill pan, also, if using)
  • in a large saute pan, heat 1 tablespoon of olive oil over medium heat; add sliced onions and cook for 4-5 minutes
  • using a spoon, scoop out the dark gills of each mushroom cap. (if they have stems, add these along with the 1 extra cap for chopping.)  brush the caps with olive oil & place rounded side down on the heated grill pan (or onto a foil-lined baking sheet)
  • bake for 6-7 minutes; remove from oven and set aside to cool slightly
  • chop up the set-aside mushroom cap (and stems, if any) and add to onions in saute pan; cook over medium heat until mushrooms get brown & fragrant (caramelize them), perhaps another 6-7 minutes
  • once onions and mushrooms are done, pour into a large mixing bowl along with the cooked quinoa
  • (using the same skillet), add ground meat. cook over medium high heat ‘til browned.  lower heat just a bit (don’t want to burn the garlic!) and add chopped garlic and saute for another minute or two stirring constantly
  • stir in red wine and chopped kale (or spinach) and cover pan; simmer ‘til liquid is evaporated
  • add meat and kale to the veggie/quinoa mixture in the large bowl
  • stir in the balsamic and mix the ingredients all together in the bowl. season well w/ salt and pepper
  • place scoops of mixture into mushroom caps (I find my hands worked well!) dividing the stuffing mixture equally amongst the caps. top each mushroom with a few crumbles of cheese
  • bake for about 12-15 minutes, ‘til mushroom caps are tender & filling is slightly browned.

♥   ♥   ♥   ♥   ♥

God loves you!    (Don’t ever forget that!)

♥  coleen

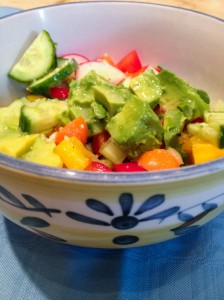
Crunchy Chopped Salad


Crunchy Chopped Salad resize

I think this was originally a recipe from a South Beach Diet cookbook.  But I started making it so long ago, and have added and deleted ingredients over the years…so that I am not sure it’s the same one in the book.  That’s okay – it’s not about exact ingredients.  You can add or subtract as you like.  It’s about CRUNCH!  And that’s what you get in this Crunchy Chopped Salad!

I know that chips aren’t great for me.  I usually don’t crave them, and I make sure I don’t keep them in the house (because as a stay-at-home mom, you DO eat whatever is in the pantry!)  But sometimes you just get that urge for something kind of salty and crunchy.  I make this salad instead.  Is it the same?  Of course not!  (Otherwise I’d call it Doritos Salad!)  But this satisfying, fun-to-eat dish  scratches that itch for me, and maybe it will for you too.

If you need a break from lettuce, try this.  If you have lots of singleton vegetables in your crisper drawer, try this.  If you want something fresh and different for your next cookout, try this!

Crunchy Chopped Salad

(Serves four as a side dish)

Ingredients:

  • 6 baby carrots
  • 1 bunch radishes, trimmed
  • 3 stalks celery, trimmed
  • 2 Persian cucumbers, or one large cucumber
  • 1/2 red bell pepper
  • 1/2 yellow bell pepper
  • 2 green onions
  • 2 cloves garlic
  • juice of 1 lemon or lime
  • 2 or 3 drops of honey
  • salt and pepper
  • 1/4 to 1/3 cup olive oil
  • 2 avocados

Directions:

  1. Wash and trim all your veggies.  Cut them all into medium-small pieces.  This is up to you, but for example, I cut the peppers into 1/2″ square pieces.  The radishes, cucumbers, carrots, and celery all get sliced vertically, then cut into 1/4″ slices.  If you dice everything too small, you won’t get the crunchiness.  If you cut everything too large, you’ll only get one or two veggies on your spoon at a time.  Experiment and see what size you like best.  If you are using a large cucumber, you may want to peel off the waxy skin and scoop out the seeds.  I like Persians because they are thin-skinned and have very little squishy gel around the seeds.  Pile all your chopped veggies into a big bowl and toss.  Beautiful, right?
  2. In a little food processor, blend up your garlic, lemon juice, honey, salt and pepper, and 1/4 cup olive oil.  Taste and dilute with more oil if you like.
  3. To serve, dish the salad into a bowl and drizzle liberally with dressing.  For each serving, dice half of an avocado and place it on top (otherwise it gets smushed.)  Eat this salad with a big soup spoon so you get a little of each vegetable in every bite!

If you have leftovers, you can mix in a can of tuna the next day.  It’s wonderful!


Explore, experiment, enjoy! — Dana


To view even more of Dana’s unique recipe, you can visit her at Frugal Girlmet!
My Crazy Diet and Views of Exercise

crackers

Ok, we have all done it..thought some ridiculous diet would help us lose weight and KEEP IT OFF or had crazy ideas about how we should exercise.  I am not sure where these crazy ideas come from or why they become ingrained in our brains, but it seems during each stage of life there is a new way of thinking about how weight loss and getting fit should be done.  We have all fallen subject to them.  I have had my own crazy diet and views of exercise over the past 25 years.

Starving Myself
My earliest memory of these, unknown to my mother, was in the 10th grade. After gaining quite a bit of weight one summer while moving to a new town, I thought the only way to lose weight was to restrict my calories. My mother sent me off to school with lunch money only to spend it on a pack of crackers and a diet coke from the vending machine, all equaling about 150 calories of nothing nutritious.

I later recall hearing and feeling my stomach growl continuously while practicing piano in the afternoon and staring at the clock wondering when we would eat dinner. Of course my mother was so proud that I inhaled everything that was on the table and saved no leftover’s…but I was famished!

What I Thought About Exercise
As a Kinesiology major in college I taught “aerobics” (as it was called back then). But my one fitness ambition was to be a runner. It did not come easy for me, but I was determined to accomplish it.  I remember attempting to go for a run the fall before turning 21 years old and thinking, “If I don’t condition myself to run a whole mile straight before my birthday, I will never get it. I will be getting too old.” Ha!  (Did you laugh out loud reading that as I did?)  How crazy was it to think I would never be able to get in shape at an “older” age.  Today, at age 42 I think I could run circles around that young 21 year old girl.

college step  me running


My Point
To truly learn how to have a healthy lifestyle, we have to develop a healthy mindset.  Romans 12:2 says,

Do not conform to the things of this world, but be transformed by the renewing of your MIND so that the perfect will of God may be done.

When we start my praying for God to transform our mind, we may have a new view of how we should eat and exercise to take care of them body He has given us.  And perhaps learn what good nutrition is and break the perceptions we have of exercise and view of self.

With the right mindset and healthy way of living, I am happy to say I no longer follow a crazy diet and view of exercise.  I am curious: what is the craziest thing you have ever done and how have things changed for you?  Please leave your thoughts in the comment section below.

In Good Health,

Crystal

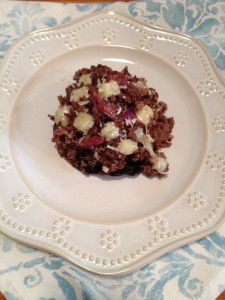
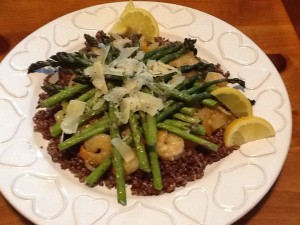
Shrimp and Asparagus Saute over Red Quinoa

It is starting to be the season when simpler suppers are more agreeable, wouldn’t you say? No need to heat up the kitchen when preparing this dish. AND, this is equally good served hot from the pan, warm, or even as a cold salad!

This dish, Shrimp and Asparagus Saute over Red Quinoa, also fits into our healthy but oh-so-yummy POV since it is full of fresh ingredients with less than 2 tablespoons of olive oil in the entire preparation, and a bit of shredded parmesan cheese to finish it off!  This easily serves 3 hungry adults and can be doubled with no trouble at all.

Have you and your family enjoyed quinoa <kEEn-wah> before?  Quinoa is a grain but it is the seed that we eat!  (Good news for the low-carbERs, right?)  And it is jam-packed full of protein.  Usually when I prepare a pot of quinoa, I make enough extra to use for another meal.  To find quinoa in your grocery store, check the natural food section, or perhaps where they sell different rice products.  Our favorite is ‘red’ quinoa.  Quinoa does come in three varieties (white, or ‘golden’, red, and black).  Basically they are the same with shades of differences, basically in texture.  But I have used all three totally interchangeably!  Here are some nutritional facts about quinoa.  I hope you enjoy this dish as much as we do!

2014-06-08 18.45.20

Shrimp and Asparagus Saute over Red Quinoa

ingredients:
1 cup quinoa
1 cup chicken broth and 1 cup water
½ medium sweet onion, sliced into half-moons
1 tablespoon extra-virgin olive oil
10-15 grape or cherry tomatoes (I used yellow), sliced in half
1 pound uncooked shrimp peeled and deveined
2 cloves garlic, minced
1+1/2 tablespoons freshly ground lemon pepper seasoning
1/4 cup dry white wine
1 pound asparagus, trimmed
1 teaspoon extra virgin olive oil
shaved Parmesan cheese
lemon wedges (optional)

directions:

  • preheat oven (or toaster oven, as I did) to 400.
  • line a baking sheet pan with foil
  • in a medium saucepan, bring liquids to a boil; stir in quinoa. return to a boil, reduce heat to low; cover with lid and simmer gently ‘til liquids are absorbed (20 minutes or so)
  • in a large saute pan over medium-high flame, heat 1 tablespoon olive oil and add sliced onions; saute for 7-8 minutes to soften
  • while onions and quinoa are cooking, place asparagus on the lined baking pan, and season well with 1 teaspoon lemon-pepper seasoning. pour 1 teaspoon olive oil evenly over the asparagus and then roll back and forth on the baking sheet to distribute. bake for 10-12 minutes
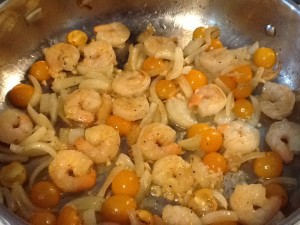
  • (back to the saute pan!) add the halved tomatoes placing flat side down in pan; heat for 3-4 minutes.2014-06-08 18.36.49
  • stir in the shrimp, minced garlic, lemon pepper seasoning. allow to cook without stirring for 3 minutes or so, ‘til shrimp are starting to turn pink. flip shrimp over and cook for 2 more minutes. pour in the wine, give everything a good thorough stir and let simmer for just 2-3 minutes to reduce the liquids. remove from heat and check for additional seasoning
  • asparagus should be done; remove from oven
  • To plate: scoop some quinoa into an even layer on plate or shallow bowl. spoon shrimp&veggies over top. add stalks of asparagus on top and sprinkle with cheese.

♥   ♥   ♥   ♥   ♥

God loves you!  ♥  (Don’t ever forget that!)

♥  coleen