November 16, 2024

At Home with GCH: Chinese Tofu Stir-Fry

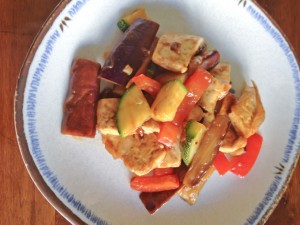
Tofu Stir Fry Plate


I call it “reverse-engineering” – when you eat something you really like at a restaurant, and then go home and figure out how to make it from scratch.  Have you ever done that?  It can be quite a challenge, especially if it’s a dish from a cuisine you are not all that familiar with.  But sometimes it’s good to challenge yourself, save some money, and make something healthy for your family that doesn’t need a trip to the strip mall!

Case in point:  There is a chain of Chinese take-out restaurants with locations all across the country.  I won’t name names, so let’s call it “Black-and-White Animal Express.”  They make a fantastic stir fry with tofu, Chinese eggplant, and onions.  I love it, and I figured I could recreate it at home.  I think I got pretty close!  The only ingredient that you may not have at home is Hoisin sauce, but I bet it’s in your grocery store’s “ethnic” aisle.  It’s sweet and a little spicy and is a great sauce with just about any vegetable and meat combo stir fry—chicken and broccoli, beef and snow peas, you name it.  If you can’t find it, you can try Plum sauce – it’s a little sweeter, and you may want to add a splash of hot sauce to it to offset the sweetness.  If you can’t find Chinese eggplants—they’re the long skinny kind—you can use a regular eggplant, or just substitute a different vegetable altogether.  I had planned on adding 8 ounces of mushrooms to this recipe; and then realized I’d used them the day before.  There’s always next time!

If you are looking for a Meatless Monday meal, or are craving Chinese take-out, why not give this a try at home?  Serve over rice and crack open a fortune cookie!

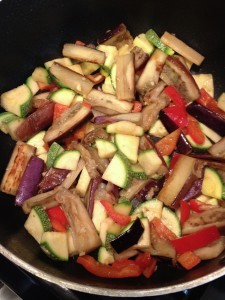
Tofu Stir Fry Pan

Before the sauce is added – I love the colors!

Chinese Tofu Stir-Fry

Ingredients:

  • 1 package firm or extra firm tofu
  • vegetable oil
  • 2 cloves garlic
  • 1 Chinese eggplant
  • 1 small onion
  • 1 red bell pepper
  • 1 zucchini
  • 1 tablespoon Hoisin sauce, or more to taste

Directions:

  1. Open the tofu, drain water, and place the tofu on a small plate.  Place another plate on top and gently squeeze out the water.  Leave the plate on top while you cut up the veggies.  Slice all the vegetables into bite-sized pieces: 2-inch strips for the eggplant, thin slices for the onion and pepper, and either strips or coins for the zucchini.  Mince the garlic.  When the vegetables are sliced, squeeze the tofu again, and then cut—first in half, then into squares, and then into smaller rectangles; they should end up around the same size as the eggplant.
  2. Heat 2 tablespoons of vegetable oil in a large non-stick pot.  Cook the tofu for five minutes until it’s golden, then flip and cook the other side.  When cooked and a little crispy on both sides, remove to a bowl.
  3. Add the rest of the vegetables to the pot, adding a little more oil if necessary to keep everything from sticking.  Sauté for five to eight minutes over medium heat, stirring occasionally.  When the onion is translucent, and the eggplant is soft and taking on a little color, add the tofu back to the pan.  Cook for another 2 or 3 minutes.
  4. Turn off the heat and stir in the sauce.  You want everything coated in sauce, but not smothered!

Explore, experiment, enjoy! — Dana


To view even more of Dana’s unique recipes, you can visit her at Frugal Girlmet!


If you would like to contact Dana in regards to this blog, please email her at Dana@girlfriendscoffeehour.com

At Home with GCH: Spaghetti Carbonara


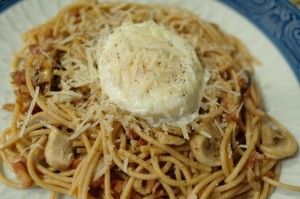
Spaghetti Carbonara

Inspiration can strike anywhere, at any time.  I was reading a magazine in the bathtub last night.  It had a page about eggs as super foods, and the different ways to prepare them.  As I was looking at photos of beautifully poached eggs, it came to me:  Spaghetti Carbonara!

Let me back up a minute.  Spaghetti Carbonara is usually made with pancetta (or bacon), onions, and is finished by adding whipped eggs to the hot pasta at the very end.  The resulting sauce is smooth, creamy, and delicious – but it’s also a little risky, since the eggs aren’t really cooked all the way.  For most people, eating uncooked or underdone eggs is not a big deal, but I thought I might be able to make it my way, and improve the food safety quotient in the process.  Instead of an egg sauce, this recipe uses poached eggs—serve with one or two, your choice.

The ingredients for this recipe are probably in your house right now.  I used whole wheat spaghetti in this recipe, but honestly, I like regular spaghetti better.  You could also use another long noodle—fettucini or linguini—if that’s what’s in your pantry.  If you want to splurge on the pancetta, feel free, but I had bacon ready to go.

This recipe serves two.  Make it for dinner tonight, with a green salad.  (Don’t worry, I don’t have an Italian Grandmother who’s rolling over in her grave right now.  Unorthodox?  Maybe, but that doesn’t mean it’s not tasty!)  Mangia!

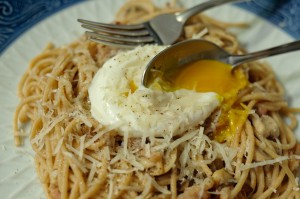
Spaghetti Carbonara Egg

The Poached Egg, aka The Sauce Bomb!

 Spaghetti Carbonara

Ingredients:

  • 1/2 pound spaghetti
  • 1 teaspoon butter or olive oil
  • 4 slices bacon, diced
  • 1/2 onion, diced (use a sweet onion, if you have it)
  • 1/2 pound mushrooms, chopped
  • 2 eggs
  • salt and pepper
  • 1/4 cup grated Parmesan cheese
  • 1/2 lemon

Directions:

  1. Place a large pot of salted water on the stove.  When it boils, add the spaghetti and cook until almost al dente.  
  2. While the pasta boils, cook the bacon and onion together in the olive oil in a large, high-sided pot.  After five minutes, when the bacon is getting crispy and the onion is turning golden, add the mushrooms.  Stir and continue to cook.
  3. When the pasta is just barely underdone, remove from the water and place in the bacon pot, but DO NOT drain the water!  Keep the pasta water simmering over very low heat.  Stir the pasta and bacon mix together over the lowest heat.  Turn off the heat and continue to combine.
  4. In a teacup or small bowl, carefully crack an egg.  Gently lower the egg into the pasta water, and poach.  This will take 3 or so minutes over low heat.  Use a slotted spoon to keep the egg white together.
  5. While the egg is poaching, plate your pasta—make a big pile of spaghetti carbonara, and make a little nest in the top.  When the egg is done—still jiggly but cohesive—place on top of the spaghetti.  Sprinkle generously with Parmesan cheese, and season with salt and pepper.  Squeeze half a lemon lightly over the whole thing.
  6. To eat:  break open the egg, and stir to combine and mix together.

Explore, experiment, enjoy! — Dana


To view even more of Dana’s unique recipe, you can visit her at Frugal Girlmet!


If you would like to contact Dana in regards to this blog, please email her at Dana@girlfriendscoffeehour.com

At Home with GCH: Popcorn, Five Ways

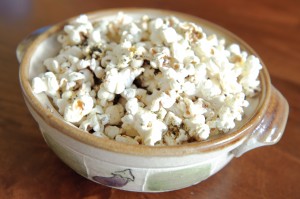
Furikake Popcorn

Furikake Popcorn

I have an admission to make:  I have a popcorn addiction.  It would be physically impossible for me to see a movie in the theater without a big bucket of buttery, salty popcorn on my lap!  When I was pregnant with my second daughter, I was eating a bag of microwave popcorn everyday—until my husband started emailing me news reports of people contracting “popcorn lung” from chemicals used in microwave popcorn.  Undeterred, I now make it on the stovetop.  I’m down to a batch a week, and I’m okay with that.

If you can, look for organic popcorn.  Trader Joe’s has it and at a good price.  You’ll also need a large, heavy-bottomed non-stick pot with a lid, and some kind of oil.  I usually use regular vegetable oil.  You can try peanut oil—it has a high smoke point, so it can withstand high heat without burning or breaking down.  Even better is coconut oil, which I use for popcorn recipes that are on the sweet side.

The technique, if you haven’t made it the old-fashioned way in a long time, is simple.  Add the oil and three kernels of popcorn, heat over medium heat, covered with the pot lid.  When you hear or see the three kernels pop, you know your oil is ready, so add the rest of the popcorn.  Cover the pot and shake every 5 or 10 seconds to keep things moving.  Just like microwave popcorn, remove from the heat when you stop hearing popping.  Add your toppings immediately; cover and shake to distribute.

Usually just salt and butter are enough for me, but sometimes I like to experiment with new flavor combinations.  Here are some of my favorite discoveries.

===========

Best Kettle Corn

Ingredients:

  • 4 tablespoons coconut oil
  • 1/2 cup popcorn kernels
  • 1 tablespoon white sugar
  • salt to taste

Directions:

  1. Add coconut oil and 3 kernels of popcorn to the pot; heat over medium until the three kernels pop.  Add the rest of the popcorn and the tablespoon of sugar.  Cover, shaking frequently, until the popping stops.  Shake on salt to taste (not a lot) and serve.

===========

Furikake Popcorn

There is a Hawaiian treat called Hurricane Popcorn that includes furikake (a mixture of sesame seeds, shredded seaweed, and other flavors) bacon, and pineapple!  It sounded amazing, but I decided to dial it back and kept it simple.

Ingredients:

  • 4 tablespoons vegetable oil
  • 1/2 cup popcorn kernels
  • 2 tablespoons butter
  • 1 teaspoon soy sauce
  • 1/2 teaspoon sugar
  • 1-2 tablespoons furikake

Directions:

  1. Heat oil and 3 tester kernels of corn.  While waiting for the tester kernels to pop, combine butter, soy sauce, and sugar and heat in the microwave for 30 seconds, or until the butter melts.  Swirl to combine.
  2. When the tester kernels pop, add the rest of the popcorn and pop as directed.  When the popping stops, pour the butter mixture over the corn and sprinkle with furikake.  Cover, shake well to distribute, and serve.

===========

Truffle Popcorn

If your “date night” this month consists of you and your man snuggling on the sofa and watching a movie, this will fancy it up.  You might even want to change into your nicest sweatpants!  Truffle oil is not that expensive, and if you make mushroom risotto, truffle oil will take it from yummy to HOT DIGGITY DOG!

Ingredients:

  • 4 tablespoons vegetable oil
  • 1/2 cup popcorn kernels
  • 2 tablespoons truffle oil
  • 1 teaspoon truffle salt or regular salt

Directions:

  1. Pop as directed in above recipes.  When done, drizzle with truffle oil, shake on truffle salt, shake to coat, and sigh with delight.

===========

Easy Cheesey Popcorn

Cheese popcorn is my biggest weakness.  I found a shortcut.  I warn you, it’s not pretty.  But it is delicious.  This recipe came about because we’d bought a box of “Easy Mac” macaroni and cheese, and the kids didn’t like it.  Waste not, want not, I always say!

Ingredients:

  • 4 tablespoons vegetable oil
  • 1/2 cup popcorn kernels
  • 2 tablespoons butter
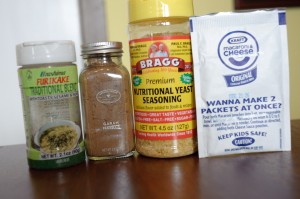
  • 1 packet cheese powder from a box of Kraft Mac and Cheese, or 2 packets from the individual Easy Mac servings
  • OR instead of cheese powder, you can use 2 teaspoons Nutritional Yeast – it has a mild, cheesy flavor, but it is vegan and full of vitamins and minerals.  It’s tasty, but not as tasty as Mac and Cheese powder.

Directions:

  1. Pop as directed in above recipes.  While the corn is popping, melt the butter in the microwave.  When popcorn is done, drizzle on butter and sprinkle on the cheese powder.  Shake well to distribute.  Wolf down popcorn, wash hands to get the orange color off, and eat broccoli for dinner.

===========

Pick your popcorn flavor!

Pick your popcorn flavor!

Indian Spiced Popcorn

Since you already have the garam masala powder in your pantry (from when you made the drumsticks last week, right?) here is another use for it.

Ingredients:

  • 4 tablespoons vegetable oil, or coconut oil (I like the coconut oil best—makes it taste more like Chai tea)
  • 1/2 cup popcorn kernels
  • 2 tablespoons butter
  • 1 teaspoon garam masala powder
  • 1/2 teaspoon sugar
  • 1/2 teaspoon salt

Directions:

  1. Add oil and 3 tester kernels to the pan over medium heat.  While waiting for the tester kernels to pop, heat the butter in the microwave to melt.  In a small bowl, stir together garam masala, sugar, and salt.
  2. Pop corn.  When done, drizzle butter over and shake garam masala powder onto popcorn.  Cover with the lid and shake to distribute.


Explore, experiment, enjoy! — Dana


To view even more of Dana’s unique recipe, you can visit her at Frugal Girlmet!


If you would like to contact Dana in regards to this blog, please email her at Dana@girlfriendscoffeehour.com

At Home with GCH: Focus on Health

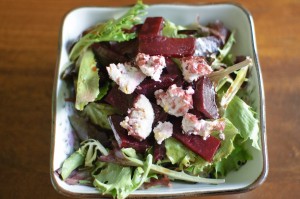
beet and goat cheese salad

In writing this blog series, “Focus on Health.” I am reminded of several articles I read around the start of the year, listing “The Healthiest Foods You’re Not Eating.”  Basically, all the lists were comprised of super foods—those veggies, fruits, grains and other ingredients that we know are good for us but that we avoid for whatever reason.  One that we’ll be looking at this month is BEETS.  Yay, beets!

Beets are high in folic acid, which is crucial during pregnancy.  They are also chock full of vitamins and minerals, including magnesium, calcium and iron.  They are being studied for their cancer and heart disease prevention properties.  Especially of interest to scientists is the pigment that gives beets their bright red color—Betacyanin—because it has been shown to fight cancer and possesses powerful antioxidants.

Perhaps you had them prepared the wrong way, like boiled to death.  Perhaps you see them in the store and just don’t know what to do with them.  In any case, beets are in season now, just waiting for you at your local farmer’s market or grocery store.  Let’s look closer!

There are two main varieties:  common red beets, and golden beets.  Both are delicious and are prepared the same way, but golden beets have a milder flavor, while red beets have a stronger, earthier and sweeter taste.  When you buy them, look for bright, strong leafy greens attached.  The greens are edible and are highly nutritious themselves—don’t throw them out! If you aren’t going to cook the beets the day you buy them, keep them in the fridge, with the greens wrapped in a damp paper towel.  The beets can last quite a while in your fridge, but the greens must be eaten quickly, like within a day or two, or they get limp and gross.

My favorite way to cook beets is to roast them in the oven.  Wash the beets, remove leaves and stems, and place them on a large square of aluminum foil.  Drizzle with olive oil, bake for 45 minutes at 375F, and let cool.  The skins will slip right off in your hands.  One warning:  beet juice stains!  You might want to wear gloves or an apron, and wipe up any spilled beet juice quickly.  Okay, ready for some recipes to try?  Here we go!

Twenty years ago I was a vegetarian and living on my own for the first time.  My go-to snack?  A can of beets and a spoonful of orange marmalade, simmered until hot and the juice is thick and sweet.  Better than dessert!

————-

This might be my favorite salad of all time:

http://frugalgirlmet.blogspot.com/2011/02/roasted-beet-and-goat-cheese-salad.html

————-
I am making this salad on Valentines Day because I love the pink color:

http://paleospirit.com/2012/roasted-beet-and-cucumber-salad-with-yogurt-dressing/

————-

This recipe for Pennsylvania Dutch pickled red beets and eggs is one my Mom made all my life.  Now that she’s gone, my sister has taken on the tradition.  She makes them every year for Easter.  The color of the eggs – maroon on the outside, white and yellow inside – is shocking and delightful!

http://www.yankeemagazine.com/recipe/for/pennsylvania-dutch-pickled-beets-and-eggs/106

————-
Beets can be shredded and eaten raw, too!  Here’s a very minimalist raw beet salad:

http://content.markbittman.com/recipes/raw-beet-salad

————-
When I think of Russian food, my mind immediately goes to Borscht.  Ever had it?

http://www.foodnetwork.com/recipes/tyler-florence/roasted-beet-borscht-recipe/index.html

————-
And for you juicers out there, beet juice is the best!  Try out a combination of beets, carrots, and apples for a sweet and healthy treat.

Explore, experiment, enjoy! — Dana


Please visit me at Frugal Girlmet for more unique recipes!


If you would like to contact Dana in regards to this blog, please email her at Dana@girlfriendscoffeehour.com

At Home with GCH: Indian-Spiced Drumsticks

Indian-Spiced Drumsticks

It’s funny how some foods are relegated to specific dates on the calendar.  For instance, canned pumpkin is on the shelves in my grocery store twelve months a year, and yet we only think about pumpkin pie for one, maybe two months a year.  If you were to show up to an Easter brunch with a pumpkin pie, I guarantee you’d get some really strange looks!  Likewise, Buffalo wings have been pigeonholed into being a “party” food, and rarely show up for the family dinner.  Why is that?

Wings are not hard to make, but I feel like they’re a little hard to eat.  So I made a recipe that is a twist on the fiery-hot Buffalo wings, and is easier to eat, because it calls for drumsticks instead of wings.  There’s no frying, you control the level of heat, and they are easy to make and eat.  What’s not to love?

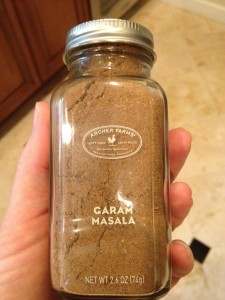
The secret ingredient is not-so-secret, since I bought it at Target!  It’s an Indian spice blend called garam masala.  Garam masala recipes vary by neighborhood and family in India, so there’s no one authentic combination of spices.  The one that I bought features black pepper, cardamon, coriander, and cinnamon.  It smells sort of like Chai tea, but is not sweet in and of itself.  If you can’t find garam masala, you can substitute one part ground cumin and one part pumpkin pie spice.

garam masala

The traditional accompaniment to Buffalo wings is carrot and celery sticks with bleu cheese dressing.  To make this a dinner, why not serve a big salad with bleu cheese dressing, or even a fancy wedge of iceberg lettuce with bleu cheese and diced bacon?

Indian-Spiced Drumsticks

Ingredients:

  • 10-12 drumsticks
  • 1/2 stick butter
  • 1/4 teaspoon granulated garlic
  • 2 tablespoons (or more!) hot pepper sauce, like Tabasco or Sriracha
  • 1 teaspoon garam masala, or 1/2 teaspoon ground cumin and 1/2 teaspoon pumpkin pie spice
  • 1/2 lime, lemon, or orange, juiced
  • a few shakes of Worcestershire sauce
  • salt and pepper

Directions:

  1. Preheat oven to 375*F.  Line a baking sheet with aluminum foil.  Spray with cooking spray, and lay out the drumsticks.  Don’t crowd them – make sure there’s plenty of room around them!  Bake for 30 minutes.  Remove from oven and lower temperature to 250*F.
  2. Make the sauce:  In a very large pot, add all the remaining ingredients.  Stir together over medium-low heat.  When the sauce is simmering, add the drumsticks and stir for 5 minutes, making sure to coat the drumsticks thoroughly.
  3. Remove wings from sauce and place back on the baking sheet.  Bake for 15 minutes.  Serve hot, with extra hot sauce if desired.

Note:  I really apologize for the shoddy quality of the photo.  I made these drumsticks on a whim for my husband and his brother for the Super Bowl.  I wanted time to set them up, make them pretty, maybe add a garnish – but no!  The men needed protein NOW!  Next week I promise to have an attractive photo for a tasty dish.


Explore, experiment, enjoy! — Dana


To view even more of Dana’s unique recipe, you can visit her at Frugal Girlmet!


If you would like to contact Dana in regards to this blog, please email her at Dana@girlfriendscoffeehour.com

At Home with GCH: Greek Chicken Soup – Avgolemono

Avgolemono


If there is one unifying theme to At Home with GCH, I would say it’s stewardship.  To me, being a good steward means using my resources wisely and creatively.  The biggest challenge to being a good steward is being thrifty and cutting down on waste.  If you haven’t already, check out the post on the Great Freezer Challenge!  And then, check out this soup recipe!

My favorite tip for saving money in the kitchen is buying a whole chicken instead of pre-cut pieces.  You can easily get two meals out of one chicken, and for the same price you would pay for a package of chicken breasts!  For the first meal, you have endless choices; but then comes the challenge—once you’ve cut the legs and breasts off, or roasted the whole bird, what do you do with the carcass? Easy answer?  Soup!

This Greek recipe is called Avgolemono.  In Greek, “avgo” means “egg” and “lemono,” well you can probably guess what that one is!  This is a fresh-tasting soup, with a bright lemony flavor.  There’s also a lot of room to customize—you can add more vegetables beyond just the spinach (bell peppers, onions, zucchini), and you can choose what kind of starch you want in it.  I’ve seen recipes that call for cooked rice, or different shapes of pasta.  However, most will call for orzo, which is a small, rice-shaped pasta.  Or, if you are cutting out refined flours or grains, just don’t add it in!

This makes a great dinner, with a salad and some bread or a roasted sweet potato.

Greek Chicken Soup – Avgolemono

Ingredients:

  • 1 chicken carcass  (You can also use 2 bone-in chicken breasts)
  • 1 (10ounce) box of frozen spinach
  • 3/4 cup orzo
  • 2 bay leaves
  • 1/2 cup lemon juice
  • 2 eggs
  • salt and pepper

Directions:

  1. Put chicken carcass in a large pot with enough water to cover.  Cook until chicken is cooked through and falling off the bone.  Remove carcass to a large bowl to cool.  Strain broth and return to the pot.  
  2. When the chicken is cool enough to handle, remove the meat from the bone and shred or chop into small pieces.  You should have 2-3 cups of chicken.
  3. Return broth to the stove and heat on medium.  When it simmers, add the box of spinach (no need to thaw), along with the bay leaves and the chicken.  Now look at the consistency of your soup.  Do you like it really brothy?  You might want  to add more water.  Do you like your soup thicker, more like a stew?  Now is the time to raise the heat and reduce your broth.
  4. When you have your preferred consistency, add the orzo to the soup.  Cook on medium heat for about 8 minutes.
  5. In a bowl, whisk together the eggs with the lemon juice.  Slowly add a ladleful of your broth to the eggs and stir, to temper them, so they don’t seize up when you add them to the soup.  Turn the heat off.  Slowly stir the egg/lemon juice mixture into the soup. Keep stirring to make sure you don’t get any eggy clumps.  Season with salt and pepper.


Explore, experiment, enjoy! — Dana


Please visit me at Frugal Girlmet for more unique recipes!


If you would like to contact Dana in regards to this blog, please email her at Dana@girlfriendscoffeehour.com

At Home with GCH: Korean Dumplings (Mandu)

mandu fried

“Mandu” in Korean, “Gyoza” in Japanese, “pot stickers” or “wontons” at your favorite Chinese restaurant—whatever you call them, everyone loves dumplings!  You can buy them frozen in many Asian grocery stores, but why not make them at home?  It’s fun, and best of all, YOU have control over what does—or does not—go into your food.

You shouldn’t have any trouble tracking down the ingredients for this recipe.  Fresh ginger and wonton skins can be found at nearly all grocery stores.  If you can’t find ground pork, you could try ground turkey instead.  Napa cabbage works best in this recipe, but you can use regular green cabbage; just make sure you shred it finely.

Ready to make dumplings?  Let’s go!

Korean Dumplings  (Mandu)

Ingredients:

  • 1/2 pound ground pork
  • 1 large carrot, shredded or chopped in a food processor
  • about 1/2 cup cabbage, shredded
  • 4 green onions, minced
  • 2 tablespoons grated fresh ginger
  • 2 cloves garlic, finely minced
  • 1 tablespoon sesame oil
  • 2 tablespoons soy sauce
  • 1/2 teaspoon salt, plus more for the cabbage
  • 1 package gyoza skins (mine had 25 skins in the package)

Directions:

  1. After you’ve shredded your veggies or chopped them in the food processor, sprinkle with a good teaspoon of salt, focusing on the cabbage. Let sit for 15 minutes or so, and then squeeze out the water. You can do this by hand, or put them in a strainer and press with your hands or the back of a spoon. You don’t want watery filling.
  2. Add pork and veggies to a mixing bowl. Then add the ginger, garlic, sesame oil, soy sauce and salt. Stir to combine or use your fingers to make sure everything is really well mixed.
  3. To fill dumplings, hold a gyoza skin in your left hand, and spoon a teaspoonful (don’t be tempted to over-fill!) of filling into the middle. Dip your finger into a bowl of water and wet one half of the edge of the skin, making a C. Fold the other half over and press to seal. I gave mine two little pleats, just to be pretty, but a straight fold is fine too.


mandu raw

To cook: you can add these to soup, or just boil them in chicken broth and add some green onions and a little soy sauce  or miso paste for a really fast dumpling soup. I like mine fried. Heat a tablespoon of sesame oil in a skillet and add your dumplings. Cook for 2 or 3 minutes on medium-low heat until they get golden and crispy (watch carefully, they burn quickly!). Flip the dumplings, add 3 tablespoons of water to the pan, and cover. This steams them and cooks the filling evenly. After 5 minutes, remove lid and cook until golden and crispy. Serve with a dipping sauce of 2 tablespoons soy sauce, 1 tablespoon rice wine vinegar, 1 tablespoon sugar, and freshly ground black pepper.


Explore, experiment, enjoy! — Dana


Please visit me at Frugal Girlmet for more unique recipes!


If you would like to contact Dana in regards to this blog, please email her at Dana@girlfriendscoffeehour.com


At Home with GCH: Focus on Health

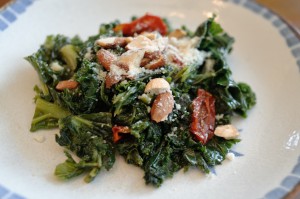
kale saute

When it comes to New Year’s resolutions, I am a champ.  Every year, I swear I’m going to lose weight, exercise more, and eat healthier.  This year, so far, I’ve done really well on one front—eating better.  There probably isn’t anyone in the world who couldn’t stand to give their daily diet a tune-up, and one of the biggest improvements we can make is to eat less “bad stuff” and more “good stuff.”  What’s the good stuff?  Vegetables, of course!  (Don’t roll your eyes at me!)

Let’s introduce the star of this show:  KALE.  It’s a hearty green vegetable in the Brassica family, related to cabbage, broccoli, and Brussels sprouts.  Any veggie you eat in the Brassica family is going to help you. Kale is the the best, and most-studied, of the group.  Kale has been shown to reduce the likelihood of many different types of cancer, and is now being investigated as a treatment for cancer and other diseases as well.  If an apple a day keeps the doctor away, imagine what a serving of kale can do!

Where I live, kale is in season now.  I’ve seen it at my local farmer’s market lately, as well as at my regular grocery store.  Whole Foods and other health food stores will always have it in stock, and if you are lucky enough to live near a Trader Joe’s, you can find it stemmed, cleaned, and bagged, all ready for your culinary prowess!

Here’s what you need to know to cook with kale:  the stem, which goes all the way up the middle of each leaf, is too tough to eat.  Your best bet is to wash it, then hold the stem in your hand.  Fold the leaf in half and hold the stem with one hand, and pull off the leafy part with your other hand.  Then rip the leaf into bite-sized pieces.  Now what?

Kale is a hearty leaf, and can stand up to long cooking and strong flavors.  Because it is an excellent source of Vitamin K, it is best served with a little fat to aid absorption of  the important nutrients.  Use either olive oil, butter, or (get ready for it)—BACON!  But don’t boil it to death.  Saute it, add it to soups, toss it into salads, or, my favorite, kale chips.  Are you ready for some inspiration?  Let’s go!

kale bag


Let’s start with my favorite, and the most “snacky,” Kale Chips.  (You can probably get your kids to eat these!)

http://www.foodnetwork.com/recipes/melissa-darabian/crispy-kale-chips-recipe/index.html

_____
Here’s one from me, featuring sautéed kale, sun dried tomatoes, and almonds:

http://frugalgirlmet.blogspot.com/2012/08/superfoods-salad-warm-kale-and-oven.html

_____
Kale plays well with others!  Try it in Coleen’s yummy soup recipe:

http://girlfriendscoffeehour.com/2013/01/07/gch-whats-on-your-plate-souppalooza-part-two/

_____

Here’s a salad, for you hearty souls who are ready to take it to the next level and EAT.  YOUR.  GREENS!  (PS: I make a salad similar to this once a week and it is delicious and filling!)

http://www.tastebook.com/recipes/1835410-Emerald-Sesame-Kale

_____

Here is another great way to get your greens in!  It will also work for the kids, too! A lot of people think Green Smoothies are going to taste bad.  Not at all!  Especially when you add  fruit to your ingredients!  I always add a banana, or strawberries, blueberries, blackberries, an apple, and more.  Once all of the ingredients are blended together, the main thing you will taste is the fruit!  So don’t be afraid to try this recipe!  I think you’ll be glad you did!

GREEN SMOOTHIE

Green Smoothie

1 handful of kale or spinach ( I use a combination of both)

1 tbsp of almonds

1 tbsp flaxseed

2 scoops of your favorite protein powder

1 banana

16 oz of filtered water

6 ice cubes

Directions

Using a high-power blender, blend all ingredients on high for at least 1 minute.  If you are using a lower power blender, you will want to blend on high for at least 3 to 4 minutes.  Ingredients should smooth and creamy!  Pour yourself a glass of this delicious drink, and keep the rest of it stored in a Mason jar until you’re ready for your afternoon Smoothie!  Makes just over 1 quart.


Explore, experiment, enjoy! — Dana


Please visit me at Frugal Girlmet for more unique recipes!


If you would like to contact Dana in regards to this blog, please email her at Dana@girlfriendscoffeehour.com
At Home with GCH: Greek Salad

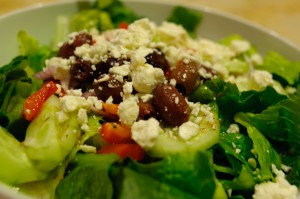
Greek Salad

We are big salad eaters at my house.  (And when I say “we”, I mean my husband and I.  My girls won’t go near the lettuce unless it’s shredded in a sandwich, and even then it’s touch and go!)  We’ll have a big salad for dinner at least once a week, sometimes more.  I’m always on the lookout for ways to eat healthier, get more veggies, and eat less refined carbohydrates.  This Greek Salad really fits the bill!

If you’ve made this salad before or had it at a restaurant, you know it’s fresh, bright and simple.  The two things that make it spark and give it that clean taste are the dressing and the cheese.  The dressing is maybe the easiest vinaigrette around—all you need are dried oregano, lemon juice, and olive oil!  Taste it, add salt, pepper and a pinch of sugar to taste, and you’re done!  The cheese is a crumbly white cheese called feta.  It tastes sort of like goat cheese, but it’s a little saltier, a little drier in texture.  It’s also very low in calories, so feel free to add a few tablespoons to your salad.

We had this salad last night, in huge bowls, with braised chicken.  If you want to make it a one-dish meal, add diced chicken or grilled shrimp right to the salad.  Healthy and delicious—it’s what’s for dinner!

Greek Salad

Ingredients:

  • 2 heads romaine lettuce
  • 1/2 red bell pepper, thinly sliced
  • 1/2 cucumber, peeled and sliced in half, then into half-moons
  • 1/4 red onion, sliced as thin as possible
  • 1/4 cup black olives (I like Kalamata; make sure you buy pitted olives – I hate spitting out the pits!)
  • 1/4 cup crumbled feta cheese
  • 1 teaspoon dried oregano
  • 1 lemon, juiced
  • salt, pepper, and a pinch of sugar
  • 1/4 cup olive oil

Directions:

  1. Make the dressing:  In a small Tupperware cup with a tight-fitting lid, mix together the oregano, lemon juice, salt, pepper, and a pinch of sugar.  Set aside – this gives the oregano time to “bloom” in the lemon juice and release it’s flavor.  If you add the oil too soon, you coat the oregano and it’s flavor won’t be as strong.
  2. Cut the lettuce into bite-sized pieces and wash well.  To compose, fill a large bowl with the lettuce, then top with bell pepper, cucumber, onion, olives, and feta.
  3. Add the oil to the oregano and lemon juice, shake well to combine, and pour over salad.

Notes:  This recipe makes 2 big salads, or  4 side salads.  Many people add tomato to a Greek Salad, and I encourage you to try it out—in the summer, when they are in season.  If you have leftover salad ingredients, this makes a great wrap—just roll it all up in a tortilla and eat like a burrito – especially great with chopped, cooked chicken! 

Explore, experiment, enjoy! — Dana


Please visit me at Frugal Girlmet for more unique recipes!

If you would like to send Dana a private message in regards to this recipe, please email her at: Dana@girlfriendscoffeehour.com.

GCH: What’s on Your Plate? Fish Tacos

 Fish Tacos

Ah, the humble fish stick.  When I was a kid, my favorite meal was fish sticks, macaroni and cheese, and whatever green vegetable was riding shotgun.  I still love fish sticks, and so do my kids.  And while they’re terrific with tartar sauce, sometimes it’s fun to take the familiar and shake it up.  And that leads us to – Baja-style Fish Tacos!

These tasty treats may be unfamiliar to you if you’ve never visited Southern California or farther down south, into the Pacific Coast of Mexico.  Fish tacos in Southern California are part of surf culture, the favorite food of stereotypically blonde, tan dudes with surfboards who say “gnarly” and wear shorts year round.  And while they’re pretty easy to find in my neighborhood, they probably aren’t in yours.  So make ’em yourself!

There are a few basic, mandatory components to the fish taco.  First is corn tortillas – save the flour tortillas for burrito night.  Next is the fish: regular fish sticks will work, as will the larger fillet-style pieces, but you definitely want the crunchy breading.  Also important are the cabbage and cilantro – regular old green cabbage, sliced as thinly as possible (but not shredded like in coleslaw), and plenty of leafy cilantro.  Last comes a big squeeze of lemon or lime.  I like the “crema” listed in this recipe, but you can also use regular tomato salsa too.  After these ingredients, you can add more to suit your taste – diced onion, avocado, even shredded cheese.

Are you ready to do this?  Cowabunga!

Fish Tacos

Ingredients:

  • 1 package fish sticks
  • 1 package small yellow or white corn tortillas
  • 1 small head cabbage
  • 1 bunch cilantro (use the rest to make the Fajitas Salad!)
  • 2 tablespoons mayonnaise
  • 2 tablespoons sour cream or plain yogurt
  • 1 large lemon or lime
  • 1/2 teaspoon ground cumin
  • salsa, avocado, cheese, green or red onion, or whatever else you like on your tacos

Directions:

  1. Bake the fish sticks according to the package directions.  While they are cooking, slice the cabbage as thin as possible.  If you have a food processor, you may want to try that.  Wash the cilantro and remove the tough stems.
  2. Prepare the crema:  Whisk together the mayo, sour cream, and the juice of half the lemon.  Stir in the cumin and refrigerate until ready to use.  If it’s too sour for you, add a dash of sugar.  You can also add tabasco or a little chipotle right to the crema.  Or, my favorite, if you have any leftover dressing from making the Fajitas Salad, use this in place of the crema!
  3. Wrap as many tortillas as you need in a damp dishtowel.  Place the dishtowel between two plates to seal it up, and microwave for 30 seconds.  This gets them hot, flexible and delicious!
  4. To assemble:  Lay out your tortilla (some people use two at a time, which keeps it from ripping or falling apart) and spoon a little crema on the bottom.  Top with fish sticks, sliced cabbage and plenty of cilantro.  Squeeze a little lemon on top, and add any other optional ingredients you like.

Explore, experiment, enjoy! — Dana

Please visit me at Frugal Girlmet for more unique recipes!