January 26, 2025

Turkey-Quinoa Meatloaf

Ahhh, meatloaf!  Either you love it…or you hate it.  (Doesn’t it seem that most folks fall into one category or the other?)  How about your family?   Meatloaf is on our menu 2 or 3 times each month…along with the leftovers, too.  So, I am always on the lookout for an additional FABulous ingredient to change it up.   We got over the hurdle of making it gluten free by the addition of dehydrated potatoes (or, even better, dehydrated sweet potatoes…oh!my!).  But that doesn’t fit into our menu right now.  For a month or so now, we have been eating really low-carb…which presents a problem with meatloaf.  So I been thinking of something to sub in for breadcrumbs or dehydrated potatoes.  And I thought perhaps some leftover quinoa…and when I googled some recipes, I found that this was not an original thought. 😉  There’s a ton of recipes and variations out there!  Here is what we enjoyed; hope you and your loved ones do, too!

Turkey-Quinoa Meatloaf

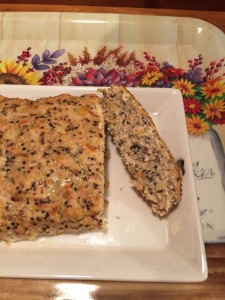
2015-10-13 18.46.21

ingredients :

1 T olive or coconut oil
1 small sweet onion
1 small zucchini
handful of baby carrots
1 stalk celery
1/2 red pepper
1/2 yellow pepper
handful mushrooms
2# ground turkey, 94 or 99%
2 large eggs, whisked
1/4 cup spicy mustard (or bbq sauce, or ketchup)
2 cups cooked quinoa, cooled
1 T dried parsley
1 T dried thyme (or oregano)
1 T each, sea salt and freshly ground pepper

directions :

  • preheat oven to 375
  • line a large baking sheet with parchment paper
  • clean all veggies and cut into chunks
  • in batches (depending on size of your food processor) chop all of the veggies into small-sized dice
  • heat oil in a large sauté pan over medium high heat
  • add the chopped veggies, stir ’til oil is well distributed.  cook veggie mixture ’til softened.  set aside and let cool
  • in a very large mixing bowl, combine turkey, eggs, cooled quinoa and vegetables, herbs and seasonings.
  • mix well by hand ’til thoroughly combined
  • divide in 1/2; shape into two equal loaves about 2-3 inches high on the parchment paper-lined baking sheet
  • bake for 40-45 minutes. done when temp reaches 165. allow to sit for 5 minutes or so to firm up

♥   ♥   ♥   ♥   ♥

God loves you!  ♥  (Don’t ever forget that!)

♥  coleen
Christmas Morning Breakfast

♪♬♪ It’s the most wonderful time of the year! ♪♬♪ Here we are…approaching Christmas Day!  Still many tasks to accomplish here!  How are you doing with your lists?  Lots of items checked off?  I am getting there…

  • game for the grandkids✔
  • Robert’s birthday card
  • gift for upstairs neighbor ???
  • a few additional stocking stuffers
  • waiting for 3 packages to arrive ✔✔

and groceries for:

  • Robert’s birthday dinner ✔
  • Christmas Eve with MKEKLR ✔
  • Christmas morning ✔
  • Aldi list

But amidst all of these details, what joy is ours as we contemplate just HOW MUCH God Almighty loves us!  He cared SO MUCH for us that He sent His precious Son to the earth to be born as a human and to live amongst men.  Ultimately, to sacrifice Him to redeem and save us so we could be called His children!  Hallelujah…what a Savior!

I pray for you (and me, too), my friends, that we will keep our priorities in order.  Even if there were no Christmas tree decorated with glittery ornaments and special momentos…if there were no carols to sing…if there were not piles of beautifully wrapped presents under the tree…we would still have MUCH to be singing God’s praises and thanking Him for as we remember the reason for the seasonJesus our Savior.

For unto you is born this day
in the city of David a Savior,
which is Christ the Lord.
Glory to God in the highest,
and on earth peace, good will toward men.
Luke 2:11,14

 *    ♥  ~  ✝  ~  ★    *

Here’s our menu for a simple Christmas morning breakfast:
fruit salad
mini quiche
spicy Thai tea

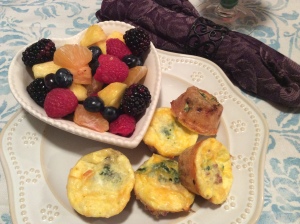
The best part about this breakfast will be that it can all be prepared ahead of time!  When we are ready to eat, just pop some mini-quiche into the toaster oven to reheat, dish out some of the fruit salad, and pour beverages; love it!  Oh!…there is one important tip to success with these mini-quiche: the fillings (veggies and meat) should be cut up fairly small.   Whenever I make this recipe, i quadruple (yes, i DO!) the ingredients.  These little two-bite quiches freeze beautifully.  Enjoy!

2014-12-21 21.01.42

Mini Quiche (makes one dozen)

egg filling:

3 large eggs
1/2 cup milk (I used coconut milk)
1/4 teaspoon kosher salt, freshly ground black pepper

  • whisk these 4 ingredients together, thoroughly blending the eggs
  • pour into a container with a spout (for ease in filling muffin tin) and set aside

Spinach&Swiss with Bacon

1/2 cup frozen chopped spinach, defrosted
2 slices bacon, cooked and crumbled
4 tablespoons chopped onion
1+ tablespoons dried dill or tarragon
1/2-3/4 cup finely grated Swiss cheese

place spinach in colander, allow to defrost, and then squeeze dry (with your hands); set aside preheat oven to 375
grease with melted butter (or spray with cooking spray) your mini muffin tin; be thorough
cook bacon, cool, and crumble
saute onion in a bit of the bacon drippings until soft
when done, mix with spinach and herbs; let mixture cool
evenly distribute the veggies, the bacon, and the cheese among the muffin cups; these should be at least 1/2 full
then carefully pour the prepared Egg Filling mixture into each muffin cup. fill almost full but do not overfill!
bake for approximately 12-15 minutes until the eggs puff and are lightly golden brown
remove from oven; let sit for 10 minutes, then carefully remove from muffin tin. if you have thoroughly greased your muffin tin in preparation, this shouldn’t be too hard. I used a small, flexible spatula—but a teaspoon or small knife will do—and just run it around the edge of each quiche to loosen. serve immediately.

Broccoli-Cheddar with Ham

4 tablespoons chopped onion
1/2 cup chopped broccoli (cooked and cooled; I used frozen)
1/2 cup cooked ham, chopped small
1+ tablespoons dried crushed rosemary or marjoram
1/2-3/4 cup of finely grated sharp Cheddar
coconut or olive oil

preheat oven to 375
grease with melted butter (or spray with cooking spray) your mini muffin tin; be thorough
cook ham cubes for 2-3 minutes, set aside to cool
saute onion in a bit of olive oil until soft
when done, mix with broccoli and herbs; let mixture cool
evenly distribute the veggies, the ham, and the cheese among the muffin cups; these should be at least 1/2 full
then carefully pour the prepared Egg Filling mixture into each muffin cup. fill almost full but do not overfill!
bake for approximately 12-15 minutes until the eggs puff and are lightly golden brown
remove from oven; let sit for 10 minutes, then carefully remove from muffin tin. if you have thoroughly greased your muffin tin in preparation, this shouldn’t be too hard. I used a small, flexible spatula—but a teaspoon or small knife will do—and just run it around the edge of each quiche to loosen. serve immediately.

filling variations (choose one from each category)

veggies: (1/2 cup) of either sauteed mushrooms, peppers, seeded tomatoes, zucchini, butternut squash (this is a great way to use up bits of leftover veggies in your ‘frig!)
cheese: (1/2-3/4 cup) of your favorite Cheddar, Monterey Jack, goat cheese, Gruyere, Parmesan, Fontina, Provolone, Gouda
herbs: (1+ tablespoon) of your favorite: parsley, chives, tarragon, basil, dill, rosemary, marjoram
meat: (1/2-3/4 cup) finely chopped ham, cooked&crumbled bacon or breakfast sausage, prosciutto

♥  ♥  ♥  ♥  ♥

God loves you! (Don’t ever forget that!)
Merry Christmas to you and yours!  ♥ coleen

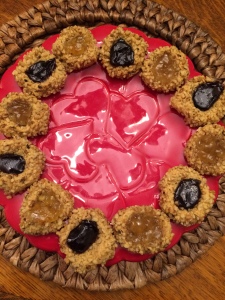
Thumbprint Cookies

It is the season for cookie baskets and cookie exchanges. How many dozen cookies have you made already? How about you, Coleen…(you ask?) Ummmm, zero….well, ‘til these! (I know, I know…better get on it!) Yup, part of my plan for this week. Here’s what I am hoping to accomplish.   I would LOVE to hear what varieties you are making for your loved ones this year!!!

2014-12-14 19.53.53

Mexican Wedding Cookies (Snowballs)
Gingerbread Hearts
Pignoli Cookies (here’s my recipe)
Chocolate Chip Oatmeal
Italian Almond Cookies (Robert’s constant request-here’s my recipe)
Spritz (my all-time, hands-down, yes, please! favorite)

But these are where I started. I just love thumbprint cookies! Most of you know that I bake/cook gluten-free. These also are paleo, dairy-free, and refined sugar-free. (Hope that is helpful to a few of you!) And all of that helps to keep these within my healthy but oh-so-yummy POV!  Enjoy!

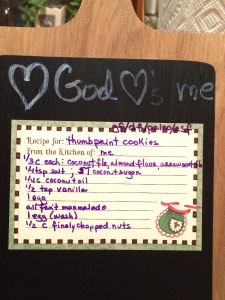
Thumbprint Cookies

ingredients:2014-12-14 21.36.14
1/3 cup arrowroot flour
1/3 cup almond flour
1/3 cup coconut flour, sifted
1/4 teaspoon sea salt
5 tablespoons coconut sugar**
1 tablespoon water
1/4 cup coconut oil, melted
1/2 teaspoon vanilla extract
1 egg, room temperature
all-fruit marmalade or jam (I used ginger/orange and raspberry)
1 egg white beaten with 1 tablespoon water, for egg wash
1/2 cup finely chopped nuts (I used walnuts)

directions:

  • preheat oven to 350
  • line baking sheet with parchment paper
  • in a large bowl, whisk together dry ingredients (first 5)
  • in mixer bowl, combine the wet ingredients (next 4) for 1 minute
  • add the dry ingredients to the wet ingredients and combine with mixer
  • take tablespoon-sized balls of dough and quickly roll into a ball
  • dip into egg wash and then run through chopped nuts
  • place on lined baking sheet about 1″ apart
  • make an good-sized indentation with your thumb (or a wooden spoon handle)—but don’t poke through the bottom
  • fill the indentation with about 1/2 teaspoon marmalade/jam
  • bake for approximately 15 minutes ‘til just lightly browned; remove from oven
  • carefully transfer to a cooling rack
    makes 15 to 20 cookies

** NOTE: these are on the not-so-very-sweet side…you may want to add additional sugar!

 ♥  ♥  ♥  ♥  ♥

God loves you!  ♥  (Don’t ever forget that!)

♥  coleen
Fruity Energy Bars

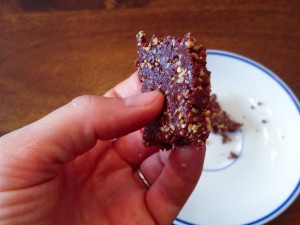
Fruity Energy Bars resize

I’ve got a lot of hoops to jump through when it comes to making snacks for my girls.  I try to eat Paleo myself, and while I do serve my girls grains and legumes, I am always searching for recipes that rely on Paleo ingredients first.  Next, my older daughter is allergic to peanuts and tree nuts.  That eliminates a giant swath of choices in the Paleo category, which excludes grains in favor of nuts.  So for baking, that leaves me either coconut products (which we love and use often), or seeds, like pepitas or sunflower seeds.  I found a recipe that sounded good, reconfigured it for our needs, and now I proudly present:  Fruity Energy Bars!

In the grocery store, you’ll find half an aisle dedicated to energy and granola bars.  I love them and I love that, for the most part, they’re healthy and nutritious.  They are, however, kind of pricy – sometimes two or three dollars a bar!  And it seems like the ones with the fewer ingredients are even more expensive!  (I’m looking at you, Larabar!)  Now, these Fruity Energy Bars couldn’t be quicker – just three minutes in the food processor, and about half an hour to chill and firm up.  I think you could easily exchange the dried cranberries for another dried fruit – apples, apricots, raisins, prunes, or cherries would all work.  If you want to use nuts instead of sunflower seeds, try almonds or walnuts.  They do warm up very quickly and get soft, so keep them in the fridge until ready to eat.  Ready?  Get energized!

Fruity Energy Bars

Ingredients:

  • 1 cup pitted dates
  • 1 cup dried cranberries
  • 1 cup sunflower seeds (I used roasted and salted)
  • 1/4 cup unsweetened flaked coconut
  • 1/4 cup chocolate chips

Directions:

  1. Pour all the ingredients into the bowl of  your food processor.  Pulse to blend, then mix for about 3 minutes.  You can blend it all the way together and it will form a ball, but I took mine out before that so I could still have a little texture to the bars – kind of like the consistency of sticky sand.
  2. Line an 8×8 pan with plastic wrap, or grease with a little coconut oil.  Press the mixture into the pan and press down with the back of a big spoon.  Refrigerate for at least half an hour.  Cut into 1″x4″ bars.  Get energized and go be productive!

Explore, experiment, enjoy! — Dana

—————————————————————————————————
To view even more of Dana’s unique recipes, you can visit her at Frugal Girlmet!

Cauliflower Mac and Cheese

Ok…I am really excited about this recipe…hope you like it, too!  Cauliflower Mac and Cheese!  Oh, yeah.  This has all kinds of tags associated with it: healthy but oh-so-yummy, paleo, low-carb, gluten free, low fat, vegetarian, comfort food (if you think of any additional, let me know, please!).
Here on our Monday installment of At Home w/ GCH, we have been featuring recipes which include Fall in-season fruits and veggies.  This week is our final blog on the subject. Our featured veggie is Cauliflower. Here are some nutritional facts about this ‘superfood.’
“We” love cauliflower here in our household.  I say, “we” because every time I tell my husband, Robert, that I have a new way to fix cauliflower, he never (may I repeat, never) responds enthusiastically.  But I am happy to report that every time (may I repeat, every time) he eats the dish I’ve prepared, his response is always (may I repeat, always) enthusiastic.  Ok—it’s taken me a while to figure this out but apparently the cauliflower dishes he grew up eating were just boiled, (overcooked), soggy, gray cauliflower-yucky!   I trust that if you have had experiences similar to Robert’s, you will try this Cauliflower Mac and Cheese and have a new yummy experience!  Enjoy!

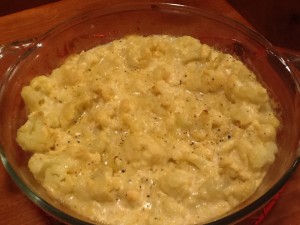
Cauliflower Mac and Cheese2013-11-01 19.11.26

Ingredients:

1 large head cauliflower, cut into small florets
1 can evaporated milk
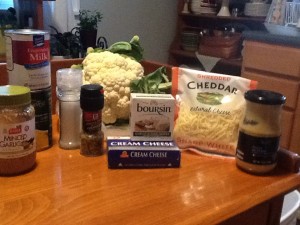
1/2 cup chicken or vegetable broth 2013-11-01 17.36.09
2 ounces cream cheese, cubed (or goat cheese, or Boursin)
2 teaspoons Dijon mustard
1 tablespoon chopped garlic
1/2 cup shredded sharp Cheddar cheese, plus 1/4 cup for topping the casserole
kosher salt, freshly ground black pepper
1/4 teaspoon nutmeg (freshly grated, if possible)

Directions:

  • Preheat the oven to 375.
  • Bring a large pot of water to a boil, seasoning the water with salt.
  • Lightly grease a 2 quart baking dish with butter or cooking spray.
  • When the water comes to a full boil, toss in the cut-up cauliflower; return to a boil and parboil ‘til crisp-tender, about 5 minutes.
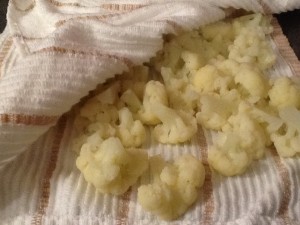
  • Drain well in colander, and then lay out on a clean dishtowel and pat dry. <The drier the cauliflower, the better the cheese sauce will cling to it.>

2013-11-01 18.33.57

  • Transfer the cauliflower to the baking dish and set aside.
  • Bring the evaporated milk and broth to a simmer in a small saucepan over medium low heat.
  • Whisk in the cream cheese, mustard, chopped garlic; continuously whisking ‘til smooth.
  • Add the 1/2 cup of shredded cheese, along with the seasonings and whisk just ‘til the cheese melts, about 2 minutes.
  • Pour the cheese sauce over the cauliflower, and stir gently to combine thoroughly.
  • Top with the remaining 1/4 cup cheese and bake for approximately 15 to 20 minutes. Turn up the oven temp to 425, and bake for 5 additional minutes; just ‘til it begins to brown.
  • Let cool 5 minutes before serving.

♥  ♥  ♥  ♥  ♥

God loves you!  ♥  (Don’t ever forget that!)

♥  coleen
Gluten Free Zucchini Bread

Here on our At Home with GCH blog, Monday’s are always focused on healthy but oh-so-yummy! recipes. Today our series on summer recipes featuring in-season produce continues. Our featured ingredient—again—this week is zucchini!  Our own little garden (ok, honestly, it is Robert’s garden) is pumping out the zucchinis.  How about you?  Are you checking Pinterest or roaming the internet looking for yummy zucchini recipes?  This zucchini bread recipe uses almond flour so it is low in carbs, high in protein…very paleo-friendly, too!  Enjoy!

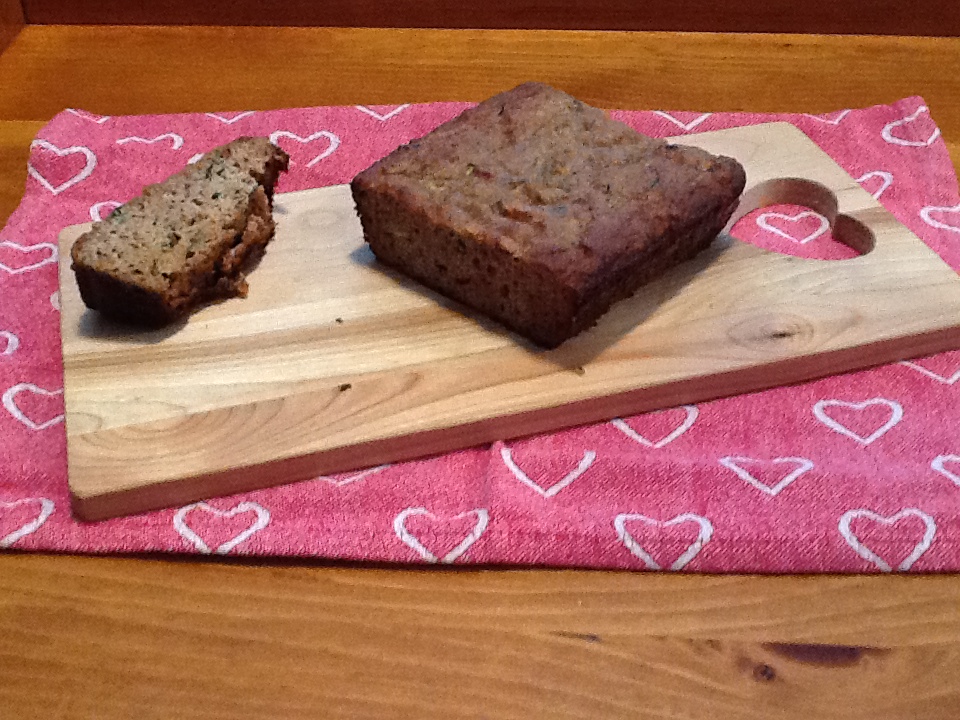
2013-08-16 10.34.44

Gluten Free Zucchini Bread

Ingredients:
1+1/2 cups blanched almond flour
1 teaspoon baking soda
1/4 teaspoon salt
1+1/2 teaspoon cinnamon
1/2 cup chopped walnuts or 1/2 cup chocolate chips (optional)
1 medium-to-large sized zucchini
2 large eggs
2-3 tablespoons honey or agave nectar
1 very ripe banana, mashed
1 tablespoon melted coconut oil

Directions:
Preheat oven to 350.  Grease a loaf pan and set aside.
Grate the zucchini (sans the seeds!) onto a tea towel; you should have about 1 cup.  Roll the towel up and squeeze to remove excess moisture from the zucchini. Set aside.
Whisk dry ingredients together in a medium bowl.
In a larger bowl, mash the banana and then whisk in the eggs, agave, and coconut oil.  Stir in the zucchini.
Add dry ingredients to wet, whisking until well combined.
Pour batter into greased loaf pan and bake for 35-40 minutes, or ‘til a toothpick inserted into the center comes out clean.

♥  ♥  ♥  ♥  ♥

God loves you!  ♥  (Don’t ever forget that!)

♥  coleen
At Home with GCH: Coconut Flour Pancakes

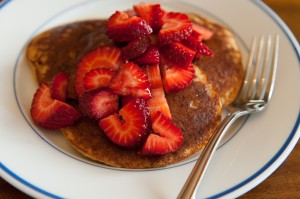
coconut flour pancakes

Through my gym, I am doing a Paleo Challenge.  For 5 weeks I am cutting all processed foods out of my diet, as well as some other “irritant” foods, so no sugar, no grains, no legumes, no dairy, and no alcohol.  The goal is to eat the way our “caveman” ancestors ate, with the belief that all the chemicals and lab-created foods we eat are not good for us, and that our bodies work the way they’re supposed to when we only eat meat, vegetables, fruits, nuts, and fats (like olive oil, coconut oil, and avocado).  Just the way God created us!

Does that mean that all the “fun” foods are off limits?  No!  No grains mean no flour, no oatmeal, no corn—and that takes a lot of American food off the table.  Coconut flour, to the rescue!  This is flour made from the dried and ground flesh of the coconut.  It’s full of protein, has lots of fiber, is gluten-free, and is pretty all-around great for you.  It’s much coarser than wheat flour, so when you make these pancakes, they won’t be the cakey, smooth type you get at a diner.  These are more substantial, and they keep and reheat well.  The next day after I make them, I like to nibble on them, slathered in homemade almond butter.  Yum!

Coconut flour can be found at Whole Foods, other health food stores, and online at Amazon.  I like Bob’s Red Mill brand, but there are others out there too.  A one-pound bag will last you a while, so don’t think you’re getting cheated.  Just keep it in a Ziploc bag in your pantry, and stay tuned for more coconut flour recipes from me.  I’m in love with the stuff, and I can’t wait to share.

Coconut Flour Pancakes

(Recipe courtesy paleospirit.com)

Ingredients:

  • 4 eggs, room temperature
  • 1 cup coconut milk (you can use regular milk too!)
  • 2 teaspoons vanilla extract
  • 1 tablespoon coconut nectar (or honey, or 1 packet of stevia)
  • 1/2 cup coconut flour
  • 1 teaspoon baking soda
  • 1/2 teaspoon salt
  • 1/4 teaspoon cinnamon (or pumpkin pie spice!)
  • coconut oil for frying (you can use cooking spray to coat a non-stick pan, too)

Directions:

  1. Beat eggs in a stand mixer (or just whisk mightily!) until frothy.  Mix in milk, vanilla, and sweetener.
  2. In a small bowl combine coconut flour, baking soda, salt and cinnamon.  Mix together.
  3. Whisk flour mixture into egg mixture and blend well so there are no lumps.
  4. Grease pan with coconut oil (my favorite!) or, if you are a using a good non-stick pan, spray with cooking spray.  (Side note:  Trader Joe’s sells both coconut oil in a jar, and coconut oil cooking spray.  Love!)  When the pan is hot, use a large tablespoon to pour out pancakes.  I make mine about 4 inches in diameter.  These are thick, and you may need to smooth them out a bit.  Cook until dry on top, just like regular pancakes, about 2 or 3 minutes, then flip and cook for another minute or so.  Serve hot!

This recipe makes 12-16 pancakes, depending on the size.  Store any leftovers in a Tupperware container in the fridge – they reheat nicely in the microwave, or eat them cold with nut butter, cream cheese, whatever you like.  My older daughter is a traditionalist and likes hers with butter and maple syrup.  My younger daughter likes her with fruit and maple syrup.  I  like them with sliced bananas, walnuts, and some flaked, unsweetened coconut on top – tastes like Hawaii.  😉


Explore, experiment, enjoy! — Dana


To view even more of Dana’s unique recipes, you can visit her at Frugal Girlmet!