November 21, 2024

4 Steps to Strewing for Education

Are you ready for Week 4 of Organizing Your Homeschool for a Brand New Year? This week we will discuss the term ‘strewing‘ and talk about how this may work for your home and learning lifestyle.

4 Steps to Strewing for Education www.GirlfriendsCoffeehour.com #homeschool #organization #strewing

Strewing is a word you may hear more often tossed around in unschooling or child-led learning circles. Sandra Dodd defines it as “leaving material of interest around for our children to discover.”  Aadel Bussinger offers an ebook called The Art of Strewing and it is filled with many wonderful ideas!  Aadel also offers many articles on strewing in different circumstances over at These Temporary Tents.

4 Steps to Strewing for Education

  1. Know your child.
  2. Choose items based on what you know about your child’s interests.
  3. Place the chosen item somewhere it can be easily found, or simply tell your child that you found xyz and thought they might be interested.
  4. Leave your expectations behind. It could be that your child is not interested in the game, art supplies, movie, etc. right now. However, they often will pick it up a day, weeks, or months later. The ‘art’ is in being able to allow that exploration on their own timetable.

So what does strewing look like in a child-led learning environment?

  • An exploration table with just one item or related set of items where your child may explore, engage in imaginary play, and generally learn more about these items with all of his or her senses!
  • Books left on the coffee table for children (and adults!) to pick up at their leisure to read or gaze at pictures until their hearts are content.
  • Chalk and construction paper placed where little ones will find it and create drawings and experiment with color as much or as little as they choose.

4 Steps to Strewing for Education www.GirlfriendsCoffeeHour.com #strewing #homeschool #organization

We set this out over the holidays and our girls spent many hours playing with Joseph, Mary, and baby Jesus. I plan to set out a new toy, or otherwise fun-to-explore item, for them to enjoy every couple of weeks, or perhaps monthly.

  • An impromptu trip to the park or for a walk around the neighborhood to examine the newly fallen snow or the changing colors of the leaves.
  • A new game laid out and ready to be played with the family.
  • Watching an entire Netflix series about airplanes, World War II, dragons, and more, simply because that is what your child is ‘into’ at the time.

There are many more—and different—scenarios that could be described. The above are just a few of the scenes that have played out in my home, a few ways that I have found to easily strew and pique the interest of my children.

If you do more research via the above-linked sites, or if you get Aadel’s book, you will learn much more about what strewing looks like and glean many wonderful ideas for implementing this idea in your own homes.

Do you have ideas for strewing or encouraging child-led learning? Please share your thoughts and tips below!

Six Steps to Ridding Your Shelves of Extra Homeschool Curriculum

Six Steps to Ridding Your Shelves of Extra Homeschool Curriculum www.GirlfriendsCoffeeHour.com #homeschool #organizing

Welcome back to part 2 of Organizing Your Homeschool for a Brand New Year! This week we will tackle what to do with your extra curriculum and other items that were not cleared out last week.

Ridding Your Shelves of Extra Homeschool Curriculum www.GirlfriendsCoffeeHour.com #organization #homeschool

Six Steps to Ridding Your Shelves of Extra Homeschool Curriculum 

  1. Determine which items you want to sell and which you would like to donate.
  2. List items on Ebay, hold a garage sale, find a local consignment shop or sale to participate in, or post them on Facebook or your blog as For Sale. Or collect your items all year and participate in your local homeschool curriculum sale at the end of the school year. Often, there are several taking place in any area.
  3. Take boxes and bags of the items you will not try to sell to your local Goodwill, or donate to a church or neighborhood family you know that could use extra clothing, toys, and books. There may be a local shelter or daycare that needs what you have.
  4. Check with local churches if you do not know of anyone in need. My church has a section on their web site for posting items needed or items being offered for sale or donation.
  5. Post a notice in your local homeschool group’s forum or in any Facebook groups you may be a part of (if allowed) about items you would like to donate to homeschool families. I often hear of or from people looking for free or low-cost items because they don’t want to spend a lot before trying, or they just don’t have the extra money to spend at the time. You have the opportunity to be a huge blessing to another homeschooling family by donating your gently used books.
  6. Another possibility is to offer your books and homeschool curriculum for loan or rent. I do not know the ins and outs of this myself, but I feel sure you could do a little research to find out more. Many families simply do not have room to store curriculum permanently, or perhaps they just don’t care to. This could be a workable solution for you and them!

Do you have more suggestions for clearing off your homeschool shelves? Please share in the comments. If you missed Part 1 of this series, please be sure to visit Organizing Your Homeschool for a Brand New Year


*   *   *   *   *   *   *   *   *   *

Interested in joining us for our next Online Bible Study that starts on January 13, 2014?   Click HERE for more details!

7 Ways to Stay Focused as You Work Towards the Goal of Decluttering

Each year, as we enter the new year, many of us begin to set goals or make resolutions. Personally, I don’t make resolutions. I choose a few goals and try to meet those throughout the year. For me, changing the wording helps with that feeling of less-than that often comes when I don’t meet the goal. This way, I still have the rest of the year to succeed!

This month I will be writing a series of posts for At Home w/ GCH that discuss getting our homeschools organized for the new year. With this series, I am hoping to help many of you, as well of myself, as we focus on just one task each week. Feel free to take more than one week to complete each task, though. It will probably take longer than that for me here, since I am also in the midst of homeschooling and working each day, too!

7 Ways to Stay Focused as You Work Towards the Goal of Decluttering www.GirlfriendsCoffeeHour.com #organization #homeschool

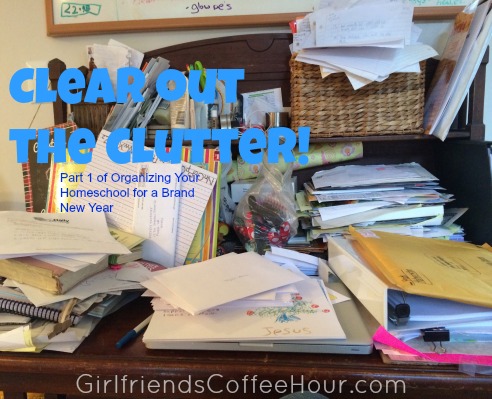
This week our task is decluttering. I am sorry to say that my home is often cluttered. The job of decluttering seems to be a constant work in progress, and can very easily get me overwhelmed if I don’t focus.

7 Ways to Stay Focused as You Work Towards the Goal of Decluttering www.GirlfriendsCoffeeHour.com #organization #homeschool

7 Ways to Stay Focused as You Work Towards the Goal of Decluttering

  1. Set a timer and work for a specific amount of time, then take a break. You will be impressed with how much you actually accomplish in that concentrated amount of time.
  2. Start with one small space. A desk, a drawer, a shelf. Simply beginning is half the battle.
  3. Throw away extraneous papers that are lying around.
  4. File bills, pay stubs, and other important documents.
  5. Purchase plastic or cloth bins to use as storage (found at places like Target, Walmart, or Goodwill and other thrift stores).
  6. Sort toys and books into ‘like’ piles and place them in bins together. This simple step helps so much when it is time for you and your children to clean up!
  7. Label the bins according to the item—blocks, books, Mr. Potato Head, cars, etc.

Do you have tips and tricks for decluttering? Please leave your suggestions in the comments section below! Be sure to check Organizing Your Homeschool for a Brand New Year  for other posts as we move forward with this organizational series throughout the month of January.

At Home with GCH – How Clean is Your Purse?

how clean is your purse

Did you know your purse may be harboring a dangerous cocktail of viruses and bacteria such as e-coli, salmonella, staph, and others I don’t even want to say? Think about the places you put your purse: on the floor of the car, in the child’s seat of a shopping cart, on the bathroom floor or counter, on the counter at the checkout register, on the floor at the restaurant, on the floor at the movie theatre… all of which are dirty, germy places. Then what do you do? You pick it up and carry it around with you, setting it on tables, your kitchen counter, your couch, and your bed, transferring all of the creepy crawlies you’ve picked up along the way right into your home. It’s a recipe for trouble.

Today, I am issuing a challenge to you: Clean your purse, inside & out. (For extra credit, clean all of your purses.)

To clean your purse:

  1. Empty the contents of your purse and wallet. Throw away old receipts, shopping lists, wrappers, pens that don’t work, and anything else you no longer need.
  2. Check the website of your purse’s manufacturer to educate yourself on any special care instructions. When cleaning my Miche purse, I went to www.michebag.com, and learned to wipe it down with a damp cloth. I use a baby wipe to clean mine. Whatever I’ve picked up along the way will then go right in the trash, rather than in my laundry room.
  3. Sanitize it, especially the bottom and handles. I use a disinfecting wipe for this. (Keep special care instructions in mind so you don’t damage it.) In a pinch, I have put hand sanitizer on a paper towel and wiped the handles, then the bottom of the purse.
  4. Turn your purse upside down and shake it out. To pick up any debris that may still be inside, wrap tape around your fingers, sticky side up, and press your fingers onto the fabric.
  5. To clean the fabric on the inside of your purse, mix warm water with a little bit of vinegar (or a couple drops of baby wash or mild dish soap) and wipe the fabric with a rag dampened with the water/vinegar mixture. Once the fabric dries, the vinegar smell goes away.
  6. Using the same method you used to clean the outside of your purse, clean your wallet.
  7. Now you can start putting things back into your purse and wallet, wiping down every item as you go with a baby wipe or damp rag. I even wipe down my credit/debit cards. Over the top? Not really. Think about how many germy hands touch those, and they’re never cleaned! Be selective in what you put back, and try to organize everything. A place for everything, and everything in its place. A purse organizer works well for this!

A few extra tips:

  • Buy a purse hanger to keep your purse off the floor when at restaurants, or for when there’s not a hook on the door in public restrooms.
  • Take 2 seconds to wipe the bottom of your purse with a disinfecting wipe any time you’ve had to put it somewhere germy. I always keep hand sanitizer and a baggie of disinfecting or baby wipes in my purse.
  • Take care to store your purses the proper way. Do not hang them. Instead, stuff each one with tissue paper, and store them upright.
  • Apply what you’ve learned here and protect your children by cleaning their backpacks or school bags. Same thing for briefcases and carry-on luggage.

How many purses do you have? Do you clean at least the bottom of your purse on a daily basis, or have you never really given it much thought? Share with the class and leave a comment below!

Love & Blessings,

Shandy

***********************

Be sure to visit Shandy’s personal blog Aprons ‘n Pearls for crafts, recipes, homekeeping tips & more!

If you have any questions, just ask in the comment section, or send me an email at:

shandy@girlfriendscoffeehour.com

At Home with GCH – Household Binder, Part 2

hb1

Last week, I gave you a tour of my household binder. (If you missed it, just click HERE.) This week, I’m giving you another peek into my binder, and am sharing my daily cleaning routine. Let’s get started!

I want to share a secret with you. It is life-changing, and is what has helped me more than anything else in keeping a clean home. FlyLady. If you have never heard of the FlyLady before, do yourself a favor and get acquainted. Just click on “Get Started” at the top of the FlyLady’s page. (By the way, making a household binder is one of the steps to get started! She calls it a “control journal”.) You will see on my daily routines, that one of the first things I do in the morning is check the Launch Pad. This is the foundation of my whole system. Another wonderful tool that has been valuable to our family is Cozi. You may have heard of it. It is a very popular web-based calendar and organizer. We’ve been using it for a long time, and last year, we switched to FlyLady’s Cozi. (They partnered up! Genius!) So between FlyLady’s Cozi (there’s an app!) and my household binder, even the most domestically challenged person can get their house clean and organized!

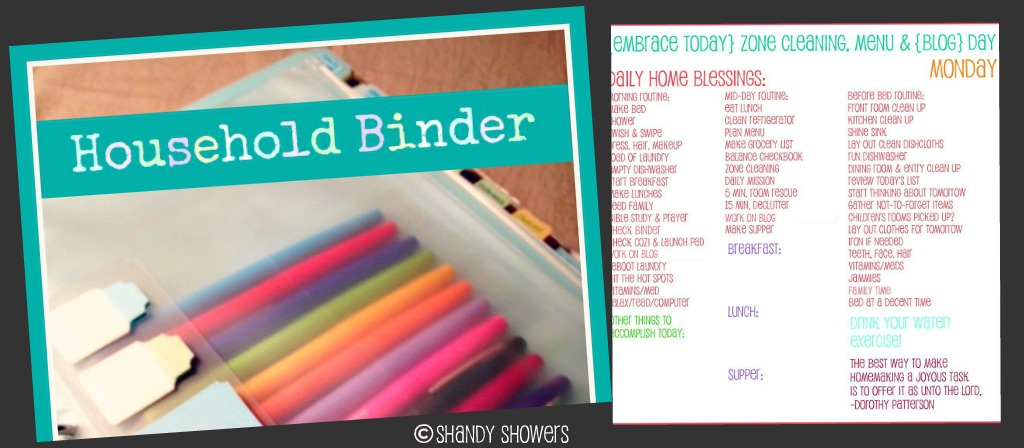
Let’s take a look at my daily cleaning routines.

cleaning routines

You’ll notice that each day is dedicated to a certain set of tasks…

Monday: Zone Cleaning, Menu & Blog Day 

Tuesday: About Town Day

Wednesday: Just the Basics Day

Thursday: Weekly Home Blessing Day

Friday: Paperwork & Clean Out Day

Saturdays & Sundays are my days to relax, so I only do the basics – cooking, cleaning up after meals, loading the dishwasher, etc.

If you click on the picture above (then click on the one that pops up) you will see what I do every Wednesday. Don’t let the amount of the words on the page overwhelm you! I have almost everything I do in a day on these charts. I am not a slave to my house. 😉 In fact, I find plenty of time in the day for hobbies, catching up with my friends, watching a show on television, playing games with my family, etc. The chart just lays everything out for me and keeps me on task. And should I get sick, my girls can look in my binder and see what needs to be done any given day!

Let’s take a closer look at Wednesday.

You’ll see that after I’m dressed and have my daughter fed and off to school, I check my binder, and then I check  FlyLady’s Launch Pad. The Launch Pad tells me what “zone” I’m cleaning that week (this week it is the master bedroom) and it also gives me a “mission.” For example, this Wednesday’s mission is to dust off the tops of the door jambs and windows. Easy peasy! So on Wednesday mornings, I do my everyday tasks like laundry & dishes, and then after lunch I get my cleaning done.

To see each day’s detailed list, click HERE.

And as promised, here’s another peek into my binder:

hb3

On the left is “My Monthly Bill Planner” from the “Finances” section of my binder. In the left column, I write down everything that is due each month. Then in the boxes, I write down what day each bill is due (if it’s always on the same day) and simply check it off once it’s been paid. If the payment is the same every month, I also write that in the left column.

In the middle is a picture of my beautiful daughter, Gabriella. I made a cute printable for each family member and slipped each one into a sheet protector. These act as the dividers in our “Family” section. Behind each person’s picture is important information that pertains to them. So for Gabbie, her medical, school, and cheerleading information is in her own dedicated section of the binder. This makes life so much easier!

On the right is my “Weekly Menu Planner” from the “Menu Planning” section of my binder. I do meal planning on Mondays, and each day’s breakfast, lunch, and dinner is written down on this chart. There’s a section for snacks on the far right of the chart, but I don’t police what everyone munches on when they want a snack. I simply write a variety of things at the top that I need to plan on having in the pantry.

That wraps up our household binder. I know some of you have started making yours, and others are updating theirs. I’m so glad this has been a help! It’s also fun to see what others have done with theirs as it may give us new ideas!

I’ve really enjoyed the comments that you’ve been emailing me! If you have any questions, or would like to know how I manage something in particular that hasn’t been covered, just ask away in the comments below, or send me an email.

You’re welcome to share a picture of your binder with me as well!

Love & Blessings,

Shandy

Be sure to visit Shandy’s personal blog Aprons ‘n Pearls for crafts, recipes, homekeeping tips & more!

__________________

If you would to send a private email to Shandy in regards to this blog, please email her at Shandy@GirlfriendsCoffeeHour.com


At Home with GCH – Household Binder, Part 1

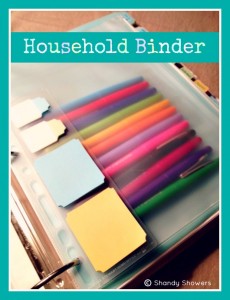
household binder Recently, I’ve had several people ask me about my household binder and for help in getting a system in place that will help keep their homes clean and organized. Today and a week from today, I will be sharing my binder with you. You will get to see what it looks like, how I have it organized, and what I use to keep my home in order. Plus I will share with you where I purchased all my supplies and where I found some of the printables it contains. Grab a pen and a notepad, find a cozy spot, and read on… and in just a few minutes, you’ll be on your way to a more organized home!

The first thing you see when you look at my binder is an adorable cover, personalized with my monogram. I found this over at lee, me, and the girls. Does your binder have to be cute to be functional? Absolutely not, but it sure helps!

bcollage

Open the cover, and you will find an assortment of labels, tabs, sticky notes, and a pouch… all from the Martha Stewart line at Staples. (I also bought my big Avery binder and sheet protectors there years and years ago when I first made my binder, and it still looks new!) I just went there to replenish supplies, and I thought maybe I was in Heaven. I love, love, love this line of products! The young man at the checkout figured that out fast. The first words out of his mouth were, “You must like Martha Stewart!” Why, yes. Yes, I do. In fact, I drove an hour one way just to get these items. No Staples near me. Booo! But I digress. Inside the pouch are my favorite Paper Mate Flair pens (another Staples find.) Colorful, and they don’t bleed through the paper! A set of twelve lets me color-code everything to my heart’s content!

Next, we come to the first section of my binder… Family Planner.” It contains:

calendar

The next section is called Keeping House.” In this section, you will find:

  • the Homemaker’s Creed
  • my daily routines
  • detailed cleaning lists
  • many, many, MANY reference sheets regarding cleaning
  • a special section for my Shaklee product information

Then, I have a section titled, Blog,” specifically for my personal blog. It includes planning sheets and more.

Next up is my “Ministry” section, with sub-sections for Girlfriends Coffee Hour and projects I work on throughout the year for various ministries (church, Operation Christmas Child, etc.)

Our family’s “Directory” is next. It includes:

The very important “Finances” section is next. In this section, you will find:

Our “Family” section is next. It includes sub-sections for each family member with tabs for:

  • medical
  • school/sports
  • work

The family section also includes:

  • a cemetery info tab so I can keep on top of my dad’s and grandparents’ graves (maintenance, flowers, etc.)
  • online info tab

Last is my “Menu Planning” section, which has:

  • weekly menu planner
  • perforated task list sheets (Martha Stewart line again!) – I can plan my meals on these awesome sheets, and write the ingredients I need to buy at the store on the right side, which then tears off to take to the store!
  • secure top sheet protectors (you guessed it… Martha!) – These are divided in half, so I get two “envelopes” per page, where I keep my coupons organized by category.

That’s it in a nutshell! Be sure to come back next week to learn about my cleaning routine, to find out what has been the single biggest help to me with cleaning, and to get another peek into my binder! In the meantime, you can start thinking about what you want to have in YOUR binder. Start brainstorming! Then have fun gathering or shopping for the materials you need to make one of your own. If you have any questions, just ask away in the comments below, or send me an email at: shandy@girlfriendscoffeehour.com

Love & Blessings,

Shandy

Be sure to visit Shandy’s personal blog Aprons ‘n Pearls for crafts, recipes, homekeeping tips & more!


Saturdays with Shandy: 6 Weeks to Make Your Home Shine for the Holidays! Week Two

This past week, we decluttered and tackled front porch and entryway cleaning projects. How did everyone do??? It wasn’t too hard, right? A little bit each week will add up to a whole lot of stress removed from our holiday celebrations! Remember, we are taking before & after pictures every week, and will have the opportunity to share them in our Facebook group on Saturdays only, so be sure to head over there today to post your pictures! I can’t wait to see what everyone has accomplished so far!

This week, we are going to focus on our living and dining rooms. In our house, our front room, or “keeping room” (also known as the living room, great room, parlour, or sitting room) is where we spend much of our time, and is where we invite our guests to sit and make themselves at home. Keeping rooms, historically, were a room right off the kitchen where Colonial families would gather to glean warmth from the kitchen stove. It’s not so different today, as many homes have fireplaces in their living rooms. Not mine, sadly, but many. *sigh* But it is our gathering place, and is where we spend most of our time together as a family.

As such, it should be a comfortable, warm, inviting place, free of clutter, dust, and otherwise unpleasant things. And then there is the dining room. The place where we pray together, break bread together, and fellowship together. If we had Jesus as a guest in our home, we would invite Him to have a meal with us in this special room, so we want this room to be the best it can be, right? Homey, clean, and welcoming. The living room, dining room, and kitchen (which we will get to next week) work together to be the hearts of our homes, so let’s give them the love they deserve.

Have you ever thought about using your five senses when it comes to making your house a home?  The way a house smells speaks volumes about the people that live there, especially the one(s) responsible for housekeeping. What do you smell when you enter your home? Do you have wonderful smelling candles burning, or perhaps a loaf of bread baking in the oven… or do you smell something offensive to your senses? What do you see? A clean, cared for home… or is it unkempt and unorganized? What do you hear? Maybe hymns, contemporary Christian music, or Christmas songs playing in the background… or do you hear harsh, unpleasant noises?

What do you feel? When you sit down on your couch, do you have a soft blanket, or maybe a homemade quilt draped nicely over the edge… or are there crumbs, pet hair, or little plastic Army men there that you’re constantly brushing away? What do you taste? Do you have goodies on hand for unexpected guests, and dinner in the oven every night for your family… or are you constantly scrambling to throw something together or running for take-out way too often?

These things either help to make a house a home, or a place to dread coming home to. Which one are you creating? I encourage you to think about these things as we continue to work on making our homes shine for the holidays!

 ______________________________

Let’s pray:

O taste and see that the Lord is good! You have blessed us with wonderful abilities to sense the world around us, Lord. Let us be ever mindful of how we can use these gifts to serve our family and friends. Be with us this week as we work to make our homes inviting, peaceful, comfortable places where we can fellowship with one another and where we would be proud to welcome You for dinner. Help each of us to remember to give You thanks before each meal, Lord. Remind us to slow down, and let there be a revival in gathering around the table to eat as a family. In Jesus’ name, Amen.

Your assignment:

TODAY – Comment below to let us know if you are mindful of the five senses when cleaning and decorating your home, and what you do to make your home pleasing to the senses. Be sure to post your before & after pictures in our facebook group! Read the assignments for the week so you are prepared for what’s to come. Now let’s get cleaning! 🙂 Clean all blinds and window treatments in your living and dining rooms; clean any mirrors and picture frames you have on display… anything with glass. No sense in getting the glass cleaner out repeatedly! If you’re not sure how to clean your blinds, dust your ceiling fan, clean a microfiber couch, etc… go to our Saturdays with Shandy board on Pinterest for some awesome tips! http://pinterest.com/gchministries/saturdays-with-shandy/

Monday – Dusting day! Dust living and dining rooms from the top down: ceiling fans, ceilings & walls, baseboards, and woodwork; clean TV, electronics, and remotes; dust shelves, mantles, tables, other wood furniture, decorations, lamps, etc.

Tues – Clean all doors, doorknobs, light switches, and fingerprints/scuffmarks on walls. Get out the touch-up paint and take care of any places that need to be touched up.

Wed – Clean out and vacuum the couch and other upholstered furniture. Vacuum or sweep & mop the floors in your living and dining rooms, moving all the furniture.

Thurs – Organize! Go through any drawers, cabinets, etc. and organize your belongings, getting rid of anything you no longer need or use.

Fri – Catch up on anything you haven’t completed. If your upholstered furniture and/or carpeting needs cleaning, clean them or have them cleaned. Did you remember to clean with the five senses in mind? Maybe light a candle, or put on some soft music. Then enjoy your evening! You’ve earned it!

———————————————————————————————————-

We’d like to invite you to be part of our online Bible study! Click on “Sign-Up Here” at the top of the page to learn more or to register for the Women’s Bible study and be added to our facebook group!

If you have not yet accepted Jesus as your Lord & Savior and would like someone to pray with you, email Prayer@GirlfriendsCoffeeHour.com and someone from our Prayer Team will contact you soon.

Blessings,

Shandy