November 25, 2024

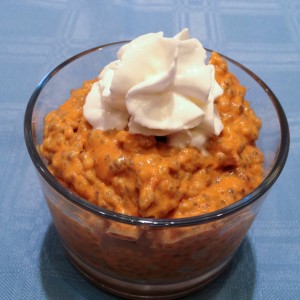
Pumpkin Chia Pudding

Pumpkin Chia Pudding resize

It seems like when we turn the calendar page to October, we all mysteriously start craving PUMPKIN!   I am not immune.   However, I didn’t want to make a big sugar bomb, so I searched around for something to satisfy the pumpkin craving and not spike my insulin.  Bingo:  Pumpkin Chia Pudding!

If you’ve never made chia pudding, now’s your chance.  I love it – the texture is a crazy blend of creamy and crunchy—like tapioca with attitude!  I make it with coconut milk, but you can try another nut milk or soy milk if that’s your thing.  This was ready to eat in an hour, and tastes just like pumpkin pie.  What more can you ask for?!

Pumpkin Chia Pudding

Ingredients:

  • 1 can full-fat coconut milk (about 2 cups)
  • 1/2 can pumpkin puree (about 1 cup, or use one cup of roasted and mashed pumpkin)
  • 1/2 teaspoon pumpkin pie spice (or combine cinnamon, nutmeg, allspice and cloves)
  • 1/2 teaspoon vanilla extract
  • 2 tablespoons honey or maple syrup
  • 1/4 cup chia seeds

Directions:

  1. In a blender or food processor, blend the coconut milk, pumpkin puree, pumpkin pie spice, vanilla, and honey together.
  2. Pour into a Tupperware container with a tight-fitting lid, or a very large jar with a lid.  Add the chia seeds and Shake!  Shake!  Shake!
  3. Refrigerate.  After another hour, shake again!  If it’s cold, go ahead and eat it!  Garnish with a little whipped cream if you like.

Explore, experiment, enjoy! — Dana


To view even more of Dana’s unique recipe, you can visit her at Frugal Girlmet!
Barley Shiitake Risotto

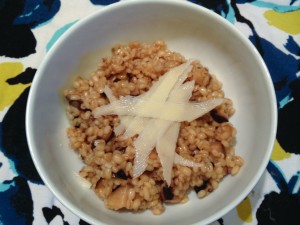
Barley Shiitake Risotto resize

Sometimes I have to peek in my pantry and decide, “Enough is enough!”  Time to use up those odds and ends of things.  I had about a cup of barley left in a bag, so I went in search of a recipe for it.  I found one, made some tweaks, and now I present to you:  Barley Shiitake Risotto!

Barley has a fantastic texture:  firmer than rice, closer to a chewy and delicious wheat berry.  It is wonderful in stews and soups, but it is strong enough to be a star on its own.  This recipe calls for dried mushrooms.  You can use any kind of dried mushroom.  I buy dried shiitake mushrooms at the Korean market, and they’re much cheaper there than what you’ll pay for dried mushrooms at a regular grocery store.  For the broth, I made bone broth…but you can use any kind—chicken, beef, or even vegetable broth, that you like.  The original recipe called for grated parmesan, which I didn’t have.  I used a very hard white cheddar.  You can use any hard cheese you like – if you can grate it, you can use it here!

This is not a forget-it-type recipe.  You do need to stir it every few minutes to get the right texture.  Just start this on the stove while you’re making a salad or prepping the rest of your dinner and it will all work out…I promise!

Barley Shiitake Risotto

Ingredients:

  • 1 cup dried shiitake mushrooms (or other dried mushroom)
  • 1 cup white wine
  • 1 tablespoon olive oil
  • 1/2 small onion
  • 2 cloves garlic
  • 1 cup barley
  • 4-5 cups broth
  • salt and pepper to taste
  • 1/4 cup grated hard cheese (parmesan, very firm white cheddar, or other cheese)

Directions:

  1. Put the dried shiitake mushrooms in a bowl.  Pour over the white wine.  Put another bowl on top of the mushrooms so that they remain submerged in the wine and microwave for 30-60 seconds.  Let the mushrooms rehydrate while you work on step 2.
  2. Mince the onion fine.  In a large, heavy-bottomed pot, heat the olive oil, and add the onion.  Stir over medium heat.  You want the onions to turn golden.  Meanwhile, in a smaller pot, heat the broth to a simmer.  Keep it simmering over low heat.
  3. Mince the garlic, and add garlic and barley to the pan with the onions.  Stir to combine, cooking for 3 minutes.
  4. Squeeze the mushrooms over the bowl and chop.  Add the mushrooms and the wine from the bowl to the barley.
  5. When the wine is almost all absorbed, add a ladle-full of broth.  Stir to combine.  Repeat this process, adding more broth every five minutes or so, when the last addition of broth is nearly absorbed.  You don’t want the pan to get dry, but you don’t want to make soup either.  This should take about 30 minutes for all of the broth to be added, stirred, and absorbed.
  6. After all the broth is added, taste a bit of the barley.  It should be firm and chewy.  If it’s still dry and not al dente, add more stock or water.
  7. When barley is done—chewy and al dente—season with salt and pepper.  Stir in grated cheese and serve hot. (Garnish with extra cheese and take a photo – optional.)

Explore, experiment, enjoy! — Dana


To view even more of Dana’s unique recipe, you can visit her at Frugal Girlmet!
Cheesecake Baked Apples

Cheesecake Baked Apples resize

I love baked apples.  They’re tender yet sturdy, and you can fill them with lovely loads of raisins, spices and nuts.  Since my girl is allergic to nuts, I needed to find something different.  Ta-da!  Cheesecake Baked Apples!

I used Gala apples, and I would suggest you use either Galas or Fujis.  You can top these with whatever you like – nuts, crumbled cookies, or even ice cream!  We kept it simple and added some whipped cream.

You know a dessert is a winner when it suddenly grows quiet in the dining room.  My girls were so serious eating these healthy treats they stopped their near-constant girl chatter.  Try these easy baked apples today!

Cheesecake Baked Apples

Ingredients:

  • 6 apples (use Gala or Fuji)
  • 8 ounces cream cheese, softened
  • 1/4 cup sugar
  • 1 teaspoon vanilla
  • 1 egg
  • 1 teaspoon cinnamon (I added a little ground nutmeg, too)

Directions:

  1. Slice off the top of the apples.  With a knife, cut out the core and scoop out the apple flesh. You want to leave at least 1/4 inch of apple “wall.”   Make sure you don’t cut through the bottom!
  2. In a bowl, blend together the cream cheese, sugar, vanilla, egg, and cinnamon.  If you like, you can add a little bit of the scooped-out apple flesh; just chop it up and stir it in.  Fill the apples about 3/4 full.
  3. Bake for about 20 minutes in a 350*F oven.  Remove and chill in the refrigerator until ready to serve.

Explore, experiment, enjoy! — Dana


To view even more of Dana’s unique recipe, you can visit her at Frugal Girlmet!

Maple-Roasted Chicken and Vegetables

Maple-Roasted Chicken and Vegetables resize

This recipe is one of those great finds:  Nutritious?  Absolutely…and Paleo too (if that’s your thing).  Easy?  You bet!  It’s a one-pot masterpiece with a quick prep time and easy clean-up.  Delicious?  Incredibly!  My family ate it all and there were no leftovers.  What is this delightful dinner?  Maple-Roasted Chicken and Vegetables!

For this recipe, you need chicken thighs with the bone and the skin still on.  Rubbed with a little olive oil, the skin crisps up and keeps the meat tender.  You can use whatever root vegetables you like.  I used baby carrots, Korean sweet potatoes (red skin with white flesh) and onions.  You could also try parsnips, turnips, butternut squash, apples, or even beets!  This recipe also calls for smoked paprika, which gives it a little smoky bite but not a lot of heat.  If you don’t have it, try a sprinkle of dried herbs instead, or even some curry powder!  Ready?  Let’s go!

Maple-Roasted Chicken and Vegetables

Ingredients:

  • 2 pounds chicken thighs, bone-in, skin on
  • 1 cup baby carrots
  • 3 sweet potatoes, peeled and sliced into baby carrot-sized fingers
  • 1 onion, cut into small wedges
  • 2 tablespoons olive oil
  • 2 tablespoons maple syrup
  • salt and pepper
  • 1/2 teaspoon sweet smoked paprika

Directions:

  1. Heat the oven to 400*F.  Use a large Dutch oven or large baking dish.  On the bottom of the pan, toss together the baby carrots, sliced sweet potato, and sliced onion.  Add one tablespoon olive oil and toss with the root vegetables.  Season with salt and pepper.
  2. Place the chicken thighs on top of the vegetables, skin side up.  Pat the skin dry with a paper towel.  Drip a little oil onto the thighs and rub it in with your fingers.  You want a thin coating of oil over all the skin.  Drizzle the maple syrup over the chicken, then season with salt, pepper, and the paprika.
  3. Cook uncovered for one hour or more, until the chicken registers at least 165*F on a meat thermometer.
  4. Serve with the vegetables.

Explore, experiment, enjoy! — Dana


To view even more of Dana’s unique recipe, you can visit her at Frugal Girlmet!

Kimchee Jjigae (Kimchee Stew)

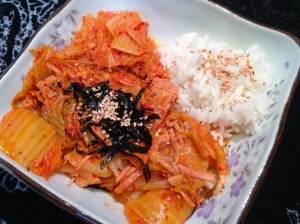
Kimchee Jjigae resize

My blog is called The Frugal Girlmet, because I like to use everything I can in the kitchen and do my best to make sure nothing goes to waste.  Kimchee Jjigae is the Korean embodiment of this principle.  A little background:  Kimchee is a fermented, spicy cabbage dish that, together with rice, is the backbone of Korean cuisine.  Traditionally, Korean families made kimchee in the summer, in gigantic clay pots.  They buried the pots in the ground to preserve them, and the family ate the kimchee over the course of the winter.  Winters are very cold in Korea, so that helped preserve the kimchee…but it still got old.  What to do with overripe kimchee – throw it away?  NO!  Koreans use every last bit of their resources, which is how Kimchee Jjigae came to be.  They made a stew out of the last of their kimchee, adding  meat to make it more filling, and served it with rice for a complete and frugal meal.

The only ingredient you MUST use in this stew is kimchee.  Everything else can vary by region, resources, or personal taste.  One of the most common varieties has pork as the protein component, and this is the way I make it.  You can cut up a few pork chops, or use any leftover pork you have.  I made a pork roast in the crockpot the night before and reserved about 2 cups of meat for this stew.  Other types of Kimchee Jjigae use canned tuna, tofu, other seafood or fish, and even Spam!  During the Korean War, American GIs brought Spam with them, and Koreans adopted it too.  Another variation that was born in the Korean War is called Budae Jjigae, which translates to “Army Stew.”  American soldiers made their own version of Kimchee Jjigae by adding ramen noodles, meat, seafood, and other vegetables to make their rations last longer.

If you like spicy foods, you will love this.  If you feel a cold or sinus infection coming on, this will clear it right out (it’s loaded with Vitamin C and probiotics)!  If your family likes chili, you should really give this Kimchee Jjigae recipe a try.  Feeling brave?  Feeling frugal?  Read on!

Kimchee Jjigae

Ingredients:

  • 1 small onion, sliced fine, or one bunch of green onions, sliced
  • 1 tablespoon sesame oil (or other oil)
  • 2 cups pork (see note above)
  • 2 cups kimchee, preferably old kimchee
  • about 1/2 cup kimchee juice (that red pepper water in the bottom of the jar!)
  • 2 cups water
  • rice to serve
  • sesame seeds, dried seaweed, or sliced green onions for garnish

Directions:

  1. In a large pot with a lid, add the sliced onions and oil.  Cook over medium heat for a minute or two.
  2. While the onion is cooking, chop the pork.  If you are using raw pork, you have two options:  you can add it in whole and then remove it when it’s cooked and chop it up.  You can also slice it thinly and add it now.  I think it’s easiest to use leftover pork that you can quickly chop or shred.
  3. Add the pork, kimchee, kimchee juice, and water to the pot.  Adjust the heat so the stew simmers.  Cover with a lid and cook for 30 minutes.
  4. Serve with rice, and garnish with sesame seeds, dried seaweed, or green onion tops.

Leftovers will keep in the refrigerator for about a week.


Explore, experiment, enjoy! — Dana


To view even more of Dana’s unique recipe, you can visit her at Frugal Girlmet!
 

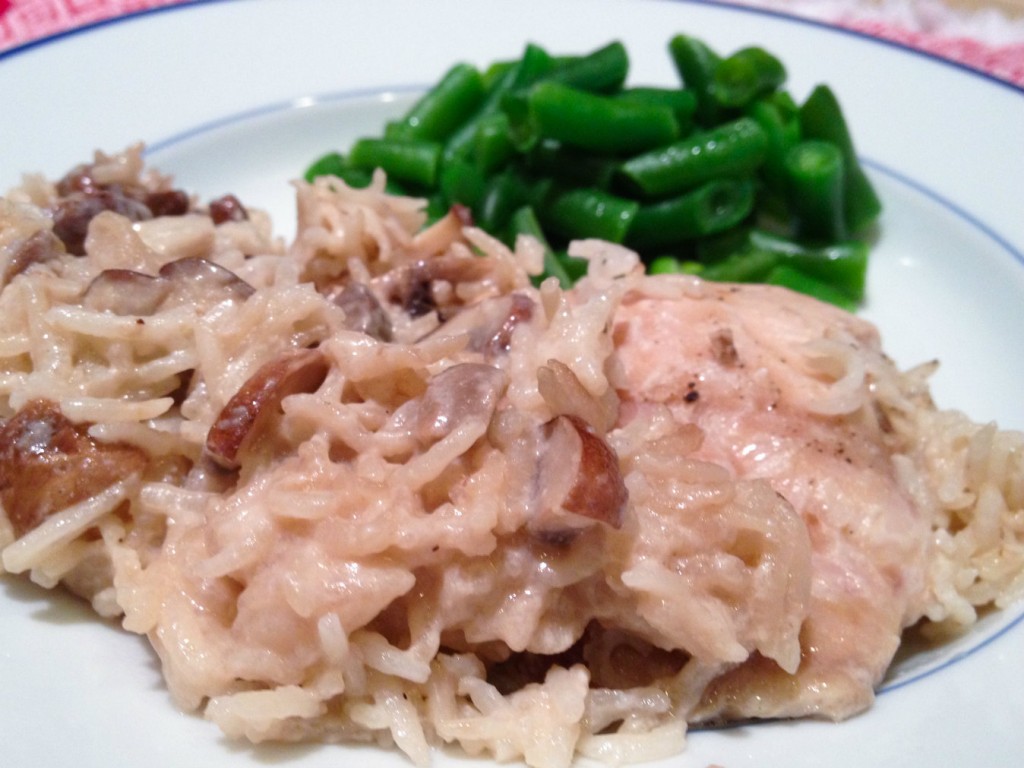
Chicken and Rice


Chicken and Rice resize

This is a recipe I learned when I was in 7th grade Home Economics. (Do they still offer that in schools?)  I liked it so much, I brought the recipe home and asked my Mom if I could make dinner for the family for the first time.  I did – and it was a success!  How’s that for boosting your kitchen self-confidence?  Your kids can make this too:  Chicken and Rice!

There are any number of variations you do make:  add onions or garlic to the rice.  Sauté the mushrooms in wine and herbs before you add them to the casserole.  Marinate the chicken in Italian dressing first.  Parboil brown rice and use that instead of white rice.  The sky is the limit, or you can keep it simple.  I made it like this last night and my whole family loved it.  Yours will too!

Chicken and Rice

Ingredients:

  • 1 can cream of mushroom soup
  • 1 can of milk (see below)
  • 1 cup white rice
  • 8 ounces fresh mushrooms, chopped
  • 6 boneless, skinless chicken thighs
  • salt and pepper

Directions:

  1. Preheat the oven to 375*F.  In a large casserole or baking dish, spray some cooking spray on the bottom and sides.  Evenly place the six chicken thighs in the dish.  Season with salt and pepper.
  2. In a large bowl, empty the can of cream of mushroom soup.  Fill that empty can with milk and mix with the soup.  Add in the rice.  Chop the mushrooms and add to the soup mixture.  Add salt and pepper, stir, and pour over the chicken.  You want the rice mixture to be evenly distributed in the dish.  Depending on the size of your dish, that may mean it nearly covers the chicken, or not even halfway.  Just spread it out so it lies pretty flat.
  3. Cover the dish with foil and bake for an hour.  Check for doneness – you want the thighs to be 175*F.  Serve hot!

Explore, experiment, enjoy! — Dana


To view even more of Dana’s unique recipe, you can visit her at Frugal Girlmet!
 

Sriracha Butter

Sriracha Butter resize

Are you a griller?  Admittedly, I am not.  The two things I avoid, as far as cooking goes, are baking with yeast (it hates me and refuses to cooperate) and the grill.  I love it when my husband or my Dad grill up something, and I will prepare everything for the fire—as long as I am not the one doing it.  Why?  I don’t know.  I’ve never done it and I guess I’m intimidated.  So even though we live in sunny Southern California, we eat pan-fried steaks much more often than grilled.  Sound boring?  Not when you serve them with Sriracha Butter!

This is a Martha Stewart recipe I found in the back of her magazine this summer.  If you haven’t tried it yet, Sriracha is a brand of hot sauce that is beloved for it’s spicy, fruity bite.  If you don’t have Sriracha handy, try another hot sauce – just not something that’s got too much fire!  The other ingredient that makes this butter special is the anchovies.  I didn’t have any, but I always have a tube of anchovy paste in my fridge (for this Caesar salad recipe and this Green Goddess dressing).  HINT: Any time you see an anchovy fillet in a recipe, you can substitute one inch of anchovy paste.

We ate this on sirloin steaks that were very lean, so the added flavor and fat from the butter were a welcome addition.  My spice-shy daughter loved it and even put some on her steamed cauliflower!  Ready to try it?  Let’s go!

Sriracha Butter

Ingredients:

  • 1 stick butter, softened
  • 2 anchovy fillets, minced (or use a 2-inch squeeze of anchovy paste)
  • 1 tablespoon Sriracha or other chili sauce
  • 1 clove garlic, minced
  • salt to taste (I didn’t add any extra salt to mine)

Directions:

  1. Mash the softened butter together with the anchovies, Sriracha, and garlic.  Taste to see if you want any more salt.  Refrigerate until ready to use.  Melt on steaks, cooked vegetables, or potatoes.

Explore, experiment, enjoy! — Dana


To view even more of Dana’s unique recipe, you can visit her at Frugal Girlmet!
Chickpea Cranberry Salad

Chickpea Salad resize

When I was in 10th grade, I decided to become a vegetarian.  My mom made no objections, but she did make it known that it was up to me to make sure I was eating a balanced diet, and that I should do some research.  “You can’t live on cheese sandwiches!” she told me more than once.  So I read up (in actual books.  It would have been so much easier to go online, but the internet hadn’t been invented yet!) and found out which foods were good sources of vegetable protein.  Chickpeas are your meatless champions!  Try this Chickpea Cranberry Salad and see for yourself!

Whether you are a vegetarian (or making lunch for someone who is), or if you just want a few meatless options, chickpeas are your friend.  Stock up on canned chickpeas for making hummus or adding to soups and salads.  I like to buy them dried.  They’re cheap and they pretty much last forever in your pantry.  Soaking them the night before you make this will cut down on cooking time, and also helps eliminate some of the chemicals that can cause gas and bloating in more sensitive tummies.  I like them better this way, because you can cook them to your preference—you can make them soft like the canned kind, or (and I highly recommend this) a little bit al dente.  The toothsome texture makes them seem more filling to me.

Serve this Chickpea Cranberry Salad between slices of bread, like a sandwich, or wrap it in lettuce.  Out of lettuce, like I was?  Use half of a sweet bell pepper as a taco shell!  Crunchy, delicious, meatless, marvelous!

Chickpea Cranberry Salad

(makes two servings)

Ingredients:

  • 1/2 cup dried chickpeas (or use 1 regular can of chickpeas)
  • 1 stalk celery
  • 1/4 cup walnuts
  • 1/4 cup dried cranberries
  • 1-2 tablespoons mayonnaise
  • salt and pepper to taste
  • squeeze of lemon juice

Directions:

  1. The night before you make the salad, pour the chickpeas into a large bowl and cover with water by at least an inch or two.  Cover the bowl with a plate and leave on the counter overnight.
  2. After soaking, drain the chickpeas.  Place in a pan and cover with water.  Simmer, covered, for about an hour.  Taste one and see if you like the texture.  Cook longer if you like.  When done, drain off the water and pour the chickpeas into a bowl.  Mash with a potato masher or the back of a fork.  I like to leave them a little chunky.
  3. Add in the rest of the ingredients and stir to combine.  Refrigerate until ready to serve.

Explore, experiment, enjoy! — Dana


To view even more of Dana’s unique recipe, you can visit her at Frugal Girlmet!
Tarragon Green Bean Salad

Tarragon Green Bean Salad resize

Green beans – get ’em while they’re hot!  Or cold.  They’re in season now, so green beans are cheap and plentiful.  My husband likes them best splashed with olive oil and roasted in the oven, but sometimes you don’t want to heat up the house.  For a yummy, summery green bean dish that’s delicious warm or cold, try this Tarragon Green Bean Salad!

Fresh herbs are a joy, and this recipe uses parsley, tarragon, and green onions.  Technically this may be a green goddess salad dressing, and it IS wonderful on a salad with fresh tomatoes.  You will have enough dressing left over to do just that!  Make the dressing while the beans are cooking and this recipe is ready in a snap.  Let’s go!

Tarragon Green Bean Salad

Ingredients:

  • 1 pound fresh green beans
  • 2 cloves garlic
  • 1-inch squeeze of anchovy paste or one small anchovy fillet (you can sub soy sauce if you must)
  • 1 fist full of parsley
  • 1 fist full of tarragon leaves
  • 2 green onions
  • 2 tablespoons mayonnaise
  • 2 tablespoons yogurt (or sub sour cream)
  • juice of 1 lemon (or sub tarragon vinegar, if you’re fancy!)

Directions:

  1. Prep the green beans:  cut off tops and tails and cut the beans into 1-inch pieces.  Put the beans in a covered dish with some water and cover.  Microwave for about six minutes.  You want the beans tender-crisp.
  2. While the beans are steaming, make the dressing:  Blend all the rest of the ingredients in a food processor.  It doesn’t have to be homogeneously smooth, but you don’t want to bite down on a big chunk of garlic!
  3. To serve:  Toss the beans in half of the dressing.  Serve warm, or refrigerate until ready to serve.  It’s great cold too, especially with grilled meats.  Serve the leftover dressing with salad and tomatoes, or use it as a dip for carrots and peppers.

Explore, experiment, enjoy! — Dana


To view even more of Dana’s unique recipe, you can visit her at Frugal Girlmet!
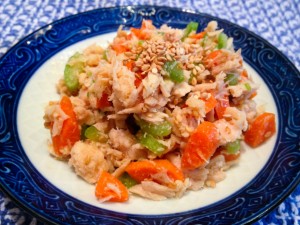
Korean-Style Tuna Salad

Korean Tuna Salad resize

Now that school is starting up again, it’s time for some lunchbox ideas.  One of my favorites as a kid was tuna salad.  Growing up, I had it only two ways:  with mayonnaise, and the way my Mom made it, which was with mayo and chopped celery.  It wasn’t until I was in high school that I had tuna salad made with mayo and pickle relish.  (Thanks, Mrs. Carson!)  It’s really easy to believe that a food will only taste good if prepared in the way you’re familiar with.  I mean, even 15 years ago, I would have been hard-pressed to believe that I would like tuna salad made without mayonnaise.  But old dogs can learn new tricks, so here I present to you:  Korean-Style Tuna Salad!

My husband asked me to make this for him several years ago, because this is the way he grew up eating canned tuna.  Believe it or not, Koreans do enjoy tuna salad, and even make a dish called Tuna Kimbap with it – tuna salad rolled up in rice and seaweed (kind of a Korean sushi roll.)  In this Korean-style dish, the mayonnaise is gone, replaced by savory sesame oil.  The celery is joined by minced carrot and green onion, and the whole dish is seasoned with a little vinegar and a healthy shake of sesame seeds.  It’s a whole new take on tuna!

Try this wrapped in lettuce or served on crackers for lunch.  Ready to break out of your comfort food comfort zone?  Let’s go!

Korean-Style Tuna Salad

Ingredients:

  • 2 cans tuna, drained
  • 2 green onions
  • 1 large carrot
  • 2 celery stalks
  • 2 tablespoons sesame oil (or more, to taste)
  • 1 teaspoon rice vinegar (or use lemon juice)
  • 2 tablespoons sesame seeds
  • 1/2 teaspoon salt

Directions:

  1. In a mixing bowl, add the tuna.
  2. Finely mince the green onion, carrot, and celery.  Add to the tuna.
  3. Pour in the sesame oil and rice vinegar.  Toss to combine.
  4. In a small bowl, combine the sesame seeds and salt. Crush them together with the back of a spoon until most of the seeds are crushed.  (You can also do this quickly in a mortar and pestle, if you have one.)  Pour the sesame seed salt mixture over the tuna and mix well.  Taste – now you can add more sesame oil, vinegar, or salt.  Refrigerate until ready to serve.

Explore, experiment, enjoy! — Dana


To view even more of Dana’s unique recipe, you can visit her at Frugal Girlmet!