November 25, 2024

Cabbage and Pineapple Slaw

Cabbage and Pineapple Slaw Resize

Don’t let the monochromatic appearance fool you – this salad packs a tasty punch!  Winter veggies come together with fruit, nuts, and a light yogurt dressing in this recipe for Cabbage and Pineapple Slaw.

Cabbage is not a glamorous vegetable.  In fact you can probably buy a giant head of it today for less than a dollar.  Nutritionally it’s a powerhouse, though, and you probably could stand to eat more of what it’s offering!  Sliced very fine (or grated if you prefer), it’s a perfect foil for crunchy apples, chewy raisins, and whatever nuts you like.  I used sunflower seeds, but try almonds, hazelnuts, pecans or walnuts.  I think walnuts would make it taste even more like a healthier version of Waldorf Salad (a childhood favorite of mine.)  The star of the show, and what lifts this recipe above other coleslaws, is pineapple.  Fresh pineapple, minced, would be glorious, but I used a half a can of crushed pineapple and it was delicious.  Save the rest of the pineapple for smoothies, or to dress up cottage cheese.

Since we’re still knee-deep in winter, and Soup Month is going strong, try this salad paired with a spicy soup.  I think it would be great with Chinese Hot and Sour Soup, or any chili recipe, to quell the heat.  Let me know how you like it!

Cabbage and Pineapple Slaw

Ingredients:

  • 1/2 head green cabbage, sliced very fine or grated
  • 1 small apple, diced
  • 1 green onion, minced
  • about 1 cup crushed or minced pineapple
  • 1/2 cup raisins or other dried fruit (cranberries or cherries would be yummy!)
  • 1/2 cup nuts or sunflower seeds
  • 1 heaping tablespoon mayonnaise
  • 2 heaping tablespoons plain yogurt
  • juice of 1 lemon
  • juice of 1 clementine orange
  • 1/4 teaspoon salt, or to taste

Directions:

  1. In a very large mixing bowl (or a very large Tupperware container with a lid, my preferred method), mix together the cabbage, apple, onion, pineapple, raisins, and nuts.
  2. In a small container with a lid, shake together the mayo, yogurt, lemon and orange juices, and salt.  Taste to see if you want any more salt or lemon.
  3. Pour dressing over cabbage mixture and shake or toss to combine.  Refrigerate until ready to serve.

Explore, experiment, enjoy! — Dana


To view even more of Dana’s unique recipe, you can visit her at Frugal Girlmet!



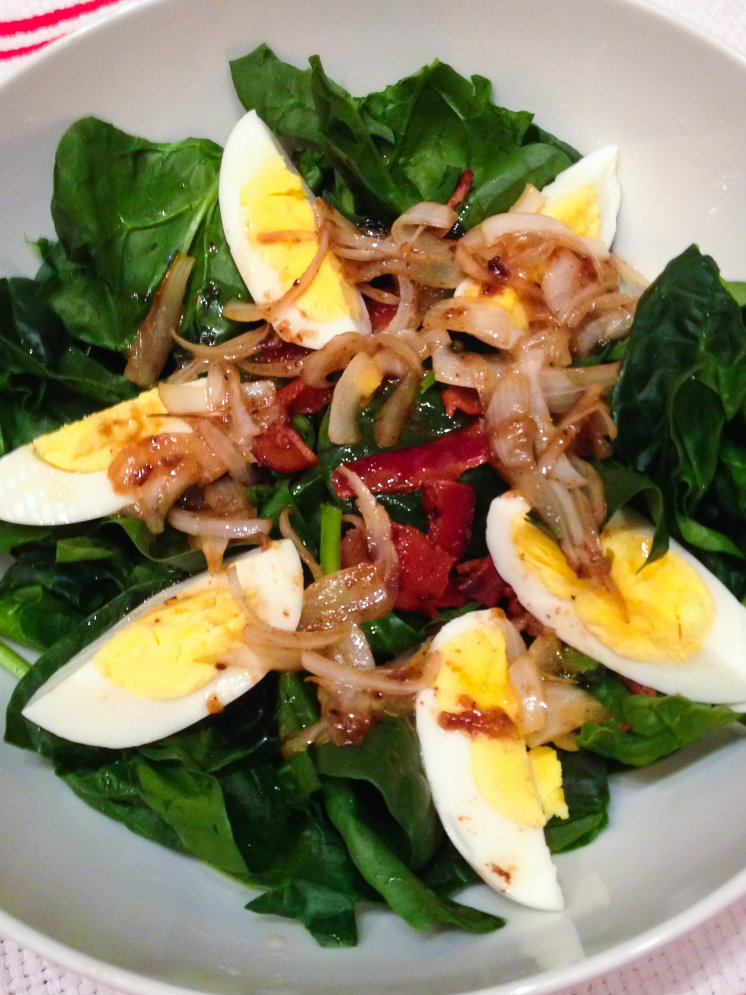
Spinach Salad with Warm Bacon Dressing

Spinach Salad with Warm Bacon Dressing Resize

Continuing with the theme of National Soup Month, I have another salad to pair with a lovely, hot bowl of soup.  With crunchy bacon, creamy hardboiled eggs, and a sweet-and-sour vinaigrette, this recipe for Spinach Salad with Warm Bacon Dressing is perfect for a cold day.

To make sure you get lovely hardboiled eggs (and not greenish, sulfury yolks), go easy on your eggs.  Put them in a pot of water that covers the eggs by an inch.  Bring to a boil – and as soon as it boils, take it off the stove, put a lid on the pot, and set a timer for 14 minutes.  When the timer rings, drain off the hot water and cover with ice and cold water.  Let the eggs cool, then peel.

I used rice vinegar; but you can try red or white wine vinegar, or apple cider vinegar.  This recipe makes two large salads.  Try it with soup, stew, chili, or just some bread and butter.

Spinach Salad with Warm Bacon Dressing

Ingredients:

  • 1 large bunch very fresh spinach (or a bag of baby spinach) rinsed very well and spun dry
  • 6 slices bacon
  • 2 tablespoons rice vinegar (or other vinegar)
  • 1 tablespoon (or more, if you like) honey
  • 1 tablespoon Dijon mustard
  • 1/2 onion, sliced, or diced, very thin
  • 4 hardboiled eggs

Directions:

  1. Wash and dry the spinach very well.  (Gritty sandy spinach is horrible!)  Divide into two large bowls and set aside.
  2. Fry the bacon in a large pan until crispy.  Remove to a paper towel-lined plate to cool.  Measure out 1/4 cup of the bacon fat, discard any leftover, and return the 1/4 cup of fat to the pan.
  3. Heat the bacon fat, and with a wooden spoon or silicon spatula, stir in the vinegar, mustard, and honey.  Add the onion and cook until the onion begins to soften, about 5 minutes.
  4. Peel and quarter the eggs and divide between the two salad bowls.  Crumble the bacon and add to the spinach.  Pour the hot dressing over the spinach and toss.  Season with fresh cracked pepper, if desired, and serve warm.

Explore, experiment, enjoy! — Dana


To view even more of Dana’s unique recipe, you can visit her at Frugal Girlmet!
 

Give Me Oil for My Lamp

psalmshymnsspiritualsongskjvI have two daughters, ages 5 and 2.  Last year I bought them the “Wee Sing:Bible Songs” CD, so we could have something fun to listen to in the car.  It’s got all the greatest hits you remember from Sunday School, no matter how old you are – “Jesus Loves Me”, “Deep and Wide”, and my 2 year-old’s favorite, “Zaccheus.”  The good news is, they LOVE it.  They love to sing to each and every song (all 63 of them), and ask me questions about the lyrics that lead to more conversations about God and Jesus.  The bad news is, they LOOOOOVE it.  As soon as I buckle them into their carseats, they ask, “Mom, can we have Bible songs?!”  About once a week, I have to tell them that Mommy needs a break, and they whine for a minute before enjoying the classical music station.

These songs don’t just stay in the car, though.  They get sung in the bathtub, or when it’s time to clean up toys.  I find myself whistling one or another every day.  They’re short, easy to learn, and catchy as all get out!  The one I’d like to explore today is…

Give Me Oil for My Lamp

~  Listen while you read, please!  ~

Give me oil for my lamp, keep me burning, burning, burning,
Give me oil for my lamp, I pray (Hallelujah!)
Give me oil for my lamp, keep me burning, burning, burning,
Keep me burning ‘til the break of day
Sing Hosanna, sing Hosanna, sing Hosanna to the King of Kings
Sing Hosanna, sing Hosanna, sing Hosanna to the King!

Not only did this song help me explain the miracle of Chanukah to my girls (who, of course, have no real idea of what a lamp is and how important it was to keep enough oil for it!), but it refers directly and indirectly to dozens of scripture.  The first that came to mind was Matthew 25, the parable of the bridesmaids.  Here Jesus tells us to be prepared for His return, and not be caught unaware.  We need to keep oil in our lamps, to keep our light shining in the world and be faithful to Him!  We are warned that the Groom can return any day, any hour, and we need to prepare our hearts and our lives for Jesus.

It also makes me think of the promise God gives us in Isaiah 40:28-31:

Don’t you know anything? Haven’t you been listening? God doesn’t come and go.
God lasts. He’s Creator of all you can see or imagine.
He doesn’t get tired out, doesn’t pause to catch his breath.
And he knows everything, inside and out.
He energizes those who get tired, gives fresh strength to dropouts.
For even young people tire and drop out, young folk in their prime
stumble and fall. But those who wait upon God get fresh strength.
They spread their wings and soar like eagles,
They run and don’t get tired, they walk and don’t lag behind.

This means God knows what we need, and He won’t forget us.  He will give us the energy we need to keep going, and all we have to do is ask.  Hallelujah!

I guess today the song might be, “Give me charge to my batteries,” but I like singing it how it is.  I also like that my 2 year-old is still working on the lyrics, and belts out with enthusiasm, “Sing Mozanna to the King of Kings!” 🙂

* ~ * ~ * ~ * ~ *

Please pray this with me:  Lord of Heaven and Earth, today we ask for oil for our lamps.  Sustain us, energize us, and fill us up with Your Spirit.  Give us strength and faith to run the race to the end.  May all we do today bring You glory and praise.  In the powerful and wonderful name of Jesus, Amen.

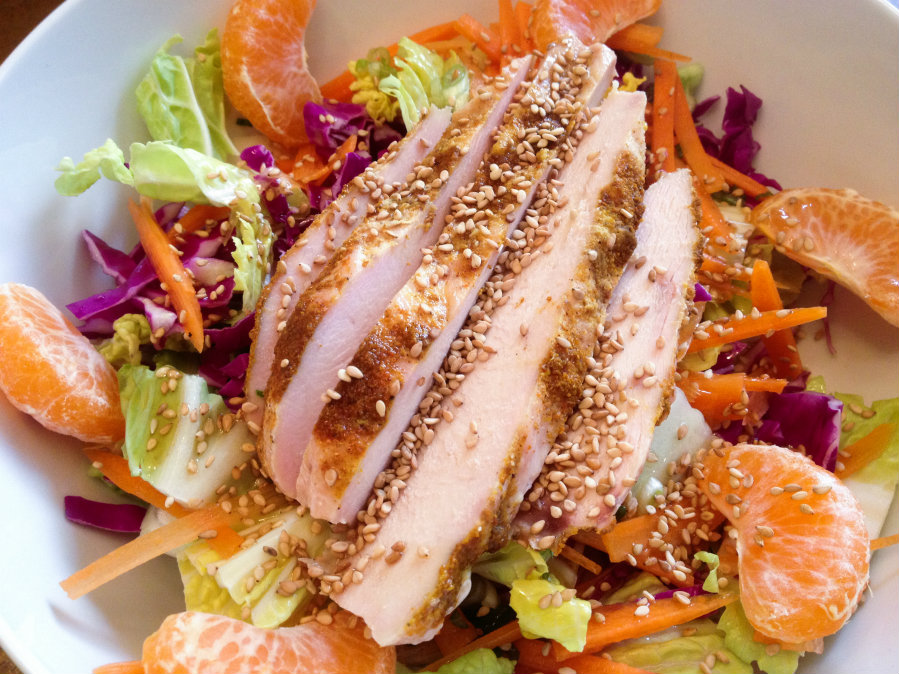
Chinese Chicken Salad

Chinese Chicken Salad Resize

As Coleen pointed out in her post on Monday, this is National Soup Month!  She will be sharing some of her favorite soups with us.  And what makes a better meal than soup and salad?   One of my favorite salads is Chinese Chicken Salad!

This is perfect for winter, because all of the ingredients are in season now.  Instead of canned mandarin oranges, you can probably find fresh ones now – I’ve got Clementines and Satsumas left and right at my grocery store.  Red cabbage and carrots are always around, as are green onions.  For the base, I used Napa cabbage, but if you don’t have that, you can use any kind of lettuce you like, or really finely chopped green cabbage.  I cooked some extra chicken breasts last night so I could chop them up cold and throw them over the salad, but you can use whatever chicken you like – roasted, store-bought rotisserie, or even breaded chicken nuggets!

This recipe serves two as part of a lunch or dinner menu.  Try this salad with any soup you like, or paired up with a sandwich, wrap, or pasta dish.  Filling, nutritious and delicious – and it won’t break any of your New Year’s resolutions!

Chinese Chicken Salad

Ingredients:

  • 1 small head Napa cabbage, or romaine lettuce
  • 1/2 head small red cabbage
  • 2 carrots
  • 2 or 3 green onions
  • 2 mandarin oranges
  • 2 cooked chicken breasts, or 3 cups chopped cooked chicken
  • 2 tablespoons sesame oil
  • 2 tablespoons rice vinegar
  • 1 tablespoon sesame seeds
  • salt and pepper to taste

Directions:

  1. Chop the Napa cabbage into inch-wide strips.  Finely slice the red cabbage.  Place both in a salad spinner and rinse under cold water, then spin dry.
  2. Cut the carrots into matchsticks.  Finely slice the green onions.  Peel the oranges and remove as much of the white pith as possible.  Separate into segments.  Dice or thinly slice the chicken breasts.
  3. To assemble:  In two very large bowls, mix together the cabbages, carrots, and onions.  Arrange the oranges and chicken breasts on top.  Drizzle each salad with one tablespoon each of sesame oil and rice vinegar, and sprinkle the sesame seeds, salt, and pepper on top.

Explore, experiment, enjoy! — Dana


To view even more of Dana’s unique recipe, you can visit her at Frugal Girlmet!

Korean Green Onion Salad – Pa Muchim

Pa Muchim Resize

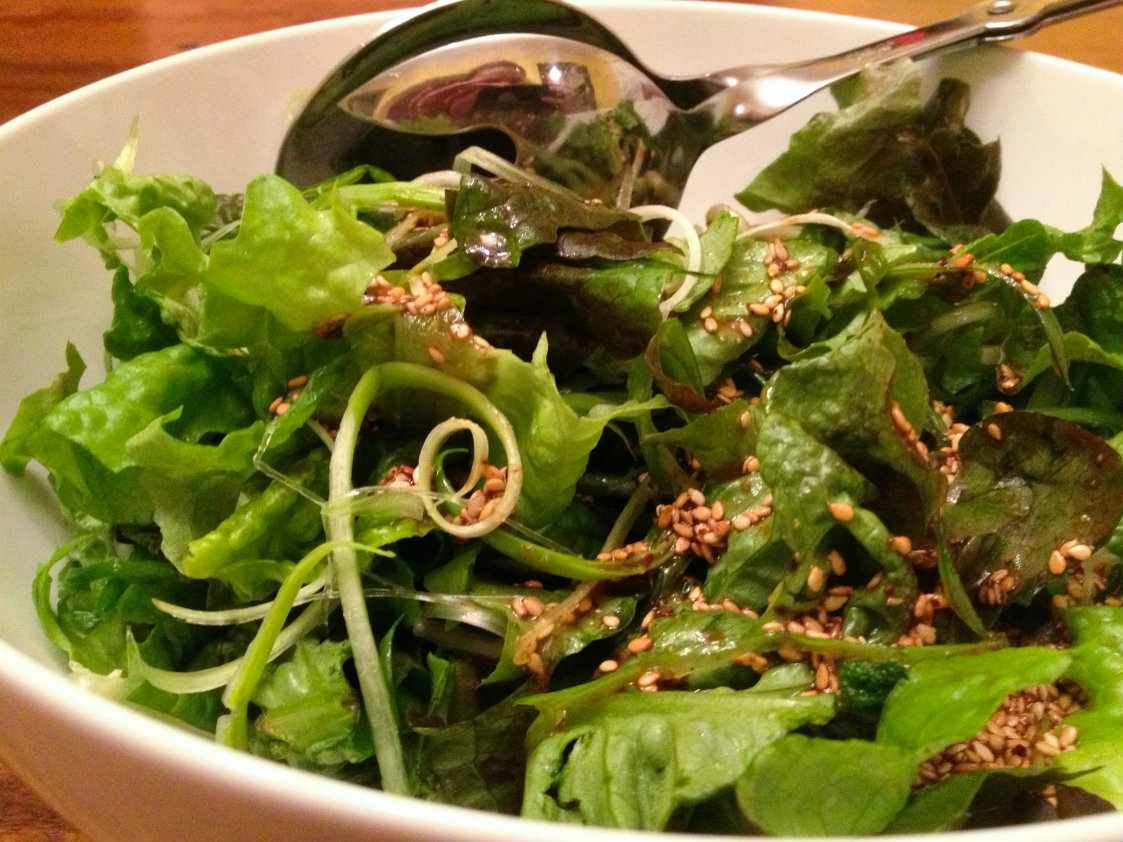
Korean Green Onion Salad, or Pa Muchim (pronounced “pah moo cheem”) is a staple at Korean BBQ restaurants and homes alike.  It is frequently paired with pork belly or other fatty meats, as a counterbalance to all the rich flavors and textures.  I find it spicy and weirdly refreshing!

Yes, this salad has a lot of green onion in it.  So much so that you should probably share it with whoever you’re going to be hanging out with that day.  I wouldn’t eat a big plate of this and then go out on a first date!  Cutting the green onions into long strips can be a little tricky.  If it’s not working out for you or you get frustrated, you can just turn the onion on a bias and cut long diagonal slices – they don’t have to be strips cut lengthwise.  Red leaf lettuce is most commonly used, but you can try green leaf or romaine too.  As for the dried red pepper, just use one of those little packets of crushed red pepper that always comes with a pizza delivery!

Next time you grill or fry something rich and delicious, pair it with this spicy and cleansing salad.  (And for more motivation, check out how healthy green onions are for you!)

Korean Green Onion Salad (Pa Muchim)

Ingredients:

  • 1 bunch green onions (anywhere from 4 to 8 onions)
  • 1 head red leaf lettuce
  • 2 teaspoons soy sauce
  • 1 teaspoon sugar
  • 2 teaspoons rice vinegar (or you can substitute apple cider vinegar)
  • 2 teaspoons sesame oil
  • 1/2 teaspoon crushed red pepper flakes (optional, but try it if you have them!)
  • 2 tablespoons toasted sesame seeds

Directions:

  1. Slice onions lengthwise into thin strips, or you can cut them on a very severe bias into long ovals.  Put the onions into a bowl of ice water and let soak for fifteen minutes.  This crisps them, and also removes some of the sliminess from the insides.
  2. While the onions are soaking, wash the lettuce and cut it into bite-sized strips.  If your lettuce is a little limp, soak it in ice water too!
  3. Make the dressing:  combine soy sauce, sugar and rice vinegar in a small Tupperware cup with a lid.  Shake well to combine.  Add sesame oil and red pepper flakes and shake again.
  4. Drain the lettuce and onions, dry them if you can:  Either roll up in a dish towel, or spin in a salad spinner.  Combine lettuce and onions in a large bowl, toss with dressing, and sprinkle with sesame seeds.  Serve immediately.

Explore, experiment, enjoy! — Dana


To view even more of Dana’s unique recipe, you can visit her at Frugal Girlmet!
Zoe’s Crockpot Chicken

Zoe's Crockpot Chicken resize

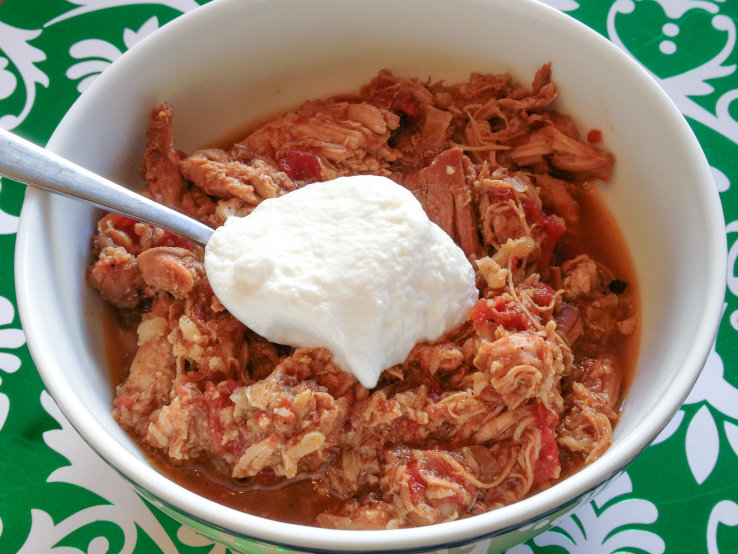
This past weekend, I invited my best friend and her family up to our house for dinner.  Instead of trying to make a meatloaf large enough to feed eight people, I decided to use my two crockpots to save time and effort in my prep.  In the one, a mushroom pot roast.  In the other, I made a lightly curried pot of chicken thighs.  I wasn’t sure if my friends’ kids would like it – they’re eight and ten years old, and I didn’t know if it would be a hit.  Ten year-old Zoe took one bite and her face lit up.  “Mama,” she excitedly told my friend, “you have to ask Dana for this recipe so you can make it at home!”  I have to tell you, I’ve never been so proud of a recipe in all my life!  This, then, will be called Zoe’s Crockpot Chicken.

You can use one or two pounds of boneless, skinless chicken thighs.  If you use one pound, you’ll have more sauce, and will probably want to serve this over rice or noodles.  If you use two pounds, like I did this time, it’s a thicker stew and doesn’t need anything under it – but jasmine rice would certainly be delicious.  Use any store-bought curry powder you like.  I have two, and the one I used this time was just a $4 jar from Trader Joe’s – nothing fancy.  I also used half a head of cauliflower, diced.  It doesn’t add much to the flavor, but it adds nutrition and body to the sauce.  I like to garnish with a big dollop of plain yogurt, and if you have cilantro, sprinkle some of that on top.  If you need a quick chicken dish that promises to please grown-ups and kids alike, check this one out.

Zoe’s Crockpot Chicken

Ingredients:

  • 1 large onion, sliced fine
  • 1 or 2 pounds chicken thighs
  • 2 tablespoons curry powder
  • 1/2 teaspoon salt
  • 15 ounce can of diced tomatoes (I like fire-roasted)
  • plain yogurt and cilantro to garnish, optional
  • rice or noodles, optional

Directions:

  1. Place the sliced onions on the bottom of the crock pot.  Layer the chicken thighs on top.  Season well with curry powder and salt.  Open the can of tomatoes and dump on top.
  2. Cover and cook on high for 4 hours or low for 6 hours.  When ready to serve, shred the chicken with a fork and mix all the ingredients.  Serve on top of optional rice, garnish with optional yogurt and cilantro, and enjoy!

Explore, experiment, enjoy! — Dana


To view even more of Dana’s unique recipe, you can visit her at Frugal Girlmet!
Chocolate Cranberry Quinoa Biscotti

CCQ Biscotti Close Tray resize

Girlfriends Coffee Hour runs on prayer and  coffee, and sometimes coffee needs biscotti!  If you’ve ever paid $2 for a biscotti at your local coffee shop and thought, “It can’t be that hard to make these,” you are right!  This recipe for Chocolate Cranberry Quinoa Biscotti takes a few extra steps, but if you are looking for a gluten-free, nut-free treat for your afternoon coffee break, read on!

I was looking for nut-free biscotti recipes online, and I found one using quinoa flour, which I’d never heard of or used.  Time to experiment!  It turns out that quinoa flour is incredibly easy to make, and exceeds wheat flour in fiber, protein, and nutrients.  If you don’t want to make your own at home, I understand – you can find it in health food stores and online, and Bob’s Red Mill makes it (I really like and trust their products.)  I used red quinoa, so the biscotti has a darker color, but feel free to use the regular white kind.  To make quinoa flour at home, pour one cup of quinoa on a baking sheet and bake for 12-15 minutes at 300*F.   When cool, grind in a spice grinder, grain mill, or superpowerful blender.  I have a hand-crank grain mill that made short work of the job!  One cup of dry quinoa will yield one and a quarter to one and a third cups of flour.  If you don’t want to go through the trouble, you can use regular or whole wheat flour instead.

Everything else in this recipe is pretty customizable.  Don’t like chocolate chips?  Leave them out or use white chocolate or even butterscotch chips.  Add in any kind of nut, like almonds, pecans or pistachios.  Replace the dried cranberries with cherries, apricots, or just lemon zest.  Drizzle with white or dark chocolate.  These make great gifts, too, because they are pretty hearty and don’t get stale too quickly.  After rigorous and exhaustive testing, I can report that these stand up well to dunking in coffee.  The things I do for you ladies!  😉

If you have a friend who loves coffee, make these as a treat for her (and keep a few for yourself!)


CCQ Biscotti Close up Resize

Chocolate Cranberry Quinoa Biscotti

Ingredients:

  • 1+ 1/3 cups quinoa flour (you can use whole wheat flour instead)
  • 2 tablespoons coconut flour
  • 1 teaspoon baking powder
  • 1/4 teaspoon salt
  • 2 eggs
  • 1/4 cup melted coconut oil (or use butter)
  • 2 teaspoons vanilla extract
  • 3/4 cup coconut sugar (or use brown sugar)
  • 3/4 cup dried cranberries (or cherries or diced apricots)
  • 3/4 cup chocolate chips
  • White chocolate for drizzling (Confession:  I was out of white chocolate, but I found a cookies and cream white chocolate bar that fit the bill.)

Directions:

  1. Preheat oven to 300*F.  Line a baking sheet with parchment paper.
  2. Combine quinoa flour, coconut flour, baking powder, and salt in a bowl.
  3. In a large bowl, combine the eggs, coconut oil, vanilla, and coconut sugar together.  Mix well, then stir in chocolate chips and cranberries.  Stir in the flour mixture a little at a time until thoroughly combined.
  4. Turn the dough out onto the parchment, and using damp hands, mold into a log that measures about 4 or 5 inches wide, one inch high, and about 15 inches long.  Bake until firm, about 25 minutes.
  5. Remove pan from oven, then pick up the parchment with the biscotti log on it, and let it cool on a rack.  You want this cooled to room temperature, so it won’t crumble too much.  With a serrated knife, slice the log into 1/2 inch biscotti.
  6. Place the biscotti back on the baking sheet and bake for about 15 minutes until dry and crunchy.  Let cool completely, then drizzle with white chocolate.  Store in an airtight container to keep them crisp.

Explore, experiment, enjoy! — Dana


To view even more of Dana’s unique recipe, you can visit her at Frugal Girlmet!
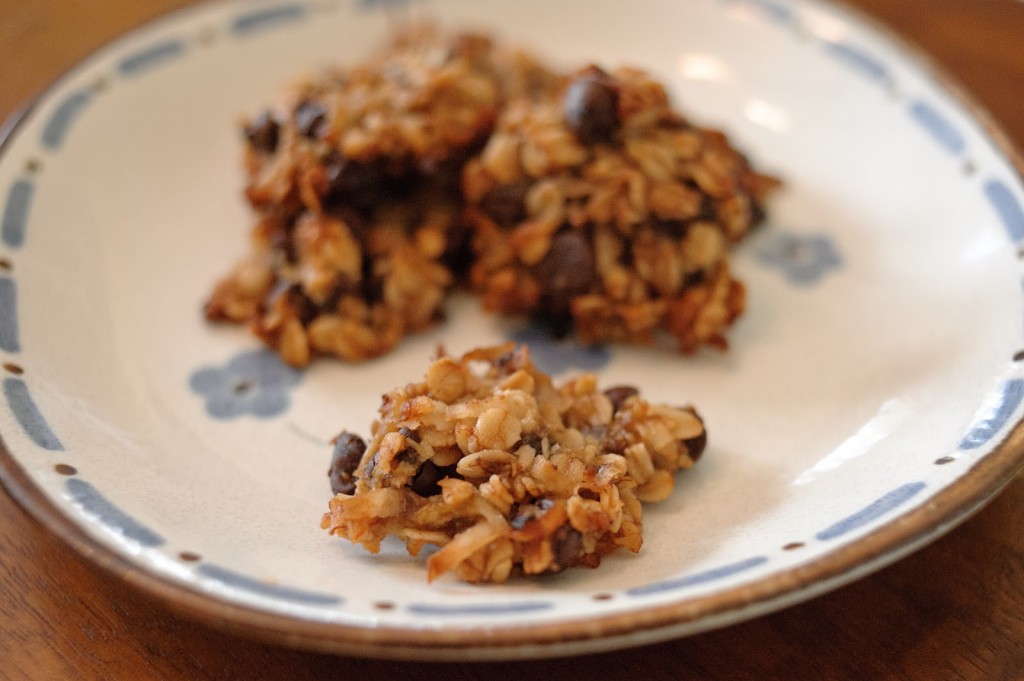
Monkey Bites (Banana Chocolate Chip Cookies)


monkey bite cookies

Christmas cookies are a tradition at my house – and yours too, I’m sure.  My Dad lives for Tollhouse chocolate chip cookies.  My favorites are peanut butter, with or without jam thumbprints and crushed walnuts.  When I worked outside the home, I made dozens of cookies each year for Christmas, sharing them with co-workers and other friends and family.  Now that I am home with my girls, I have to be much more careful – I can’t have all those cookies around, since I don’t have anywhere reliable to offload them, and I DON’T want to eat them all myself!  So I am committed to striking a balance between festivity and nutrition.  Enter:  Monkey Bites!

These cookies have all the flavor (and more!) of your typical chocolate chip cookie, but instead of being filled with flour and sugar, you get bananas and oats.  These are soft cookies, and I keep them in the fridge when I’m done.  But the best part of Monkey Bites is that they use three of these:

overripe banana

So if you are looking for a healthier chocolate chip cookie (or you have a few squishy bananas to contend with), try these Monkey Bites.  And feel free to customize:  butterscotch or peanut butter chips would be delicious, or add dried cranberries or cherries to pair nicely with the chocolate chips.  The sky is the limit!

Monkey Bites

Ingredients:

  • 3 overripe bananas
  • 2 cups oats
  • 3 tablespoons coconut oil or butter
  • 1 teaspoon vanilla extract
  • 1/2 teaspoon cinnamon
  • 3/4 cup (or about half a bag) of chocolate chips
  • 1/2 cup shredded unsweetened coconut

Directions:

  1. Preheat oven to 375*F.  Lightly grease a cookie sheet or use a Silpat liner.
  2. In a large bowl, mash bananas with a fork.  Stir in the rest of the ingredients, mixing well.
  3. Using a spoon and fork, scoop up a largish tablespoon of cookie dough and place on baking sheet.  You’re going to have to mold it into shape, because these don’t spread.  Mine are about 2″ in diameter and about 1/4″ high.  Try to make them a uniform size so they bake evenly.
  4. Bake for 15-20 minutes.  You want them to be firm, and the chocolate chips should be starting to melt.  These are soft cookies but you don’t want them squishy.  Let cool on baking sheet for 10 minutes, then store covered in the fridge.  You can put them in a toaster oven to warm them and crisp them up a little.

Explore, experiment, enjoy! — Dana


To view even more of Dana’s unique recipe, you can visit her at Frugal Girlmet!

Come, Thou Long-Expected Jesus

gchcarolsbloggraphic

The first candle in the Advent wreath is the Candle of Hope.  This past Sunday my pastor referred to it, interestingly, as the Candle of Waiting.  How are “Hope” and “Waiting” related?  I think the link between the two is in one definition of the word faith—we have a need, and we turn to God to fill it.  In other words, we put our hope in His power and compassion, and we wait for His perfect timing.  David writes on this often in the Psalms:

Psalm 27:14
Wait for the LORD; be strong and take heart and wait for the LORD.

Psalm 130:5-6
I wait for the LORD, my soul waits, and in his word I put my hope.

This is one of the reasons I love the hymn “Come, Thou Long Expected Jesus”.  It perfectly describes not a tiny baby in a manger, but instead the Savior’s mission, His whole reason for being:  to deliver us from our sins, and from captivity (of all kinds).  All we have to do is wait for Him.

Come, Thou long expected Jesus,
Born to set Thy people free;
From our fears and sins release us,
Let us find our rest in Thee.
Israel’s strength and consolation,
Hope of all the earth Thou art;
Dear Desire of every nation,
Joy of every longing heart.

Born Thy people to deliver,
Born a Child and yet a King,
Born to reign in us forever,
Now Thy gracious Kingdom bring.
By Thine own eternal Spirit
Rule in all our hearts alone;
By Thine all-sufficient merit,
Raise us to Thy glorious throne.

Come, Thou Long-Expected Jesus ~ Prichard/Wesley; sung by Ashley Spurling

The hymn shows our relationship to God:  we are weak, and He is strong.  We are tired and can’t go it alone, so Jesus was born to deliver us, give us rest, and console us.  We are captive to sins and fears, so God sent His son free us.

I love the Christmas carols that show the innocence and fragility of a newborn baby, and how amazing it is that God poured Himself into such a fragile vessel.  This song is not one of those!  This is a song about a Hero, a Man with a Plan.  This carol shows Jesus’s purpose in His life’s ministry, and how He fulfills the promises God has made to His people.

I like the dual message in this hymn, as well.  “Come, Thou Long-Expected Jesus” is a Christmas carol, describing the birth of the Messiah — but it also is a plea for the second Coming!  We light the Candle of Hope—the Candle of Waiting—and we have faith that the Lord will keep His promises today, just as He kept them to Israel when he sent The Savior.  We have faith in the blood of the Lamb who washes our sins away, and we wait for Him to come again!  Hallelujah!

* * * * *

Please pray with me:  Heavenly Father, thank You for the gift of Your Son.  Thank You for sending a Hero to save us from ourselves.  Strengthen our faith as we wait, and help us to continually seek You and praise You and be Your hand in this world.  Come, Thou long-expected Jesus, come!  In His Holy name, Amen.

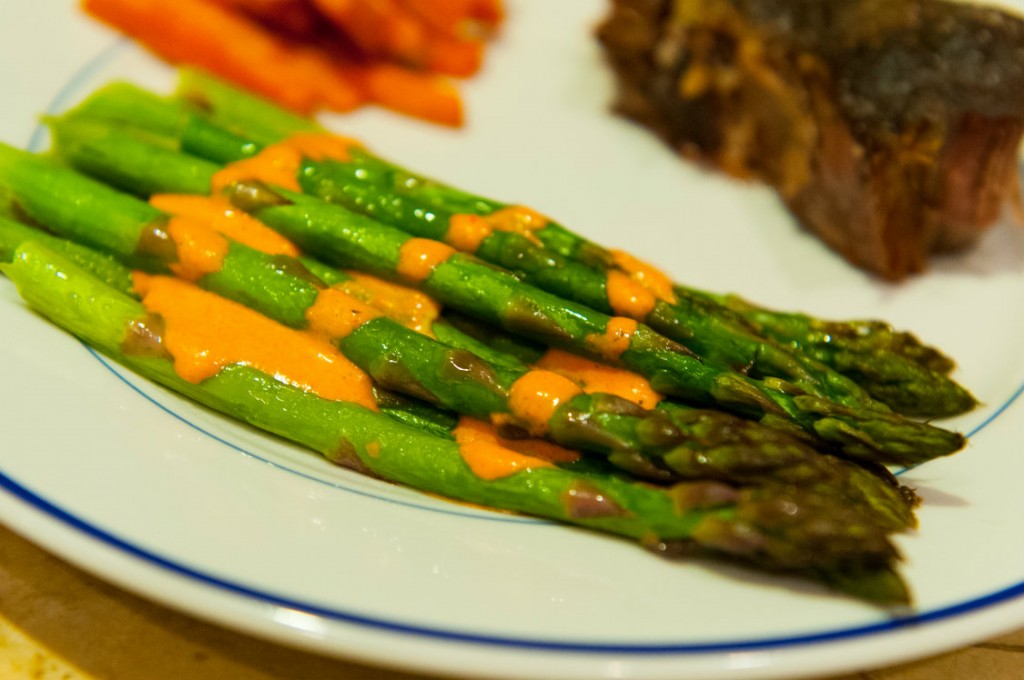
Roasted Red Pepper Aioli

Roasted Red Pepper Aioli Resize… or as it’s known at my house—Magic Sauce!  This recipe for Roasted Red Pepper Aioli is easy to whip up at a moment’s notice, and is infinitely customizable.  Like it spicy?  Add some hot sauce of your choice, or a spoonful of adobo sauce from a jar of chipotle peppers.   Depending on my mood and what else I have laying around, this aioli also gets a few shakes of smoked paprika, or a half a teaspoon of ground cumin.  Mix it up in your blender, taste it, and then see where you want to take it.

We eat this on roasted asparagus.  My husband dips steamed broccoli in it.  I love it on oven-roasted sweet potato fries.  And it’s the best sandwich spread in the world!  Try it in place of regular mayonnaise on your next turkey sandwich or veggie wrap and you’ll ditch that jar of Miracle Whip for good!

Roasted Red Pepper Aioli

Ingredients:

  • 2 cloves garlic
  • 1/2 cup roasted red peppers from a jar, drained and patted dry (or roast your own!)
  • juice of half a lemon
  • 1/4 teaspoon salt or more to taste
  • 1/3 cup mayonnaise (make your own!  Or use store-bought, but not low-fat mayo)
  • optional:  paprika, cumin, hot sauce

Directions:

  1. In a blender or small food processor, blend together the garlic, red pepper, lemon juice and salt until almost smooth.  Add the mayonnaise and optional ingredients and blend again.  Keep refrigerated.

Explore, experiment, enjoy! — Dana


To view even more of Dana’s unique recipe, you can visit her at Frugal Girlmet!