December 23, 2024

Tamale Pie

I wanted to share a recipe by my friend Irene Ladd.  I haven’t tried this yet, but it looks delicious!!

TAMALE PIE

Ingredients:

1 tablespoon olive oil
1 cup chopped yellow onion
2 cloves garlic, finely minced
1 1/2 pounds lean shredded beef
1 (29 ounce) can tomato puree
1 small can of enchilada sauce
1 (15 ounce) can pinto beans, drained and rinsed
2 cups whole kernel corn (drained & rinsed)
1 (4 ouncez) can diced green chilies
1 package of chili seasoning
4 ounces shredded Monterey Jack and Cheddar Cheese


Directions:

Saute onions, and then add garlic last minute in olive or coconut oil.  Add the shredded beef and reduce heat.

Stir in tomato puree and enchilada sauce.  Simmer for 1 minute.  Add chili seasoning package. Stir and simmer for about 10 minutes on low.  Add in beans, corn, and green chilies; simmer while preparing Tamale crust.

Tamale Crust

Ingredients:

2 cups masa harina

½ cup salted butter, cold and diced into pieces

1 teaspoon baking powder

½ teaspoon salt

1 ½ cups hot water

Directions:

In a food processor or mixing bowl, mix together masa harina, baking soda, and salt; cut in butter.  The mixture will resemble coarse crumbs.  Stir in hot water.

Divide mixture into 8 Ramekin cups and add about 1/2 cup of chili mixture; top with cheese and bake for 30 minutes at 350 degrees.  Top with chopped green onions, chopped cilantro, and sour cream.

*****


Have Time for Fitness…Physically and Spiritually

AskCrystal.jpg

I remember my thoughts, very clearly, as I sat drinking coffee at 5:30 one morning. It was the week before I went back to work from maternity leave for my second child Zach.  We were now a family of four and I remembered all of the words of friends and family who said, “Two kids changes it up.”  Life is different when you go from one child to two.  How would I have time for fitness, physically and spiritually?

As I sat there, I began to realize all of the things on my plate, not my breakfast plate, but my plate of life.  I did a quick check list:

  • Full time job
  • New business
  • Volunteer work at church
  • New schedule with Hannah (my daughter) starting Kindergarten
  • New baby

IMG_0726

Adding to all of that was my continued desire to have daily quality time with God, my husband, children, and exercise. They were all important to me, but were overwhelming and seemed impossible. It was then that I realized there were things I would have to take off my plate and let go of, if I truly wanted to focus on things that were important to me. As I thought about where my time went each day, I realized it was not all toward my priorities or really necessary. I knew I would have to make a few changes.

Such as:

  • Saying “yes” to things before thinking it through
  • Having my house perfectly cleaned and organized at the end of each day
  • Working hard to make sure everything goes according to MY plan (that can really take up a lot of time)
  • Giving up a favorite TV show

A couple of weeks ago, I talked about making exercise a priority.  Do you feel like you had good intentions of making it a priority, but still struggle to find the time to actually do it?  If so, it may be time to ask yourself two questions.

  1.  Is my time prioritized each day around what is important to me?
  2. Are there things I need to give up or add to focus on my priorities?

Improving our fitness and having a daily quiet time will not just happen. We have to be intentional with our time and sometimes that means giving up what may not be that important in the big scheme of things, certain responsibilities, or our own selfish desires.  God has shown me that, if I give my time to Him, He will help me find time for what is important, even now as a busy woman with a family of four.

family tball

Finding time for your physical and spiritual fitness has to be intentional and usually comes about by making a few changes. Give your time and agenda to God and ask Him for guidance.  He will show you that you do have time for fitness, physically and spiritually.

*****

If you have a question for Crystal in regards to this blog, please email her at: Crystal@girlfriendscoffeehour.com

Gluten Free Chewy Chocolatey Gingery Cookies

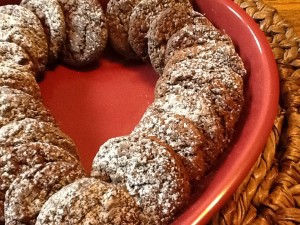
Here on our At Home with GCH blog, Monday’s are always focused on healthy but oh-so-yummy! recipes.  Today we have another cookie recipe!  This recipe makes a delicious and not-so-sweet cookie which still fits into this category!  Included in the recipe are healthy ingredients like sunflower and chia seeds, coconut oil instead of butter or shortening, and non-refined sweeteners.  Also to note, these are flourless and grainless (as I know that is important to some of you).

I am thinking this would make for a great ice cream sandwich with chocolate or caramel homemade ice cream!

2013-05-25 17.38.30

Chewy Chocolately Gingery Cookies  
(makes approximately 3 dozen medium-sized cookies)

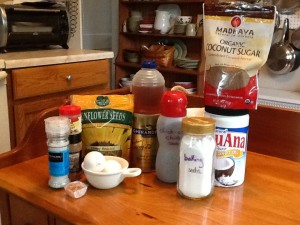
ingredients:
1+1/2 cups sunflower seeds
1 cube crystallized ginger
2 tablespoons coconut oil2013-05-25 16.18.42
2 tablespoons honey or maple syrup
1 tablespoon chia seeds
3/4 cup coconut sugar (or sugar of your choice)
3 tablespoons cocoa powder
1 teaspoon ground ginger
1/2 teaspoon ground cinnamon
1/2 teaspoon baking soda
1/4 teaspoon kosher salt
1 large egg PLUS 1 egg yolk

directions:

  • preheat oven to 350; line 2 baking sheets with parchment paper; fit a food processor with a mixing blade
  • place sunflower seeds, crystallized ginger, coconut oil, honey, and chia seeds into the bowl of the food processor
  • process for 2 minutes, stopping a few times as needed to scrape down the sides of the bowl ‘til all is finely ground (the mixture will look like nut butter)
  • add the coconut sugar, cocoa powder, ginger, cinnamon, baking soda, and salt;  process ‘til thoroughly combined
  • keeping the food processor running, add the egg and egg yolk; and process just ‘til dough forms
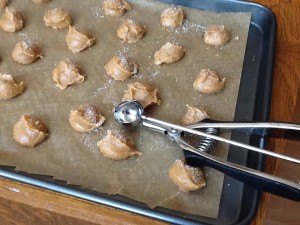
  • using a small cookie scoop, drop dollops of dough onto the lined baking sheets about 2″apart (if doing by hand*, a small cookie scoop holds approximately 2 teaspoons of dough)
  • bake for approximately 9-10 minutes ‘til the cookies are almost firm to the touch; do not overbake
  • remove from baking sheet and cool completely on a rack
  • best stored in an airtight container; enjoy!

* this is a sticky dough, as are most gluten free doughs.  if rolling by hand, you might need to occasionally rinse your hands with cold water.

*** I dusted mine with a little bit of powdered sugar.  To make these an extra-special treat, melt ½ cup of chocolate chips in the microwave; dip a portion of your Chewy Chocolatey Gingery Cookie into the melted chocolate while it is still hot.  Let cool on a rack for the chocolate to harden.

♥  ♥  ♥  ♥  ♥

God loves you!  ♥  (Don’t ever forget that!)

♥  coleen

_________________________________

If you would like to send a personal message to Coleen concerning this blogpost, you may email her at: Coleen@girlfriendscoffeehour.com

Bacon and Peach Salad


Bacon Peach Salad

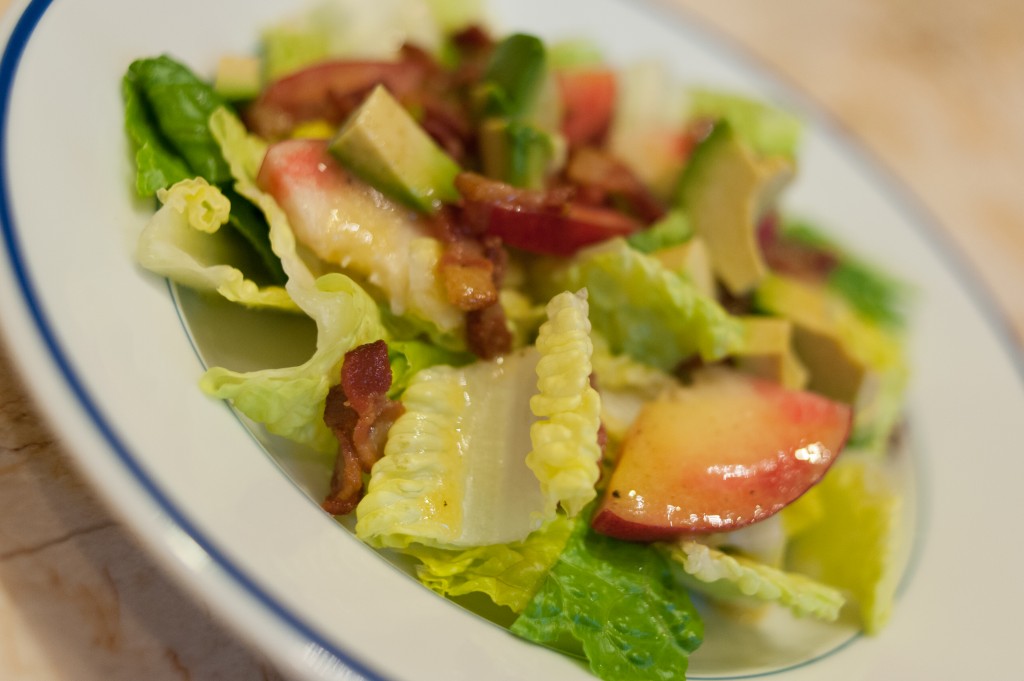
When it’s hot, I crave a nice cool salad.  This Bacon and Peach Salad would be great, with some sweet and spicy barbecued chicken, perfect for your Memorial Day BBQ!  My husband brought home some ripe avocados and sweet little peaches from the farmer’s market this past weekend.  If you can’t find peaches yet, give it a few weeks – this salad is worth the wait!

For the dressing, you can use any mild vinaigrette you have in the fridge, or use my recipe below.  I used romaine lettuce, but I bet spinach, or even arugula, would be tasty too.  This salad is based on an Emeril Lagasse recipe, and he adds feta.  I didn’t have any, but next time I make it, I’ll sprinkle on a little feta or crumbled goat cheese.  And this dish was so delicious, there WILL be a next time!

Bacon and Peach Salad

Makes four small starter salads or two larger side dish salads

Ingredients:

  • 4-5 slices bacon
  • 2 tablespoons rice vinegar
  • 1/2 teaspoon honey
  • 1/2 teaspoon Dijon mustard
  • salt and pepper
  • 1/8 teaspoon garlic powder
  • 3 tablespoons olive oil
  • 2 heads romaine lettuce, torn into pieces
  • 1 ripe peach, diced
  • 1 ripe avocado, diced
  • 1 tablespoon crumbled feta for each plate

Directions:

  1. Dice the bacon and cook until crispy.  Drain on paper towels and set aside.
  2. While the bacon is cooking, add the vinegar, honey, mustard, salt and pepper, garlic powder, and olive oil in a small container with a lid, and shake vigorously to combine.
  3. To serve, divide the lettuce among the plates and top with bacon, peach, and avocado.  Drizzle with the dressing and sprinkle with feta.

Explore, experiment, enjoy! — Dana


To view even more of Dana’s unique recipes, you can visit her at Frugal Girlmet!

An Exercise Plan that Gets Results

AskCrystal.jpg

Last week, I talked about finding the right motivation when starting an exercise program.  But let’s be honest, we still want an exercise plan that gets results, either physically or mentally.  It can be easy to quit if you feel defeated and it is important you follow a program that is right for you.  Everyone has different goals, schedules, and fitness levels.   Once you have established your motivation and made exercise a priority, it is  time to develop an exercise plan that gets results.

Establish the following for your program:

Type: Choose the right type of exercise (walking, jogging, yoga, strength training, Zumba, step class, etc.) to meet YOUR goals whether it is to gain energy or strength, maintain a healthy weight or increase flexibility.  Find something that you actually enjoy and determine if it is appropriate for your fitness level and physical limitations.

Intensity:  Determine how hard you will work and include the appropriate working heart rate. As a certified instructor with American Council of Exercise, I guide my clients with the following heart rate zones when designing a fitness program.

Duration: Set the appropriate length of time for your workout. Do you need 20, 30, or 60 minutes to achieve your desired results?

Frequency: Decide how many days a week are needed and what you can commit to give.

Proverbs 21:5 says, “The plans of the diligent lead surely to the advantage, but everyone who is hasty comes surely to poverty. At the beginning of the week, take a few minutes with your weekly calendar and pencil in your exercise for the week.  Be sure to include the type, intensity, duration, and frequency.  With a plan and a goal,  you are less likely to quit a few minutes into it.

Proverbs 16:3 says, “Commit to the Lord whatever you do; and your plans will succeed.”  Give that plan to God as a way to honor Him and commit to stick with it.  With commitment and the right program for you, you will have an exercise plan that gets results.

*****

If you have questions for Crystal, please email her at: Crystal@girlfriendscoffeehour.com

Italian Almond Cookies, Gluten-Free by Coleen Hayden

Here on our At Home with GCH blog, Monday’s are always focused on healthy but oh-so-yummy! recipes.  Today’s recipe makes a delicious, slightly decadent sweet which still fits into this category!  This recipe has no oil or butter, uses gluten-free almond flour which is high in protein, and can be made very successfully using alternative, unrefined sugars.

These yummy little almond cookies are so reminiscent to me of Italian bakery cookies called ‘amaretti.’  Going to make a confession here: I just l-o-v-e Italian bakery pastries!  For my birthday, thank you but no birthday cake, please!  Just a platter of mini pastry and almond cookies.  For sure!  So when my darling daughter, Kassia, called and told me that she had made ‘amaretti’ and they were gluten free—happy me!  Perhaps you will find these little cookies as delightful as I do; maybe even turn you into an amaretti fan!  Enjoy!

IMG_1567

Italian Almond Cookies      makes approximately 3 dozen cookies

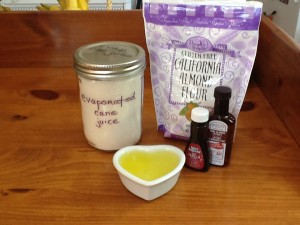
Ingredients:
2+1/2 cups almond flourIMG_1563
1+1/4 cups superfine* sugar
3 room temperature egg whites
1/2 teaspoon vanilla extract
1 teaspoon almond extract
extra sugar for dusting


Preheat oven to 300.  Line 2 baking sheets with parchment paper.

Using a food processor, blend together the almond flour and sugar for 30 seconds.  Add both extracts, and pulse 5 or 6 times to blend.  Add the egg whites ONE at a time, and continue to process the mixture ‘til the dough is nice and smooth.

Using a small cookie scoop, place teaspoons of the dough onto the lined cookie sheets, approximately 1″ apart.  These cookies do not spread.  Sprinkle the tops of the cookies with the extra sugar.  Bake for 20-24 minutes for chewy cookies; 24-30 minutes for a slightly crispy cookie.  Remove to a cooling rack.  Easily stored in your favorite cookie jar!

IMG_1565

*If, like me, you are using alternative sugars, put them into the food processor first and give them a 20 second whirl to pulverize them and make the sugar “super fine.”  I used a mix of coconut sugar and evaporated cane juice sugar.

♥  ♥  ♥  ♥  ♥

God loves you!    (Don’t ever forget that!)

♥  coleen

_________________________________

If you would like to send a personal message to Coleen concerning this blogpost, you may email her at: Coleen@girlfriendscoffeehour.com

Balsamic Roasted Chicken by Dana Kim

Balsamic Roasted Chicken


I had a hard time figuring out what to call this recipe.  In my head, I call it “Quarter Cup Chicken,” and you’ll see why when you look at the ingredients; but that wasn’t very descriptive.  This is one of those everyday, basic dishes that you end up falling in love with for its simplicity and ease of preparation.

I didn’t have any on hand this time around, but I like to add in quartered onions and baby potatoes, cut in half.  The onions get soft and smooth, the potatoes get a little roasted crust, and they both play nicely with the chicken.  Feel free to make this recipe with all drumsticks, or all breasts—whatever you like best.  Just make sure you use bone-in, skin-on chicken.  Also, dried rosemary works fine…but fresh rosemary really makes this dish sing!

Balsamic Roasted Chicken

Ingredients:

  • 1/4 cup soy sauce
  • 1/4 cup balsamic vinegar
  • 1/4 cup honey
  • 1/4 cup olive oil
  • 1 tablespoon chopped rosemary needles
  • 1 chicken, cut into pieces (or any combination of bone-in, skin-on chicken pieces)

Directions:

  1. In a large Ziploc bag, add the soy sauce, vinegar, honey, oil, and rosemary.  Squish around to combine, then add the chicken pieces.  Squish around some more, making sure all the chicken pieces are coated in the marinade.  Refrigerate for 1 – 8 hours.  (You could do this in the morning and cook it at night, but I wouldn’t let it marinate overnight, or the chicken might break down too much.)
  2. Preheat oven to 400*F.  In a large Dutch oven or roasting pan, empty the bag – get all the marinade in there too!  You can add quartered red or white onions, halved baby potatoes, 2-inch chunks of regular potato, or even large chunks of sweet potato.  Toss to coat everything.  Bake for 45 minutes, or until internal temperature of chicken reaches 170*F.

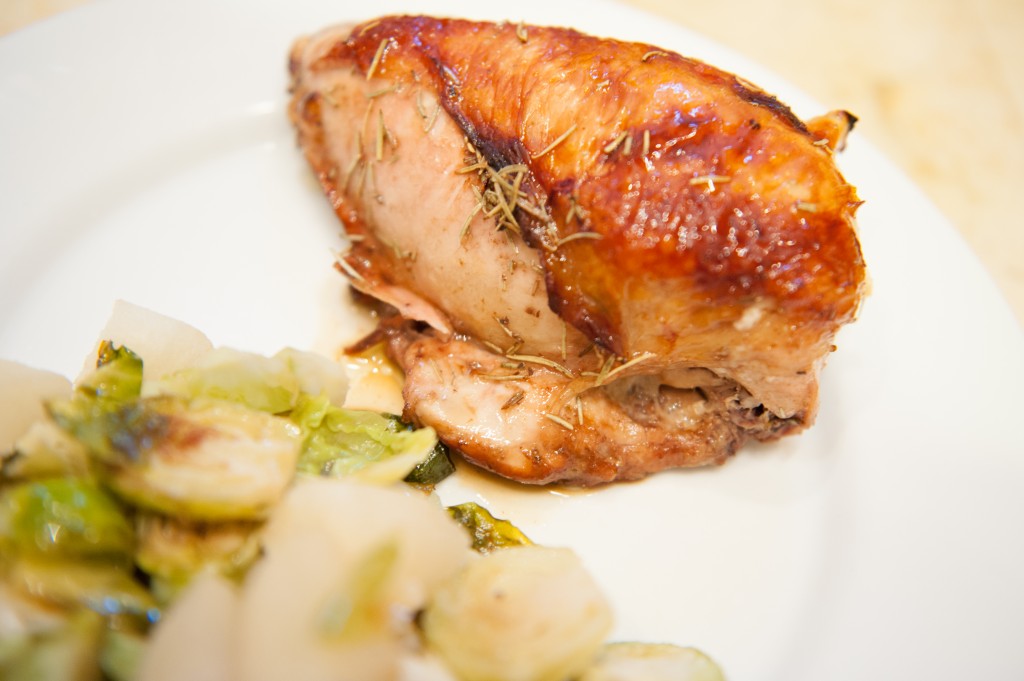
That’s it!  I served this with roasted Brussels Sprouts and Korean Pear.

Explore, experiment, enjoy! — Dana


To view even more of Dana’s unique recipes, you can visit her at Frugal Girlmet!

Crucial Questions Before Starting an Exercise Program by Crystal Breaux, Wellness Coach/Fitness Designer

shelly


Have you ever wondered what you should do when starting an exercise program, such as:  What works, what doesn’t work?  Should I do cardio or lift weights?  How long, how fast, and what do I wear?  These are all important questions and need the right answers to achieve your personal health and fitness.

However, can YOU answer two crucial questions before starting an exercise program?

  1. Have you made exercise a PRIORITY in your life?
  2. What is your MOTIVATION?

Your answers will not only help you get started, but set the road map for having a consistent exercise program, which can be the most difficult part.

Follow me for a moment with this newspaper headline:

After receiving the news that she would have to drive 45 minutes to pick up her 1 million dollar lottery check, a busy woman states  that she  “does not have time” and will have to decline her winnings.”

Does that sound crazy or what? Like me, I am sure you are thinking, “I would find the time!” because I know that…

  • My life would change
  • I would never HAVE to work again
  • My kids college would be paid
  • I would never have to worry about money again

Without a doubt, picking up that money would become a PRIORITY that day because of the benefits I would receive in finding 45 minutes in my day.

How often do you say “I don’t have time to exercise?”  Let’s be honest — is it that you don’t have the time or you have not made exercise a priority?

WHAT IS A PRIORITY?

A priority has been defined as something afforded or deserving attention. 

The truth is we will make time for the things that are a PRIORITY to us, like picking up a million dollars. We will rearrange schedules, cancel meetings, or say no to certain things so that it can be done.

WHAT IS YOUR MOTIVATION?

Would exercise become a priority if you were motivated for the right reasons?  Before I design a specific program for my client, we establish a concrete motivator.

It is important to know that what motivated you in the past may not motivate you now.  For example, the only reason I exercised 20 years ago was to “hopefully” look a certain way in my jeans, although it did not exactly work.  Today at age 41, while the jeans do matter (let’s be honest) it is not my only motivation for exercise.  If I use “the jeans” as my only motivation, exercise would not be a priority.

What does motivate me is focusing on Scripture and remembering that when I exercise I am

  • Bringing honor to God with my body (I Corinthians 6:19-20)
  • Feeling close to God as He strengthens me during my exercise (Isaiah 45:5) and brings me:
  • Less stress (Philippians 4:6)
  • More peace (Psalm 34:14)
  • Feeling good and in good health (Proverbs 3:8)
  • Strong enough to do what I am called to do (Proverbs 31:17)
  • More energetic at work (Proverbs 31:17)
  • Positive with a better attitude (Proverbs 17:22 )
  • Feeling confident about myself (Psalm 197:14)

What will motivate you today?  Before jumping into the next exercise craze, ask yourself the real questions before starting an exercise program.

  • What is my motivation?
  • Have I made it a priority?

If just like taking the time to pick up your money would change your life,

how would your life change if you were motivated to make exercise a priority?


To Your Health & Wellness, 

Crystal Bush Breaux

Wellness Coach/Fitness Designer

At Home with GCH: Gluten Free Zucchini Muffins

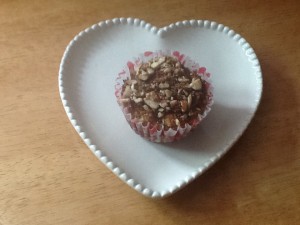
Here on our At Home with GCH blog, Monday’s are always focused on healthy but oh-so-yummy! recipes.  Today’s recipe fits into this category being it is low in fat (uses greek yogurt and a small amount of coconut oil or butter), is gluten-free (uses no grains) and is full of really good for you ingredients.

Have you ever used crystallized ginger?  If not, I would like to introduce you to it!  I just love crystallized ginger, and always have some stored in a sealed container in the freezer.  It is a great ingredient in many spicy foods.  We especially enjoy it in Thai food!  Try adding a bit to any baked goodies that have cinnamon, or nutmeg, in them.  I buy mine in the grocery store; look for it either in the Asian food aisle, or the baking goods aisle.  Below I have posted a couple of links for you so that you can check it out!  Enjoy!

2013-05-10 12.11.00

Zucchini Muffins (Gluten Free)    – makes one dozen

Topping Ingredients:
1/4 cup chopped almonds
1 tablespoon sugar (I use coconut sugar)
1 teaspoon cinnamon
2 tablespoons almond flour
2 tablespoons cold butter, cut into little cubes 2013-05-10 11.09.39

Muffin Ingredients:
1/2 cup sugar (I use coconut sugar)
3 eggs
3/4 cup greek yogurt
1/4 cup softened coconut oil
1+1/2 cup shredded zucchini
1 teaspoon cinnamon
1/8 teaspoon powdered ginger
1 cube crystallized ginger*, grated fine
1/4 teaspoon nutmeg
1+1/2 cup almond flour
1/2 cup coconut flour
1 teaspoon baking powder

  • Heat oven to 325
  • Place muffin cup papers in muffin tin
  • Make topping first: mix all dry components of topping together; then drop in the cold butter and quickly use your fingers to incorporate the butter ’til crumbly.  Set aside.
  • In a medium-sized bowl, whisk together first 4 muffin ingredients until sugar is dissolved
  • Add shredded zucchini (and crystallized ginger, if using) to the wet ingredients; stir well
  • In a large bowl, mix together the flours, spices, and baking soda
  • Add wet ingredients to the dry, mixing until incorporated
  • Divide batter into muffin cups evenly
  • Sprinkle on almond topping
  • Bake for 30-35 minutes ’til toothpick comes out clean

*Here is where you can buy crystallized ginger .  I have bought this brand before; it is a very nice product.  NOTE: the price listed is for a “12 pack.”  When you buy them individually at WalMart, they run approximately $1.89 or so.  And the grocery store price runs just about the same.

Here is Alton Brown’s recipe to make your own!  I am going to use this recipe this week!

♥  ♥  ♥  ♥  ♥

God loves you!  ♥  (Don’t ever forget that!)

  coleen

_________________________________

If you would like to send a personal message to Coleen concerning this blogpost, you may email her at: Coleen@girlfriendscoffeehour.com

At Home with GCH: Strawberry Shortcake (Gluten-Free)


Strawberry Shortcake Whole

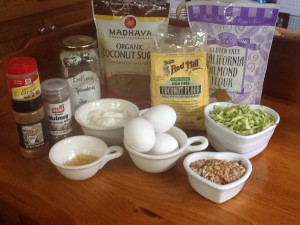
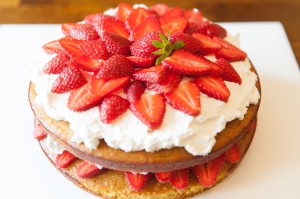
Strawberry Shortcake is one of those comfort food recipes that everyone’s Mom or Grandmom makes a version of.  When Spring arrives and berries finally come to the store, what better way to dress up a plain old cake than with sweet, juicy fruit?  I wanted to make a healthier version, so I adapted a recipe for a coconut flour cake, spruced up with orange zest, from Nourishing Days.  Add whipped cream and a basket of berries and you’re in business!


Strawberry Shortcake Cut
Strawberry Shortcake (Gluten-Free)

Ingredients:

  • 12 eggs
  • 1/2 cup coconut oil (or butter), softened
  • 1/2 cup coconut milk (or regular milk)
  • 1/4 cup honey (or more, if you like)
  • 2 teaspoons vanilla extract
  • 1 teaspoon grated orange zest
  • 2 tablespoon orange juice
  • 1 cup coconut flour
  • 1 teaspoon baking powder
  • 1 teaspoon salt
  • 1 cup strawberries, sliced thin
  • 1 pint heavy whipping cream
  • 1 teaspoon vanilla extract
  • optional – 1 or 2 teaspoons sugar (I didn’t use them, since my berries were really sweet.  If your strawberries aren’t as sweet as you’d like, add the sugar to the whipping cream)

Directions:

  1. Preheat the oven to 350*F.  Grease two 8-inch round cake pans, and then cut a circle of parchment paper for the bottom of each pan, and grease that too.  (You can do this without parchment paper, but you will need to be really liberal with the coconut oil / butter / cooking spray on the bottom of the pan.  The cake stuck the first time I made it, so the next time I used parchment paper, and it was perfect!)
  2. In a very large bowl, using a stand mixer or a hand mixer, beat the eggs until frothy.  Beat in the softened coconut oil and milk, blending well.  Mix in the honey, vanilla, orange zest and orange juice.  Beat until foamy again.
  3. In a small bowl, stir together the coconut flour, baking powder and salt.  Then, a little at a time, blend the flour mixture into the egg mixture.  Mix well, making sure there are no lumps.
  4. Divide the batter between the two prepared pans and bake for 35-40 minutes.  When a toothpick comes out dry, remove from the oven and cool for ten minutes.  Remove from pans, and finish cooling on a rack.
  5. While the cake is cooling, place the beaters of your hand mixer and a metal mixing bowl in the freezer for half an hour.  Slice the strawberries and put back in the fridge until ready to use.
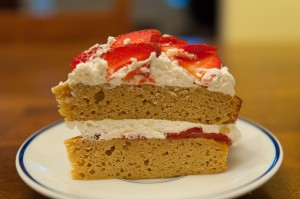
  6. When the beaters and bowl are very cold, beat the whipping cream with the vanilla (and optional sugar) until stiff peaks form.  To decorate:  spread a very thin layer of whipped cream on the top of one cake.  Make concentric circles of strawberry slices (use half the strawberries, saving the other half for the top), then cover with a thick layer of whipped cream.  Place the other cake on top of this, cover with the rest of the whipped cream and the rest of the strawberries.  Refrigerate until ready to serve.

This is not a very sweet cake, since it relies on the berries for sweetness.  If your berries are not sweet enough for your taste, you can add more honey to the cake, and the optional sugar to the whipped cream.

Explore, experiment, enjoy! — Dana


To view even more of Dana’s unique recipe, you can visit her at Frugal Girlmet!