November 25, 2024

Homemade Chicken Noodle Soup

Yesterday, I was off work and took my little boys to the doctor. Turns out they both have ear infections. So, I decided to make homemade chicken noodle soup. It is so healthy and delicious. Below is my recipe.

Homemade Chicken Noodle Soup

Homemade Chicken Noodle Soup

Ingredients:

3 Large Chicken Breasts

1 Medium White Onion – diced

4 Carrots – diced

3 Celery Stalks – diced

2 boxes of Chicken Broth

Salt and Pepper

Egg Noodles – ¾ bag


Directions:

In a large pan, boil the chicken breasts for about 45 minutes (until the inside is white).  Add salt and pepper during cooking.

Remove the cooked chicken breasts and place them on a plate. When they cool slightly, cut up the chicken into small bite-size pieces.

In the water that you cooked the chicken, add the diced onions, carrots, celery, and cooked chicken into the water. Add one box of the chicken broth. Season with salt and pepper. Let cook on medium heat for about an hour.

Once the carrots and celery are tender, add ¾ of the bag of Egg Noodles. Add the other box of chicken broth. Turn up the heat for the noodles to boil, for about 20 – 30 minutes. I always test the noodles for tenderness to see if they are done before serving.

You can add a cup or two of water if you like more broth to your soup.

Serve the soup in a bowl or coffee mug, shown below. I like using the coffee mug so you can sip the broth. Make sure that you let the soup cool for about 5 minutes before serving.

This is something easy to make and we always have plenty of leftovers for the rest of the week. This is nice, especially when everyone is a little under the weather.

Another tip: You can boil more than 3 chicken breasts and use the others for dinner another night during the week. I like making Chicken Casserole or Chicken Salad with boiled chicken. What are some of your favorite chicken recipes?

Happy Cooking J

Amy

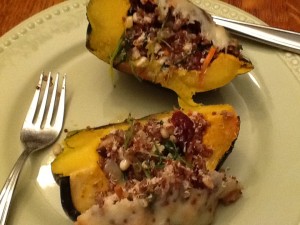
Stuffed Acorn Squash

Here on our Monday installment of At Home w/ GCH, we are continuing to focus on Fall in-season fruits and veggies.  This week, our recipe features Acorn Squash.  Ok, ok, I am sure you have noticed that I have a ‘thing’ for winter squash.  I love ‘em all…but my fav’s are Butternut, Spaghetti, Acorn, Delicata, and Sweet Dumpling.  Check out this link for lots more info on winter squashes and details on the incredible nutritional value they have.

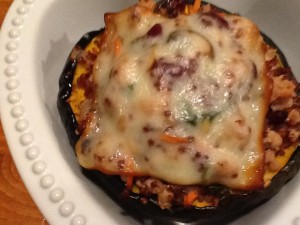
This week’s recipe fits into our healthy but-oh-so-yummy! category since it is full of lucious veggies, uses low-fat ground chicken, and almost no added fat.  Also, this could easily become a vegetarian meal by leaving out the meat.  Also, you will have some leftover stuffing so you could enjoy it in a different “container” i.e., portabello caps, or zucchini; thus getting two meals for your effort!  Enjoy!2013-10-09 19.06.00

Stuffed Acorn Squash

Ingredients:
2 acorn squash, rinsed
1 tablespoon butter
salt and pepper
1 cup water
1 cup chicken or vegetable broth
1 cup quinoa (I used red quinoa)
1 medium-sized sweet onion, chopped
4-6 large Baby Bella mushrooms, cleaned and chopped
3 tablespoons chopped garlic
2 large handfuls baby arugula (or spinach) 2-3 ounces, roughly chopped
3-4 tablespoons pine nuts
1/2 cup dried cranberries
2# ground chicken
1 teaspoon thyme
1/2 teaspoon ground sage
1 teaspoon each, kosher salt and freshly ground pepper
4 slices (1 ounce each) of smoked gouda (or muenster, or swiss)

Directions:

  • Preheat oven to 400.
  • CAREFULLY cut each squash in half lengthwise; scoop out seeds and strings. Season the inside of each squash well with a bit of butter, and lots of freshly ground salt and pepper.  Place each half, cavity side up on a baking sheet and roast ‘til tender when pierced with a sharp knife, about 35-40 minutes. Remove from oven and set aside.
  • Reduce oven temperature to 350.
  • Cook quinoa according to package directions, using water and broth. When done, pour into a large bowl; set aside.  (NOTE: the squash and the quinoa can be prepared ahead of time.)
  • Meanwhile, in a large saute pan over medium-high heat, warm 2 tablespoons of olive oil; then add the onion and mushroom pieces.  Stirring often, saute ‘til just turning slighty brown and caramelized.
  • Add the chopped garlic and stir constantly for one minute.
  • Reduce heat and toss in the chopped arugula.  Stir frequently and cook just ‘til the greens are getting wilty; approximately 5 minutes or so.
  • Add this mixture to the cooked quinoa along with the pine nuts and dried cranberries, and stir ‘til all is well-combined.
  • Using the same pan, add 1-2 tablespoons olive oil and the ground chicken and seasonings.  Cook over medium high heat, ‘til the chicken is completely cooked through.  Break up the meat as it cooks.
  • When the chicken is done cooking, add it to the mixture in the large bowl and combine.
  • Fill each squash half equally with veggie-quinoa-chicken mixture and bake, uncovered, ‘til filling is slightly browned on top about 15 minutes.
  • Lay one slice of cheese on each squash half and bake just ‘til cheese begins to melt.2013-10-09 19.11.52

♥  ♥  ♥  ♥  ♥

God loves you!  ♥  (Don’t ever forget that!)

  coleen

Creamed Kale


Creamed Kale

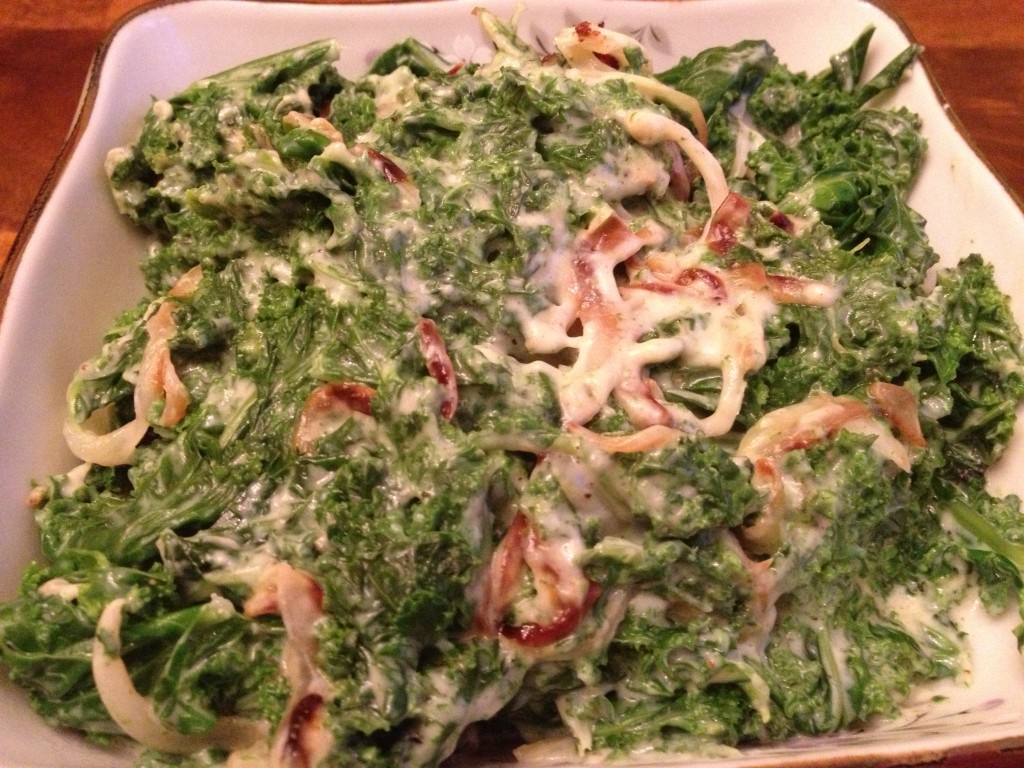
My favorite side dish in restaurants is creamed spinach.  There’s just something about it that I crave.  And lucky for me, it’s not hard to make at home.  But spinach is a little fussy – it goes mushy in the fridge really quickly, so I don’t have it on hand unless I’m cooking it that day.  But kale on the other hand … that hearty veggie will hang out in your fridge for a few days without appreciable loss of texture or taste.  So I had 2 bunches of curly kale hogging space in my fridge and decided to see if I could cream it.  In short, yes I did!  Creamed Kale for dinner!

Use whatever hearty green you have – kale, chard, or spinach.  If you are using spinach, just wash and blanch it quickly.  Kale and chard need more time in the pot to soften up, so plan accordingly.  I made this with one part whole milk and one part half-and-half, but I think next time I can just use whole milk.  If you like a richer flavor, use all half-and-half.  As for the onion, I used just a regular brown onion.  I think a sweet variety would be even better, so if you see Vidalias or Walla Wallas, pick one up!  Also, I left it out, but you can certainly add a little (or a lot, your choice) grated parmesan cheese to garnish.  Ready to check it out?  Let’s go!

Creamed Kale

(serves 2 as a side dish)

Ingredients:

  • 2 bunches kale, any kind, or chard, or spinach (see note above if using spinach)
  • 1 onion
  • 3 tablespoons butter, divided
  • 1/2 cup whole milk
  • 1/2 cup half-and-half
  • 1 teaspoon corn starch
  • salt and pepper
  • 1/8 teaspoon grated nutmeg

Directions:

  1. Set a large pot of water to boil.  Prepare the kale:  tear out the tough center stem, and tear the leaves into bite-sized pieces.  Wash well.
  2. Slice the onion as fine as possible – you want thin strings.  In a large pan, cook the onions in 2 tablespoons of butter, stirring to make sure they don’t burn.
  3. Boil the kale for about 3 or 4 minutes.  You don’t want it too soft – a little chew is nice.  Remove to an ice bath.  When cool enough to handle, squeeze out as much water as possible from the kale.
  4. When the onions are soft and browning, add the kale to the pan.  In a bowl, whisk together the milk, half-and-half, and cornstarch.  Pour over kale and onions and stir to incorporate.  Turn the heat down to medium low and simmer for 3 minutes until thick and creamy.  Season with salt, pepper, and nutmeg.  Stir in last tablespoon of butter, then serve hot.

Explore, experiment, enjoy! — Dana


To view even more of Dana’s unique recipe, you can visit her at Frugal Girlmet!

Fall Crafts, Printables, Art, and Writing Projects for the Homeschool Family

AHWGCH_Woerner

Last week we featured several delicious fall recipes for you to try in your homeschool. I hope you all had fun with that.  I know our family did!  Pumpkin is one of our favorite fall flavors, so we really had fun in the kitchen over the last week.

We are planning to get into some crafts soon.  I’d love to make a thankful turkey like those I’ve seen on Pinterest, or create some special kind of wreath or other decoration for our home.  I need to do a bit of research to find out just exactly what I want for that.

A good start will be found in the links I’ve posted for you below! I have collected ideas from some of my blogging friends for crafts, printables, writing ideas, and art projects.  Have fun with them as you plan your homeschool days this fall!

Fall Crafts

Pumpkin Turkeys and Easy Fall Crafts from The Chaos and the Clutter.

Candy Corn Jar Candle Holder found at Our Little Corner of the World.

The Thankful Tree from Paradise Praises.

Apple Stamping: A Fun Kid Craft found at A Moment With Mom.


Fall Writing Ideas

Fall picture writing prompts from In Our Write Minds.


Fall Printables

The November Planning Pack for Children found at The Multi Taskin Mom.

My Book of Thanks: a 25 Day Gratitude Journal for Kids from Upside Down Homeschooling.

Unit Lesson Plan|Fall Apples and Unit Lesson Plan|Fall Leaves found at Tutus & Tea Parties.

Free Fall Printable from Happy and Blessed Home.


Fall Art Projects

Autumn Tree Art from Campfires and Cleats.

Easy Apple Tree Painting from the Chaos and the Clutter.


I don’t know about you, but I am very excited about trying some of these projects!

Do you have any fun art projects, crafts, printables, or writing ideas?  Please share them in the comments below!

How to Make Roasted Pumpkin Seeds

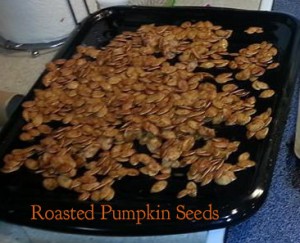
Almost every year, when we carve a pumpkin for Halloween, we make a tasty snack out of the seeds. My oldest son, Tristan, loves to help make these. He thinks they are delicious, too.

 roasted pumpkin seeds

Items Needed:

  • Pumpkin/Seeds
  • Carving Knife
  • 11 x 13 Baking Pan
  • ½ stick of butter
  • Salt

Directions:

  • Heat oven to 350 degrees.
  • Put the butter in the pan, place in oven and let it melt. Remove when melted.
  • Carve your pumpkin by cutting a circle around the top of the stem. Remove.
  • Pull out the insides of the pumpkin, making sure you remove all the seeds.
  • If you wish, carve out a design or face on your pumpkin and use it for an outdoor decoration. I always like to put a tealight candle in mine and set it by my front door.
  • Take the seeds and remove the excess guts, the orange slimy insides, from the seeds.
  • Put the seeds in the baking dish, making sure you coat each one with butter by stirring. Its best to just have one layer of seeds.
  • Salt the seeds.
  • Bake in the oven about 30 – 45 minutes.
  • If you like your seeds extra crispy, you can turn on the broiler, and toast the seeds for about 2 – 3 minutes.
  • Remove from oven.
  • Let cool.
  • Enjoy!

This is an easy healthy snack that you can make at home that has become one of our family traditions. I hope you give it a try.

Have Fun!

Amy

Roasted B, B, and B Topping

Ok, so what do you do when your sister food-blogger posts EXACTLY the same recipe you were going to post?  Well, first you tell her how good hers looked (check it out) then you scurry to the refrigerator to see what else you can throw together!

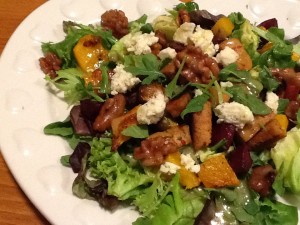
As promised, we are focusing on Fall in-season fruits and veggies for a few weeks.  This week, we have a Roasted ButternutBrussels SproutsBeet recipe.  We enjoyed this topping a salad with goat cheese and candied nuts.   This recipe makes enough for some leftovers, perfect for a Roasted Veggie Lasagna!  Perhaps you might want to try it as a pizza topping, or over pasta or rice.  Enjoy!

2013-10-04 21.10.46

Roasted Butternut Squash, Brussels Sprouts, and Beets

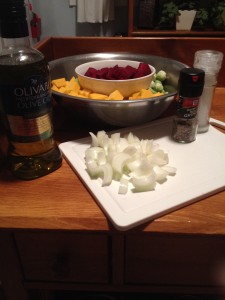
Ingredients:2013-10-04 19.36.19
1/2 large Butternut squash, peeled
1 medium sweet onion, peeled
1 bunch beets (3-5) peeled
6-8 ounces Brussels sprouts
3-4 tablespoons olive oil
kosher salt, freshly ground black pepper

optional:
3-4 tablespoons candied walnuts *
2 links fully-cooked chicken sausage
3 ounces herbed goat cheese

Directions:

  • Preheat oven to 425.
  • Cut squash and beets into 1″ cubes.
  • Cut off end of each Brussels sprout and any leaves that are brown or dry.  If large, halve lengthwise.
  • Cut onion in half around the middle, and then slice into half-moons.
  • In a large bowl, combine squash, sprouts, and onions; drizzle 2 tablespoons olive oil over them, season well and stir to evenly distribute the oil among the veggies.
  • Pour onto 2 rimmed baking sheets.
  • Now pour the cubed beets into the bowl adding up to 1 tablespoon additional olive oil, if necessary.  Add the beets to one area of one baking sheet; this will keep the beets from ‘bleeding’ onto the other veggies.
  • Roast for 15-20 minutes or ‘til the veggies begin to caramelize.
  • Remove from oven, stir well turning pieces over, if possible.
  • Roast for an additional 15 minutes or ‘til the other side begins to caramelize.
  • Test with a knife tip to make sure veggies are cooked through.  Allow to cool.

* Candied Walnuts
1 cup apple cider
3 tablespoons coconut sugar
pinch of sea salt
1 cup raw walnuts

  • Bring apple cider to a boil in a small saucepan; turn down heat but keep at a good simmer.  Let reduce by ½.
  • Lower heat, and add sugar stirring ‘til dissolved.  Add salt and walnuts; stir well.
  • Continue to cook at a low simmer, stirring constantly ‘til liquid is almost evaporated.
  • Remove from heat; pour onto a small plate and allow to harden.

♥  ♥  ♥  ♥  ♥

God loves you!  ♥  (Don’t ever forget that!)

♥  coleen

Brussels Sprouts with Bacon


Brussels Sprouts with Bacon

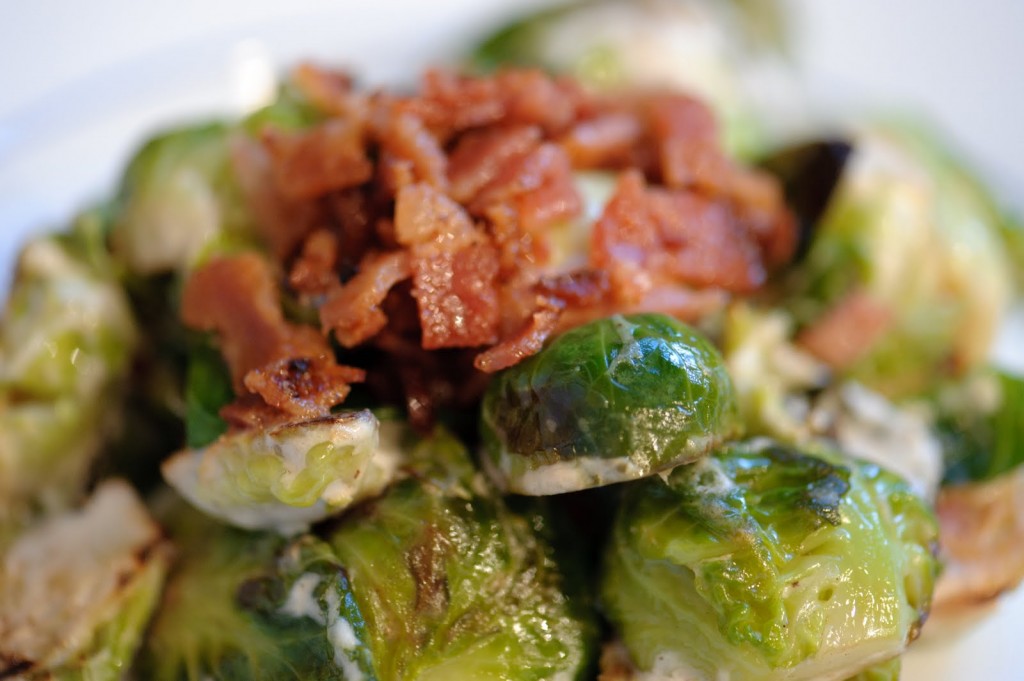
Fall is here, and I couldn’t be happier!  One of my favorite cool weather veggies is Brussels sprouts.  I remember growing up, my sister hated them so much, she only managed to choke them down if she smothered them in yellow mustard.  If you have someone like that in your family, reintroduce them to this wonderful, healthy vegetable with this recipe for Brussels Sprouts with Bacon!  This side dish comes together quickly…and, yes, you can feel free to double the amount of bacon in the recipe.

Brussels Sprouts with Bacon

Ingredients:

  • 2 slices bacon
  • 1 pound Brussels sprouts
  • 1/4 cup plain yogurt or sour cream
  • 1 teaspoon prepared horseradish
  • salt and pepper

Directions:

  1. Fry the bacon.  You want it pretty crispy.  When done, remove from pan to cool, but do NOT drain the bacon grease from the pan.
  2. While the bacon is cooking, prepare the Brussels sprouts:  Trim off the bottoms and slice in half lengthwise.  Remove any outer leaves that are yellow or spotty.
  3. Add the sprouts to the bacon grease in the pan.  Saute for about five minutes until they start to color a little.  Add 2 tablespoons of water and cover with a lid, so you are now steaming them.  Cook for another five minutes, then remove the lid and cook them uncovered for about 3 minutes.  They should be getting golden and softening up a bit.
  4. While the sprouts are steaming, combine the yogurt and horseradish in a large bowl.  When the sprouts are done and al dente, pour them into the bowl and toss with the yogurt mixture.  Dice the bacon and add it to the bowl, or you can sprinkle it over the top if you like. Season with salt and pepper, and toss again.  Serve warm!

Explore, experiment, enjoy! — Dana


To view even more of Dana’s unique recipe, you can visit her at Frugal Girlmet!

How to Homeschool: Self-Directed Learning

How to Homeschool: Self-Directed Learning www.girlfriendscoffeehour.com #homeschool #selfdirectedlearning

When we began homeschooling in 2006, my children were excited about the time they then had to pursue their interests.  Honestly, so was I!  We made weekly trips to the library, we went on field trips with our homeschool group, we had play dates and park days, and we attended extra-curricular classes such as dance and wrestling.  One of the things that my oldest two loved was to check out How to Draw books from the library.  If you’ve ever found this section at the library with your child, you know that many books exist which cover how to draw cars, dinosaurs, puppies, horses, insects, people, comic book characters, and so much more!  My children were enthralled with this new interest and pursued drawing with everything they had and as often as they could.  This type of pursuit of learning is what I would call self-directed learning.  Others may call it delight-directed, child-led, or even unschooling.  In all of these cases, in my opinion, this is learning that the child pursues due to his or her interest rather than as a result of pressure or initiation by parents or teachers.

Over the years my children have continued to take an interest in art.  They have studied math, science, music, sports, literature, and more.  All have held their interest for some period of time, but none like the subject of art.  Last fall we became involved with a local co-op and my two oldest finally took their first formal art classes.  At the end of the school year, both of them were invited to join the Advanced Art Class beginning the next semester (currently ongoing) due to their skill and obvious love for drawing.  They were ecstatic, and I was very pleased for them, as well!

You may be wondering why I’ve shared all of this with you. I simply want you to see what homeschooling can be!

Yes, there are academics involved.

Yes, some days are difficult, academically as well as spiritually, physically, and emotionally.

The truth and joy, though, is that children truly can enjoy learning.  They can and will work hard to gain a skill they want to learn.

I have continued to encourage my children, if they really wanted to learn how to draw well, to keep trying.  I employ this same thought process in other areas, too.  Sometimes this helps motivate them to work towards a goal.  At other times, they decide they really aren’t that interested and do not work as hard or pursue a topic very long.  I believe that, overall, this has helped them to enjoy their homeschooling journey.  We do have some ‘musts’ in our homeschool, but we are much more relaxed than we were at the beginning.  The reason for that is because I have seen the learning take place, much of it aside from our ‘school’ assignments.  Life is a wonderful teacher, and I am now watching my children reap the rewards.

My eldest daughter is now using the skills and knowledge she has gained through her pursuit of art, and is teaching younger children.  She just held her first art class in our home today.  I enjoyed watching her work with the girls, teaching them to enjoy the pursuit of art and to take pride in their work.  Teaching this class is also allowing her to earn some money for her own expenses, including saving for a summer missions trip.  She continues to learn through life, and benefit herself and others, even while teaching and pursuing one of her loves.

I encourage you to observe your children.  What are the topics they are drawn to?  What do they spend a lot of time talking about, playing with, and researching?  Perhaps you could allow them extra time to learn more after their academic work is done, or possibly in place of it.  Allow them to grow into self-directed learners. I believe you, and they, will enjoy it as much as we have!

Did you miss our previous How to Homeschool posts? I’ve linked them below for you!

HOW do I homeschool?

How to Homeschool: Homeschooling Methods, Curriculum, and Resources

How to Homeschool: Homeschool Field Trips

This week we have linked up with The Homeschool Village. Click on the image below to go see what everyone else is sharing!

The Homeschool Village

Thanks for stopping in. Come back and join us next week for our 2nd linky party!

Preparing For a New Season!

NoClutterZone_Boyd

It’s that time of year again, ladies!  Fall is here and winter is soon upon us.  It’s time to declutter those closets!!

Living in Kentucky where it goes from blazing hot to freezing cold, I have to admit I have a lot of clothes that I really only wear a few months out of the year. Due to limited drawer and closet space, I have come up with a routine that I learned from my own mom. This is a way to help keep you organized. It always seems to me that I feel better the more organized and tidy my house is. Being a single mom with two little boys, there is a beautiful mess in my home all the time. So I like to clear out unneeded clutter when I can.

Items Needed:

  •  Boxes or Totes
  •  Markers or Labels

Directions:

  •  Go through each person’s clothing individually and pull out the clothing they will not be wearing for the upcoming season. Also, this is a good time to pull out items that you no longer need, or no longer fit. You can save them for a garage sale or donate them to a friend or to a non-profit agency, like Goodwill or Salvation Army.
  •  Put the clothes in a box. I always use a separate box for each family member. If you would like, you can use the plastic totes with lids to store the items.
  •  Label the boxes or totes with the person’s name and what clothing is inside. Example: “Tristan’s Summer Clothes”
  •  Store the boxes out of the way, until they are needed again.

I hope you find this decluttering tip helpful. Little things can make a big difference in the long run.

Happy Cleaning!

Amy

How To Make a Home Management Binder

Home Management Binder …also known as a Household Binder.  The first question you may have is, “What Is It?

This is where I keep things that are important to me; things that help me manage my home more effeciently. My Command Center, so to speak. In this binder, I keep things such as:

  • Schedule
  • Meal Planner
  • Recipes
  • Cleaning Schedule
  • Kid’s Stuff
  • Contacts
  • Blog Schedule
  • To-Do / Projects

Binder1
For this project, you will need the following items:

3-ring Notebook – 3-inch
Sheet Protectors
8 Divider Sheets
8 Index Dividers

Directions:

You will begin by inserting your dividers into your notebook, and attaching the index labels. You will label each of your index tabs with the categories listed above.

Then you will begin adding in your inserts. I’ve listed several below, with links to take you to the free downloads, in some cases.

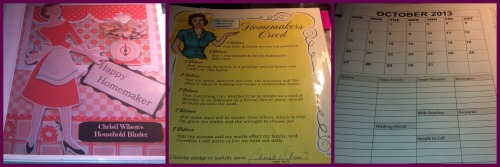
The first thing you will see when you open my binder is the Homemakers Creed, and a lot of other marriage or family-oriented inserts found on Darlene Schacht’s website (Time Warp Wife). Click on the link above to be taken to this awesome FREE printable!! You will find a lot of the inserts in my binder are from Darlene’s website.  Just click here: www.time-warp-wife.blogspot.com and click on the Freebies tab.

The freebies I have downloaded from Darlene’s site, and have added into my binder are:

  • Homemakers Creed
  • The Proverbs 31 Woman
  • The Ultimate Marriage Vow
  • Marriage Manifesto
  • Mommy Manifesto

SCHEDULE
The next thing you will see is the first section of my binder: Daily Planning Goals and Calendars. I find my calendar printable, again from Darlene’s website. Click on the link above to download your free calendar printable. This particular calendar from her site is awesome! Each monthly calendar includes the calendar, a To-Do list, Hope-To-Do List, Prayer Requests, Reminders, Thinking Ahead, Bible Reading, Groceries, People to Call. I love these calendars!!! You will also find my Birthday calendar. This calendar lists the birthdays of all family members.

MENUS
In this section of my binder, you will find:

  • Grocery List
  • Meal Planner
  • Coupon Pocket
  • Freezer Inventory
  • Pantry Inventory
  • Freezer Storage Cheat Sheet
  • Produce Buying Guide
  • Internal Cooking Temperature Cheat Sheet

RECIPES
This is where I store printed recipes that I love!

HOME CLEANING ROUTINE
In this section of my binder, you will find:

  • 60 Uses for Baking Soda
  • Daily Housekeeping Schedule (time warp wife)
  • Weekly Chores for Life (time warp wife)
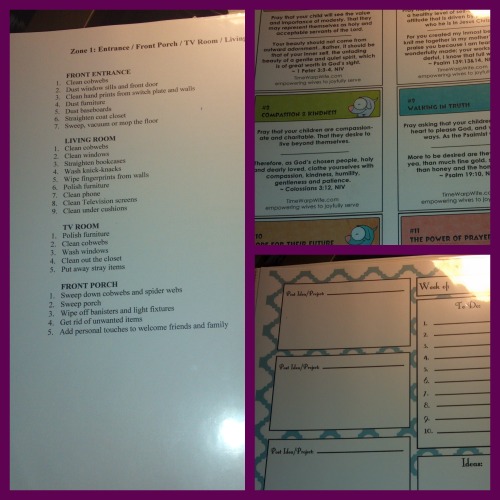
  • My Zone Cleaning Schedule from FlyLady.com

If you haven’t tried FlyLady.com yet, give it a try! Each week, you are given a zone in your home to clean. She gives you a complete list of what to accomplish in each of those zones. Pretty cool stuff!

Binder2

KIDS
In this section of my binder, you will find:

Quick References for Kids

  • House Rules
  • Chores Chart for my kids
  • School District Directory
  • School Lunch Menu for each month
  • School Calendar – I tore this calendar apart so I could put each month in a sheet protector. Since it is the calendar for our school district, I went through each month and highlighted our school’s events for the whole year, including PTO meetings, holidays, spring break, early dismissal, and so on.
  • Classroom Handbook from our daughter’s teacher
  • Birthday List of each student in class

I have also included things for my own personal use that will help me pray for and encourage kids that come through our home through the Safe Families For Children organization, as well as my own kids and grandkids!

  • 31 Ways to Inspire Your Children
  • 31 Ways to Pray for Your Children
  • 31 Prayer Card for Your Children (time warp wife)

CONTACT LIST
In this section of my binder, you will find:

  • Contact List from my husband’s work
  • Medical Staff & Provider Directory for our community
  • Ultimate Contact Sheet that lists the numbers for grandparents, doctor, dentist, hospital, pharmacy, school, coaches/teachers, vet, housekeeper, insurance agent, miscellaneous. I downloaded this document from SimpleOrganizedLiving.com

BLOG
In this section of my binder, you will find information for my personal blog:

  • Monthly Blog Schedule
  • Weekly Blog Schedule – breaks my month down into Ideas/Projects, To-Do’s, Weekly Statistics, Bloggers to Encourage. It’s always a good idea to find bloggers to encourage. Blogging can be a pretty lonely job sometimes!! 🙂
  • Website Log-ins sheet
  • HTML Codes Cheat Sheet

TO DO / PROJECTS
In this section, you will find nothing but notebook paper. I use this section for things like vacation to-do’s, home projects, holiday/birthday shopping ideas, and more.

*****

I hope you have enjoyed a sneak peek into my Home Management Binder, and a little bit into my own personal life! I think having a good system like this is important, as it can help us stay organized and focused on the things that need to be done. I always feel good at the end of the day when I can look back at my list and see the items that have been checked off! I can go to sleep feeling quite an accomplishment has been achieved! A very good feeling!

Blessings,

Christi

________________________

If you would like more housekeeping, home organization tips, recipes, and more from Christi’s personal blog, visit her at:

www.ChristiWilson.blogspot.com