November 25, 2024

Frozen Pea Salad

Frozen Pea Salad Resized

Here we go, ladies – we’re heading into the holiday season!  Every time I go to the supermarket now I see dozens of magazines at the check out, with photos of glorious turkeys and fantastic centerpieces.  But let’s be honest – not everyone will have to make a turkey this year. In my case, my newlywed brother-in-law and his wife will be hosting Thanksgiving, so they are in charge of the turkey.  But it’s always good to have a couple of  side dish recipes in mind.  I’m usually responsible for making at least one pie and cornbread stuffing, plus some kind of vegetable  dish.  This year, I plan to bring this Frozen Pea Salad.

Before you think I’ve gone off the deep end, No, the peas are not frosty little balls of ice.  They are thawed and cold, but not actually frozen anymore.  The version of this recipe my Mom used to make featured sour cream and a little mayonnaise.  I’ve switched that out for Greek yogurt to up the protein and lower the fat a little bit.  This can easily be doubled or tripled, depending on how many people you are serving, but I would suggest not adding in the cashews and bacon until you are ready to eat, so the textures stay distinct.  It’s sweet and salty, crunchy and chewy, cold and delicious!  If you need an easy, off-beat vegetable side dish, read on, friends!

Frozen Pea Salad

Ingredients:

  • 1 pound frozen peas
  • 1/2 cup Greek yogurt (or more, to taste)
  • 2 green onions, finely sliced
  • salt and pepper
  • 1 cup salted, roasted cashews (you can break them up a little or leave them whole)
  • 4 slices bacon, fried crisply and drained

Directions:

  1. Take the peas out of your freezer and empty the bag into a Pyrex or other casserole dish.  Set them by the stove as you fry the bacon.  The heat from the stove will help the peas thaw.
  2. Fry the bacon crispy, drain it well, blot with paper towels, and dice.
  3. Are your peas thawed yet?  If not, microwave them for thirty seconds at a time, stirring well each time, just until the ice melts and you can squish a pea between your fingers.  You still want them very cold, just not icy and crunchy.  When thawed and still very cold, drain any extra water in the bowl.  Mix in yogurt and green onion, and season with salt and pepper.  Refrigerate until ready to serve.
  4. When serving, sprinkle the pea salad with cashews and bacon.  If you have leftovers, either keep the cashews and bacon separate, or make sure they stay on top.  If they get mixed into the salad and then saved that way, they will soften up.  It will still be delicious, but it won’t have the crunchy versus soft texture difference that makes this salad so fun!

Explore, experiment, enjoy! — Dana


To view even more of Dana’s unique recipe, you can visit her at Frugal Girlmet!

School Projects in a Jiffy

School Projects in a Jiffy.

amynov6-3.jpg

For me, being a crafty person has paid off this week. Tristan, my sixth grader, told me last night that he had a science project due in the morning.  Luckily, we had all the supplies he needed at the house.  Below is a list of items that would be good to have on-hand if you have schoolaged children.  This is also what Tristan used for his diorama science project.

Items Needed:

Paint
Paint brushes
Box (shoe box or decorative box)
Foam animals
Plastic Trees
Plastic Rocks
Glue Gun
Stick Glue
Note cards
Tape
Pens, Pencils, or Markers

Directions:

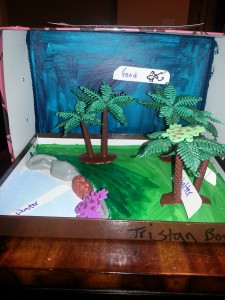
Tristan’s project was to create an animal habitat. We looked through the house, his toys, and my art supplies and found what we had in order to create an animal habitat. It turns out, that we had enough items to create a rain forest with frogs.

Tristan painted the scenery: blue for the sky, light blue for the pond, and green for the grass.  He hot-glued the rocks, trees and frogs in place.  He then labeled the parts of the habitat with a marker and cut out pieces of note cards.  He  used the stick glue to glue those in place.

Tristan had to make a presentation about his project, so he made notes on a note card and taped it to the top of the box.

Below is the before and after project.  I am so proud of Tristan.  He did a great job with very little direction from me. This is something fun to do with your kids. Hope you give it a try.

amynov6-1.jpg


amynov6-2.jpg


Have Fun!

Amy

Oven-Roasted Pork Chops with Lemon-Caper Sauce


Where others have a sweet tooth, I have a sour tooth.  I’ve been known to use only vinegar, and skip the oil, when dressing my salad.  I eat cornichons like other people eat bon-bons.  So when I saw this recipe for Oven-Roasted Pork Chops with Lemon-Caper Sauce, I knew I was going to like it.

Using a recipe from my Complete America’s Test Kitchen TV Show Cookbook (which I highly recommend!), I made a few changes to work with what I had.  If you don’t have a shallot, feel free to use a red onion – just mince as finely as possible.  These pork chops were easy, quick, and nearly fool-proof.  They were tart and tangy (but not pucker, so if you are not a sour-lover like me, you won’t be put off.)

Oven-Roasted Pork Chops with Lemon-Caper Sauce

Ingredients:

  • 4 pork chops, about 1 1/2 inches thick, trimmed of excess fat
  • 2 tablespoons oil or bacon fat for cooking
  • 1 medium shallot, minced
  • 1 cup chicken broth
  • 1/4 cup lemon juice (about 2 lemons)
  • 2 tablespoons capers, drained
  • 3 tablespoons butter

 Directions:

  1. Preheat oven to 450*F.  Heat the oil in a large skillet over high heat, and brown the pork chops on one side, for about 2 minutes.  Flip and brown the other side, another 2 minutes.
  2. Transfer the chops to a foil-lined baking sheet or large, wide baking dish (so they aren’t crowded or touching each other.)  Roast in the oven until the internal temperature reaches 140*F on a thermometer, about 15 minutes, turning them over halfway through cooking time.  Remove from the oven, place on a platter, and cover with aluminum foil. Let the chops rest for about 5 minutes, and check to make sure the internal temperature has reached 150*F.
  3. While the chops are in the oven, add the shallot to the skillet you cooked the pork chops in, and cook over medium heat until softened, about 30 seconds (about 2 minutes if you are using an onion.)
  4. Increase the heat and add the broth, stirring to scrape up any bits stuck to the pan.  Add the lemon juice and capers and cook until the sauce reduces to about 1/3 cup, about 4 minutes.
  5. Off the heat, whisk the butter into the sauce, and pour over the pork chops.

Explore, experiment, enjoy! — Dana


To view even more of Dana’s unique recipe, you can visit her at Frugal Girlmet!

5 Ways to Keep Your Littlest Homeschoolers Busy

Homeschooling can be a challenge any day of the week. Add in a toddler or preschooler (or both!), and it can become downright difficult if you don’t have a plan for keeping them busy! Today I have some ideas for you that are engaging as well as educational, and should help corral those younger ones while you read aloud, help their sibling with math, or try to prepare a meal.

5 Ways to Keep your Littlest Homeschoolers Busy www.girlfriendscoffeehour.com #homeschool


5 Ways to Keep Your Littlest Homeschoolers Busy

  • Utilize blanket time (or room time/playpen time) while you read to older siblings. Place a blanket on the floor for each child; choose, or have your child help you choose, a few select toys to play with during this time (2 to 3 at most); set the timer for prescribed amount of time, 5 to 45 minutes (training will be needed, but you can teach your child to stay in one place for the full 45 minutes, perhaps longer, with a little practice).  During the learning phase, don’t expect to be able to get alot done, but after a few days to a week for most children, you will be able to get some good learning time in. Try this several times a day in short amounts, or a couple of times per day for a longer stretch of time!
  • Give your child his or her own ‘work’ to complete during your learning time. Find fun coloring or tracing pages, easy sorting activities, or books for your child to look at while you work with a sibling.  Have him sit right next to you while doing this to ensure that he stays engaged and you remain aware of what he is doing.
  • Take your lessons outside.  Set up for reading or doing math problems at a table near an area where your smaller children can safely play.  This is a great time during warmer months to introduce water or sand play, pull out the Play Dough and paints, or experiment with other messy play like shaving cream painting, tracing letters in cornmeal, or pushing trucks through a bin of corn kernels.
  • Have older children play with the younger children while you work with their sibling. If you have older children, you may find a way to schedule times for each of them to play with your younger children while you teach another sibling his English lesson or practice reading. Then switch and work with the other child.  Even younger children can be put ‘in charge’ of a sibling who is younger than them, if they are in a nearby room and have access to mama as needed.
  • Spend time with your youngest children first.  You may find it easier and more productive to take your smallest children outside, or to spend some time doing a special activity, first thing in the morning.  Your older children can use this time to complete chores and any independent work they may have (handwriting, silent reading, essays, research, typing, etc.).  This often helps the younger children be in a better frame of mind to play on their own for a bit while you spend some time with their older siblings. Their ‘tank’ has been filled and they are ready to get started with their day!

Still need some fun and practical ideas? Here are a few blog posts on the topic that you may find helpful.

How Do I Keep My Preschooler Busy? by Kendra over at Prechoolers and Peace.

Keeping Toddlers Busy During Homeschool & Baby and Toddler Busy Ideas by Karen over at Teach Beside Me.

Planning Busy Activities for Toddlers During Homeschool from Tabitha of Meet Penny.

Sensory Bottle Fun by Lara at Lara’s Place and a Cup of Grace.

Great Preschool Activities from Monique at Living Life and Learning.

Chili in a Pumpkin

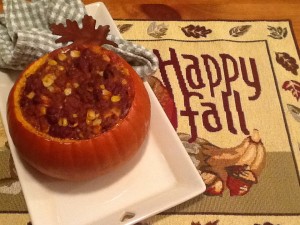
Here on our Monday installment of At Home w/ GCH, we have been featuring recipes which include Fall in-season fruits and veggies.  This week’s recipe is baked in a pumpkin…I’m thinking that you can’t get much more autumnal than a pumpkin!  This is super easy…and makes for a fabulous presentation.  You can use one pumpkin and serve all of your happy eaters a ‘slice’ of pumpkin.  Or (which I am going to do for our Thanksgiving feast) you could purchase those adorable little ‘Jack Be Little’ pumpkins and serve one per customer!  I wouldn’t suggest too large a pumpkin though; they can be very stringy…not appetizing at all!  Optimally, use a pumpkin that is called ‘pie’ pumpkin; these are approximately 1-3 pounds and are of a size that can easily be held in the palm of your hand. Check out these incredible nutritional facts, too.  Alternately, you could make a Vegetarian Chili to serve in your pumpkin; here is a recipe that you might check out.  Or, of course, your family’s favorite chili recipe!  <3

Chili in a Pumpkin

2013-10-24 20.24.55

Ingredients
1 2#-3# “pie” pumpkin 
1# ground beef
2-3 tablespoons olive oil
1 medium-sized sweet onion, chopped
1 large red bell pepper, chopped
4-5 ounces Baby Bella mushrooms, chopped
3 tablespoons chopped garlic (I use jarred)
1-28ounce can crushed tomatoes
1-15 ounce can dark red kidney beans, rinsed
1-15 ounce can black beans, rinsed
1 package taco seasoning (or try this)
1-2 cups frozen corn, defrosted
Optional toppings: sour cream, shredded cheese, chopped avocado, salsa

Directions

Pumpkin:

  • Preheat the oven to 375.
  • Carefully slice the “cap” off of the pumpkin. Discard the cap. Clean the seeds thoroughly out.
  • Lightly oil the inside of the pumpkin, and season well with salt&pepper.
  • Place the pumpkin into a baking pan, and bake for 40-45 minutes (depending on the size of your pumpkin, it will be less or more time).  Remove from oven when a sharp knife inserted into the flesh (inside) of the pumpkin is tender but not mushy.

Chili:

  • While the pumpkin is baking, saute the ground beef ‘til all the pink is cooked out.  Drain away the excess liquid and set the cooked meat aside.
  • In the same pan, add 2 tablespoons olive oil to heat over medium heat; add the chopped onion and mushrooms.  Saute for 5-6 minutes.
  • Add in the chopped bell pepper; stir well.  Saute the veggies for approximately 6-7 minutes ‘til just beginning to get slightly brown.
  • Lower heat and add chopped garlic.  Stir constantly for 1 additional minute.
  • Increase heat to medium-high, pour in the chopped tomatoes and the taco seasoning mix.  Stir.
  • Finally add back the cooked meat as well as the beans; stir well ‘til all is combined.
  • Bring just to a boil; and lower heat so the mixture is gently simmering.
  • Simmer away until the pumpkin is ready.

Assembling:

  • When the pumpkin is tender, remove from oven.
  • Stir the corn into the meat-veggie-bean mixture, and then pour this mixture into the pumpkin.
  • Return to oven and bake for approximately 30 minutes.  (Again, this will depend on the size of your pumpkin.)
  • Remove from oven; slice into serving size pieces.
  • Serve with your choice of toppings.  Enjoy!

♥  ♥  ♥  ♥  ♥

God loves you!  ♥  (Don’t ever forget that!)

♥  coleen

Pumpkin Spice Coffee Creamer


Cheers!

Cheers!

Since the website is called Girlfriend’s Coffee Hour, I think we should have a post actually about coffee!  One of the hardest things I’ve ever done for my health was changing how I took my morning coffee.  I was a teaspoon of white sugar plus half and half kind of girl.  I was also a big fan of Coffeemate creamer – you know, Irish Cream, French Vanilla, Hazelnut – the good stuff. Unfortunately, white sugar first thing in the morning creates a huge insulin spike, setting you up for inflammation, sugar cravings, energy crashes – the list goes on.  And I dare you to pick up a bottle of flavored coffee creamer at the store and tell me what half of those ingredients are. Chemical city!  So I decided to surf the web and find something to jazz up my coffee (because a splash of almond milk just isn’t making magic in my cup.)  After some experimentation, I present to you:  Pumpkin Spice Coffee Creamer!

This recipe is dairy-free, gluten-free, and processed sugar-free.  I used maple syrup for a little sweetness, but you can use honey or stevia if you prefer.  This recipe calls for an egg.  Try to find organic, best-quality eggs – hopefully you can find a farmer’s market that carries local eggs, because that really lowers any salmonella risk.  If it freaks you out, you can skip the egg, but it really does add body and substance to the creamer.  I keep this in a mason jar in my fridge.  I go through it in about a week and that seems to work well.  It may get solid, and that’s fine – just scoop out a ball of creamer with a tablespoon and it will melt immediately in your coffee.  If you want to make a fall treat for the kids, heat up some milk in a pan on the stove, stir in a quarter cup of the Pumpkin Spice Coffee Creamer, and garnish with whipped cream and a little extra cinnamon!

Pumpkin Spice Coffee Creamer

(makes about 16 ounces)

Ingredients:

  • 1 can (13.5 ounces) full-fat coconut milk
  • 1/4 cup pumpkin puree
  • 1 egg
  • 1 teaspoon pumpkin pie spice (or 3/4 teaspoon ground cinnamon and 1/4 teaspoon ground nutmeg)
  • 1 teaspoon vanilla extract (or try half vanilla and half almond extract!)
  • 2 tablespoons maple syrup
  • 1 tablespoon coconut oil (optional, but I like it!)

Directions:

  1. Add all ingredients to the blender and mix for 30 seconds.  That’s it!  Pour into a jar with a lid and store in the fridge for up to one week.

Enjoy!

Dana


Sprucing Up the Place! :)

This weekend, I moved into a new rental home. It is really cute and was well taken care of, for the most part. It is an older house so some of the closets and cabinets needed some sprucing up. So, I decided to re-cover the shelves in one of the closets and to re-cover the cabinet underneath the bathroom sink.

Items needed:

  • Contact Paper – any design you choose
  • Scissors or Box Cutter

Directions:

• Clean the area you want to re-cover the best you can. I had to bleach underneath the bathroom sink before I could begin this process. I let it dry overnight as well because it was really dirty!

Pre-measure the amount of contact paper you will need. Then, cut the paper.

• For the shelves, I wrapped the contact paper around the edges so it would stay in place. For the bathroom cabinet, I had to use two pieces of contact paper and overlap them in order to cover completely.

• Take off the back of the contact paper and gently stick the paper in place. Rub all the air bubbles out with your hand or a sponge.

• Put the shelves back in place and you are done.

Pic1


Pic2

The before and after pictures tell it all. I like the creative designs and colors. Little things like this make me happy and I must admit it is a big improvement.

Have Fun,

Amy 🙂

Harvest Soup

2013-10-15 21.49.39

This past weekend some of my large family (I have 7 brothers and sisters, along with their spouses, children, and grandchildren and my own daughter, son-in-law, and their 4 children!) came to celebrate my 58th birthday; happy me!  One dish that we shared was a Harvest Soup, full of veggies and grated apples…very yummy.  This is a slightly sweet soup, very satisfying and filling.  Also, I chose to make it vegan since I was sharing it with my beautiful sister, Brigit.  (The dollop of sour cream in the above pic was in my own bowl of yummy soup!)  This would make a great addition to your own menu when you have vegans, vegetarians, and meat-eaters 😉 sharing a meal together.

Here on our Monday installment of At Home w/ GCH, we have been featuring recipes which included Fall in-season fruits and veggies.  This week, our recipe features a few: apples, cauliflower, and (surprise!) butternut squash.  This week’s recipe fits into our healthy but-oh-so-yummy! category since it is really yummy (did i mention that before?), extremely low in fat, and full of delicious, nutritious vegetables.  Enjoy!  <3

Harvest Soup

Ingredients:
2 butternut squash
1 large head of cauliflower
3 teaspoons olive oil
Kosher salt, freshly ground pepper
1 sweet onion
1 additional teaspoon olive oil
2-3 tablespoons chopped garlic
2 quarts of vegetable stock
2-3 apples, grated
1 can coconut milk (shake well!)

Optional add-ins:
Cooked, crumbled bacon
Sour cream
Shredded sharp Cheddar
Chopped avocado
Sprinkle of cinnamon (try it!)

Directions:

  • Preheat oven to 425.
  • Peel the butternut squash; scoop out the seeds and strings; and cut up into 2″ pieces.  Set aside in a large bowl.
  • Cut up the cauliflower into smallish-size florets; add to bowl.  Pour in olive oil and season veggies with salt and pepper.  Stir well, pour onto a baking sheet and roast for 20-25 minutes.
  • Meanwhile, dice onion fairly small and saute along with 1 teaspoon olive oil over medium high heat for 5 minutes or so; reduce heat to low and add in chopped garlic stirring constantly for 1 minute.
  • Pour in the vegetable stock; add salt and pepper to taste and simmer gently.
  • When the veggies in the oven are done roasting, remove from oven and immediately pour into your stockpot.  Stir well to combine.  Allow to simmer for 20 minutes or so,adjusting heat if necessary.
  • When done, scoop out about 1/3 of the veggies and use an immersion blender to puree what is left in the stockpot.  (This could also be mashed, or, very carefully, pureed in a standard blender in batches.)  Taste (be careful…it’s hot!) for additional seasoning, and add back in the reserved veggies.
  • Add the grated apple and pour in the coconut milk; stir well.  Done!
  • Optional add-ins can be put atop individual bowls of soup.

♥  ♥  ♥  ♥  ♥

God loves you!  ♥  (Don’t ever forget that!)

♥  coleen

Baked Fish with Cilantro Sauce

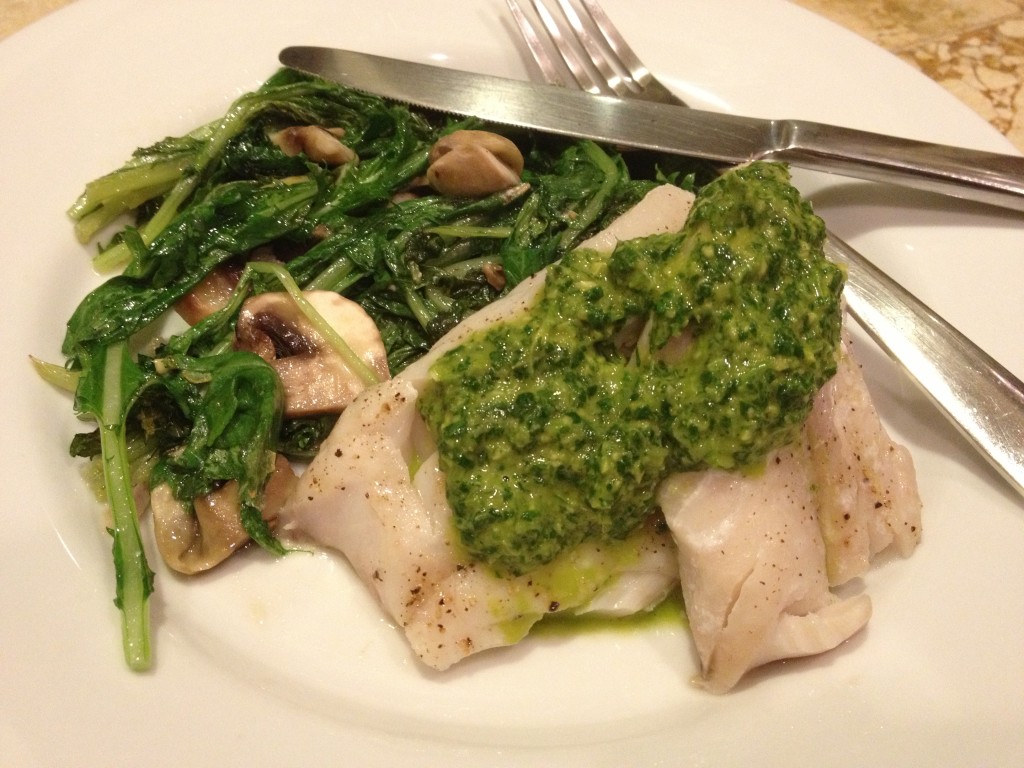
Baked Fish with Cilantro Sauce


Monday I went to Costco and found some really beautiful fish.  It was so yummy-looking, I couldn’t pass it up, even though I didn’t know what I was going to do with it.  Google to the rescue!  I went to a site called Epicurious.com that I’ve had luck with before, and found a recipe for halibut, but it said you could use any firm-fleshed white fish.  Bingo!  I changed a few things, and now I’m calling it Baked Fish with Cilantro Sauce!

Use whatever firm-fleshed white fish you have.  I used rockfish, which is like red snapper.  You can also use halibut, cod, and probably even tilapia.   And if you’re not really a fan of fish, I bet you could even get super crazy and make this with thin-sliced chicken breast (though you’ll probably want to cook it a little longer.)  The cilantro sauce is phenomenal!  The original recipe called for shitake mushrooms.  I didn’t have any, so I used regular button mushrooms.  But I really liked the mushroom flavor in the recipe and wished it was stronger.  I would suggest a wild mushroom mix, or maybe portobello mushrooms if you can find them.  Regular button mushrooms will work fine, but if you like mushrooms, maybe use more than the recipe calls for.  And if you can find shitakes, by all means use them!

Full disclosure:  My girls didn’t really like this.  I think this is maybe more of a grown-up dinner.  So make this for you and your adult diners, and maybe throw some fish sticks in the oven for the kids.  That meant I had leftovers.  I ate them yesterday for breakfast … and finished the rest off at lunch!  (Can you tell I really liked it?)

Baked Fish with Cilantro Sauce

(Serves 4)

  • 1 bunch fresh cilantro, ends trimmed off (but use the stems too, not just the leaves!)
  • 1 clove garlic
  • 1-inch piece ginger, peeled
  • 2 teaspoons sesame oil
  • 3 tablespoons olive oil
  • 1 small squirt Sriracha chili sauce, or other hot pepper sauce of choice
  • juice of one large lemon
  • 1 1/2 pounds filets of rockfish, halibut, cod, or other firm white fish
  • 1 pound green beans, trimmed
  • 1 bunch mizuna or arugula
  • 8 ounces mushrooms, sliced
  • 3 cloves garlic, finely sliced
  • 3 tablespoons olive oil
  • salt and pepper

Directions:

  1. Preheat oven to 450*F. Combine first 7 ingredients (through the lemon juice) in a food processor and blend until mostly smooth.  If you’d like it a little smoother, you can add more olive oil.  Taste and add salt if desired.  Set the sauce aside.
  2. Wash and trim the green beans, and cut into bite-sized pieces.  Place in a covered bowl and add a tablespoon of water.  Microwave for 2 minutes.  You just want to help them along so they can bake in the oven and not still be crunchy when the fish is done.
  3. In a large bowl, combine the mizuna or arugula, sliced mushrooms, sliced garlic,and green beans.  Drizzle with 2 tablespoons of olive oil.  Place in the bottom of a very large casserole dish (like one you would use for lasagna.)  Place the fish filets on top, season with salt and pepper, and drizzle with the remaining tablespoon of olive oil.
  4. Bake for 10-15 minutes, depending on the thickness of your fish filets.  Divide fish and vegetables among 4 plates, and serve with the cilantro sauce.

Explore, experiment, enjoy! — Dana


To view even more of Dana’s unique recipe, you can visit her at Frugal Girlmet!

Fun Fall Recipes for the Homeschool Family and Linky Party

AHWGCH_Woerner


Fall has arrived in my neck of the woods. I can see hints of orange in the treetops as I sit here writing this post. Along with the fall season comes cooler weather and, for me, an urge to prepare all sorts of delicious fall dishes that we may not serve so much throughout the rest of the year.

This week I have collected several recipes for you for some fall fun in the kitchen! I’ve linked them below for you. I hope you’ll try some of them, and please do come back here to let me know how it went!


Fun Fall Recipes

Granny’s Perfect Pumpkin Pie: Plus a Yummy Gluten Free Option, found at Not Consumed.

Caramel Pumpkin Doughnut Hole Muffins, Perfectly Pumpkin Pancakes, Perfectly Pumpkin Waffles, and Rustic Apple-Stuffed Coffee Cake from A Nest in the Rocks.

Pumpkin Spiced Oatmeal from A Moment With Mom.

Cinnamon Orange Stovetop Potpourri from Covenant Ranch Trucking.

Gluten Free Apple Crisp found at The Chaos and the Clutter.

Dairy Free Pumpkin Bread and Mixed Berry & Cocoa Nib Oatmeal Cookies from Southern Test Kitchen.

Fall Inspired Caramel Apples found at Happy and Blessed Home.

Pumpkin Cream Cheese Muffins from Preschoolers and Peace.


Fun Fall Linky Party 

I hope you will link up with us this week with your own fall recipes. You’ll find the linkup listed below.

Also, next week when we host the next linky party, we have chosen a theme for you. Pumpkin Painting, and we’ll be having a contest!  Be sure to work on your pumpkins between now and then, and come link up next week to enter the contest.  Children and parents alike may enter to win.