November 24, 2024

I Got Them to Eat My Mashed Cauliflower Recipe

final

Recently, I attended a dinner party with my husband that served what I thought was mashed potatoes (which has never been my favorite).  Much to my surprise it was not potatoes, but mashed cauliflower—and I loved it.  Prior to that, I had found several recipes for this dish, but was not brave enough to serve to my family, who love mashed potatoes but are not thrilled to try new vegetables.  However, since my husband loved them as well, I thought I would combine a few recipes and add my own twist. Could I get my family to eat my mashed cauliflower recipe in the name of mashed potatoes? (not a lie, just not telling the truth).

As my daughter sat down at the table with excitement, as she always does at the sight of mashed potatoes, I waited with anticipation for the first bite.  Her words, “Mom, you did something different and they are really good.”  Yes!  But too early in the game to tell her the truth.

Here is the recipe that my 9 year old daughter and husband loved.

Ingredients: (4 servings)

  • 1 head of Cauliflower
  • 3 Tablespoons of skim milk
  • 1 Tablespoons of I can’t Believe It’s Not Butter
  • 2 Tablespoons of light cream cheese
  • 1 Tablespoon of garlic
  • 1/2 cup of shredded cheese
  • Salt and pepper to taste

Directions:

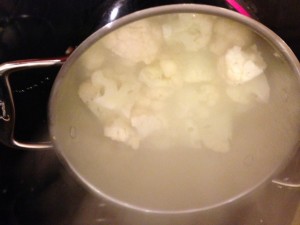
  • Boil your cauliflower until tender about 15 minutes

Boiling

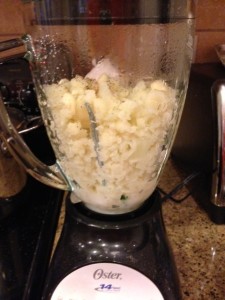
  • Add all ingredients and blend or mash to your desired consistency.  I have done them in a blender as well as mashed by hand and both were well received.

blender


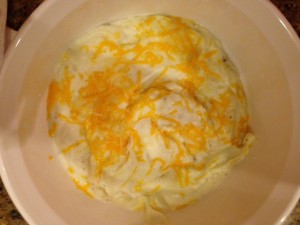
  • Sprinkle with cheese and bake 10-15 minutes at 350 degrees to melt cheese; serve hot.

final

 This easy and quick side dish at only130 calories, 11grams of carbs and 6grams of protein, is not only tasty, but a great way to sneak in a serving of vegetables to your diet and home.

I did come clean with my daughter a few days later when she explained to me how much she did not like vegetables.  I could not resist but to inform her that she does like cauliflower. With the confused look on her face, I reminded her of the tasty mashed potatoes and let her in on the secret.  It was a proud moment for me to know I got her to eat my mashed cauliflower recipe.

In Good Health

Crystal
Gluten free, Grain free Zucchini Muffins

Here on our At Home with GCH blog, Monday’s are always focused on healthy but oh-so-yummy! recipes.  This recipe fits perfectly into the category being it is low in fat (uses greek yogurt and a small amount of coconut oil or butter), is gluten-free, grain-free, and more than one cup of vegetables.

Have you ever used crystallized ginger?  I just love this product and try to always have some stored in the freezer.  (Hint: if you keep it frozen, it is super easy to grate up to put into your recipe.)  It is a great ingredient to add to many spicy dishes.  We especially enjoy it in Thai food!  Try adding a bit to any baked goodies that have cinnamon, or nutmeg, in them.  I buy mine in the grocery store; look for it either in the Asian food aisle, or the baking goods aisle.

Oh…just  a suggestion:  perhaps you might want to make a double batch!  Enjoy!

IMG_1556

Zucchini Muffins

makes one dozen regular-sized muffins

Ingredients:

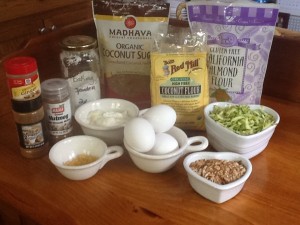
topping ingredients:IMG_1553
1/4 cup chopped almonds
1 tablespoon sugar (I use coconut sugar)
1 teaspoon cinnamon
2 tablespoons almond flour
2 tablespoons very cold butter, cut into little cubes

muffin ingredients:
1/2 cup sugar (I use coconut sugar)
3 eggs
3/4 cup greek yogurt
1/4 cup softened coconut oil
1+1/2 cup shredded zucchini, squeezed dry in a dish towel
1 teaspoon cinnamon
1/8 teaspoon powdered ginger
1 cube frozen crystallized ginger*, grated fine
1/4 teaspoon nutmeg
1+1/2 cup almond flour
1/2 cup coconut flour
1 teaspoon baking powder

  • Heat oven to 325
  • Place muffin cups in muffin tin
  • Make topping ingredients first: mix all dry components of topping together; then drop in the butter cubes and quickly use your fingertips to incorporate the butter; set aside
  • In a medium-sized bowl, whisk together first 4 muffin ingredients until sugar is dissolved
  • Add zucchini (and crystallized ginger, if using) to the wet ingredients; stir well
  • In a separate large bowl, mix together the flours, spices, and baking soda
  • Add wet ingredients to the dry, mixing until incorporated
  • Divide batter into muffin cups evenly
  • Sprinkle on almond topping
  • Bake for 30- 35 minutes
  • After removing from oven, let cool for just a minute  and then remove to a cooling rack

Broccoli Stalk Soup

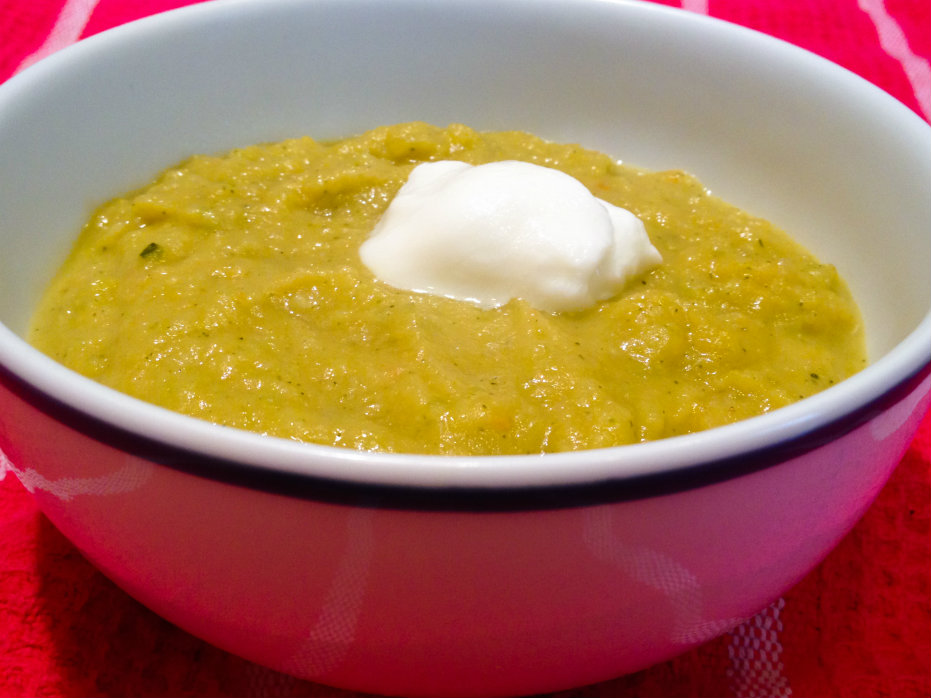
Broccoli Stalk Soup Resize

I’m coming in, just under the wire, with a soup recipe to round out January as National Soup Month!  It’s creamy, it’s Paleo, it’s as frugal as can be:  Broccoli Stalk Soup!

I seriously buy about ten pounds of broccoli a week, and I’m ashamed to admit how many stalks have gone to waste over the years.  My girls didn’t want to eat the tougher stalk and will only eat the florets, and to be honest, they do take a little more work to prepare if you want to serve the stalk together with the floret, since you have to peel off the tough outer layer.  But I couldn’t accept throwing all those healthy green vegetables into the compost bin, so I made a broccoli soup out of them.  Hooray – it is delicious and uses up nearly all the stalk.  So much less to compost!

If you don’t follow the Paleo diet, feel free to use one large or two small potatoes in place of the rutabaga.  But I really liked the rutabaga – I think it adds a sweetness, and contributes a creamy texture to the soup when you blend it.  And because you are blending it up, you don’t have to worry about mincing and dicing carefully – just chop up your veggies and cook them til tender.  You can serve this with some shredded cheese on top, or like I did, with a dollop of plain yogurt.  You can also add a little more chicken stock than I did if you want a thinner soup.  But I like it this way:  thick, warm, and truly satisfying!

Broccoli Stalk Soup

Ingredients:

  • 3 tablespoons olive oil or bacon fat
  • 1 large rutabaga, peeled and cubed
  • 3 cloves garlic, minced
  • 1 onion, sliced
  • 2 carrots, peeled and chopped
  • 6 broccoli stalks, plus one head of broccoli
  • 4 cups (or more) chicken or vegetable stock

Directions:

  1. In a very large pot, heat the oil and add the rutabaga, garlic, onion and carrots.  Cook on medium, stirring to keep the garlic from burning, for about ten minutes.
  2. While the other vegetables are cooking, prepare the broccoli.  With a paring knife or vegetable peeler, peel the broccoli stalks.  Cut off the bottom half inch of stalk, and then cut the stalks into smaller pieces.  Chop the head of broccoli and separate the florets.  Add the broccoli to the pot and cook another five minutes.
  3. Add the chicken stock and cover the pot with a lid.  Simmer over medium-low heat for about 20 minutes, or until the vegetables are tender.  Transfer soup to a blender – CAREFULLY! – in batches and blend until mostly smooth.  You can leave a few chunks if you like.  I used an immersion blender and it worked very well.  You can add a little more stock here if you want a thinner soup.
  4. Serve soup hot, garnished with grated cheese or yogurt.

Explore, experiment, enjoy! — Dana


To view even more of Dana’s unique recipe, you can visit her at Frugal Girlmet!

3 Keys to Increasing Communication with Your Children About How and What They Would Like to Learn

Welcome to the fifth and final week in this series on Organizing Your Homeschool for a Brand New Year.  I’m excited to share with you today about communicating with your children regarding learning methods and topics!

3 Keys to Increasing Communication with Your Children About How and What They Would Like to Learn www.GirlfriendsCoffeeHour.com #organization #communication

For a while after we began homeschooling, we followed a packaged curriculum and really enjoyed it. In fact, even though we don’t currently use a full packaged curriculum, I do have a favorite and may go back to it with my littlest two girls in the fall. I have such fond memories of our learning time with our books from Heart of Dakota Publishing!

When my 4th child was born, we began to move away from the full package of curriculum. I needed my children to work more independently at that time. My children were also getting a bit older and they had expressed the desire to begin learning about their individual interests more, as well. This is the plan I came up with to meet their needs.

3 Keys to Increasing Communication with Your Children About How and What They Would Like to Learn www.GirlfriendsCoffeeHour.com #organization #communication

3 Keys to Increasing Communication with Your Children About How and What They Would Like to Learn

  1. Talk with each of your children about what he or she is interested in learning more about. Keep in mind that these things may be academic in nature, but could also include topics such as cooking, art, beadwork, photography, writing a novel, and more. The sky is the limit! You will be able to find a way to incorporate almost any topic of interest into your learning day.
  2. Take your children to the library, the local bookstore, or used curriculum sales to search for books and/or curriculum that covers their topics of interest. Alternatively, you may also peruse catalogs at home or get online together to search curriculum or other learning web sites and blogs for the perfect learning tools for your family.
  3. Once you have your materials in hand, help your child to come up with a schedule or workable plan for using them to learn as much as possible about the topics he chose.

That’s it. Try using these keys in your homeschool, see how they work for you, and please do come back here and share with me how it’s going!

Do you have tips for increasing communication with your homeschooled child? Please do share in the comments below!

SoupPalooza 2014: Chili w/ Veggies

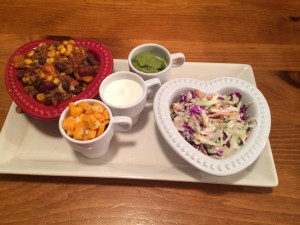
Final Week of SoupPalooza 2014!  Here on the Monday edition of the At Home w/ GCH blog, we have celebrated with four different soup recipes: Mushroom Soup with Wild Rice, Baked Potato Soup, Turkey Veggie Soup, and today’s recipe, a Chili w/ Veggies.  Each recipe a completely different ‘style’ soup than the next!  From Mr. Hayden and I, we hope you have enjoyed the variety…He certainly has!

This week’s recipe was inspired by a suggestion from our Dana Kim in her recent post ing of a Cabbage and Pineapple Slaw recipe.  (Boy, was that good!)  She hinted at a recipe for a spicy soup or chili.  So, I prepared BOTH her recipe along with mine…here y’go!  2014-01-25 22.54.47

Ingredients

2# ground beef (or turkey)
2-3 tablespoons olive oil
1 medium-sized sweet onion, chopped
1 large red bell pepper, chopped
4-5 ounces Baby Bella mushrooms, chopped1 medium-sized sweet onion, chopped
3 tablespoons chopped garlic (I use jarred)
1-28ounce can crushed tomatoes
1-15 ounce can dark red kidney beans, rinsed
1-15 ounce can black beans, rinsed
1 package taco seasoning (* see below for ‘homemade’ seasoning recipe)
1-2 cups frozen corn, defrosted
Optional toppings: sour cream, shredded cheese, chopped avocado, salsa

Directions


  • Saute the ground meat ‘til all the pink is cooked out.  Drain away the excess liquid and set the cooked meat aside.
  • In the same pan, add 2 tablespoons olive oil to heat over medium heat; add the chopped onion and mushrooms.  Saute for 5-6 minutes.
  • Add in the chopped bell pepper; stir well.  Saute the veggies for approximately 6-7 minutes ‘til just beginning to get slightly brown.
  • Lower heat and add chopped garlic.  Stir constantly for 1 additional minute.
  • Increase heat to medium-high, pour in the chopped tomatoes and the taco seasoning mix.  Stir.
  • Finally add back the cooked meat as well as the beans; stir well ‘til all is combined.
  • Bring just to a boil; and lower heat so the mixture is gently simmering.

Homemade Taco Seasoning Mix

1/4 cup chili powder
3 tablespoons dried minced onion
1 tablespoon garlic powder
1+1/2 teaspoons salt (optional, I do not include it)
2 teaspoons dried oregano
2 teaspoons ground cumin
1 teaspoon ground chipotle pepper
2 teaspoons paprika
1 teaspoon black pepper
½ teaspoon cayenne pepper
1/3 cup cornstarch

Place all ingredients in a small glass jar; shake really well ‘til all ingredients appear to be evenly distributed.  (To substitute for the mix that comes in a yellow package: use 3 tablespoons of mix and 1/3 cup water for each pound of meat.)

♥  ♥  ♥  ♥  ♥

God loves you!  ♥  (Don’t ever forget that!)

  coleen

Cabbage and Pineapple Slaw

Cabbage and Pineapple Slaw Resize

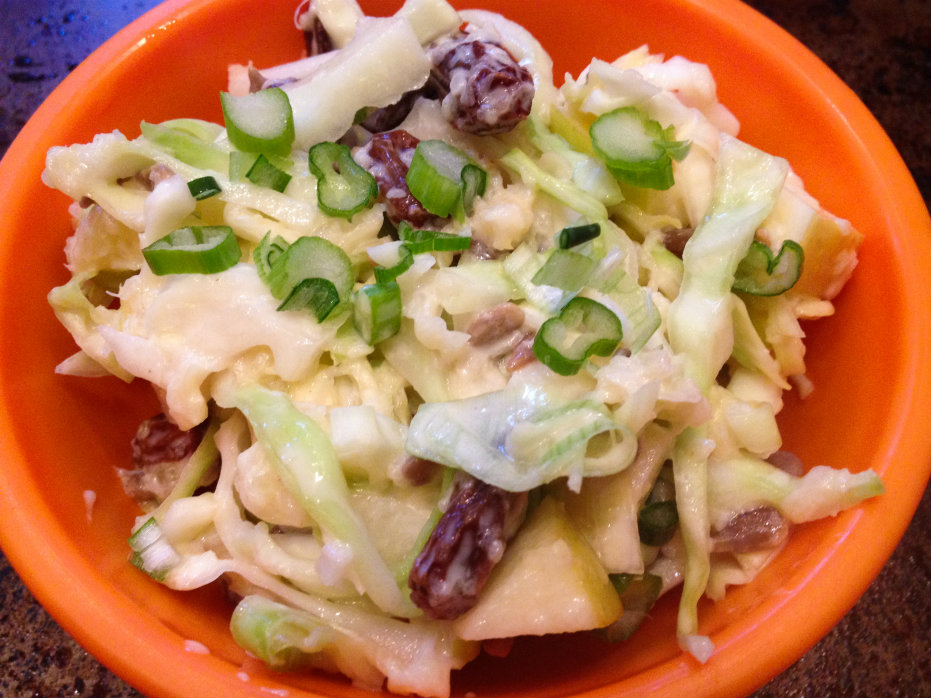
Don’t let the monochromatic appearance fool you – this salad packs a tasty punch!  Winter veggies come together with fruit, nuts, and a light yogurt dressing in this recipe for Cabbage and Pineapple Slaw.

Cabbage is not a glamorous vegetable.  In fact you can probably buy a giant head of it today for less than a dollar.  Nutritionally it’s a powerhouse, though, and you probably could stand to eat more of what it’s offering!  Sliced very fine (or grated if you prefer), it’s a perfect foil for crunchy apples, chewy raisins, and whatever nuts you like.  I used sunflower seeds, but try almonds, hazelnuts, pecans or walnuts.  I think walnuts would make it taste even more like a healthier version of Waldorf Salad (a childhood favorite of mine.)  The star of the show, and what lifts this recipe above other coleslaws, is pineapple.  Fresh pineapple, minced, would be glorious, but I used a half a can of crushed pineapple and it was delicious.  Save the rest of the pineapple for smoothies, or to dress up cottage cheese.

Since we’re still knee-deep in winter, and Soup Month is going strong, try this salad paired with a spicy soup.  I think it would be great with Chinese Hot and Sour Soup, or any chili recipe, to quell the heat.  Let me know how you like it!

Cabbage and Pineapple Slaw

Ingredients:

  • 1/2 head green cabbage, sliced very fine or grated
  • 1 small apple, diced
  • 1 green onion, minced
  • about 1 cup crushed or minced pineapple
  • 1/2 cup raisins or other dried fruit (cranberries or cherries would be yummy!)
  • 1/2 cup nuts or sunflower seeds
  • 1 heaping tablespoon mayonnaise
  • 2 heaping tablespoons plain yogurt
  • juice of 1 lemon
  • juice of 1 clementine orange
  • 1/4 teaspoon salt, or to taste

Directions:

  1. In a very large mixing bowl (or a very large Tupperware container with a lid, my preferred method), mix together the cabbage, apple, onion, pineapple, raisins, and nuts.
  2. In a small container with a lid, shake together the mayo, yogurt, lemon and orange juices, and salt.  Taste to see if you want any more salt or lemon.
  3. Pour dressing over cabbage mixture and shake or toss to combine.  Refrigerate until ready to serve.

Explore, experiment, enjoy! — Dana


To view even more of Dana’s unique recipe, you can visit her at Frugal Girlmet!


4 Steps to Strewing for Education

Are you ready for Week 4 of Organizing Your Homeschool for a Brand New Year? This week we will discuss the term ‘strewing‘ and talk about how this may work for your home and learning lifestyle.

4 Steps to Strewing for Education www.GirlfriendsCoffeehour.com #homeschool #organization #strewing

Strewing is a word you may hear more often tossed around in unschooling or child-led learning circles. Sandra Dodd defines it as “leaving material of interest around for our children to discover.”  Aadel Bussinger offers an ebook called The Art of Strewing and it is filled with many wonderful ideas!  Aadel also offers many articles on strewing in different circumstances over at These Temporary Tents.

4 Steps to Strewing for Education

  1. Know your child.
  2. Choose items based on what you know about your child’s interests.
  3. Place the chosen item somewhere it can be easily found, or simply tell your child that you found xyz and thought they might be interested.
  4. Leave your expectations behind. It could be that your child is not interested in the game, art supplies, movie, etc. right now. However, they often will pick it up a day, weeks, or months later. The ‘art’ is in being able to allow that exploration on their own timetable.

So what does strewing look like in a child-led learning environment?

  • An exploration table with just one item or related set of items where your child may explore, engage in imaginary play, and generally learn more about these items with all of his or her senses!
  • Books left on the coffee table for children (and adults!) to pick up at their leisure to read or gaze at pictures until their hearts are content.
  • Chalk and construction paper placed where little ones will find it and create drawings and experiment with color as much or as little as they choose.
4 Steps to Strewing for Education www.GirlfriendsCoffeeHour.com #strewing #homeschool #organization

We set this out over the holidays and our girls spent many hours playing with Joseph, Mary, and baby Jesus. I plan to set out a new toy, or otherwise fun-to-explore item, for them to enjoy every couple of weeks, or perhaps monthly.

  • An impromptu trip to the park or for a walk around the neighborhood to examine the newly fallen snow or the changing colors of the leaves.
  • A new game laid out and ready to be played with the family.
  • Watching an entire Netflix series about airplanes, World War II, dragons, and more, simply because that is what your child is ‘into’ at the time.

There are many more—and different—scenarios that could be described. The above are just a few of the scenes that have played out in my home, a few ways that I have found to easily strew and pique the interest of my children.

If you do more research via the above-linked sites, or if you get Aadel’s book, you will learn much more about what strewing looks like and glean many wonderful ideas for implementing this idea in your own homes.

Do you have ideas for strewing or encouraging child-led learning? Please share your thoughts and tips below!

SoupPalooza 2014 – Mushroom Soup with Wild Rice

SoupPalooza continues! Here on our healthy but oh-so-yummy! Monday’s on the At Home w/ GCH blog, we are promoting soup, soup, and soup! This is National Soup Month, and my husband, Robert, certainly enjoys his bowl of soup—he would eat soup every single day! (I know, you’ve heard this before…but it is true!)  So, I have committed to serving soup at one meal each day for all of National Soup Month.  So far, so good!

This week one of the soups I made was a hearty, earthy Mushroom Soup. Oh, if you could have smelled this house…between the onions, garlic, mushrooms, and thyme! This soup is thick and creamy…and I thought it would go really well with the recipe that Dana shared with us recently—Spinach Salad w/ Warm Bacon Dressing. She is SO right…soup and salad? Such a great combination!

Don’t forget to utilize the search button on our website to check out soups from SoupPalooza 2013 along with soups that Dana has shared with us, too! I would love to hear what varieties of soup you and your family enjoy! Leave a comment below, ok?

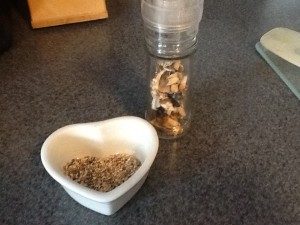
Now, I did use one *secret ingredient…want to know what it is?  Dried Mushrooms.  Incredible Ingredient…you really should get some for your pantry!  They can be purchased in the spice aisle, or the ethnic foods aisle of your grocery store.  They come in a small baggie.  And are really inexpensive, too!  I put mine into a grater like this one.  Super easy to use!  And the grated mushrooms add SUCH a depth of flavor!  Try adding a tablespoon or so to any number of dishes: quiche, stews, marinara sauce, soups, etc.   Try it; I think you will like it!2014-01-19 14.50.21

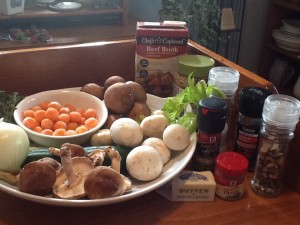
I used a combination of the fresh mushrooms…about 1 pound altogether. Whichever (shitake, button, baby bella) mushrooms you choose to use, be sure to cook them deeply before adding the flour, wine and stock. Along with the onions, they should get really brown and caramelized. This takes a little while, but this is also where the soup gets its deep savory flavor and richness.2014-01-19 16.41.34

Ingredients:
1/2 cup wild rice
1/2 teaspoon butter2014-01-19 14.44.05
1 cup broth
1 cup water
2 tablespoons butter
1 cup onions, chopped
1 cup celery, chopped
1# mushrooms, white, baby bella, shitake, cleaned and chopped
1/4 cup brown rice flour (you could use all-purpose flour)
1 teaspoon kosher salt, freshly ground pepper to taste
1/2 cup red wine
2 teaspoons fresh thyme, separated
6 cups broth or stock
8 ounces frozen carrots, defrosted
2 cups cooked wild rice
1/2 cup half and half (or milk)
1/2 cup sour cream

Instructions

  • In a small saucepan, melt 1/2 teaspoon butter. Stir in wild rice to coat with butter, and heat for 1 minute.
  • Pour in broth and water. Bring to a boil; cover and immediately reduce heat to very low; simmer for approximately 45 minutes or ‘til liquid is absorbed.
  • Heat 2 tablespoons butter in a medium-sized saucepan or soup pot over medium heat.
  • Add onions, mushrooms, and celery and cook, stirring often, until softened (7-8 minutes).
  • Allow the mushrooms and onions to get some color.
  • Sprinkle flour over cooked veggies along with salt and pepper; cook for 2 minutes, stirring constantly. (This is where I added my ‘secret ingredient; *see above.)
  • Stir in wine and thyme; increase heat to medium-high and reduce ‘til the liquid is almost absorbed.
  • Add broth and carrots to pan and bring to a boil. Reduce heat and allow to simmer for 7-8 minutes.
  • Scoop out the carrots and just a bit of the veggies, and set aside.
  • Using an immersion blender, puree the soup and the veggies ‘til smooth;
  • Add back in the carrots, along with the half and half and additional thyme.
  • Heat over low ‘til piping hot! When ready to serve, place a small portion of wild rice in the bottom of the bowl or mug, add soup and top with a dollop of sour cream. Enjoy!

   ♥      ♥      ♥      ♥      ♥ 

God loves you!  ♥   (Don’t ever forget that!)

♥   Coleen

Spinach Salad with Warm Bacon Dressing

Spinach Salad with Warm Bacon Dressing Resize

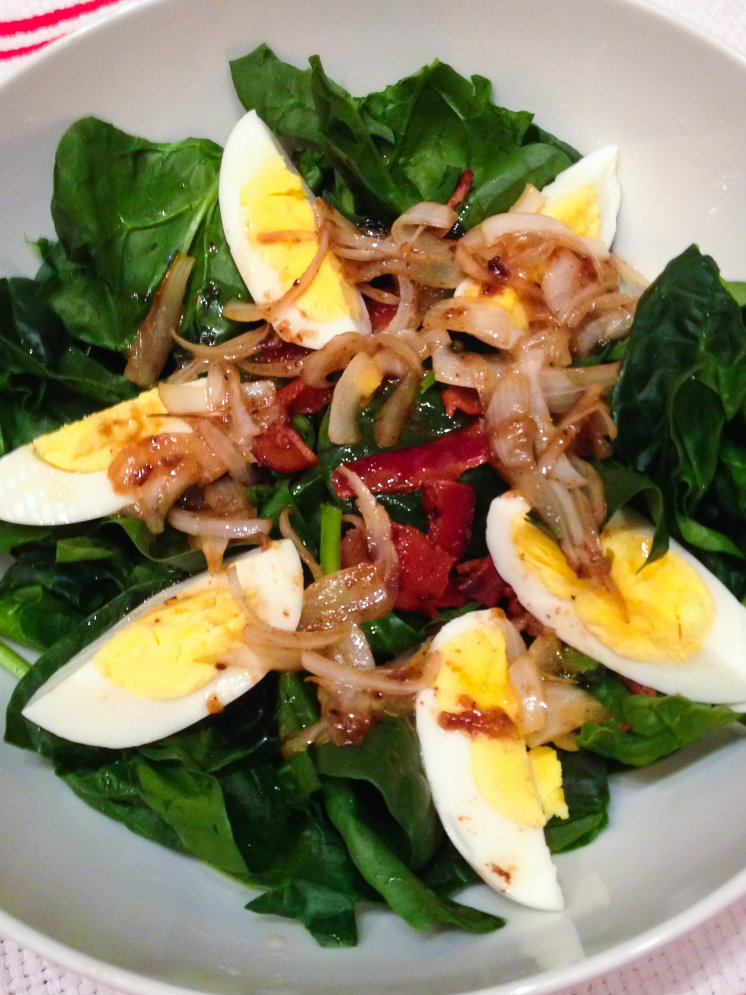
Continuing with the theme of National Soup Month, I have another salad to pair with a lovely, hot bowl of soup.  With crunchy bacon, creamy hardboiled eggs, and a sweet-and-sour vinaigrette, this recipe for Spinach Salad with Warm Bacon Dressing is perfect for a cold day.

To make sure you get lovely hardboiled eggs (and not greenish, sulfury yolks), go easy on your eggs.  Put them in a pot of water that covers the eggs by an inch.  Bring to a boil – and as soon as it boils, take it off the stove, put a lid on the pot, and set a timer for 14 minutes.  When the timer rings, drain off the hot water and cover with ice and cold water.  Let the eggs cool, then peel.

I used rice vinegar; but you can try red or white wine vinegar, or apple cider vinegar.  This recipe makes two large salads.  Try it with soup, stew, chili, or just some bread and butter.

Spinach Salad with Warm Bacon Dressing

Ingredients:

  • 1 large bunch very fresh spinach (or a bag of baby spinach) rinsed very well and spun dry
  • 6 slices bacon
  • 2 tablespoons rice vinegar (or other vinegar)
  • 1 tablespoon (or more, if you like) honey
  • 1 tablespoon Dijon mustard
  • 1/2 onion, sliced, or diced, very thin
  • 4 hardboiled eggs

Directions:

  1. Wash and dry the spinach very well.  (Gritty sandy spinach is horrible!)  Divide into two large bowls and set aside.
  2. Fry the bacon in a large pan until crispy.  Remove to a paper towel-lined plate to cool.  Measure out 1/4 cup of the bacon fat, discard any leftover, and return the 1/4 cup of fat to the pan.
  3. Heat the bacon fat, and with a wooden spoon or silicon spatula, stir in the vinegar, mustard, and honey.  Add the onion and cook until the onion begins to soften, about 5 minutes.
  4. Peel and quarter the eggs and divide between the two salad bowls.  Crumble the bacon and add to the spinach.  Pour the hot dressing over the spinach and toss.  Season with fresh cracked pepper, if desired, and serve warm.

Explore, experiment, enjoy! — Dana


To view even more of Dana’s unique recipe, you can visit her at Frugal Girlmet!


5 Ways to Prepare a Homeschool Schedule

Welcome to Part 3 our series, Organizing Your Homeschool for a Brand New Year! I’m so glad you are here, and I hope to help you learn more about scheduling this week with some tips from me, as well as a few links and recommended resources for your homeschool.

5 Ways to Prepare a Homeschool Schedule www.GirlfriendsCoffeeHour.com #organization #homeschoolorganization

In Part 1 of this series we discussed decluttering and in Part 2 we talked about getting rid of curriculum. If you missed either post, be sure to go back and read them before tackling this third step.

After decluttering and getting rid of ‘extra’ curriculum and other unneeded items, in my home it is then time for creating a schedule of sorts.

I have talked before about our unschooling tendencies; our desire to be more child-led in our learning pursuits. Still, we do have a bit of a routine that we follow.

5 Ways to Prepare a Homeschool Schedule www.GirlfriendsCoffeeHour.com #homeschoolorganization #organization

Currently we have a large marker board that is located just above my desk near the kitchen. On it are written all of the chores for each child; our weekly menu along with our Dinner Time (6:30), for easy reference when a child invariably asks “what’s for dinner” at 5 p.m. each day; and a current quote or Bible verse which we are trying to live by. Our routine is not written on the board, as everyone already knows what it is. It goes something like this:

  • wake/shower/dress
  • eat breakfast/complete kitchen chores
  • feed pets
  • complete other assigned chores
  • begin any assigned lessons
  • check ongoing chores (such as trash, wiping down table, washing dishes) at key times throughout the day, such as after breakfast, after lunch, and before dinner
  • be sure all chores are complete BEFORE asking for computer/iPad/video game time

This looks great written out, but please know we do not have it all down pat. We have great days, and some are not as great, as far as staying on task goes. We are a work in progress, much like the rest of you.

Are you looking for tips for creating a schedule or routine for your homeschool? Keep reading.

5 Ways to Prepare a Homeschool Schedule

  1. Routine A routine is simply an order of doing things, much like the list I shared above. Decide what needs to be done, list it out, and then instruct your children to follow it in order. For me, this works well, because I have a list to follow but without times listed I do not feel overwhelmed or stressed if we do not finish ‘on time’.
  2. Time Schedule This method is exactly what it says; creating a schedule that lists out exactly what needs to be done and during which timeframes. This may be your preferred method if you do not get stressed trying to be on time or if you need a little nudge to improve punctuality in either yourself or your children.
  3. By curriculum program Using your curriculum exactly as written, following the provided schedule, and sticking to the suggested hours of instruction for each day. This method works for many and if it is what you and your children prefer, I say go for it!
  4. By subject You may choose to have your child complete assignments or learning pursuits by subject. Simply choose one subject per day to study. Perhaps Mondays will be science, Tuesdays will consist of art projects, and so on down the list. This could be a fun way to spend your days, learning about any given subject for hours at a time, never needing to stop to move on to the next subject.
  5. Wing it  Study whatever you want, however you want, anyplace you want, and for as long as you want. No pressure. We use this method a bit, but I am hoping to get to the point where I am completely comfortable and confident enough to wholly embrace it!

Need to see more samples and resources to help you to determine what will work for you? Check out these posts from some of my blogging friends!

Why a Daily Schedule Doesn’t Work for Me ( What We Do Instead) Sarah Mueller

Extra Freebie – Curriculum Planner Sandra Modersohn

Homeschooling Plans, Charts, and Ideas Tonia Lyons

Do you have tips and tricks for scheduling your homeschool day? Please share in the comments! And be sure to visit again next week for Part 4 of this series, Organizing Your Homeschool for a Brand New Year!